Warm loggia with your own hands. Ways to make a balcony warm. Warm glazing technology
Read also
Increasingly, when starting an apartment renovation, people are thinking about expanding the usable space. A warm loggia, which can be made with your own hands, can help in solving this issue. To do this, you need to completely insulate the structure.
All work on arranging a warm loggia can be divided into several stages that must be solved comprehensively: glazing, insulation and subsequent finishing. It is worth noting that when work is carried out with long breaks, its cost increases, since some aspects have to be redone. That is why it is recommended to do the insulation of the loggia with your own hands “in one go.”
Necessary measures to create a warm loggia
As already noted, arranging a loggia requires a set of measures, which includes the following steps:
- Glazing;
- Internal insulation;
- Finishing work;
- Heating installation.
All these events must be carried out in this order, then you will be able to make a really warm loggia.
Advice! In some cases, it is advisable to remove the front fence and lay it out again with your own hands using any lightweight concrete blocks - gas or foam blocks. This will allow you to remove the old unreliable structure and use modern materials for insulation.
Now on the Internet you can find many photos of ready-made insulated balconies, but we will look at each stage sequentially and what you can do with your own hands at each of them.
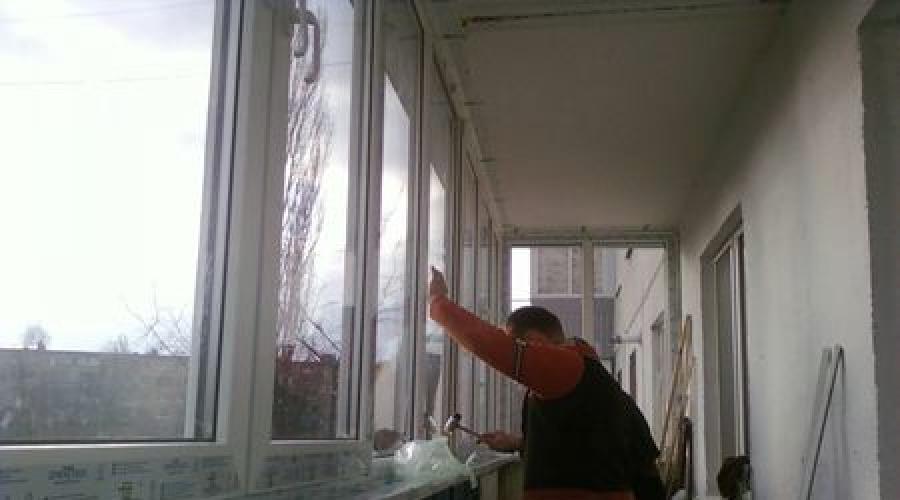
Glazing of the loggia
Without high-quality glazing there is no need to talk about a warm loggia. Plastic double-glazed windows are optimally suited for this purpose, the use of which on a balcony has some nuances:
- It is necessary to provide for the use of a special expansion profile, which will compensate for the thickness of the insulation layer and finishing.
- The absence of a window groove into which the frame is inserted forces the use of special linings that close the gap between the frame and the wall.
- Also, the balcony block must have ventilation valves in its design.

When ordering a double-glazed window for installation on a loggia, it is necessary to discuss these points. It is also advisable to entrust the installation to professionals, since installation by an untrained specialist can lead to the failure of the entire expensive structure in a very short time.
Insulation of the loggia
However, modern double-glazed windows alone cannot make a loggia warm; high-quality insulation is necessary. Insulation can be carried out both from the inside and outside, but the first option is more accessible to do it yourself. Although there are many types of insulation available in building materials stores, only a few of them are suitable for use on balconies.

Material selection criteria
- The main indicator is the thermal conductivity of the material, and the lower it is, the better. After all, it is this indicator that affects the effective thickness of the insulation layer.
- Low weight of insulation.
- Level of moisture resistance of the material.
- It is desirable that the material be breathable.
- Penoplex (or polystyrene foam);
- Styrofoam;
- Mineral wool (pressed sheets are preferable to rolled material).
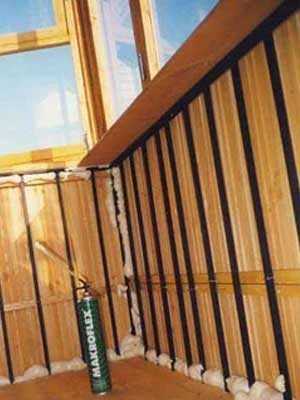
Vapor barrier insulation
After installing the insulation with your own hands, you must make a vapor barrier layer. Its main task is to prevent the formation and accumulation of condensation in the insulation layer, which will positively affect its service life.

It is worth noting that many modern vapor barrier materials are produced on a foil base. The use of such materials makes it possible to further insulate the structure by reflecting heat waves.
Advice! When choosing material for insulation, you need to take into account the climatic conditions of the region, the purpose of the loggia and the budget allocated for this stage.
Interior decoration of the loggia
After the installation of the insulation is completed, it is time for finishing. For these purposes, you can use any material that involves fastening to wooden blocks (insulation lathing). The most commonly used materials are:
- Plasterboard sheets;
- Various PVC panels;
- Laminated MDF panels and other similar materials.
Cladding with such materials is easy to do with your own hands, and examples of completed work and design solutions can be seen in the photo.

Solving the problem of heating a loggia
Another issue that needs to be resolved is maintaining a comfortable temperature on the balcony. For a loggia that is separated by a balcony block and used as a separate room, for example, an office, an additional heat source is necessary.
The easiest to install with your own hands, the most modern and at the same time economical option is film heated floors. The thin film is easy to spread and quickly assembled, does not require additional fixation and consumes very little electricity. In the photo you can see how easily and organically this film fits into various loggia settings.
Advice! In the process of insulating the loggia, it is necessary to provide for electrical cable wiring and install several sockets. It's easy to do it yourself.
Having studied the material, it becomes clear that an insulated loggia is a completely affordable option in terms of independent implementation. All work, except for installing plastic double-glazed windows, can be easily done with your own hands. The reward for your efforts will be additional space that can be used all year round.
Insulating a balcony is always a pressing issue, especially for people who value comfort above all else. Who wouldn’t want to go barefoot onto a warm balcony during the cold seasons to breathe fresh air without experiencing discomfort and cold. In this article we will tell you how to make a balcony warm, turning it into a comfortable corner.
There are such ways insulation of loggias and balconies, like regular glazing of house balconies, double-glazed windows combined with special insulation, installation of heating systems - including floor heating. Below we will look at each of the options.
1. USUAL SOLUTION. This method involves installing a frame made of various materials - metal, wood or plastic. Glass is inserted into the frames, which can be regular or tinted. With the help of such a double-glazed window you can slightly reduce street noise and increase the temperature by 3-4°C. As a result, you will get an ordinary veranda - a closed, cold space. Approximate price such glazing: wood - from $230 (3-meter balcony | loggia) to $400 (for 6 m), aluminum - from $340 to $800 (respectively, for a 3-6 m balcony), plastic frame (PVC) - from $570 to $900. The price includes: frame, canopy, window sill, installation. Takeaway | roof is paid extra.
2 . PARTIAL INSULATION. This option involves installing a window profile, the room is sealed with polyurethane foam or other sealant. Sealing will increase thermal insulation and resist water ingress. Powder paint is applied to the aluminum profile, which is not only decoration, but also additional protection. The interior of the room is covered, for which, as a rule, lining, plastic panels or other materials are used. But it’s still better to decorate the balcony with wood. This solution will make it more comfortable and modern, but it will not add much warmth.
In this case price the issue will increase by the cost of the thermal insulation and finishing materials you have chosen, plus payment for the work of a hired specialist. In total (material and work) it will be about 20-35 dollars per m2, depending on the materials.
3 . FULL INSULATION. In addition to the frames, in this case it is necessary to carry out waterproofing, lay insulation on the floor, ceiling and around the entire perimeter, cover the walls and ceiling with special material, and install lighting.
To make the balcony even warmer, you can equip it with a heating system and build additional internal walls. Remember that you cannot place steam heating pipes on the balcony, but you can use an electric fireplace and other heating devices.

Most often, tiles or porcelain stoneware are laid on the floor of loggias. This solution will make the room even more comfortable and beautiful. And by installing an electric heated floor, you can completely heat the balcony. The basis of the work heated floor is a heating cable, and the temperature is maintained by a special thermostat. Please note that in this insulation method, a heating cable is installed under the screed so that the power per square meter is at least 180 W.
"Heating floor"– current modern trend. There are CALEO film systems (price from $35 / sq. m) and electric cable systems (about $60 / sq. m, a thermostat can be purchased separately - from $20). There are also other brands. The total cost of organizing a heated floor (heating system, floor covering and specialist work) is from $100 per sq. m. m.

When choosing a full balcony heating system, you can use a thermostat with an air temperature sensor (usually located in the thermostat itself), it will allow you to maintain a more comfortable temperature in the room, and the floor temperature sensor will prevent the heating cable from overheating.
A balcony or loggia can be turned into a full-fledged room for various purposes. Insulating these elements of the building will create additional usable space for your apartment, and will also reduce noise coming from the street. How to make a loggia or balcony a warm room? It is necessary to carry out a number of construction works, the main ones of which are to improve the thermal insulation properties of structures.
A balcony or loggia can be turned into a full-fledged room for various purposes. Insulating these elements of the building will create additional usable space for your apartment, and will also reduce noise coming from the street.
In construction terminology, a balcony is a platform with a fence protruding from the plane of the facade of the building. A loggia is a room built into a facade wall and, unlike a balcony, has enclosing capital structures.
Heating a balcony or loggia with central heating is prohibited by construction and operational standards. Therefore, it is necessary to thoroughly insulate the walls, floor and ceiling of the room, and organize its heating in an autonomous version.
To do this, it is necessary to carry out the following list of works:
- Install a parapet to provide a secure base for the glazing.
- Glaze the room in a way that most effectively prevents the penetration of cold.
- Seal existing seams and cracks with sealant or foam.
- Provide waterproofing for structures. This will help prevent the formation of moisture and mold in certain areas of the room.
- Install a thermal insulation surface on all concrete elements. Thermal insulation will become the main protection against external temperature influences.
- Cover the walls and floor with a layer of internal waterproofing, which will be an additional barrier to moisture penetration.
- Form a frame for sheathing.
- Carry out final finishing.
- If you plan to heat the balcony, an electric floor heating system is installed before finishing.
A rigid and durable base is required for balcony glazing. In old houses, parapets are made of rods and angles. On the outside, they are sheathed with thin plastic, asbestos-cement sheets, etc. These structures are not suitable for installing glazing on them. A parapet made of foam block or light brick is laid under PVC or slider windows. For glazing with aluminum frames, use a foam block or a frame made of antiseptic solid timber.
Foam blocks with a thickness of at least 100 mm are laid on a special solution, similar in composition to tile adhesive. This solution allows you to make seams of minimal thickness, which enhances the thermal insulation properties of the fence. To connect the main wall and the masonry, long self-tapping screws are screwed into a plastic dowel pre-hammered into the wall as reinforcement. Such reinforcement is inserted through two rows of masonry.
Glazing of a balcony or loggia

The use of modern high-tech metal-plastic structures and double-glazed windows (single- and double-chamber) most increases the thermal insulation qualities of the room
The use of modern high-tech metal-plastic structures and double-glazed windows (single- and double-chamber) greatly increases the thermal insulation qualities of the room. Wooden frames are also used. The wood is coated with antiseptic and moisture-resistant paint.
The main frame structures are equipped with extensions (expansion profiles). They expand the distance from glass to ceiling and wall. This will facilitate subsequent insulation finishing of these areas. Their size is selected taking into account the thickness of the finishing layer, which must be at least 7 cm. There is a way to install a second row of glazing for loggias. An additional profile is mounted into which single- or double-chamber double-glazed windows are installed.
Sealing cracks in balcony structures
To seal structures, you can use any materials for this purpose that are available on the market. Preference is given to polyurethane mastics, foams and sealants that have the required hardening time.
To seal structures, you can use any materials for this purpose that are available on the market. Preference is given to polyurethane mastics, foams and sealants that have the required hardening time. Germaflex, germatubil and other materials are used. Large holes are pre-sealed with improvised means, for example, polystyrene foam. Gaps in double-glazed structures are eliminated.
An open foam seam on the street side is not allowed.
Polyurethane foam breaks down when exposed to sunlight, gets wet and freezes. The seams are closed with sealant or special “flashings”.
Waterproofing. Materials and installation methods
Traditionally, time-tested and affordable roofing felt is used as a waterproofing material. Among modern insulators, foil isolone is widely used. Its thickness is only 4 mm, but it serves as additional insulation. The materials are laid overlapping. A torch is used to seal the seams. With its help, roofing felt is also glued to the ceilings.
To secure such protective materials, special adhesives are also used. The selected adhesive should not contain tolulene. It is contraindicated for these types of insulation. The seams are sealed with self-adhesive tape or sealant. The internal waterproofing is fixed together with the insulation with dowels or glued to it. Penetrating and coating compounds enhance the waterproofing properties of structures. Measures to protect against moisture penetration also include the installation of ebb, which blocks the access of water under the frame structure of the window.
Installation of the thermal insulation layer
When choosing insulation, they are guided by its thermal conductivity coefficient. As it increases, the thermal insulation properties of the material deteriorate. The average value of this indicator for such premises is 0.03-0.04 W/m°C. Materials with improved thermal insulation properties are more expensive, but due to their smaller thickness, useful balcony space is saved.
Extruded polystyrene foam, in particular Penoplex and Technoplex, is increasingly used for insulating premises. These materials are light weight, 5 cm thick, do not crumble and can be cut with a regular knife. Traditional mineral wool is used, but a thicker layer of insulation will be required. Installing foam sheets is inexpensive.
Modern high-tech materials are isolon, tepofol, penofol and others. They are a reflective type of insulation and are made from polyethylene foam encased in an impermeable foil shell.
Foam and polystyrene sheets are mounted with glue or using plastic dowels. The glue is applied with a notched trowel over the entire surface of the base and in several places of the insulation board. Fastening with dowels is carried out along the perimeter of the sheet with the calculation of 8-10 fastenings per 1 m 2. The seams are sealed with polyurethane foam. Mineral wool is usually installed using plastic dowels.
Decorating a loggia or balcony

The ceiling is finished in the same way. Plasterboard sheets are subsequently painted or wallpapered. You can improve the design of the room by using PVC panels of various colors.
A cozy loggia or balcony should be decorated in accordance with the interior of other rooms. After high-quality insulation measures, various types of materials can be used. To attach the finishing material to the walls, frames are formed from wooden blocks (30 x 30 mm) or from a profile used for installing drywall. Sheathing is done with plasterboard or clapboard. The ceiling is finished in the same way. Plasterboard sheets are subsequently painted or wallpapered. You can improve the design of the room by using PVC panels of various colors.
50 x 50 mm bars are used as floor joists. The floor is sheathed with 30 mm thick boards, laminate or chipboard. When equipping the floor with heating elements, wooden coverings are not used.
Installation of heated floors on the balcony
To make your balcony warmer, you can use electric heating devices. There are the following main systems for heating the floor of a loggia or balcony:
- cable heating device;
- heating mats;
- film infrared floor.
If it is possible to make a cement screed on the balcony floor, lay two- or single-core cable sections into it to a depth of 30 mm. The screed itself must be at least 45 mm thick. Floor tiles or porcelain tiles are suitable as a covering.
If the floor slab is not designed to withstand the load from a concrete screed, heating mats or infrared film systems are used to heat the floor. If you use this high-tech equipment for floor heating, having previously carried out all the heat protection work, instead of a cold area you will have a cozy loggia or balcony.
An insulated balcony can almost instantly turn into a comfortable room, in demand by all family members - it can be designed as a comfortable office, a playroom, or a relaxation corner. Flower lovers can turn a warm loggia into a mini-garden or even a vegetable garden, where you can grow a decent crop in winter. By adding a balcony or loggia, you can significantly increase the area of the room. However, before transforming the balcony into a comfortable and functional resting place, it should be insulated and the interior should be refined.
There are various ways to insulate a balcony. On an open-type balcony, a parapet and side walls are installed using ceramic bricks or foam blocks, then glazing is performed. This will help to slightly increase the temperature on the balcony, as well as protect it from dust and noise from the street. The installation of thermal insulation and “warm floor” systems will help make your balcony truly warm and cozy.
In order to equip a warm balcony, it is necessary to perform a certain set of works, each stage of which has a special significance, including:
- laying thermal insulation;
- installation of a “warm floor” system;
- purchase of heating devices.
Before insulating a balcony, you should decide on the choice of materials and tools. Today the market offers a wide selection of insulation materials, limited only by personal preferences and the volume of the room. Some of the most popular options include:
- mineral wool;
- Styrofoam;
- penoplex (extruded polystyrene foam).
Do-it-yourself insulation of a balcony with penoplex
Wall insulation
Modern thermal insulation materials provide a high degree of protection of walls from the cold, and if the technology for insulating balconies is fully followed, turning a balcony into a comfortable and warm room is quite possible. As reliable and effective insulation materials, it is recommended to use isolon, polystyrene foam, mineral wool, penoplex, penofol, as well as the already familiar lining and siding. Although all these materials differ significantly in thickness and structure, the installation methods are similar to each other.
- Insulation with siding. The first step is to stretch and fasten the wind barrier rolled into a roll using a stapler. This operation is performed simultaneously with the installation of siding. The wind barrier is directly adjacent to the walls of the loggia, preventing the penetration of cold air. Next, a frame of slats is attached, between the sections of which roll insulation (mineral wool) or polystyrene foam is laid. Mineral wool is easy to install; its edges do not protrude beyond the outer plane, without interfering with the fastening of plastic or plasterboard panels. At the same time, when laying mineral wool, you should be careful: you need to work in gloves and a respirator, wear clothes that cover your hands and the whole body from small particles of insulation.
- Insulation with foam panels. Methods for insulating a loggia using polystyrene foam are quite simple: fixed foam plastic slabs are laid tightly next to each other, and polyurethane foam is blown into the joints. Flat pieces of polystyrene foam are placed into the wide cracks, and they are also fixed with polyurethane foam.

The laid layer of mineral wool or polystyrene foam is covered with cellophane film, securing it at the joints with an overlapping stapler, and plasterboard, PVC or IMF panels are placed on top. The film can be purchased at the Gidrobarrier store. If you plan to insulate the balcony under plaster, a fine reinforcing mesh is attached on top of the film.
Floor insulation
Mineral wool and polystyrene foam are also used for floor insulation. If this is not enough, you can install a “warm floor” system.
- A wooden floor made of well-treated boards, coated with shiny or matte varnish, looks comfortable and stylish on the balcony. The boards are laid on wooden logs and secured to them with screws. To install logs, the floor surface is completely cleared of the previous coating. Mineral wool is laid between the joists to retain heat or polystyrene foam is laid.
OSB boards can be laid on top of the boards and coated with varnish. If necessary, you can lay linoleum, carpet or carpet on top.

Balcony insulation with penoplex
- When leveling the floor of a balcony or loggia with a concrete screed, after it hardens, 20 mm high-density (35th) density foam is laid, on which 10 mm thick OSB slabs are then laid. In this way, a reliable one is also created, protecting the room from the penetration of cold air.
- “Heated floors” systems are recognized as the most effective insulating agent, which at the same time is the most expensive option.
Roof insulation
It is most convenient to insulate with foam plastic - this is facilitated by its lightness and sufficient rigidity during installation, as well as excellent thermal insulation qualities. If there is a balcony slab on top as the ceiling, the ceiling may not be insulated, but a decision should be made only after assessing the specific conditions.
- Insulation with foam plastic. Aluminum-galvanized corrugated sheeting is most often used for roofing. A metal or wooden frame is installed underneath it to attach 55 mm thick foam insulation. Lastly, MDF, PVC or plasterboard panels are attached. Only with insulation can a roof made of corrugated sheets protect the balcony from the effects of cold weather.

The width of such a frame is about 1 meter; both layers of insulation and bottom panels can be conveniently mounted on it. In order for the sheets of polystyrene foam to fit tightly in the grooves intended for them, they are cut out to be slightly larger (several mm) in size. This contributes to a more dense arrangement of the insulation without additional fasteners. All remaining cracks remaining after assembling all the parts are filled with foam.
- Insulation with mineral wool. The most suitable option is mineral wool with foil attached to one side. Foil-coated mineral wool has high thermal insulation and energy-saving properties - the foil layer prevents heat from escaping from inside the room, while simultaneously preventing the penetration of cold air from the street.

Insulation of the ceiling on the balcony with mineral wool
In order for the material to be firmly held on the ceiling, a frame of 50x20 mm wooden slats is required, the same as for cladding balcony railings. When screwing the slats, you don’t have to adhere to a certain order - this will help to better hold the insulating material.
The main thing is to ensure that the distance between the slats is sufficient and that the mineral wool layer does not protrude beyond the slats.
Finishing work
To avoid the appearance of condensation between the insulation and wall cladding, it is necessary to prevent moisture from entering the layers of insulation and cladding. The following are used as vapor barrier reflective materials:
- special films made of polyethylene;
- single-layer and multi-layer membranes, single- and double-sided.

DIY balcony vapor barrier
Water vapor generated during the operation of the room enters the vapor barrier film, remains on it and quickly evaporates. In the absence of a vapor barrier layer, evaporation penetrates directly into the insulation, remaining in it for a long time and leading to a gradual deterioration of its properties and damage due to the occurrence of fungus and mold.
How to install “warm floors”
When choosing an option for installing “warm floors”, you can be guided by your own preferences and capabilities. The main selection criteria are:
- system installation cost:
- the cost of its operation.
The main options for “warm floors” are the following systems:
- water;
- electrical;
- heating mats.
For water heating, it is enough to lay a flexible pipeline of the appropriate diameter in the floor, connecting it to the heating or hot water supply system, doing this with the permission of the organization operating the house.
For electric heating, a special electric heating cable of a certain power is laid in the floor. The organization of work provides for unconditional compliance with electrical safety requirements when laying cables and further operation of “warm floors”. The order and features of installation, power and length of the cable are determined by calculations in accordance with the instructions.
The easiest to install are heating mats that are laid directly on the screed and covered with a finishing floor covering.
How to install an electric floor heating system
Calculations for the preparation and installation of the heating cable are carried out in accordance with many parameters, including taking into account the desired air temperature in the room, its dimensions, etc. The cable is laid around the perimeter of the balcony (if its dimensions are small), or along the balcony in the form of a “snake” , with a certain step between parallel sections. Laying it along the length of the balcony allows you to reduce the number of cable bends.
When laying the cable to the floor, a mounting tape is used, which is fixed to the floor. The mounting tape contains special brackets-petals, in which each turn of the cable is fixed. The ability to turn on and regulate the supply of electricity to the heated floor is carried out by means of a thermostat connected to a cable and attached to the wall of the balcony at a convenient height. After completing the above work, the functionality of the system is checked, after which the floor is screeded. The flooring must have a high degree of thermal conductivity to transfer the maximum amount of heat into the room.

Installing heated floors on the balcony
How to choose heating devices for an insulated balcony or loggia
If the balcony was insulated with the aim of converting it into a living space, all stages of the work should be carried out sequentially. In this case, of course, it will be difficult to do without heating devices. The most suitable option for heating devices are convectors, which are quite economical to operate and can create a constant temperature in the room. In combination with an adjustable underfloor heating system, convectors will provide all the conditions for comfortable living in a newly created living space.
Do-it-yourself insulation of a balcony with penoplex Do-it-yourself vapor barrier for a balcony Do-it-yourself technology for insulating a balcony Do-it-yourself thermal insulation of a balcony Insulation of a balcony with penoplex
You have decided to renovate your balcony. You naturally face the question of what type of glazing to choose. Currently, the miracle of construction thought can offer several options with different characteristics of insulation from moisture, noise, and heat preservation. I propose to dwell on each of them in more detail so that you can make the right and informed choice so that the balcony pleases you and meets the functions assigned to it. Warm or cold balcony - let's try to answer this question.
Cold balcony
In the summer, such a balcony can become a place for pleasant relaxation, a greenhouse or even a bedroom. In winter it is suitable, if only for storing some homemade preparations that are not afraid of frost. If you do not require more from this room, then you can safely choose this option. The most popular modern type of cold glazing is glazing with aluminum sliding frames.
Pros of a cold balcony:
- Strength, durability, lightness of construction. Due to the light weight of the structure, no additional strengthening of the slab or obtaining permission for installation is required. Suitable for balconies of old houses
- Sliding windows save space
- Easy to use. When it gets dirty, just wipe it with a damp cloth. Does not require additional care, painting, or treatment with special products
- Protect from noise, dust, rain, snow
- Keep warm. Provided that it is -15 outside the window, then on the balcony it will be -5
- The thin frame allows a large amount of light to pass through
- Variety of designs. You can select the required number of blind and opening sections
- Wide choice of colors. The frame can be made in any color at the request of the customer
- Possibility of installing a frame with an extension, which will increase the space of the balcony
Cold balcony without take-out

Cold balcony With take-out


A distinctive feature of a cold balcony is its efficiency. A balcony can be made for only 8,000 rubles, but the final price depends, of course, on the complexity of the project.

Cons of a cold balcony
- Insufficient thermal insulation. During the cold season, it will be only a few degrees warmer on the balcony than outside.
- In winter, during severe frosts, ice may freeze, which will make it difficult to open the windows.
In addition, the cold type of balcony repair includes:
- Glazing with wooden frames. Every year it loses its popularity, as it requires annual additional care. Such windows must be painted and varnished. They do not have high insulating qualities.
- Panoramic glazing. New on the technology market. Looks original. Lets in a lot of light. Eco-friendly, safe. Full (from ceiling to floor) or partial (with parapet) glazing is possible.


Materials
When choosing a cold type of balcony, you need to pay special attention to the finishing materials of the walls and floor of the room. Wallpaper, drywall, and PVC panels are definitely not suitable for these purposes. They are not intended for rooms with temperature changes or high humidity. It is better to give preference to wooden lining, PVC lining for external repair work, and artificial stone.
You should not choose linoleum or laminate as a floor covering. They will quickly become unusable due to changing temperature and weather conditions. The most suitable option would be a wooden floor or floor tiles. It should be understood that a cold balcony does not require the use of additional insulating materials.
Warm balcony
This type of balcony makes it possible to use the room at any time of the year, in any weather conditions. Warm glazing is carried out using plastic windows. Single or double glazing.

The advantages of a warm balcony
- The main advantage is high insulation characteristics. No noise from the street will enter the room and the heat will remain. The temperature on the balcony will be almost the same as in the entire apartment.
- Expanding the possibilities of design imagination. Thanks to warm glazing, the balcony can be combined with a room or used as an office, relaxation area, small bedroom, or year-round flower garden.
- Strength, durability
- Easy to use
- Wide range of colors and options

Disadvantages of a warm balcony
- Heavy design. Due to their heavy weight, installation of such frames in older homes requires additional consultation and permission. Weak balcony slabs may not support the weight of the structure
- A hinged window system can be a significant drawback on narrow balconies.
- Thick plastic frame reduces the amount of light passing through
- Affordable, but higher cost compared to aluminum glazing. From 16,000 rubles
- Choosing a warm balcony involves additional finishing of the room with insulating materials. This, of course, will entail additional costs, and will also eat up precious centimeters of space. Among the most popular materials for insulating balconies are polystyrene foam, penoplex, and penofol. Insulation of walls and floors will cost approximately 400 rubles per square meter

It should be noted that to create a high-quality warm balcony you need two key ingredients: warm glazing, insulation with thermal insulation materials. One without the other will not work to the desired extent.
Middle balcony
There is a third option. It is neither warm nor cold. Located in the middle. Glazing is carried out with a plastic profile, but with a sliding window system. The design is not so heavy. Protects against noise and heat loss to a greater extent than with aluminum glazing. The cost of this option varies from 11,000 to 16,000 rubles

In combination with finishing with insulating materials, a rather warm balcony can be obtained, especially if the room is equipped with additional heating devices.