Drying the cellar at home. Drying basements with high humidity. What to do with the cellar after drying
High humidity in the cellar occurs for various reasons. First of all, it is necessary to find out why it has increased, take measures to eliminate it, and then bring it back to normal. On last stage— if necessary, carry out disinfection. In any case, without properly organized ventilation and waterproofing, the problem will appear again and again. Therefore, before drying the cellar, check whether the ventilation pipes are clogged or whether the waterproofing is damaged.
Preventing dampness
As usual, this “disease” is easier (and cheaper) to prevent than to treat. Still being decided at the design stage:
Inspecting the floor
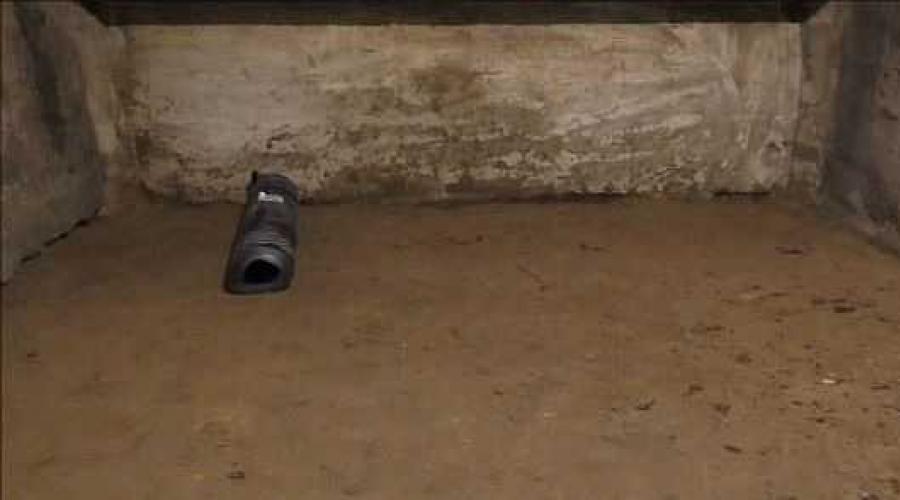
Very often the floor in the cellar is made of earth. This is often the source of excess moisture. Through it, the moisture contained in the soil gets inside. To reduce humidity in the cellar, you need to level the earthen floor, compact it and cover it with thick plastic film. You can use roofing felt, but it breaks more often. Although it seems more durable, it breaks due to less elasticity.
There is no need to pour sand or soil on top of the film. Sometimes there is a large amount of water in the basement (accidental flooding). Then you simply remove the film, the water goes partly into the ground, partly evaporates through the ventilation. After the dampness has gone, you can re-cover the floor. If there is earth or sand on top, you will need to poke around in this slurry, extracting the film.

If the floor in the cellar is earthen, most of the moisture enters through it
If after laying the film the humidity level in the cellar has decreased, then you have found the reason. You can leave everything as is, just change the “flooring” periodically, or you can make a concrete floor with full waterproofing. The choice is yours. To prevent the film from tearing when people walk on it, knock it down wooden boards and throw them on the floor.
Improving waterproofing
The second reason why humidity increases in the basement is an insufficient degree of vapor barrier or waterproofing of the walls. This usually occurs if the cellar is lined with brick, especially silicate brick. The material is very hygroscopic and allows water vapor to pass through well. They settle in drops on the ceiling and all objects.
The problem can be solved if you make good external waterproofing: dig out the walls and apply bitumen mastic in two layers. Previously, they were coated with resin, but mastic is more effective and easier to handle.

But excavation- it’s not always a joy, and it’s not always possible to dig out the walls. In this case you can do internal waterproofing cellar walls. For this purpose, there are cement-based impregnations: “Pnetron”, “Kalmatron”, “Hydrotex”, etc. They penetrate to a depth of up to half a meter into the thickness of the material (concrete, brick, etc.) and block the capillaries through which water seeps. Water permeability decreases significantly. Their only drawback is the price. But they are really effective.
All these measures will prevent the occurrence high humidity in the basement. But what to do if there is already moisture, how to dry the cellar? Next, we’ll look at ways to reduce humidity.
Preparatory work
All supplies are removed from the basement, as well as all wooden structures, cleaned well. On the street they inspect the wood - shelves/drawers/boxes. If they are not damaged, and there is no fungus or mold, they are simply laid out in the sun to dry. If there are traces of damage, the wood is impregnated with a solution of copper sulfate (concentration 5-10%, no more).
Whitewashing with lime gives good results - it will also “collect” moisture from the air. Therefore, before draining the basement, it makes sense to whitewash everything. They just do it differently from the outside. Needs to be applied thick layer lime on the walls. To do this, make a bucket of thick whitewash and add a little diluted copper sulfate. It is an excellent disinfectant, but the concentration should not be higher than 5%, maximum 10. The resulting thick liquid is poured in half into two containers.

The first half is lowered into the basement, dressed in old clothes, glasses, and covered hands. They take paint brush for whitewashing (it looks more like a small broom) and coats the corners well with it. Then you stir the slurry with a brush and spray it on the walls and ceiling. Just dip it in thick whitewash and spray it on the walls. They are covered with drops and tubercles of lime.
After everything is covered with lime, wait a day for it to dry. Repeat everything with the second bucket. As a result, the walls and ceiling are porous and uneven. But condensation rarely hangs on them: lime retains moisture well inside. After the lime has dried, you can begin drying the cellar.
Basement dehumidification with ventilation
Sometimes it happens like this: the cellar was dry, and suddenly dampness appeared. One of the reasons is poor ventilation. First of all, check the cleanliness of the ventilation ducts. Clean if necessary. If everything is fine, but the dampness does not go away, it means exhaust pipe works poorly. This happens when the air in the cellar is colder than outside. Heavy and cold, it will not rise up the pipe on its own. A paradoxical situation arises, at first glance: it was cold and damp outside, but it was dry in the cellar. It got warmer - drops of moisture hung on the ceiling, walls and objects, and a musty smell appeared. In this case, in order to dry the cellar, it is necessary to activate air movement. There are several solutions.

Sometimes increased air movement leads to the fact that the humidity in the cellar does not decrease, but increases. This can often be seen in hot weather. The reason is this. Heated air carries with it a significant amount of moisture in the form of vapor. Once in a cool cellar, the air cools down, and moisture condenses on the coldest surfaces: the ceiling, walls, and sometimes on shelves and jars. If this is exactly the case for you, then stop ventilation. Even close the supply pipe and slam the lid tightly, limiting the inflow warm air.
How to dry the cellar in this case? Wait until autumn, and when there is no rain yet, but the temperature is already about +10°C, start ventilation using one of the methods suggested above. Works. If your nights are cold in the summer, you can turn on the fan at night and close the ventilation ducts during the day. This way you can gradually reduce the humidity in the cellar in the summer.
Heating the cellar
If it is necessary to remove dampness while warm weather, and ventilation only worsens the situation, you need to heat the air in the basement so that it comes out on its own, carrying away moisture (the higher the air temperature, the more vapor it can contain).
To do this, take an old bucket or other metal container of approximately the same volume. Make a lot of holes in it (you can use an ax) in the bottom and walls. Such a bucket with holes is tied to a cable (attach it securely). Coals for barbecue are poured inside (you can light it yourself), the bucket should be almost full. The coals are ignited and stable combustion is achieved (to accelerate the combustion, you can adapt a vacuum cleaner by turning it on to blow). A bucket of smoldering coals is lowered on a cable into the cellar, secured so that it hangs above the bottom, and the lid is closed.

Periodically, the cellar lid needs to be opened, letting in an additional portion of oxygen (every 20-30 minutes). You can put a fan on the supply pipe or periodically turn on the same vacuum cleaner. If the coals do go out, they are rekindled.
Attention! It’s better not to climb inside, do everything from above. Firstly, the temperature there is high (in a room about 2*3 meters about 70°C), secondly, smoke and, perhaps, carbon monoxide accumulate inside.
As the coals burned out, they took out the bucket and closed the lid. Don’t look inside for three days: smoke and gases will kill mold and, at the same time as drying, you will disinfect your cellar. Usually one such “firebox” is enough to dry out the basement in the house or on the street. You can also get rid of dampness in the basement under the garage.
Sometimes coke or coal is used instead of charcoal. He gives more high temperature and the “processing” takes longer, but it burns more difficult, it requires more oxygen, often - forced blowing (use an old vacuum cleaner and a corrugated hose, but turn it on for blowing). But the temperature rises even higher and dries even more efficiently. But the price of coke is high, even though you won’t go broke buying a bucket.
Instead of a bucket of burning coal, you can use other heaters:
- propane burner (lower the one burning on the wire, make sure it doesn’t ignite anything and leave it hanging in the middle, you’re tired of it, close the valve, you can only open the lid every other day);
- heat gun of decent power (3-5 kW);
- kirogas;
- lower the potbelly stove into the basement and heat it.
All these methods can be used, but you have to go down into the cellar in order to light a kirogas or potbelly stove. But this is not a safe idea and do not use this method alone. You need someone to insure you upstairs. Regarding the heat gun: it is also better to lower it by tying it with a cable, rather than lowering it yourself.
How to dry a basement in a garage is described in the video.
How to dry a cellar without ventilation
If ventilation was not installed during construction, it is advisable to install it now. At least some: it will be easier to get rid of dampness. It is better, of course, to have two pipes - one for inflow, the other for outflow - as described at the beginning of the article. If the cellar is made separately on the street, it is easier to organize: they broke through the ground and roof of the cellar, inserted pipes, and filled everything with concrete mortar.
It’s more difficult with a garage, but it’s solvable that no one cares about aesthetics here. But if there is a basement without ventilation under the house, everything is more difficult to do: it is better not to break the foundation, and you cannot stretch many pipes through the floor into the room. But even in this case, make at least one pipe. Even if it’s through the lid, into the wall or ceiling, or installing a supply and exhaust fan. It can be turned on either for supply or exhaust and in this way somehow dry the cellar.
Having at least such ventilation, you can use any of the methods described above. You can also try to collect more moisture. For this inside lay out hygroscopic materials:

If all these dances with tambourines don’t inspire confidence in you (although they work), you can dry the cellar using modern technology. There are such Appliances —household dehumidifiers. They are often installed in swimming pools to get rid of dampness in the room. You will need a medium power model. They cost about 20-30 thousand rubles, operate from a 220 V household network. In the process, they collect moisture from the air into a special container. You will need to drain the water periodically.

One way to dry out a damp basement is to install a household dehumidifier.
Disinfection and control of fungi and mold
Increased humidity in the cellar leads to the appearance of mold and fungi on the walls, shelves and ceiling. different types and flowers, and all this beauty is accompanied by “fragrances”. In this case, take everything that can be taken out of the cellar and lay it out to dry. Wooden shelves After drying, whitewash boxes, boards, and racks with lime with the addition of a solution of copper sulfate. Better twice.
In the cellar, clean all growths from the walls and ceiling, whiten with lime copper sulfate twice (the technology is described at the beginning of the article). Before the main drying, you can carry out special events, which will destroy the spores (or neutralize them for a while).
Lime vapor
Place a barrel in the cellar and fill it with quicklime. Lime is taken at the rate of 3 kg per 1 cubic meter of volume. There should be a maximum of lime in the barrel, a little more than half. Fill everything with water. Don't interfere. Quickly get out and close the lid tightly (hermetically) and that’s it. ventilation ducts. You can open it in two days, ventilate it well, then you can go down.
Repeat the treatment after 7-10 days. Lime vapors should burn out mold and fungi, destroy insects and their larvae. They also cope very effectively with odors of dampness and mustiness. True, the cellar will smell of lime for several days.

Sulfur (smoke) bomb
Use sulfur bomb. They are sold in stores that sell seeds or household supplies. Each one comes with instructions. But, in short, you need to act according to the following scheme:
- take out all metal things; if this is not possible, cover them with a layer of lubricant - grease or something similar.
- You light the fuse of a sulfur bomb, it begins to smolder.
- Get out quickly, close the lid and ventilation ducts hermetically, and leave for 5-6 hours.
If the basement is in the house, it is advisable to leave it during the treatment: a couple of breaths if the airtightness is insufficient and the lungs will need to be put in order for a long time.
Disinfection occurs due to the formation of sulfuric acid. It is obtained by the reaction of sulfuric anhydride and water. Because more effective than mold a sulfur bomb is killed in damp cellars.

After 5-6 hours (or after the time indicated on the package), open the ventilation ducts and the lid (in that order). Leave open for at least 12 hours. The remaining gases disappear during this time. You can come in.
From the experience of operating such checkers, we can say that they need to be lit twice as much as normal. Then everything will really be neutralized.
Mold Remover
Sometimes white fluffy growth appears on wood or walls. This is a type of fungus. It can be dealt with using the methods described above, but if only it is present, it can be found on construction market hardening remover polyurethane foam(they sell it in the same place where foam is sold). Insert the tube into mounting gun and apply to areas with fungus. It immediately begins to curl up. And then it doesn’t appear in this place.

Floor bedding
If you have an earthen floor, lay a thick layer on it. plastic film(for what - described above), shoot down wooden gratings and throw them on the floor. Scatter pieces of slaked lime under them. And they will collect moisture and create “bad” conditions for fungi.
How to dry a basement after a flood
If the flooding was accidental, you need to pump out the water using any in an accessible way, and then proceed according to the standard scheme:
- Take out everything you can from their cellars.
- Leave the lid and ventilation vents open for a while.
- When it is more or less dry, remove debris, fungi, mold from the walls and floor.
- Whiten with lime.
- Dry using one of the following methods.
If the flooding is periodic, in the spring, for example, you will have to build a full-fledged drainage system, and this is a separate conversation.
All the methods described above on how to dry the cellar are mostly based on practical experience. They are used everywhere and very often. In one case, one method works, in another, another. Your task is to find the most effective one for your situation.
When the long-awaited spring arrives, many begin to have problems with flooding of cellars and basements. Such unpleasant situation happens due to a rise in level groundwater. The earth becomes like a sponge that absorbs water and holds it in itself. If the groundwater level rises above the foundation, then moisture seeps into the room through cracks.
The cause of basement flooding is the first aquifer. It is formed from nearby rivers, lakes, and reservoirs. Also, the groundwater level is affected by melted snow and precipitation in the form of rain. There are several ways to help cope with annual flooding. By choosing one of them, you will be able to make your basement dry.
Creation of a drainage system
Drainage is a drainage system consisting of trenches, pipes and a well. It helps prevent flooding basements and also dry land plot. The drainage system is made during the construction of the basement. Right installed system, will help you forget about water in the basement once and for all and protect the foundation from destruction.
How does the drainage system work?
The basis of drainage is a pipe large diameter(at least 100 mm). It has holes all over its surface. Through them, groundwater seeps into the pipe and flows into the collector. In order for the system to work well, the following conditions must be created:
- Dig a trench with a slope around the basement below the floor. This will ensure efficient water collection and drainage.
- Be sure to use filter materials (geotextiles and crushed stone) that will protect the pipe from flooding.
- Drain to central sewer, where a large volume of groundwater will accumulate.
What is necessary:
- drainage pipe wrapped in geotextile;
- fine, washed crushed stone;
- geotextile fabric;
- river sand.
Installation
- Make a trench below floor level around the foundation and a deep well at a distance of 10-15 meters from the building. The trench must have a slope sufficient for water to drain.
- Place a geotextile fabric in the dug trench. And then fill it with crushed stone (layer thickness 10 cm). This way you will create a primary layer that filters groundwater.
- At the next stage, lay a drainage pipe (preferably two-layer in geotextile) on a layer of crushed stone. Make sure that the slope is maintained throughout the trench. Using a tee, lay the outlet pipe to the well.
- Cover the laid pipe completely with crushed stone. Leave 20 cm to the top of the trench. Fold the free edges of the geotextile fabric over the crushed stone bedding. This will completely isolate the drainage from the ground. After this, fill the trench with sand.
As a result, you will have a reliable drainage system. Geotextiles and crushed stone act as a filter, preventing clogging perforated pipe. And sand will ensure the transport of moisture from the soil surface to the drainage channel.
Conclusion
Drainage channels installed around the basement will help eliminate main reason flooding – high level groundwater. The result of drainage will be a dry basement. Unfortunately, this system has its own significant drawback. It is customary (according to technology) to install drainage channels outside the premises, so not all basements can be equipped in this way.
However, in exceptional cases, basement owners can build drainage channels indoors. The installation process is almost the same, with the exception of some moments that occur during the floor screed stage. After installation internal system drainage system, the basement will lose 30 cm of height.
Creation of an automatic water pumping system
Not all basement owners have the opportunity to create a slope with a water drainage system. Therefore, in such areas a different method is used. To dry the room, install automatic system pumping excess water.

What does that require:
- Create a recess (pit) in the basement. Dig a hole measuring 50x50x50 cm. Then reinforce it with concrete or brickwork - this must be done to prevent the destruction of the walls. Pour 10 cm thick gravel into the hole.
- Purchase a special pump that automatically turns on when a certain level of water accumulates.
Installation
Place the pump in the dug pit, connect the hoses to it and take them away from the room. When the volume of groundwater increases, it will first accumulate in the hole. The pump will start working, reacting to the rising level, and pump out excess moisture. This will continue until the groundwater finally subsides.
Conclusion
Enough simple system, which is inexpensive. Quick to install and easy to configure. But this system has two significant shortcomings. First, the pump works properly until it exhausts its service life, and then it will have to be replaced. Second, a water pumping system will not eliminate the cause of flooding, but will only temporarily relieve the consequences.
Creating waterproofing in the basement
Waterproofing walls and floors helps provide a quality waterproof barrier. It consists of three layers: penetrating waterproofing, bitumen mastic and plaster. Apply layers above the flood level with a margin of height in case groundwater rises.

What does that require:
- Buy materials: Hydrotex or Penetron, bitumen mastic, sand, waterproof cement, and metal mesh for plaster are used as penetrating waterproofing.
- Collect necessary tools: hard brush and spatula for applying compounds, iron brush for grouting between brick seams or cracks, a mixer and a container for mixing the solution.
- Prepare the basement: pump out the water - for this it is convenient to use the “Malysh” pump with a bottom suction. After drying, clean the surface of the floor and walls from dirt. Brush seams, corners, and cracks.
Installation
- Treat the concrete floor and walls with penetrating waterproofing. This composition is deeply absorbed and clogs macrocracks through which water penetrates into the basement.
- Then coat it bitumen mastic corners, seams, cracks. Then apply the mastic in the same way to the remaining surface of the walls and floor. The layer thickness should be at least 2 cm.
- Attach the metal grill to the wall. It is necessary to ensure the rigidity of the plaster layer. Prepare a cement mortar of medium viscosity. Using a spatula, apply a 3 cm thick layer of plaster.
- Lay it on the floor metal mesh and fill with liquid cement mortar and give it time to dry. At this point, the process of creating basement waterproofing can be considered complete.
Conclusion
The waterproofing layer prevents groundwater from seeping through cracks. It also makes concrete stronger, extending the life of walls and floors. The waterproofing method is an excellent alternative drainage system, which cannot be built in all basements.
So, the above methods for dealing with basement flooding will help get rid of excess water. Each has its own installation features, advantages and disadvantages. You need to choose a method based on your specific goals and financial capabilities.
Video: how to make drainage in the basement with your own hands
Drying basements is a complex of one-time or preventive measures aimed at normalizing the humidity of structures and air. The specific method is selected based on the volume and functional purpose: for an area within 2 m2, it is sufficient to improve air exchange using a candle; if it is necessary to dry large storage facilities, use portable ovens and dehumidifiers. These works are combined with antifungal treatment surfaces.
When is drying required?
The need to normalize humidity arises:
1. In case of a one-time flooding of the cellar in spring time or when the groundwater level rises due to excess precipitation. After the water recedes without taking measures, dampness remains inside the underground for a long time; the system, which is sufficient under normal conditions, cannot cope.
2. If necessary, accelerate the removal of construction moisture. Basements of a private house, pits under garages and utility rooms are filled and insulated in summer time or early autumn, but there are exceptions. It is not recommended to delay finishing; drying the walls and floors helps to avoid technology violations.
3. If the operation of the channels or insulating layers of the cellar is disrupted. Clogging of holes, lack of traction in hot or rainy times, seepage of ground moisture or other deviations in temperature and humidity conditions lead to excess dampness and the appearance of condensation, which is unacceptable.
4. When carrying out annual preventive measures. Most of the disinfectant solutions used dry naturally, but if necessary, quickly obtain a dry basement before loading the crop or unfavorable weather conditions the intensity of air exchange is increased.
Review of popular methods
To rid the cellar of a private house or a hole under a garage from dampness, one of the following methods is used:
- Absorption of excess moisture by absorbent materials.
- Increasing air exchange using a lighted candle or dry alcohol.
- Dry with a broiler or portable oven.
- Using electric dehumidifiers: heat guns or specialized units operating on the principle of air cooling.
- Installation of forced fans.

Drying begins after eliminating the causes of excess moisture or for the purpose of prevention, to simplify work and remove dampness from the area. hard to reach areas all removable items and the products themselves are taken outside. If there is free time, they first try to dry the basement naturally, namely, with increased ventilation for 3-5 days. If there are no results, one of the above forced methods is selected.
The preparatory stage is mandatory in any case: surfaces are inspected for fungus and disinfected with compounds deep penetration, loose ones are removed Decoration Materials, updated upper layer the ground floor (if any), walls and shelving systems are treated with antifungal solutions or re-whitened. In basements after flooding, which is systematic in nature, the protection of the floor and walls is enhanced; along the perimeter of such buildings, drainage pipes. The last thing to check is the draft in the air exchange system (by holding a match to the holes); if necessary, additional supply and exhaust pipes are installed or the existing channels are cleaned.

1. Features of drying using hygroscopic materials.
If there is a slight but constant presence of dampness in the cellar and it is impossible to install additional ventilation pipes, absorbent substances are used inside to normalize the operating conditions. Drying a damp basement can be done by scattering sawdust on the floor and periodically changing it, lowering boxes of charcoal, fluff lime, placing calcium chloride in the corners and pieces of cardboard. The advantages of the method include simplicity and the possibility of updating sorbents (some types of materials can be quickly dried in the sun and re-immersed), the disadvantages are that it is inappropriate if processing is necessary large areas. Cardboard and charcoal used without restrictions, lumps of lime or calcium chloride are not placed near products.
2. Increasing traction with a candle or dry fuel.
The most simple way changing the thermostatic equilibrium is by bringing lit paper to the outlet of the hood. In rooms with standard two pipes, forced drying is organized by placing a candle under them in a fire-proof container. In addition to the supply opening, the volume of incoming air is increased by opening the entrance hatch or door. A burning candle is placed on the floor, and the exhaust pipe itself is extended with a temporary nozzle.

This method is proven and safe; it allows you to dry out a cellar relatively quickly (burning is maintained until results are achieved, usually 2-3 days) of any size: from pits in garages to individual storage facilities. Burners or dry alcohol tablets can be used (10-15 pieces are needed for a standard volume basement; in addition to high-quality drying, its vapor kills fungal spores). The limitations taken into account include the need to support combustion and the risk of increasing condensation inside when sucking in moist hot air in the summer with subsequent cooling on the walls; control of the process is required.
3. Pros and cons of using heat guns and electric dehumidifiers.
This method is valued for its safety: in the center of the cellar or in any in the right place a heater or heat generator is placed to quickly remove excess moisture from structures. In rooms with concrete screed they are installed directly on the floor, with ground floors- on a specially prepared base. The power of the device is selected based on the volume and humidity: for drying, an oil, infrared or converter heater is sufficient; for expelling moisture from flooded private houses, they are used heat guns at 3-5 kW. In particular difficult cases forced fans are introduced into the circuit.

A separate group includes dehumidifiers that operate on the cooling principle based on freon. By driving a humid environment through themselves, they remove condensate into special receiving containers and containers; to start the devices, it is enough to connect to the network and periodically pour out water. It is recommended to buy such dehumidifiers for the basement when servicing the underground with large area, including agricultural vegetable storage facilities and industrial facilities. In addition to collecting condensate, they filter the circulating air and control its temperature; the most advanced models function for both cooling and heating. Their scope of application is not limited to the cellar; if necessary, they can be transferred to any room.
Heat guns work quickly and provide high-quality and deep drying of structures. They require installation on a stable and dry base, but such conditions are not difficult to organize. The disadvantages include the need for electricity; in addition to significant consumption, this option is not suitable for remote storage facilities not connected to the network.
4. Heating with a broiler.
The idea is to place on the floor a brazier, a potbelly stove, a kerosene burner or an ordinary tin bucket with sawdust or charcoal burning inside. The resulting heat enhances circulation processes and expels moisture from surfaces, the achieved effect lasts for a long time. Before starting, the room is naturally ventilated for 3-4 days, the brazier and its analogues are placed for several more hours, in especially difficult cases the fire is maintained for 1-2 days. This method allows you to dry and fumigate the structures with smoke, thereby increasing protection against mold.

A brazier or stove requires caution when lowering, it weighs a lot, and safety with ropes is required. Dry sawdust is used for kindling and for support. long burning- coke or charcoal, but in general there are no restrictions on loading ordinary firewood. You should be prepared for the formation of a large volume of smoke; this method is better suited for individual storage facilities, rather than the underground of private houses. Self-ignition of a brazier or potbelly stove is prohibited; a belay assistant remains at the top.
5. Forced fans.
When carrying out annual maintenance, the easiest way to dry the cellar is by increasing the volume of circulating air. There are no restrictions; the desired effect is provided by both portable fans installed on the basement floor and compact deflectors built into exhaust pipes, the latter can be temporary or permanent. The advantages include simplicity, the disadvantages are dependence on electricity. Efficiency depends on eliminating the causes of moisture penetration; if the waterproofing layer is damaged or there is constant flooding, the underground requires more serious protective measures; optimizing air exchange is not enough.
“My cellar began to cry. There are always drops of water on the ceiling, wooden hatch wet through, the carrots and cabbage have long since rotted, the potatoes are still holding together,” he writes FORUMHOUSE member Syava_1.
“Crying” cellar – always a big problem. How to dry it urgently and what to do to no longer encounter increased dampness? We tell you what the participants of our portal do.
For quality storage vegetables, the temperature in the cellar should not be higher than +5 degrees, the air should be clean and fresh, but without drafts.

BogAD FORUMHOUSE Member
The Russian scientist A. T. Bolotov wrote more than two centuries ago that there should be no damp and musty air in the room where vegetables are stored - the vegetables will rot. And at the same time, he notes that there should be no draft, as it will dry out our vegetables.

But you can’t overdry the cellar; there is even data from observations of FORUMHOUSE participants in their cellars, which indicate that excess humidity is not as dangerous for storing vegetables as excess dryness.
Humidity level for optimal storage reserves should be 70-80%.
Having measured the temperature and relative humidity in the cellar with a thermometer and hygrometer, we bring them into accordance with the necessary indicators(recommendations BogAD):
- If the cellar is cold (temperature in winter is below +2 0 C), we insulate the basement or roof.
- If the cellar is too warm (temperature above +5 0 C), we lower it by isolating the cellar area from heat sources. Provide adequate ventilation and isolate the area from heat sources.
- Slight excess relative humidity corrected by ventilation.
- If the relative humidity is significantly exceeded (abundant condensation on the walls and ceiling), we do waterproofing, and then we begin ventilation.
- If the air is musty, the ventilation system does not correspond to the area or is missing, we eliminate this omission.
- If there are drafts in the cellar, ventilation system also needs modernization, perhaps it will be enough to simply add a damper to the inlet.
Based on the diagnosis that was made to the cellar, a work plan is drawn up. But there are situations when the stored crop needs emergency help, and there are several ways to provide it.

The picture on the left shows a cellar drainage diagram that a FORUMHOUSE member DoctorBo I saw it in some book from Soviet times.

DoctorBo FORUMHOUSE Member
The light bulb heats the air, which rises through the open basement hatch.
The right picture shows an improved, modernized scheme, in which the light bulb is located not under the hatch, but under the exhaust pipe. This scheme is better, especially when we are not dealing with a cellar that is located under the building - then the air does not go into the house, but outside it.
Variants of this method, successfully tested by members of our portal:
- A light bulb from the refrigerator is inserted directly into the pipe, 5-7 cm.
- If the light bulb does not fit into the pipe.

Glebomater FORUMHOUSE Member
Place a lampshade on the bottom of the pipe with a light bulb in it. The light bulb lights up, heats the air in the lampshade, and the draft begins to work.
Instead of a light bulb, you can use a candle (to avoid fire hazards, place the candle in a tin can). It is better for the spark plug to be as close to the floor as possible, and to improve traction, the exhaust pipe is lengthened by adding a tin link to it.
A burning candle or light bulb accelerates air circulation and intensively ventilates the cellar. The musty atmosphere of the cellar is replaced fresh air, and within a few days the cellar is usually completely dry.
If instead of a candle or light bulb we use dry alcohol tablets, we will get additional benefit: alcohol combustion products have antiseptic properties.

Member FORUMHOUSE topos proposes to bring the science of chemistry into the service of draining the cellar.

topos FORUMHOUSE Member
1 kg of dry calcium chloride takes 1.5 kg of water. Buy 50-100 kg. Loading. Every other day you remove it, dry it (calcinate it) and load it again. Have fun working.
You can also use a good household dehumidifier air (the kind used to drain swimming pools), a heat gun. Or put a regular oil one in the center of the cellar - in this case, drying will be carried out by thermal radiation. But this process is long and expensive (it may take several weeks continuous operation device). Most importantly, without normal ventilation of the cellar, the desired effect with the help of a heater is unlikely to be achieved.

topos
Using an electric heater to circulate air is a stupid thing to do if the soil is damp, the air is humid and there is no ventilation. You will create a regular bathhouse. You need exhaust ventilation with air intake near the basement floor.
To store supplies in the cellar, poor ventilation will be sufficient. Strong ventilation is more likely to cause harm.

Jeeper Moderator-consultant FORUMHOUSE
With strong ventilation you disturb the climate in the cellar - for example, in winter you can cool it down very much, and in summer you can heat it up very much. This promotes the formation of condensation and mold.
However, competent, well-thought-out cellar ventilation is the key to successful storage of vegetables until the next season.
Tocon FORUMHOUSE Member
The ventilation began to work, the cellar stopped crying (before that, one might say, it roared incessantly).
Ventilation in cellars and basements is arranged as follows:

WITH north side In the basement, an exhaust pipe is installed, which lowers 10-15 cm relative to the ceiling.
A supply pipe is installed on the south side, which should drop to a level of 10-20 cm above the floor.
Typically, pipes are installed diagonally, in opposite corners of the cellar. To avoid the formation of condensation in the cellar in the summer, during the warm season exhaust openings close, and also make sure that the lid is tightly closed and insulated as much as possible from heat (to do this, you can put a piece of foam on it). In the fall, when it becomes more clear outside low temperature than in the cellar, the cellar lid is opened and left open until the temperature reaches about +2 - +3 degrees. The warm, humid air of the cellar will be replaced by dry and cold air from the street, so during such ventilation the wet cellar usually dries out quickly.
For the winter, with the exception of especially frosty days, only the inlet is closed.

Efh FORUMHOUSE Member
I can advise you to leave one hood open for the winter and insulate the pipe itself well (so that it doesn’t get sucked in by the kurzhak). No inflow, and nothing will freeze.
Some participants in our portal do not have ventilation in the cellar, but condensation does not form in it, since the reasons for the dampness were different - bad and cold walls and floors. Sometimes these shortcomings are easy to eliminate, but sometimes a complete remodeling of the cellar is required.

Dampness in a room can appear in a number of ways: various reasons: flooding, recent renovation, leaking roof, errors during the construction of a building, or just a room for a long time there was no heating. But in most cases, dampness becomes an undesirable phenomenon, which they try to get rid of as soon as possible. There are many ways to dry a room, but the most effective option The use of electric fan heaters, as well as heat guns, air dryers, recuperators and some other devices is becoming increasingly common. But sometimes the so-called traditional methods.
Drying the room
To dry the air in the room and no longer encounter this problem, first of all, you need to eliminate the cause of dampness, and only then deal with the consequences. In many ways, the choice of method for drying a room depends on the reasons, and today there are several of them.
So, in order to dry the room, you can use one of the following methods:
Drying out the basement
High humidity in the basement is evidence of mistakes made during construction. But still, no one can guarantee that no one will flood the basement from above, or that a neighbor will not lay storm drainage in close proximity. If dampness appears in the cellar, then it is worth immediately carrying out work to eliminate the cause, and in addition, dry the room itself. Before this, all vegetables, boxes, drawers and other items are taken out of the basement, all garbage is carefully swept away, and left in this state to dry naturally for a couple of days.
The basement, of course, can be dried using a heat gun or dehumidifier, but, as a rule, traditional methods are used in this room, which have been highly effective for a long time.
Most often used to dry the basement brazier- an analogue of a heater or fan heater in an apartment. Place a bucket in the center of the room and light a fire there, using first small wood chips and then firewood. The fire is maintained for several days, and during this time the heat displaces the damp, heavy, stagnant air from the basement. The bonus of this method is that the smoke coming from an open fire can destroy mold spores and “drive out” various insects.

You can even use it to dry out your basement. an ordinary candle. True, to do this, you first need to extend the ventilation pipe almost to the floor, and place a candle under it. To create the initial draft, you should set fire to a sheet of paper in the pipe, and then it will be supported by a candle flame. As a result, humid and damp air will gradually leave the basement - you just need to constantly change the candles until the desired effect is achieved.

You can also take advantage of the property of some substances to absorb moisture: for example, place calcium chloride powder, and the lower end is placed in some container. This substance is capable of absorbing excess moisture, and absorbing it in an amount twice the weight of the powder itself. The method is suitable for maintaining dry air in the basement, and calcium chloride, after drying in a warm place, can be reused. Potatoes and other vegetables will definitely never bloom or rot in such a basement.
Drying out the garage
 In order to dry the air in the garage, it is better to use heat guns: They will get the job done very quickly. Moreover, it is in the garage that you can use not electrical apparatus, which consume a lot of energy, and their gas analogues, or even diesel heat guns. The latter are considered the most economical, but during operation as a result of fuel combustion they form bad smell, which is not as critical for a garage as for a living space. Thus, a diesel heat gun with a power of 20 kW consumes about 1 liter of fuel in 1 hour. Depending on the size of the garage and the air humidity in it, the drying time may vary.
If the humidity in the garage is strong, you can try using Air Dryer. By the way, some companies provide not only the sale of such devices, but also their rental, which is very convenient: you can dry the garage space in a few days, remove the cause of dampness, and the dehumidifier will not be unnecessarily stored somewhere in the corner.
If it is not possible to use special devices, you can dry the air using heaters and fan heaters. And, of course, it should be normal ventilation, to remove moist air, and the presence of heating in it, i.e. recuperator is an additional plus.
Drying the warehouse
 A warehouse, which has a huge area and volume, requires a very serious approach to solving the problem of air drying. It is for such cases that they are most often used heat guns, which are also used in large stores, offices, construction sites. For warehouses, you can choose a gas or diesel heat gun: they are cheaper to operate than an electric one, and they will provide a lot of heat. A directed flow of warm air leaving the device at enormous speed can very quickly displace all dampness and humidity from the warehouse.
If the warehouse is not very large in area, you can try using a dehumidifier, but when choosing, proceed from the parameters of the room. If the dehumidifier does not correspond to the warehouse in terms of air exchange, then no visible result will be obtained: the air exchange parameter must be several times greater than the volume of the room.
Once again, it is worth noting that along with drying the air in the room, it is not a bad idea to find and eliminate the cause of humidity.