Construction of a drainage pit for a bathhouse. How to make a drain in a barrel sauna Distance of the drain pit from the sauna

Any bathhouse, be it a black-heated bathhouse or a state-of-the-art sauna with electric ovens, bubble pools and Jacuzzis require a drain. A drainage pit for a bathhouse is an irreplaceable part, the construction of which should be thought about even before construction begins.
You should immediately make a reservation that if there is a sewerage system or, at worst, a drainage ditch near your site, then the construction of a drainage pit becomes impractical. In this case, all work on draining water from the bathhouse is reduced to laying pipes to a ditch or liquid waste receiver.
Advice!
In order to assess the level of groundwater, look at the vegetation cover of the area. If there are a lot of moisture-loving plants on it (foxglove, horsetail, sedge, nettle, cattail, hemlock, coltsfoot, horse sorrel), then the groundwater lies close to the surface.
In such a site, it is extremely undesirable to build a cesspool with drainage into the ground.
Determining the type of drain pit
A drainage pit in a bathhouse is not hydraulically complex and its construction can be done by any physically healthy person who can hold a shovel and trowel in his hands. Physical health you will need to dig a hole of the appropriate size, and a trowel for laying bricks. Our instructions will help you with the rest.
Drainage pits can be divided into three types: sealed, with drainage into the ground and septic tank.
Let's consider the use of all three types in more detail.
- Sealed cesspool. Used in areas with high groundwater levels. In this case, a sealed container of suitable size is simply dug into the ground, into which the bathhouse wastewater is drained. In this case, you should definitely take care of the convenience of access to it, because... such a pit should be pumped out periodically. The price of such a structure is determined by the cost of the waste container.

- Pit with drainage into the ground. The most commonly used type. Suitable for both summer cottages, and for private households not equipped with sewerage.


If you use scrap materials for construction (old truck tires or unnecessary iron barrels), as well as construction waste as drainage, the price of such a structure will approach zero. If you build from used bricks or waste from the construction of the bathhouse itself, then the price will increase by the cost of the masonry mortar.
- Septic tank. The most complex structure, allowing the output to be practically clean water. There are septic tanks different types: from the simplest, with mechanical settling of water, to complex energy-dependent ones with several stages of filtration.

When choosing the type of treatment plant, naturally, first of all you should look into your wallet. And if it turns out that there is a sufficient amount of relatively free finance, preference should be given to a septic tank industrial production. If not, then you can try to build it yourself.
We build our own drainage pit for a bathhouse
Let us examine in more detail the structure of a drainage pit for a bathhouse. Since the bathhouse is a building that is not used often, a large volume of drainage pit is not required. It should be borne in mind that any septic tank will sooner or later either have to be cleaned or filled up and a new one made.
Therefore, we will not consider options for constructing from old barrels and tires. The former are unsafe in case of cleaning, and the latter, in addition to being unsafe, are also not environmentally friendly.
In our article we will tell you how to make a drainage hole for a bathhouse with drainage into the ground from brick or cinder block. Let's look at all the stages of building a bathhouse drain with your own hands in more detail.
Choosing a place
When choosing a location, you should be guided by only one rule - the septic tank should be located no further than two meters from the walls of the bathhouse. Otherwise, the slope under the drain will be too small, and the water may stagnate. This means that in addition to unpleasant odors, frequent clogged drain pipes will add to the troubles.
Digging a pit
This is the most labor-intensive part of all work. The main problem will be the use of the excavated earth. Fertile soil can be scattered for plants, but clay and sand will have to be removed. Large stones and crushed stone can be left - they will be useful for cladding and drainage.


Note!
The cylindrical shape of the drain pit is preferable to the cubic one because distributes the load on the ground more evenly.
We do the cladding
If the soil on the site is dense and absorbent enough, then no special wall cladding is required. However, in our latitudes, such types of soil are quite rare, so the walls of the pit need to be strengthened.
For these purposes, it is best to use ceramic bricks or natural stone - they are cheaper and absorb less water. In addition, you can use special concrete rings.


If the cladding is made of brick, then it should be placed on edge for less material consumption. Between the bricks leave gaps sufficient for water drainage.
Filling up the drainage
After finishing the cladding, we fill in the drainage. Fragments of brick and cinder block, as well as large construction debris, will be used. In this sense, the construction of a bathhouse will be very useful for us - both the drainage hole will be filled and the construction waste will be disposed of.
Note!
The thickness of the drainage layer must be at least 20 cm.
The walls of the drainage pit should be raised 30-70 cm above ground level. The building is covered with a tight lid on top to prevent foreign odors from arising. The drainage hatch should be made spacious enough for ease of maintenance.
Summary
In conclusion, I would like to note that the septic tank lid is well-kept area may not look very nice. Therefore, you can arrange a small flower bed or other landscape design element on it. When installing these, it is important not to fill the lid with heavy soil, so that if necessary, it can be moved without damaging the beauty.


And the video in this article can clearly answer these and some other questions on this topic!
How to drain water from a bathhouse
The good thing about the bathhouse is that it does not have to be connected to the sewer system. Although, if sewer pipes pass near the site, this is the easiest option.

There are several ways to organize the drainage of water in a bathhouse, which are not very expensive, quite effective and easy to do with your own hands:
- Organization of a drainage pit or septic tank, which is filled with expanded clay, broken bricks, etc. The water is purified by microorganisms, after which it can be used to water the area. The disadvantage of this method is the following: the filter materials become clogged and need to be changed or cleaned approximately every six months.
- Build a well. The wastewater that accumulates in this reservoir is periodically pumped out and removed. In addition to the obvious disadvantage - the need to call a sewer truck - there are several more negative aspects: firstly, the need to organize access for a sewer truck, and secondly, the pit needs to be organized at the lowest point of the site. This combination of requirements is often difficult to reconcile.
- Using natural ground filtration. This method has both advantages and disadvantages. Main disadvantage– it is necessary to lay pipes throughout the site. This leads to two disadvantages: firstly, the high cost, and secondly, you will have to dig up a large area, which is unlikely to appeal to those whose site has been planned and landscaped for a long time. And now about the advantages: water is distributed over a large area, does not stagnate anywhere, and therefore does not cause problems. unpleasant odors, besides, you water the area with purified wastewater from the bathhouse, i.e. save water.
How to make a drainage hole for a bathhouse
It is worth starting the construction of a drainage pit only if the groundwater is located deep. Otherwise, the pit will always be filled with groundwater, and the drains simply will not fit into it.
First you need to decide on the sizes. They depend on the number of people who will take a steam bath. The more people, the bigger size you will need a reservoir. If there are 3-4 people maximum, the water consumption is approximately 50-60 liters, respectively, the volume of the pit should be slightly larger.

Then you need to decide on the place where you will install the tank. From experience we can say that the most optimal distance– 2 meters from the bathhouse. It’s not worth it any further - it will be difficult to organize the required slope of the pipes so that the water drains by gravity, closer is also dangerous - the foundation may sag or get wet.
To determine the amount of materials that will be needed to construct a drainage pit, you need to know the type of soil. If the soil does not crumble, there is no need to strengthen the edges of the hole. You just need to dig it up and fill it with filter materials. At the same time, it is important that the soil absorbs moisture well. Then the treated wastewater will be absorbed, which is very convenient. In this case, crushed stone, expanded clay or broken brick are poured onto the bottom of the pit, and then sand. But such conditions are rare.

It is necessary to strengthen the walls of the pit only when the soil is loose
If the soil is loose, you will have to strengthen the edges of the hole. You can line it with brick (half a brick is enough) or wild stone, leaving gaps for water outflow, you can use slate, or you can bury an old (or new) barrel made of metal or plastic, make holes in the walls for outflow and remove the bottom. The holes should not be large so that rubble does not get stuck in them.


If we talk about the shape of the tank, then the best option is a cylinder. In this case, the pressure on the walls is uniform, and besides, a pit of this shape will require repairs much less often. The walls of the pit should not reach 30-40 cm from the ground surface, and the hole should be covered with a lid (iron or concrete).
After the walls of the pit are ready, crushed stone, broken brick, expanded clay are poured, and everything is covered with sand. Drain pipes are connected to the pit from the bathhouse at a slope sufficient for gravity flow of water. As a rule, a difference of 10 mm per meter of pipe is sufficient. Water passing through filter materials is purified and then absorbed by the soil.


If a square hole is dug to drain the bath, it can be filled with wave slate sheets. Each sheet is placed so that the waves of the previous one are perpendicular (at an angle of 90°).
There are several more options for making a drainage pit from scrap materials. You can take old tires (tires from KAMAZ trucks), make holes in them for better drainage and partially cut off side surfaces. Next, place the prepared tires one on top of the other in the dug hole, and then cover them with filter materials.


The simplest option for organizing a bath drain
If the bathhouse is seasonal (not used in winter time), then you can not complicate your life and make the most basic horizontal filter pad. But this option is suitable for highly absorbent soils. To do this, a trench about 1 meter deep is dug at a distance of 2-3 meters from the building. It is about a meter long and 30-40 cm wide. Pour crushed stone or expanded clay onto the bottom of the trench, lay the drain pipe from the bathhouse connected (at an angle) onto this cushion, and cover everything with soil.
For information on how to supply water to a bathhouse from a well, see the article Organization of water supply for a bathhouse from a well: the main task do not freeze the system in winter
How to make a drain in an area with clay soil
If the soil on the site does not allow water to pass through, you will not get away with a horizontal cushion. If the clay lies in layers, you need to dig a hole down to the absorbent soil, and then install a barrel or build a septic tank of a different design. But clay is also a heaving soil. This means that when it freezes in the spring, the barrel or other structure will be pushed up or destroyed. If at the base of the sewer pit iron barrel, it can be secured by bending the bottom edge outward and folding it large stones along the perimeter.
If the soil is completely clayey, you should think about organizing a well in a place accessible to a sewer truck, or making a more complex structure. Dig and fill a sewer hole, from which another pipe should be brought out to the side (2-3 meters). Place this pipe on a horizontal filter pad (see how to make it above).
Read about how to make a shower in a bathhouse with your own hands here.
How to organize water drainage in a bathhouse using natural filtration
This is already a rather complex system, which is advisable to use when there are large volumes of wastewater and the presence of solid particles in it. The system consists of a tank of any shape with waterproof walls and a bottom, from which a the whole system pipes throughout the area. The water purified in the septic tank disperses through pipes located on a slope and is absorbed by the soil. The use of such a system is possible with low wastewater levels - no higher than 2.5 meters. The volume of the tank should be at least three times the daily water consumption. The inlet pipe is made at least 5 cm above the maximum wastewater level, and the outlet holes are at its level. For better cleaning The water chamber of the septic tank is partitioned off, and holes are made in the far corners of the partition. This slows down the passage of water and speeds up the deposition of impurities. The height of the partition wall does not reach the hatch, or there are holes in it to provide ventilation.
Over time, sediment accumulates at the bottom of the well, which is periodically removed using a sewer truck. So, when choosing the location of the pit, ensure access for equipment.
Any of these options for draining water in a bathhouse can be done with your own hands. But there's no need to complicate things. There is no point in building a bulky system for a small bathhouse that will only be used in warm weather. The choice, in any case, is yours.
How to drain a bathhouse yourself
Whatever the size of the bathhouse, it needs an organized drainage of liquid waste. For those who are interested in how to make a drain in a bathhouse, you need to understand that the most optimal solution would be to construct a drain.
By adhering to building codes, you can protect yourself from fungi and unpleasant odors.


By definition, there are two ways to build a drain in a bathhouse:
- construction of simple drainage;
- arrangement of a high-quality drainage system.
In the first option, all wastewater goes into the sump on its own. Therefore, the floor covering must have good density and be installed with a slope (in some cases, a drain hole is provided). A gutter made of asbestos or metal is placed under it.

The tray is mounted between the steam room and the washing room, flowing into drainage well. As the instructions indicate, such wells are dug at a distance from the bathhouse. The size of the wells depends on how many people will use the drain.
Speaking about how to properly drain a bathhouse, experts offer several tips:
- The well should be deepened to the level of soil freezing. A layer of drainage expanded clay is poured inside the finished pit, slightly above the freezing point. The rest of the space is covered with earth and compacted;


If water is absorbed by the soil with difficulty, it is advisable to dig a pit ─ an additional small hole from which the accumulated water is discharged outside the site through a drain outlet. The pipe is dug above the bottom of the pit.


Floors in the bathhouse
When talking about how to make a drain under a bathhouse, you should take into account the method of laying floor coverings. They can be laid directly on the joists (with a 5 mm gap). If necessary, they can be removed and dried. Sometimes, floors are installed completely, at a certain degree.
A ventilation riser is constructed - a metal or asbestos device. The upper end is equipped with a special cap. The drainage system needs periodic cleaning (just like risers).


The procedure consists of several stages. First, preliminary mechanical cleaning(precipitates and lime are separated). Then it undergoes filtration and biological purification.
At the second stage, filtration occurs in wells, pits, or in the ground itself.
Methods for organizing the drainage of water from a bathhouse
Today, several options for water removal are known. All of them are not very expensive, but are quite effective.
Since the construction of the latter does not present any particular difficulties, you can build them yourself:
- a system that includes a drainage pit and a septic tank. Expanded clay and broken brick are used as its filler. The water is purified by microorganisms; after purification is completed, it can be used to water the plants on the site;
- well construction. Risers are installed in this tank, where sewage accumulates. In the future, periodic pumping out of waste and its removal will be necessary.
The downside is that it is necessary, from time to time, to call special sewage trucks (the price of such services is rather high), for which it is necessary to provide passage. In addition, the well is dug at the lowest point of the site;


- an option that uses natural ground filtration. Here, wastewater ends up in a filtration well without a bottom, on the basis of which layers of loading-filtrate are filled. Water passing through them is purified and then absorbed into the soil over a large area. The downside is that you will have to lay pipes throughout the entire area, which will be expensive.
Note!
Sometimes, a built bathhouse can do without sewer system at all.
However, if the pipes lie in close proximity to it, there is nothing easier than connecting to a common pipe.
Construction of a drainage pit
Before draining the bathhouse, it is necessary to clearly determine where the tank will be located. Experience suggests that it is advisable to locate the object 2 meters from the bathhouse; at a greater distance, laying pipes with an inclination for gravity flow will result in greater costs. In the case of a closer location, subsidence or wetting of the foundation is possible.


The pit is built based on the type of soil. If the earth does not crumble, then the edges of the pit do not need to be strengthened. All you have to do is dig a hole and fill it with filtrates.
The main thing is that the soil absorbs water well. To do this, the bottom of the pit is covered with crushed stone, expanded clay or broken brick, and then with sand.
If the soil is loose, the pit must be secured along the edges. Brick is used as a reinforcing material (it is enough to make the walls half a brick thick).
In some cases, wild stone will do. It is necessary to make a number of gaps through which water will flow out.


How to make a drain in a bathhouse - nothing is simpler. Metal or plastic barrels will work as a reservoir; holes are made in their walls and the bottom is removed. The best option There will be a cylinder of such a tank. There is no need to make large holes so that crushed stone does not get stuck in them; everything is covered from above with a lid made of iron or concrete.


Advice!
A drainage pit for a bathhouse can be constructed only when the groundwater is located at a considerable depth.
Otherwise, groundwater will always be present in the pit, and the drains simply will not fit there.
How to make a drain for a bath?
The order is:
- as soon as the walls of the pit are ready, crushed stone, broken brick, and expanded clay are poured into it;
- later everything is covered with sand;
- the finished pit and the bathhouse are connected by drain pipes with a slope through which water will flow. A 1 centimeter difference is enough linear meter;
- if a square hole is dug, then sheet metal is placed in it, wave slate. The sheets are laid so that the waves are at right angles to each other;
- the system is ready.
Conclusion
Experience says that the sewerage system must be simple and reliable so that it is convenient to use. It is only important to carefully consider all stages of future construction. After studying the video in this article, you can get full information on this topic.
Do-it-yourself bathhouse drain: the simplest solution
The bathhouse is a structure with a lot of different features. This is due to the fact that, in addition to high temperatures, there is direct contact of surfaces with water.
That is why many builders are interested in the question of how to organize a drain for a bathhouse with their own hands.

The simplest device
First of all, it must be said that there is a mass various systems, organization of water drainage. They all differ in the way they implement different components and materials for creation. Therefore, in this manual we will consider the simplest device that can be made independently at minimal cost.


Creating a drain
- This stage is carried out during the manufacture of the foundation, since this will make installation easier and will not interfere with anything during its production.
- First, a small hole is dug in the place where the washing room and steam room will be located. Its walls must be lined with bricks, and the floor must be filled with cement.
- Further installation instructions require installation drain pipe for a bath. It is brought from the street side, through the foundation, straight into the finished pit. In this case, it should be located at an angle of 3 degrees, and above the level of the surface of the well it will rise by 3-5 cm.


- The second end of the pipe must be led into a sewer or cesspool. Moreover, if it comes to the surface, then it should be insulated.
- Some experts, when deciding how to make a water seal, prefer not to create additional nodes that could become an obstacle, but install a corner connection at the end of the pipe that is located in the well. However, many simply refuse this.
- At the next stage, it is necessary to carefully treat the masonry and floor of the pit with bitumen to protect the material from moisture.

- The fact that the upper edge of the well will be the lowest point of the subfloor also deserves special attention. Therefore, before starting work, it is necessary to make calculations and prepare a drawing.
Advice!
If it is not possible to drain the water, then the well is made large enough so that it can become a cesspool.


Creating ladders
- To properly organize the drainage from the bathhouse with your own hands, you need to think about the water supply.
- Many craftsmen use a whole system of ladders for this. However, the entire design can be significantly simplified.
- First you need to create a subfloor. It is poured from concrete, creating a slope towards the drain hole of the well. In this case, water should flow freely into the bath drain from all ends of the room.


- Then the surface is treated with a special mastic, which will serve as waterproofing. You should not save on this material, since the high price is due to the fact that these substances are developed specifically for baths and saunas. They have antibacterial components and do not emit harmful substances as a result of heating.
- At the next stage, logs are attached to the walls of the bathhouse. They are set at the water level and fixed to the surface using metal brackets. There is a technology in which logs are mounted on special supports, but in in this case it should not be used.


- Next you need to install floorboard. At the same time, almost all manuals that tell you how to organize a drain in a bathhouse with your own hands advise leaving gaps of at least 10 mm between the modules. This is necessary so that when heated and humidity the board does not expand and fill the entire space.
- Thus, water will penetrate through the cracks and enter the common drain. Then, under the influence of gravity, it flows into a well, from which it ends up in a cesspool or bathhouse sewer.
- Special attention must be paid to the fact that all surfaces of subfloors must have a reliable and high-quality waterproofing. For this, roofing felt is often used, but it is better to use a special mastic that does not release harmful substances when heated.
Advice!
If you do not want to organize a common drain, then you can use special products that will help organize the flow of water in one direction.

Conclusion
In the video presented in this article you will find Additional information on this topic. Also, based on the text presented above, we can conclude that organizing a drain for a structure such as a bathhouse is quite simple. In this case, you can use the simplest materials and not resort to complex structures.
One of the most important stages of arranging a bathhouse is the organization of timely disposal of wastewater into a treatment facility. The most affordable option for a sewer system is a drainage pit for a bathhouse.
To provide safe use drainage system, before starting work, it is recommended to carefully study its design features and perform the necessary calculations, and at the construction stage, follow the basic recommendations of specialists.
Types of drainage pits
There are three types of sewage pits: a sealed tank, a drainage type pit and a multi-chamber septic tank.
A sealed cesspool is the simplest and safest construction option, which prevents the penetration of polluting effluents and household chemicals into the soil and aquifer. It is being built on land plots with a high level of groundwater.
The design is represented by a simple sealed tank dug into the ground to the required depth. Feature cesspool is the need to regularly pump out accumulated water runoff. Significant disadvantages of a sealed tank include the complexity and high cost of maintenance.
A drainage pit for drainage is the most popular option for private baths that do not have bathrooms. In this case, an open container is installed that does not have a sealed base. A gravel-crushed stone mixture is used as a bottom filter. Design drainage pit provides for the presence of special holes necessary for the removal of purified liquid into the soil.
The primary sealed chamber ensures the collection and initial filtration of wastewater: solid waste sinks to the bottom, and the liquid undergoes additional purification by aerobic microorganisms. The reservoir is connected to the second compartment by an overflow pipe, which provides the supply of purified liquid. The second chamber serves as a drainage pit, where water undergoes secondary purification and is discharged into the soil.
If the septic tank consists of three compartments, then the drainage chamber is installed last. In this case, a deeper cleaning of impurities and pollutants occurs in the second chamber, after which the purified liquid enters the drainage tank.
Available materials for building a drainage pit
Choice suitable material for the construction of a drainage pit under the bathhouse depends on design features structures, wastewater volume and financial capabilities of the site owner.
Barrel pits
Tanks can be constructed from barrels, metal and plastic, of various sizes. Such a system involves the use of one or two drainage containers:
- One container. The bottom of the prepared pit is covered with a drainage mixture of crushed stone and gravel, then a plastic container without a bottom and with a perforated surface is lowered into it. The distance between the barrel and the pit is filled with drainage. A waste pipe is connected to the barrel at an angle. Some of the liquid will flow through the drainage holes into the soil for further cleaning.
- Two containers. This system involves the use of two barrels, with the first being installed 25 cm above the second. The containers are connected to each other by an overflow pipe. The wastewater enters the first container, in which foreign impurities and solid waste settle. Next, the purified liquid is poured into a second tank, to which perforated pipes are connected for drainage. Drainage elements are installed in trenches filled with drainage material and a dense layer of soil.
Brick pits
To construct drainage pits, ceramic bricks are used, the masonry of which is carried out with small gaps - they ensure the drainage of wastewater into the drainage pad and soil. The operating principle of such a drainage system is no different from the previous one, the difference lies in the material used. Distance between brick tank and earth foundation filled with drainage material designed to clean wastewater and distribute it around the perimeter of the pit.
A brick pit is considered more durable and practical compared to a structure made from plastic barrels.
Concrete pits
With technical equipment and financial capabilities, you can build a drainage pit from concrete rings with a perforated surface, which are mounted in a prepared pit. After the installation of the rings is completed, the bottom of the structure is covered with a drainage cushion of gravel and crushed stone.
In the case when the depth of the pit is at least 2 meters, and the bottom of the tank is concreted, such a structure can be used both for drainage of wastewater from a bathhouse and for sewage of a residential building.
Tire pits
Cesspools made from used tires are designed to drain liquid waste, so they are well suited for the needs of a bathhouse.
The arrangement of a drainage system when installing tires can be carried out in various ways, including side perforation of the walls, maintaining a technological gap between the installed slopes, cutting off the outer walls while maintaining the internal structure of the tires.
This is the simplest and most popular option for organizing drainage under a bathhouse, according to which the work can be done with your own hands.
Step-by-step arrangement of a drainage pit for a bathhouse
Now let's look at a question that interests many - how to make a drainage pit for a bathhouse with your own hands. The easiest option for beginners is a drainage hole made from a barrel. A metal barrel with a volume of up to 250 liters is used as a drainage tank.
First you need to select appropriate place under the pit. The distance from the foundation of the bathhouse to the treatment device should be from 3 to 7 meters. When determining the depth of the sewer pit, it is important to take into account the total volume of wastewater and groundwater. The optimal value is no more than 7 meters.
The process of arranging a pit for drainage involves stage-by-stage execution of work.
Pit preparation and pipe laying
- Preparing the construction site for the pit. An earthen ditch must be dug from the base of the bathhouse, having the necessary slope for convenient drainage of wastewater. The average slope is 4 degrees per linear meter. The bottom is insulated and covered with drainage made of gravel and sand. A drainage pipe connecting the steam room and the waste pit is laid on the pillow.
- Next, they dig a pit and also insulate it. A drainage cushion made of gravel and crushed stone (thickness up to 25 cm) is installed at the bottom.
Preparing the drain container
- The side surfaces of the barrel are perforated with a grinder in increments of 18 cm in a checkerboard pattern.
- A hole is made in the bottom for mounting a pipe, which will be connected to the drainage pipe with a fastening coupling. The connecting joint is treated with sealant from the inside and outside.
- The barrel is wrapped in geotextile material, which will ensure reliable drainage of wastewater and prevent foreign objects from entering the container. Geotextiles are fixed over the entire surface using twine or construction tape.
Installation of the tank in the pit
- The barrel is placed on a drainage pad so that the pipe is located on top.
- All formed voids between the walls of the pit and the barrel are filled with fine gravel.
- The pipe is connected to the drain pipe laid earlier.
Features of laying a sewer pipe
Laying a drainage pipe – important stage in arrangement. According to building codes, the pipe is laid at the stage of foundation construction. It is located at the bottom of the base with a slope towards the drainage hole. When pipe laying is required for a finished building, installation is carried out under the floor of the steam room.
To properly install the pipe, you must follow the following rules:
- Bends, turns and joints are not allowed when installing the product. This can lead to blockages in any part of the pipe.
- After completing the installation of the drainage system, a concrete screed of the bath floors is carried out, maintaining a slope towards the drainage hole. After the screed has completely dried, the floor is covered with tiles or porcelain tiles, on top of which removable wooden gratings are installed. They will provide protection against burns in direct contact with heated flooring. In addition, the gratings can be easily dismantled for drying and treatment with antiseptic compounds.
- The drain is closed with a protective grille to prevent possible clogging of the sewer pipe.
Important! Bath floors do not require additional insulation. With high-quality concreting and cladding, such a base warms up during the combustion process and prevents the penetration of cold from outside.
How to make a drainage hole for a bathhouse is a question that will not take the owners of such buildings by surprise. After all, organize reliable system drainage of wastewater from scrap materials and without the involvement construction crew It’s not difficult, the main thing is attitude and a serious approach to business.
One of the stages of constructing a bathhouse on a personal plot is the construction of a sewerage system. Draining a bathhouse for wastewater disposal can be done in many ways, but the most popular at the moment is. Due to the fact that the bathhouse wastewater is slightly contaminated, this option is the most appropriate.
Ready-made brick drainage pit
Since a simple drainage system for a drainage pit can cope with the filtration of wastewater, which, as a rule, contains only water and detergents, the construction of other types of sewage systems for a bathhouse is not economically justified.
The only thing that needs to be taken into account is the groundwater level - if it is shallow, then the drainage in the bathhouse will have to be organized in some other way. If there is a drainage pit not far from the bathhouse, intended for other buildings on the site, then it is possible to use it, you just need to lay the necessary communications.
Anyone who wants to make a drainage pit on their own is faced with the task. It is not at all necessary to be a designer, it is enough to have some construction skills.
 Diagram of a drainage pit for a bathhouse
 To begin with, you need to decide on the following parameters:
- The volume of water that will be used for water procedures in the bath. Depends on the frequency of visits to the steam room and the number of people washing in it;
- Type of soil on the plot;
- It is also necessary to know how deep the groundwater lies.
For an average family of four, as practice shows, the volume of water used will be small and its use will not be daily. Hence, optimal size The drainage pit will be two meters deep and one and a half meters wide. If you plan to receive more visitors in the bathhouse, then it is best to increase the size of the drainage pit.
It should be understood that baths that have swimming pools, fonts and other water reservoirs consume much more water due to the need for periodic cleaning.
An important issue in the preparation of construction flush bath is to determine its location.
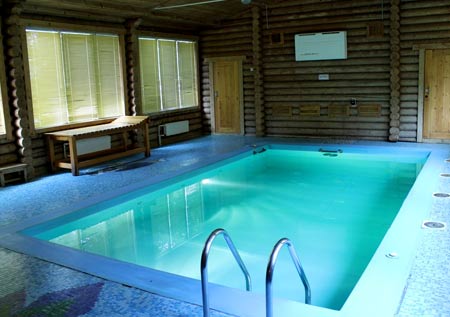 Project of a bathhouse made of timber with a swimming pool
 There is a recommendation to place the drainage hole no closer than three meters from the building. If it is located closer, there is a threat of destruction of the base of the bathhouse; in addition, bathing procedures can be overshadowed by the unpleasant odor of wastewater.
It is also not recommended to drain far from the building, as this will entail unnecessary expenses for laying communications. Because the pipes from the bathhouse to the drain must be laid at a certain slope, this operation is very difficult to perform.
As noted above, if there is shallow groundwater on the site, it will be impossible to make a drainage hole - otherwise it will be constantly filled with water. To solve the sewerage issue in such areas, sealed tanks should be used, which will have to be emptied from time to time, or other types of wastewater disposal should be provided.
Read also
Bathhouse projects with barbecue
Materials needed for construction
If the soil on the plot is strong enough, then there is no need to strengthen the drainage pit. In this case, construction is limited to digging a hole in the ground and installing a gravel-sand cushion for drainage.
However, the type of soil is not always favorable for such developments. Typically, some strengthening work will be necessary. The walls of the drainage pit are best reinforced with brick or slate. You can also make plastic or iron tanks.
It is necessary to provide drain holes at their bottom so that the water goes into the ground. Concrete rings are also used, but their use will entail significant costs. In any case, a gravel-sand cushion is needed at the bottom of the drainage pit.  To lay the necessary communications, pipes made of various materials are used: metal, asbestos. However, the most acceptable in terms of quality and price are plastic pipes.
The process of constructing a drainage pit
When all the preparatory work has been carried out, it is necessary to excavate the soil and build a pit with a trench for communications. Next, the pit is strengthened; if brickwork is used, it is recommended to make it half a brick.
When strengthening the walls of the pit, holes should be made at a certain distance to drain water into the ground. Natural stone more preferable than brick, since such material will last much longer. It is worth noting that limestone under conditions high humidity use is not recommended.
 Example of a cinder block cesspool
 After the work on strengthening the walls is completed, a gravel-sand cushion about 20 cm thick should be made. Then the drainage pit is covered with a concrete slab, or a screed is poured on top. A very important point is the organization of a hole in the “lid” of the drain pit for the removal of gases.
In order for the owners to be able to control the filling of the pit, it is necessary to make an inspection hatch on top. In order to disguise an unflattering drainage hole on the site, you can place a flower bed with flowers on its cover.
Communications are laid in the ground at a depth not less than the depth of soil freezing, as a rule, at least 0.5 meters.
Probably, the vast majority of owners of summer cottages and private country houses cannot imagine their lives without own bathhouse, since such a structure is an integral part of ancient Russian traditions. A bathhouse is not only a place for washing, but also a kind of home “dispensary” that works to restore the strength and health of the owners, and provide the necessary periodic relaxation. But in order for her to bring only pleasant sensations, its arrangement, and in particular all the necessary communications, must be carried out in accordance with all the rules. for a bathOne of the traditionally problematic components bath system is the disposal of used water, so it is very important to properly organize its drainage and collection site. Disposing of contaminated, untreated wastewater onto the ground or into natural bodies of water is strictly prohibited, and such an approach will inevitably lead to penalties from supervisory environmental authorities. Therefore, in the absence of a centralized sewerage system (as is most often the case), a special storage or drainage pit is usually created for these purposes. And in order for the drainage pit for a bathhouse to function effectively, it is necessary to study its design before starting construction, and during the period of arrangement work, follow the recommendations of experienced craftsmen.
Main types of drain pits
Construction of any drainage pit is a rather labor-intensive process, since the pit will most likely have to be dug manually. At the same time, such a hydraulic structure is not very complex in design, so any owner of the site can build and equip it independently, without even involving assistants, of course, if there is enough strength for excavation work. Drain pits can be divided into three main types - these are a sealed container, a pit with drainage capacity, and a septic tank consisting of several. First, let’s figure out what each of the varieties is, in principle.The bottom of the drainage pit is covered with a layer of filter material - crushed stone or gravel. In addition, holes are often made in the walls of the drainage pit at a certain height through which water will be absorbed into the soil. This option is perfect for a bathhouse and is perhaps the easiest to build, however, if the soil characteristics on the site allow it.

An approximate diagram of the design of a simple septic tank. If a septic tank of three containers is planned, then the third chamber is made into a drainage chamber. The second serves for the final sedimentation of suspensions, deeper purification of water due to the action of anaerobic microorganisms. And from here the purified liquid is poured into. A septic tank is most often installed in the case where it is intended to collect the entire considerable volume of liquid waste from both a residential building and a bathhouse.
What is important to know about the design and rules of septic tank equipment? A septic tank is already quite complex engineering structure, the creation of which must obey certain rules. Often home owners prefer to install finished system factory production. What are the rules for setting up such a treatment plant, and what to look for? Special attention at choosing a septic tank– read in a special publication on our portal.

Materials for arranging a drainage pit for a bathhouse
Various materials can be used to construct bath drainage pits. Their choice directly depends on the expected volume of wastewater, the financial capabilities of the site owners and the convenience of construction.Barrel drainage pit
To create this water drainage system, metal or plastic barrels of different sizes are used. However, such a drain can be arranged in different ways:
To make the pit, an old metal barrel was used. A pipe is placed in the barrel at the required slope angle, through which used water will flow from the bathhouse into the container. This wastewater will gradually seep into the drainage layer through holes in the walls and through the bottom, be cleaned, and then be absorbed into the surrounding soil. In some cases, drainage material fills not only the free space of the pit, but even the barrel itself, that is, water will flow directly into the drainage layers and then into the ground. Thus, the barrel will never be filled. It must be correctly understood that such a scheme is not suitable for collecting other types of wastewater from a residential building. For a bathhouse that is used for its intended purpose once or twice a week, such a pit becomes one of the most optimal options.

This is, in fact, a mini-septic tank with the output of water that has undergone primary purification to the drainage field. Outlet pipes from the second tank are laid in drainage trenches filled with gravel or crushed stone, through which water purified from chemical precipitation will be distributed, moistening the soil. The trenches are covered with a layer of fertile soil, approximately 500 mm, and can be planted with ornamental shrubs that will receive constant watering. Thus, two problems are solved at once - draining water from the bathhouse and irrigating plants on the site. This option for arranging a drainage pit will be discussed in detail below.
Brick drain pit
The walls of the drainage pit can be arranged using bricks, which are laid out with gaps - through them, water is drained into the drainage backfill and further into the ground. The difference between this pit and the first version, made from a barrel, differs only in the material, but the operating principle remains the same. In the gap between the ground and brick walls a drainage layer is filled in, which will purify the water and distribute it throughout the pit, discharging it into the ground. Drainage pit with walls lined with red brick. A pit made of brick is more durable and is designed to hold a larger volume of water. Moreover, if you dig a pit deep enough, and the bottom and bottom part If the walls are made hermetically sealed, then this design can also be used for draining other waste, but in this case the pit will have to be cleaned periodically. To create this version of the drain pit, it is not at all necessary to use new brick - used material is also quite suitable.Drainage pit made of concrete rings
If there are financial and technical capabilities, then the drainage pit can be built from perforated rings, which are installed in the prepared pit. After installing the rings, a drainage backfill is arranged at the bottom of such a well.
A good solution, but, as a rule, requiring the use of special construction equipment. In this option, the entire space between the walls, as in previous cases, is also filled with drainage material, so the hole, provided it is used only for bathing needs, will never be filled with water. In the same case, when the pit is deep enough and the bottom of the well is cemented, then such a pit is suitable not only for a bathhouse, but also for general sewerage Houses. True, this will require additional calculations, assessment of the absorbent properties of adjacent soils and the location of aquifers.
Pit made from old car tires
A drainage pit made from unnecessary car tires can only be used for liquid waste, so it is ideal for collecting periodically incoming water from a bathhouse.
A very popular scheme among owners of summer cottages is a drainage pit made from old tires. Tires are installed in different ways: in some cases, holes are cut out in their side walls, in others, a small gap is provided between the slopes, in others, the outer walls are almost completely cut off, but the principle of operation of the drainage the pit remains the same. This option for draining water from a bathhouse can be called the most popular, since it is simple to install, affordable (tires are easy to find for free) and practical to use. Schematic diagram of the construction of a drainage pit made from car tires. The diagram shows the following numbers: 1 – Crushed stone or coarse gravel – drainage backfill, a layer of 250÷300 mm thick. 2 – Old car tires.3 – Drain pipe from the bathhouse (there may be two of them) 4 – Crossbars for laying the lid. 5 – Lid or hatch. Around the laid out stack of wheels, and sometimes inside the resulting well, a drainage cushion is backfilled, which allows you to retain and clean the water coming from the bathhouse With good drainage capacity of the soil and periodic use of the bathhouse, the pit never overflows. It should be noted that other materials that can withstand high humidity are also suitable for the construction of a drainage bathhouse pit.
How to independently equip a drainage pit for a bathhouse
Inspection of the soil at the site of the planned drainage pit
In order for the bathhouse drainage system to be effective, it is necessary to determine the type of soil in the area at the approximate depth of the planned pit. To do this, a trench or test hole is dug. In order for the bathhouse to be used in winter, the depth must be below the freezing level of the soil. Information about soil freezing in a specific area can easily be found on the Internet, or you can consult with the owners of neighboring plots who have been using similar drainage systems for a long time.
To determine the nature of the soil and make a decision in favor of one or another scheme for constructing a drainage pit, it will be necessary to carry out certain research. Sandy soils and sandy loams, including those with rocky inclusions, have good drainage abilities. But dense clay layers can cause problems. At high humidity, they are well saturated with water, swell, and become practically waterproof; when dry, they shrink. In addition, they are highly susceptible to frost swelling. These qualities of such soils are unfavorable both for laying foundations and when laying pipes in trenches, as they can lead to deformation and damage to themselves and other elements of the system. Constructing a drainage hole in such soil, if it extends to great depths, is an almost pointless exercise. Well, if you have to lay a pipe through such layers to a drainage pit that reaches the depth of soil with high absorbency, then the bottom of the trench must be lined with a sand cushion 100÷120 mm thick, which will prevent the harsh impact of ground vibrations on the elements of the drainage system. The level is also important the occurrence of groundwater (GWL), since the degree of absorption of water entering the drainage pit will also directly depend on this. So, between the bottom of the pit and the location of the stable aquifer there should be a distance of about 1000 mm. If the groundwater is located close to the surface, then the contaminated water will not flow well into the drainage, and such a well will soon turn into a fetid pit, so it will be constantly filled. In this case, as with clay soils, the option of a drainage pit is not suitable. You will have to either install a sealed container that requires periodic emptying, or organize water drainage to special surface filtration fields.
Having chosen the material for constructing the pit, you need to decide on a few more important points its arrangement, on which the efficiency of the system and the environmental safety of both the site itself and its inhabitants depend. First of all, you will need to decide on the place where the pit will be located.
The location of the drainage pit directly under the bathhouse is not the most convenient option, since it sharply limits the possibility of inspecting and servicing the drainage system

Necessary removal of the drainage pit from other objects on the site

If the circumstances are such that the pit has to be placed in close proximity to the walls of the bathhouse, it is necessary to provide for several design features

Minimum slope of free-flow sewer pipes, depending on their diameter (height difference per linear meter of length) It should be noted that to organize the drainage of water from a small bathhouse without a toilet, a pipe with a diameter of 50 mm is usually sufficient. In order to maintain the required slope, when digging a connecting trench, as well as when adding a sand “cushion” to it, you should control the difference in its depth using a building level.
Arrangement of a drainage pit - step by step
In this section of the publication, two options for drainage pits will be considered, which can be arranged independently.Regular drainage hole
This version of the drainage pit has a design that can be made from various materials discussed above. Illustration Brief description of the operations performed
After determining the location of the drainage hole, you can proceed to digging a pit.
For a bath drainage well, a pit depth of 2500÷3000 mm will be sufficient. It can have a round or square cross-section - it will depend on the chosen material for the walls. For example, if the pit is made of brick, then it is more convenient to lay a square or rectangular shape from it, but in some cases a round well can also be built from it.
The diameter of the pit should be 150÷200 mm larger than the prepared container.

When the pit is prepared, a trench is dug from it to the bathhouse building at the required angle for laying the drainage pipe.
The width of the trench can be 300÷500 mm, and the depth will depend on the level of soil freezing in the area where the bathhouse is built, but not less than 500 mm at the entrance to the well.

The bottom of the finished pit is filled with medium-fraction stone - gravel, crushed stone, crushed brick or even broken slate.
The drainage layer must be at least 300 mm, as it is designed to retain dirty water and purify it, that is, moisture must reach the soil by capillary action, which will allow it to be quickly absorbed.

Further, they act differently.
You can lay a sewer pipe right away, and then work on the brick walls of the water intake well, or you can first install or build a container, and as it is being built, a drainage pipe is inserted into one of the specially made holes.
Most often, the pipe is laid at a time when the walls are brought out to the level of the depth of the trench, otherwise it will simply interfere with the work.

So, the walls of the drain well can be built of brick.
The laying is carried out maintaining a clearance between adjacent bricks in a row of 40÷50 mm.
The wall can have a thickness of half a brick or one brick - this parameter is chosen by the builder, and largely depends on the amount of prepared material.
Having raised the walls of the well by another 200÷300 mm, the space between the soil and brick walls is filled with drainage backfill.

If concrete perforated rings are used to form the walls, then specialized equipment will have to be used to install them, since each of them has an impressive mass, and distortions must not be allowed during installation.
After their installation, the distance between the soil and concrete also needs to be filled with drainage backfill.
It should be noted here that if concrete rings are used for the pit, then you should not rush to install them in the hole of the sewer pipe wall, since under their weight they can sink somewhat into the ground - sometimes by 100-150 mm. Therefore ready concrete well It is recommended to leave it alone for a while for shrinkage, otherwise the plastic pipe may crack or break due to the resulting pressure and tension.

When used for pit metal barrels, the bottom and lid are cut off from them, and the side walls can simply be cut using a grinder.
The cuts are made at a distance from each other of 200÷250 mm horizontally and in increments of 100÷120 mm in height.
If two barrels are used, they are placed one on top of the other. After installing the lower one, the free space around its walls is filled with drainage.
After this, in the second of them, in the top, a hole is marked and cut through which a drainage pipe will be installed into the barrel.
The hole according to the markings can be cut with a grinder, but the opening made electric jigsaw. To do this, a hole is drilled at one of the points on the marked circle into which the tool file should fit freely.

If plastic barrels are prepared for the drainage pit, then they are mounted in approximately the same way as metal ones, but quite often the drain pipe is connected through the top lid of the container.
The bottom of a plastic barrel can also be cut off or several round holes with a diameter of 100÷120 mm can be cut into it.

Holes with a diameter of 10 mm are drilled in the side walls along the entire perimeter of the polymer container with a frequency of 100÷150 mm horizontally and vertically.
Crushed stone or gravel is poured around the barrel and under it, into which, just as in previous cases, water will flow from the holes of the barrel, be cleaned and go into the ground.

The most commonly used material for arranging a bathhouse drainage well is car tires, which are stacked one on top of the other.
WITH inside At the edges of the tires, in three or four places, holes with a diameter of 10 mm are drilled, through which they are fastened together using, for example, plastic clamps.
The sewer pipe can be connected between two tires. In this case, for support, bricks are installed along the edges of the plastic pipe and in three or four more places between the tires at the place where it passes, which will relieve the load on the plastic from the upper slopes.

Another option for drilling the pipe is to install it in a hole cut in the side wall of the tire.
When choosing this method, it is necessary to provide for possible shrinkage of the structure by cutting a hole larger than the diameter of the pipe by 70÷80 mm.

Quite often, the drainage bath pit is not filled with drainage material around the barrels or tires, but is filled with it two-thirds - this allows the water to slowly flow to the soil walls and slowly be absorbed into them.

It is recommended to strengthen the top of the pit with brick walls by arranging concrete pad with a hole for the hatch.
To do this, formwork is built around the well, into which a reinforcing grid is laid, and then it is poured concrete mortar, layer 70÷80 mm thick.

After the concrete has hardened, a homemade cover made of a steel sheet and a corner is installed on the hole.
Factory-made hatches, metal or plastic, are also quite applicable.

Special plastic sewer manholes may have various shapes and linear parameters.
So, when planning to install this particular option, the hatch is purchased in advance, and the top cover of the drainage pit is built according to its dimensions.

A well made of concrete rings is usually covered with a special lid made of the same material with a ready-made hole for a plastic or cast iron hatch.

Well walls built from tires or barrels have less rigidity than brick or concrete, so it is best to strengthen them with cement mortar mixed with crushed stone.
If the drainage was filled between the walls of the well and the soil, then its top layer, 120÷150 mm high, is recommended to be made from the solution mentioned above.
Further, the top of the pit can be left in this state by simply installing a hatch on the hole, or a concrete platform can be built over the structure and then backfilled with soil.
A pit based on the principle of a two-chamber septic tank with access to a filtration field
The second option is more complex in design, but its functionality is significantly higher. This system is perfect for installation in areas with groundwater located close to the surface, since it does not require a deep pit. In addition, such a design can also be a solution for organizing drainage of water from the foundation, from a storm well, filled from linear rainwater inlets on the site or their gutters on the eaves of the roof of the house. To figure out how to cope with the arrangement of such hydraulic structure, this process should be considered in detail. Illustration Brief description of the operations performed
This system uses two plastic drums, which are easy to prepare for installation work and connect to sewer pipes made of the same material.
Usually, for the drainage pit of a small bathhouse, two or three containers with a volume of 200÷250 liters are enough.

The pit for installing barrels is also dug 100÷150 mm larger than their diameter, and due to the fact that containers of equal size will be installed at different levels, the pit for them should have a stepped configuration.
The depth of the pit in this system should be 450÷500 mm greater than the height of the barrel. This distance will be needed to create a drainage cushion under the barrel and a recess for the pipe entering it.
The difference in the installation level of the containers should be 150÷200 mm, and the distance between them varies between 200 and 300 mm. The barrels are installed in one line.
The bottom of the pit is compacted and filled with medium-fraction crushed stone, a layer 80÷100 mm thick, which also needs to be compacted.

Next, you can move on to working on preparing the containers.
The barrel installed above will serve as the primary chamber, that is, a sump for dirty water.
A neat hole is cut in its top cover into which the drain pipe will be installed. In the side wall, on the opposite side from the hole in the lid, holes are cut for a pipe that will connect the first barrel with the second, installed slightly lower.
For insertion plastic pipes into the lid or into the walls of the barrel, you can find special flanges at a plumbing store, such as the one shown in the illustration.

If not, then you will have to cut the hole with maximum precision, and then to seal it, use high-quality silicone sealant.

Additionally, it is recommended to cut a hole for installing a ventilation pipe with a diameter of 40÷50 mm, or install a tee, as shown in the illustration, where one outlet will be intended for connecting the sewer drain pipe from the bathhouse, and the other, vertical, for the ventilation pipe.

The second barrel is equipped with three holes, one of which is drilled in the top lid, and two in the side wall, 100÷120 mm below the top edge.
The axes of these side windows should be radially rotated from the axis of the central hole by 45 degrees.

Nozzles with 45-degree bends installed on them are cut into the side holes and sealed.
As a result, the pipes for connecting the drainage pipes will become parallel to each other - as shown in the illustration.

Additionally, in the lower part of the walls of the installed second barrel, on the opposite side from the entrance, small holes with a diameter of 5 mm are drilled, at a distance of 150÷170 mm from each other. This is an additional outlet of water into the drainage fill around the barrel.
However, if powerful filter fields will certainly cope with their task, and even more so if such a septic tank has to be installed in the immediate vicinity of a bathhouse, then this operation is not necessary.

The result should be a design similar to that shown in the illustration.
Having installed a system of barrels and pipes, you can proceed to creating a filtration drainage field.

For a drainage area, which is located at a slope from installed barrels, a trench is dug, having a width of 1200÷1500 mm and the same depth to which the first barrel standing above is buried.
If desired, the drainage filter field can be extended over the entire area, since it will not interfere with the arrangement of beds above it for annual crops or for planting shrubs.
A geotextile fabric is laid at the bottom of the resulting channel, on top of which drainage will be laid.
Filling the trench with crushed stone is done in layers, each of which should be carefully compacted and distributed at a slope along pre-set pegs.
The slope of the trench should be approximately 25 mm per linear meter. Pegs installed in advance with the required height difference will become a kind of beacons for the correct filling of the drainage layer.

As drainage material is poured around the bottom barrel, water is poured into it, otherwise external soil pressure may deform it.
It is recommended to fill the space between the walls of the barrels with gravel or coarse sand, which should be compacted by pouring water.
Next, pipes with perforated walls are connected to the nozzles, through which water will be distributed throughout the drainage area. Holes are drilled in increments of 150÷180 mm along the bottom and sides of the pipes.
After drilling, the pipes are covered in a filtering “casing” made of geotextile - so that the inside of the pipes is not subject to silting.

The next step is to fill the pipes and the entire trench space with medium-fraction crushed stone mixed with sand.
Such a layer should reach the lid of the barrel installed below, that is, completely cover the pipes from above with a layer of at least 100–120 mm.
It is best to backfill several different layers of soil on top of the crushed stone. So, the crushed stone is first covered with geotextiles, on which a layer of moistened sand 70–80 mm thick is laid, and the rest of the space can be filled with fertile soil.
On this site it is quite possible to arrange a flower bed, plant annual vegetable crops or even small shrubs with a shallow fibrous root system. At the end of the publication, it should be noted that there are other materials that can sometimes be found in the yard among old stocks or even seemingly unnecessary trash, which in fact may well be suitable for building a drainage pit for a bathhouse. For example, you can find use for old sheets of corrugated or smooth slate, or even those left over after roofing works covering scraps of corrugated board. Some inventive owners country houses line the walls of the drainage well with glass or plastic bottles, which are filled with sand, find others very interesting solutions. Therefore, if you want to save money, and at the same time free up part of the yard or barn room from old materials, then you need to use your imagination “to the fullest” - and act! We will be glad if some creative master shares his innovations on the pages of our portal. Another example of a simple drain for a bathhouse is shown in the video below.
Video: How to make a bathhouse drain yourself, with minimal cost.
Many owners of private houses want to have a good Russian bathhouse on their property. But before you start building it, you need to carefully think through and properly organize drainage. Currently, there are several ways to remove waste water from a bathhouse, which do not require large financial investments and a connection to the general city sewer system. High-quality drainage washing bath will help ensure the long life of your floors and foundations, and will also prevent mold and mildew from forming on your walls.
Drainage device in the washing room at the bathhouse
Drainage in a bathhouse can be carried out in various ways, which depend on the type of floors in the washing room of the bathhouse. There are wooden leaking and non-leaking ones, as well as concrete ones. For the first case, it is necessary to arrange a special reservoir for drainage of water, from which it will be poured into the sewer. And for the second option, a floor in the bathhouse is laid with a slope, and special gutters and drainage ladders are installed. Any drainage system in the bathhouse must be installed before laying the floors.
When choosing to create an external sewage system for a bathhouse, it is necessary to take into account factors such as:
- Intensity of use of the bath;
- Dimensions of the building;
- Type of soil and depth of freezing;
- Sewage system (its presence or absence);
- Is it possible to connect to the central system?
The above aspects are among the most important when determining drainage.
For a small bathhouse where one or two people will steam several times a month, there is no need to create a complex sewer system. It will be enough to dig a regular drain hole or a small pit under the bathhouse.
The type of soil is of great importance when creating drainage. For sandy soils that absorb water well, it is recommended to make a drainage well. In clayey soils, it is better to equip a drainage pit from which the wastewater will need to be pumped out periodically. It is also necessary to take into account the degree of freezing of the ground, since water in pipes that are laid above the required level will simply freeze and the plastic will crack.
If you do not want the water from the bathhouse to simply flow out and be absorbed into the ground, you must use a septic tank with a settling tank, where the wastewater will settle and be purified, and then distributed through irrigation pipes. The most difficult and in an expensive way The water outlet is to install a well with biological filters, which consist of slag, broken bricks and crushed stone. The peculiarity of this method is that when waste water enters a well, its walls are gradually covered with a layer of sludge in which microorganisms live that purify the water.
Advantages and disadvantages of each external drainage system in a bathhouse
Let's consider Various types drainage systems, as well as their characteristics, advantages and disadvantages.
This is a sealed pit made of reinforced concrete, in which water coming from the bathhouse accumulates. When it is full, it is pumped out using a special device.
Advantages:
- Simplicity of the device;
- Does not require maintenance;
- Low cost.
Flaws:

Drainage well
This water drainage system is a pit with filtrate that cleanses waste water. The filter can be sand, broken brick, crushed stone, slag, etc.
Advantages:
- Low cost;
- Ease of construction.
The disadvantage of the system is the regular replacement of the filtrate or its cleaning. And this procedure requires a lot of physical effort.
Pit
This system consists of a hole that is dug just under the washroom floor. At the bottom of the pit there is a natural filtrate, which allows waste water to flow through it, gradually going into the depths of the soil.
Advantages:
- There is no need to install a pipeline;
- Low cost of the device.
Flaw:

This is a system that consists of a septic tank and pipes emanating from it, which remove water purified from impurities. Drainage systems are installed at a certain slope so that the water quickly drains and is completely absorbed into the ground.
Advantages:
- Works offline;
- Can be used to create a sewer system with several points for receiving waste water;
- It can even clean “black” drains if you install an anaerobic septic tank.
Flaws:

Alternatively, you can connect to central sewer. Then there will be no need to install external structures for receiving and processing wastewater. But here you will have to pay for the services of specialists and draw up various permits.
Internal sauna drainage system
The washing room inside the bathhouse is equipped taking into account the future drainage and the selected floors. Draining should be done in such a way that no moisture remains in the room, which will contribute to the development of fungi and mold.
- Leaking wooden floors are the most widespread, as they are the most simple option drainage devices in the bathhouse. The boards are laid with gaps of about 3–4 mm, so that through the cracks the water from the washing room flows into the pit without hindrance. Such floors are dismountable so that the boards can be properly dried. In this case, the floor is arranged without a slope for drainage, since the water will be absorbed into the ground under the bathhouse.
- Non-leakage floors are installed with a slope towards the drain, through which waste water will flow into the drainage basin and then into the sewer. Also, water can flow into any chosen drainage system.
- Concrete floors are easy to maintain, durable and reliable, so they are perfect for setting up a washing room in a bathhouse. Such floors are also made with a slope towards the drain so that water can quickly and easily flow into the selected sewage system.
Preparing for the construction of a drainage system: drawings and diagrams of various drains
Scheme of a wooden leaky floor with a drain. Must be carried out before laying floors.
If a dry steam room is provided in the bathhouse, and there is a shower in the washing room, then it is necessary to provide a drain in the steam room.
In the sauna sewer, where water will be collected from several rooms, it is necessary to install a riser with a ventilation valve.
If the steam room and the washing room are in different rooms, then a gutter for water drainage is placed under the ceiling between them.
Under a wooden floor you need to do concrete base with a slope towards the central part, where the gutter will go, joining the sewer.
Also, instead of concrete, you can lay a stainless or galvanized steel tray on the floor under the flooring.
Video: installation of a galvanized pan for draining water under the wooden floor of a bathhouse
When installing self-leveling floors on which tiles will be laid, it is necessary to maintain a slope, where at the lowest point a drain is installed to receive water, which is connected to the sewer.
- To install a sewerage system inside a bathhouse, it is necessary to use modern durable plastic pipes that have a long service life and will therefore serve long years. They are not afraid of moisture, are not subject to corrosion, like ordinary metal or cast iron, and are also easy and simple to assemble yourself without the involvement of specialists. PVC pipes are excellent for the device internal sewerage in a bath, are pliable in any processing, and can also be with or without a bell. Service life more than 50 years.
- Cast iron pipes are too expensive, heavy, and also inconvenient to work with.
- Asbestos-cement pipes are the cheapest, but they often have many defects. Also, installation of a gravity drain requires pipes with a smooth inner surface of the walls, and asbestos-cement products often have rough inner walls with indentations.
Types of plastic pipes:
- PVC pipes (polyvinyl chloride);
- PVC (chlorinated polyvinyl chloride pipes);
- PP (polypropylene products);
- HDPE (pipes made of low pressure polyethylene);
- Corrugated polyethylene pipes.
Any of the above types of pipes can be used for internal structure plum in the bath. The diameter of the product for the main line is taken based on the future intensity of operation of the bathhouse and the number of drain points. For an ordinary bathhouse with a steam room, a washing room and a toilet, pipes with a diameter of 10–11 cm are recommended. If plumbing is not installed, then pipes with a diameter of 5 cm will be sufficient to drain water.
Calculation of material for creating drainage and tools
To install internal sewerage in the washing room, we will need gray PVC pipes, as well as joints and adapters.
- The number of pipes depends on the length of the internal drainage system.
- We will also need tees size and angle 110–110–90° - two pieces (highlighted in red in the diagram);
- Elbow adapter - 90° - three pieces (highlighted in black in the diagram).
- Horizontal sewer pipes – Ø11 cm;
- Vertical pipes for installing water drainage receivers – Ø11 or 5 cm.
- For connecting pipes different diameters You will need adapters from 5 to 11 cm.
- For external sewerage baths will need orange pipes (PVC).
For work we will need:
- Bayonet shovel (special equipment);
- Building level;
- Grinder with cutting wheel;
- Sand;
- Cement;
- Crushed stone.
Step-by-step instructions with photos for making various drain designs in a bathhouse
Before considering the drainage system in the washing room, it must be said that the entire sewer system internal system in the bathhouse is interconnected and consists of three waste water receivers.

The drain trap is a siphon that has a water seal that prevents unpleasant odors from entering the washing room, and it also serves as a grate that prevents large debris from entering the sewer.
In the photo we can see the slope of the tiled floor towards the drainage ladder.
A drain ladder must be installed in bathhouses.
Video: system of functioning of a drain with a water seal in the washing room of a bathhouse
- First we will lay the sewer pipes. To do this we dig trenches.
- At points A and B, the depth of the trench should be approximately 50–60 centimeters relative to the ground level (outside the foundation). If the height of the base is 30–40 centimeters, then the depth of the trench will be 80–100 cm in relation to the top of the foundation.
- From points A and B, we gradually dig ditches so that the slope is about 2 centimeters per 1 linear meter. We pour sand approximately 5–10 cm thick at the bottom of the trench and compact it well, maintaining the required slope.
- We fill the foundation and make a hole for the sewer pipe.
- We install the drain pipes vertically (1 and 2 for drains). To do this, we drive sticks about 1 meter long into the bottom of the trench, and then tie plums to them. We install vertical pipes with a small margin of length. During the process of installing the floor and installing the ladders, we will shorten them.
- We install the sewerage system according to the specified diagram.
In the construction industry, the depth of laying sewer pipes in southern regions is about 70 cm from the ground surface. In the middle zone the depth varies from 90 to 120 cm, and in the north it is at least 150–180 cm.
To prevent the drains from freezing, the tubes must be insulated with several layers of special 10 mm polyethylene foam.
Under one end of the pipe we dig a shallow hole for drainage. Now we need to try to drain a certain volume of water to check the correct angle of the pipe. We check all the pipes one by one.
We make an external sewage system with our own hands
If the volume of waste water does not exceed 700 liters. per week, then we can use old truck wheels as a septic tank. We can calculate the water absorption area of the septic tank, taking into account that the degree of water absorption of 1 sq/m of sandy soil is about 100 l/day, mixed sandy loam is about 50 l/day, loamy soil is about 20 l/day. Depending on the type of soil and its water absorption, we calculate how many wheels we need.
- We dig a hole 2x2 meters and a depth of about 2.3 - 2.5 meters, depending on the level at which the pipe will emerge. We pour 10–15 cm of sand at the bottom, and 10–15 cm of crushed stone on top.
- In the pit, we tightly stack about 5-7 wheels vertically on top of each other. The top point should be such that the drain pipe can accurately fit into it.
- In loamy soil it will be enough to install 7 wheels. If the site has sandy loam or sandy soil, then 5 pieces will be enough.
- Cover the wheels with a durable metal or plastic cover with a hole made in it. We insert a ventilation pipe into it, through which air will flow, ensuring the vital activity of microorganisms that process wastewater.
- We carry out a test drain and bury the entire structure.
How to make a drainage well: a guide
The drainage pit can be made of a plastic or metal tank, reinforced concrete rings or red brick.
- We choose a place in the lowest part of the site so that the water from the washing room leaves by gravity. In order to make it convenient to pump water out of the well and for a car to freely drive up to it, you need to choose a place with convenient access.
- Digging a hole using an excavator. If there is no equipment, then you will have to dig by hand, and this is a long process. We monitor the condition of the pit walls (they should not crumble). We can dig a hole of square, rectangular or round shape.
- We make the bottom with a slight slope towards the hatch for easy cleaning of the tank. We fill in 15 cm of sand and concrete the bottom. Instead of concreting, you can simply lay a reinforced concrete slab of the desired shape and size.
- We lay out the walls with bricks. You can take used red brick. For masonry we make a solution of clay and sand. During the laying process, we install an inlet pipe for water in one of the walls.
- Since brick walls are waterproof, we need to treat them with a special sealant. To do this, take bitumen mastic or other similar material.
- We install the ceiling from reinforced concrete slab. The upper part of the well should be blocked on all sides by about 30 cm. To pump out water, we make a hole above the area of the pit where the slope is located. The overlap is installed in several steps. First, we make formwork from boards and pour a 5–7 cm layer of concrete. We put reinforcement on top and pour the next layer of mortar. Let the concrete dry for several days.
- We lay a metal hatch, cover the concrete floor with polyethylene and fill it with soil so that only the hatch is visible on the surface.
How to place a drainage system with a pit
- Under the floor of the washing room we dig a hole 2x2 meters and at least 1 meter deep. At a height of 10–15 centimeters from the floor level, we install a pipe that will connect the pit to the external sewage system. We maintain a slope of 1 centimeter per 1 linear meter.
- We put a layer of crushed stone, broken brick, gravel or expanded clay at the bottom, and pour a layer of sand on top. We strengthen the walls with brick, large-wave slate or natural stone.
- We lay logs on top of the pit, and then install a wooden floor on them.
- So that waste water can easily drain directly into the pit, the boards are laid at a distance from each other. Such a wooden floor does not need to be attached to the joists so that it can be easily removed and dried.
The second option for constructing a pit is a water collector, from which wastewater will be poured into a septic tank or sewer system when it reaches a certain level. This drainage method is mainly used when constructing leaking floors.

How to install ground filtration for a bathhouse
To install such a system, you will need a separate septic tank, which will serve as a sump and distribution well. They will depart from him different sides drainage pipes designed to distribute treated waste along the entire perimeter of the yard. You can buy a septic tank, or you can make it yourself from large containers made of plastic or metal.
A septic tank made of reinforced concrete or a round structure made of brickwork works perfectly.

Rules for constructing a drainage system:
- The length of the pipe should be no more than 25 meters;
- Laying depth of at least 1.5 meters;
- The distance between pipes is at least 1.5 meters;
- The width of the trench for drainage is at least 50 cm, maximum 1 meter.
- We dig a trench taking into account an inclination angle of about 1.5°. We check the angle with a regular building level.
- To the bottom of the trench clay soil pour 10 cm of sand and 10 cm of gravel on top. In loamy soils, the pipe will need to be wrapped with filter material to avoid silting. On sandy soil we make a sand and crushed stone cushion, and wrap the pipes with geotextiles.
- Pour 10 cm of gravel on top of the drainage, and then fill the ditch with earth.
- The filtration system must be ventilated, so at the end of the drainage pipe we install a pipe about 50 cm high, and put a safety valve on top.

Video: how to connect the drainage system to the bathhouse
Properly done drainage in the washing room of the bathhouse and its other premises guarantees a long service life of this structure. It will help protect the building from the harmful effects of moisture and prevent contamination of the area with waste water. Even in small bathhouses it is necessary to equip a drainage system, so this process it is necessary to approach it with complete seriousness and responsibility.