We are building a garage from our own foam blocks. How to build a garage from foam concrete blocks yourself? Required materials and tools
Read also
Possessing best characteristics For one-story construction, foam blocks are often used to build a garage. IN in this case their advantages (light weight, ease of processing and installation) are visible the best way, and a garage made of foam blocks will reliably protect your car.
All construction work can be carried out independently, and the technology itself is budget-friendly. To build a garage from foam blocks, you can completely make do with your own drawing, but if you are planning a two-story building, then it is advisable to contact specialists and order a project from them.
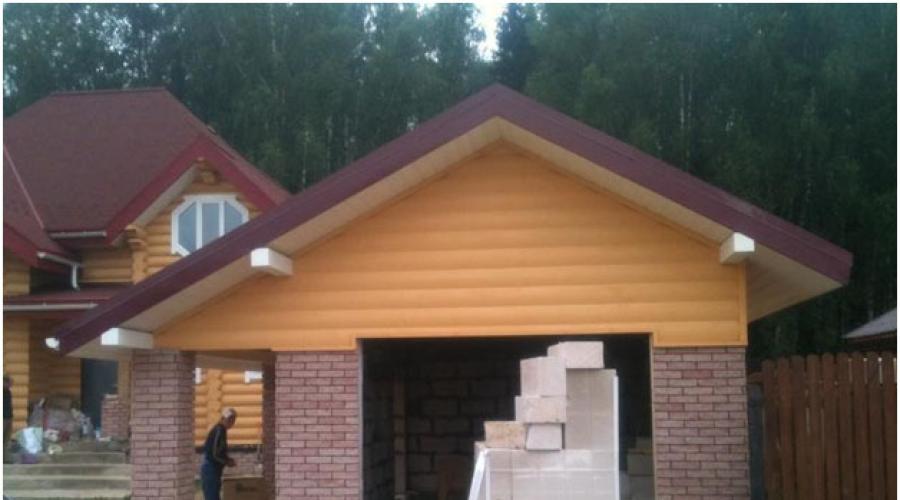
Foam block garage with sectional overhead doors
Any construction begins with a plan. It should display basic data:
- Type of construction (separately or in a common array of garages);
- Purpose (number of transport units, household room);
- Dimensions of the building (length, width, height);
- Type of foundation (strip, columnar or monolithic);
- Wall material – foam blocks.
- Roof parameters (type, slope, single or gable roof);
- Inspection hole. If the garage has an inspection ditch, then it is much more convenient to dig a pit in advance using special equipment.
To build a garage from foam blocks yourself, you need to start with a whole range of preparatory processes.
Read more about phased construction You can watch a garage made of foam blocks in the video:

Do-it-yourself house with a garage made of foam blocks
Calculation of material for garage
For the construction of garage walls, foam blocks with dimensions of 600×300×200 mm are used. Before calculating the number of foam concrete blocks, you need to decide on the dimensions of the garage. As a rule, its dimensions are 6x5x3 meters. To calculate correctly, you need:
- Calculate the length of the walls (6+5) ×2 = 22 meters.
- Divide the result obtained by the length of one block, which is 0.6 meters 22:0.6 = 36.6, rounded up to 37 pieces.
- The number of rows is calculated (the standard garage height of three meters is taken into account). Divide the height of the wall by the height of the block 3:0.3 = 10 rows.
- To fully calculate the number of foam blocks per side, you need to multiply the number of blocks in one row by rows: 10 × 37 = 370 pieces.
- From this amount we subtract the number of blocks that are replaced by gates and windows. When constructing walls 200 mm thick, the number of foam blocks per 1 m2 will be 6 pieces. There are about 50 pieces for garage openings. It turns out that for the construction of walls with dimensions 6 × 5 × 3
needed: 370 – 50 = 320 pieces.
On a note. This calculation is taken as an average, without taking into account the thickness of the seams and possible defects during transportation. It is recommended to add 5% to the calculated result so that if necessary, you do not have to purchase foam blocks from another batch, which may differ in size and properties.

Calculation of the number of foam blocks
Selecting a location
After developing the project and acquiring the material, the plan must be transferred to the area. First, a place to build a garage is determined and selected. Most the best option, when the building is located next to the house, within walking distance.
If this is not possible, then you need to take into account the distance to the exit road so that it is minimal. It is not advisable to build a garage from foam blocks with your own hands in a lowland, as this threatens flooding in the event of spring flood waters. You need to make sure that at the future construction site there are no:
- Power line;
- Gas pipeline;
- Sewer lines;
- Water pipes.
In emergency cases, repairing these communications will be significantly more difficult if there is a building on this territory.
Marking the site for garage construction
After choosing a place, you need to mark the foundation. To do this you will need a small set of tools:
- Hammer;
- Cord;
- Rods;
- Roulette.
First, we determine the location of one of the corners of the future building and drive in a small peg. Then we alternately calculate the location of other similar points, drive in the rods and then, for control, you need to check the distance along the diagonals of the resulting rectangle.
A strong cord is pulled over the driven pegs and you can proceed to the next stage - preparing and constructing the foundation.

Development of a project on site
Choosing a foundation
When installing a foundation for a garage, you must first know the type of soil and the height of groundwater at the site of the future construction.
Depending on the soil, a certain type of foundation is chosen:
- Strip foundation. This type of foundation is the most traditional for garages on hard ground. It can be a foundation buried to the freezing layer, reinforced with reinforcement.
- Slab foundation. Such a base is buried up to 50 cm and is floating; it is used mainly on clay soils.
- Columnar foundation method. Used in swampy areas. With this option, the floor will be raised above the ground, and the disadvantage of this structure is that it will not be possible to make an inspection hole in it.
Whatever foundation you choose, the main thing is that it is strong and reliable, so you need to take the process of constructing this basic foundation very seriously.
You can watch the video in more detail about the construction of a monolithic strip foundation:

Strip foundation device
Laying the foundation
When constructing a base, regardless of the composition of the soil, you must adhere to the basic rule - the foundation must rest on solid soil, which is located below the freezing layer.
The exception is peaty and clay soils: in this case you can use slab foundation. Let's take a closer look at the construction of a strip foundation, which is most often used in the construction of garages made of foam blocks.
On a note. Such a foundation is more favorable for a garage if it includes an inspection hole or basement.
Calculation of solution for strip foundation
First you need to dig a ditch around the perimeter of the garage and then measure the width and depth of the ditch. To determine the volume of the strip base, you need to multiply the cross-sectional area by the length of the ditch. Let's say the width and depth of the trench are 40x40 cm.
To calculate, you need to take the formula: V=S×L, where S is the cross-section of the base, L is the length of the entire base. Substituting the initial data, we obtain the following result: V = 24 × 0.16 = 3.84 m³.
As a result, we obtained a volume of concrete solution for a strip foundation 24 meters long. Such calculations are suitable for a foundation of the correct shape; if the cross-section is different, then the calculations will be different.

Calculation of material for strip foundation
Strip base device
To install the foundation, you must first carry out preparatory work, for which:
- Pour a layer of crushed stone 10-15 cm thick at the bottom of the trench and build a metal frame on top from rods and wire with a diameter of at least 6 mm and with a cell side distance of 15-30 cm. This design will give rigidity to the strip base;
- Then you need to make formwork from available material (boards, plywood, chipboard or flat slate). As a rule, it is made 30 cm high from the surface of the ground. Spacers, wedges and other clamps are used to create rigidity;
- After installing the formwork and reinforcement, the prepared trench is filled with a concrete solution, which is obtained in a concrete mixer. The base mixture is prepared in the following proportion: one part cement (grade M 400) and three parts sand, gravel or seedings;
- The strip foundation must be poured with concrete at one time to avoid uneven drying and cracking of the concrete.
After pouring concrete mixture in formwork, it must be covered with roofing felt, thereby protecting it from direct sunlight and allowed to stand for 3-4 weeks.

Construction of a strip foundation
Features when constructing walls from foam blocks
After the cement mortar has completely dried, construction of the walls begins, but first a stationary gate must be installed.
If the canvases are lifting, then you need to insert the guide profiles strictly vertically and at a certain distance from each other.
When building a garage from foam block, certain conditions must be met:
- It is recommended to make walls 200 mm thick, which is the most economical option;
- To prevent the foam block from coming into contact with water, the bottom row is raised by 300 mm (if the foundation is not raised) using a cinder block or concrete slabs.
- As a rule, garage walls are built from D 700-D 600 blocks with a thermal conductivity from 12 to 0.16 m² K/W, which is 4 times less than that of brickwork.
- It is necessary to observe the vertical and horizontal position of the wall from the first row using a plumb line and level. And at the same time, if you maintain the seams of a certain thickness, you can easily do the masonry yourself and build fairly even walls.
- The foam block has a relatively light weight, about 700 kg/m³, which significantly reduces the load on the foundation. And the strength of foam blocks allows you to build a building up to 3 meters high.
- The large dimensions of the foam block, combined with simple processing of the material, make the installation process faster.
- Foam concrete does not burn.
The disadvantages of such blocks include increased condensation inside the garage. To prevent this from happening, it is recommended to improve ventilation by installing forced exhaust with electric drive.
Walls made of foam blocks cannot withstand conventional fasteners, so special dowels with a PVC cap are used.
Attention. Walls made from foam blocks are laid using glue or cement mortar, while maintaining seams when gluing you need 3-5 mm, and on cement composition– 1 mm. It is recommended to lay a reinforcing mesh through two blocks into a horizontal gap.

Reinforced masonry walls made of foam blocks
Roofing device
After the walls have been erected, all that remains is to install a stable structure made of beams for rafter roof. Don’t forget to put roofing felt under the beams first as a waterproofing layer.
The final covering can be made of any material (profile sheet, metal tile, roofing felt), but it is desirable that the roof be combined with the roofs of existing buildings.

Garage roof sheathing
Installation of overhead gates
The last stage in the construction of a garage is the installation of the gate. Each type of gate has its own advantages and disadvantages. Let's take a closer look at how to install overhead gates.
Such gates are convenient and reliable device to protect the garage from unauthorized persons. When opened, they take a horizontal position, moving forward, forming a small canopy over the entrance.
The interior of the gate is filled with polyurethane, which is an excellent thermal insulation material. IN similar designs all parts (rollers, brackets, couplings) are made of metal or plastic.
The drive for opening the gate is made by an electric motor through a gearbox, mechanically, chain or universal method. Last option applies if there are power outages in the region.
Advice. Before installation overhead gates, you need to purchase a set of components ready for assembly, and carry out the installation yourself.

Overhead garage door open
Installation of sectional overhead doors:
If the garage is not built on its own site, but on the territory of the municipality, then its construction must be carried out in compliance with all the requirements of regulations, technical specifications and fire safety regulations.
This is so that in the future it will be possible to draw up documents for a garage without alteration individual elements newly created building.
Construction of a garage from foam blocks with your own hands
Choosing material for building a garage is a responsible task. It is important to ensure reliable protection vehicle, structural stability and long service life. Along with aerated concrete blocks, brick and wood, foam concrete is widely used, allowing you to quickly and inexpensively build a garage from foam blocks with your own hands. Let's consider the features of the technology, the specifics of design and the algorithm for determining the need for material.
How to build a garage from foam blocks with your own hands
Foam blocks are used for this purpose due to the following advantages:
- low price level. The low cost estimate for construction allows developers with limited financial resources to carry out construction using foam concrete blocks;

The construction of a garage cannot be approached according to the residual principle: “made from what was there”
- insignificant mass of blocks with increased dimensions. The low weight of the products allows you to reduce the load on the base and use a strip foundation for the construction of a two-story garage with an attic;
- increased strength characteristics. An increased safety margin allows for the stability of buildings, including larger sizes (6 by 6) designed for 2 cars;
- reduced thermal conductivity. When using foam concrete to build a garage, there will be no problems maintaining a comfortable temperature, since the blocks retain heat well;
- ease of masonry. It’s not difficult to build a garage yourself or attach a car storage room to an existing building, given that when we build, we don’t need special lifting equipment.
Attention! Giving preference to foam concrete for construction garage building, do not forget that the structure of the material and the thickness of the walls do not allow the blocks to “breathe”. To remove the condensate that forms and reduce the humidity level, it is necessary to install supply and exhaust ventilation equipped with an electric fan.
Having studied the characteristics of foam blocks, it is necessary to correctly carry out a set of preparatory work:
- carry out engineering and geodetic surveys to determine the level of groundwater, freezing depth and soil characteristics;

IN last years building a garage from foam blocks has become extremely popular among car owners
- decide which design option to choose - two-story with an attic, for 2 cars measuring 7 by 6 or for one car with an increased size (6x4);
- develop a project that takes into account the structural features, connection of electrical energy and water supply systems;
- determine the best way to lay foam blocks, calculate the need for building materials, and become familiar with construction technology in detail;
- calculate the volume of the estimate for the construction of the building, taking into account design features garage and transportation costs for delivering building materials to a garage cooperative or to a dacha.
Important! The official document allowing the construction of a building to begin is a building permit, which must be issued in advance.
Let's take a closer look at the technology for constructing a garage structure from foam blocks with your own hands. It is important to figure out how to fold the walls to ensure their stability. Carry out construction activities following the sequence of operations:
- Mark the building area using twine and wooden pegs. Check for the presence of right angles by taking measurements of the diagonals, the difference in size should not exceed 1 cm. Be guided by the dimensions indicated in the project. Please note Special attention to ensure that there are no obstacles that would impede the free opening of the gates of the future building.

Building a garage from foam blocks with your own hands begins with laying the foundation
- Prepare the foundation of the garage, depending on the soil characteristics. A slab foundation buried below the freezing level can be used as the foundation of a building located on heaving soil. In this case, arrangement is excluded inspection hole or basement. On dense soil, the stability of the building will be ensured by a strip foundation.
- Waterproof the base of the structure. Walls are protected from moisture using roofing felt, which is laid on the surface of the foundation. Secure fastening The waterproofing layer is provided by coating the surface of the base and roofing felt with bitumen mastic.
- Install exit gates, the reliable fixation of which will be ensured during the construction of walls. Attach embedded elements around the perimeter of the gate frame, which will ensure the immobility of the structure in the foam block masonry. Cover the gate with primer to protect the metal from corrosion.
- Build walls. Start laying from the corners of the building, ensuring that the foam blocks are displaced by 30-50% of the length. Coat the joints thoroughly special glue or cement mortar. Control the horizontalness of the masonry using a building level. Reinforce the masonry with reinforcement every three rows. Provide openings for laying ventilation lines.
- Build an armored belt around the perimeter of the walls, designed to distribute forces evenly. The reinforcement contour is poured with concrete mortar into an installed formwork 30 cm high, in which a frame made of steel reinforcement is placed.
- Build an inspection hole, concrete the floor, and fill the inclined blind area along the outer perimeter of the building with concrete. Please note the need to construct a drainage system for nearby groundwater. Fill the floor with concrete grade M150.

Beginners most often use ordinary cement-sand mortar
Attention! At the stage of purchasing the material, pay attention to the absence of cracks, chips and the flatness of the surface of the products. Minimum thickness joints are achieved using a special glue that reduces heat loss by reducing the thickness of the “cold bridges”.
Having completed the construction of the garage box, proceed to the final stage of construction activities - arranging the truss structure and installing the roof.
Construction of the garage roof is the final stage of work
Possible various options garage roof structures:
- pitched roof. Is the most common option. It is carried out by concreting cross beams or installing a reinforced concrete slab, followed by covering the surface with waterproofing material;
- double-slope tent-type structure. Formed by laying wooden beams ceilings to which it is fixed truss structure. The trusses installed along the cord are fastened with lathing and covered with metal tiles or ordinary slate;

Laying on the walls wooden beams ceilings, rafter legs are attached to them attic structure
- attic roof. It allows rational use of the available space and is widely used in garage cooperatives, where the standard room area is clearly not enough. Additionally insulates the room, which can be used year-round.
Let's consider the construction technology of a common pitched roof:
- Cut I-beams whose length exceeds the width of the building by 40–50 cm.
- Install and secure across garage walls at intervals of 0.8 m steel I-beams.
- Fix boards 4 cm thick inside the garage at the bottom of the beams.
- Place rolled roofing felt on top of the boards, bent along the edges of the future ceiling by 10–15 cm.
- Pour expanded clay or other insulating material onto the roofing material.
- Concrete a concrete mortar screed on top of the insulation, ensuring a thickness of 4–6 cm.
- After the concrete has hardened, treat the surface with bitumen mastic and thoroughly waterproof it with roofing felt.
Attention! Ensure Even Protrusion beam structure 20–25 cm beyond the contour of the garage walls. This will ensure the walls are protected from negative impact precipitation.
Development of a garage project made of foam blocks
Construction activities are based on the design results. The project provides full information about the design of the building and the type of foundation used, taking into account the characteristics of the soil and groundwater level.

In preparation for construction, the purpose of the building is determined: a garage for one or two cars, with or without a specially equipped place for things
Of course, a temporary trailer will help out, but worth remembering that there is nothing “more permanent” than what is built for time. Therefore, some far-sighted developers begin with the construction of a multifunctional garage, in which you can store equipment and tools, install an electrical panel and meter, and connect a pipe from the well to expansion tank or install a boiler room.
Of course, this is not the most perfect option, because a garage is, first of all, a “luggage room” for the most expensive and in demand in Everyday life mechanism. And such storage requires:
- fire safety;
- convenience for maintenance;
- protection against condensate accumulation;
- protection from groundwater and weather changes.
If you have time to think, then even before laying the foundation, you should decide what your garage will look like, what additional functions you will assign to it, whether you can build it yourself or whether you should entrust the construction to professionals.
How garages differ by type
First of all, the type of garage determines the location chosen for its construction relative to the main house. That's why distinguish between garages:
- built-in (the garage is included within the boundaries of the load-bearing walls of the house);
- attached (the garage has one common wall and internal entrance);
- detached (the building is located 9 meters from the main house and 10 meters from the buildings of the neighboring plot).
How the garage floor relates to the ground level determines the following types of this building:
- above ground (the entire building is located above ground level);
- semi-underground (the building is buried 1/3 or 1/2 into the ground, which is only permissible for dry dense soils with deep groundwater);
- underground (the building is buried up to the roof).
The garage can be equipped inspection hole or have a basement, connected to central heating and have supply and exhaust ventilation- all this will affect its cost and degree of complexity during construction.
Why do you need a project even for a garage?
Having decided on the choice of the preferred option, you need to create its project in the form of a drawing, or at least a sketch. By the way, standard project It’s not difficult to find a garage on the Internet on construction sites or create it in the ArchiCad program, a graphic editor for designing an object. In any case, it must be agreed with technical services regarding the characteristics of the soil, its structure, the proximity of groundwater and the degree of its salinity.
A typical project includes:
- appearance of the building;
- façade finishing options;
- number of floors and area of the building;
- room layout;
- necessary building materials.
When ordering a project from a design organization, you will also be given a cost estimate for materials, main work and additional details.
What kind of garage can a home craftsman do?
Of course, a lot depends on the developer’s ambitions, his knowledge in construction and practical skills. But, undoubtedly, to those who are not alien physical work, skillfully wields tools and has ingenuity, it will be quite possible to independently build an above-ground detached garage with a pitched roof. AND special role the success of this business will be taken upon himself by the popular construction material- called foam block.
The peculiarity of the structure of this building element made of cellular concrete, water, sand and foam makes it light, malleable to mechanical stress and surprisingly durable.
For the amateur craftsman it matters foam block size for the garage: the most common is 20x30x60 (cm). This is 5 times more than brick, with relatively low weight. Therefore, the construction time for walls made of foam blocks will be significantly reduced in comparison with brickwork. And the use of special glue as a binding material will significantly strengthen the structure with small (up to 20mm) thickness of the seams.
A wall thickness of 30 cm will fully correspond to the functionality of a garage space, and factory D500 blocks will provide strength with a load of 500 kg per 1 cm of area.
Worth keeping in mind that to simplify the determination of the exact angle at the junction of the walls, there are also corner blocks of the appropriate dimensions on sale.
Calculation of foam blocks for a garage
Just like the children's game of blocks, you need a complete set of building elements to start building. There should be a sufficient number of blocks, without unnecessary costs for surplus. Therefore, an accurate calculation of the material is needed, given that it is sold on pallets in cubic meters.
How to calculate the number of foam blocks for a garage? Calculation start after you have decided on the thickness of the walls. If the wall has a thickness of 30cm, for further calculations you will need a length of 60cm and a height of 20cm. We calculate how many blocks of this length and height will be in 1 square meter. and multiply this value by the area of the wall(s), excluding the opening for gates or windows. The total number of blocks is the desired result.
The standard size of a garage for one car with a height of 3 meters is 3.5 x 6. In each specific case it depends on the tasks that it has to solve at the will of the owner.
Calculating the number of blocks in 1 square meter is not difficult count their number per cubic meter(if the material is of the same type). And, knowing the standards for the supply of these blocks for sale (pallets of 0.9 m3 or 1.8 m3), calculations will help you purchase a masonry element without excess.
True, is there any reason to do this if any construction site on the Internet prudently offers online calculations for your project?
The sequence of actions when building a garage from foam blocks with your own hands
- Marking the area using pegs and cord, in accordance with the project.
- Laying the foundation. For heaving soils - a solid monolith installed below the freezing level (an inspection hole or basement is unacceptable). For dry and dense soil - a continuous strip foundation with a viewing hole or basement.
- Installation metal gates on spacer pins (up to 4 pieces on each side, 40 cm long) embedded in the joints of the blocks of the walls being built.
- Waterproofing under the base of walls made of rolled material.
- Construction of walls from foam blocks, starting from the corner. Laying the first row on cement-sand mortar.
- Laying the next rows on the adhesive solution with the blocks shifted by 1/3 of the length.
- Installation of a transverse concrete lintel beam above the gate opening.
- Reducing the walls to the rear (under a pitched roof).
- In the lower and upper rows of masonry, it is necessary to provide openings for the influx of air and the outflow of vapors, if the project does not include the creation of supply and exhaust ventilation.
- Completion of walls by creating a monolithic reinforced belt.
- Laying across the building I-beams at intervals of 80 cm. Extend the ends of the beams 20cm beyond the boundaries of the walls.
- Laying tongue and groove boards on the lower edges of the beams to form the ceiling.
- Laying film waterproofing on a plank base.
- Insulation works (expanded clay, slag, glass wool).
- Making a 3cm screed.
- Covering material for overlapping roofs (from back wall to the visor).
And here is a video of the construction of a garage made of foam blocks.
And another video about how to build a garage from foam blocks.
Features of laying foam blocks

- An aqueous solution of a dry mixture of special glue for foam blocks is thrown onto a vertical edge and spread horizontally with a spatula, achieving a seam thickness of no more than 20 mm.
- The blocks of the first row are laid on the sealant, applying the solution first to the lower horizontal edge, then to the vertical.
- For better binding, the blocks are sprayed with water.
- The masonry is constantly checked according to construction level and a stretched cord.
- Any distortions that arise are immediately eliminated with a grinding tool.
- The first and last row of masonry, to increase strength, is reinforced with a metal mesh, fiberglass or reinforcing rod embedded in the body of the blocks, which protects the walls from bending and cracks during natural shrinkage.
What determines the material costs of building a garage?
- Material cost. In pursuit of cheapness, you should not buy foam blocks from artisanal manufacturers who cannot guarantee strict adherence to the composition and production technology.
- Cost of involved lifting equipment.
- Cost of electrical equipment used in construction.
- Cost of the required tool.
- Unexpected expenses.
Cost of work- this is what a skilled man can save on when he takes on the construction of a garage on his own. average price for laying walls made of foam blocks in the construction services market - 1,500 rubles per 1 sq.m. Multiply by the area of the walls - and this amount will warm your soul.
How to save money on garage construction?
- Purchase material during a season that is unpopular for construction work.
- Avoid the inspection hole, especially if you are an ordinary car enthusiast.
- Refuse exterior finishing walls with careful masonry.
- Instead of a concrete floor, use a well-compacted dirt floor.
- Refuse from the basement, and, if this is difficult, from plastering the walls in it.
- Divide the construction process into two temporary stages, allowing you to collect the required amount for finishing and installation additional amenities in the garage.
And in these photos there are two-story garages made of foam blocks, garages with an attic.


Build it yourself foam block garage- the opportunity to receive invaluable practical experience, which will motivate you to new goals: and building a house with your own hands will no longer be an unattainable goal.
Despite the fact that nowadays it has become fashionable to keep cars in the yard without bothering to buy a garage, not all car owners like this trend. If a person cares about his vehicle and performs at least minimal maintenance on his own, it is difficult to do without a garage. In addition, the car, being constantly on the street, is constantly exposed to such atmospheric factors as precipitation, wind, sunlight, temperature changes.
The impact of each of them negatively affects all materials from which the car is made, be it steel or plastic. Metal constructions At the same time, they actively corrode, and the plastic gradually loses strength, as a result of which the service life of the car decreases.
Therefore, prudent car owners prefer to park their car in a garage, where it not only “takes a break from work,” but is also serviced and repaired. And the owner has peace of mind when the vehicle is locked up.
Not every person can afford to buy capital garage, so many take on construction on their own. At the planning stage, the main issue is the choice of material for the construction of the walls of the future garage. The choice here is not as wide as we would like, but there are still several options that can be considered: brick, concrete, wood, block materials.
Brick is often eliminated due to its high cost and relative complexity. masonry work from small elements.
 A concrete garage will be very reliable, but its construction is also difficult for self-execution. To build a garage from concrete slabs or blocks, you will need lifting equipment, and pouring monolithic walls It is also quite expensive both financially and in terms of labor costs.
A wooden garage is out of the question right away - it’s too flammable, especially considering that operating a car is impossible without gasoline and oils.
Large-block materials remain the best and most realistic option for self-construction. Considering that you will have to build without the use of construction equipment, it is better to choose lightweight blocks, which are presented on the market in three main versions: cinder blocks, foam blocks, and gas blocks. Cinder blocks are afraid of moisture, gas blocks have opener pores, therefore they also require protection from atmospheric moisture. But foam blocks, characterized by a large number of closed pores, are worth considering in more detail.
Foam concrete blocks
Foam concrete differs from aerated concrete in having closed pores, which significantly reduces moisture and vapor absorption of the material, making it suitable for the construction of utility and residential buildings, including garages.
Foam concrete produced in industrial conditions is cut into elements of various geometries, including wall blocks, representing a regular parallelepiped with sides 600×300×200 mm.
Modern equipment makes it possible to achieve high geometric dimensional accuracy, which facilitates the laying of block structures.
On sale there are blocks with smooth edges, as well as blocks whose ends are equipped with grooves and ridges, which greatly facilitate the laying process.
All foam concrete blocks are divided into three categories according to technological purpose.
 Blocks are:
- thermal insulation - brand D400-D500, they are not very durable and frost-resistant, therefore they are not suitable for open work;
- structural and thermal insulation – grades D600-D1000, which can be used both for masonry structures and as thermal insulation;
- structural – brands D1100-D1200, used for installation various designs, But thermal insulation characteristics they are reduced, although they are twice as high as that of bricks.
Advantages of using foam blocks to build a garage:
- The low density of foam concrete facilitates the construction of the garage and allows you to avoid constructing a full-fledged foundation; you can use a shallow foundation strip.
- Light weight blocks and their large sizes make the construction of walls easier and faster.
- The material is environmentally friendly.
- The closed pores of foam concrete allow walls to be laid almost from ground level, without constructing a high plinth from other materials.
- The blocks can be cut, drilled and milled using conventional tools.
- Porous material absorbs sound well.
- The blocks do not shrink much, so the exterior finishing of the garage can be done in 3-4 weeks.
The disadvantages of foam blocks are a consequence of their advantages:
- Light porous material still needs exterior decoration, protecting it from atmospheric moisture, so it is advisable to at least plaster the building.
- Not every fastener will hold up well in foam concrete. True, you can always find suitable dowels on sale.
- The vapor permeability of foam concrete leaves much to be desired, so the garage will have to be equipped with ventilation so as not to create conditions for corrosion of car parts.
 So, the best material for the garage there will be structural and thermal insulating foam blocks of the D600-D800 brand. They are distinguished by the optimal combination of strength and thermal insulation qualities necessary for the construction of a garage.
If you want to make your garage warmer, you can lay the blocks on the wider side - 300 mm, thus increasing the thickness of the walls. Although you can go the other way: purchase blocks of greater thickness 300x400x600 mm.
Work procedure
You should not start construction without preliminary preparation.
It’s better to break the whole process into stages, this will allow you to properly plan the work:
- Development of a garage project. If you are building a simple one-story garage without an inspection hole, then you can limit yourself to a self-drawn plan. If the garage is two-story or with an inspection hole and a cellar, then it is better to order the project from specialists. Then all issues with materials will be resolved during the preparation of the project.
- Calculation of the need for materials, including the foundation, gates, walls, floors and roofing of the future building.
- Purchase of materials.
- Construction of the foundation. At this stage, work is also often carried out on installing floors and equipping an inspection pit.
- Erection of building walls and installation of gates.
- Roof installation.
- Ventilation device, wall decoration outside and inside.
- Improvement of the garage - fixing shelves, installing a workbench and other necessary equipment.
It is very important at the stage of preparation for construction to immediately resolve the issue of the type of foundation and roof.
Construction of the foundation
 The foundation structure requires clarification at least primary information about the soils on the site allocated for construction. If these are strong, dry soils, then you can limit yourself to installing a shallow foundation strip. If the soil is wet and heaving, then you will have to build a pile-strip foundation.
After marking the axes of the foundation using pegs and a cord, checking the straightness of all corners, you can begin work.
The work is performed in the following order:
- Along the perimeter of the future building you need to dig a trench about 700 mm deep. Its width should exceed the width of the garage walls by 200-300 mm.
- The bottom of the trench must be filled with a layer of sand 100 mm high and compacted thoroughly.
- Then a gravel layer is created in the same way.
- At the next stage, the formwork is installed. Its height should take into account the height of the base above ground level, usually 150-200 mm. It is necessary to very accurately set the horizontal level of the upper cut of the base. This is important for the subsequent laying of foam blocks.
- A layer of waterproofing must be made inside the formwork so that the edges of the waterproofing material extend outward above the walls of the formwork.
- After this, you need to install a reinforcing belt. Typically it consists of 4-6 reinforcing bars forming the sides of a rectangle and connected by jumpers.
- To fill the foundation, use a regular concrete mortar. The surface of the concrete mass laid in the formwork must be carefully leveled.
- Next, the foundation must stand for 3-4 weeks in order for the concrete to gain the necessary strength.
- After this, you need to waterproof the foundation by coating it with bitumen mastic on three sides. As horizontal waterproofing, you can use roofing felt in 1 or 2 layers.
This option is a little more complicated, but it guarantees protection of the foundation from the effects of frost heaving.
 The work is carried out as follows:
- Similar to the first option, you need to dig a trench.
- Then holes are drilled in its bottom along the entire perimeter of the garage. The drilling depth must exceed the depth of seasonal soil freezing in the area. The diameter of the wells must be at least one third of the width of the concrete grillage. The holes should be located in all corners of the garage, and along the length of the walls they should be at a distance of 100-120 cm.
- You need to hammer asbestos-cement pipes into the holes and or install a pipe made of rolled roofing felt.
- Then 2-3 reinforcing bars are lowered into the wells. The height of the rods should be such that their ends are located at the level of the concrete grillage.
- Then the formwork is placed and the reinforcement frame of the foundation strip is mounted.
- After this, the holes and then the formwork are filled with concrete.
After gaining strength, the foundation is waterproofed.
Monolithic slab- another option for constructing a foundation on unreliable or water-saturated soils. This option allows you to avoid drilling wells. To implement it, a shallow pit is dug across the entire area of the garage, formwork is placed, a reinforcement frame is installed over the entire area of the pit and concrete is laid.
After curing the concrete, a monolithic floating slab is obtained, which protects bearing structures garage from deformations occurring in the soil.
Floor The easiest way to make a concrete garage is to make one.
If the need arises, you can then mount another one on top flooring. At the stage of building the foundation, pouring the floor is much easier than after laying the walls. For the floor you will need a gravel-sand cushion, on which a reinforced screed with a thickness of at least 100 mm is installed. This is necessary so that the floor can support the weight of the car.
If necessary inspection hole, then it is better to also dig it up and arrange it at the stage of pouring the foundation. The width of the pit should be at least 90-100 cm, and the depth should be about 180 cm. The walls can be lined with bricks or filled with concrete in several stages, moving the formwork upward.
 When concreting, reinforcement must be made between the walls of the pit and the formwork.
Before starting work, it is necessary to mark the location where the gate will be installed. If they are already ready, then you can immediately put them in place, using wooden spacers to fix them.
It is very important to maintain the verticality and horizontality of the structure.
To ensure a reliable connection between the gate and the subsequent masonry, perpendicular pieces of reinforcement about 50 cm long are welded to their posts, which will be embedded in the masonry. The rods should be positioned in height so that they subsequently fit into the seams between the rows of blocks as accurately as possible.
If the gate is not ready yet, then you need to leave an opening of the appropriate size for it.
Next you can start laying the walls:
- The first row is laid on a layer of waterproofing to isolate the blocks from capillary moisture of the foundation. This row is always laid on cement mortar. Laying begins from the corners, starting from the highest point. Having laid out the corners, the level of the masonry is checked using cords stretched between the corner blocks. They should all be located in the same horizontal plane.
- After the solution has set, you need to reinforce the first row of blocks. This is done using reinforcing bars, or by placing a reinforcing mesh in the solution between the rows. When using rods with a diameter of 8 mm, you need to cut grooves in the blocks about 20 mm deep, then clean them of dust and fill them halfway with construction glue. After this, reinforcement is placed in the grooves with an overlap of adjacent rods of 300-400 mm. In the corners of the masonry, the rods are bent at an angle of 90 degrees, leading to the adjacent wall. After laying the reinforcement, the grooves are filled masonry mortar, leveling it to the level of the block surface.

- The next rows can be laid using construction adhesive or cement mortar with perlite. The glue allows you to make the seams very thin - 3 mm, which reduces heat loss in the garage. The glue must be prepared strictly according to the instructions supplied with it. Don't knead too much adhesive solution, in finished form, the lifespan of the glue is limited. Using perlite to prepare the solution also reduces its thermal conductivity. The proportion of the components of such a solution is as follows: 1 part sand: 1 part cement: 1 part perlite.
- The masonry is carried out with bandaging of the seams. The displacement of elements in adjacent rows in height should be at least 100 mm, and preferably it should be half the length of the block.
- Before installing each subsequent row, the masonry surface is checked for evenness. If any tubercles are found, they are removed using a plane or grater. Then the surface is dusted and moistened with water - this improves the distribution of glue over the surface.
- If the blocks have smooth surfaces, then glue must be applied on three sides - two vertical and horizontal. If the blocks are equipped with tongue-and-groove locks, then the glue is applied only to the horizontal plane.
- After installation, each block is carefully aligned horizontally and vertically, pressed manually or by tapping rubber mallet. The exposed glue is immediately removed and used to plaster the joints flush with the wall surface.
- Reinforcement of the masonry is carried out after laying the 1st and 2nd rows, and then every 4 rows. Reinforcement is also carried out under windows, as well as in the area where lintels are installed above door and window blocks.
- The lintels themselves can be concrete or metal - from a channel of suitable width.
- It is advisable to pour a reinforced concrete reinforcing belt along the upper cut of the walls, which will give the building additional strength. If a light pitched roof using wooden rafters is planned, a concrete belt can be omitted. In other cases, it will serve as a support for concrete slabs or wooden mauerlats.

On the roof side, a garage made of foam blocks must be insulated, otherwise the whole point of using heat-insulating material is lost.
To insulate the ceiling, you can use any lightweight insulation.
Perfect for:
- expanded clay;
- mineral wool;
- slag.
In this case, a flat pitched roof with unorganized drainage. But if you have the opportunity and desire, you can make a real one gable roof, which looks much more interesting.
To install a flat roof, a thin reinforced concrete screed is made over the insulation layer. And then they make a soft roof over it.
If you decide to build a gable roof, then roofing material You can use piece products: slate, metal tiles, soft tiles.
As already mentioned, to increase the service life of foam blocks, it is better to isolate them from the environment.
There are many ways to do this from the outside:
- plastering;
- painting with facade paints;
- tiling or siding;
- installation of a suspended facade.
 It is better to plaster the inside of the walls too, although you can also line them with moisture-resistant plasterboard.
Air exchange in the garage is ensured by means of the simplest device natural circulation air. To do this, you need to cut holes in the foam blocks: one at floor level, the second in the ceiling area.
Ventilation holes should be placed on opposite walls. They need to be closed ventilation grilles with adjustable flaps. This will help, if necessary, change the intensity of air exchange in the garage.
If possible, you can equip ventilation exhaust fan, which can be turned on if necessary to quickly ventilate the garage.
In order not to overpay for unnecessary materials and services, you should not provide unnecessary options in the garage, such as an inspection hole, if you do not repair the car yourself; cellar - if you planned it “just in case”, expensive external or interior decoration- in the end, you can stop at simply plastering the walls and whitewashing them with lime.
Thus, construction one-story garage can be made from foam blocks with my own hands. If you want to build a two-story building, then most likely you will need help or the services of professionals.
It just so happens that the garage is often used not only as a shelter for a car, but also becomes a kind of “men's club”.
Here you can put your favorite car in order, discuss with friends pressing problems, and if necessary, spend the night.
We are no longer talking about such an important function of this building as storing household items and conservation.
The construction of a garage cannot be approached according to the residual principle: “made from what was there.” Only a competent design and proper use of materials will make it a universal and durable structure.
In recent years, building a garage from foam blocks has become extremely popular among car owners. We'll look at this one constructive option starting from the foundation to the roof.
Why foam blocks?
The answer is simple - it is a warm, inexpensive and easy to style material. The cost is on average 35-40% lower than the price of red brick, and the speed of laying them is 3-4 times higher. The low weight of the material gives tangible savings when laying the foundation. Low thermal conductivity allows you to build a warm room in which it will not be cold even with minimal heating.
Good vapor permeability prevents moist air from stagnating in the garage, saving the car body from its main enemy - corrosion. Sufficiently high strength (35-50 kg/cm2) provides the walls with reliability not only in one-story, but also two-story building with attic space.
Foundation
Building a garage from foam blocks with your own hands begins with laying the foundation.
There are two economical options here:
- Lightweight pile-strip foundation.
If your garage will not stand on problematic soils (swampy and heaving soils), then there is no point in spending money on a deep foundation. 50-60 cm of penetration into the ground, filling a 20-centimeter sand cushion along the bottom of the trench (with layer-by-layer compaction) and installing a reinforcement cage. That's all you need to do before laying concrete.
If the soil is dense enough and the walls of the trench do not crumble, you can pour concrete “by surprise” without formwork. It will only be needed above “zero” to fill a low grillage (20-30 cm).
A trench for a shallow strip foundation (an option with installing formwork in the ground) needs to be dug 20-30 cm wider than the thickness of the foam block wall. This will create an additional “buffer zone” on the sides of the grillage, which will compensate for the pressure of the frozen soil.

Having poured concrete into the formwork, we give it time to gain strength (1-2 weeks), after which we waterproof it. To do this, the easiest way is to buy a bucket of cold water and coat the grillage on three sides (on the sides and top). A simplified option is to lay 1-2 layers of roofing material on top. The foam block does not absorb water very actively (closed cell structure). However, waterproofing the grillage and concrete floor in the garage is a must.
The second foundation option (pile-strip) is a little more complicated than the first, but it is suitable for construction on heaving soils. Having dug a trench under shallow foundation, wells are drilled around its perimeter with a depth exceeding the mark of seasonal soil freezing. For such work, manual or. The diameter of the wells is at least 1/3 of the grillage width.

In each hole (they are made in all corners, and under the walls they are drilled in increments of 1-1.2 meters) they put roofing material rolled into a pipe or cuttings of asbestos-cement pipes. Then 2-3 reinforcing bars are lowered into the holes so that their ends extend into the future concrete grillage.

After this, work is carried out by analogy with the first option. A sand cushion is poured in layers, formwork and reinforcement are installed and concrete is poured.
Wall masonry
It is better to choose foam blocks for the garage with a density of 600-800 kg/m3 (structural and thermal insulation). They are quite warm and durable. We do not need a lower density, since such material is too fragile.
For masonry, you can buy a foam block (20x30x60 cm). If you want to make the walls warmer, then purchase material measuring 30x40x60 cm. The thickness of the walls can be increased by laying blocks with the wide side down (thickness 30-40 cm).

Beginners most often use ordinary cement-sand mortar for masonry. More experienced builders prefer perlite - optimal material to obtain a “warm seam”.

It is not too expensive and makes the masonry mass equally warm, without cold bridges through the seams. A solution with perlite insulation is prepared in the following proportion:
- 1 part perlite;
- 1 part cement;
- 2 parts sand.
Water is added in small portions as you knead until a masonry consistency is reached (thick sour cream). If you cannot find pure perlite, then buy dry mortar mixture"thermoshov".
Even if you have made the surface of the foundation quite flat, you still need to lay the first row of foam blocks on a layer of mortar 2-3 cm thick. This will allow the block to “find” its place and eliminate the risk of cracks from point loads.
When working with foam concrete, one should not forget about its fragility, so after 2-3 rows you need to lay a reinforcing mesh made of galvanized steel or plastic.

Having marked a place for the gate, you need to install it on the foundation, check horizontality, verticality and secure it with temporary struts.
Dressing sutures – required element technologies. It is especially important for foam blocks. Their dimensions are much more sizes standard brick, therefore, without overlapping the seams in adjacent rows and at the corners of the masonry, the wall mass will not be strong and monolithic.

Having driven the walls under the ceiling, take a break for a couple of days so that the solution gains strength. After this, work is carried out depending on what the garage will be covered with.
If you are building two-story garage or decided to block a one-story reinforced concrete panels, then along the top row of masonry you need to make reinforced belt made of reinforced concrete 15-20 cm high. It will protect fragile foam blocks from being crushed by heavy panels and give the structure spatial rigidity.
Floors
Everything is relatively simple here. After removing 15-20 cm of natural soil and leveling the base, it is covered with sand and compacted with a tamper. After this, a thick polyethylene film is laid, bringing its edges 15-20 cm onto the foundation to cut off ground moisture.
For reinforcement, use a regular masonry mesh (cell 10x10 cm). To create a protective layer of concrete, crushed stone is placed under it. Having poured the first “rough” layer (5-10 cm) and leveled it, the screed is given several days to gain strength. After this, wooden beacon slats are placed on the concrete with a step equal to the width of the “trowel”, the finishing screed is poured and carefully leveled.
Roof

There are three possible design options:
- Shed roof on wooden beams;
- Gable hip roof;
- Mansard type roof.
If the garage will be used not only for storing a car, but also as a workshop, it is better to go with the third option. not much more expensive than low pitched roof, but it is more profitable from the point of view of ease of use. This is especially true for cooperative garages, where standard dimensions 3.5x6 meters is clearly not enough to set up a workshop. Besides, warm garage with an attic can be used all year round.
Having laid wooden floor beams on the walls, the rafter legs of the attic structure are attached to them. Installation begins with end walls(back and front). Having assembled the two outer trusses, a beacon cord is pulled between them and the remaining structures are installed. After this, the sheathing is filled and slate or metal tiles are laid.

If you are happy with a cold garage, then construction can be completed by lining the ceiling with plywood, edged or tongue-and-groove boards. If we are talking about a warm room, then the roof will have to be given more attention. You need to lay ecowool or rolled mineral wool in the ceiling on the vapor barrier layer (layer of at least 10 cm). The walls of the attic will also have to be insulated with one of the specified materials, laying it in the space between the rafters and covering it from the inside with a vapor barrier film.
Calculation of the amount of materials for a garage made of blocks
A set of materials for a garage with a height of 2.5 and a plan size of 6x3.5 meters includes:
- Sand (for backfilling the foundation pad and floor);
- Concrete for the foundation, monolithic belt and gender;
- Ruberoid or cold bitumen mastic for waterproofing;
- Masonry mortar;
- Fittings;
- Foam blocks;
- Masonry mesh;
- Edged boards (ceiling, floor and roof sheathing);
- Beams for floors and rafters;
- Insulation;
- Metal tiles;
- Vapor barrier;
- Fasteners;
- Gates.
You can calculate the number of foam blocks for a garage by determining the perimeter of the foundation and multiplying it by the thickness and height of the wall. From the obtained value we subtract the area of the gate multiplied by the thickness of the wall.
In our case, the calculations will look like this:
Garage perimeter = 6x2+3.5x2 = 19 meters x 2.5 meters (wall height) x 0.3 (wall thickness) = 14.25 m3 of foam blocks. From the resulting volume, you need to subtract the volume of the gate 2.5 x 2.0 meters x 0.3 m = 1.5 m3. We get 14.25-1.5 = 12.75 m3.
Now we divide this volume by the volume of one block - 0.036 m3 and we get 354 pieces. We give a 15% reserve for waste during cutting and transportation 354x1.15 = 407 pieces. Now we just have to determine how much it costs to build a garage from foam blocks, taking into account the current prices of materials (including delivery to the site).
- We will need 3.8 m3 of sand (filling the foundation cushion) + filling the floor 2.4 m3 = 6.2 m3x800 rubles/m3 = 4960 rubles.
- Concrete M 200 (5.5 m3 at 3500 rub./m3) = 19,250 rub.)
- Cold bitumen mastic (2 buckets of 18 kg each) – 740 rub.
- Mortar M100 (consumption = 0.23 m3 per 1 cubic meter of masonry) x 12.75 m3 x 2,400 rub./m3 = 7,038 rub.
- Reinforcement 14 mm – 4,100 rub.
- Masonry mesh 100x100x3mm (2 rolls of 15 m2) = 6,800 rub.
- Foam blocks 20x30x60 cm (407 pieces at a price of 150 rubles/piece) = 61,050 rubles.
- Edged board 2.1 m3 x 5000 rub./m3 = 10,500 rub.
- Beams for floors and rafters 1.26 m3 x 5,000 rub./m3 = 6,000 rub.
- Roll insulation for ceilings (mineral wool 10 cm) 1.62 m3x4300 RUR/m3 = 6,966 RUR.
- Vapor barrier 1 roll = RUB 1,350.
- Metal tile 54 m2 x 290 rub./m2 = 15,660 rub.
- Fasteners 4 kg x 125 rub./kg = 500 rub.
- Gates (insulated with a wicket) – RUB 34,000.
Total estimated cost construction we get equal to 178,914 rubles.