Posts for gates in winter yourself. How to install gates correctly: tips, instructions. Building gates: how to install gate posts
Doing it yourself is not such a labor-intensive process as it might seem at the very beginning of the work. The most important thing here is to have the necessary materials and tools available. When manufacturing and installing them, be sure to follow safety precautions and be especially careful when cutting metal. This type of gate is ideal for private homes and cottages.
Advantages of swing gates:
- simplicity of design;
- installation that does not require special skills;
- low cost;
- versatility of use;
- long service life.
Disadvantages of swing gates:
- availability of free space for opening the doors;
- during the winter season, clearing the area.
In fact, these shortcomings are considered so insignificant that they do not in any way affect the popularity of gates of this type among owners of private farmsteads.
And, despite new proposals, modern designs and technical innovations, swing gates, compared to others, have remained leaders in use for many years.
Basically, profiled sheets, or less often wood, are used to produce gates.

Required materials for making gates:
- profiled sheet;
- sheet steel thickness;
- profile for frame;
- foundation racks;
- loops for fastening the canvas;
- loops for a padlock;
- bolts;
- concrete solution;
- bricks or stones;
- roofing felt
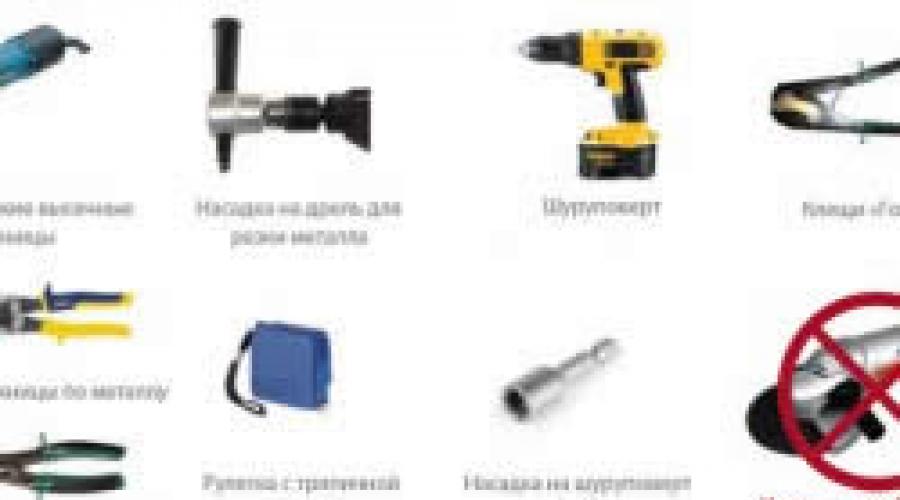
Gate installation tools:
- tape measure, pencil, building level;
- welding machine;
- a set of keys;
- drill and grinder;
- self-tapping screws;
- screwdriver
How to install swing gates correctly

- Do-it-yourself installation of the sashes is carried out on pre-prepared and already installed load-bearing pillars. Supporting pillars You can make them yourself from hardwood, concrete, metal pipes with a cross-section of no more than 10 cm. They can also be made from stone or brick pillars.
- Before this, the pillars must be concreted in special pits. We do this to ensure good fixation of the pillars, which should not be negatively affected in the future by the condition of the soil and other possible mechanical influences.
- If a profile or metal pipes, then welded to one end a metal sheet size 250 by 250 mm. This is done to ensure that the pillars stand securely in the ground. For better balance, you can additionally weld 2 pieces of reinforcement to this structure, connected crosswise. And while the racks are in a free position, weld canopies to them.
- Now you need to properly install and concrete the pillars. In this regard, it is necessary to dig 2 holes, with a depth of at least 60 cm and a diameter of 30 cm.
- In order for the foundation to be strong enough, the bottom of the pit is filled with concrete, and the walls are lined with roofing felt.
- A support is placed on the concrete, aligned vertically and fixed with bricks or stones.
- A little crushed stone is poured in and concrete pouring begins. The liquid mixture should reach the level of the horizontal surface where the pillar rests.
- Thus, alternating concrete, stones and crushed stone, you should ensure that the installation of the pillar is carried out correctly and clearly.
- Filling the pillar with your own hands stops when the level of the mixture reaches ground level or slightly higher.
- The second support is installed in the same way.
- During work, it is necessary to constantly monitor the exact verticality of the racks and their height. Before cutting the pipes, they must first be fitted to the pits. After all, each support can have its own depth and length, and it also depends on the soil of the earth.
- If stone or brick will be used as supports, then a hole is dug and the brick or stone is laid on the concrete mortar. But here you need to do the reinforcement with reinforcement yourself. And to be able to carry out installation work, metal plates and corners should be secured and removed from the racks.
- Regardless of the material used, the mounted poles will be finally prepared for fastening the sashes in approximately 20 days. It is after this period that they will gain final strength and it will be possible to install the gate. But in practice, the sashes are fastened within a week.
Return to contents
How to make a gate frame

You will need to take a pipe for the frame, for example, a rectangular profile measuring 30 by 50 mm. The pipe is marked according to the dimensions made in the gate opening and cut into the required lengths. The segments are welded together with a simple horizontal seam, using electrodes with a diameter of 3 mm.
Welding is best done in the following way:
- lay out all the frame parts on the ground;
- connect them together by light welding;
- fit all the parts one to another to form an even quadrangle;
- weld the joints well;
- strengthen the joints using sheet steel overlays.
- Do the same with the second part of the hangers; weld them so that there is a gap of about 8 cm between the ground and the canvas.
Return to contents
Hinges for swing gates
Since the entire structure will be held on the hinges, you should pay attention to their quality Special attention. Hinges for gates and gates must be massive, that is, garage hinges. Two hinges for each leaf and separately for the gate will be quite enough.
Since hinges for this purpose are held on metal, they must be adapted for such fastening. This will require 6 plates measuring 3 by 4 cm with a metal thickness of more than 3 mm. You can cut out the necessary rectangles from pipe scraps with your own hands and straighten them with a hammer. Finished plates must be cleaned of rust.
The hinges consist of 2 parts, the part with the pin is welded to the post, and the other part is welded to the doors. The welding site should be cleaned and holes drilled in the “ears” with a diameter of up to 3 mm. On each plate the number of holes will be different: 4 pieces for the doors and 1 piece for the post.
Concreting pillars must be approached responsibly, because the reliability and service life of the entire fence depends on it.
How to install fence supports, what materials are best to choose? Let's look at the main points of building a fence.
Why concrete fence supports?
Advantages:
- The pillars will not loosen in the ground. If the pillars are not concreted, when the groundwater level rises, they simply may not withstand the load and fall.
- Protection against corrosion processes is provided.
- You can extend the operating time.
The downside is that if the pillars are concreted, over time they begin to stick out of the ground due to precipitation. This situation will arise when there are closely lying groundwater, which push the supports from concrete base from the earth cover. There is also a possibility of cracks in the concrete.
The strip base is one of the most reliable
How to prepare a construction site?
Take these materials:
- shovel, crowbar, concrete mixer;
- fittings;
- drill;
- cement, crushed stone, sand;
- roofing felt;
- level, plumb line, tape measure;
- theodolite, cord;
- timber for formwork;
- wheelbarrow;
- plastic bags.
 First you need to prepare the surface and only then install the supports for the fence. Use a shovel to cut off the rhizomes and turf so that there are no obstacles during drilling. The size of the hole may vary depending on the diameter of the drill. Install it as deep as possible. Remove the soil from the pits immediately so that it does not interfere with construction work Oh.
Drill the soil to the freezing depth (about 1.5 m), then install the expander on the plow and begin arranging the anchor expansion at the bottom of the hole. Thanks to this, winter frosts will not affect the position of the pillars; they will remain in place.
Which fence posts to choose?
The main criteria for selection are not only external characteristics, but also technical, as well as installation methods that include additional elements.
Types of pillars:
- Made of wood- short-lived. They will last an average of 10 years. If you choose this option, treat the supports with antiseptic preparations or solution copper sulfate. This will extend the service life.
- Asbestos cement pillars characterized by practicality, ease of installation, affordable price. Suitable for summer cottages or economic territory. The disadvantage is that the pipe is empty. When it rains, water accumulates inside, and during frost the pipe may burst. The logs are difficult to attach to the base.
- – the most practical and popular. Pros: easy to install, reliable, can be used for all types of fences, have a long service life.
- Made from concrete. Finished goods expensive, often made independently, since it does not require large investments. They are used often, but require skills to pour the design efficiently the first time.
- Brick pillars– the best decorative material. They are expensive and difficult to work with. Laying of the foundation is required, mutual bandaging is required, decorative processing and preventive methods, but they look attractive.
Choosing the right pole type
Follow these tips when choosing supports:
- For corrugated fences those supports that are able to stand reliably in the ground and support the structure without problems are suitable. The weight of such a fence is light, so you can even use wooden posts. Although best option – concrete types, as well as metal and brick. To make the structure more durable, use iron corners as a frame along the fence.
- Are you planning to install chain-link mesh? Buy small-diameter iron poles. This option will not be expensive. Bury deeply so that the mesh, when stretched, does not bend the supports. Place a reinforced concrete pillar in the corner area.
- For brick fence take pillars made of brick, concrete with the correct dressing and with a high-quality foundation. Other options will not be able to withstand heavy loads and will ruin the overall appearance.
- For concrete structures– pillars made of concrete, metal (wide in diameter).

Metal supports are the most practical option
What type of concreting to choose
A wooden post does not need to be filled with concrete, since if the wood is damaged, it will simply be impossible to replace the post. You will have to break the concrete and start the process again. It is better to install a steel or asbestos glass, this will allow you to replace the timber in the future. But for metal supports, use cement compounds.
Pouring supports can be of the following types:
- Inexpensive is the type spot concreting.
- Option partial concreting used to fill the top layer of soil. Disadvantage – deformation of the support due to the influence on the soil low temperatures. The structure is weakened.
- Mounting strip base- an expensive method, but reliable.
- At dry type there is a possibility of the pillars swaying during the wind, this weakens them.

Concreting scheme for corrugated board fencing
Preparatory stage of concreting pillars
Measure the future fence. Based on its length, calculate the number of supports. When using slate (flat, wave) as a fence, it is necessary to maintain a distance of less than 2 m between the posts. If it is corrugated sheeting, 2 m is enough. With light structures (chain-link mesh), the gap will be 3 m or even more.
The next step is to complete the markup. Measure the area where the fence will be installed. Its length is divided by the length of the fence sections and 1 is added - this will be the number of columns. Did you get a non-integer number? Reduce the flight distance. For example, the width is 10 m, the material is corrugated board, between sections is 2.5 m. The calculation is as follows: 10/2.5+1=5 pillars.
Take measurements and mark where the structure will be installed. Take this into account if a gate or wicket will be installed.
Their length usually does not correspond to the section markings, so the number of supports will fluctuate. A standard entrance gate is about 3 m, and a wicket is 1 m.
Now start drilling or digging holes to install the column. If your site is located in a humid area, which is characterized by severe frosts, refuse this type of partial concreting. Replace with tape mounting. 
Partial pouring process
 You can drill neat holes with a mobile motor drill, or use an infantry shovel (hoe). The hole should be 2 times larger in diameter than the diameter of the support, and lie to a depth of more than 1/3 of the entire height of the main structure. So, if the height is 2 m, the depth of the hole is 1.2 m.
Insert the post evenly into the dug hole, use a level or plumb line to control it, fill it halfway with soil and tamp it down. Then fill concrete composition. Install a cap at the top so that when it rains, water does not get inside and destroy the structure.
Spot installation method
The hole is dug in the same way as the previous method. Cover the bottom with a layer of crushed stone and sand mixture. Weld a heel on one side of the post to increase its stability. A sheet can be used as a support flat type, wider in diameter than the pillars, or a lattice of reinforcing bars.
Lower the structure all the way into the hole, level it and fill it with concrete solution to the top. Compact with a steel rod as you go.
At high humidity the site should be sealed at the base of the pillar (for example, with roofing felt). Twist the roofing material into a ring, 18-20 cm larger than the depth of the hole. This way, water will not get into the concrete when pouring. Cover one edge of the “glass” with a plastic bag and insulate with tape. Place the structure in the hole and proceed according to the usual scheme pole installation.
The video shows in more detail this type concreting pillars:
How to mount a pole using the strip method?
Use the following instructions:
- It is necessary to dig holes for the posts and a trench (40 cm deep, 15-40 cm wide) around the entire perimeter where the fence structure will be mounted. Are you installing slate or corrugated fencing? The width of the ditch will be small, and for a brick structure it will be much wider. The main support does not have to be immersed deeply, because thanks to the strip foundation, wind and weight will not damage or weaken the structure.
- Formwork is required; fill the bottom of the ditch and holes under the pillars with a cushion (use crushed stone, sand, etc.) to a depth of 10 cm. Drive in steel rods every 50 cm (in a checkerboard pattern). Select the length so that they are stable after being immersed in the ditch, and their upper ends are not visible after pouring the concrete. Install the posts evenly.
- Place it on the pillow metal carcass in the form of 2 parallel rods with jumpers (every 20 cm). The jumpers in contact with the main pillar must be secured by welding or wrapped with wire. Place the second frame perpendicular to the rods 20 cm higher.
- Pour the concrete. The result is a multi-layer base for the post, which is designed even for heavy weight fencing.
On video - how to concrete strip foundation under the fence:
What is the essence of dry concreting?
Drill a hole, make a roofing material “glass” without an insulated bottom. Place this type of cylinder in the hole, then sink the post with the heel pointing down. Level using a level, pour sand, crushed stone or other material between load-bearing structure and a “glass”, periodically adding water to make the layer more compacted.
Important! For any type of concreting, install the outer pillars first, stretch a rope between them, which will help level the remaining intermediate components of the fence.
Pole Installation Basics
To install fence posts, it is better to use types frost-resistant crushed granite , both for filling into a drilled hole and for adding to concrete base. Then you need to follow these steps:
- Fill the bottom with crushed stone and compact it. Next, fill the hole with water and install the post in the hole. It is advisable to have an assistant, so that one holds the support and monitors the verticality, and the second pours the solution. Water for pouring over the hole is needed so that moisture from the concrete does not escape into the ground, otherwise you will end up with a skinny and fragile foundation.
- It will be good if you have a concrete mixer. This will make the work much easier. You can immediately add crushed stone to it. If such equipment is not available, pour in small layers concrete mortar and crushed stone.
- The next step is to fix the pole in a level position on all sides with supports for a while until the material “seizes.” You will be able to continue direct installation of the fence sheet after 4 days. Can't wait to finish the installation quickly? Buy an additive, so-called quick-hardening concrete. Place plugs at the top of the supports - weld or put on plastic caps.
- Use roofing felt. When pouring the solution, the roofing felt tube will push the collected moisture to the surface. This will provide complete protection of the concrete from deformation. The basis of the funnel can be a bottomless bucket, and periodically bayonet the concrete with slats.
- The solution should not reach the top edge of the pit. Insert several reinforcing bars with a length that is lower than the main pillars into fresh, uncured concrete. To limit the height of the support, stretch the rope along the fence. Measure how much space there is from the cord to wooden box, which stands in the middle of the pit. Mark the width on the asbestos cement pipe. Count from the top.
- Drill a through hole, then you need to install a king pin made of steel rods. Place the pipe on the reinforcement frame protruding from the hole. With the help of a pin, the pipe will be held suspended and rested on the formwork box.
- Align all posts. You can do this using bubble level. Secure their position with struts and concrete the upper part of the well. On final stage fill, remove the king pin.

Concreting options
- Concrete the corner post or support near the gate first. Insert it into the finished well in vertical position, fill the cavity with concrete mortar. After compacting the material, add a little more to the top, installing additional clamps that will help keep the pillars level until the concrete mass hardens.
- Wedge the support in the hole using stones in a vertical position. Pour the concrete composition, constantly monitoring verticality. Additional braces are not needed, but compaction must be done carefully. If you are working without an assistant, use a couple of levels, attaching them along and across the post. Fill in the first and last column. Then, using a cord, pull a guideline between them, which you will adhere to during the entire working process.
As you can see, you can also build an excellent fence with your own hands. The technologies are not complicated, but they require care and precision. Follow all the tips and the fence will serve you well long years, and you won’t have to worry that the structure will simply fall apart when it rains.
Almost everyone Vacation home definitely has beautiful fence. Most often it is made of brick. Brick gate posts remain the most popular for DIY fence construction. The reason for this prevalence brick fences became a large assortment the brick itself. There are a lot of great things offered for sale. different textures this material.
Brick pillars for gates made of corrugated sheets and forged elements
It should be noted that brick gate posts always have a solid appearance: this is a solid structure, once again reminding of the financial condition of the owner of the property.
Material quality
I must say that bricks for laying gate posts are not very suitable material. It simply cannot withstand dynamic loads. He needs special reinforcement.
Basically, the outer pillars are always chosen for gates, which are made by hand in accordance with special technology.

Layout of brick pillars for gates and wickets
In principle, brick is not a material that can bear the main load when the gate is in use. In this regard, the brick in the gate post plays only a decorative role.
You can easily make brick gate posts with your own hands. They have no visual difference from other pillars. They are also faced with bricks, have mortgages and the same color. When laying with your own hands, it is very important to make brick pillars for gates, following a certain technology: with reinforcement of the internal part of the structure, metal addition.
Gate post design
When the fence has hinged gates, the installation of the outer posts on which they are hung is performed somewhat differently than other installation work. The brick pillars on which the gate will be hung must have an internal metal rod.
When the foundation is poured, a metal rod is installed in the hole.

Example of reinforcement of a brick pillar
He should be a little taller than himself brick pillar. In this case, it is recommended to bury the pillar in the ground to a third of its length, which rises above the ground.
Thus, the installation of a brick pillar is done. To the metal rod you can subsequently.
Let's talk about mortgages
One of the common mistakes when making a brick pillar is to insert a steel rod only inside it. As a result, it becomes completely useless. To fasten gate posts, it is impossible to do without profile material:
- channel;
- corner;
- pipes.
At this moment, you should not forget about mortgages. First, they are driven in near the surface of the earth, and then into the upper section of the post. Only after this is the channel welded to the mortgages.
Such work must be done very carefully.

Installation of mortgages in brick fence posts
If you have difficulty performing this operation yourself, you can pre-drill holes in the channel where the embeds will be inserted. The channel will be put on the mortgages, after which the entire structure will be secured with a weld. A very thick weld seam needs to be cleaned. The channel must be dug into the ground, because if this is not done, it will fall off the post. You need to try to dig it to a greater depth.
When the height of brick pillars exceeds two meters, welded vertical channels may not be enough.
A third channel is added, and its length should be equal to the width between the gate posts.

Scheme of device and installation of mortgages
The channel is buried in the ground, both ends are welded to two already installed channels, then everything is filled with concrete. The dug trench must be backfilled, which is very easy to do with your own hands. After this, the passage is beautifully decorated.
If this design does not create a reliable fastening for the gate, a fourth channel is welded. It is installed on top of the driveway and secured to the tops of the brick pillars. For greater reliability, “ears” are welded to the vertical channels. The fourth channel will be inserted directly into them.
Typical error
When you attach gates to brick supports with your own hands, one characteristic mistake is made. Mortgages are welded directly to the gate in order to secure the future gate. But only two pillars should have mortgages; they are simply not needed on the rest. The gate will not be highly reliable, since it simply will not be held in place by small sections of brick from which a metal rod sticks out.
To install the gate when the pillars are made of brick, you need to first make a layout and mark those pillars that will become the main support of the gate. The gates are mounted using electric welding, which is cheaper than gas welding. It does not form an influx of metal.
Required Tools

Detailed drawing for reinforcement of masonry pillar and foundation
To make gates that have a beautiful appearance, you need to have various materials, as well as the appropriate tools:
- Fittings;
- Brick;
- Steel pipe;
- Cement;
- Crushed stone;
- Sand;
- Bulgarian;
- Buckets;
- Shovels;
- Master OK;
- Concrete mixer;
- Roulette;
- Building level.
Foundation installation
Since the mass of brick pillars is significant, it is necessary. All work must be performed using appropriate technology.
First, holes are dug for mounting two supports. The depth depends on the level of soil freezing. This value will be different in each region.  The next step is to make a pillow, which includes sand and crushed stone. First, sand is poured, the thickness of the layer should exceed five centimeters. It is compacted well. A 15 cm layer of crushed stone is poured on top, which is also compacted.
A frame is made using reinforcing bars. They are laid in horizontal and vertical directions. They are tied with knitting wire, maintaining a step of 20 cm. Then the reinforcement frame is inserted into the hole made. After that, the installation of steel pipes is carried out, playing the role of the supporting frame of all brick pillars. Installation work should be carried out level, after which the pipes are well secured.
A concrete solution is prepared, for which it is necessary to pour the following into a concrete mixer:
- cement;
- sand;
- crushed stone
All components are mixed very thoroughly. Water is added to the mixture and mixed until a concrete mixture is obtained.

The process of pouring the foundation for the gate
In principle, you can do this operation yourself by mixing all the ingredients in a container. The only downside will be the loss of time.
It is necessary to wait several days with the resulting solution until the concrete has completely hardened. Installation of poles can begin after completely dry foundation, but not earlier than in half a month.
The construction of any fence begins with the installation of the supporting part - the pillars. The more securely they are installed, the longer the fence will last under the influence of winds and bad weather. That's why this stage work is the most responsible and must be carried out according to technology. After familiarizing yourself with it, you can confidently place poles and build a fence with your own hands without the involvement of hired workers and equipment.
Methods of mounting supports - which one to choose?
When erecting fences, 3 methods of installing supporting structures are practiced:
- direct driving into the ground;
- partial concreting;
- complete pouring of concrete into the underground part of the rack, including the installation of a strip foundation.
Note. In turn, partial concreting is carried out in two ways - pouring the so-called concrete collar or filling the well below the soil freezing line.
Pole installation options
Each of the listed methods is used under certain conditions, depending on the quality of the soil, its saturation with moisture and the degree of freezing. In addition, the choice of technique is influenced by vertical and lateral loads created by the weight of the structure and its windage. Valid for solid fences important rule: they must be able to withstand wind loads well, which sometimes exceed the weight of the fence.
Load on a solid fence made of corrugated sheets
Simply driving posts into the ground allows you to speed up construction and significantly reduce its cost. In contrast to these advantages, the method has numerous disadvantages:
- A post driven into soft or loose soil (chernozem, clay, sand) will quickly become loose in the wind and tilt when solid fence sections with large windage are attached to it. The latter includes corrugated sheets, polycarbonate and various wooden boards.
- If the height of the fence exceeds 2 m, then the wind will turn out the clogged post in any case, even together with a transparent one. air flow mesh - chain-link.
- In areas with clayey, moist soil that swells when negative temperatures, such supports will come out of the ground by 5-10 cm in the first winter. After which they will finally be tilted by the wind.
- After driving, the post is not able to bear a large load in terms of mass. Metal structures or artistic forging elements cannot be attached to it.
Heavy fence made of forged elements
From the above it follows that driving in racks can be used under the following conditions:
- when your site has hard or rocky soils;
- driving into soft soil is possible if the height of the fence does not exceed 1.5 m, and the spans are made of mesh - chain-link or other wind-transparent material;
- if it is necessary to quickly erect temporary fencing;
- during the construction of wattle fences or low decorative hedges near flower beds and front gardens.
To fence the front garden, posts can be driven into the soil
Concreting will require high costs labor, time and money. Just hardening the concrete will take you 3 weeks, not to mention buying the ingredients to prepare the mixture and finding a concrete mixer. In return you receive the following bonuses:
- durability (the fence will easily stand for 30-50 years, depending on the material);
- proper concreting is used on all types of soil;
- reinforcement with concrete mixture is suitable for all types of fences, including heavy ones (stone, brick, metal structures, forging).
Fence with brick pillars
Note. Racks cannot be concreted in swampy, oversaturated soil. But in such situations, driving will not save you; you need to build a pile-screw foundation.
It turns out that the choice of rack installation method depends on the conditions in each specific case. Hammering saves time and money, but is not always applicable. Concrete is used everywhere and provides reliability and durability for any structure, although it is more expensive. On stable, dry soils, construction costs are reduced by partially concreting the supports.
Materials for pillars
For installation of a fence erected around land plot, the following types of pillars are used:
- from wooden beam and logs;
- from various rolled metal products - profile and round pipes, channels and angles;
- made of brick and concrete.
Wooden fence
Reference. Channels and angles are used either singly or double, welded into a “box”.
As a rule, wooden posts are installed when constructing a fence made of slabs, boards or thin logs (picket fence). They are also convenient to use together with plasticized mesh or chain-link mesh. The advantages of wooden poles are:
- low price;
- ease of processing and fastening of fence sections;
- fracture strength of the material, lack of flexibility, like metal;
- The supports can be given a wonderful appearance using wood carving, varnishing or painting.
Palisade with wooden supports
The use of wood as fence posts has one significant disadvantage - the material quickly deteriorates from exposure weather conditions. To prevent a wooden stand from rotting in 10-15 years, it will have to be treated with an antiseptic and periodically painted. There is also a danger of the fence catching fire from an accidentally thrown cigarette butt.
Rolled metal is a universal solution for the construction of various fences, but it is also more expensive. Although steel pipes They also need to be protected from corrosion; they will last much longer than wooden racks. Sections can be attached to metal from various materials starting from wood and ending with forging elements. Steel posts are also used in the construction of permanent fences - they serve as the core of a brick pillar, to which wickets and gates are subsequently welded.
Steel pipe serves as a frame for brick supports
Reference. For quick assembly fences made of corrugated sheets and polycarbonate are available for sale ready-made kits from metal profile pipes and fastening elements for them.
Euro fence with concrete pillars
Concrete pillars are installed complete with a so-called Eurofence, consisting of individual slabs decorated with a relief pattern. In other cases, it is impractical to use concrete supports due to high price and installation difficulties (the racks are quite heavy). But they also “live” for a long time - up to 50 years, and are not afraid of winds, precipitation and temperature changes.
Selection of columns by section
- timber with a section of 10 x 10 cm, minimum - 8 x 10 cm;
- log with a diameter from 100 to 150 mm;
- for a stockade it is better to take round timber maximum size- 15 cm.
For pillars, it is advisable to select logs of the same diameter
When selecting wooden supports, you should pay attention not only to the cross-section, but also to find out the type of wood. Birch and poplar are of little use for outdoor structures because they rot quickly. The best choice in terms of price/quality ratio - these are materials from coniferous species. They contain a significant amount of natural resins that help resist environmental influences.
Profile pipes for fence
When selecting metal poles Consider the following recommendations:
- with a fence height of 2-2.5 m, take a profile pipe cross-section of 60 x 40 mm; for a one and a half meter fence, products measuring 40 x 40 mm will be used;
- optimal diameter round pipe- 57 mm;
- take the maximum size of corners and channels installed individually to be 90 and 160 mm, respectively.
Diagram showing pipe cross-sections
Advice. To ensure that steel supports last at least 20 years, choose rolled metal with a wall thickness of at least 3 mm.
The pillars to which the gate leaves and wicket are attached carry an increased load, so their cross-section must be larger. As a rule, a profile pipe size of 100 x 120 mm or a round pipe diameter of 109 mm is sufficient. The cross-section of the channels and angles remains unchanged, but for gates they are combined in pairs by welding into a “box”.
Calculation of basic parameters for do-it-yourself installation
- Measure the overall length of the fence using a tape measure. Determine the height of the fence for safety reasons and based on personal wishes. As practice shows, it is not economically feasible to build a continuous fence more than 2.5 m high. Optimal height, allowing you to save materials - 2 m (a six-meter pipe is divided into 3 parts).
- Determine the height of the pillars. The principle is this: to create a reliable support lever in the ground, the stand must be immersed in the ground at least 1/3. If you plan to build a 2-meter fence, then at least 1 m of the support must be in the ground, then its total length will be 3 m.
- Count the number of columns depending on the interval of their installation.
Fences with a height of more than 2.5 m are best made of mesh
Advice. On preparatory stage It is worth coordinating the construction with the neighbors so that later there are no disputes regarding the delimitation of plots.
It is important to choose the correct step for installing the supports, depending on the area and windage of the fence. The distance between the posts should be between 2 and 3 m. A smaller interval is not advisable from the point of view of economy, and a larger one sharply reduces the reliability of the structure. The exact selection is made on an individual basis.
Solid fence with an optimal distance between posts of 2.5 m
Calculation example for a fenced area length of 13.4 m with a fence height of 1.5 m:
- If you divide this distance into 4 sections, then the pitch of the pillars will be 3.23 m. With such a span length, the fence can be built from brick or chain-link mesh on metal posts. It is extremely undesirable to install corrugated sheets or other solid material; the racks will be shaken by the wind.
- Dividing into 5 sections will give the optimal interval - 2.56 m. This suitable option for most fences, both wooden and metal.
- If you divide the distance into 6 spans, then the length of each span will be 2.12 m. The reliability of such a fence will be excellent, although the cost of construction will increase. But here you can save on the cross-section of the pillars and take a smaller standard size according to the assortment.
An example of a breakdown into 4 spans
Advice. Optimal distance between the posts of a solid fence 2 m high is 2.5 m. This the best option in terms of price/reliability ratio when it comes to the most popular fencing made of corrugated sheets on metal supports.
An example of a breakdown into 5 spans
If you choose the optimal pitch of 2.5 m, then the construction of the fence will require 6 supports protruding 1.5 m above ground level. According to calculations, the total length of the post together with the underground part is 1.5 / 2 x 3 = 2.25 m, with a margin of 2.5 m. In total, 2.5 x 6 = 15 m of pipe or channel will be required.
Breakdown into 6 spans
Reference. IN concrete eurofences There is a fixed span length of 2 m, so calculating the number of pillars is not difficult.
How to install fence posts by driving
To carry out construction work you will need various instruments and accessories:
- measuring instruments - tape measure, liquid level;
- long twine and pegs for marking;
- manual or mechanized drill;
- sledgehammer or portable hydraulic hammer;
- bayonet shovel;
- tamper
If you plan to install wooden posts, they must be treated so that they do not rot in the ground. First, cover the entire support with an antiseptic composition such as Novotex or Biosept, and then tar the underground part with molten bitumen.
Advice. Bitumen coating It must adhere firmly to the surface, otherwise it will peel off when driving the post. For this reason, it is not recommended to use cold bitumen compounds and primers to protect racks.
Painted metal supports
Before installation, the underground part of the metal poles must be cleaned of rust, coated with a primer and also applied with hot resin. The operation will not take much of your time, since the bitumen hardens quite quickly.
Work order
The first stage of installation of the supporting part of the fence is marking. Stretch a string on stakes between the extreme points, and then measure along it the calculated intervals between the posts, marking their installation points. The installation technology is as follows:
- At the designated points, drill wells of the calculated depth. The diameter of the drill should be 2-4 cm less than the cross-section of the post. When drilling, try to hold the tool vertically and not swing, so as not to break the walls of the hole, which will cause the post to fall in there without any driving.
- Ends wooden poles It is advisable to trim them, so it is more convenient to insert them into the hole.
- Compact the bottom of the well with a tamper and add some sand or small crushed stone.
- Hammer the first post to the required height with a sledgehammer. Here you will need the services of an assistant who will support the end of the support and prevent it from vibrating from impacts.
- Repeat the previous operation with the last post and pull a rope between them to break off the top level.
- Drive in the remaining posts, focusing on the level of the string. Cover them with earth on all sides and compact it.
Marking the fence on the site
Important! In order to maintain a clear vertical when installing pillars, it must be controlled during the drilling process. It is impossible to align the support when driving if the hole is drilled crookedly. But if this happens, then you can correct the matter in the manner described below.
Photo instructions for driving in racks
 When driving the column, an assistant must support it.
  Drilling a hole with a motor drill
  This is what a finished well looks like for driving
  Using hammering, the frame is installed in 1 day
Installation of backfilled pillars
To implement this method, you will need medium-sized stones, broken bricks and tiles or large crushed stone. The installation procedure is as follows:
- Drill or dig a hole to the required depth. It should be 10-15 cm wider than the cross-section of the support.
- Compact the bottom of the hole and fill it with crushed stone. Have an assistant place the post and hold it upright using a building level.
- Fill the space between the soil and the stand with stones or crushed stone, compacting it periodically.
- Sprinkle the installed column with soil on top and compact it.
Scheme of backfilling supports
Reference. There is an old-fashioned way to secure the support tightly using backfill. You need to make a liquid solution of clay and water and pour it between the stones into each hole. The clay will fill all the pores and, after hardening, will hold up no worse than concrete.
Video on driving posts
Instructions for concreting supports
This technology provides complete or partial filling columns with a concrete mixture of grade M100 in dry soil and M150 when the ground is wet. To calculate the amount of materials required for concreting, use the data from the table, which shows their volumes for preparation different brands solution.
Calculation table for concrete, cement and other ingredients of concrete mixture
Knowing the number of holes for supports and their depth, it is easy to calculate the total consumption of building materials. When fully concreting, no more than 4 standard buckets of concrete are placed in a hole 1 m deep. Additionally, prepare the following materials:
- roofing felt or plastic film to separate the concrete mixture from the ground;
- sand for adding to the bottom of the well;
- pieces of reinforcement or corners for anchoring.
Building materials for concreting pillars
The set of tools used is the same as for driving, only instead of a sledgehammer you will need a concrete mixer. As a last resort, you can do without it and prepare the mixture on a sheet of metal using a shovel. To fix and anchor metal posts, you need to prepare a welding machine.
How to concrete: pouring technology step by step
The first stage of work, consisting of marking and digging holes, is carried out using the technology described above. Complete concreting of pillars is carried out in the following sequence:
- Compact the bottom of the hole, add sand and compact it again.
- Install the support and level it vertically in two planes, using a building level.
- Fix the pipe in the design position by welding the cutting corners to it so that their ends rest against the soil. If the posts are wooden, then nail strips to them or simply wedge them with large stones.
- Cover the bottom of the well and earthen walls with roofing felt or film. The goal is to prevent the milk from leaking out of the concrete, which reduces the strength of the latter.
- Prepare a concrete mixture and place it in a hole with a stand. During the pouring process, make sure that it does not deviate from the vertical and is level.
Full concreting of the rack
Advice. In the first 20 min. after pouring, when the concrete gives away excess water, the position of the pillar can be adjusted in order to align the vertical.
Vertical adjustment after concreting
Complete hardening concrete mixture occurs after 3 weeks. Until then, it is not allowed to carry out work that could load the columns. The most you can do is clean them and paint them.
Fixing the stand with supports  Using a rope is more convenient to determine the installation point of the pole
  Preparation of concrete mixture
About partial concreting: what depth to bury and what is the distance between the columns
If the soil on your site is dry and not free-flowing, then it is pointless to spend materials on a full fill. It is enough to make a concrete collar for each column using the following technology:
- Dig a hole half the calculated depth, but make it 20-25 cm wider than the section of the rack.
- Take ready-made support and drive it in the middle of the bottom of the hole to the required depth. Compact the soil around the pipe and add sand.
- Find out exactly what the freezing depth of the ground is in your area. Calculate the total height of the supports using the following formula: above-ground part + freezing depth + 0.5 m.
- Prepare a mixture of crushed stone and sand to replace the heaving soil around the post.
- Drill a hole so that the drill goes 0.6-0.7 m below the border of the frozen soil. Make a 10 cm layer of sand and compact it.
- Install the support and secure it in a vertical position.
- Fill the hole with concrete to a height of 0.5 m.
- After the monolith has set, fill the well to the top with a mixture of sand and crushed stone.
The method is convenient in that it is easier to align a post halfway into the ground vertically and fix it in this position. But this technology, like complete concreting, is not applicable in heaving soils. In severe frosts, the soil will push the entire structure out. To prevent this from happening, use the following instructions:
Concrete is poured no higher than the frost line, and then crushed stone is poured
Note. Considering that in some regions of the Russian Federation the soil freezes to 2-2.5 m, the fence posts will be very long and the well will be deep. Therefore, the choice of material for pillars is small; only steel pipe is suitable.
When the moisture-saturated soil is replaced with crushed stone, and the concrete monolith is located below the freezing line, the forces of frost heaving will not be able to push your support out of the ground.
How to properly concrete pillars - video
As you can see, the technology for installing fence posts does not contain any particular difficulties. Also, no special equipment is required to complete the work, but if you have a concrete mixer or hydraulic hammer, things will go much faster. It is better to build a fence with an assistant, since most operations are inconvenient to perform alone.
Gates installed at the entrance to a suburban area are distinguished by a variety of designs, materials used and have different functionality. The main types of gates for country houses and suburban areas include lifting, sliding and swing. The most common are swing gates. Compared to other types, they are quite simple to install and their installation is less expensive. Swing gates can be made from various materials and decorated with a variety of decorative elements. You can assemble and install this type of gate yourself.
On suburban area there is a need to install a gate. They enhance your safety and are certainly a beautiful addition to your home.
In order to properly manufacture and secure gates that are reliable and perform their functions well on supports, you must first make an assembly drawing (sketch) of the structure.
It can be done on paper or on a computer screen. At this stage, the dimensions of the structure corresponding to the operating conditions are calculated. Determined design features devices, list and quantity of required materials. The sketch should show the gate leaves in the closed and open positions to accurately display the dimensions. The main tools you will need for the job: welding machine, grinder, square, tape measure, building level.
Installation of support pillars

Methods for installing pillars: 1 - driving in; 2 - combined; 3 - concreting; 4 - butting with crushed stone.
The most important operations when installing gates are installing the supports and hanging the leaves on them. As support pillars For gates, you can install steel pipes (from ø100 mm), I-beams or channels with a flange width of at least 100 mm.
The depth of the foundation for the support pillars depends on the nature of the soil of the site, the weight of the canvases and must be at least 1.5 m. The foundation of the supports will experience constant dynamic loads when the doors move and gusts of wind. It must also withstand the impact of the soil during sudden transitions from a thawed state to a frozen state. When pouring the foundation, you should take into account the geological features of the soil, which were taken into account when constructing buildings on the site. In any case, the foundation base must be installed below the freezing depth of the soil.
Before installing supports, you should consult with specialists to select their design and size. The installation process itself is carried out in the following sequence.
- Holes of a certain depth are dug to lay supports. Their diameter must be at least 10 cm greater than the diameter of the pipes or the cross-section of the pillars.
- A layer of gravel is poured into the bottom of the pits, broken bricks or small stone. The pillars are installed in holes and aligned strictly vertically with the installation of supports or welding of holding bars perpendicular to the supports.
- The base is concreted with control of the verticality and alignment of the pillars. If the load is heavy, the foundation must be reinforced.
- After installing the pillars, before hanging the sashes, you need to hold the foundation until it hardens for 28 days.
Return to contents
Manufacturing of gate leaves
To manufacture the sash frame, a square (rectangular) profile with a cross-section corresponding to the weight of the structure or corners is used. The corners must have shelves from 40 mm wide. Gate leaves can be made from sheet iron or mesh. During preliminary calculations, it is necessary to determine what additional elements will be required (gate, hinges, lock, deadbolt, lock lugs, etc.). It is desirable that the doors swing 180° when opened. If possible, it is better to open the doors outward to save money. usable area plot.

Sheets of corrugated sheets are most often used as a door leaf.
The door leaves are welded on a flat horizontal surface, observing the diagonals and right angles of the structure. The frames of the shutters are made according to the dimensions in the sketch, taking into account the width of the opening between them, the gaps between the panels and the distances from the support pillars. On average, the total width of the sashes is made no 30-35 mm less than the width of the opening. If mesh gates are provided, gussets are welded at the corners of the frame. Overlapping corner welding will make the structure stronger, but will spoil its appearance.
For the manufacture of gate leaves, a steel sheet with a thickness of 2 mm is used. The sheets welded to the frame should protrude beyond the edge of the top and bottom by 1-2 cm. In the middle of the gate, the edge of the sheet of one leaf overlaps the frame of the other. To sheet material did not lead, it first grabs on the corners of the frame at the middle points of the canvases. Then, using spot tacks every 10-15 cm, the sheets are welded completely. After completion, the welds in the corners are cut off to avoid thermal deformation in the future.
For canvases made of steel sheet If necessary, reinforcement can be made with stiffening ribs. During assembly, there should be no holes left through which moisture can get inside the structure. After assembling the structure, preliminary fitting of the sashes to the opening is done. Bars are placed under the sashes and the correctness of the calculation of the gaps is checked. The intended location of the loops is marked with chalk.
Return to contents
Welding hinges to gate leaves

The process of welding hinges to sashes and support posts requires special precision. The size and number of loops are selected depending on the weight of the canvas. It is better to hang massive collars on 6 loops. Smooth ride the valves will be ensured by the use of bearing hinges. For the chosen one, so-called garage hinges are suitable, the rod of which has a diameter of at least 12 mm. The rod must fit into the cavity of the mating part of the hinge with minimal clearance. The presence of play can be determined by moving the hinge assembly to a bend.
Straight hinges are welded to the gate frame before installation in the following order:
- the sash is laid on boards or an assembly table strictly horizontally;
- The upper part of the hinge with the cavity is applied to the chalk marks; a flat planed board should be placed under it in order to correctly position the hinges;
- a gap is maintained between it and the frame by inserting a plate of a certain thickness under half the length of the loop;
- the loops are grabbed while maintaining alignment between them;
- in the same way, the upper parts of the hinges are attached to the second sash.