The walls are plasterboard without a frame. Wall covering with plasterboard without frame. On gypsum glue
Read also
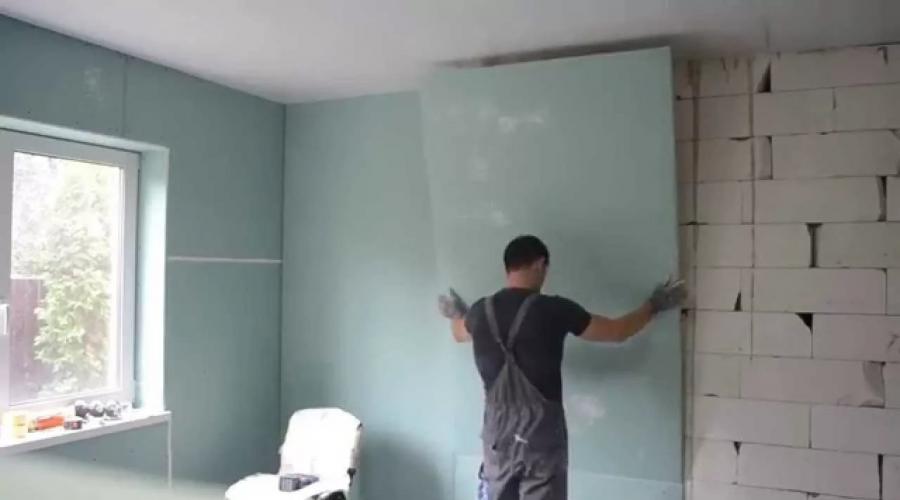
Cladding walls with plasterboard is a practical and common method inside apartments and houses. GKL allows you to level walls and ceilings. A common method is when the sheets are mounted on a frame made of wooden slats or metal profiles. If you need to save money or time, the question arises: is it possible to attach drywall directly to the wall? Yes, there are cases when the sheathing may not be installed. Leveling walls with plasterboard without a frame is carried out on practically flat bases of various types. The photo below shows a room with gypsum-coated walls and ceilings.
Benefits from frameless installation
Fastening drywall to a wall without a profile is the best option for flat surfaces. The degree of deviation from the plane plays a big role. The frameless method of wall cladding is applicable if the differences do not exceed 5 cm. When they are larger, sheathing is often installed.
Drywall is fixed to uneven surfaces using beacons. Thanks to this, the installation of sheets occurs immediately according to the level. Without beacons can be installed with extensive experience, or in small areas.
You can control the degree of curvature of the base using a building level and a long rule.
Existing to the wall without a profile allows you to mount it on different types of surfaces. It is possible to attach sheets:
- to a brick wall;
- for partitions made of porous concrete, monolith, panels, limestone, shell rock, cinder block and plastered;

The gluing of sheets on a foam concrete base is shown in the photo above.
Finishing walls with plasterboard without a frame and profile is beneficial for the following reasons:
- this finishing method reduces the cost of lathing material;
- money is also saved on its installation (if it was planned to involve a specialist);
- the volume of the room practically does not decrease;
- The time required for facing work is reduced, and the process itself is simplified.
The following requirements apply to surfaces that are planned to be covered with plasterboard sheets:
- the base must be strong, smooth, without significant defects and fungus;
- It is required that the wall surface be protected from moisture.
If the gluing method is used, then it is recommended to remove old paint and contaminants (dust, oil stains).
The big advantage of finishing walls with plasterboard without a frame with your own hands is that the process is faster and easier than if you need to first create the sheathing.
Preparatory activities
Before attaching this material to the wall without profiles, you should decide and prepare the required tools. Everything needed for different installation methods is presented in the table below.
Some tools and materials are used only for certain methods of installing gypsum boards.

The photo above shows a bag of gypsum adhesive used for drywall to glue it down.
The work cannot be done without a stepladder or other device for working at height.
Installation of drywall on walls without a frame requires compliance with a number of conditions:
- the temperature during work must exceed +10 degrees, so at lower values it is necessary to take care of organizing heating;
- it is necessary that the walls in the room being repaired are dry;
- if there is high humidity in the rooms, use moisture-resistant types of facing material;
- Before installation, it is recommended that the sheets lie in the room for 3 days;
- the base for installing gypsum plasterboard must be intact and not fall apart, otherwise it will need to be pre-strengthened.
The quality of the result directly depends on how correctly the preparation was carried out. Due to the fact that all the necessary tools and materials will be pre-assembled, there will be no need to be distracted while working. Maintaining the required microclimate is a prerequisite during finishing.
Methods for fixing gypsum boards without installing a frame
In practice, there are several ways to level walls with plasterboard without a frame. They differ in the materials used and the technology of work. Using the frameless method allows you to sheathe walls or ceilings of rooms and offices by directly fixing the sheets to their surface.
In practice, there are 2 options for how to fix drywall without installing sheathing. But different materials are used. Here's what you can use to fasten the sheets:
- self-tapping screws (for wood) or dowels;
- glue, “liquid nails”, polyurethane foam.

The photo above shows the application of polyurethane foam to a sheet in order to then secure it to the wall.
General scheme of work for any installation method:
- prepare the base;
- fixing drywall;
- seal the joints.
No additional strengthening measures are required. Installation methods can be combined with each other. Thus, the glued cladding can additionally be fixed with self-tapping screws or dowels.
Depending on the option of subsequent cladding, the surface can then be puttied, and then sanded and primed.
The choice of one option or another is determined both by personal preferences and by the evenness and material from which the partitions are constructed. So, drywall is glued or secured with dowels to a concrete wall (flat). The leveled wooden surface is sheathed using self-tapping screws.
Fixation method with self-tapping screws and dowels
Without a frame using self-tapping screws, it is possible if there is a base made of a suitable material: wood, foam concrete or gypsum. The workflow consists of the following actions:
- remove existing protrusions: wooden partitions are leveled by trimming them with a hatchet or a chisel with a hammer, and walls made of foam concrete (gypsum) - with a hammer drill with a chisel inserted;
- fix plasterboard sheets in increments of 25-35 cm, using a checkerboard arrangement of their location on the surface of the base, with hardware 3.9x25 mm or 3.9x35 mm long (on a flat wooden surface) and 3.9x45 mm (on aerated concrete, plaster).

After tightening with a screwdriver, the head of the screw should be slightly “recessed” into the facing coating.
The photo below shows the process of fixing a plasterboard fragment to a wooden ceiling.
It should be taken into account that strong tightening of hardware in the locations of the depressions causes deformation of the material. To avoid this, the sheets fall short, leaving a slight gap between them and the surface. The strength of the created structure will not decrease.
When it is impossible to screw self-tapping screws into the wall (the base is made of concrete, brick, cinder block), then they do it without a profile, using driven dowels for installation. Their length for unplastered surfaces should be 6x40 mm or 6x60 mm. If the thickness of the cladding layer exceeds 2 cm, then hardware 6x80 or 8x100 mm is used.
The technology consists of the following operations:
- using a hammer drill or a hammer with a chisel, level the base, removing defective areas;
- when the sheet is installed, then a hole is drilled through it;
- insert the plastic part;
- hammer or twist the metal core, placing a washer under the head;
- In this way, they sheathe the entire room, cutting the sheets if necessary.
The backing for the head of the metal core can be made from a U-shaped fastening for the profile. To do this, it is cut into plates using metal scissors.
In places of depressions, the core is not finished off so that the sheet does not bend.
When all the sheets are attached, then they begin to seal the seams. With smooth base surfaces, the use of hardware allows you to quickly cover a room or office space.
Bonding technology
To level walls with plasterboard using glue, in addition to gypsum compounds, polyurethane foam and “liquid nails” are usually used. Homemade solutions are also used, for example, based on putty and PVA. The techniques for applying the compositions to the surface of the material being installed differ.
Before you start attaching drywall to the wall, you should prepare it in a special way. The process consists of the following steps:
- the work area is cleared of old finishes (paint, wallpaper, defective plaster);
- seal cracks;
- apply the primer composition in two layers;
- dowels are hammered into the corners (screws are screwed in);
- using a plumb line or level, pull threads (thin ropes) between them;
- in a selected square lying at an angle of 90° relative to the floor, consider surface irregularities;
- if deviations of more than 2 cm are detected, a substrate is prepared from fragments of the installed material (a sufficient width of the pieces is 10 cm);
- make markings for attaching drywall sheets to a wall without a frame.
When sketching the location of the fragments, take into account the gaps between the edges of the plasterboard and the floor (0.7-1 cm), ceiling (0.3-0.5 mm). Open areas (communication outlets) are also taken into account when marking.
It is convenient to use a laser level for marking.
To attach drywall to a wall without a profile with deviations of more than 2 cm, it is recommended to install beacons. To do this, do this:
- pull the threads horizontally in increments of 50 cm;
- under them (also after half a meter) beacons-cakes made of glue are applied;
- control the thread level;
- Allow the beacons to dry before attaching drywall to unframed walls.
As beacons, you can also use strips of gypsum board the length of the height of the room, glued vertically every 50 cm. In addition to guiding functions, they serve as support points for leaning gypsum boards.

The figure below shows options for leveling walls of various curvatures with plasterboard when installing it with glue.
- wait for the primer to dry completely;
- apply the adhesive mass in fragments (with a height 2 cm greater than the gap between the back side of the gypsum board and the surface of the base) at a distance of about 40 cm from each other over the entire surface of the sheet;
- cover the base with the composition in the same way;
- press the plasterboard fragment against the wall;
- beat it with a rubber hammer so that it leans against the beacons.
Installing gypsum boards using adhesive compounds is considered a more complex and painstaking method compared to fastening with dowels (screws). It is recommended to use deep penetration primers with antiseptic properties to treat surfaces before gluing.
The use of assembly adhesive to secure drywall is demonstrated in the video below.
Installation using polyurethane foam is shown in the following video.
The use of frameless methods allows you to both level the wall with plasterboard without a profile and save money on work and material. The savings figure can reach almost 60% compared to the frame option. Sheets secured using the chosen technology will hold securely. In this case, it is easier to do the work yourself and faster (especially on level grounds) than using lathing.
There are 2 methods of attaching drywall to the wall surface: with and without a frame. The latter, at first glance, seems to be the simplest, since this method does not require the installation of profile sheathing or wooden blocks. Is it so? What are the methods for frameless fastening of drywall to a wall?
Fastening drywall to a wall without a profile
Of course, the most reliable and correct method is to construct a frame and then attach drywall sheets. But in some cases, constructing a structure from profiles or bars turns out to be impractical - for example, if it is necessary to close or level a wall in a small room. In this case, the construction of the frame will take away the already scarce space.
The possibility of frameless fastening of gypsum boards to the wall can be carried out under the following conditions:
- Correspondence of the height of the walls to the length of the gypsum board. The frameless method requires the absence of horizontal seams, so for installation you should select sheets that match or exceed the height of the ceiling.
- Relatively smooth surfaces. The curvature of the walls should not exceed 20 mm, otherwise the sheets will not be fixed securely and may repeat the configuration of the underlying surface. To achieve this condition, preliminary alignment may be required.
- Strength. Since with the frameless method there is no gap left between the sheets and the stationary wall and the surfaces are tightly glued to each other, it is important that the base is strong and reliable. Crumbling brickwork or a concrete slab will lead to the rapid destruction of the constructed structure.
- Favorable conditions. Mold, dampness and walls that freeze in winter will negatively affect the components of gypsum plasterboard and destroy the sheets.

If with the frame method it is possible not to process stationary walls in any way, then when installing plasterboard sheets directly on the surface, it is necessary to first clean it of old finishing materials and dust. In addition, it will be necessary to protect the plasterboard from dampness by installing waterproofing in places where there is a possibility of penetration of moisture or fungus.

You can attach gypsum board sheets to the wall in several frameless ways:
- using glue;
- using polyurethane foam;
- using self-tapping screws;
- using dowel nails.

The choice of method will depend on the nature of the walls: the optimal method is determined based on their curvature and the material from which they are constructed.
Towards a concrete wall
Since a concrete wall is usually quite flat, drywall is accepted on it. Before starting work, you should remove dust and degrease the surfaces, and to improve the adhesion of the gypsum mixture, make notches on the concrete using a jigsaw or an ax.

Then materials and tools are prepared:
- plasterboard for walls;
- dry gypsum mixture;
- container for diluting the mixture;
- cutting tools - jigsaw and painting knife;
- notched trowel and trowel;
- a board with a length 30 cm less than the height of the walls;
- roulette;
- level.

Advice. Before starting work on installing gypsum boards to the wall, all engineering work on electrical wiring must be completed.
Assess the curvature of the walls using a level and mark the deepest and most convex places with chalk or pencil. The gluing of sheets begins with the latter, and the first gypsum board, fixed at the highest point of the surface, will become a guideline for the installation level of the rest. If there is a large difference between the existing unevenness, it is recommended to knead a little dry mixture and fill the holes with it.

Algorithm for attaching gypsum boards to glue:
- The length of the drywall must match the height of the wall. It is recommended to cut sheets only after accurate measurements. Keep in mind that the gypsum board is glued with a small gap in relation to the floor - the distance from it to the bottom edge of the sheet should be about 1.5 cm.
- The glue is mixed from the dry mixture in small portions in accordance with the instructions on the package. The composition retains its consistency for no more than half an hour, and then begins to harden and loses the necessary adhesion.
- Apply glue with a notched trowel along the contour on the edges of the sheet in a continuous strip, and use a trowel to make fixing points along the surface, located in a checkerboard pattern at a distance of about 40 cm from each other. The diameter of the glue spot should be about 15 cm.
- While the glue has not hardened, the sheet is lifted and pressed against the wall. The prepared board is applied with careful pressure along the gypsum board, thereby distributing the glue under it. If necessary, the rule can be additionally tapped with a rubber hammer.
- The plasterboard sheet is pressed against the wall with spacers at several points for 40 minutes until it is completely glued.
- Adjacent sheets are attached with a gap of 5-7 mm. To maintain the required gap, you can use wooden wedges.

If the curvature of the concrete is very pronounced, you can get out of the situation by installing beacons made of strips of drywall on the surface. They are placed on glue along the perimeter of the wall, the vertical outer lines are connected at different levels with fishing line. Based on it, you should glue vertical strips of plasterboard in increments of 40-50 cm, if necessary, lifting them above the wall surface with gypsum compound. The main wall sheets of plasterboard are attached to the installed beacons made of gypsum plasterboard strips with glue or self-tapping screws.
Upon completion of the work, the seams between the sheets and the ceiling gap are filled with putty. After this, you can begin to use finishing materials.
To the brick wall
Brick has a number of disadvantages that prevent the use of glue or the screwing method when fastening drywall: the fragility of the material and pronounced unevenness of the masonry. In such cases, it is advisable to install gypsum boards using polyurethane foam.

There are 2 methods of mounting on foam:
- fixing sheets on the wall with filling the gaps with foam;
- applying foam to the sheet.
The latter method is used more often; it allows you to control the volume of foam used. The mounting medium continues to expand as it hardens, so when using the first method there is a risk of deformation of the structure under its pressure.
Advice. To attach gypsum boards to brickwork, it is better to use polystyrene foam for mounting. It has good adhesion and does not expand as much.

Fixation with self-tapping screws and foam
The use of this method requires careful measurements and some experience in using polyurethane foam. Before starting work, you should evaluate the curvature of the walls and select screws of different lengths to level out level differences.
- The gypsum board is drilled out for screws at 9-12 points.
- The sheet is applied to the wall and the fixation points are marked on the brickwork.
- On the gypsum board, pieces of foam rubber are temporarily glued in a circle from the holes drilled for self-tapping screws for shock absorption when screwing.
- The points marked on the wall are drilled out and dowels are driven into them.
- The drywall sheet is fixed to the wall with self-tapping screws and wide washers. During the screwing process, you should control the position of the gypsum board using a level.
- Next to each fastener, 5-6 mm holes are drilled in the sheet of drywall for the attachment of a polyurethane foam container.
- The balloon nozzle is inserted into the holes, and the gap is carefully filled with foam. The contact patches should be about 10-15 cm.

When the foam dries, you can unscrew the screws and remove the washers. After this, the sheet is again fixed with fasteners so that the caps are slightly sunk into the drywall, and all joints and recesses are fixed.
Gluing sheets
If the brickwork is fairly smooth, you can glue the gypsum boards directly to the wall with foam. Height differences of no more than 20 mm will ensure uniform pressure of the composition and fixation of the sheet.
Important. Polyurethane foam is a fire hazard, so wiring should not pass through this material; a fire will lead to the release of toxic, life-threatening substances.

- Polyurethane foam is applied directly from the container around the perimeter of the sheet, and then distributed in a snake over the entire surface area.
- Wait 15 minutes for the foam to spread over the surface and begin to expand again.
- The sheet is carefully applied to the wall in the intended place and fixed with a system of spacers until the installation composition has completely hardened.
To prevent the gypsum board from deforming due to the secondary expansion of the mounting foam, a sheet of chipboard can be placed under the spacers, approximately . After hardening, the joints are sealed with putty.
Drywall firmly occupies the position of one of the most popular among construction and finishing materials, and this is easily explained by its many advantages. These include its environmental friendliness, ease of installation, the ability to be used in a wide variety of rooms, relatively low weight and affordable cost.
Plasterboard sheets are used for leveling walls and for, moreover, working with them is accessible not only to an experienced builder, but also to a novice craftsman. Finishing walls with plasterboard without a frame or profile is possible with different adhesive compositions and on surfaces made of various materials. The advantages of such fastening compared to the frame method are that the reduction in the area of the room is not so noticeable, a decent amount of money is saved on the sheathing elements, and the installation work itself proceeds quite quickly and can easily be done on its own.
Basic methods of installing drywall on a wall surface
To evaluate the advantage of frameless installation of drywall, you can briefly consider both existing methods by comparing them.
To be fair, it should be noted that sometimes when installing drywall it is impossible to do without installing a frame, so this case is also worth mentioning when considering methods for installing the material.
So, there are two main technologies for attaching plasterboard sheets to the wall in order to level it:

- Installation of sheets using self-tapping screws on a frame made of a metal profile or wooden beam. This method is chosen in cases where the wall requires additional thermal or sound insulation, and the insulating material is installed specifically in the frame structure, or if the wall has very large distortions that are difficult to level with plaster layers.
- Fixing sheets to the wall using self-tapping screws and polyurethane foam or using an adhesive composition made on a gypsum basis. Self-tapping screws and foam for fixing drywall are used if it is necessary to cover not only a wooden wall, but also surfaces made of other materials that require correction. The adhesive gypsum composition is more often used to level a concrete or brick wall. However, it should immediately be noted that the frameless method of attaching drywall should only be used when the walls have a height not exceeding 3000 mm.
In this publication, only the nuances of frameless drywall fastening will be considered.
Required materials and tools
Set of tools
To level walls with plasterboard using one of the adhesives, you will need much fewer tools than if a frame was attached to the wall. The list of everything necessary consists of the following items:

- A plumb line, a building level and a rule, preferably 1500 mm long, to control the evenness of the original wall and the created vertical plane.
- Electric jigsaw or sharp utility knife - for cutting drywall.
- Rulers of different lengths, a square, a tape measure and a simple pencil - for marking.
- Wide, medium and narrow spatula, as well as possibly a trowel (trowel) - for applying and distributing the solution.
- Construction float – for processing putty surfaces.
- Roller and brush - for treating walls with primer.
- Rubber hammer - for adjusting plasterboard sheets glued to the wall.
- Electric drill and mixer attachment - for mixing the solution.
- In some cases it will be necessary for additional fixation with self-tapping screws.
Drywall prices
drywall
Necessary materials
Now it is necessary to consider the materials that will be required to prepare the surface of the walls and for high-quality installation of drywall:
- Primer solution with antiseptic additives.
- Gypsum-based putty mixture, base and finishing.
- Dry construction mixture - drywall adhesive, or polyurethane foam.
- Serpyanka mesh tape - for sealing joints between sheets.
- Long self-tapping screws may be required to level the wall by adjusting the plasterboard sheets. The size of the fastening elements will depend on the flatness of the surface, taking into account the fact that they must be recessed into the wall by 50÷60 mm.
- One of the leveling technologies will require pieces of foam rubber - this will be discussed in due course.
About some materials - a little more detail.
Drywall
The Knauf company produces not only a variety of building and finishing mixtures, but also plasterboard sheets for various purposes - this is a simple, moisture-resistant, fire-resistant and moisture-resistant finishing material:

- Ordinary drywall (GKL or, according to the Knauf proprietary classification - GSP-A) is used for rooms with normal humidity.
- Moisture-resistant sheets (GKLV or GSP-N2) can be used to level walls in bathrooms or bathrooms. After treating such a surface, ceramic tiles will fit perfectly on it.
- Fire-resistant sheets (GKLO or GSP-DF) are used for finishing walls around fireplaces, stoves, and chimneys.
- Fire- and moisture-resistant plasterboard (GKLVO or GSP-DFN2) is well suited for finishing walls in boiler rooms of private houses, in attic and attic spaces.
Here we can briefly talk about it, which does not require special effort, experience and special tools - it is enough to have an ordinary sharp stationery knife on hand. The cutting process takes place in the following order:

- The sheet is placed on a solid base - this can be a large table, floor or several stools placed side by side at some distance from each other.
- Then, using a tape measure or ruler, the sheet is marked, and the necessary lines are drawn with a simple pencil.
- The next step is to follow the drawn line, also along the ruler, with a knife, which should cut the top layer of cardboard.
- The sheet is moved to the edge of a hard surface and laid on it along the cut line.
- Then, pressure is applied to the edge of the drywall that extends beyond the base, which will cause the sheet to break along the cut line.
- The last step is cutting the cardboard on the other side of the sheet.
To level walls during repairs, plasterboards are often used. There are two ways to install them - with and without a frame. The first method is more reliable, but it is not suitable for small rooms, since the thickness of the structure reduces the already small size of the room. In this case, attaching drywall to walls without a frame is suitable, as a method that is simpler and less expensive.
The essence of the method is to attach plasterboard sheets to the wall using special adhesives, but provided that the ceiling height does not exceed 3 m, that is, no higher than the length of the sheet. It is performed after complete completion of work that uses water - putty or plaster, as well as when the walls are completely dry.
Preparing the wall
To carry out the work you will need the following equipment and materials:
- Rulers, tape measures and markers for taking measurements;
- Construction or stationery knife for cutting slabs and chamfering;
- Construction level, usually a level lath, rubber hammer;
- A container for mixing glue and a drill with an attachment;
- Primer and construction adhesive.
The complexity of surface preparation depends on the material from which it is made. A convenient option is brickwork, which just needs to be coated with a primer. If you attach it to old plaster, it will eventually begin to fall off and deform the slab from the inside. To eliminate this, all old coatings are removed to a solid base, including whitewash, wallpaper, painting and non-wettable stains, after which the surface is treated with an appropriate primer. If the old base is solid, the preparation procedure will be as follows: 
- “Tapping” the wall with a trowel to identify places where part of the layer may fall off.
- Removal of old coatings, wallpaper, and weak areas of the coating.
- Plastering the damaged areas.
- Cleaning the wall from dust.
- Primer with deeply penetrating compounds.
Before the main work begins, all necessary communications are carried out. High voltage lines must be hidden in grooves and a fire hazard sleeve. Low voltage wires are attached directly to the wall.
Glue mounting
Before direct installation, the main walls are measured to ensure correct cutting of the sheets. The fragments are arranged so as to prevent cross-shaped joints. An adhesive mass is prepared using gypsum putty, mixed to the consistency of sour cream. The mixture is applied to the pre-primed drywall. Based on the degree of unevenness on the wall, the glue is applied as follows:
- If the height difference is less than 4 mm, fixation is carried out with Funenfüller putty, which is applied in a small layer over the entire perimeter;
- With a difference of up to 2 cm the slabs are fixed with Perflix, applied in separate spots with an interval of up to 35 cm;
- With a difference of up to 40 mm in such places, strips of plasterboard 10 cm wide are attached, and the main sheets are attached to them.
The sheet is applied to the wall quickly and carefully. First, the gaskets are installed from the bottom edge, and after it is installed in accordance with the marks on the floor, the rest of the part is pressed.
Using a rule or a long level, bulging areas are corrected, which are leveled by light tapping. It is not recommended to knock on the instrument. It is removed, the place is leveled, and checked again. After leveling, the sheet is supported for several hours with a wooden board.

Instead of glue, the fastening compound can be polyurethane foam, which has a low expansion coefficient. But at the same time the sheet is securely fixed. If this is not done, due to the expansion of the foam, bumps will appear that cannot be removed.
If the wall deviations are significant (up to 4 cm), during installation, guides are used, which are attached in places of maximum deviation. Large differences are compensated by a higher amount of glue. In this case, leveling the slab is carried out more carefully, since excessive force can cause the surface to bend. For ease of positioning, you need to mark the floor and walls; this measure will help to avoid mistakes and rework of inaccuracies.
After installation is completed, the joints are glued with sickle tape, and as they dry, putty is applied on top. After drying, the uneven surfaces are sanded with sandpaper, and the surface is cleaned of dust and coated with a primer.
Self-tapping installation
The method is more complex than the previous one, but the fastening is reliable, and the method is successfully used on walls with a large curvature. For this you will additionally need:
- Electric drill and screwdriver;
- Glue and polyurethane foam;
- A set of self-tapping screws and screws with washers with a diameter of more than 1 cm;
- Thick foam.
With the frameless method of installing plasterboard slabs, the ceiling height should not be higher than 3 m, since the technology does not provide for the installation of horizontal joints.
After priming the wall surface with all prepared sheets, the following actions are carried out:
- The plate is applied to the wall, and holes are drilled in it at a uniform distance from each other at 8-10 points, which are marks;
- The sheet is removed, and dowels are driven into the drilled holes at the marks;
- Foam rubber is glued onto the drywall 10-12 cm from the holes, which will act as a shock absorber during installation;
- The sheet is applied to the wall and secured with screws with washers on them;
- Using a level, the sheet is installed in a strictly vertical position by screwing or unscrewing the screws;
- The actions described above are carried out with all plasterboard boards;
- A hole with a diameter of up to 7 mm is made near each screw for injection of mounting foam for the purpose of fixation. Its supply is carried out blindly, and you first need to experiment with the dosage to get a spot with a diameter of up to 15 cm;
- All slabs are fixed with simultaneous control of their position using the building level;
- The screws are removed after the foam has hardened, and the remaining holes are filled with putty;
- The work is completed by standard puttying of the seams and then sanding them with sandpaper after drying.

Frameless leveling of walls with plasterboard slabs is a complex technology that requires knowledge of the properties of the materials used and skill in working in this area. You need to be able to choose putties and glue based on the conditions of the work and the characteristics of the surface on which installation will be carried out. You need to take on this task yourself if you have confidence in your abilities. Otherwise, it is faster and cheaper to entrust the repair to professionals.
Drywall has recently become one of the most popular materials for renovation work in apartments. Large-area, even and smooth surfaces of the sheets make it possible to eliminate the curvature of the walls in a short time and prepare the room for subsequent finishing. In addition, if gypsum boards are attached to a frame structure, then it becomes possible to additionally insulate the ceiling.
But creating a frame is not possible in all cases, since such a design significantly “steals” the usable area of the room. Therefore, for owners of city apartments planning renovations, information on how to attach drywall to a wall without profiles is often more useful, so that the loss of space in already cramped conditions is minimal.
There are several methods for attaching drywall in this way. But for any of them, the wall requires some preparation.
Preparatory work
Any work begins with preparing a set of necessary tools and purchasing the necessary materials.
Materials and tools
A. Tools you will need:
- Knife for cutting drywall.
- Building level, plumb line, marking cord, tape measure, long ruler or rule, pencil or marker - for preliminary marking and constant monitoring of the verticality of the surface during the installation of sheets.
- Rubber and regular hammer.
- Spatula or trowel
- Container for mixing glue.
- Screwdriver, electric drill with mixer attachment.
- A roller with a long handle and a soft brush.
- Chamfer plane
B. Materials for work:
- Drywall sheets. Depending on the room, ordinary gypsum boards and moisture-resistant gypsum plasterboards can be used, and if a wall near a stove or fireplace is being finished, then fire-resistant gypsum plasterboards will be required. The number of sheets is calculated by taking into account the area of the walls of the room, subtracting from it the areas of window and door openings, and making a reserve of approximately 15%.
The calculator below will help you quickly and accurately calculate the number of sheets of drywall.