Remedy for car bumper scratches. How to remove scratches from a plastic bumper with your own hands
During the operation of the car, various abrasions, scratches and chips may appear on the bumper. The presence of such damage significantly worsens the appearance of the car, so it is not surprising that many car owners are thinking about how to do it themselves on the bumper. You can easily restore this body element, saving on contacting specialized specialists.
The cost of car painting services today is quite high, so many car owners decide to do this work themselves; fortunately, you can easily paint over existing damage by choosing paint to match the color of the bumper and car body. If you did it yourself in the past high-quality repairs It was difficult, but today in car accessory stores you can choose various markers and high-quality polishes that will help completely restore the appearance of the coating.
You can remove scratches on a plastic bumper yourself in the following ways:
- machine polishing;
- using a wax pencil for minor damage;
- filling deep cracks with putty and painting.
The undoubted advantage of doing repairs yourself is significant savings, and the car owner will not lose quality of work. If you use high-quality wax pencils and similar products, you can completely paint over existing damage. In specialized workshops, the car owner will be asked to pay at least 5-7 thousand rubles for painting a plastic body kit.
Classification of defects
Removing damage from the bumper is not particularly difficult. To perform such work efficiently, the car owner needs to do the following:
- Inspect and classify defects.
- Choose a method to remove them.
- Purchase appropriate materials.
- Carry out work to repair the damage.
Before proceeding directly to examining the bumper, it must be thoroughly washed. This will allow you to see all the scratches and chips, correctly assessing their depth and size. All existing scratches and damage can be classified into several main categories:

Shallow abrasions and scratches are classified as simple defects, and to eliminate them you don’t even need to remove the bumper from the car. Such defects can be eliminated locally by tinting and subsequent polishing. Many car owners do not pay attention to such damage, since it does not reach the base of the plastic, which eliminates future problems with corrosion and damage to the plastic body kit.
Careless parking maneuvers or impacts from small pebbles can cause the paint on the bumper to peel off and cause large cracks to appear. To remove such damage, partial or complete repainting of the element will be required. In this case, it is necessary to remove the bumper from the car and carry out the appropriate repair work.
Repairing serious dents, rips and other damage to the bumper can be difficult. Only professionals can handle this kind of work efficiently. Therefore, if there are serious deformations of the body kit, you should still contact specialized workshops that repair body parts.
Using wax correctors
The simplest and effective method To get rid of minor damage to the bumper, use a wax-based pencil. To repair minor damage to the body kit, you will need the following:
- Wax based polish.
- Wax pencil.
- Gasoline or White Spirit.
- Soft rags.
 Today you can find various wax pencils on sale that are easy to use. WITH best side Correctors from Turtle wax, Liqui Moly and other American and German manufacturers. You should not skimp on the quality of such correctors. Using cheap wax pencils will invariably result in the need to redo repair work.
Restoring a bumper using wax pencils can be done in the garage or at outdoors. The only requirement is positive temperature. Necessary:
- Wipe the damaged area with a rag and degrease with white spirit.
- Open the cap of the pencil and carefully apply the composition to existing damage, scratches and grooves. When applying, lightly press on the marker, then remove any excess wax protruding along the edges of the damage with a dry cloth.
- Polish the defect area using appropriate polishing compounds and a clean, dry rag.

When performing such bumper repairs, it is prohibited to use solvent or acetone for degreasing, since such compounds can have a detrimental effect on the protective layer varnish If necessary, polishing and restoration of damage with a wax pencil can be repeated.
Using wax crayons is not particularly difficult. It takes no more than 15 minutes to remove one small scratch. The only drawback of using wax correctors is the mediocre durability of the work done. Gradually the wax will be washed out of the bumper, and the car owner will have to repeat restoration work.
Polishing with a grinder
If the bumper has deep scratches or the paintwork is dotted with a network of minor damage, then such defects can be removed by polishing the plastic with a grinding machine. Such damage occurs both as a result of the harmful effects of ultraviolet radiation on the protective varnish, and due to mechanical damage in the parking lot. Grinding is carried out indoors, and all work is carried out in a strictly defined sequence.
To polish the plastic body kit you will need:

Purchase specifically for polishing grinder not required. Most car owners who are facing such restoration work rent the equipment they need.
If there is significant damage to the bumper, it must be removed from the car, and only then begin restoration work. The bumper must be washed thoroughly, then problem areas disinfect with white spirit or gasoline.
The bumper polishing algorithm is as follows:

Such work, despite its complexity, can be done independently even by car owners who have never polished a car before. You just need to choose the right polish to use and, when sanding the bumper, act carefully, gradually moving from coarse polish to fine polish.
Local touch-up
If there are chips on the bumper and minor damage from small pebbles, the body element can be restored by local touch-up. For this work you will need:

Damaged areas should be washed, degreased, then carefully apply primer using toothpicks or thin pointed sticks and tint the bumper with paint. A small layer of varnish is also applied pointwise over the paint. Wait the day it takes for the paint to dry and the varnish to harden. Polishing is carried out sandpaper No. 2000 and a fine polishing wheel.
Local painting of the bumper is not particularly difficult; you just need to choose the right paint color and then carefully polish it plastic elements. All such work is best done in the garage, which will prevent dust and sand from getting on the paint and varnish.
Metal bumper repair
 In the presence of mechanical damage, scratches and chips on metal bumpers, repair and restoration work must be carried out as quickly as possible. Metal is susceptible to corrosion, so deep scratches and defects can quickly lead to rust.
It is made using technology that is similar to a plastic body kit. Shallow grooves can be removed by polishing or using a wax marker. Deep chips and cracks can be removed by touching up the paint. If the scratch reaches the base, then it is necessary to dismantle the body kit and completely paint it.
When preparing a bumper for repair, a rust converter is used, which must be used to treat problem areas. In case of deep and extensive damage to metal bumpers, it is not recommended to carry out such repairs yourself. The easiest way is to contact specialized auto repair shops that specialize in body repair. Experienced craftsmen will be able to choose the right repair technology and completely eliminate the damage, eliminating any subsequent problems with corrosion.
Restoration of plastic and metal bumpers after mechanical damage can be carried out using different technologies. If there are small and shallow damages, you can remove scratches on the plastic bumper with a wax marker. Polishing can eliminate deep chips and cracks.
Full and local touch-up is used in cases where there are through holes, deep damage and cracking of the body kit. By choosing the right repair technology and using quality materials, it will be possible to completely restore the appearance of the body kit, eliminating problems with the operation of the car.
Front and rear bumper car - the most vulnerable parts of the body. It is on them that various scratches, dents and chips most often appear. Many motorists immediately turn to a car service to remove the defect that has arisen, but this should not be done. The workshop will charge you a lot of money for simple repair, in addition, you will have to negotiate services, hand over the car to the mechanics and receive it - all this takes a lot of time. After reading this article, you will learn how to remove a scratch on a bumper with your own hands, saving time and money.
Types of defects and ways to eliminate them
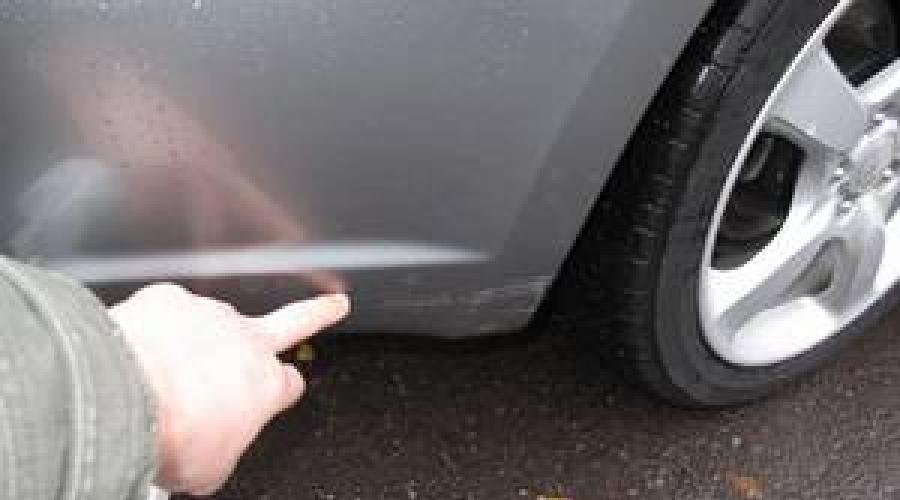
Like any other repair, scratch removal should begin with an assessment of the damage. We recommend washing the car first so that the scratch is clean and better visible on the body.
Conventionally, all damage to the body, depending on their nature and depth, is divided into the following groups:
- small scratches that can hardly be felt, but are clearly visible on the surface of the bumper;
- deep scratches that are very noticeable and also cling to the nail;
- large cracks and chips paint coating;
- dents and breaks in the bumper.
Let's look at each type separately.
Minor scratches and abrasions can be easily removed by polishing the bumper; in addition, you do not have to remove it from the body. Such scratches are hardly noticeable on dark-colored bodies, but on light-colored ones, dirt caught in a crack in the varnish will stand out noticeably.
Next are deep scratches on the bumper. As a rule, they arise from light mechanical stress and are removed by local touch-up. Painting over the scratch is easy, but to do this you will most likely have to remove the bumper.
Large cracks in the paint and chips most often appear due to the inexperience of the driver, who touches the guardrails when parking. Also, the cause of such defects is stones flying out from under the wheels of other cars. Removing the crack will be quite difficult, since you will have to completely repaint part of the bumper, but you should be able to cope with this, because below we will give detailed instructions, how to do it.
The last type of bumper defect is deep dents, tears and holes. You are unlikely to be able to cope with such destruction on your own; in addition, sometimes it will be cheaper and faster to buy a new bumper.
Wax pencils
Wax pencil for removing scratches - perfect solution, however, they can only wipe out minor scratches. You can find them in any car store, and they are sold at a very low price.
You will also need:
- White spirit for degreasing the surface (do not use acetone or solvents based on it).
- Wax polish.
- Soft rags.
It will be difficult to choose a high-quality pencil and polish, because there are a huge variety of cosmetic products for cars on the market, all from different companies. It makes no sense to choose based on any characteristics, since all pencils are approximately the same, but their quality depends on the methods and materials used by the manufacturer.

- Fix it Pro;
- ASTROhim Color WAX.

How to use a wax pencil
Having bought a pencil for removing scratches, you can immediately start working, because for repairs in this way you will not need special conditions, except for positive air temperature.
The work must be carried out in the following order:
- Wash the bumper thoroughly and dry it.
- Degrease the scratch and let it dry.
- Open the pencil and fill the scratch with wax. To do this, you do not need to press too hard, because even with slight pressure the wax will protrude beyond the edges. Any excess that appears must be carefully removed with a dry cloth.
- Polish the scratch with polish, following the instructions on the package.
Now you know how to remove a scratch on a bumper using a wax pencil, but don’t rush to rejoice. The effect of such repairs is temporary, since the wax will melt and wash out during the operation of the car. Even for major repairs minor scratches More serious methods will be required, which we will discuss below.
Machine polishing
A sander is an indispensable tool when repairing scratches on a bumper. One of the advantages of such repairs is the wide processing area. If several small scratches appear on your bumper at once, then a grinder will remove them in one short treatment. This polishing method is also suitable for removing shallow abrasions.
It is necessary to polish the bumper indoors so that dust does not fall on the treated area. Also important is the absence of direct sun rays, because expansion of the workpiece when heated will negatively affect the result of the work done.
Polishing a bumper is a fairly one-time task, so it makes no sense to buy a grinder. We recommend renting one, or asking friends to save money. In addition to the machine itself, you will also need:
- grinder wheels;
- № 2000;
- starting and finishing grinding paste;
- white spirit for degreasing;
- corrector with paint to match the color of the car;
- rags;
- glasses for eye protection.
How to polish a bumper with a grinder
Before removing a scratch on the bumper, remove it, wash it thoroughly and dry it. If the scratches appeared as a result of an accident, then paint from another car may remain next to them. It can be removed with gasoline or white spirit.
- Place the sandpaper on the block.
- While wetting it, clean out the scratched areas, but be careful not to rub into the paint layer.
- Rinse the bumper again, dry and degrease.
- Apply a coarse abrasive polish to the damaged area and polish with a machine. We recommend setting the speed to about 2000 per minute so as not to overheat the surface, but you will still have to control the temperature with your hand. It should easily withstand the temperature of the treated area.
- Wash and dry the bumper. If scratches in the paint are visible on its surface, then cover them with a corrector that matches the color of the car and let it dry.
- Apply final polish and sand. We recommend polishing the entire bumper so that it appears uniform. You may also have to repeat the sanding procedure several times, but here you will have to evaluate the final result yourself.
Now you know all the ways to remove a scratch on a bumper without painting. Next, we'll move on to removing more serious damage that requires partial touch-up or complete repainting.
Removing small paint chips and deep scratches
To remove such scratches, you will have to put in a lot of effort and time, however do-it-yourself repair will save you a lot of money.

To repair bumper scratches you will need:
- fine-grained sandpaper No. 1500;
- White Spirit;
- stationery knife;
- primer, paint and varnish;
- toothpicks;
- everything for polishing, which we talked about above.
Before starting work, you also need to wash the bumper from dirt and dry it. Work can be carried out outdoors, however final stage- polishing is best done indoors.
How to remove a scratch on a bumper:
- Remove stationery knife all the dirt from the depths of the chip, and also break off pieces of paint that do not adhere well to the primer.
- Clean the hole with white spirit and let it dry.
- Moisten sandpaper with degreaser and sand the surface within a radius of 3-5 cm around the chip.
- Spray the primer into a container and pick it up with a toothpick. Next, fill the inside of the chip with primer and let dry.
- Carry out the staining in the same way.
- Sand the surface again with sandpaper and white spirit.
- Apply the varnish with a toothpick so that you end up with a small bump above the chip, which must be removed with sandpaper after drying.
- Carry out polishing in the same way as described above.
Painting a defect
Speaking about how to remove a scratch on a bumper with your own hands, it is also worth touching on the topic of removing deep grooves and cracks. Unfortunately, the only way to get rid of them is by painting, so before you start work, think about whether you can handle it.
By doing the painting yourself, you spend a lot of time and effort, but you save a decent amount of money. You will have to spend money on materials:
- sandpaper No. 300 and No. 1500;
- putty for cars;
- primer and varnish;
- suitable color paint for the spray gun, but you can also buy it in a can;
- rubber spatula;
- tape and polyethylene;
- White Spirit;
- rubber gloves and respirator;
- everything for polishing.
How to remove a scratch on a bumper by painting
Repair work must be carried out in a closed, dust-free area with good ventilation. To begin, also wash the bumper and dry it. Next, start the process:
1. Take coarse sandpaper and sand the defect down to the base so that the difference at the crack site cannot be felt by hand.
2. Take fine sandpaper and sand the crack again to make the surface smoother.

3. Degrease the surface and seal the area around it with masking tape.
4. Fill the area of the crack so that the dried putty protrudes.
5. Level the surface of the putty using coarse and fine sandpaper.
6. Degrease the surface and prime it with a spray can in two layers.
7. Treat the hardened primer with fine sandpaper and degrease again.
8. Apply paint with a spray gun or spray it from a spray can in three layers. This must be done from a distance of 20 cm, moving horizontally from the right edge to the left or vice versa.

9. Apply 3 layers of varnish in the same way.

10. Polish the bumper as described above.
Conclusion
Now you know how to remove scratches on a bumper with your own hands. In order not to mislead you, it is worth saying that the final result will still be far from ideal, for example, a processed scratch may stand out under a certain incidence of light.
Also remember that to repair deep cracks on the surface of an iron bumper, you will also need a corrosion removing fluid. If you scratch an iron bumper, try to get rid of the defect immediately, as it will only increase due to corrosion.
Most car enthusiasts repair minor scratches on their cars with their own hands, which saves cash and time. Life for car owners is made easier by the fact that modern paintwork is durable and flexible, and a huge number of effective products are available for its restoration.
Removing minor scratches on a car
Do-it-yourself removal of small scratches on a car
All minor defects– scratches, abrasions, cobwebs, cracks are divided according to size and depth of damage. It can be superficial or deep - depending on the nature of the damage, a method for eliminating the defect is chosen.
Every car abounds in surface scuffs and tiny bumper marks. Without posing a threat of corrosion, such damage to the top layer of paintwork in itself is harmless, but they spoil the appearance, especially of a new one. To eliminate them, cosmetic repairs of scratches on the car are done without painting. It comes in two types:
- camouflage using special compounds;
- removing scratches from a car body by polishing.
You can fix scratches on your car by treating the surface with special restorative compounds based on silicone, wax or Teflon. The duration of action of such preparations is short; the cosmetic effect lasts from 2 to 12 washes.
 Scratches on car doors
 Removing scratches on a car body without painting can be done using a wax pencil - this is the most easy way masking surface damage that has not affected the soil. The color of the pencil is selected as close as possible to the shade of the car's coating. The area around the scratch is cleaned, and then the damage is shaded using transverse movements. The wax will fill the depression, the surface will be leveled, and the defect will become invisible. According to reviews from car enthusiasts, the masking effect wax composition remains stable after 2-3 washes. After treatment with a wax pencil, it is recommended to sand the surface with an abrasive polish. Instead of a pencil, you can use a wax-based polish; it is more durable and can withstand 5-6 washes.
Synthetic pastes are produced based on Teflon; they are more expensive, but can withstand up to 12 washes. To eliminate, the paste is rubbed into the surface, having first cleaned and then degreased the damaged area.
 Products for removing defects from paintwork
 Polishing pastes are available in several types, numbered from 1 to 4 - from coarse-grained (No. 1) to fine-grained (No. 4). Polishing can be carried out sequentially with all pastes from the first to the fourth number, changing the polishing wheel of the grinder or reducing the grain fraction of the sandpaper. Polishing wheels vary in hardness, the degree of which is indicated by color: the coarsest is white, medium is orange, soft (for finishing) - black.
Removing minor scratches on a car will allow you to update the appearance of the car with the least cost and effort.
Repairing deep damage to the body
A scratch that penetrates the car to the metal carries the risk of corrosion and is subject to immediate restoration. The principle of eliminating damage is to remove rust and fill it with special paint-cementing compounds. Removing deep scratches on a car without painting is carried out according to the following scheme:
- The surface of the car is washed, degreased, and dried.
- If the damage has become corroded, oxidized metal particles are removed: the recess is treated with a rust converter. If the scratch is fresh, it is filled with primer for better paint adhesion.
 Deep damage along the entire side of the machine
 - After completely dry The treated surface is painted over the car's scratches - paint specially designed for local repairs (for example, Touch-Up, produced in the form of a pencil) is applied inside the recess. Some car owners, in order to remove scratches from the car body, use special kits from car manufacturers, consisting of paint and varnish that are ideal for the car’s paintwork.
- When the paint and then the varnish have dried, the area is treated with abrasive polishes - coarse and fine abrasive. If possible, the surface is sequentially sanded with both compounds, but you can get by with just one.
- The last step in removing a scratch on a car is rubbing it with a restoring polish, which adds shine to the surface.
Removing chips on a car without painting is carried out according to the same scheme.
Removing scuffs on a bumper yourself
The bumper is designed to protect the car from impacts; it is the most vulnerable part that takes impacts. Occupying a central place, it is also designed to decorate the car. Repair and removal of scratches on . Paint scratch removal technology and choice suitable composition depends on plastic material from which it is made: thermoplastic, thermosetting plastic or polypropylene.
 Removing scratches on the bumper
 If many cracks and webs of the paintwork are superficial in nature and they are not clearly expressed, then to eliminate damage to the paintwork, the bumper is polished to remove scratches. Craftsmen recommend removing the part from the machine for ease of work and better results.
Polish the clean, grease-free surface of the bumper “wet-on-wet” - after wetting it with water. First, apply a coarse abrasive paste, sand with 2000 grit sandpaper, gradually increasing the speed of the grinder. When finished, wipe the surface with a dry cloth. The next step is 3000 sandpaper. Finally, treat the bumper with finishing paste or polish. The difference in polishing plastic and metal is that working on plastic requires lower revolutions of the grinder.
The next way to remove a scratch on plastic that is superficial is to use chemicals:
- wax corrector;
- auto repair enamel;
- pencil for fixing scratches;
- universal enamel spray.
First, the surface is washed and degreased with white spirit or another solvent. Then apply the selected product, if it is liquid enamel, then shake the bottle before use. After waiting until the composition “sets,” the excess is removed with a dry, lint-free cloth.

If the damage is penetrating, then eliminating scratches on the car's plastic will require local puttying and painting. The surface is sequentially sanded with P150 and P240 sandpaper, cleaned and coated with primer for better adhesion putties. Plastic putty is applied to the ground and, after drying, treated with sandpaper P110, P240, P320, and Scotch-Brite. If it is necessary to level the surface, the putty can be applied in several layers, waiting for the previous one to dry. The putty is covered with primer, painted, and varnish is applied to the dried paint.
A special feature of painting plastic parts is the obligatory application of primer under the paint layer.
WATCH VIDEO INSTRUCTIONS
Periodically repairing scratches on your car and removing deep scratches without painting is a necessary part of car care. For this, the necessary compounds, preparations and tools are sold, and the skills to carry out the work yourself will save a significant amount and a lot of time.

The Avtoscrapina company offers services in the field of repairing damage to paintwork. We use professional tool and apply modern techniques. Removing deep scratches on a car without painting is one of our main specialties. Depending on the type and severity of the damage, we will offer the most affordable, fastest and effective method eliminating it.
So if your car is scratched in your yard, near work, office, or just on the road and you don’t know what to do, contact us! We will remove scratches from your car and return the body to its original appearance!
Removing scratches on a car body without painting
Promotion: removing scratches from scrapers with a 50% discount!

The process of removing scratches from a car body
If the damage only affects upper layer varnish and has not touched the ground, it can be quite easily removed by machining LCP.
First of all, the car needs to be washed and cleaned of complex contaminants - remove bitumen stains, bird droppings, traces of gasoline, etc. Without this, you cannot begin to remove scratches on the car body: polishing on a dirty surface will only damage the paintwork. That is why it is important to protect the room from dust. IN in this case It is best to use a professional spray booth.
Then, using a special tape, the area bordering the scratch is protected. It must be protected from accidental contact with polishing paste. Only after this can you start polishing the car body.
Depending on the depth of the damage, polishing takes place in two or three stages. Each of them uses softer baits and finer grain pastes. Having eliminated the main damage, you need to remove smaller ones. The process of removing scratches on a car ends with final polishing.
It is also recommended to treat the car after repairing scratches without painting protective composition. This will consolidate the result and maintain shine for a long time.
Polishing repairs scratches not only on the body, but also on the bumper, wheels and even headlights. Working with plastic parts, however, requires the use of special pastes and more careful finishing.


Painting scratches on a car
If it is impossible to remove scratches using a polishing machine, then a much more complex technology of complete or local painting of the part is used.
The process of preparing the body for repairing deep and minor scratches on a car with paint also requires cleaning it from all visible contaminants. However, in this case, this is necessary not only to eliminate the possibility of additional damage, but also to select the right color.
If removing scratches on a car requires complete painting of the part, it can be dismantled or simply covered with other body parts protective film. The best option is selected depending on the degree and nature of paintwork damage.
At the next stage, the area to be treated is cleaned of paint residues, leveled, primed and covered with pre-selected paint. After this, it is necessary to carry out polishing to even out the color and texture of the part.
Repairing scratches on a car by partial painting, all other things being equal, is cheaper, because it involves less paint and consumables. However, performing such a procedure yourself can be problematic. After repairing scratches on the car body, the places where scratches were applied may be noticeable. new paint. This technique requires professionalism and accuracy.
However, to repair scratches on cars, manufacturers produce kits of small cans of factory paint and varnish. However, with their help it is impossible to achieve an ideal result. They are not even suitable for removing scratches on car bumpers and other plastic parts- they can be easily damaged.


Removing scratches on a car: fix defects yourself or turn to professionals?
To successfully return your car's paintwork to its original appearance, you will need:
- prepared and protected from dust;
- polishing machine and set of wheels;
- original rags;
- Consumables(paste, paint, varnish);
- a lot of free time.
Also, successfully removing scratches from a car body is impossible without a certain level of experience. To test your capabilities, you can practice on an old household appliances, unused body parts or something else.
Thus, high-quality repair of car body scratches on your own is practically impossible. Therefore, if you value your time and want to achieve good result, it’s better to sign up for service at the Autoscratch company. We remove small and deep scratches on cars at reasonable prices. We work quickly and follow technology. We always have in stock necessary equipment and consumables.
Centers with cameras prepared for removing scratches are located in North-Western Administrative District, Northern Administrative District, North-Eastern Administrative District, Eastern Administrative District, South-Eastern Administrative District, Southern Administrative District, South-Western Administrative District of Moscow. Choose the most convenient one, sign up and come!


2000 rub. Duration 1.5 hours


1500 rub. Duration 1 hour


2500 rub. Duration 2 hours


4500 rub. Duration 4 hours


3000 rub. Duration 1 hour


3500 rub. Duration 1 hour
2000 rubles. Duration 1.5 hours
1500 rubles. Duration 1 hour
2500 rubles. Duration 2 hours
4500 rubles. Duration 4 hours
3000 rubles. Duration 1 hour
3500 rubles. Duration 1 hour
High-quality repair work on the car body - important point ensuring good appearance car and preserving it high cost on the secondary market. Cosmetic repairs Every fourth motorist needs a DIY bumper, because it is this plastic part of the body that often becomes a victim of limited visibility. Removing chips and scratches from a bumper is often cheaper than buying a new bumper and painting it completely. Even if you have to use a little putty.

Working with a bumper is not much different from repairing chips and scratches on metal body parts. Modern cars Most of them have bumpers that are painted in the color of the body, which requires high-quality and careful execution of any touch-ups. Otherwise, the repair site will be too noticeable.
Preparing a chip on the bumper for painting
The ideal solution when working with a bumper is to dismantle it and install it at a convenient height - on a desktop, for example. This feature will allow you to see the chip location more clearly and perform all actions more professionally. If you don’t have the time or desire to remove the bumper, you can skip this step and prepare the touch-up area for repair work.
Let's discuss the option when the chips or scratches are quite large. In this case, paste small area around the chip with masking tape, and cover the undamaged parts of the bumper with newspaper or film so as not to spray paint on them. All you need to do is follow these steps:
- wash the top layer of paint to remove the gloss from the entire covered area of the bumper;
- use fine sandpaper and constantly apply water to it so as not to scratch the bumper;
- after this, evaluate the need for putty;
- if present, degrease the putty area with a solvent and prepare a solution;
- fill up the uneven surfaces, and then smooth the hardened solution to a perfectly smooth state.

Let the putty cool down with a sufficient amount of hardener for about an hour. After this, sand first with coarser sandpaper, then with fine sandpaper. If necessary, repeat the puttying process until the bumper surface is in perfect condition. After this, degrease the repair area again with solvent.
If you want the repair to be done well enough, you must also apply a coat of primer. This can be done using a can or spray bottle connected to a compressor. It is necessary to apply the primer in a small layer, moving the paint source 12-15 centimeters from the bumper.
Painting a bumper repair area
When the soil is dry, grade it perfectly flat surface. If difficulties arise during the application of the primer, drips or unnecessary spraying have formed, simply wash the primer using the procedure described above. This way you can bring the surface to perfect condition and completely avoid problems after the final painting.
To paint, you will need a spray can with a perfectly matched paint color or enamel purchased after computer selection, as well as car varnish with which the paint is mixed. If varnish required composition no, you can refuse to use it. The procedure for painting the bumper is as follows:
- check the uniform operation of the paint spray source on any flat surface;
- if all is well, move on to painting the bumper;
- the sprayer should be kept at a distance of 8-11 centimeters from the bumper;
- all movements must be quite energetic and uniform;
- make sure that the paint does not get on parts of the bumper or car body that do not need repair;
- After painting, give the parts a few hours to dry completely.

This is the easiest way to apply car enamel to a bumper. Plastic has its own peculiarities in the perception of paint, so often such repairs do not provide long result. If the damage is deep, such local repairs may not cope with the assigned tasks.
Because if there is too severe damage It’s better to go to a service center and entrust the work on your car to specialists. This will help you get much more beautiful results and permanent correction of defects on the bumper.
What to do if the chips on the bumper are small?
If there are small chips or shallow scratches, simply fill them with paint. Of course, in the case of scratches, the result will not be as pleasant as you might expect. The scratch will still be visible, but will not be as noticeable as without painting.
Chips can be repaired quite simply only if the damage does not reach the plastic base. In this case, the repair procedure will be simple:
- rinse and dry the chipped area, and also degrease it with a solvent;
- take some enamel that matches the color (the similarity of the paint will play a major role here);
- use a small artist's brush or even a match;
- Apply a drop of paint to the chip and wait a little until it spreads completely;
- after that, using a brush, match or other selected tool, level the enamel as much as possible along the chip recess.

This may seem like jewelry work, but in reality there is nothing complicated here. If you inadvertently drip paint onto other body parts that you did not intend to repair, just take a rag soaked in solvent and wipe off a fresh drop of paint.
Sometimes it is enough to polish with abrasive automotive chemicals to completely remove shallow scratches on the paint.
Of course, if the bumper is cracked, then it will have to be repaired by specialists, for example, as follows:
Let's sum it up
Before starting body repair work, determine whether less serious means can help you. For example, a good professional polish can be an excellent alternative to repairing some scratches. Also, do not immediately carry out deep repairs to the damaged area. Perhaps simple steps with a drop of high-quality enamel can solve your problem.
When performing repairs, remember that the quality of the result depends on the level of the materials chosen, as well as on the professionalism of the actions performed. If possible, body work should be performed by specialists or under their supervision. Does anyone have experience doing body work in a garage environment?