Snow slide, make a snow slide with your own hands. How to make a winter slide for children at the dacha
Read also
All children are looking forward to winter. After all, this time of year brings with it a lot of entertainment and fun. New Year holidays- not all that the cold season has to offer. Ice skating and skiing, throwing snowballs, exciting sleigh rides - all this and much more is given to us by the generous winter season. If you want to give joy to yourself and your loved ones, learn how to fill a slide.
You will need:
- Shovel;
- Bucket;
- Watering can;
- Warm gloves;
- Latex gloves;
- Wooden plank.
Engineering survey
- First, take a look at the area where you plan to place your homemade attraction. Of course, the longer the track, the more fun it is to slide down it.
- In order to fill correctly ice slide, remember: the slope should not be too steep. Ideal ratio height and length – 1 to 4.
- In addition, it is necessary to equip the so-called “roll-out”. This is a flat area on which sliding will continue. It should be about one and a half times longer than the inclined surface.
Construction technology
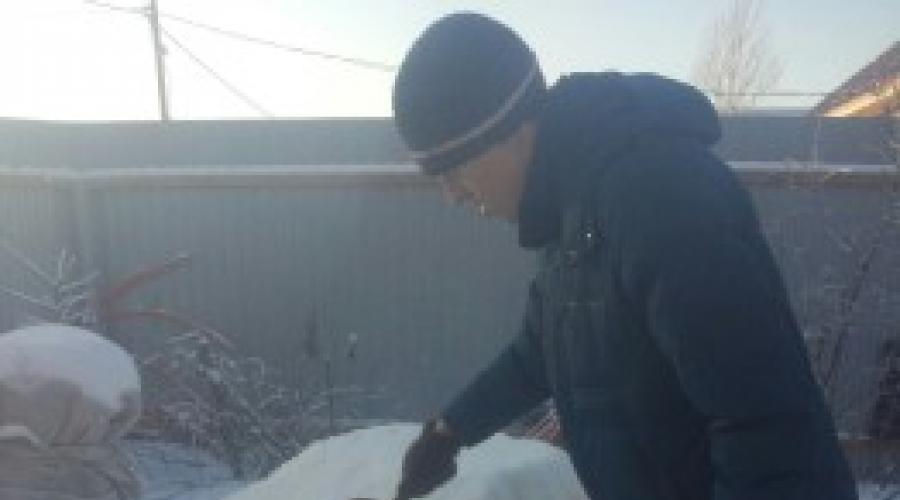
- When pouring the slide, put on warm gloves and thick rubber gloves on top.
- It is best to wait until it thaws, then it will be easier to work. Roll snow balls and lay out a base of them according to pre-prepared dimensions.
- Before filling the slide, you need to take care of the ladder along which you will have to climb to the hill. It can also be made from similar lumps. Make and lay wide steps.
- Thoroughly compact the surface with a shovel.
- It is better to fill the ice slide when it starts to freeze again. This should be done warm water. You can use a garden watering can to distribute the liquid evenly.
- You may notice some bumps and indentations appear. They need to be patched up. Use diluted snow cold water, apply it with a regular spatula.
- From snow mass curbs need to be built. This will make the entertainment safe.
- Once you are able to properly fill the slide, take a flat board and run it across the surface to get rid of any remaining unevenness.
Now is the time to invite the neighborhood kids, who will be happy to test the device’s strength. It seems that it will not be difficult for you to fill the slide yourself. Of course, you will have to spend several hours at work. However, until spring you will be able to have a fun and active holiday without leaving your own yard.
Winter is just around the corner, and for kids it's school holidays. Any parent wants their child to have fun and useful time during this period. Of course, walks are also important for children and adults. fresh air and family leisure. To prevent them from turning into a boring pastime, you can entertain yourself. For example, build together with children snow slide, after which it’s fun to ride with it. We will tell you how to do this in this article.
snow Hill
Since ancient times in Rus' it was customary to ride down the hills on a sleigh. This was a favorite pastime for both old and young. Those who live in hilly or mountainous areas are lucky, just wait for snowy weather and the slide is ready. And most importantly, you don’t need to make any effort. Well, if there is no hillock near your house, or you live in apartment building You can build a slide yourself. We'll tell you how to do this later.
DIY snow slide
Making a slide with your own hands is not that difficult. For this you will need:
- prepared site;
- snow;
- several shovels;
- water.
First, you need to choose a place for the future slide. It is best to place it on open area further from the roads. This is primarily a matter of the safety of the children themselves. If necessary, clear the area of debris. The size of the slide is also important; a small slide will be uncomfortable for children to ride, while a very large one may not be safe for children. The height should be comfortable and preferably below the height of an adult. This will make it more comfortable for you to monitor and help your child. It is best to make the length 5 m, this is the most optimal length. The shape of the slide is also important.
Show your imagination and make it with a twist, or decorate it with an arch at the top. Children will have a lot of fun riding on a custom slide. The place has been marked, now you need to throw the snow in the shape of the slide and compact it. Everything must be done evenly and in several stages. The angle of the slide should be from 30 to 50 degrees. The slope angle can be adjusted by adding material. If the slide is intended for small children, then it must be made flat from the very beginning of work. For convenience, it is necessary to provide steps along which children will climb the slide. To prevent them from slipping, you can lay them out with planks. Along the length of the slope itself, you can make a small side of snow to prevent children skating from falling. After completing the main work, it is recommended to fill the slide with water. To do this, you can take a bucket of water and gradually water it starting from the steps. Then let the water freeze and repeat the procedure several more times until the surface becomes smooth. If cracks and holes appear on the slope during the pouring process, they must be filled with snow and watered. After this, it is recommended to leave the slide overnight, during which time the water will freeze and in the morning the children will be able to slide down it.
How to make a snow slide
Making a snow slide is quite simple. This will require a minimum of equipment, just a couple of shovels, pieces of plywood and snow. The snow slide has a number of positive aspects:
- Children can be involved in the work, regardless of age;
- no material costs;
- pliable material gives great scope for imagination;
- the ability to add new elements at any time.
There is only one drawback - it's seasonality. The slide will delight everyone only throughout the winter. The main thing is that adults and children can show their imagination and create something original. To simplify the work, you can build a frame from pieces of plywood. Secure them firmly and cover them with snow. Having made the descent and steps, you should take care of safety. Make sides along the edges of the slope and provide small handrails for ease of climbing the slide. After which the entire slide must be covered with water to form an ice glaze. It will give strength to the entire structure. Most upper platform structures can be covered with plywood for convenience and safety. After which you need to wait until the next day and you can safely begin testing.
How to fill a snow slide
It would seem that it could be simpler to fill a snow slide with water. But, even here there are some nuances, the implementation of which will significantly simplify the work. For correct filling The following rules must be observed:
- you need to protect your hands from cold and moisture, for this we wear warm gloves and rubber gloves on top;
- It is best to fill the surface in frosty weather;
- It is best to fill it with warm water, it will harden faster.
It's not all that difficult. For pouring, it is best to use a regular garden watering can. With its help, the water will be more evenly distributed over the slide and the surface will be smoother. This process is quite labor-intensive. But a few hours of work are worth the happy children's eyes and ringing laughter. This will be the best reward for your efforts.

Snow slide
The snow slide can be made in different shapes and size. For example, you can build wooden frame with two descents. One steeper and longer for adults and older children, and the other with a lower angle and length of descent for children. After which the frame is filled with snow and the slide is ready. This structure will be strong and safe. And most importantly, it can be used in the warm season. Place sheets of tin or other sliding material on the slopes for the amusement of the children.
If you have imagination and free time you can build a slide for children with arches in the form of a log cabin. This slide has several descents. Children will have a lot of fun riding this slide. The main thing is that they will have a fun and active time.

If desired, you can beautifully decorate even the most ordinary mountain. For this you will need paints and brushes. On the side surfaces of the slide you can draw Christmas trees, snowflakes and winter birds (for example, a bullfinch). Such simple patterns will appeal not only to children, but also to adults. Kids will have fun sliding down the slide and admiring the drawings on the way up. As you can see, making a slide is quite simple, and with a little imagination you can make even the simplest model beautiful.

This article talks about snow slides and how you can build them with your own hands. Advice is given on filling the resulting structure with water. Describes how you can arrange appearance structures. Using the advice in the article, you can quickly build a safe slide for children using available materials. Fill it with water correctly and, if desired, decorate it in an original way. Good luck with your work.
Sledding, skiing, skating and others fun entertainment winter opens up for us. To give real joy to your own children, you should figure out how to properly fill a snow slide. Let's try to understand this issue.
Choosing a place to build a slide
Before answering the question of how to properly fill a slide, let’s find out in which places it is best to form it. It is recommended to choose safe areas. It is advisable that the slide be located away from trees and bushes, roadways, all kinds of drains and sewer hatches, deep ravines, and other objects that can cause injury during the descent.
It is better to choose a spacious area. The higher the slide is planned to be built, the more free territory should be available. Of course, going down a high, massive slide, the slope of which is made with all sorts of turns, will be much more fun.
Slide size
The width and height of the future structure will depend on the available amount of snow, your own reserves of strength and patience. If you plan to make a slide for very young children, don’t get too carried away. For the little ones, it will be enough to build the most modest in size. So what should the dimensions of the slide be? As practice shows, the optimal ratio of the height of the structure to its length is 1:4.

How to properly fill a snow slide with water? In addition to the descent itself, you will need to create a rollout. The latter is a flat, trampled and icy territory, along which sliding will continue for some time until it comes to a complete stop.
Tilt angle
When trying to figure out how to properly fill a snow slide, you should not make the descent too flat or, conversely, too steep. An inclination of 30-50° is considered ideal at the top point. Next, the height of the descent must be gradually reduced, trying to make the slide evenly flat until the very end.

How to build a slide?
It is convenient to build a slide using large balls of snow prepared in advance. The latter must be laid tightly together, and all gaps must be filled with a shovel. The resulting mass of snow must be compacted thoroughly. The result will be a base on which it will be convenient to create a descent, railings, and other elements.
steps
To make the slide convenient for both children and adults, you should take care of creating steps. They need to be placed on the highest side of the structure. The optimal width for steps will be from 40 to 50 cm. This will allow people with the most advanced skills to climb the hill comfortably. different sizes legs. On the sides of the steps you can make low sides, which will be easy to grab while climbing.
How to properly fill a slide with water?
Now let's move directly to the issue of filling. Before starting the procedure, you need to let the slide stand for several days alone. This will allow the frame to compress and become as strong as possible. Thus, the snow structure will not fall apart after the first ride.
How to fill a slide correctly? It is necessary to carry out such work when there is severe frost outside - from -20 ° C. Otherwise, the shape of the structure may “float”. The optimal time for filling the slide with water is considered to be in the evening, when the sun has already managed to hide behind the horizon.

People who are well versed in how to properly fill a slide with water recommend first walking along its surface, spraying small drops with a spray bottle. After a few hours, the structure will be covered with a thin ice crust, which will allow the main pouring to begin.
It is convenient to water the slide with water from a watering can. This should be done slowly. Indeed, with a large flow, there is a risk of large gaps forming in the thickness of the snow. Oddly enough, the water should not be the coldest. Using barely warm water, you can get it perfect much faster smooth surface. If, with this solution, voids form on the surface of the snow, they should be immediately filled with slurry from snow, leveling with a piece of cloth. If you leave such shortcomings unattended, you can get scratched or tear your clothes when riding on the jagged edges.
How to properly fill a slide at the descent point? To do this, you need to mix snow into a container of water. The resulting slurry must be laid out on the descent, leveling construction spatula. For safety, it is worth building curbs along the entire length of the slope and processing them internal surfaces the same way. Then you can leave the slide alone until the ice layer completely hardens.
After complete freezing, the structure can be doused with water again. Then you should walk along the descent with a polished board. As a result, the slide will become even more slippery and smooth.
Finally
Using the above recommendations, it will not be difficult for an adult to build a slide and fill it with water. The main thing is to show imagination and do the work carefully. Naturally, it may take a whole day or even more to implement your plans.

However, the effort spent will pay off in spades, because with the help of an ice slide, children will be able to have fun from the beginning of the first frost until spring, without leaving their own yard. By the way, it will be possible to descend from such a home-made structure not only in warm clothes, but also on rubber mats, cardboard and even a sled.
Sledding down a hill, skiing and skating, building snow castles - these are not all the entertainments that winter gives a child. If parents want to give their child real pleasure, then they definitely need to learn how to make a snow slide in their yard.
Snow slide: making a winter attraction
To build a snow slide you just need a little ingenuity, a free flight of imagination and a couple of available tools that are sure to be found in every home.
Tools:
- metal or plastic shovel;
- scraper, construction spatula;
- spray;
- buckets and watering cans.
Usually, to build a full-fledged snow slide, a small shovel is enough, which will help form the basis of the future structure, as well as several spatulas for leveling the surfaces. A metal or plastic bucket and a pair of warm mittens will come in handy. However, depending on the complexity of the work, conditions and circumstances, you can use any other convenient one at your own discretion.
Engineering and Safety
Figuring out how to make a snow slide is not at all difficult. However, before you begin, you need to pay attention to some “engineering secrets” that will help make the structure stronger, safer and more durable.

- First, you should choose the optimal location to place your homemade attraction. Naturally, the longer the slope, the more fun the ride will be.
- In order to avoid problems with filling and freezing of water, it is better to make the slope of the slide more gentle.
- To protect children from injury, it is necessary to arrange a rollout onto a flat area, the plane of which will ensure uniform sliding until it comes to a complete stop.
How to make a snow slide: construction technology

Before you begin specific actions, you need to protect yourself from frostbite by protecting your hands tightly and, if necessary, wearing warm mittens on top.
Optimal conditions for building a snow slide come with the arrival of a thaw. As soon as the temperature gets as close as possible to zero, and the snow becomes more tenacious, it is necessary to roll large balls, laying out from them the base of the future structure, according to the planned parameters and dimensions.
How to build a snow slide that will be comfortable and safe for a child? To do this, you need to take care of preparing a ladder that will help you climb to higher ground without any problems. You can make an impromptu ladder from the same snowballs laid in the form of steps. Smooth surface steps can be easily formed using a spatula or scraper.
It is better to fill the snow slide with the arrival of severe frosts. Moreover, this should be done by evenly watering the surface of the slide with warm water from a watering can. In this case, small depressions may appear that will have to be slightly patched with snow and smoothed with a spatula.
Parents who know how to make a children's ice slide correctly never build it without curbs. This allows you to increase the safety of the structure and leave the kids alone to have fun without fear for their health.
Secrets of creating a route

Having familiarized yourself with the basic recommendations on how to make a snow slide, you can move on to studying the technology for creating an ice path. First you need to compact it thoroughly snowballs, forming a smooth, dense surface of the future descent. You can compact the surface with your feet, a shovel, a small log, or any other available means.
The angle of descent should be done based on the age of the children. For children under 3 years of age, the angle of the inclined path should be no more than 30 degrees. Parents who want to learn how to make a snow slide for older children should be advised to make the descent steeper, otherwise the children may quickly get bored with the fun.
Preparing the Base Ice Layer

The first layer of ice is the most important start when building a snow slide. His correct formation becomes the key to creating ergonomically thought-out descents, adjusted slopes and turns.
It is convenient to create a base layer of ice using a regular home sprayer for spraying plants. The water in the spray bottle should be warm. Otherwise, the slope will freeze too quickly, resulting in uneven areas. The first layer of ice crust should freeze for at least an hour.
How to make a snow slide with your own hands? Filling with water
It is convenient to pour the main layer of water to form a full-fledged ice slope using a small bucket, or better yet than a regular one. The water in the container should, again, be warm, this will make the surface of the descent smoother. However, you need to try not to overdo it, because when filling the slide, you can frankly throw all your efforts down the drain.
In order for the surface of the descent to be completely seized by a strong ice crust, children should not be allowed to descend until the next morning. To finally secure the surface, it is necessary to splash several buckets of water onto the slope of the structure early in the morning.
Eventually

How to make a snow slide for a child? When performing such a task, the main thing is to have a reserve of strength and time sufficient to form a full-fledged snow mountain.
In order not to fly off the slide, it is better to make the descent in the form of a groove with strong, high curbs. Similar to the descent, the surface of the curbs must be evenly doused with water from a watering can, bucket or hose.
Once you find out how to build a snow slide, you will probably want to make such a structure in your yard. If you also involve others in this process - parents and children, then you can turn the construction of a slide into quite an exciting event. As soon as the slide is completed, you can safely convene neighborhood kids from all over the area, who will happily test the structure for strength.
Usually filling a small snow slide on our own, even without outside help, is not difficult. Depending on the number of participants at the event, the work may take from several hours to several days. However, the work expended will not go unnoticed. Until spring, children will be able to have fun and spend time in the company of their peers without leaving their own yard.
In our online store you can purchase winter wooden slides - they are stronger, safer and more durable than snow slides. The slides we offer have GOST certificates, a durable prefabricated design and good protection from rotting and dampness. And, unlike handicraft products, every detail wooden slide processed on all sides, the edges and edges have a rounded shape, which eliminates the possibility of getting a splinter or injury.
So, after purchasing and assembling a winter slide, you need to turn it into an ice slide, how to do this?
We place the slide so that later the rollout of the slide can be extended to the desired length. Cover the slope and sides of the slide with wet snow and connect bottom part slide slope with soil, compact it and leave to harden. At this time, we extend the rollout - we compact the snow along the trajectory of movement and sculpt sides from the snow. When everything freezes, we begin to fill the slide with water. 
We are expecting significant subzero temperature, pour water into a water line with a sprayer and water the slope, sides of the slide and roll-out with water. The main thing here is not to keep the watering can in one place for a long time, so as not to wash away the snow and the previous layer of ice. When one layer hardens, pour the next one, and so on until the required density and thickness of the ice is achieved. And leave the ice to harden overnight.
Please note that the steps cannot be filled with water - to ensure safety they must be clean and free of snow.

In the morning we polish the ice. To do this, pour half a bucket hot water, pour snow into it and stir until it becomes a homogeneous paste. Then we take a plastic spatula and cover all the holes in the ice; We also take care of the ice when further exploitation. Let's do finishing fill from the watering can and after the ice has hardened - that’s it, you can skate. After children slide down the ice slide 10-15 times, the ice will polish and become slippery. Have a happy winter!