Download download manager for windows 7. Choosing a download manager: which one is better
Read also
There are quite good options for personalizing the Start screen, but in Windows 8.1 they have expanded even further and allow you to customize almost all its aspects. The new release has increased the selection of colors and patterns, including animated ones, and there are some less obvious improvements that are worth knowing about.
Patterns and colors
The most obvious customization options are available right from the start screen. Just click “Settings” and select “Personalize”.
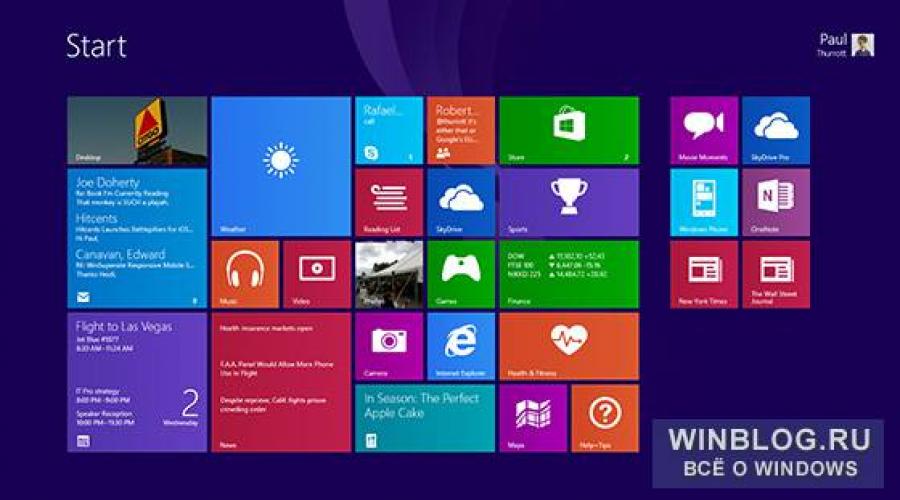
Everything works almost the same as in Windows 8, but there are many more possibilities. There are twenty options available in the list of background patterns, including six animated, twelve static, a blank background (matching the background color), and Desktop wallpaper. The choice of background and foreground colors is also very wide, especially compared to Windows 8. Together, this allows you to completely customize the Start screen to your liking. Here are some examples where only the pattern, background and foreground colors are different.


Tip: if you expect to frequently switch between the Start screen and the Desktop, you should use the same background for them - this will soften the harshness of the transition from one interface to another.
Tiles

Consolidating administrative utilities. Administrators and old-school IT pros will appreciate the ability to pin administrative tools to the Start screen. To do this, click on the Settings charm on the start screen and select Tiles.
Turn live tiles on and off. The main advantage of Windows 8.1 in general and the Start screen in particular is the ability of tiles to update and show relevant information in real time. However, some would prefer to do without it - and they have such an opportunity. To turn off updating for one or more tiles, select them and select the “Turn Live Tile Off” option in the panel that appears. You can turn updates back on in the same way, just keep in mind that some tiles simply are not dynamic.
Replacing the Home screen
Desktop users may want to replace the Start screen with the Applications screen, which shows a static but full list everyone installed programs. As I already said in the article “”, this can be done in the properties of the taskbar, on the “Navigation” tab. Required option It's called "Show the Apps view automatically when I go to Start." If desired, the list of applications can be sorted by category to make it even more convenient.

Setting up synchronization
Using account Microsoft (as it is designed) Windows 8.1 automatically synchronizes a lot of settings, including the Start screen, so that all computers can work in a familiar environment. It's worth exploring these settings because not all Home screen settings are synced by default.
Home screen sync settings can be found under PC Settings | SkyDrive | Synchronizing settings" (PC Settings | SkyDrive | Sync Settings).

The following options are available:
“Sync your settings on this PC”. This option must be enabled in order for settings to be of this computer synchronized.
“Start screen”. When this option is enabled, tiles and their placement are synced across all computers. By default this option is disabled, but if you enable it, curious side effects. Let's say modern applications that are not installed on the current computer may appear on the start screen, and if you click on the tile of such an application, it will be automatically installed.
"Performance" (Appearance). By default, this option is enabled and is responsible for synchronizing the pattern, background and foreground colors of the Start screen (as well as other settings not related to the Start screen). If you prefer to use different settings on different computers, it is better to disable this option.
| Materials |
This article will talk about how to add tiles in Windows 8.1 or how to remove extra tiles in the Modern or Metro interface. Not every user uses the Modern interface. For example, I haven’t been able to get used to it for a month now, or maybe I just don’t want to, because I’m used to my native seven. But perhaps someone is using Windows 8 tiles. This article is actually intended for such a user.
The new interface has a lot of unnecessary tiles that can easily be removed and shortcuts added in this place necessary programs. Use built-in Windows programs 8 is somehow not very convenient. For some reason, there is a feeling that they are somehow underdeveloped or specially made this way, something like a rebus that must first be solved and only then used. I would like to give an example from my own experience of using the music player tile. So I launched the mp3 file and the music seemed to start playing, but I still couldn’t figure out how to turn it off. Not finding a button to turn off the music (oh, what kind of player is this that doesn’t have play or stop buttons, maybe it works by the power of thought, damn I didn’t think about that, I’ll have to try it), I decided to use the most reliable method and stupidly restart the computer. And what would you think? Yes Yes Yes! I almost jumped out of my chair, the music continued to play as if nothing had happened, it didn’t even think about turning off. I don’t remember how I stopped it (apparently I was in a trance state), but after that I decided not to use the built-in tile applications anymore but to install regular programs like AIMP and ACDSee and to make it more convenient to launch them, I needed to configure the tiles.
So, let's look at how to remove unnecessary tiles. Open the “desktop” (damn, the name “Metro” or “Modern” infuriates me, I’ll call it R12 in the old fashioned way; desktop (after all, it’s a desktop?)), and select the first “square victim” that we will remove. Yeah, there you go! We remove the camera. I use ACDSee to view photos (or you can install FastStone, there are many different viewers). To do this, right-click on the tile we need.
A simple panel like this should appear at the bottom. Find the icon called “Unpin from Start Screen” and left-click on it.

That's all! The tile has been removed. We see empty place in place of the camera. By the way, you can add any tile you need there.
To consolidate the material, we will perform this procedure again. This time we’ll put away the notebook (of course I need a notebook, but I’m willing to sacrifice it to consolidate the material). Also right-click on it
And in the panel that opens, left-click on the icon with a hairpin (I forgot what this garbage is called correctly)

We see that the notepad has been removed from the “Home Screen” (here it turns out that the “Modern” interface is called correctly in Russian)
Well, we have learned how to remove tiles from the start screen, now we will learn to add the necessary tile programs, i.e. tile-shaped labels.
To do this, on the home screen, click on the down arrow, where all the programs are located (of course, they can be launched from the bottom screen, but this is not very convenient, so we will transfer them to the top screen)
Here we see all the programs installed on our computer. Select the one you need. I chose “Eset Nod32” that came at random (although I don’t really need it there, but whatever you do for the sake of an example). Right-click on it and in the panel that opens at the bottom, left-click on the icon that says “Pin to Start Screen”
We look at the initial screen and see the Eset Smart Security label square.
We add other programs in the same way. I chose the Yandex browser shortcut. Also right-click on it
And in the bottom panel select R12; “Pin to Start Screen” (the caption speaks for itself)
We look at the start screen and see the tile we added
This is how we set up the initial screen.
You can also freely move tiles from one place to another simply by clicking on it with the mouse and rearranging it to any other place.
If you no longer have enough space, you can customize their size. For example, if you often use some programs and less often others, then you can make them larger or smaller. To do this, again right-click on the tile we need and in the bottom panel click on the “Resize” icon
will appear additional window with size options. IN in this case two options (for other icons there may be three options, in my opinion three options are only for built-in Windows programs 8.1). We choose small.
We see that it has become two times smaller. This way you can place who knows how many tiles on the home screen.
This is where I’ll end this article. If you have any questions or suggestions, you can add something to it. Leave your comments.