Restoring an old cast iron bathtub! Restoring enamel on your own. Restoration of a metal bathtub. Useful tips and choice of materials How to update an old cast iron bathtub with your own hands
Read also
Liquid acrylic is a modern material with which you can perform high-quality bathtub restoration with your own hands. It consists of a base having a fairly high density and a hardener. Can be used for the restoration of steel, cast iron and acrylic bathtubs.

Materials and tools
To restore the bathtub, you will need bulk liquid acrylic, cleaning and degreasing products for plumbing fixtures, and soda. Please note that liquid acrylic is sold in containers designed for bathtub sizes - 1.2, 1.5 or 1.7 m.
You need to prepare a tool for work:
- grinder;
- drill;
- whisk attachment;
- pliers;
- sandpaper of various grain sizes;
- rubber spatula;
- respirator;
- vacuum cleaner;
- sponge;
- gloves;
- flashlight.

When using a drill to sand the surface of the bathtub, you will need a special attachment.
Note: a hair dryer and a utility knife will be useful for removing non-factory enamel if the bathtub has already been restored with it.
You also need polyethylene to protect the floor and walls (you can use rags or newspapers).
Preparing the bath
The appearance and service life of the applied coating will depend on the quality of preparation. First, the overflow and drain are removed. Using a grinder or a drill with a grinding attachment, you need to carefully treat the surface of the bathtub. For this purpose, sandpaper for rough work 40-N or 32-N is used (according to GOST 3647-80). Emery will also help remove any water deposits that have formed. The surface after sanding should be rough to ensure good adhesion of liquid acrylic.

Note: non-factory enamel, previously applied to restore the bathtub, is removed with a utility knife after heating with a hairdryer.


The bathtub needs to be cleaned and any remaining debris removed. Then the surface is treated with a plumbing cleaner - the poured product must be spread with a sponge over the entire surface of the bathtub, including the installation location of the removed overflow.


The bath is washed again and left to dry. After drying, the next important stage of work begins - degreasing. Soda is poured into the bath and thoroughly rubbed over the entire surface with coarse sandpaper.

Perhaps degreasing will need to be done not once, but two or three times. You must work with gloves. Then the bath is thoroughly washed with a stream of water from the shower.

Before starting the next stage, you need to remove the siphon.

The installation site of the siphon must be cleaned, degreased and rinsed from soda residues.

The mixer and shower are covered with a bag and secured with tape - water should not get on the applied layer of liquid acrylic until it dries completely. The tiles and shelves above the bathtub are cleaned of dust particles with a cloth. Do not allow sanding dust to get on the acrylic.


After completing this stage, the bath should be thoroughly dried with a hairdryer. Particular attention is paid to places where water can collect: the joints of the tiles and the bathtub, under the side, which is installed at the junction of the tiles and the bathtub. It is better to remove the rim and carry out the restoration of the bathtub without it. The cement joints at the junction with the bathroom can be dried well with a hairdryer.


To eliminate defects in factory enamel (cracks, chips), use quick-drying automotive putty.

The composition is stirred and applied to the damaged areas with a rubber spatula, after which it is allowed to dry.


While the putty dries, cover the floor under the bathtub and the tiles at the joints with polyethylene or newspapers, which are secured with tape.

This way, when pouring liquid acrylic, it will not spoil floor and wall tiles.
After the putty has dried, these places are covered with fine sandpaper. Use a vacuum cleaner to remove dust particles from the bathtub.

Use a degreasing agent (acetone) to wipe the areas where cracks and chips have been putty. You should also wipe the installation areas of the overflow and siphon with acetone. Place a container under the drain hole (you can use a cut plastic bottle). Excess liquid acrylic will drain into this container.

Coating
After completing the preparatory work, they begin to prepare liquid acrylic. The hardener is added to the material in parts and thoroughly mixed using a drill with a whisk attachment.
It is necessary to achieve complete mixing of the two components, not forgetting about the material in the corners and at the bottom of the jar with liquid acrylic. Otherwise, the layer of applied acrylic will dry unevenly. You need to stir the mixture for 10 minutes.
Important! Do not forget about the pot life of the finished mixture, which is indicated on the packaging. During this time, you need to completely complete the work.
Before pouring the composition is allowed to stand for 5-10 minutes. To work, you will need a plastic container into which acrylic is poured. You can use a trimmed and well-wiped hardener bottle. The work is performed wearing medical gloves.
Note: adding coloring paste will allow you to obtain the desired color of the composition. Color paste by weight should not exceed 3% of the total mass of the composition.
The composition is poured around the perimeter of the bath from top to bottom.


Going lower, help yourself with a rubber spatula, which is used to rub the acrylic into the surface of the bathtub. Having achieved complete coverage with liquid acrylic, use a spatula to make zigzag movements along the bottom of the bath. Then the composition is leveled with even movements from the wall towards the drain.


The bath is left for 5 minutes. Turn off the light and use a flashlight to check the surface of the bath for defects or irregularities (smudges) that need to be leveled with a spatula.


Important! Air bubbles may have formed when mixing the composition. To remove these bubbles, the surface of the bath is quickly blown with a hairdryer at low speeds.
After 10 minutes, use a flashlight to check the surface again. The bathtub can be used 24-48 hours after complete drying. Until this point, the bathroom must be closed. The drying time of the composition depends on the technical characteristics of the material and the temperature in the room.
Note: Some modern liquid acrylics take 12-16 hours to dry.
Result of the work
As a result of the work done, you will receive a completely restored bathtub with a beautiful appearance, which is guaranteed to last at least 10 years. After each use, the bathtub should be washed with special acrylic care products, dishwashing detergents or liquid soap.
Advantages and disadvantages
Advantages of bathtub restoration with liquid acrylic:- long service life;
- beautiful appearance;
- smooth surface;
- excellent performance characteristics, primarily mechanical strength;
- possibility of repeated restoration in the future.
The disadvantages of this technology include:
- the long time required for the surface to dry completely;
- a specific smell when applying and drying liquid acrylic;
- the need to purchase bath care products.
Tricks at work
A high-quality bathtub surface will be obtained by applying the composition in an even, thick layer. Acrylic should flow down on its own. Determine by eye the middle of the side slopes and pour a second portion of the composition onto them. The remaining material is poured to the bottom. This way the entire surface of the bath will be covered with a thick layer of acrylic.Ecology of knowledge. Estate: Restoring a cast-iron bathtub can give an effect no less high-quality than would be the case when replacing an old bathtub with a new one. Let's take a closer look at how to update an old bathtub and why it's worth doing it.
After using the plumbing fixtures for a long time, the question arises: “how to update the bathtub so that it becomes beautiful, clean and durable again?”
The simplest solution to the problem is to purchase new equipment. Naturally, this option will save effort, but its implementation will have a negative impact on the budget. A worthy alternative would be to independently update the surface of the bathtub.
To do this, it is enough to understand the basic methods of carrying out the procedure and purchase the necessary material for repairs.
Choosing a restoration method
How to update an old bathtub with your own hands? To do this, you can use one of the following methods: enamel restoration, installation of an acrylic liner, or filling with liquid acrylic.
Before giving preference to one of the restoration methods and getting to work, you should assess the condition of the product itself. The choice of method for updating it depends on the degree and type of damage.
The main reasons for bathtub restoration:
- The enamel lost its shine, became dull, rough, dark spots appeared, and the paint peeled off. Re-enamelling the surface will help solve this problem.
- The product has rust that cannot be removed; cracks and chips have formed. An acrylic liner or restoration using the “fill-in bath” technique can repair the damage.
- The steel bathtub began to cool quickly, and a loud noise of water being poured was heard. Such a product can only be updated by installing an acrylic liner.
- Severe deformation of the bathtub body, large chips and cracks, new pipes not matching the drain holes. In such a situation, there is only one way out - replacing the equipment.
No restoration technique can restore the aesthetics and functionality of a bathtub.
Of course, the choice of method is also based on the material from which the product is made. Acrylic bathtubs are perfectly refurbishable.
Using a special polish you can remove scratches and minor defects. And liquid acrylic and special repair compounds can repair even such serious damage as chips and through holes.
Renewal of steel and cast iron bathtubs is carried out using one of the above-mentioned methods, depending on the extent of the damage. Repair is especially important for cast iron structures, as they have a long service life while remaining very durable.
Bathtub enamel
The enameling process is a fairly simple procedure that allows you to update the appearance of the product. From a financial point of view, this method is considered the cheapest.
In addition, during restoration you can significantly save on the services of craftsmen, since even a person who has not done this before can enamel a bathtub himself.
Preparation for enameling
Before directly covering the bathtub with a new layer of enamel, it is necessary to carry out preparatory work. Their goal is to create a surface that provides the best adhesion between two materials.
Initially, you need to clean the bathtub of old enamel. To do this, its surface should be thoroughly cleaned with an abrasive stone, sandpaper or a grinding machine using cleaning powder.
Then the abrasive chips and soap film should be washed off with water. It is important to widen all cracks and chips with a working tool. After this, the surface must be degreased.
To remove the degreasing layer, you can pour hot water into the bath and leave for 5-10 minutes, then drain and wipe with a cloth. The result of the preparatory work should be a dry, smooth and slightly matte surface.
Before updating the bathtub by applying enamel, you need to unscrew the drain and overflow, remove the gaskets, and clean the product from dust using a vacuum cleaner.
Enameling process
You need to dilute the enamel in a container by mixing the base with the hardener. Apply the composition with a brush from the edges to the bottom of the bath. The first layer is a primer, it is important to carefully level it with alternating vertical and horizontal movements.
The second layer, and, if necessary, subsequent ones, are applied after 10-15 minutes in a similar way.
Surface painting work should be carried out as carefully as possible. Its service life depends on the quality of enamel application.
If bubbles form on the surface during the restoration process, they must be removed with a brush. Otherwise, in this place the new layer will come off immediately after drying.
Having completed the enameling procedure, you should check the condition of the product after 15 minutes. Smudges formed on the coating can be easily removed with a brush from bottom to top. After the new enamel has completely dried, which will take at least 4 days, the product can be safely used.
An updated bathtub can last about 5 years if the operating rules are strictly followed.
Caring for a renovated bathroom
After restoring the product, you should follow the recommendations for caring for it, since updating the bathtub is only half the battle. If you ignore the rules, the new coating will very quickly fail and lose its original appearance.
After enameling, the bathtub cannot be cleaned with products containing acid or aggressive chemical compounds. For this purpose, you can use soap solutions and dishwashing detergents.
You should not wash in a bathtub using bleach; it is highly undesirable to soak colored laundry in it.
Bathtub restoration with liquid acrylic
Liquid acrylic is a modern restoration material that allows not only to eliminate aesthetic defects, but also serious damage. This technology has a number of significant advantages.
In order to update an old bathtub with acrylic, you do not need any special skills; just follow the instructions. The newly created coating is very durable and can withstand even mechanical stress.
The water in the updated bathtub will cool more slowly than in a cast-iron structure.
Acrylic does not change its appearance over time, the coating does not darken, and remains resistant to detergents containing aggressive chemical compounds.
The service life of a refurbished product can reach 10 years or more. At the same time, aesthetic and practical qualities are fully preserved.
Preparing to create a new coating
Updating a bathtub with acrylic with your own hands must begin with its preparation. It is necessary to remove stubborn dirt and limescale by thoroughly washing the product with cleaning agents. 
To degrease the surface, you can clean it with soda.
After this, you will need to twist the linings on the drain hole and on the overflow and clean the bathtub covering with sandpaper.
This will help remove rust and loose old enamel.
If the bathtub has already been restored using the enameling method, you will have to remove the old coating.
After this, the surface must be thoroughly washed. It is recommended to heat the material to be restored by running hot water into the bath. After 5-10 minutes, you can dry the surface; this can be done easily using a hair dryer.
To work, you will need a small container with a volume of 1.5 liters, from which acrylic will be poured onto the bathtub. You also need to prepare a wooden stick, which will be needed for mixing the components of the solution, rubber gloves and a spatula.
It is necessary to place a container under the drain hole, the remaining acrylic will flow into it, and the tiles at the edges of the bathtub must be sealed with masking tape.
Acrylic pouring process
After completing the preparatory stage of work, it is necessary to prepare liquid acrylic by thoroughly mixing the hardener with the polymer base. It is very important to strictly follow the instructions to get high-quality results.
It is quite possible to cover a bathroom with acrylic yourself. The process itself involves uniformly pouring the finished mixture onto the surface of the product. For convenience, you need to use a small pre-prepared container.
Having completed the first circle, you need to start the second, starting from the middle of the sides of the bath. The result should be a thick layer at the bottom, which will need to be leveled with a spatula towards the drain hole. Excess acrylic will be removed in this way.
It is highly undesirable to touch the sides of the bathtub with a spatula. If sagging has formed on the surface, it will remove itself. Any impact on the new coating will damage its integrity.
After finishing the work, the bath should be left so that the surface is completely dry. This will take at least a day, the exact time is indicated on the acrylic packaging. The final stage is installing a drain siphon and overflow, removing masking tape from the walls.
To get a snow-white, smooth and durable surface, it is enough to update the bathtub with liquid acrylic. The new coating will have excellent adhesion and a long service life.
Acrylic liner
How to update your bathroom quickly and easily? An excellent way is restoration using an acrylic liner. The main disadvantage of this method is its price, which will be higher than repairing equipment using other methods.
First you need to take the dimensions of your bathtub and purchase a ready-made liner in a specialized store. The inserts have standard parameters, but are also made to order.
The advantageous characteristics of acrylic are its strength, tightness, resistance to high temperatures, and environmental friendliness.
It is easy to clean, does not lose its aesthetic properties during use, does not turn yellow, and does not rust.
If a cast iron bathtub is restored, the result will be an excellent design that combines the advantages of cast iron and acrylic.
Work procedure
How to update your bathtub yourself by installing an acrylic liner? Main stages of work:
- Cleaning the surface of the bathtub.
- Preparing the liner, applying markings, determining the location of the drain holes.
- Checking the connection of holes.
- Aligning the liner, trimming the edges along the wall tiles.
- Application of a special adhesive composition to the surface of the bathtub and to the liner.
- Installing the liner in the bathtub.
- Pouring water into the product. The filled bath should be left for a day to ensure maximum adhesion of the materials.
How to update an old bathtub with your own hands in order to not only eliminate defects, but also make it beautiful? An acrylic liner will help achieve the desired result.
The insert itself is thin, so the usable space will decrease very slightly. The updated bathtub is ready to serve its owner for at least another 20 years.
Thus, having decided on the restoration method, strictly following the recommendations and performing the work efficiently, you are quite capable of updating your bathtub yourself. published If you have any questions on this topic, ask them to the experts and readers of our project.
No matter how carefully you treat your plumbing fixtures, time will still leave its mark on once new products. The abrasive properties of detergents and mechanical effects on the surfaces of bathtubs negatively affect the factory enamel and make it visually unattractive. Two options come to mind - replacing or restoring the bathtub. Which method is better, reviews and the financial component of the issue are described in our article.
Restoration of a cast iron bathtub
The appearance of indelible rust stains on the bathroom indicates that the service life of the factory enamel has come to an end. Complete bath replacement? But this procedure is technically difficult and expensive. New materials and technologies will allow refresh the surface of plumbing fixtures in the shortest possible time, and this:
- Saving finances. Modern plumbing will cost the new owner a lot of money. Let's add to this list: dismantling the old bathroom, transportation, installation of new plumbing.
- Minimum terms. A practicing master will complete the work in no more than 5 hours, and after 48 hours you can use the updated equipment.
- Quality. The durability of the product, which depends on the material used and the restoration method, is 10-15 years.
- Color variation. Acrylic enamel is often available in white. At the request of the client, by adding color paste, you can get a bathroom shade to suit every taste.
And of course it is worth mentioning the most important feature of a cast iron bathtub - the ability keep warm for a long time. All of the above reasons point to one thing - “ No" replacement, " Yes" restoration.

What methods of restoring cast iron bathtubs exist?
So, we found out that completely replacing the plumbing in the bathroom will cost us a considerable amount, and besides, it is a waste of personal time.
Let's consider three restoration options that, for an optimal fee, will give us excellent result:
- Acrylic coating. A new method by which a liquid acrylic solution is applied (pouring method) to the surface of the bathtub. Obtained layer characteristics:
- Lifetime. Depending on the thickness of the layer, it lasts from 8 to 15 years.
- Perfect coverage. The composition spreads well, filling all cracks and irregularities.
- Odorless and hygienic. Both children and allergy sufferers can take the bath.
- New layer of enamel. Applying special enamel to the surface of the bathtub will remind many people of the painting process. The cheapness and simplicity of the method reduce the physical properties of the updated product:
- Durability. New enamel will last no more than 5 years.
- Coating. The resulting hard coating is sensitive to impact.
- Appearance. With time , The enamel will definitely turn yellow.
- Acrylic liner. An acrylic liner is placed on the old surface, which completely follows its contours. Advantages:
- Life time. The strength of acrylic gives the product a service life of up to 15 years.
- Surface. The “bath-in-bath” design completely hides all defects.
- Aesthetic appearance. Acrylic will never turn yellow, and the plasticity of the material allows you to add new design elements to the bathroom.

Restoration of bathtubs with liquid acrylic
When using liquid acrylic, you can get excellent results even in the most advanced cases, and the surface of the bathtub will become smooth and glossy. In addition to acrylic, the mixture includes: epoxy resin, hardener and chemical additives that increase the characteristics of the new surface.
Restoration stages:
- Surface preparation. Scratches are sanded with sandpaper, rust and chips are removed using a grinder. The debris is removed, the surface is treated with baking soda - degreasing.
- Enamelling. The bathtub container is washed with hot water. A thin layer of the mixture is poured in a small layer onto the side of the structure. Acrylic flows freely along the walls of the bathtub and connects at the bottom. The resulting voids at the bottom are also filled with liquid until the circle closes.
You should not try to deal with drips and sagging - this can only cause damage. When dry (the hardening process lasts up to 24 hours), all errors will disappear.

In this video, restoration specialist Artem Babenko will tell and show how he restores a bathtub using liquid acrylic:
Restoration of bathtubs by applying a new layer of enamel
Ideally, enameling takes place in an industrial environment, but special compounds that have appeared recently make it possible to do this at home. As a result, you can get a new protective coating without dismantling the bathtub.
- Preparatory work. Contaminants deposited on the surface of the bath must be removed. The container of the restored structure must be thoroughly washed and dried.
- Applying enamel. Tools for enameling are chosen according to your taste. This could be a roller, brush, etc. During operation, the solution should be thoroughly rubbed to prevent drips.
After at least two days, the enamel will completely harden and the bath will be ready for use.

Restoration of bathtubs using an acrylic liner
The two restoration methods described above are labor intensive. What to do if you need to get results in a short time? For this, there is a “bath in bath” method - installing an acrylic liner on the old surface will allow you to enjoy the updated plumbing in just two hours.
- Preparatory work. The dimensions of the old bathroom are carefully taken and the appropriate frame is selected. The enamel of the old coating is carefully protected with sandpaper - the roughness allows the liner to stick to the old bathtub as accurately as possible.
- Installation. A sealant is applied around the perimeter of the bathroom (protection from moisture), the rest of the part is filled with special foam. An acrylic tab is installed, along with a siphon and screws.

For thorough gluing, you should fill the bath with water - under the influence of the load, the foam will not be able to lift the liner up. Everything is ready, and after two hours you can take water procedures.

Do-it-yourself bathtub restoration at home
All the methods described in our article do not require installation of a bathroom, and the work is done at home. To do the restoration yourself, or to invite a specialist, is everyone’s business.
Let's look at the important points to pay attention to when restoring bathtubs at home:
|
Foreign objects. |
Whatever the work is in vain, you should completely protect any possibility of foreign objects getting onto the drying surface of the bath: washcloths, creams, soaps, shampoos should be hidden. Remember - even a hair falling on the enamel can ruin the work done. |
|
Proper surface preparation. |
An improperly prepared surface of an old bathroom can lead to swelling or chipping of the new layer. Only conscientious cleaning (grinder, drill, sandpaper) and degreasing (baking soda) will allow you to achieve an excellent result. |
|
Preparation of liquid acrylic. |
After adding the hardener to the main components, whisk the mixture for at least 7-9 minutes. Then give the acrylic about 4-5 minutes to polymerize, and mix the resulting solution by hand for another 5 minutes. If acrylic is not prepared correctly, the enamel may not harden in places or may turn yellow. |

The best way to get rid of wasting personal time and considerable financial investments to replace the unattractive enamel of plumbing products is to restore the bathtub. Which method is better, reviews and an excellent opportunity to preserve an old cast iron bathtub will allow you to make the right choice.
Video tutorial: restoring the coating in the bathtub
In this video, master Evgeny Pogrebnoy will tell you how to restore an old, rusty bathroom coating with self-leveling acrylic:
In modern life, almost all residential buildings are equipped with baths, with the exception of those where the owners preferred showers. In most cases, cast iron or metal bathing containers with a white coating are used. This white coating is a layer of enamel that turns yellow or becomes damaged over time. At the same time, there is a need to restore the enamel for your bathtub, since its presentable appearance is conducive to bathing. In this case, you should consider how to update the bathtub, as well as repair the enamel of a cast iron or metal bathtub.
Before considering how to update the fixture and methods for restoring a cast-iron bathtub with your own hands, you should understand the advantages and disadvantages of this event. Let's take a closer look at the benefits of restoring enamel in your bathroom:
- The design acquires a presentable appearance and the necessary snow-whiteness.
- Restoring the bathtub enamel yourself allows you to avoid large material investments.
- Updating the bathtub helps to increase its service life and continuous use.
- Restoring a bathtub with enamel allows you to increase the time the filled water stays at the required temperature.
Despite a number of advantages, do-it-yourself bathroom restoration also has some significant disadvantages. Restore should only be done in a certain sequence. There is a high risk that the work performed will not have a positive effect. The use of liquid acrylic or other devices does not allow the container to be used for its intended purpose for a long time. All stages of recovery have a certain complexity. In addition, it is necessary to follow the technology for applying a repair kit or another version of the composition when restoring the structure.
Important. Separately, it is necessary to clarify the fact that any kit for restoring bathtub enamel retains a pungent odor for a long period of time, which is not entirely pleasant to perceive.

Tool selection
Before considering how to restore bathtub enamel at home, you should consider the rules for selecting tools:
- You must first decide on the reconstruction option;
- the material used is additionally taken into account;
- the available budget is taken into account separately;
- Finally, you need to inquire about the availability of your own tool.
As a rule, for work you will need sandpaper, a spatula, brushes with natural bristles, a drill with a diamond blade, a plastic cup, any small container, and construction tape.
Having figured out whether it is possible to restore the enamel in the bathroom, you should decide on the preparatory measures:
- since the work is done with your own hands, rubber gloves are required;
- the drain and overflow are disconnected, a plastic cup is placed in the drain;
- the old layer of enamel is first completely removed;
- in order to restore the surface, it is necessary to erase all chips and irregularities;
- then the bare surface is degreased;
- subsequently everything is taped with construction tape.
The last point is fulfilled if acrylic or another type of enamel is used for restoration. The bathtub liner does not require as much preparation.

Application technology
Depending on which restoration option is envisaged, the following series of recommendations should be followed:
- first of all, you will need to remove the layer of corrosion using oxalic acid, and then remove the main coating;
- It is recommended to use special lighting to monitor the cleaning procedure and subsequent application of the composition;
- when applying paint, the initial layers should be applied manually, and the last layer, if possible, should be sprayed with a spray gun;
- All work is carried out in protective equipment (rubber gloves, safety glasses and long sleeves).
When using liquid enamel, you should carefully cover the sides, smoothly moving to the recess. In this case, a small amount of the composition is applied so that its excess does not flow off, but remains on the walls.
Important. To carry out the procedure correctly, you need to follow the recommendations of not only specialists, but also the manufacturers of the base material for enameling.
In this case we are talking about a two-component composition of acrylic and a special hardener. The restoration process consists of the following stages:
- existing rust is removed;
- The surface is leveled with putty;
- Hot water is poured in for 15 minutes and then drained;
- The drain and overflow are completely dismantled;
- at the end, a composition is poured from the edges, forming a thin and durable film;
- the next stage begins pouring the composition from the center.
This restoration option can significantly save time on drying, but the complexity of the process is that it is necessary to pour the composition with special care.

Advantages of glass
Having understood how to restore enamel with glass acrylic in a bathroom, you need to consider its positive qualities, namely:
- relatively fast hardening;
- sufficient strength of the hardened coating;
- speed of restoration work;
- the ability to refuse to fully cleanse the old layer of enamel.
Despite a number of advantages, this two-component composition also has a disadvantage, namely, quite high consumption and high cost.
Important. In the process of work, you may encounter a number of difficulties, which is why it is better to entrust it to specialists.
This is the simplest and most cost-effective restoration option, but it significantly reduces the size of the container. Let's look at the procedure:
- should be puttied first;
- you will need to completely close the drain and overflow;
- it is necessary to eliminate bathtub bumpers;
- ceramic elements must be removed separately;
- then an identical insert is prepared;
- drain holes are drilled;
- Next, apply adhesive and sealant to the drains;
- subsequently an acrylic liner is installed, and then the silicone is cut off;
- upon completion, all that remains is to install the finished gratings;
- at the very end you need to fill the container with cold water.
This option for restoring bathtub enamel, according to reviews, is suitable for those users who are not ready to fully engage in the restoration of an acrylic surface using paint or other compounds.

Bathtub enamel
In this case, we are talking about the most budget-friendly and conservative option for restoration work. Let's take a closer look at the procedure:
- the substance is applied evenly with a brush;
- the paint is distributed evenly from all sides to the recess;
- it is necessary to ensure that the bottom is not filled with a deep layer;
- all enamel is applied gradually in three even layers;
- subsequently, complete drying occurs after 3-4 days;
- then, after complete drying, polishing is performed.
At the end, be sure to polish so that the entire surface resembles gloss, otherwise there is a possibility of damage to the skin due to powder coating.
Important. When performing any option for restoring an enamel surface, you should follow the recommendations of specialists.
Regarding the procedure for carrying out work on restoring enamel on a bathing tank, the following advice from specialists and manufacturers is present:
- All work will need to be carried out in protective equipment.
- It is necessary to completely eliminate chips and irregularities.
- Acrylic or stacrylic should be applied in several layers.
- During operation, dry thoroughly.
- There should not be high humidity in the room.
- For work you should use only high-quality material.
Important. When choosing a reconstruction option, you should first of all take into account the material from which the bathtub is made, since in each individual case it is better to use a suitable repair method.
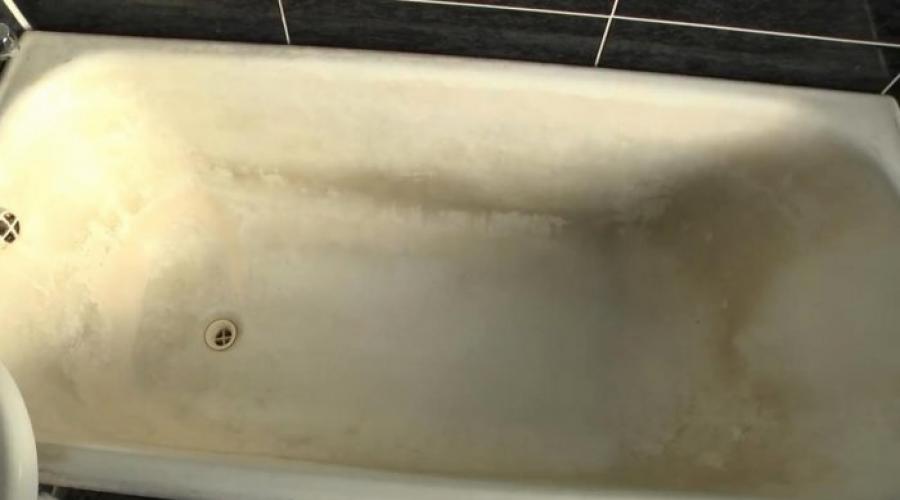
During the operation of a cast iron bathtub, due to certain circumstances, damage to the enamel may occur due to mechanical stress and, as a result, the formation of rust spots. The appearance of the bathtub becomes unaesthetic and the owner faces several ways to solve this problem, one of which is restoration with his own hands.
In contact with
Classmates
Although this procedure is labor-intensive, significant financial savings are achieved, the finish of walls and floors is not disturbed during dismantling, and the usual reliable but updated bath remains.Is it possible to restore a bathtub?
It should be understood that a bathtub can only be restored if there are no clearly rotten areas that cannot be repaired. This applies to the bottom near the drain and where water constantly remains. The enamel on the face may be in good condition, but rust that has penetrated through the damaged coating may have caused the cast iron to rust. As a result, the thickness of the metal is not able to provide the same performance characteristics. You can assess repairability by stripping the old enamel, and then tapping the surface with a wooden or rubber hammer to identify problem areas.
How to clean old bathtub coating?
It is best to clean old enamel by applying abrasive powder to the surface and rubbing or using a grinding wheel. Abrasive attachments on an electric drill should be used in cases of deep penetration of rust into the metal layer. In this case, it is advisable to perform circular or translational movements of the working part of the tool along the surface, so as not to accidentally grind off the excess layer. Restorative compounds that are applied directly to the affected areas are also suitable. When the cleaned dirt accumulates, it is removed. The procedure is carried out until the coating is removed, that is, until the cast iron surface is shiny.
Application of acrylic
Full or partial restoration of enamel?
This issue is considered in each case individually, since it is necessary to take into account the condition of the enamel, service life and the amount of damage. If small chips were received during the delivery or installation of a new bathtub, then local treatment can be performed. But even in this case, problems may arise with selecting the color tone and creating a certain coating thickness. That is, traces of restoration will be, albeit slightly, noticeable. After removing the rust stains, the contrast will be more pronounced because the enamel has acquired a yellowish tint. Therefore, if quick measures are taken to preserve the metal, partial processing and finishing can be done, but to obtain the quality of the coating, complete restoration is done.
Preparing the bathtub surface for painting
After removing the enamel and removing the rust, wash off the remaining coating and crumbs with water. Then the surface is degreased by applying special chemical mixtures that are neutral to cast iron by rubbing with a soft, dry cloth.
Note!
When inspecting the bathtub, the wall thickness is checked and the possibility of further operation is determined.
Before applying a new coating, warm up the bath with hot water poured in for 15 minutes. Then the water is drained, and the inner surface to be painted is wiped dry with a soft cloth. The result should be a surface free of lint, dust and other foreign substances.

Application of acrylic coating
One of the simple ways to create the perfect bathtub cover is to pour an acrylic solution - stacrylic - onto the surface. It is a two-component mixture of hardener and acrylic. When applied to the surface, the composition polymerizes and forms a thin, uniform layer with a thickness of up to 5 mm. It has different degrees of viscosity and fluidity, which allows you to accurately select the required option for creating layers of a given thickness. Also for beginners, delayed polymerization will be convenient, which gives a little time to correct minor errors.
Method for creating acrylic coating
- Prepare the mixture according to the instructions.
- Take a container and fill it with liquid acrylic.
- The mixture is slowly poured onto the edges of the bath until approximately the middle height of the wall is reached, after which the stream is moved further along the perimeter.
- Having passed the entire perimeter, the procedure is repeated starting from the middle until a continuous coating is formed.

Acrylic coating
Advantages and disadvantages of self-leveling coating
The acrylic coating is highly durable and therefore can protect the bathtub from external mechanical influences and significantly increase its service life. The method of applying it is quite simple and even if you have no experience in carrying out such work, difficulties will not arise. The coating is smooth and quite thick, thanks to its ability to fill unevenness and minor surface defects. There are no pungent odors during application and therefore no respiratory protection is required. However, the drying time can be at least three days. Restoring an old cast iron bathtub in this way will be very expensive.
Types of enamels for painting
This method is classic and has been successfully used to restore the enamel coating of bathtubs on a budget. There are two options for enamels: professional and regular. The first is used by specialists with extensive experience in enameling. This is due to the fact that the composition of the mixture is highly fluid and to apply a layer of a certain thickness it will be necessary to paint in several layers. At each stage, a layer of the same thickness is created without drips or streaks. If you have experience, it is possible to perform partial restoration of the old coating with high accuracy. Regular enamel is thicker and the entire coating is painted at one time, but with minor errors.

Coating
The process of applying enamel to a bathtub
First you need to prepare the required mixture. To do this, it is poured into two containers for mixing two portions in equal quantities, since the restoration of a cast-iron bathtub with enamel is carried out in two layers. The first part is mixed with the hardener in the amount described in the instructions for use. Then pour it into a spray bottle and evenly apply the first layer of enamel to the surface. This procedure can be performed with a brush, but it will take more time to create a layer of the desired thickness. After this, wait until it dries and immediately apply the second layer in the same way. You can use the bathroom no earlier than after 7 days.
Using a bath liner
The method is a radical solution in cases where the condition of the cast-iron bathtub has been brought to an unusable state: there are rusty holes or significant damage to the surface, and the owner has decided that it is better to restore it than to replace it with a new one. The special liner is an acrylic frame that is inserted inside a cast-iron bathtub and glued with a special adhesive.
Note!
The insert is manufactured in a factory according to individual sizes, so it will be extremely expensive.
They are adjusted locally to the level, coated with glue, placed in the bathtub, and coated with sealant on top. After a day, the bath is ready for use.

Conclusion
Restoring the operational condition of the bath requires an analysis of the economic feasibility of such an event. It includes the amount of time spent, experience in carrying out such work and the availability of the necessary tools. Therefore, before restoring a cast-iron bathtub, its condition is assessed and possible methods of applying enamel are selected.
Do-it-yourself restoration of a cast-iron bathtub video:
In contact with
See inaccuracies, incomplete or incorrect information? Do you know how to make an article better?
Would you like to suggest photos on the topic for publication?
Please help us make the site better! Leave a message and your contacts in the comments - we will contact you and together we will make the publication better!