Repair of LED lamps using examples. Repairing LED lamps with your own hands: a guide for the home handyman Repairing how to disassemble an E27 era LED lamp

Read also
Today, LED lamps are found in almost every home. But unfortunately, these lighting devices often fail long before their expected time, and there are many reasons for this. Throwing away? Not worth it, it can be repaired. Today we will disassemble several of these devices down to the screws, see what is inside them, and try to repair a 220 V LED lamp with our own hands.
LED lamp device
Before we undertake practical repairs, let’s understand the operation of a 220 V LED lamp theoretically.
Any LED light bulb (SL) is a ready-made LED lamp, which consists of a set of LEDs placed on a specific board equipped with a radiator to remove heat from the diodes. Often the metal body of the lamp plays the role of a radiator.
Diodes connected in series feed the driver - a current source. In budget devices, the current through the LEDs is not stabilized and directly depends on fluctuations in the mains voltage. In more expensive lamps, the current through semiconductors is stabilized at a given level. The second option, of course, is much more reliable than the first, but such a lamp costs a little more and is more difficult to repair.
This entire device is placed in a housing of one design or another, which is equipped with a base for connecting to a 220 V network and a protective cap, which simultaneously plays the role of a light diffuser.
Design of a 220 V LED lamp
On the lamp shown above, the role of a heat sink is played by a part of the body made of ribbed metal. In some lamp designs, the housing may be plastic, and the radiator is located inside it.
 In these light bulbs, the radiator is located inside a plastic housing equipped with ventilation holes
 Driver circuits and their operating principles
To carry out a successful repair, you must have a clear understanding of how the lamp works. One of the main components of any LED lamp is the driver. There are many driver circuits for 220 V LED lamps, but they can be divided into 3 types:
- With current stabilization.
- With voltage stabilization.
- No stabilization.
Only devices of the first type are, in essence, drivers. They limit the current through the LEDs. The second type is better called a power supply for LED strip. It’s difficult to name the third one at all, but its repair, as I indicated above, is the simplest. Let's look at the circuits of lamps on drivers of each type.
Driver with current stabilization
The lamp driver, the diagram of which you see below, is assembled on an integrated current stabilizer SM2082D. Despite its apparent simplicity, it is complete and of high quality, and its repair is simple.
 LED-A60 lamp circuit on a full driver
 The mains voltage is supplied through fuse F to the diode bridge VD1-VD4, and then, already rectified, to the smoothing capacitor C1. The constant voltage thus obtained is supplied to the LEDs of the lamp HL1-HL14, connected in series, and pin 2 of the DA1 chip.
From the very first output of this microcircuit, the LEDs receive a current-stabilized voltage. The amount of current depends on the value of resistor R2. Resistor R1 is quite large, a shunt capacitor, and does not participate in the operation of the circuit. It is needed to quickly discharge the capacitor when you unscrew the light bulb. Otherwise, if you grab the base, you risk getting a serious electric shock, since C1 will remain charged to a voltage of 300 V.
Driver with voltage regulation
This circuit, in principle, is also quite high quality, but you need to connect it to the LEDs a little differently. As I said above, such a driver would be more correctly called a power supply, since it stabilizes not the current, but the voltage.
 Power supply circuit for an LED lamp
 Here, the mains voltage is first supplied to the ballast capacitor C1, which reduces it to approximately 20 V, and then to the diode bridge VD1-VD4. Next, the rectified voltage is smoothed by capacitor C2 and supplied to an integrated voltage stabilizer. It is smoothed again (C3) and, through the current-limiting resistor R2, powers a chain of LEDs connected in series. Thus, even if the mains voltage fluctuates, the current through the LEDs will remain constant.
The difference between this circuit and the previous one is precisely this current-limiting resistor. Essentially, this is with a ballast power supply.
Driver without stabilization
The driver assembled according to this circuit is a miracle of Chinese circuit design. However, if the voltage in the network is normal and does not fluctuate much, it works. The device is assembled according to the simplest circuit and does not stabilize either current or voltage. It simply lowers it (voltage) to approximately the desired value and straightens it.
 The simplest driver for a 220 V LED lamp
 In this diagram you see the already familiar damping (ballast) capacitor, shunted by a resistor for safety. Next, the voltage is supplied to the rectifier bridge, smoothed out by a capacitor of an offensively small capacity - only 10 μF - and through a current-limiting resistor it is supplied to the LED chain.
What can be said about such a “driver”? Since it does not stabilize anything, the voltage on the LEDs and, accordingly, the current through them directly depend on the input voltage. If it is too high, the lamp will burn out quickly. If it “jumps”, the light will also blink.
This solution is usually used in budget lamps from Chinese manufacturers. It is, of course, difficult to call it successful, but it occurs quite often and can work for quite a long time at normal network voltage. In addition, such circuits are easy to repair.
Reasons for failure
Why do LED lamps burn out at all if, as LED manufacturers claim, the lifespan of light-emitting semiconductors is at least 15-20 thousand hours? Almost all drivers do not have mechanical elements and contacts, which means their MTBF should be no less. But the lamps burn, sometimes without even expiring their warranty period, and this is a fact. There can be several reasons for a light bulb to break:
- Manufacturing defect. Alas, no one is immune from this. Especially if the manufacturers of components and LEDs are our Chinese brothers, working in the garage and on their knees.
- Incorrect operation. For example, poor ventilation in a closed lamp. In such light sources, the lamp overheats, and then anything can fail - from the driver to the LEDs. This also includes dust, moisture, a “sparking” switch, a backlit switch, etc.

Expert opinion
Alexey Bartosh
Ask a question to an expertIf your switch has a backlight, then this is a sure way to the rapid death of the LED lamp. Either remove the backlight, or screw an ordinary incandescent light bulb of any, even the lowest power, into one of the chandelier arms.
 This backlighting of the switch is convenient, but it causes the LED lamp to “wink” and reduces its service life by tens of times.
 - Poor nutrition. If the voltage constantly fluctuates or is abnormally high, then even the best-quality driver can “lose patience.” This also includes constant voltage surges, for example, when starting powerful motors or welding equipment, and impulse noise.
 In this Chinese lamp, the “driver” is located right on the board with LEDs, and there’s not even a smell of a radiator here
 Example of LED light bulb repair
If the lamp does fail, do not throw it away immediately. Firstly, it is likely that it can be revived by making repairs yourself. Secondly, even if the repair is not successful, the surviving parts may be useful for repairing another lamp.
You should only undertake repairs to a light bulb if you are sure that it is the light bulb that is faulty, and not the socket, socket or wiring. This is not difficult to check: just replace the lamp with a known good one and make sure that it lights up.
What do we need for repairs?
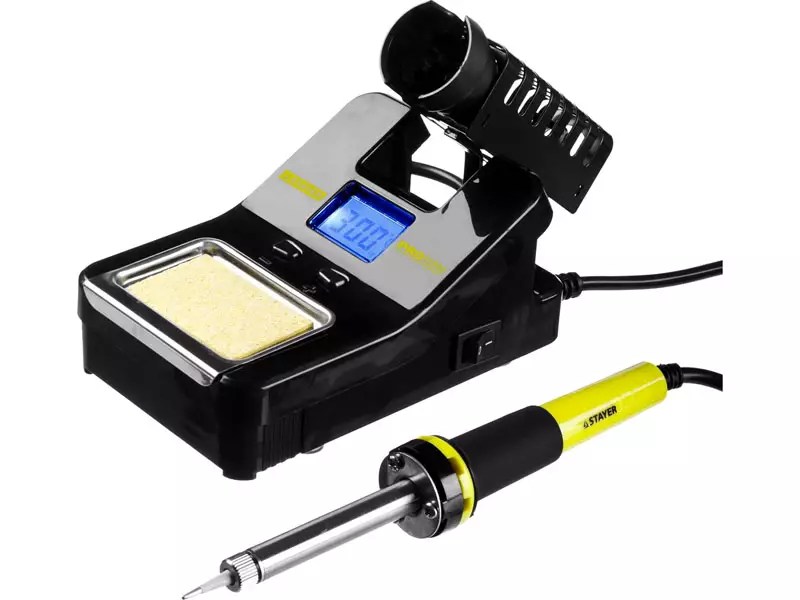
Before you undertake any repairs, you need to collect everything you need for this. To work you will need:
- low power soldering iron;
- tweezers;
- sharp knife;
- solvent (if necessary);
Any multimeter is suitable - dial or digital, the main thing is that it must have a diode continuity mode.

This device is suitable: it has a diode test mode
How to disassemble an LED lamp
Here you need to immediately make a reservation: if your filament lamp has failed, then you should not undertake repairs. The device has a sealed glass flask filled with an inert gas. It is simply impossible to repair such a device.
This lamp cannot be repaired.
So, if everything is ready, and your lamp is not filament, then you can start repairing the LED lamp. First of all, the light bulb must be disassembled. To do this, you need to remove the light-diffusing cap. This is usually easy to do. There are three ways to attach the diffuser to the device body:
- Using a threaded connection.
- Using latches.
- Using sealant.
It is easiest to disassemble a lamp with a threaded connection. To do this, simply unscrew the glass from the case without applying too much force.
 The diffuser of this lamp can simply be unscrewed
 Disassembling a lamp with latches is not much more difficult. The only thing is that it is necessary to determine the location of the latches, since they are not visually visible. Carefully insert the tip of the knife between the diffuser and the body and at the same time try to remove the cap. With some patience and carefully moving the knife around the circle, you will easily find the latches.
 Disassembling a lamp with a snap-on cap
 If the diffuser is placed on a sealant, then you will have to tinker with the repair a little longer. Scratch the joint between the cap and the body with a thin (preferably a stationery) knife. Do this at an angle towards the base and as deep as possible, but without fanaticism. Now try to unscrew the cap as if it were threaded. If the sealant is of poor quality or there is not enough of it, the light-diffusing cap can be easily removed.
 Disassembling an LED light bulb on sealant using a utility knife
 Did not work out? There are two more repair options. Take a syringe and pour paint solvent (not acetone!) into the gap formed. After some time, the sealant will become soft and the cap can be easily removed.
The second repair method is to heat the joint with a technical hair dryer. This must be done very carefully so as not to melt the plastic of the lamp body, and the glass of the diffuser does not burst. The heated sealant will become soft and the diffuser can be easily removed.
Expert opinion
Alexey Bartosh
Specialist in repair and maintenance of electrical equipment and industrial electronics.
Ask a question to an expertImportant. When disassembling the light bulb, be patient and be careful: the body of the device and the cap are easy to break. In this case, you will most likely have to forget about repairs.
 The result of careless disassembly, when there is no point in repairing
 All that remains is to unscrew the fastening screws holding the board with LEDs, remove it and pull out the driver. Disassembly can be considered completed, it’s time to move on to repairs.
 Unscrew the two screws holding the board with LEDs
 If there are no screws, then most likely the board is secured with sealant. Cut it along the circumference of the board, and carefully pry the board itself with a knife.
 This board is secured to the case with sealant
 Troubleshooting
The lamp has been disassembled and all its components can be reached. Great. Start the repair with a visual inspection of all driver parts. All elements must have a “healthy” appearance: not darkened, not swollen or burnt.
 In the left picture the electrolytic smoothing capacitor has failed, in the right picture the quenching capacitor has failed
 Carefully inspect the soldering areas: they must be of high quality, without cracks or holes in the solder.
 The problem with this lamp is cold soldering - the element has poor contact with the board
 If visually everything is in order with the driver, inspect the board with LEDs. Usually (but not always) a burnt-out LED is visible: it either burns out or burns out completely.
 On the left, the burnt crystal burned through the phosphor, on the right, the diode burned out completely
 Since all light-emitting diodes are connected in series, if only one LED burns out, the others will also stop lighting.
It is quite clear that if problems are found, they need to be eliminated: burnt parts should be replaced with similar ones, and suspicious soldering should be soldered with a well-heated soldering iron with a large amount of flux. You can read how to replace the LED in the next section of the article. Found the above problems and fixed them? Turn on the lamp and hopefully the repair is complete.
If everything is visually in order, it’s time to use a tester for further repairs. First, let's deal with the board with LEDs, since they are easier to check, and the probability of failure of this node is higher. We turn on the multimeter to check the diodes and ring each LED in both directions. In one direction the device will show a high resistance, in the other the diode will light up faintly.
 A working diode in one of the positions of the multimeter probes will light up
 Can't ring a single diode? Perhaps the driver is interfering with this. Unsolder one of the wires going from the driver to the LED board and repeat the test.
 If the driver interferes with diode testing, you can disable it by unsoldering one of the power wires from the module
 If one of the diodes behaves differently from the others, it must be replaced with one of the same type. If everything is in order, you can finish checking the LED module - it is working. It's time to move on to driver repair.
Driver repair
First of all, check the fuse, if there is one. The device should show zero resistance. This can be done without removing the fuse from the board. Did the device show infinitely high resistance? Replace the fuse and plug in the lamp to test. Is it glowing? The renovation is complete. If the fuse is OK, we continue the repair. . You can find out in detail how to do this.
Is the diode bridge working? Then unsolder the smoothing electrolytic capacitor and ring it. If the capacitor is working properly, then at the initial moment of continuity the multimeter will show a small resistance, which will grow before our eyes until it goes to infinity.
 Checking an electrolytic capacitor with a multimeter
 If the driver is simple, as often happens, then all these manipulations will certainly lead to success and completion of the repair. If the driver is more complex, then all you can do is ring the remaining electrolytic capacitors and diodes. It is easier to completely unsolder capacitors; only one terminal of a diode can be unsoldered. To make it lose contact with the board, it is enough to lift the device with a needle or tweezers.
If everything is in order here, then, alas, for further more complex repairs you will have to use the help of a qualified electronics engineer.
Replacing LEDs
The main disadvantage of SMD elements is the occurrence of some problems with the repair of equipment containing them. Dismantling such elements, especially multi-pin ones, can be very problematic. But if the device is two-terminal, then you can desolder it using a soldering station, and then the repair is greatly simplified. Take the double soldering iron that comes with the soldering station, heat up both leads of the diode at the same time and with the same soldering iron, like tweezers, remove the element from the board.
 Removing an SMD capacitor using a double soldering iron
 If your soldering station only has one soldering iron (which is most often the case), then there is another option. You can use the hair dryer included with the soldering station. Blow the faulty diode with a hairdryer and at the same time try to move it from its place with a needle or thin tweezers. Once the solder has melted, the LED can be easily removed from the board.
 Removing the LED with a hairdryer
 To repair LED lamps, you can use a technical one instead of a soldering gun, but the diameter of its nozzle should be minimal. Otherwise, you will heat the aluminum substrate and either you will not solder anything at all (the power of the hair dryer is not enough), or all the LEDs of the lamp will fall out of their places, or the conductive paths will fall off. In this case, repairs will be seriously complicated, if possible at all.
How to replace LEDs in a lamp if you don’t have a hair dryer or soldering station
Of course, not everyone has a soldering station for such repairs (I, for example, don’t have one at home). In this case, you can use a regular soldering iron for repairs, slightly modifying its tip. Just wind a copper winding wire with a diameter of 1-2 mm onto the tip, and sharpen and tin the ends of the wire. Why not a soldering station for repairing and replacing SMD parts?

Removing an SMD LED using a regular soldering iron
All that remains is to replace the LED, and the repair can be completed. This can be done with a soldering iron with a thin tip or a regular one, but modified for desoldering (see photo above). Before soldering, remove excess solder from the contact pads and apply flux to them. Now put the new LED in place, observing the polarity, hold it with thin tweezers and solder. Keep in mind that the soldered LED must be exactly the same type as the burnt one. Otherwise, such repairs will not last long.
Expert opinion
Alexey Bartosh
Specialist in repair and maintenance of electrical equipment and industrial electronics.
Ask a question to an expertIf the lamp has a real driver - a current stabilizer, then a new LED does not need to be soldered in. Just solder a jumper in place of the burnt one, and the lamp after repair will serve faithfully.
Safety precautions when repairing 220 V LED light bulbs
Since we are repairing a device that operates from the network, there is no need for safety precautions. LED lamps have transformerless power supply; almost all elements of the circuit during operation of the device, including LEDs, are under life-threatening voltage. Therefore, observe the following precautions:
- All soldering and measurements during repairs should be carried out only with the lamp turned off.
- Even if the capacitors are bypassed with discharge resistors, after turning off the lamp, discharge all capacitors manually. To do this, just short-circuit the capacitor leads for a second with any metal tool with a dielectric handle.
- When turning on the device after repair, take care of your eyes. If something goes wrong, any of the elements can explode. Better turn away, turn on and turn around.
- Do not leave a switched-on soldering iron unattended and do not place it on flammable objects during repair breaks. 260 degrees is relatively little, but enough to start a fire.
We can probably end here. Now you know how an LED lamp works and how it works. And if necessary, you can repair it yourself.
Video
LED lamps have moved from luxury items to household appliances. Currently, many companies produce such light sources, since their manufacture does not require complex equipment, and the assembly scheme is simple. Now everyone can buy a miracle lighting source, but what to do if it suddenly stops working. It’s good if there is a warranty, but what if it ended or didn’t exist at all? Is it possible to repair LED lamps with your own hands? Let’s try to figure it out in today’s review.
LED lighting sources differ in power parameters and variety of configurations
Before deciding how to disassemble an LED lamp, you need to understand its structure. The design of this lighting source is not complicated: a light filter, a power board and a housing with a base.

Cheap products often use capacitors to limit voltage and current. The light bulb contains 50-60 LEDs, which form a series circuit. They form a light-emitting element.
The operating principle of the products is similar to the functioning of semiconductor diodes. In this case, the current moves only directly from the anode to the cathode. What contributes to the emergence of light flows in LEDs. The parts have little power, so the lamps are produced with many LEDs. To remove the unpleasant sensations from the produced rays, a phosphor is used, which eliminates this drawback. The device eliminates heating from spotlights, since luminous fluxes decrease with heat loss.

The driver in the design is used to supply voltage to the diode groups. They are used as a converter. Diode parts are small-sized semiconductors. The voltage is transferred to a special transformer, where the operating parameters are slightly slowed down. The output produces a direct current, which allows you to turn on the diodes. Installing an additional capacitor helps prevent voltage ripple.

LED lamps come in different types. They differ in the features of the device, as well as in the number of semiconductor parts.
Related article:
We’ll talk about this in more detail in the article to help you reduce costs when purchasing and during operation, and solve other practical problems.
Reasons for repairing LED lamps: device, electrical circuits
Before you start repairing LED lamps with your own hands, it is important to find out the reasons for their failure. The declared service life of lamps may not coincide with the actual lifespan. This is due to poor quality crystals.
There are the following reasons for malfunctions of lighting devices:
- Voltage drops do not greatly affect the operation of electrical parts; noticeable fluctuations in voltage readings can cause a malfunction;
- unsuitable lamp. If the wrong lamp is selected, the light source may overheat.
- light-emitting elements of poor quality contribute to the rapid failure of products;
- improper installation of the lighting system has a negative impact on electrical wiring;
- Strong vibrations and shocks can cause damage to such equipment.

To avoid having to repair the LED light bulb yourself, you need to minimize the impact of the listed factors on the lamp.
Note! If there are no visually detectable deformations, then you need to look for the cause of the breakdown using special devices: a multimeter and a tester.
Frequent problems arising with ice devices
It is often necessary to repair LED lamps yourself if there are problems with the capacitor. To carry out the test, it will have to be removed from the board. You can measure the element voltage with a multimeter. The same device checks the operating condition of the diodes.

In some cases, LED elements blink. This happens if the current-limiting capacitor is faulty. The cause of the breakdown may be a burnt out emitter. The malfunction cannot be seen in all LEDs, so you will have to check every detail. A tester is used to find the problematic diode.
When making renovations, you can experiment with LED elements. For example, choose warm or cold light temperatures. Some devices do not have a smoothing capacitor and a rectifier. They can be installed using a soldering iron.

Advice! If only one LED burns out, you can close its contacts.
Related article:
High-tech lighting equipment allows you to create a comfortable indoor environment. Let's find out what information you need to know to choose such products.
How to repair an LED lamp with your own hands
If you are wondering how to repair a 220v LED lamp, then get acquainted with the standard repair schemes. The most common cause of failure is capacitor failure. A multimeter is used to check this part. If the capacitor burns out, it is replaced with a new one. Another common lamp malfunction is driver problems. When replacing this part, it is important to choose the appropriate option.

Current limiting resistors don't break often, but it does happen. You can check the malfunction using a multimeter in dial mode. If the deviation of the indicator is more than 20%, then the device is faulty.
LEDs often need to be replaced. They should be checked only after it is clear that everything is in order with the power source. To replace these parts you will need a soldering iron. All faulty elements are soldered off.
The cause of flickering of LED lighting sources is a poor-quality capacitor. To eliminate such a malfunction, it is worth purchasing a more powerful mechanism.
You can try to do your own repairs to LL-corn ice lamps (corn lamps).
| Image | Stages of work |
|---|---|
 | If it is impossible to find the burnt-out LEDs on the case, then it is dismantled. |
 | Since the wires are short, the base is removed. |
 | To remove the base, the mounting points are drilled with a drill with a diameter of 1.5. Then the base is removed using a knife. |
 | Inside are drivers that power 43 LEDs. The heat shrink tube on the driver is cut off. |
 | After repair, the tube is put back on and pressed with a plastic tie. |
 | The breakdown occurred as a result of high voltage. The driver is connected to the socket. |
Before any repair, be sure to check for voltage. This turns on the required switch. If there is no voltage, the electrical wiring is checked and the fault is eliminated.

It is important to check the functionality of the light bulb, as well as the integrity of the fuses. You can ring not only integrity, but also the possible presence of a short circuit. The power supply and LEDs are also checked. LEDs can be tested using a battery. To do this, voltage is supplied to each LED through a resistor.

If a larger number of LED elements in the lamp have burned out, then you need to unsolder all the old ones, and then solder the working elements to the back side.

LED lamp repair (video)
You might also be interested in:
 Scheme for connecting a 220V LED strip to the network - done correctly
 How to hang a chandelier on a suspended ceiling: video and main steps
Despite the diversity on the country's shelves, they remain unrivaled due to their cost-effectiveness and durability. However, a quality product is not always purchased, because in a store you cannot take the product apart for inspection. And even in this case, it is not a fact that everyone will determine from what parts it is assembled. burn out, and buying new ones becomes expensive. The solution is to repair LED lamps yourself. Even a novice home craftsman can do this work, and the parts are inexpensive. Today we will figure out how to check in what cases the product is repaired and how to do it.
It is known that LEDs cannot operate directly from a 220 V network. To do this, they need additional equipment, which, most often, fails. We'll talk about it today. Let's consider the circuit, without which the operation of the lighting device is impossible. At the same time, we will conduct an educational program for those who do not understand anything about radio electronics.

driver gauss 12w
The 220 V LED lamp driver circuit consists of:
- diode bridge;
- resistance;
- resistors.
The diode bridge serves to rectify the current (converts it from alternating to direct). On the graph it looks like cutting off a half-wave of a sine wave. Resistors limit the current, and capacitors store energy, increasing the frequency. Let's look at the operating principle of a 220 V LED lamp.
The principle of operation of the driver in an LED lamp
| View on the diagram | Operating procedure |
 | A voltage of 220 V is supplied to the driver and passes through a smoothing capacitor and a current-limiting resistor. This is necessary in order to protect the diode bridge. |
 | Voltage is supplied to a diode bridge, consisting of four differently directed diodes, which cut off the half-wave of the sine wave. The output current is constant. |
 | Now, by means of a resistance and a capacitor, the current is again limited and the desired frequency is set. |
 | Voltage with the necessary parameters is supplied to unidirectional light diodes, which also serve as current limiting. Those. when one of them burns out, the voltage increases, which leads to failure of the capacitor if it is not powerful enough. This happens in Chinese products. High-quality devices are protected from this. |
Having understood the principle of operation and the driver circuit, the decision on how to repair a 220V LED lamp will no longer seem difficult. If we talk about quality products, then you shouldn’t expect any troubles from them. They work for the entire prescribed period and do not fade, although there are “diseases” to which they are also susceptible. Let's talk about how to deal with them now.
Reasons for failure of LED lighting devices
To make it easier to understand the reasons, let’s summarize all the data in one common table.
| Cause of failure | Description | Solution |
| Voltage drops | Such lamps are less susceptible to breakdowns due to voltage surges, however, sensitive surges can “break through” the diode bridge. As a result, the LED elements burn out. | If surges are sensitive, you need to install one, which will significantly extend the life of the lighting equipment, but also other household appliances. |
| Incorrectly selected lamp | Lack of proper ventilation affects the driver. The heat it generates is not removed. The result is overheating. | Choose one with good ventilation that will provide the necessary heat exchange. |
| Installation errors | Incorrectly selected lighting system and its connection. Incorrectly calculated electrical wiring cross-section. | Here the solution would be to unload the lighting line or replace lighting fixtures with devices that consume less power. |
| External factor | Increased humidity, vibration, shock or dust if the IP is incorrectly selected. | Correct selection or elimination of negative factors. |
Good to know! Repair of LED lamps cannot be carried out indefinitely. It is much easier to eliminate negative factors that affect durability and not purchase cheap products. Savings today will result in costs tomorrow. As economist Adam Smith said, “I am not rich enough to buy cheap things.”

Repairing a 220 V LED lamp with your own hands: nuances of the work
Before you repair an LED lamp with your own hands, pay attention to some details that require less labor. Checking the cartridge and the voltage in it is the first thing to do.
Important! Repairing LED lamps requires a multimeter - without it you will not be able to ring the driver elements. You will also need a soldering station.
household multimeters
A soldering station is necessary for repairing LED chandeliers and lamps. After all, overheating of their elements leads to failure. The heating temperature when soldering should be no higher than 2600, while the soldering iron heats up more. But there is a way out. We use a piece of copper wire with a cross-section of 4 mm, which is wound onto the soldering iron tip in a tight spiral. The more you lengthen the tip, the lower its temperature. It is convenient if the multimeter has a thermometer function. In this case, it can be adjusted more accurately.
Soldering Station
But before you repair LED spotlights, chandeliers or lamps, you need to determine the cause of the failure.
How to disassemble an LED light bulb
One of the problems that a novice home DIYer faces is how to disassemble an LED light bulb. To do this you will need an awl, solvent and a syringe with a needle. The LED lamp diffuser is glued to the body with sealant, which needs to be removed. Carefully running an awl along the edge of the diffuser, inject the solvent with a syringe. After 2-3 minutes, easily twisting, the diffuser is removed.

Some lighting fixtures are made without sealant. In this case, it is enough to rotate the diffuser and remove it from the body.
Determining the cause of failure of an LED light bulb
After disassembling the lighting fixture, pay attention to the LED elements. Burnt is often identified visually: it has scorch marks or black dots. Then we replace the faulty part and check its functionality. We will tell you in detail about the replacement in step-by-step instructions.
If the LED elements are in order, move on to the driver. To check the functionality of its parts, you need to remove them from the printed circuit board. The value of resistors (resistance) is indicated on the board, and the parameters of the capacitor are indicated on the case. When testing with a multimeter in the appropriate modes, there should be no deviations. However, often failed capacitors are identified visually - they swell or burst. The solution is to replace it with suitable technical parameters.

Replacing capacitors and resistances, unlike LEDs, is often done with a regular soldering iron. In this case, care should be taken not to overheat nearby contacts and elements.
Replacing light bulb LEDs: how difficult is it?
If you have a soldering station or hair dryer, this work is simple. It is more difficult to work with a soldering iron, but it is also possible.
Good to know! If you don’t have working LED elements at hand, you can install a jumper instead of the burnt one. Such a lamp will not work for a long time, but it will be possible to gain some time. However, such repairs are carried out only if the number of elements is more than six. Otherwise, a day is the maximum work of the repair product.
Modern lamps operate on SMD LED elements, which can be desoldered from the LED strip. But it is worth choosing the ones that are suitable according to technical characteristics. If there are none, it is better to change everything.

Related article:
To choose the right LED devices, you need to know not only the general ones. Information about modern models and electrical diagrams of working devices will be useful. In this article you will find answers to these and other practical questions.
Repairing an LED lamp driver if you have an electrical diagram of the device
If the driver consists of SMD components that are smaller in size, we will use a soldering iron with copper wire on the tip. A visual inspection revealed a burnt element - unsolder it and select the appropriate one according to the markings. There are no visible damages - this is more difficult. You will have to solder all the parts and ring them separately. Having found a burnt one, we replace it with a functional one. It is convenient to use tweezers for this.
Helpful advice! You should not remove all elements from the printed circuit board at the same time. They are similar in appearance, you can later confuse the location. It is better to unsolder the elements one by one and, after checking, mount them in place.

How to check and replace the power supply of LED lamps
When installing lighting in rooms with high humidity (or), stabilizing ones are used, which reduce the voltage to a safe one (12 or 24 volts). The stabilizer can fail for several reasons. The main ones are excessive load (power consumption of luminaires) or incorrect selection of the unit’s degree of protection. Such devices are repaired in specialized services. At home, this is unrealistic without equipment and knowledge in the field of radio electronics. In this case, the power supply will have to be replaced.

LED power supply
Very important! All work to replace the stabilizing LED power supply is carried out with the voltage removed. Don't rely on the switch - it may not be connected correctly. The voltage is turned off in the apartment's distribution panel. Remember that touching live parts with your hand is dangerous.
You need to pay attention to the technical characteristics of the device - the power must exceed the parameters of the lamps that are powered from it. Having disconnected the failed unit, we connect a new one according to the diagram. It is located in the technical documentation of the device. This does not present any difficulties - all wires are color-coded, and the contacts are labeled with letters.

The degree of protection of the device (IP) also plays a role. For a bathroom, the device must be marked at least IP45.
Article
LED lamps today are considered the most economical and durable compared to others. And although their cost is still relatively high, they are increasingly replacing incandescent and fluorescent lamps.
Why is this happening?
Mainly for two reasons:
1. incandescent lamps burn out quickly and have low efficiency,
2. luminescent ones require special disposal as they contain mercury vapor in the flask. In addition, if you break such a lamp at home, you can expose your family to poison.
There are no such problems with LEDs. Throw them anywhere and break them to your health, they do not pose any danger - except for glass fragments.
At the same time, there are a lot of companies producing these products, and choosing a quality product among them is sometimes not an easy task.
Yes, and a famous brand does not guarantee complete confidence in the long-term uninterrupted operation of the device.
What should you do if the lamp stops shining and you can’t replace it under warranty? You can try to repair it yourself. Its structure is not complicated and does not require special tools for disassembly.
This article will describe the disassembly and repair of a standard, budget-class LED lamp. In addition, one of the possible breakdowns and its elimination is given.
The only tools you need are a screwdriver, a knife, and possibly a two-handed indicator.

If there is no indicator, any “dialing” will do.
So, let's start by removing the diffuser. To do this, insert the knife blade into the gap between the glass and the plastic case and carefully move it in different directions.


The diffuser should come out of the latches and be removed without any problems.

A board with LEDs and a rectifier appears.

There is also a fuse installed on the board. To make sure that it is not burnt out, we connect the ends of the continuity wire to its terminals. Light or sound indication of the device will show its serviceability. If it doesn't show up, you'll have to replace it.

When the fuse is intact, we disassemble further.
First, unscrew the two screws securing the board, after which it can be easily removed.


Under the board there is a radiator in the form of a metal flask.

Thermal paste applied to both surfaces improves the heat transfer of the board to the radiator.
If necessary, it can be changed if it has dried out. Regular thermal paste for a computer processor will do.
To continue disassembly, pull on the top of the lamp housing and it can be easily removed.


At the bottom of the case with the cartridge, you can see two metal strips, one end connected to the base, and the other with holes where the screws go.

Thus, voltage is transmitted through the screw from the base to the board.
The problem turned out to be that over time the contact became bent and did not come into contact with the board screw. Hence the lack of light from the lamp.
To eliminate this malfunction, simply bend the end of the contact strip with a screwdriver or tweezers.

Of course, you can do it better, for example, by soldering wires to the board and base. Then there will definitely be no problems with contact. But more often than not, the first simple option is sufficient.
Now you can assemble the lamp in reverse order. We put on the upper part with the radiator so that the two contacts fit into the holes.


Next, install the board and screw it in.
We will send the material to you by e-mail
Modern, energy-efficient LED lamps are not cheap. But they last longer than usual, and consume much less electricity. It's a shame when such a device fails. We are accustomed to the fact that lamps are disposable goods that have to be thrown away after they burn out. The topic of this article is how you can bring such a lamp back to life with your own hands. Repair of LED lamps is possible! Moreover, this task can be accomplished even by a person who is not particularly knowledgeable in electrical engineering.
LED lamp significantly saves your electricity costs
LED devices significantly save energy and at the same time provide adequate lighting. A 10-watt light bulb with diodes produces the same powerful stream of light as a hundred-watt incandescent lamp. It turns out that this one cuts your costs tenfold. Moreover, such devices are durable, unless of course they are made in the Middle Kingdom.
To understand possible repairs, you need to understand the principle of operation of the device. Everything here is a little more complicated than in traditional Edison lamps. Each light source, a diode, consists of two semiconductors of different materials. One contains predominantly electrons, the second – ions.
A short video about:
For repair work you will need a soldering iron, a set of screwdrivers, a medical scalpel or a thin knife.
How to carefully disassemble an LED lamp and identify the cause of the breakdown
So, how to fix a 220 V LED lamp? The cause of the problem cannot always be found with a simple visual inspection. In any case, you will have to spend time and effort searching for a hidden illness. How to properly disassemble an LED light bulb? The main thing in this matter is extreme caution and accuracy. Do not apply excessive force or use sharp tools where you can handle them with your hands.
Disassembly algorithm:
| Photo | Description of work |
|---|---|
 | The first stage is removing the dome. It is attached to the radiator using a thin layer of glue. Grab both parts with your hands and use a rotating motion to release the dome. Try not to squeeze the fragile plastic too much, as it may burst. |
 | After releasing the dome, you are faced with the most difficult task - separating the plate with LEDs. |
 | First you will have to unscrew the mounting bolts. Their heads are very small, so you will need a set of so-called precision screwdrivers. |
 | After removing the bolts, the aluminum plate with the LEDs must be separated from the radiator. It is secured with glue, so you need to pick it up with a sharp object and carefully tear it off. |
 | The radiator must be disconnected from the base. This is done easily with the same rotational movements. |
 | To finally separate the wafer with semiconductors, you will have to unsolder the attachment points of the supply wire. |
 | After removing the LED board and heatsink, you will find the lamp power supply. |
 | To check the operation of the LED board, you will need a 12 volt power supply and two probes. They are applied to the places where the wires are soldered. If the board doesn't light up, that's the problem. Sometimes burnt out LEDs can be seen with the naked eye. |
 | Checking the operation of the power supply requires extreme caution! The lamp base should be screwed into the socket and connected. Afterwards, the voltage at the ends of the soldered wire is measured with a multimeter. The procedure is dangerous! |
LED replacement procedure
If the problem is a faulty LED, the light bulb simply stops working. If it is, then the problem is with the power board.
After detecting an extinguished diode, you need to remove it. There are three ways to determine the health of a semiconductor:
| Photo | Description of work |
|---|---|
 | Burnt-out diodes have dots or spots on the surface. In addition, you can find traces of burnout around them. |
 | You can try to test the diodes with a multimeter. |
 | You can remove the questionable diodes and check their functionality with wires connected to a 12-volt power source. |
To repair a lamp, it is good to have a similar donor lamp. Semiconductors are removed from it for replacement. How to replace LED:
To consolidate the completed video lesson on this topic:
Related article:
Knowing the basic ones, you can choose the best option in terms of room illumination and operating costs. We offer you to familiarize yourself with the main types of diodes, their distinctive features and installation procedures.
LED lamp driver repair
We looked at how to repair an LED lamp with your own hands if one of the semiconductors has burned out. As you can see, the task is quite simple. Now let's consider the situation if the control unit, the lamp driver, fails.
The bridge and chip for repair, as well as other spare parts, can be purchased in the largest Chinese online store.
| Photo | Description of work |
|---|---|
 | Donor boards may be useful for driver repair. Don't rush to throw away old lamps. |
 | The bridge and the chip are removed from the board in the same way as the LEDs. Use a hair dryer to heat the surface of the board and use tweezers to easily remove the parts. |
 | After the parts are removed, their attachment points are treated with BGA solder paste. |
 | All that remains is to place the replacement parts in the vacant spaces and secure them with the same hair dryer or soldering iron with a needle tip. |
This task is for those whose hands grow from the right place. If you are not confident in your abilities or have a vision problem, just order several ready-made drivers and change them as needed.
Video on how to replace the driver:
Replacing the power supply
One of the common causes of LED lamp failure is the failure of a resistor or capacitor. It is not easy to check the condition of this part; you will have to connect the lamp to the network.
| Photo | Description of work |
|---|---|
 | The malfunction of the capacitor can be determined visually - it swells, as in this case. |
 | The swollen capacitor must be unsoldered from the board using a soldering iron. |
 | A new capacitor of appropriate power is fixed on the board, observing polarity. |
In order to replace the resistor on a lamp, you need to know the basic data of LEDs.
Video: instructions for selecting a resistor
Article