Relief and geoplastics in landscape architecture. Geoplastics in landscape design or how to make an artificial hill with your own hands. Materials for creating an artificial hill with your own hands
Read also
Geoplastics in landscape design is a technique for the artistic transformation of a land plot, which involves the artificial creation or change in the terrain. The main idea of the reception is the formation of hills, earthen ramparts and depressions where they have never been. Interestingly, a raised flower bed or an alpine hill can already be attributed to geoplastics. And, of course, the high ridges and crater gardens of Sepp Holzer are also examples of do-it-yourself geoplastics for the needs of vegetable growing.
Do-it-yourself geoplastics in landscape design: an overview of the direction and recommendations for arrangement
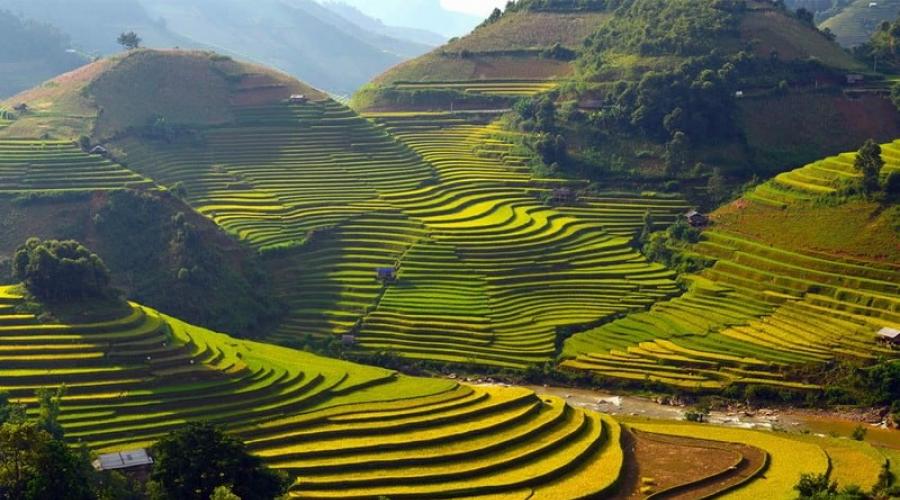
At all times, the reception was very popular, and is still relevant today. If you look into history, you can find elements such as dams on the Nile River, ancient Greek and Roman amphitheaters built into the mountainous terrain, as well as earth mounds of the Mongols, Scythians and Druids, rice fields of Asia, etc.
Based on environmental considerations, two groups of geoplastics can be distinguished:
- Vast parks and natural landscapes, which do not serve mainly human purposes, are elements of the ecosystem, they are unique and diverse in themselves. Absolutely flat land is practically never found in nature.
- The second group includes artificial, man-made geoplastics used in private gardens and parks.

Significant success in geoplastics has been achieved by Italian designers, this is due to the natural landscape of the country - most of the gardens and parks in Italy are located on the slopes.
Features and benefits of geoplastics
Terrain geoplastics involves the construction of various embankments, ramparts and dams, the construction of terraces, the creation of hills, labyrinths, hills, depressions, reservoirs and other structures. 

Often, the owners of land with relief differences dream of a more even terrain, but the owners of completely flat plots want to add zest in the form of hills and raised areas, because the plastic transformation of any territory opens up a lot of opportunities.


The artificially created relief gives the territory artistic expressiveness, expands the space, divides the site into zones, while man-made hills or depressions help to hide outbuildings and other corners of the garden from prying eyes, provide sound insulation, and contribute to the creation of a certain microclimate.
In a recessed recreation area with a small pond, coolness and moderate humidity will always remain, which will not interfere at all in the summer heat. In windy weather, this place will be warmer, as it is protected from all sides. And if you arrange a gazebo on top of a hill, you will get a unique view point, with an overview of the entire site.


Reorganization of the relief makes it possible to create a spectacular fence in the form of a man-made shaft, arranged along the perimeter of a site covered with lawn grass. The highest point can be framed by trees or shrubs. So you solve the problem with external noise and dust, for example, if there is a motorway nearby.
Terracing of relief terrain or areas on a slope
Terraces are formed in two ways - slopes or retaining walls. The first option looks more natural, but gentle slopes take up a lot of space and are suitable for large gardens, you can decorate the slope with large stones, a concrete wall, lawn grass, ground cover plants, or arrange it as an inclined rock garden. In a small area of the terrace, it is better to equip it with steep slopes and strengthen them with geogrids. 


artificial hills
The arrangement of hills is the most common type of geoplastics. Unfortunately, not every idea can be implemented in summer cottages. Remember, the main task of geoplastics is to recreate the natural outlines of the relief, the natural balance must not be disturbed. On a small plot, you should not create a string of large hills, such a composition will not fit into the landscape and certainly will not expand the space, a small rockery, rock garden or deep gardens would be more appropriate here.


Let's take a closer look at the technology for creating artificial hills, you may want to repeat something similar on your site.
It is advisable to think about arranging a hill at the initial stage of building a house and planning a common territory. In this case, you do not have to bring the soil, you can use the remnants of the earth after digging the foundation and other construction work.
To create an artificial hill, peat soil and clay cannot be used, since their volume changes with high humidity. So that, after a while, the hill does not settle, the top layer of soil in the place designated for arrangement is removed. Humus contains organic matter, which decomposes over time, and the volume of the soil decreases, thereby nullifying all the work. The ideal option is infertile or technical (without construction debris) soil.


Do-it-yourself hill planning
Tools:
- Ruler (1 m) and tape measure (10-15 m);
- Level;
- Wooden pegs (50 cm each).
The first step is to create a terrain map of the area. Measure and divide the site into even squares (for example, 10 × 10 m), hammer in a peg in the corners so that each of them rises 30 cm above the ground. On difficult terrain, the squares should be made smaller - 5 × 5 m. All measurements are carried out from the highest point of the garden to the lowest.

Territory marking
Using a level, measure the difference in height between the peg and record all measurements on paper. To mark the territory and outline the future hill, wind the rope around the pegs and remove the top layer of soil (about 30 cm deep).
Hill landscaping
Now you can start forming a hill, cover the marked area with infertile soil, remember that the size of the embankment should correspond to the size of the area and not stand out too much, and it is advisable to make the slope angle no more than 45 °.
Further, the hill must be left for at least six months for the natural shrinkage of the soil. And if there is no time to wait, and you want to decorate a new element of the garden as soon as possible, you will have to tamp the ground yourself. Compaction is carried out with special equipment, it should be compacted every 30–40 cm of a new embankment.
So that the fertile soil layer on the slope does not slip, it should be reinforced with geogrids or geogrids, the soil layer is usually about 20 cm, and the earth should cover the grid by 5 cm. Artificial hills change the hydrology of the site, at the foot of the hills, underground water flows slow down, there is a risk of water stagnation, so even during the planning of geoplastics, you should take care of high-quality drainage.

The decoration, as well as the size of the hill, depends on your wishes, improvise! But keep in mind that it is better to refuse planting tall trees at any level of artificial hill in favor of maintaining the integrity of the structure.
And since our project "ECOGarden for All" pays a lot of attention to vegetable growing, it is impossible to "slip" past the experiments of Sepp Holzer. After all, it was he who learned to use the microclimate created by the outcrop of rocks in order to expand the favorable zone for neighboring plants.
Of course, its landscape reorganization of the relief greatly affects the growth and development of plants. He is sure that water is everywhere (even in the desert), and every farmer needs to learn how to find it by equipping open reservoirs. You should also protect the site from the winds by creating hedges and high ridges. 
In Latvia there is an ecovillage Amatciems, where, from our point of view, the most beautiful embodiment of the idea of natural geoplastics. This, logically, is a living realization of the bright dream of cohabitation in harmony with nature without any fences and far-fetched restrictions (oh, nonsense). In terms of this excellent artificial geolandscape, there are about 500 families, and a fifth of them have already been sold. 

When you can not violate the relief
Geoplastics mainly help nature, but in some situations it can harm, disrupt the ecosystem of the site, you do not need to use geoplastics in the following cases:
- Wetlands;
- A large number of trees not intended for felling;
- Possible seismic activity;
- Looseness of the soil.
If you are not sure whether it is worth planning and applying geoplastics on your site, it is better to consult with experts in this field. The modification of the relief is a rather fascinating occupation, but it is worth approaching it with special attention and in-depth study of the issue. Do-it-yourself geoplastics in landscape design can radically change even the most unfortunate site.
Good afternoon! I heard from a friend, and she is a fan of country affairs, that the direction of geoplastics is now fashionable. Tell us what kind of animal it is and what it is eaten with?
Victoria
Expert answer
The term "geoplasty" appeared not so long ago, but in fact, it hides a thousand-year history of garden art. These techniques have been used in landscape art for many centuries, because people at all times have sought to improve living conditions and farming, for which it was sometimes necessary to correct the natural topography of territories. But geoplastics have become especially widespread since the 20th century. It was during this period that this method of relief design gained relevance and became popular not only in garden and park architecture, but also in home gardens. Despite the fact that many of the new decoration ideas that are popular in the West are not yet widely used in our country, more and more people who have their own land want to transform their pristine landscape for the better, to emphasize all the diversity and beauty of the relief.
The possibilities of geoplastics in many cases are not limited.
So what is geoplastic? What abilities does she have? How can you use them to improve the territory of your garden?
What is geoplastic in landscape design
Geoplastics is an architectural and artistic plastic processing of the relief and transformation by artificially creating its forms, taking into account the aesthetic, technical and functional requirements for the object, the landscape features of the territory, the presence of vegetation and the level of groundwater.
Activities in the art of geoplastics and relief modeling include the construction of both engineering and aesthetically expressive structures enriching the relief.
These are, first of all: terracing of slopes; retaining walls; slope planning; arrangement of stairs, ramps, steps; the formation of earthen ramparts and hills where they originally did not exist.
Thus, the application of this promising direction can benefit both owners of plots on a slope, and those who have a completely flat plot.
How can you create such forms on your summer cottage with your own hands
In the event that you are the owner of a plot on a slope, for the convenience of its use, you will need to terrace the slope. This can be done both in and in style using two different methods. The first is the use of retaining walls, the second - slopes (steep slopes must be reinforced with a special grate that will protect them from slipping).
In addition, on a relief site you can not do without stairs. The choice of material depends mainly on the style of the site and your preferences. Long and steep stairs should be protected with railings, and for people with limited mobility, steps should be replaced with ramps.
Material on strengthening slopes and slopes on the site will also be useful:
Another situation is if your site is completely flat. This is ideal for laying out a vegetable garden or orchard, but for ornamental gardening, such a relief can seem boring and monotonous. Here, such a technique of geoplastics as the creation of artificial hills can help.

You can apply the direction both in small areas and in the design of the landscape of large land holdings.
In addition to creating a visual effect, man-made hills can solve many purely practical problems.
- In this way, you can zone the space.
- It will be great to hide from prying eyes any areas that you wish (for example, a cellar, a recreation area). To do this, it is enough that the height of the hill planted with plants is about 1.5–2 m. On the contrary, you can make the hill a great place to relax by placing a gazebo on its top, from which a picturesque view of the site will open.
- The hill can act as soundproofing. If the soil in the area retains moisture well, you can also use the hills for growing plants, placing light-loving ones on the southern slope, and shade-loving ones on the north.
But there is one caveat - on a plot of less than 10 acres, the hills look unnatural, violating the natural balance. Therefore, if your site does not have such dimensions, you can make a small hill for or.
What materials are preferable to use
It should be noted that not all materials can be used to create an artificial hill. Clay and peat soil are completely unsuitable because of their ability to change volume with increasing moisture, as well as humus, due to the content of a large amount of organic matter, which will gradually decompose, reducing the volume of the soil and contributing to the subsidence of the hill. The best option is to use infertile soil, which must be poured in layers (layer thickness 30-40 cm), tamping and spilling water on each layer. It will be possible to proceed with the design of the finished hill only after a year, otherwise it is likely that the soil may subside.
In any case, whether it is building a retaining wall or building a hill, you will need to make drainage. Drainage is laid at the bottom of the retaining wall, along the slopes and at the foot of the hills.
Cons of geoplastics on the land
Despite the large number of advantages and positive aspects, geoplastics also has its own “disadvantages”, which consist in a number of limitations in the application of its methods. The main ones are:
- It is undesirable to change the relief in areas with high seismic activity.
- It is not necessary to create an artificial relief on a site with loose soil.
- Geoplastics is absolutely inapplicable in areas with marshy soil.
- You will have to refuse to change the relief if your site has valuable plants that need to be preserved.
- Geoplastics should never be used in forest areas.
Nevertheless, there are not so many restrictions on the use of geoplastics, and they do not detract from its many advantages. Geoplastic techniques help us to make our garden unique and original, to give it uniqueness and originality.
Land owners are often unhappy with this flat and boring look around the house. And the truth is how such a monotonous relief can please the eye. But do not despair, geoplastics will come to the rescue. Her goal is to change, embellish the site, while everything looks natural, natural and unusually beautiful.
What is geoplastic used for?
Geoplastics is a way of artistic improvement of the garden, an exceptional opportunity to make your backyard more expressive by modifying the terrain.
In other words, any change in the natural relief will be considered geoplastic. For example, a well-known flowerbed also refers to this method of improving a piece of land. But in our time, its main task is to form earthen hills and slopes, in places where they are absent. It is recommended to apply this solution on your site, after weighing all the pros and cons of the planned project. Spontaneity is not welcome in this case.

People use geoplastics for several reasons. First of all, creating an artificial relief allows you to play with space. Especially if a whole chain of hills is formed, which smoothly pass from one to the next, and delight the eye not only with the wonderful green color of the grass, but also with the right selection of plants that have a decorative value.
Without taking into account the creation of a visual effect, hand-made hills allow us to solve quite practical problems in the household. For huge plots, geoplastics are a great way to divide the site into separate zones. In addition, a hill (if the height reaches 2.5-3 m), planting it with various plants, will help to hide a place to rest from the eyes of inquisitive people passing by. In addition, it will become an excellent sound insulation, which is relevant when placing a site near a railway, highway or other infrastructure facilities. Also, inside the elevation, it is possible to design the so-called “glacier” (a cellar in which, regardless of the time of year, a low temperature is maintained, allowing you to store various products) or other premises necessary for the household, which causes the owners of the site to want to disguise it.
The creation of artificial types of relief on the site contributes to a change in the microclimate. For example, adjustments are made to the temperature of the area, its wind regime, the hydrological data of the soil and its structure. In short, the diversity of the relief entails an expansion of the climatic range on the site. For those who are fond of floristry, the hills allow the planting of new types of flowers, the cultivation of which was impossible under previous conditions.
As the topographers put it, a hill is a relief related to positive forms. There are forms that are considered negative: if we take geoplastic forms as an example, then they will include pits created artificially.
Another highly demanded part of geoplastics is terracing - the formation of platforms on existing slopes that look like wide steps limited by retaining walls of different heights.

Hill design phase
Having made the final decision that the site needs a hill, you need to start modeling either on a piece of paper or on a gadget, depending on personal preference. To start designing a hill, you first need to draw up a plan that reflects the topography of the site to the smallest detail. Nowadays, specialists in the field of landscape design prepare a whole folder of documents - layout drawings, a plan for landscaping, as well as a computer layout of the territory. Having a desire, you can design an elevation on your own.
To understand the initial location of the relief and the exact distances between some objects on the ground, it is divided with rods into separate sections in the form of 3x3 m squares, while the heights of all rods above ground level must be equal. Further, using a meter ruler and a building level, we make measurements of the relief and reflect them on the layout. After completing the topographic scheme, we put on it the features of the planned hill.
We place a hill on the plan, taking into account aesthetic views, and at the same time remember that such outbuildings must also meet the following criteria:
- functionality;
- reliability;
- durability;
- height and angle of inclination should be in accordance with the proportions of the territory.
An important point is the slope of the hills on the south side, it should be as much as possible illuminated by the sun's rays.
Having brought the modeling of the contours of the hill to full readiness, we transfer them to the site using rods and a signal tape. We remove the soil layer along the marked lines, then we begin to form the planned hill.

Forming the foundation for the hill
When creating a hill, you will need earth, drainage, and a small amount of elements necessary for reinforcement.
Drainage will be required when working with one of the parts of the hill, namely, the retaining wall: the so-called body of the hill consists of it and the soil, and crushed stone must be laid between these layers. Also, you need to lay a drainage pipe, which is used to avoid the accumulation of water. We install it at the base of the wall.
When planting plants is planned on a hill, drainage is indispensable. In this case, a high-quality drainage cushion is created at the base of the hill. In addition, drains will also need to be laid at the foot and over the entire area of \u200b\u200bthe slopes. These works are so important because of the change in the hydrology of the area, due to the construction of the hill. Underground water flows in places of the foot begin to slow down their course, which in turn causes stagnant water.

Almost all waste after construction can act as reinforcement elements, for example, broken bricks or concrete rings are suitable for us. Reinforcement is in every sense a mandatory step that will strengthen the hill, and in the future will not allow it to "slide".
To reduce costs, the soil needed to form the hills can be taken from the site. For example, land taken during the construction of roads or terraces. In such cases, the volumes of the soil layer are sufficient for this purpose. To make it more clear when building a terrace of 100 sq. soil is sampled to a depth of 70 cm. This means that we get 70 cubic meters. land that is suitable for hill embankment. But it should be borne in mind that peat cannot be used! It changes its volume depending on the level of humidity.
It is forbidden to create a base from humus, because it rots in a short period of time, which subsequently causes subsidence of the hill. Also, do not use the land that was mined when digging a pit. In such soil, the percentage of clay in the composition is too high, which will interfere with the drainage stage. Vegetation on such a hill will not be able to take root, due to the fact that the clay is water resistant.

Creation of hills
If soil is planned to be imported, the best option would be hills in the garden made of sand or sandy loam.
O \u003d (P1 + P2): 2 * P, where:
- O-volume of soil,
- P1 and P2 - cross-sectional areas,
- P is the distance from one to the other section.
We lay the earth gradually, layer by layer (the thickness of each is approximately 26-31 cm). Do not forget that the slopes of the walls of the planned elevation should not be more than 45 degrees, otherwise difficulties may arise during the landscaping stage, and directly when caring for the plants. Some experts advise when laying layers, water each of them, and then eliminate the dips that form. In fact, it's a waste of water.

We form an artificial relief of the garden, and then we tamp the soil with a vibrating plate or vibrotamper. But this method is used only for short periods of work. Ideally, you need to leave the made hill for natural, natural shrinkage. But in this case, it will take about 4-6 months.
Landscaping, planting plants on the hills
If you just plant plants, then later on the slope of the hill they will wash out and slide off. In order to avoid such consequences, it is necessary to make reinforcement using geogrids or, in the case when the slope is small, you can use a geogrid. When landscaping a hill, they most often use a rolled lawn, it is tightly pressed against the soil and fixed with rods for the first time.
If you want to create a natural lawn, sow the seeds in geogrid pockets. Why is it necessary to green the hill? The thing is that the lawn or any other kind of plants perfectly strengthens the soil. Also, the vegetation on the slopes in the garden takes root better, due to the drainage of the soil, which prevents stagnant water.

Make your own slopes
People who have slopes in a garden of natural origin are very lucky. But what about those who do not have them? Firstly, do not be upset, because this type of relief can be created using only your own strength.
The slope formation technique is very simple. In addition, it is almost identical to the instructions for creating a hill. The materials will require soil, drainage and reinforcing elements. The only necessary tool for making slopes is a shovel.
To begin with, we design the planned slope (for this, we perform all the same steps as when designing a hill). After drawing lines directly on the site itself, we begin to "dig" our slope. We make the first recess by 30 cm, and then every half a meter we deepen by 5 cm. The best option would be to level the resulting slope with a rake for a smoother transition. Next, you need to carry out drainage and install a pipe for draining water. Do not forget about the reinforcement stage. The final work will be compacting the soil.
Your slope is ready, but to improve the aesthetic appearance and service life, we recommend terracing.

DIY terracing
First, let's understand what terracing is. Terracing is the installation on the slopes of platforms that look like wide steps. Such plots are often intended for the cultivation of various fruit plants or other commercial crops. In addition, terracing helps to protect the soil from soil erosion and prevents the fertile soil layer from being washed away. This method is known and widespread in almost all countries of the world.
Terracing creates a unique landscape design for your site. In addition, this method can be used when arranging complex types of relief. For example, slopes in a ravine, river banks, soil drops.
With proper planning of elevation changes, they will be the original features of the area.
There are three main principles for terracing:
1. It is imperative to organize a surface pipe system for draining water, which has a small length;
2. It is necessary to decide in advance where the check-in for the car will be located;
3. Design how recreation areas, landscaping areas, buildings and other structures will be located.

With an independent arrangement of terraces, you need to perform the following work:
1. Cut.
2. Forming terraces to give them the final look of the surface.
The connection between the terraces is created by paths, ramps, as well as stairs. To prevent the slopes of the terrace from collapsing, and to be able to lay paths, use retaining walls. For an even better effect, plant trees or bushes, their roots prevent soil erosion.
Also, remember that the terrace has several varieties, the choice of which depends only on your preferences:
- ridge;
- trench;
- stepped;
- bench-like;
- ditch terrace.

Other types of artificial relief
Hills and slopes are not the only garden design options. In addition to them, there are:
- artificial reservoirs;
- alpine slides;
- rock gardens;
- rockeries;
- landscape labyrinths;
- fountains;
- artificial small waterfalls.
After reading this article, the owners of the plots will not wonder how to create hills, how to make slopes in the garden with their own hands and how to improve them. Now everyone will be able to independently create their own unique and inimitable landscape of the garden.
Geoplastics- these are works on the device of an artificial relief of a house adjoining plot or garden, photo 1. Geoplastics is widespread in such countries as: Italy, Germany, USA, Canada, France, Great Britain.
Photo 1. Geoplastics of the local area, park or garden
What is geoplastic? The device of an artificial relief on a suburban area
Elements of geoplastics:
- retaining walls;
- stairs;
- terraces;
- artificial reservoirs;
- artificial hills;
- alpine slide;
- rock garden;
- rockery;
- fountains.
With the help of geoplastics, areas with natural natural forms can be arranged, or vice versa, landscape forms that are specially unusual for nature can be created, for example, creating hills, pyramids, zigzag depressions and ridges in the form of a hemisphere.
The park area or adjacent plots are classified depending on the features of the relief:
- relief of positive forms (hills, mountains, slopes, ridges);
- neutral terrain (flat terrain, possibly with a slight slope of 5 ... 7 °);
- relief of negative forms (ravines, valleys, gorges, pits, slopes, etc.).
Terrace device
Terraces are arranged in areas located on slopes and can have a different geometric shape and size.
On the terrace you can have:
- lawns;
- sports grounds;
- playgrounds;
- and other garden items.
Terraces are arranged in two ways:
- retaining walls;
- slope device.
Slopes can be made in the form:
- lawn;
- rocky slope;
- alpine hill.
Geoplastics on flat areas is used in such elements:
- arrangement of artificial (excavated) ponds;
- arrangement of artificial hills;
- arrangement of flooded gardens.
Retaining wall device
Retaining walls are arranged on slopes with significant elevation differences and are designed to secure soil slopes, photo 2.
Retaining wall requirements:
- reliable foundation;
- sufficient depth;
- required retaining wall thickness.

Photo 2. Retaining walls
Retaining walls can be made in different versions:
- masonry without the use of mortar or special glue (dry masonry);
- mortar masonry;
- concrete slabs or blocks;
- wall made of monolithic reinforced concrete.
Depending on the predominance of wind direction, the slopes are divided into:
- leeward, which are sheltered from the prevailing winds;
- windward, which are exposed to the winds.
Also, peaks and ridges are subject to stronger wind effects. The device and location of slopes, retaining walls and hills allows you to create your own microclimate on the site.
The device of artificial hills
To bring aesthetics to a garden or park, it is recommended to arrange hills, photo 3. For example, you can arrange an artificial reservoir in the lower zone of the site, and a hill with a gazebo near the reservoir.

Photo 3. The device of the hills
We list some points on the device of the hills:
- before pouring the soil, the fertile layer should be cut off in the zone of the future location of the hill;
- soil is poured in layers. Layer thickness 30 ... 40 cm;
- each layer is carefully compacted and watered;
- the hill must withstand the winter and almost only a year later its further design is carried out;
- the height of the hills is usually taken within 120 ... 150 cm, less often up to 2 m;
- it is not recommended to use for the construction of a hill such types of soil as peat, black soil, clay;
- for the device of the hill, used tires, parts of building elements can be used as a frame or body of the hill;
- it is recommended to arrange hills with a slope of no more than 45 °;
- it is recommended to use a geogrid or geogrid for more reliable fixing of the slopes of the hill;
- the upper part of the hill at the end of the formation is covered with a fertile layer of soil 10–20 cm thick.
Under the hill, you can place a cellar or, in terms of decoration, a cave, a photo3.
Arrangement of a pond or other type of reservoir
An artificial reservoir should be arranged at the lowest point of the site, photo 4. To give a more beautiful view to the site and the reservoir, it is recommended to arrange:
- brook;
- waterfall;
- fountain with LED lighting.

Photo 4. The device of artificial reservoirs and streams
The device of stairs
- tread width (horizontal platform on which the foot is placed) - 30 ... 40 cm;
- riser height (vertical part of the step, or step height) - 10 ... 15 cm.
Usually I make the first few steps with a height slightly less than the rest - 10 ... 12 cm, and the width of the tread is wider.
For the construction of stairs, various building materials are accepted:
- concrete;
- wood;
- some bulk materials.
Site drainage system
Konev Alexander Anatolievich

Many of us often hear the interesting word "geoplasty", only few people really understand what it is. We all see only a beautiful and beautiful picture of the site, which strikes with excellent relief. Only few of us have thought about whether it is real or artificially created. We want to open a little secret - many sections were made artificially. In this article, we would like to talk in more detail about what it is, how to do it and why it is needed. We will also try to tell you exactly where it can be applied, what problems can be, what can be created in general.
The easiest way to get a beautiful front lawn
Of course, you have seen the perfect lawn in the movies, on the alley, and perhaps on the neighbor's lawn. Those who have ever tried to grow a green area in their area will no doubt say that this is a huge job. The lawn requires careful planting, care, fertilization, watering. However, only inexperienced gardeners think so, professionals have long known about the innovative tool - liquid turf AquaGrazz.
What it is?
To begin with, I would like to understand what it is. Geoplastics is an artificial change in the natural relief on a piece of land. Few people immediately get that piece of land that will suit in all respects and truly satisfy. That is why many resort to such a method as geoplastics. Most often, this technique is used in landscape design and architecture, while helping to create a dream courtyard.

You must understand that you can create anything (streams, lakes, hills, depressions).
Before you create something on the site, do not forget to come up with and draw a layout. You are unlikely to cope with such a procedure on your own, but in the modern world there are many design firms that will take on the realization of your idea.
Why is this needed?
After you read what it is, the question arises: why? It should be noted that geoplastics are decorative in nature. But where exactly to apply it, you decide. You can create it in a small area of your yard or cottage, but, on the other hand, you can create not only a garden, but also a park, a health zone or a "green" zone in the city.
- Geoplastics solves several aesthetic problems. It helps to improve the appearance and is created as a decorative element at the same time. Most often, only entertainment purposes are pursued.
- Solves several engineering problems related to the natural conditions of the site: soil stabilization, drainage, drainage, wind protection.
What can be created?
Since geoplastics will definitely interest you, we decided to immediately tell you about what you can create:
- Various hills and embankments, hills and small mountains;
- Grottoes and terraces;
- artificial reservoirs;
- Other.
Terracing the site will help you diversify the landscape. You can build special support walls that can level your site, and the created hills, on the contrary, make it more uneven. At the same time, in the grottoes created by you, you can place cellars or storage places.

You can also use streams and lakes to create a real Eden! Reservoirs can be created in the desired shape and depth.
What problems might arise?
Many, igniting the idea of geoplastics of the site, forget to think about the fact that this can not only help nature, but also harm it. There are a number of problems in which geoplastics are contraindicated for landscape design, among them.