Recommendations for making wooden children's slides. Children's slide at the dacha: how to plan and make it yourself? Slide for children made of plywood at home
If you have children and country cottage area, then it’s definitely worth building a slide on it. While parents are busy gardening or cooking barbecue, the kids will have fun on the mini playground. Read about how to plan and make a slide with your own hands, using photo and video instructions in practice.
Height and safety
The slide on the site should first of all be safe for children of different ages. So, for children under 2 years old the height of the slide is only 1.5 meters, for children from 2 to 7 years old the height is about 2.5 m, and for teenagers 3-3.5 meters. The steps on the slide ladder should be wide, and the rungs should be located close to each other. Further, the staircase design must be equipped with handrails of any type: after climbing the slide, the child must hold on to something.
Advice! So that the slide serves more than one generation of children and is safe on the stairs and around it anti-slip coating. The covering protects children from injuries when climbing during rain, snow or after swimming in the pool.
Another important stage in creating a safe slide is calculating the weight of the children who will ride on it:

The height of the slide depends on the age of the children
- The slide is secured to a base or supports that can easily support the weight of 2-3 children.
- A level gutter is responsible for safety during descent; it is good to make sides on the sides to prevent the child from falling out.
- All bolts, chips, chips or sharp corners on the slide for children are excluded. The wood is sanded so that the child does not drive a splinter.
Advice! Under the gutter along which the child descends, a soft piece is placed - this lawn grass, a mound of sand or soft covering.
Choosing a place to place a children's slide
The slide is placed in the place where it opens good review from any point on the site. But make sure that the place for games is not in the very hot sun. In the case of such an arrangement, it is worth thinking about building a canopy.
Advice! The canopy is made of polycarbonate, and a regular beach umbrella is also suitable for a low slide.
Wood slide
Slide from natural wood distinguished by its environmental friendliness and ease of installation, it consists of the following elements:
- Base.
- Staircase with railings.
- Descent.
- Top platform and protective parts.
Such a slide can be complemented by a whole of labyrinths, beams, sandbox or mini rooms with entrances and exits. The construction of a wooden slide involves the selection of high-quality raw materials and their normal processing.

Wooden slide
The ramp is made of plywood, pre-coated with varnish to hide sanding errors. Support structure It is made of timber, and the steps are made of strong boards.
Important! Today, there are a variety of ramps available for sale, made of durable plastic, fiberglass or wood. The minimum price of a stingray is 1.5-2 thousand rubles. The best option is the creation load-bearing structure for a slide with subsequent installation of a flat or spiral slope.
A wooden slide is good for everyone, but located on open space after 3-5 years it may dry out, be damaged by insects or mold. Wood rots from rain, and the situation can be saved by covering each structural element with a thick layer of varnish. But after winter and hot summer, the slide should be inspected, identifying dry or cracked parts.
Metal slide
Previously, metal slides stood in every yard, distinguished by their strength and durability. Such designs are more reliable, because they are not afraid of the hot sun, rain, or frost.
The construction of such a slide is carried out in several stages:
- The most primitive foundation is poured; you can immediately pour 4 support pipes, as is done when installing fences.
- Next, the stairs and railings are welded onto 2 pipes on one side, the remaining 2 pipes are used to attach the gutter.
- A platform is welded onto all pipes.
Important! Gutter is 2 metal pipes, to which a curved sheet of metal is welded. After assembling the slide, everything welds must be sanded; a grinder is used for these purposes.
After completing the assembly of the structure, the slide can be painted with plain paint or painted. The metal gets very hot under the sun, so on hot days it is worth covering the slide with a beach umbrella to prevent children from burning their skin.

Play complex with slide and swings
A simple slide can be made using a descent from a house, which is also built with your own hands, using timber or leftover building materials:
- Concrete piles are mounted in 4 old car tires and beams of the required height are installed vertically on them. The beams are secured with construction corners.
- A frame for the house is installed along the perimeter of the posts, with holes for entry through the stairs and exit through the slide.
- After this, a light but durable ladder, a chute for descent, the floor and walls of the future house are installed. The elements are attached using self-tapping screws, and the entire wooden structure must be coated with an antiseptic.
- Holes are drilled at the joints of the beams, tightening the structure with 120 mm bolts.
- Next, stack rafter elements from timber for the roof. The final roof covering is made of corrugated sheeting. Decorative tiles made from ordinary colored foam are often used.
The last stage is to cover the entire structure with a layer of varnish.
How much does a finished slide cost?
To avoid the hassle of making it, you can simply purchase a slide:
- Inflatable slide for the little ones. Such a slide perfect solution for small children, because it can be equipped with a shallow pool, mini trampoline or educational elements. The cost of an inflatable slide starts from 4 thousand rubles, usually it has a height of more than 1.4 m. The advantages of the slide are its mobility, resistance to temperature changes, and after the child grows up, the inflatable center can be sold at a profit.

You can buy a slide, but it will be more expensive than building it yourself
- Play complexes are made of plastic, in some cases combined with wood. This kind of city is more expensive, and minimum cost starts at 4.5 thousand rubles for the most primitive model. But plastic slides can combine a swing, parallel bars that develop the muscle corset, a basketball basket and much more. Thanks to the fastening system, the height of the gutter can be adjusted to suit the age and height of the child.
Creating a children's slide is a creative process, and a full-fledged play area requires a swing, a sandbox and even a football goal. But to build these elements children's corner much cheaper on your own, because buying finished product requires 60% more material resources.
DIY children's slide: video
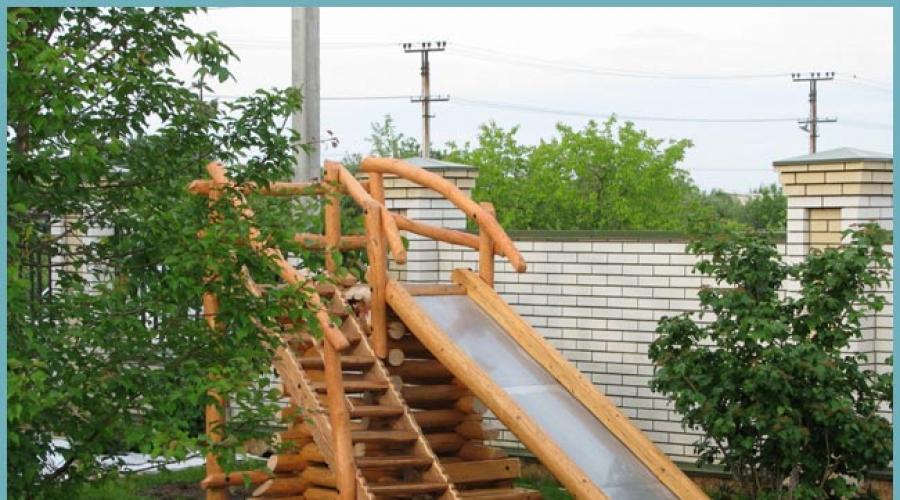
Slide for children at the dacha: photo


Children's slide, swing, sandbox for the cottage. Wooden CHILDHOOD - with your own hands. July 28, 2011
I remembered... Mine small miracle began to grow, and as he grew older, I decided to stock up on heavy artillery in the form of a playground with all kinds of slides, ladders, ropes, and swings.
So the long process of creating a coniferous structure began.

Other photos
I devoted a week of my vacation to leveling the area,
So I buried four cubes of sand in a hole under the playground.
Of course, it’s not necessary to do this at all, and it’s not even worth it,
or at least just under the hill.
where the sandbox is supposed to be.
The child, of course, was warned in advance about his dad’s plans, but could not understand that this same dad had been rummaging around in the middle of the plot all week, digging up soil and scattering it all over the garden, but when the Kamaz arrived with sand, the whole family, headed by mom (everyone except dad ) ran joyfully around the mountain donated by the truck. Dad, meanwhile, was breathing heavily. 
While dad was digging, he could play king of the hill.
The first sketch (diagram of the playground) was like this 
Another diagram with the dimensions of the playground 

She was given shine 
It turned out that it was impossible to get onto the slide; there was no elevator, not even stairs. I started making a staircase, I didn’t seem to drink, apparently I don’t have to drink to get a drunken staircase. 
And


We didn’t cover the house with boards on one side; we wanted to watch from country window what the child is doing.
But over time we sewed up the wall. 


Having screwed the basketball hoop on, I didn’t immediately realize that it was upside down. 


The slide house was filled with furniture for comfort. 
The ring was turned over. 
After the sandbox appeared, a mountain of toys immediately fell into it.
We urgently need to make a pantry, namely a box. 
Well, how can we do without a table, because on fresh air and eating and drawing is a nice thing. 
After a snack, you can strain your brain a little and play chess or, for starters, checkers in the fresh air. 
In winter, it turned out that it was possible to slide off the roof if large snowdrifts appeared below. 

Now you can ride even in winter. Take the ice cube and go big. 

All that remains is to install the lights, voila, now you can invite your friends to a dinner party, and then admire the stars. 
A piece was cut out of the sides of the sandbox to make it easier to lick into it.
how he repeatedly hit his head against it. Beauty, of course, requires sacrifice, but not on the playground) 


The slide has faded in the sun, so this year we painted it with oil paint instead of impregnation. 
After we inserted multi-colored plexiglass.
Our windows have acquired a color: blue, yellow, orange - now the grass next to the hill is cheerful.
And looking through such windows the whole world becomes more cheerful. 
Now the only thing missing is a climbing frame, so that you can climb closer to the stars,
watch them. 
We urgently need to build a ladder to the roof 
Five years have passed, the children have grown up and we decided to update our children's complex, increase the space of the house above the sandbox.
We had to shorten the height of the swing so that the difference in the floor of the extension would not be too different from the height of the floor of the house. 
Due to the fact that the height of the swing was shortened, its amplitude also decreased (for aunts it’s not scary, but for adults it’s noticeable), it’s a pity, of course, but something had to be sacrificed (maybe we’ll find another place for the swing in the future).

Half of the roof was also dismantled in order to put it on new guides for the large roof. 
Maybe on such a roof it will be possible to go down on ice in winter) 


Part of the second half was also dismantled in order to increase the space; later we will insert a window into this space. 
Painted the roof new paint, this time not with wood impregnation, but with enamel, it turned out to be more durable
and already contains varnish at its core. 
We lay the floor in our extension, then lay plywood on top of the boards,
so that sand does not fall on the heads of those who swing on the swings. 

We cut out the grooves for the glass. One glass will remain in place, and the second will move away,
so that you could climb out of the window onto the roof. 

All that remains is to make a handle on both sides of the sliding glass so that it can be opened from both sides 

On the side we screw a support under the balcony, which is also a beam for attaching the rings and rope.


We hung a hammock in the extension as agreed. 
On the other side of the house we install a second beam for the future balcony and fastening of a rope ladder or some kind of rocking chair 

In order to be able to climb onto the balcony from below, we make a ladder. 
Every 20 cm we make indentations for sticks. And fasten them with ties. 
Painting the stairs in a bright color 


The balcony frame is ready, all that remains is to lay the floor. 

Lay the floor and make railings so that children do not fall out of the balcony. 
You can get to the balcony either by stairs from the street or from the house through a sliding window. 
You just need to make a ladder or steps that can be used as shelves, so as not to clutter up the space inside the house. 


I really wanted to hang a round wicker swing under the balcony so that several people could swing at once, but there are none of those on sale.
We found it on a Chinese website, we are waiting for it to be delivered, but while we are waiting we decided to make something similar to a swing boat. 

Steps appear from the house to climb onto the balcony from inside. 
What a pity that there are only two weekends during which you can’t do everything.
To be continued
Our rocking chair was not very popular, since it is interesting to swing on it with a large group, and this does not always happen.
I had to remove it and make a not so capacious swing from a tire. 
Now that in our yard fun companies we hang a big rocking chair,
and on weekdays there is a tire swing. 
But the other day we decided to make a winch lift for toys or sand, so that we could lift them to the balcony with interest. 

For similar slides but made from less thick materials, the price ranges from 40 tr and above, for example
You can also additionally make toy boxes, a hanging table,
Find out how you can make a snow slide yourself in winter, how to properly fill it with water so that it freezes.
Agree that in new year holidays One of the best, most memorable childhood memories is winter festivities. Making a snowman, sledding, skiing, and, of course, on the slides is a wonderful activity. The latter will be discussed in this article.
You will learn how to build a slide without difficulties at home, without any outside help. This slide will bring great joy to your children and even adults, and to make the work less boring, you can involve the whole family in it.
How to make a snow slide for children with your own hands?
It often happens that some problems occur during the construction of a slide. It collapses, falls apart, and pits and irregularities appear in the most inappropriate places. Next, you will learn how to make a slide correctly. So that it is durable, reliable, and most importantly, comfortable.
Materials for building a slide
To build successfully you will need the following:
- Frost outside the window
- A large amount of pure snow
- Shovel
- Broom
- Quite a decent amount of water
- Watering can, ladle
- Positive attitude
- Scraper or spatula
 An example of building a slide for collective use
 To build a slide, you need to follow a few simple rules:
Safety. Select safe place location future design. This is necessary so that your child does not get hurt during the descent, so that there is no tree, fence, road, bushes or other obstacles on the way. You should not create an object of entertainment under the roofs of old houses, from which an icicle, slate, brick, etc. may fall.


Slide height, inclination angle. Determine the height of the future slide based on the age of the children. For very young children, up to about three years old, a slide one meter high is enough. For older children, the most optimal, safe height is two to four meters. You should also adhere to correct angle tilt, such that it is no more than forty degrees.

Pure snow. When building a slide you need to use pure material. Because your child may smear things. Try to prevent children from getting hurt. The problem arises if there is debris, branches, sticks, etc. in the snow.


The procedure for creating an ice slide:
- Once the location and size are determined, we begin work. Using shovels you need to sketch required quantity snow. For example, a meter-long slide can be built in about thirty minutes. It is advisable to make the foundation of your snow slide using rolled large balls of snow. This way you will already have the base of the slide created.
- Next, we proceed to the formation of our slide. Using a spatula or broom, give it the required form. Let's do optimal angle slope of the slide, straighten the area of descent of the snow slide.
 The base of the formed snow slide
 - If the slide is high, make steps using a spatula (scraper) or shovel. To make the steps stronger, strengthen them with your feet so that the snow settles, and only then form them auxiliary tool. They should be comfortable and small so that children can easily climb up.

 An example of making snow steps
 IMPORTANT: The acceptable width of the step is at least twenty-nine centimeters.
Don't forget about the sides. Their height should be approximately ten to thirty centimeters, depending on the age of the child. The sides can be made using a shovel. Also, in order to give them shape it is necessary to use handmade. During it, do not forget to wear gloves as protection from the cold.


If you have the desire and time, then add decor. Decorate the slide with snowmen, various figures, and paint it with patterns. Or do everything to your liking, a lot depends on your imagination.

How to properly fill a snow slide with water?
We have come to the most difficult final stage - pouring ice slide water. The slide must be filled in several stages - at least three times. Use cool water using a sprayer, watering can, or ladle.
 What needs to be done to ensure that the descent on the hill is uniform?
 You will need a broom; with it you spray an even layer of water over the entire surface of the structure. Make sure there are no irregularities, holes, or bumps. To do this, during pouring, you need to smack the set thin, fragile layer of ice with a broom. After the second stage, you have a rough crust of ice. For a more reliable result, fill the slide a third time, after which you will get a strong, smooth, and most importantly, reliable structure.


IMPORTANT: Fill finished design stands at a low temperature, from 10 degrees below zero. Otherwise, your efforts will be completely useless.
If you follow the entire sequence of work, you will get excellent snow slide, which your children will be very happy about. If the winter turns out to be frosty, then the item of entertainment will last until the spring thaw.
Video: DIY snow slide
It's hard to find a child who doesn't love to ride downhill. On a sled or snow scooter, on car tire or modern cheesecakes, all children love to joyfully roll down the mountains, surprising adults with their courage and tirelessness. But very often slides located within city limits do not meet all safety standards. Therefore, modern parents are simply afraid to let their children ride on such children's slides. What to do in this case? Ban children from playing outside? In no case! You can build a slide yourself!
Let's look at a few simple ways creating a slide for a child with your own hands at home.
- Ice slide. With the onset of winter, crowds of children fill all the snowy slopes. But such skiing is not always safe. Very often, slides are located near the roadway. To protect your child from possible injuries and other unpleasant situations, you can make an ice slide yourself. For this you will need:
- shovel;
- water;
- bucket;
- metal spatula.
 Once the area has been selected, begin clearing the area for the future route with a shovel. Excess fragments can be removed using a metal spatula. If you are making a slide for kindergarten-aged children, it is preferable to make sides along the entire length of the track so that children do not have the opportunity to fly off the mountain while riding.
After the place for the slide has been cleared, proceed to one of the most time-consuming work - the formation of an ice track. A spray bottle will help you with this. Type into product warm water, and then evenly treat the entire surface of the future slide. Make sure there are no uneven spots on it. Otherwise, bumps will form on the slide, which will negatively affect both the quality of the ride and the health of the children. After the slide has dried slightly, fill the bucket with water. room temperature and roll the slide from top to bottom. Make sure that the liquid is evenly distributed on the surface. After this, leave the slide to freeze until the morning. If you have the opportunity, make a wide platform for the children from which they will go down the mountain, as well as steps that are comfortable for children’s feet.
- shovel;
- Home slide. You will probably not find a single child who has not at least once built a pile of their improvised materials. Help your children in such a difficult task! Build a home slide with them! To build it you will need:

- old desk;
- cabinet door (preferably varnished);
- plywood;
- small planks (you can use table legs or pieces from the handle of a shovel).
- old desk;
- Wooden slide. If your little ones very often visit their grandparents at the dacha, or you live in country house, then you can build a slide in the fresh air yourself. Of course, many advanced parents purchase entire children's complexes. But firstly, it is very expensive. Secondly, just imagine what kind of hero you will look like in the eyes of your son or daughter if you yourself build a miracle slide for them to play.
Basic rules when building a children's slide:
- It doesn’t matter at all how old your children are: one year or twelve years, the slide must be equipped with safe railings and fences;
- For the construction of the slide, choose only environmentally friendly components that will not harm the health of children. Never use flammable materials.
- When building a slide for children, it is preferable to use wood rather than metal structures. Firstly, a wooden slide can be absolutely safely placed anywhere on the site. Metal structure will have to be placed exclusively in the shade, because It heats up easily, which can cause thermal burns in children. If we consider plastic, it is quite fragile. Anyway, plastic slides in wide range presented in online stores and at very affordable prices. Therefore, there is no point in “reinventing the wheel.”
- Pay special attention to the safety of the children's structure. Remove all gaps and cracks where children can stick their arms, legs, or heads. Before letting your children play with the slide on their own, think through all the nuances to avoid sad consequences.
 You will need:
- grinder or grinding disc;
- five planks (length 2.2 meters);
- five bars (length 45 cm);
- two beams (70 cm each).
After we have made the descent from the mountain, we need to start building the side parts of the structure. Initially, you need to decide on the height and angle of inclination of the mountain. Standard sizes All factory designs of children's slides are: height 1.3 meters and angle of inclination 55 degrees. We cut out the side parts so that they fit on top floor slides. The finished sides must be secured on both sides of the mountain using self-tapping screws. Then we sand the sides of the slide and remove all the corners. This will allow us to protect our children from possible abrasions, cuts, fractures and other troubles.
The final stage of work is painting the slide and securing the supports. The surface of the structure can be covered with stain and then with varnish. After painting, let the children's slide dry for 24 hours. During this time, not only will the paint dry, but it will also disappear bad smell. After this, it is necessary to proceed to the final stage - installing the supports. They are initially buried and then concreted. It is the supports that will serve as some kind of guideline for you, relative to which you will attach other parts of the slide. Lastly, the base of the product is fixed. That's it, homemade wooden slide ready!
- It doesn’t matter at all how old your children are: one year or twelve years, the slide must be equipped with safe railings and fences;
Or they simply don’t have a slide near their home that children could ride on.
A slide can be not only a fun activity for kids, but also for children in their teens.
Everyone loves to have fun going down, laughing and running races down the fun slide.
Parents who made slides with their own hands can be pleased with themselves, because your children will definitely thank you. And their laughter and good mood will not leave anyone indifferent.
Making a children's slide with your own hands
Alas, plastic parts for children's slides are not yet sold in stores, and it is not possible to produce them independently, outside the factory. Therefore, we stock up on wood. You will need:
- wooden boards 2200x150x20 in the amount of 5 pieces;
- do-it-yourself timber for a children's slide 450x100x50 in the amount of 5 pieces;
- timber 700x100x50 in the amount of 2 pcs.
We will need three boards to build the base for the children's slide.
To make it as convenient, comfortable and safe for kids to ride as possible, they should be almost perfectly polished. It is also important to make these three boards the same thickness.
To make the slide for children or as smooth as possible, you will need a regular grinder with grinding wheels.
The boards should be attached to the beams on top of the slide with your own hands so that they do not sag during use. In order for them to be attached to the beams, holes should be made in accordance with the chosen fastening method.
The wood must be coated with a special putty that clogs all unnecessary holes. To definitely protect yourself from unevenness, you can treat the surface of the children's slide, made with your own hands, a second time with a sanding machine, and then cover it again with putty.
It is important to buy wood putty. When you apply the mixture, you must wait until it is completely dry before continuing to work.
How to make the side of a slide for children with your own hands
Now we need to prepare the side parts of the future slide. To do this, we process the wood in the same way using a grinding tool, and then install the sidewalls and attach to them the base of the children's slide, which will serve as the starting point for descending the slide itself.
The inclination angle of a slide for children is usually approximately 55 degrees.
The side parts must be attached to the beams, as well as to the base of the slide using self-tapping screws.
In addition to the fact that we attach the sidewalls at the second stage, we also need to make the sides for the slide.

Any requires the presence of sides different swings and slides, because it is better for children to go down, and for the sake of safety this should be taken into account. Firstly, the sides are convenient, and secondly, a child can fall in the middle of the path.
The sides need to be properly sanded and then coated with an antiseptic.
I love it wooden part for children's slides that you make with your own hands, you need to process antiseptic, since rain, snow and other precipitation can spoil the quality of wood.

In addition, insects do not sleep and also pose a danger to the life and reliability of your slide.
To clearly understand how to make a slide with your own hands, you can draw a diagram on which all the details, dimensions, scale and angle of inclination of various parts will be marked.

We secure everything with self-tapping screws, and in some places with long nails. To prevent nails from injuring anyone, they must be driven deep into the wood.
You will also need to create a children's slide with your own hands, which can be in the shape of steps.

Handrails are nailed to the steps, with the help of which children of almost any age can climb the slide.
It is advisable to sand all parts several times so that no one gets hurt.
How to make and install a children's slide with your own hands
After the slide for children is ready, you need to cover it with paint in several layers:
- apply toner to the slide with your own hands (stain);
- apply yacht varnish (when the stain dries).
Yacht varnish is also called super gloss, because it shines very well, and it will be more convenient to slide on it than just a wooden one. varnished surface.

In principle, this coating is not inferior in functionality to conventional ones, metal slides.
After the last coat has dried, sand one more time and then apply the final coat.
What is important to remember when installing a children's slide that you made yourself:
- the supports of the slide are buried to a depth of 60 cm;
- The supports of the slide for children are buried and laid with bricks - this will serve as a kind of strengthening.
Of course, the hole can be filled with concrete to firmly plant the slide, but the first option, which is the easiest to implement without extra costs.
In addition to the fact that you can make a swing, a slide, horizontal bars, there is an option to create one that will be used in summer time of the year.
IN in this case, whatever your idea, it is important to consider the presence of an antiseptic that coats the wood to prevent moisture and rotting. However, it is wood that serves as the main material for equipping a homemade playground, so Sander you will still need it.
Make your and your neighbor's children happy, don't be lazy and make a slide for children!