The recipe for Olympic bear cookies is old. Cookies “Shishka-Mishki. How to make “Shishka-Mishki” cookies
Read also
I think many people remember from childhood the most delicious “Mishki” cookies, prepared in a mold on gas. Today I accidentally came across a mold for nuts, mushrooms, straws and a mold for Olympic bears. I decided to bake and remember my childhood, when my mother or grandmother often prepared such delicacies. I found the recipe in my mother’s notebook and used it.
Ingredients
To prepare “Mishki” cookies in a gas pan we will need:
2 cups flour;
200 g butter;
100 g sugar;
2 eggs;
100 g sour cream;
11 g vanilla sugar;
1/2 tsp. soda;
1/2 tsp. salt;
1/2 tsp. vinegar;
vegetable oil for greasing molds.
Cooking steps
Add butter at room temperature and beat thoroughly until smooth.


 Place the dough on only one side of the pan. There should be enough dough so that it is enough for 2/3 of the volume of the finished bear (the dough should protrude slightly above the mold in which we put the dough).
 Close the mold and place on medium heat. Bake on gas for about 1-2 minutes, periodically turning the pan over. From this amount of ingredients I got 15 bears. Cookies prepared according to this recipe in a gas pan turn out very tasty and will definitely please the whole family.
Having rummaged through the deposits of old kitchen utensils, many people can find such joy as a mold for baking homemade cookies from Soviet times. Back then it was in short supply, and since they used to bake more and prepare pastries and much more with their own hands, they bought these beautiful antique things that you can’t find anywhere now, perhaps only at the flea market, and for quite decent, big money. Such forms had different coinages. Some people have cookie baking molds in the shape of hearts, others in the shape of stars. My sister Catherine luckily had a cookie cutter in the shape of geometric shapes. But this does not affect the taste of the cookies. It is important to choose your own recipe, the one according to which homemade cookies were prepared in the Union. Therefore, we are looking for grandmother’s and mother’s notebooks with recipe notes, where such a recipe will definitely be found.
So, even if your uniform is smoked with smoke, be sure to clean it and it will again delight you and serve you faithfully for many, many years, and then it will serve your children and grandchildren just as long. The recipe has been found, the mold is ready, we begin to prepare the dough for homemade cookies and bake the Soviet cookies themselves. Believe me, the taste of homemade cookies in the form will be exactly the same from distant Soviet times, just as awesome and incomparable with anything.
You will need:
- Flour - 1.5-2 cups (faceted cups)
- Eggs - 3 pcs.
- Sugar - 2/3 cup
- Butter (margarine) - 200 gr.
- Vanillin - 1 gr.
- Salt - 1/3 tsp.
- Soda + vinegar - 1/2 tsp. (or baking powder for dough)
 How to make homemade cookies in the form:
I want to show you right away - this is the form in which we will make homemade cookies. This metal mold is over 30 years old and served our grandmother, mother, and now us. Sometimes it needs to be cleaned, fortunately now it does not require a huge expenditure of effort. 
Cut margarine or butter into pieces, place in a saucepan or iron mug and melt over low heat, stirring. While the butter is heating, whisk the sugar, eggs and vanillin separately. Do not beat! We extinguish the soda with a bite.
Combine the cooled melted butter with the egg-sugar mixture and mix until smooth.  Add flour and knead the dough.
  The cookie dough is ready. In terms of consistency, it should not be too liquid, but in no case too thick.
Lightly grease the baking pan with butter and heat the pan heavily over the fire (this is the case if you are preparing cookies in an old metal pan). If you are making cookies in modern electric appliances, simply follow the instructions that come with them. 
We warm up the mold so that the cookies do not stick to the inner parts of the mold during baking. When the pan is hot, place the required amount of dough in the center.  and immediately close the second half. The dough will distribute itself evenly throughout the entire pan (after the first baking, you will immediately understand how much dough you need to add - less or a little more).
Bake cookies on each side for 15-20 seconds, no more. But our cookies are already so golden brown. 
The finished cookies can be placed in a heap on a plate and they will reach the desired degree of frying. Or you can immediately break it into segments. Homemade cookies are very tasty, especially when eaten with milk. Prepare it for your family, they will definitely appreciate your efforts. 
Svetlana and my home kulinarochka2013.ru wish you all a bon appetit!
Cookies "Olympic Bear" - original, tasty, inexpensive. By the way, such baked goods will be especially suitable for children’s parties. The good old Olympic bear is a worthy competitor to modern Barney!
Nowadays it is difficult to surprise someone with delicious original pastries. City and provincial supermarkets simply abound with an endless variety of the most intricate pastries, crackers, cookies, bagels, buns, cakes and other desserts. And modern housewives amaze with their culinary creativity, which new kitchen units help to realize.
However, as they say, “The new is the well-forgotten old.” We invite you to remember one of the most popular recipes of our grandmothers - soft Olympic Bear cookies. It is prepared very simply from a very affordable set of products. For baking you will need a special metal mold, which many grandmothers and mothers have kept since Soviet times.
This form consists of two halves connected to each other and is intended for use on an open fire (gas). This uniform was created in honor of the first Olympic Games, held for the first time on the territory of a socialist state in 1980. In honor of such a historical event, many souvenirs with the symbol of the Olympics were produced, as well as this culinary form. An analogue of the rarity is produced by some modern enterprises today.
Method of preparation: baking in a metal form on gas
Cooking time: 1.5 hours
Number of servings: 26 pcs.
Ingredients:

Cooking method

Add sugar to the bowl.


Mix the ingredients in the bowl thoroughly.

Add eggs to the bowl.

Mix eggs with all ingredients.

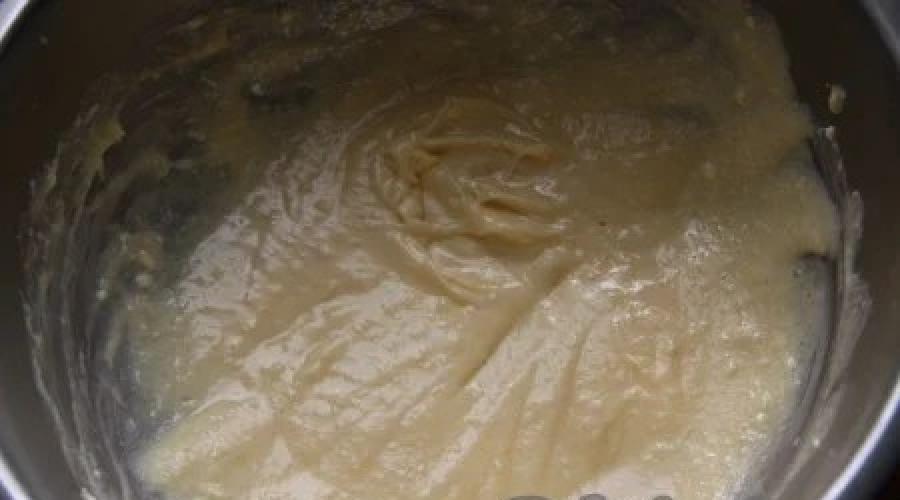
Add flour to the bowl.

Mix the flour with all the ingredients in the bowl. The result is a medium-thick dough, similar to honey, thick sour cream or pancake dough. There should be no lumps in it.

Carefully lubricate the inside of the metal bear mold with vegetable oil using a silicone brush.

Place the mold closed (folded) on the gas. Heat thoroughly on both sides for several minutes. If the mold is poorly greased or not properly heated, then the first bears baked in it will inevitably stick and break when pulled out. Place the finished dough into the preheated pan, distributing it evenly along the length. It requires 1 heaped tablespoon (for each cell). Cells are filled only on one side. Try not to let the dough go beyond the edges of the pan. The cells should not be too full. During the baking process, the dough rises and increases in volume.

Close the pan tightly and bake the bears over low (moderate) heat, 2 minutes on each side. If the fire is high, the inside of the bears will be raw and the outside will be burnt. Make sure the cookies bake evenly. After the required amount of time has passed, open the mold and place the finished bears on a plate or serving plate. If they stick a little, pry up the edges of the figures with a knife. If there is excess dough around the edges of the bears, trim it off. Place a new portion of dough into the pan and bake the same way. These are the Olympic beauties we have!

Ready-made cookies in the shape of cute bears are especially popular with children. The Olympic bear is a worthy competitor to the modern “Barney”. Suitable baked goods for a children's party or home tea party.
Cookies in a gas tin
Ingredients
Flour - 7 tbsp. with top
Vegetable oil - for greasing the mold
For cream:
Butter - 200 g
Boiled condensed milk - 0.5 cans
Cooking process
I remember that in Soviet times there were various forms for gas-fired cookies on sale: “Mushrooms”, “Nuts”, triangular shapes and various others. I’ve been using my mold for decades and I never tire of thanking my mother, who bought me this mold, and the unknown inventor. When I received my nut maker, I was still a child, but even then I managed to make cookies; my mother did not participate in the baking process. And my children started baking nuts in a gas pan at school age.
But my granddaughter surpassed everyone. She is not yet three years old, but she is already helping me put the dough into the nut bowl. This is all to say that even an inexperienced housewife is guaranteed to succeed in baking cookies in a gas pan. This is a great way to teach children to cook, and such a unit will also help out an adult when you need to cook something tasty.
I also have an electric nut maker, but I find the gas version more practical. Just yesterday, when I was in the middle of baking cookies on gas, our power went out. The lack of electricity did not stop me from finishing the job I started.
I'll start by preparing the dough. We will need to prepare shortbread dough. Mix the egg with sugar (no need to beat), add sour cream. Let's melt the margarine. Let’s cool it and also add it to the total mass along with soda, quenched with vinegar. Next, add flour and mix everything until the dough is smooth. Wrap in film and refrigerate for half an hour.
During this time we can prepare the cream for our future cookies. Add boiled condensed milk to the butter.
Using a mixer or whisk, grind everything into a homogeneous mass. I told you in detail how to make cream from boiled condensed milk here.
You can start baking. My uniform is already quite old, and I was surprised to find the price on it was 5 rubles. The mold consists of two parts, grease both of these parts with vegetable oil or margarine.
Place the dough into the holes for the shells. Fill it two-thirds full.
We connect the two parts of the form. Let's close. Put on gas and fry on both sides. In the process, I carefully open the form and see what color my shells are.
The first batch is ready. The disadvantage of this cookie mold is that at one time we get 8 shells, that is, there will be only 4 nuts. It turns out that preparing nuts in a mold on gas is a lengthy process. I'm thinking about buying a second pan so I can make cookies on two pans at the same time.
We remove the shells and process them - we cut off the excess from them. We chop these scraps and put them in the cream. Well, fill the form again with dough and put it on gas. Don't forget to grease both sides of the pan with oil before each addition of dough.
All the shells are fried, let's wait until they cool down.
Fill the cooled shell with cream.
We connect two shells together. We've got a nut. We remove the excess cream (which has crawled out).
Well, here are our cookies in a gas pan and ready. Unlike a cake, we don't have to wait for the cake layers to soak. “Nuts” cookies can be eaten immediately.
Cookies in gas form: mushrooms
Several decades ago, many housewives had special molds for baking cookies in their kitchens. Mushroom cookies, made in special molds, were a favorite delicacy of Soviet children and adults. An interesting look, crumbly dough and delicate cream inside - these are mushroom cookies; preparing these homemade cookies in a gas pan was not at all difficult. It was baked in special thick-walled molds. There were baking molds for both full and hollow products. The products were prepared on a regular gas stove; the mold had to be turned over first one side or the other, alternately. In order for the baked goods to be easily shaken out, its surface had to be carefully greased with odorless sunflower oil.
Mushrooms in glaze
Although the recipe is many years old, it has not become outdated, conquering new generations of sweet tooths.
Ingredients
- 0.5 sticks of butter;
- 1.5-2 cups premium flour;
- one egg;
- a pinch of salt;
- 20 grams of vanilla sugar.
- 0.5 cups of powdered sugar;
- one protein;
- green coconut flakes;
- 5 cups sour cream;
- 3 tablespoons sugar;
- 2 tablespoons butter;
- 2 tablespoons cocoa.
- Add an egg to the pre-melted and cooled butter, add sugar and flour with soda and vanilla sugar.
- Mix everything thoroughly.
- We put the empty mold on gas and warm it up well on both sides. Lubricate the inside with odorless vegetable oil and pour in the dough. Close and place on medium heat. After about a minute, turn it over to the other side, do this 5-6 times. Open the pan and check if the baked goods are ready.
- Shake the prepared mushrooms onto a dish and add another portion of dough.
- To prepare chocolate glaze, sugar and cocoa powder must be thoroughly ground until all lumps disappear. Mix with sour cream and bring to a boil over low heat with constant stirring. Add butter to the boiling glaze and boil until the butter dissolves. The glaze should be used warm.
- Prepare the sugar glaze, beat the egg whites with powdered sugar.
- Dip the mushroom caps into the warm chocolate glaze, place them on a plate and let sit until the glaze hardens. This will happen faster in the refrigerator.
- Dip the mushroom stems in sugar glaze and sprinkle with green coconut flakes.
- two eggs;
- 200 grams of margarine;
- 100 grams of sugar;
- 1/4 teaspoon of soda;
- 1 teaspoon vinegar;
- one packet of vanilla.
- 1 glass of sugar;
- 3/4 cup milk;
- 250 grams of butter;
- a packet of vanilla sugar.
- Melt the margarine and cool.
- Beat sugar with eggs, quench soda with vinegar. Mix all the products, knead thoroughly until completely homogeneous.
- Preheat the mold on both sides and grease the inside with vegetable oil. Fill the cavity with dough to 1/3 of the volume. Remove excess dough.
- Bake, turning the pan periodically. The pieces are very thin, bake quickly, it is important not to overheat the pan.
- Keep the butter at room conditions until it softens.
- Mix milk and eggs in a saucepan, add sugar. Place in a water bath and keep over low heat, stirring constantly until the syrup thickens. You should have the consistency of liquid pancake batter. Remove from heat and cover with a lid. Let cool.
- Mix the butter with vanilla and gradually add the syrup, whisking continuously. The finished cream must be cooled for 15-20 minutes so that it becomes thicker.
- We take out the finished cookies and fill them with cream or jam.
- 2.5-3 cups flour;
- 1 egg;
- 2/3 stick of butter;
- 1.5-2 cups sugar;
- 0.5 cups sour cream;
- 3/4 cup water;
- a packet of baking powder;
- 0.5 cups starch;
- green coconut flakes;
- 1 tablespoon cocoa.
Products for cookies in a gas mold are ready:
Cookies with filling
Before baking cookies in a gas pan, we will select recipes for hollow cookies. We will prepare the mushrooms with a filling - with Charlotte cream or jam.
For shortbread cookies you will need:
Prepare mushrooms in the following way:
Favorite recipe
Let's learn how to prepare another version of mushroom cookies. Adding starch to the dough makes the baked goods especially airy, crumbly and crispy.
Cooking method
Let's start preparing the mushrooms:
- The butter must first be melted. In a saucepan, mix butter, sour cream, egg and half the sugar.
- Add flour and starch. Mix everything thoroughly, cover with film and place in the cold for half an hour.
- Place walnut-sized pieces of dough into a preheated and greased pan. Bake, turning from one side to the other every minute. When the pastry is browned, remove from heat. Shake out the cookies and place the next portion of dough into the mold.
- From the remaining sugar and 2 tablespoons of water, cook syrup and cool. Place the stem of the mushroom in the syrup and dip it in coconut flakes.
- Mix the remaining syrup with cocoa and mix well. Dip the mushroom cap into the syrup; for a brighter color, you can do this twice.
So we studied the recipe - cookies in a gas pan. Mushroom cookies, despite their longevity, will delight all sweet lovers with their taste for a very long time.
Cookies "Olympic Bear"
“Olympic Bear” cookies are baked in a mold that many have preserved from Soviet times. Today's young housewives often get this form from their mother, grandmother, mother-in-law... But the only problem is: not every home remembers exactly how Olympic Bears cookies are baked. But once upon a time such pastries were very popular! 
“Cozy Kitchen” firmly declares: the recipe for “Olympic Bear” cookies has been completely undeservedly forgotten! Because the simplicity of execution and its taste truly deserve attention. Therefore, take out the dusty forms and act!
Melt the margarine, cool slightly and add all the other ingredients to it. The dough turns out like pancakes. The most important thing here, as usual, is that there are no lumps.
Place the pan on the burner and heat it very well. If you don't heat it up, the cookies will stick. Grease the heated pan with vegetable oil - once during the entire baking period.
Place a tablespoon of dough into one part of the mold. The most difficult thing here is to catch the portion that will fill all the details of the mold and not go over the edge. Once you determine this norm for yourself, cookies will be baked easily and simply. 
Close the filled pan tightly and bake the cookies over moderate heat for 2 minutes on each side. If the burner is small (or gas), the pan must be moved a little so that the cookies bake evenly.
Shake the baked bears out of the mold onto the table (plate, towel, tray) and immediately put a new portion of dough into the mold. We slightly trim the edges of the baked bear cubs and beautifully arrange the finished figures.
After use, just wipe the outside of the mold with a dry soft cloth, and it will be ready for storage and subsequent work.
A great option for a children's party - children will love to eat Olympic Bear cookies! The recipe is simple and economical, you get quite a lot of figurines. A worthy answer to the purchased “Barney”!
comfort-kitchen.ru
Homemade cookies in molds
The dough for these cookies is very easy to roll out and cut out with molds. You can decorate with icing or chocolate. There is a link to the frosting recipe in the note. See different design options in the photo for inspiration.
Ingredients
It turns out: 30 pieces
- 150 g butter
- 1 cup sugar
- 2 eggs
- 0.5 tsp vanilla
- 2.5 cups flour
- 1 tsp baking powder
- 0.5 tsp salt
- Flour – 3 cups
- Sugar – 1 glass
- Sour cream or mayonnaise – 200 gr
- Margarine 250 gr
- Egg – 3 pcs.
- Table vinegar – 1 teaspoon
- Salt – 0.5 teaspoon
- Soda – 0.5 teaspoon
- Beat the whites
- Grind sugar with yolks, add salt
- Quench soda in vinegar
- Combine margarine with flour, add sour cream
- Mix everything thoroughly to a thick mass.
- Bake in a cookie tin. You need to heat the mold evenly, turning it 180 degrees.
- eggs - 2 pcs,
- butter - 100 g,
- mayonnaise - 100 g,
- flour - 2 cups,
- sugar - 1/3 cup,
- starch - 1/3 cup,
- soda - 1/3 teaspoon,
- vinegar 9% - 1 teaspoon
Cookies “Nuts”, “Bears-cones”, “Mushrooms”, etc. in a pan
first option
INGREDIENTS
Wheat flour, premium - 200 g
Egg - 1 pc.
Margarine - 100 g
Sugar - 20 g
Salt - a pinch
Baking soda - a pinch
Citric acid - a pinch (you can use table vinegar - 5 g)
Vegetable oil - 5 g
PREPARATION METHOD
Take one egg. Wash the egg shell thoroughly. Break the shell and pour the contents of the egg into a container for preparing the dough.
Pour the prepared sugar into the container with the egg. Add salt.
Using a wooden spoon, stir (in a circular motion) the contents of the container until the sugar and salt are completely dissolved.
Add softened margarine to the mixed mass.
Thoroughly rub the margarine with a wooden spoon until smooth.
Quench soda with vinegar. Pour the quenched soda into the prepared mixture.
Mix thoroughly again. Add flour.
Mixing thoroughly, proceed to kneading the dough. You will know that the dough is ready by its thickened appearance and the remains of undissolved flour. The dough must be kneaded until the flour is completely absorbed. It is advisable to knead the dough by hand. The warmth of your hands makes the kneading better.
After finishing kneading, place the container with the dough in a warm place for half an hour.
While the dough is settling, take the mold and place it on the stove to preheat.
Lubricate the cells with vegetable oil.
Close the pan and heat on the stove. If the splashes of water applied to the back (non-working) sides of the mold are boiling, then the temperature of the mold is suitable for baking.
Uncover the pan and use a spoon to fill one half of the pan with a small top.
After filling, close the mold and, using a mitt or oven mitt, squeeze the handles and place the mold on the hot plate. Keeping your arms clenched, hold them on one side for a few minutes. After this time, turn the closed pan over to the other side and heat it too.
Open the mold slightly and look at the color. If the color is moderately brown, the cookies are ready.
second recipe
5 eggs
glass of sugar
200 margarine,
vanillin,
flour - until the pancake dough becomes thick.
Melt the margarine
Mix everything with a mixer and it’s ready.
fourth recipe
250 gr. margarine, better than butter,
1 tablespoon sugar,
1 yolk of a hard-boiled egg,
1/4 cup sour cream
Flour (I can’t say the exact amount, add until you get a stiff dough, like for shortbread cookies)
Grind margarine well with sugar and yolk. Add sour cream, mix. Then - flour. Make a stiff dough and put it in the refrigerator for an hour. Bake at 220 until golden brown. Fill the finished halves of nuts with creams
fifth recipe
150 g butter 3 tablespoons sugar 2 eggs 1 tablespoon honey 1 tablespoon cognac 1/2 teaspoon soda 1 teaspoon vinegar 3 cups flour
cream: option 1: 1 can of boiled condensed milk 100 g butter
Option 2: 400 ml 20% cream 3 yolks 2-3 tablespoons sugar 1 tablespoon flour
Option 3: 1 glass of milk 3/4 glass of sugar 3 yolks 1 tablespoon of flour 1 tablespoon of cognac 1.5 cups of walnut kernels molds for baking nut cookies
Yield: at least 40 “nuts”
Preparation: Grind softened butter with sugar, add eggs and cognac - beat everything well. Add honey, soda quenched with vinegar, mix everything, then gradually add flour - you should get a plastic dough that does not stick to your hands. Place a piece of dough into each “nut” mold, press it tightly to the bottom and sides of the mold so that there is a depression in the center (after baking, each half of the nut will form a depression that is filled with cream). Remove excess dough protruding beyond the edges of the pan. Place the molds on a baking sheet. Bake the cookies in an oven preheated to 180°C for about 15 minutes (until golden brown). The “nuts” come out beautiful, golden, and easily come off the molds (just turn the mold over and the cookies will fall out on their own).
sixth recipe
Tender and crumbly dough for “Nuts”:
200 g butter 0.5 cups sugar 3 yolks 1/4 teaspoon baking soda 1 teaspoon vinegar 3 cups flour (1 tablespoon flour can be replaced with starch)
Grind the softened butter with sugar, continue grinding, add the yolks. Add baking soda, vinegar and flour to the oil-egg mixture. Knead the dough and put it in the refrigerator for 20 minutes. Roll out the chilled shortbread dough into a thin layer, from which cut out circles with a glass. Place each circle of dough into nut molds and gently press against the inner surface of the mold. Cut off excess dough with a knife. Place the molds with the dough on a baking sheet (dough side up) and place in a preheated oven. Bake nut cookies at 180°C until golden brown.
seventh recipe
Thick dough for "Nuts":
200 g butter 0.5 cup sugar 3/4 cup full-fat sour cream 3 egg whites 1/2 teaspoon baking soda 3 cups flour (1 tablespoon flour can be replaced with starch) pinch of salt If desired, you can add vanilla or cinnamon to the dough
This dough for “nuts” is denser than the previous one. Doesn't crumble, keeps its shape well. To ensure that the “nuts” from such dough do not turn out too hard, the blanks for the “nut halves” need to be rolled out as thin as possible. Mix flour with soda, salt and spices. Grind the softened butter with sugar, continuing to grind, add egg whites, sour cream, then flour with spices and soda. The further sequence of preparing “Nuts” is the same as in the 6th option. Fill the cooled halves of the “Nuts” and seal them with cream: place a teaspoon of cream on one half of the cookies, cover with the other half and press - carefully remove the excess cream on the sides of the “nuts”. The cream for the “nuts” should be thick and viscous so that the cookie halves stick well to each other.
Types of cream for Nuts:
1. boiled condensed milk with pieces of nuts
2. boiled condensed milk, mashed with butter (for 1 can of condensed milk - 100 g of butter)
3. thick creamy custard (to make it thicker, use a tablespoon of flour instead of a teaspoon).
4. Nut custard. At the same time, in the middle of the “nuts”, in addition to the nut custard, you can additionally put half (or a quarter) of a walnut kernel. Place the finished “Nuts” in the refrigerator for several hours to soak in the cream. The “nuts” turn out crispy.
recipe eight
Break the eggs into a bowl, add sugar and beat lightly with a whisk.
Add softened butter to the egg mass, then mayonnaise and mix.
Quench the soda with vinegar, pour into the dough and mix well.
Combine flour with starch and sift.
Gradually add flour and starch and knead into a homogeneous, plastic (not stiff) dough.
Place the dough in the refrigerator for ~40-60 minutes.
Before baking, warm the nut pan (a special form for baking nuts) on the stove on both sides.
Grease the hazel with vegetable oil using a pastry brush or a cotton swab.
* For the next batches of nuts, you do not need to grease the mold.
Pinch off small balls from the dough and place them in the holes of the hazelnut.
Close the mold, pressing the lid firmly for the first few seconds.
Bake the nuts until browned (turn the pan once during baking).
Transfer the finished halves of nuts to a plate and trim off the excess dough (save the trimmings).
Then add baking powder, 1.5 cups of flour and knead into a soft dough.


Add cocoa powder and 1/4 cup flour to the larger portion. Add 1/4 cup flour to the light dough. Wrap the dough in cling film and place in the refrigerator for 30 minutes. From this amount of dark and light dough, I decided to prepare dark and several light “bears”; if you prepare only dark “bears”, then you will need less light dough, and if you prepare only light “bears”, then, on the contrary, you will need less dark dough, than light.


To decorate the dark “bears”, divide the remaining dark dough into 15 parts - 14 equal and one larger. You will also need 8 identical pieces of light dough, slightly larger in size than 14 pieces of dark dough.

Line a baking tray with baking paper, grease with vegetable oil, lay out circles of dough, form “ears” from the prepared dark pieces of dough, roll out pieces of light dough into a circle and place on the dark dough. Also decorate light “bears”. Form “eyes” from light and dark dough, and “nose” and “mouth” from dark dough. Bake the cookies at a temperature of 170-180 degrees for 15-20 minutes, depending on the oven, you need to make sure that the light-colored cookies do not brown too much.