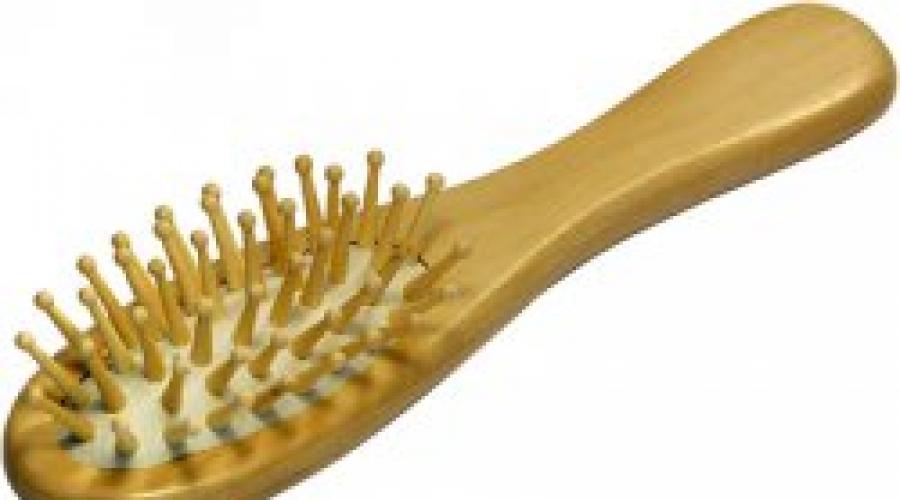
DIY comb. Master class on creating a comb for a doll Do-it-yourself wooden combs
Read also
The website dslaboratories.ru presents professional hair care cosmetics. Using a circular saw we cut the board to a thickness of 6 mm, this is very difficult. Therefore, make all the markings in advance, especially since you will have to work along the material. It’s better, of course, to play it safe and do everything slowly.
We choose the width and length of the comb ourselves, approximately 2 cm and 12 cm. This will be enough; there is no need to use a large comb either. As soon as the workpiece is ready, we begin to cut teeth on it.
 Most likely, we will proceed from the parting frequency. This means we make teeth 1.5 mm thick, and the distance between them is 1 mm. Although you can divide it into two parts and make the other half larger.
We perform all manipulations on a circular saw, therefore, we exercise maximum caution. It is advisable to use protective equipment so that the chips do not get into your eyes. After you have finished cutting out the teeth, you need to polish the comb.
You can apply sandpaper or a machine, only with a fine-grained wheel. Upon completion, we scrub it thoroughly, varnish it and it is ready for use. In principle, the comb is ready, the main thing is not to pull the hair too hard so as not to break the teeth.
- Sewing a leather bag is not that difficult, although the process is more creative than physical. You will need materials that can be found in the store or use those that you have at home. How
- Stow floor tiles It may not be that difficult, but you need to have certain knowledge. Most of all, she doesn’t like unevenness, so first of all we level the base. Since there is to be
- Perhaps there is not a single stage of work performed during the construction of a house where edged boards are not involved. With its help, foundations are poured, frames and doors are made, and construction
- Every girl loves to experiment with her hair and different hairstyles. Naturalness has always been and will be in fashion, so it makes no sense to do neat and complex hairstyles during the day. Even
- If you've ever had to remove a drilled-out piece of wood from a hole saw, you know how difficult it can be to remove it without damaging it. With a simple grip, you can easily pull out
Everyone uses combs. If you want to use an exclusive comb, you can make it yourself. Our article will tell you how to make a comb.
Combs made of wood have always been considered the highest quality, because wood does not “tear” or electrify hair. In addition, it has positive energy. For a comb, cherry, pear or apple tree are best. In addition to wood, you will need tools, namely: a jigsaw or circular saw, a grinding machine, sandpaper.
Making a comb
- The width of your board should be at least 8-10 cm, thickness - at least 6-8 mm. With help circular saw or a jigsaw, you need to cut out a rectangle from it, the length of which will be 10 cm and the width - 8 cm. Next, you need to carefully sand this board using a grinding wheel.
- Now you need to draw the shape of your future scallop on the prepared rectangle. You can make it any way you want, but you need to take into account that one side (namely the length, which is 10 cm) must remain straight.
- Next, we cut out the outline of the comb itself using a circular saw or jigsaw and begin creating the teeth of your comb. The suitable thickness of these teeth is 2.5 mm and the distance between them is approximately 1.5 mm. This marking must be done in advance. It is also necessary to cut the teeth using the above-mentioned tools.
- Now all that remains is to polish these teeth using grinding machine with a fine nozzle and use sandpaper to bring the teeth to the required condition. Now the comb itself is ready. You just need to cover it with wood impregnation (stain) or varnish.
Next, you can start decorating your comb, for example, decorate it using the decoupage technique, glue a variety of rhinestones, burn out patterns or inscriptions. If you are not very comfortable with the tool, then you can create a comb this way:
- Buy wooden toothpicks or skewers.
- Take 9 skewers and glue them together to form a square. There should be 3 skewers on each side of this square. You can glue them together with glue, and simply cut off the sharp ends in order to get comb teeth.
- Using a knife, you can make indentations in the handle itself for the teeth and secure them with superglue.
- Now the comb needs to be varnished. Ready.
Now you know how to make a comb yourself! Use your handmade comb for a long time and with pleasure!
Today we will create a hair comb with our own hands from wood. The craft is complex and requires special skills and unusual tools. With the help of such a comb, girls can pin up stripes or use them as decoration.
Tools and materials:
1. A piece of wood, 8 millimeters thick;
2. Wood coating oil;
3. Stain;
4. Pencil;
5. Jigsaw and cutters;
6. Sandpaper;
7. Brush.
Everything you need is shown in the photo.

How to make a hair comb
Let's take it wooden blank and place the paper patterns cut out on it. Draw along the outline with a pen or pencil.

For clarity, here is an example of our craft. You can print and cut out the sample.

The most difficult thing is to cut out the scallops with a jigsaw.

We smooth out the unevenness with sandpaper, remove the angularities at the edges so that the comb fits well into the surface.

Then we take finer sandpaper and polish. Those blanks that do not have seals can already be coated with stain and varnish.

Draw a cat in in the right place and carefully, with incisors, in manual mode cut out the figure. We clean each stage in a timely manner with sandpaper.

We paint the homemade products with stain and let them dry completely. Then we repeat this in several layers.

Cover with special teak oil. We wait until it dries completely. If necessary, blot it with napkins.

A great gift for a girl, even if... this moment she wears short haircut. Perhaps in a couple of years she will want long curls and a comb will come in handy. In addition, none of your friends will definitely have the original comb with a figurine of a sleeping cat!
Materials for making the comb:
- a piece of hardwood (such as tatachuba, teak or birch) 8mm thick
- stain on water based
- teak oil.
Tools for making a comb:
- jigsaw
- pencil
- wood cutters
- sandpaper
- brush.

How to make a hair comb with your own hands
We draw the contours of the ridges on the tree. The diagram is attached.


Using a jigsaw, we cut out the ridges along the contour.

We clamp a sheet of sandpaper into the holder. We need to grind the workpiece at an angle to the ends so that the combs fit into the hairstyle more easily.

Now we take small pieces of sandpaper and round all the corners, especially carefully rounding the ends. Combs without seals are already ready to be coated with stain and oil.

Seal combs are a little more complicated. We select cats along the contour using incisors. The main thing is to take your time and periodically sand the cat figurine with small pieces of sandpaper. The lines should be smooth and flowing.

We tint the combs with water-based stain (1-3 layers). Let it dry thoroughly for a couple of hours.

Apply teak oil generously and leave for 15-20 minutes.

Remove excess oil with a paper towel or rag. After 3-4 days, the oil will be absorbed and the comb will be ready for use.

All that's left to do is make the gift wrapping!
1) Using a hacksaw or circular saw, cut out an 8 by 10 cm shape from a plank.

2) Afterwards the surface is polished. We use a polished wheel.

3) It is required to draw the geometry of the blank for the ridge.

4) Then cut along the contour using a saw.

5) The teeth are cut out on a comb using a circular comb with a blade width of 1.5, and the width of the teeth is left at 2.5 mm. You can also use another value.


6) When the teeth are cut, it is necessary to sharpen the plane of the comb at the edge.


7) Now you need to grind the teeth (sharpen) using a special nozzle and clean the grooves.

8) Then the final look is achieved using sandpaper - zero.

Useful tips for making wood combs regarding sanding
- If you need to attach the skin to the surface, this can be done using simple silicate glue (stationery glue). Polymer adhesives soften when heated and rebound.
- If the skin is round, it is better to place it on a piece of vacuum rubber, in the center of which there is a metal axis. When installing the nozzle, press the washers on both sides. The skin is removed when the washers are relaxed.
- When initially making combs from wood, you can use a board from packing boxes - this will help you make good versions of combs and learn how to do more serious things.
- Don't be afraid to experiment with shape, size, etc. personal experience we will not replace.