Hollow core slabs and aerated concrete walls. Floor slabs for houses made of aerated concrete. Is it possible to lay floor slabs on aerated silicate?
Read also
Good afternoon.
It's very good that the foundation is intact. And 90% of our subscribers build houses themselves. Therefore, you have come to just the right place.
But I want to upset you, you can’t put slabs on blocks. I'll explain why. You will understand for yourself that these are completely different things: an armored belt and a masonry made of blocks or a lintel over a window. An armored belt can easily perform the function of a jumper over a window. This is how many people build now: they put an armored belt right above the window, then 2-3 rows of blocks with good density and a slab on top. You can lay slabs on nasosilicate only if the block density is 1600. But you won’t find such blocks. Even if your house were made of brick, you would still need armored belts, since they perform the function of uniformly distributing the load. And a brick or block takes a point load on each brick. In concrete and block masonry different strength characteristics and if you test them for compression, the block is very soft and fragile. In a reinforced belt, the reinforcement lies tightly, clamped by concrete, and the strength and stability of the enclosing structure is determined by the reinforcement.
An armored belt is a well-reinforced concrete layer that is laid along all load-bearing walls, which must be closed and in no case interrupted. Designed to increase the strength of load-bearing walls and maintain the integrity of the structure during soil subsidence, temperature fluctuations, precipitation or soil shifts.
An armored belt is especially necessary when building a house from blocks (gas silicate, Varmit, aerated concrete, etc.), since these materials do not have good resistance to bending loads. The armored belt takes on the entire load arising from deformation of the structure, evenly distributing the load on the foundation and the rest of the masonry. The structure experiences severe vertical loads from the floor and roof slabs, which only the reinforced belt structure can cope with. Therefore, if you do not want the masonry to fall apart, you need to do it as expected.
For your building you will need 2 armored belts, under the floors between the 1st and 2nd floors and under the roof of the house along all load-bearing walls (we also take into account the internal ones).
Parameters of the armored belt: monolithic belt with a minimum height of 20 cm and a width equal to the thickness of the block. It is advisable to immediately calculate the insulation for your region from 400 mm gas silicate, you can tell us about this and specialist Valeria will calculate whether just a block is enough or whether you need to insulate it from the outside.
Reinforcement of the reinforced belt: 4 rods of longitudinal reinforcement Ø12 mm, laid in 2 rows (2 rods in each row), connected by transverse reinforcement (clamps) Ø8 mm with a pitch of 30 cm. The distance of the reinforcement from the edge of the concrete is 5 cm. Scheme:
Are you going to clad or plaster your house?
Ask what is not clear.
answerThey are usually made from prefabricated reinforced concrete slabs. There are several types of reinforced concrete floor slabs: cellular concrete, multi-hollow heavy concrete And prefabricated monolithic floors. They are selected based on the span width and load-bearing capacity.
Found the greatest application hollow core slabs PC and PNO floors, with a load-bearing capacity of 800 kgf/m2.
Distinctive Features Such floors are characterized by high strength, fire resistance, manufacturability and complete factory readiness for installation.
Floors made of hollow-core reinforced concrete slabs are used with a load-bearing wall spacing of up to 9 meters. These floors are durable, fire-resistant, and provide the necessary spatial rigidity and stability of a residential building.
The slabs are laid closely and connected to each other by sealing the seams between them cement mortar. To create a rigid single horizontal floor reinforced concrete slabs They are connected to each other and to external walls using steel anchors attached to mounting loops. The gaps between the slabs, when supported on the internal walls, are filled with bricks of the same brand as in the main masonry.
Using concrete floor A prerequisite is the installation of a circular reinforced belt.
IN modern literature you can find several ways to construct a ring reinforced belt (armed belt):
So in one case, when the wall is made of lightweight cellular concrete and the support of the slab does not reach 250 mm. (usual support - 120 mm), use a distribution belt, through which the floor slabs rest on the wall (Fig. 1). Such a belt is made over the entire length of the floor supporting the wall and can be made of monolithic reinforced concrete or of three rows solid brick, reinforced with masonry mesh. The width of the belt is 250 mm, and the thickness is at least 120 mm. Floor slabs must rest on the distribution belt of at least 120 mm. Together with floor slabs, it creates a rigid structure to increase resistance to wind loads, temperature and shrinkage deformations, as well as resistance to emergency impacts..
Rice. 1. Supporting unit for the floor slab on the wall
from cellular concrete gas silicate and foam concrete blocks.
1 - masonry; 2 - layer of thermal insulation; 3 - leveling layer cement-sand mortar; 4 - floor; 5 - floor slab; 6 - monolithic reinforced iron concrete belt; 7 - additional masonry blocks; 8 - prefabricated reinforced concrete lintel of the window opening; 9 - fiberglass corner; 10 - slope; 11-elastic gasket; 12 - window unit
In the second case: when the compressive load passes the established standards or the width of the support of the slab on aerated concrete blocks is more than 120 mm, the distribution belt need not be used. In this case, its role in giving the house a rigid structure is played by an armored belt in the form of a ring anchor along the outer perimeter of all laid floor slabs. Photo.№2 -5
Currently, in our country, the most popular are three methods of constructing floors in a house. This is the installation of floor slabs, the installation of a monolithic reinforced concrete floor and the installation of floors using wooden (less often metal) beams. We will definitely talk about all these methods and more. And the first technology we will consider is installation finished slabs ceilings
First, a little about the floor slabs themselves. Depending on their shape, all slabs can be divided into flat and ribbed. Flat ones, in turn, are divided into solid and hollow. We are now interested in empty ones, because... It is this type of slab that is used mainly in low-rise construction.
Hollow core slabs, in turn, are also classified according to various parameters, such as the shape and size of the voids, the thickness of the slabs, the manufacturing technology of the slabs, and the method of reinforcement.
I will not delve into the topic of classification. It is better to look for this information on the websites of manufacturers of reinforced concrete products (reinforced concrete products). We'd better talk directly about installation.
The very first point that you need to pay attention to even at the stage of designing your future home is the opportunity to purchase in your area exactly the slabs of the sizes that are included in the project. Each manufacturer has its own specific range of products and it is always limited. This is really important and I am surprised that very often developers forget about this recommendation and then they have to either cut one or several slabs or do it on the floor monolithic site. We'll talk more about this below.
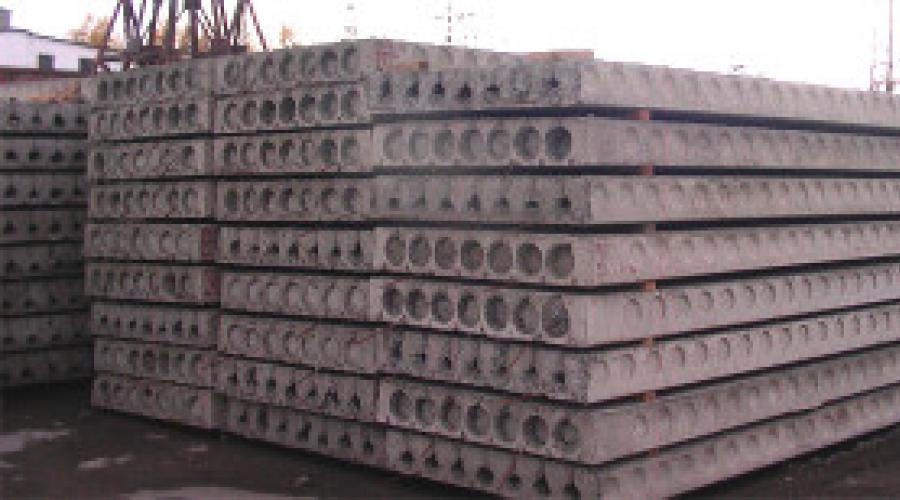
Storing floor slabs at a construction site.
Of course, it’s great if you have the opportunity to lay floor slabs immediately upon delivery directly from the truck that brought them. But most often this does not happen. Or the driver insists that you unload the slabs as quickly as possible, because... he is in a hurry for the next order, or the slabs are not laid on the machine in the order you need, or you simply bought them in advance and are not going to lay them yet. In all these cases, the slabs will need to be stored on your site.
 Try to choose for this flat surface. Never place slabs directly on the ground. Be sure to put something under the edges of the slab, for example, trimmings wooden beam. There should be only two pads, at a distance of approximately 25-40 cm from the edges. Pads cannot be placed under the middle of the slab.
The slabs can be stored in stacks up to 2.5 meters high. Make the shims for the first slab higher, so that if they are possibly pressed into the ground when laying subsequent slabs, the first slab should never touch the ground, otherwise it could easily break. It is enough to make all subsequent linings even from an inch (2.5 cm). They must be stacked strictly one above the other.
Preparation for installation of floor slabs.
Preparation begins at the moment when the masons cast out the last rows of masonry. The slabs will lie flat and without differences if the top rows of load-bearing walls are level and in the same horizontal plane.
To achieve this, there must be horizontal level marks in all corners of the room being covered. They are installed during the construction of walls using a level, or laser level, or hydraulic level. And when the last row of masonry is done, the distance from the marks to the top of the walls is controlled with a tape measure. It should be the same in all corners. From my experience I can tell you for sure that some masons neglect this, especially when they do backfill masonry at the same time as the face masonry, which is done “under the rod”.
The top row of load-bearing walls must be bonded. That is, if you look from inside the closed room, then load-bearing walls(on which the floor slabs rest) in the very top row of the masonry only the pokes should be visible.
 If the slabs are placed on a load-bearing partition 1.5 bricks thick (that is, the slabs rest on it on both sides), then the top row of such a partition is laid out in one of two ways:

Before laying floor slabs on walls made of various blocks (foam concrete, gas silicate, slag, etc.), it is necessary to make a reinforced concrete belt (usually about 15-20 cm thick). Such a belt is made either by pouring concrete into the formwork, or using special U-shaped blocks along the entire perimeter of the house box, i.e. not only on load-bearing walls, but also on non-load-bearing ones.

During installation hollow core slabs overlapping holes in them must be sealed. It is much more convenient to do this in advance, while the slabs are still on the ground. In general, SNiP prescribes that voids must be sealed on the side of the slab that rests on outer wall(to reduce the likelihood of freezing of the slab), and from the side that rests on internal partition, only starting from the third floor from the top of the house and below (to increase strength). That is, if, say, the house has basement floor, overlap between the 1st and 2nd floors and attic floor above the 2nd floor, it is mandatory to fill the voids on the side of load-bearing partitions only in the basement floor.
I will say that we always seal holes when laying slabs. Moreover, recently, more and more often, round-hollow slabs come from factories with the holes already sealed. It's comfortable. If the holes are not sealed, we insert a one-and-a-half brick (or even a half brick) into them and fill the remaining cracks with mortar.

Also, before installing the slabs, it is necessary to prepare the site for the crane in advance. It’s good if in the place where the crane will stand the soil is, as they say, compacted. It's worse when the soil is bulky. If you have a basement, you should not place the faucet too close to the house, in order to avoid what is shown in the figure below:

In such cases, it is better to order a truck crane with a longer boom. Also, sometimes in the place where the faucet will stand, you first have to put several road slabs(usually used ones are found somewhere). Often this has to be done in the fall in rainy and slushy weather, when the area is so “broken” that the crane simply gets stuck on it.
Laying floor slabs.
Sufficient for installation of floor slabs three people. One hooks the slabs, two lay them down. If you want, you can do it together, although not always. It happens that when covering, for example, the second floor, the installers and the crane operator do not see each other. Then, at the top, in addition to the 2 people directly laying the slab, there must be another person who will give commands to the crane operator.
Laying begins from the wall on a layer of mortar no more than 2 cm. The mortar should be thick enough so that the slab does not squeeze it completely out of the seam. After the crane operator places the slab on the walls, he first leaves the slings taut. At the same time, using a crowbar, if necessary, it is not difficult to move the slab a little. If the upper surfaces of the load-bearing walls were made smooth, then the slabs will lie evenly, without differences, as they say, “from the first approach.”
Regarding the amount of support of the slabs on the walls, I will give an extract from the document “A manual for the design of residential buildings. Vol. 3 (to SNiP 2.08.01-85) 6. COLORS:
Paragraph 6.16.: The depth of support of prefabricated slabs on walls, depending on the nature of their support, is recommended to be no less than, mm: when supported along the contour, as well as two long and one short sides - 40; when supported on two sides and the span of slabs is 4.2 m or less, as well as on two short and one long sides - 50; when supported on two sides and the span of the slabs is more than 4.2 m - 70.
When assigning the depth of support for floor slabs, you should also take into account the requirements of SNiP 2.03.01-84 for anchoring reinforcement on supports.
In our practice, we try to make the support no less than 12 cm, fortunately now it is possible to purchase exactly the slabs that are needed. The step of their lengths is 10 cm.
I often hear debates about whether it is possible to support hollow-core floor slabs on three sides (two short and one long) and how far the long side of the slab can be placed on the wall. From what is written above, it follows that it is possible to support the slabs this way. But it is not so. If you read the specified SNiP, it says that slabs that rest on three sides have a different reinforcement pattern than those that rest on only two sides.
The vast majority of hollow core slabs that are currently produced by concrete factories are designed specifically to be supported on two short sides, so it is not recommended to place them on the wall with their long side. Under a certain load, this can lead to cracking of the slab. The reinforcement scheme and, therefore, the possibility of supporting the slab on a third side must be clarified with the manufacturer.
Another mistake associated with improper loading of the slab is covering two spans at once (see figure below):

Under certain unfavorable conditions the slab can crack, and the location where the crack appears is completely unpredictable. If you still use such a scheme, use a grinder to make a cut (to the depth of the disk) on the upper surface of the slab strictly above the middle partition. Thus, if something happens, the crack will pass precisely along this cut, which, in principle, is no longer scary.
Of course, it’s good if we manage to cover ourselves exclusively with whole slabs. But circumstances are different and yet sometimes some slab (or even more than one) has to be cut lengthwise or crosswise. To do this you will need a grinder with a diamond disc for concrete, a sledgehammer, a crowbar and not the weakest guy at a construction site.
To make work easier, it is better to place the slab on a lining. Moreover, this lining is placed exactly under the cut line. At a certain moment, the slab will simply break along this line from its own weight.
First of all, we make a cut on the upper surface of the slab with a grinder along the cut line. Then, striking with a sledgehammer from above, we cut a strip along the top of the slab. It is quite easy to penetrate concrete in void areas. Next we break through with a crowbar bottom part slabs (also on voids). When cutting a slab lengthwise (we always cut along the hole in the slab), it breaks quite quickly. When chopping across, if the slab does not break after breaking the lower part with a crowbar, a sledgehammer is used to strike the vertical partitions of the slab from the side until the victory is achieved.
During the cutting process, we cut the reinforcement that comes across. You can use a grinder, but it’s safer to use welding or a gas cutter, especially when the reinforcement in the slab is pre-stressed. The grinder disc can bite. To prevent this from happening, do not cut the reinforcement completely, leave a couple of millimeters and then tear it apart with a blow from the same sledgehammer.
Several times in our practice we had the opportunity to cut slabs lengthwise. But we have never used, so to speak, “stumps” less than 60 cm wide (less than 3 holes remain), and I do not advise you to. In general, when deciding to cut a slab, full responsibility for possible consequences You take full responsibility for this, because not a single manufacturer will officially tell you that cutting a slab is possible.
Let's now see what can be done if you still don't have enough slabs to completely cover the room:
Method 1- we place the first or last (maybe both) slabs without bringing the long side to the wall. We fill the remaining gap with bricks or blocks, hanging them no more than half from the wall (see figure):

 Method 2— we make the so-called “monolithic section”. Plywood formwork is placed underneath the slabs, a reinforcement frame is made (see figure below) and the area between the slabs is filled with concrete.
 Anchoring of floor slabs.
After all the slabs have been laid, they are anchored. In general, if the construction of a house is carried out according to a project, then it must contain an anchoring scheme. When there is no projection, we usually use the circuit shown in the figure:

 The anchor is made by bending the end into a loop, which clings to the mounting loop of the slab. Before welding the anchors to each other and to the mounting loops, they must be tensioned as much as possible.
After anchoring, we immediately seal all mounting eyes in the slabs and rustications (seams between the slabs) with mortar. Try not to delay this so that construction debris does not get into the rustics, and water does not pour into the eyelets during rain and snow. If you suspect that water has gotten into the slabs (for example, you bought slabs with voids already filled in, and rainwater could have gotten in even while being stored at the factory), it is better to release it. To do this, after installation, simply drill one small hole in the slabs from below with a hammer drill, into the voids where the mounting lugs are located.
It is especially dangerous to find water in voids in winter time when the house is not yet heated (or not completed at all) and the slabs freeze below zero. Water saturates the bottom layer of concrete, and with repeated freezing-thawing cycles, the slab simply begins to collapse.
 Another way to secure the slabs is to construct a so-called concrete ring anchor. It's kind of the same monolithic reinforced belt, only it is not done under the slabs, but in the same plane with them, also along the entire perimeter of the house. More often this method is used on foam concrete and other blocks.
Let me make a reservation right away that we have never used it because it is much more labor intensive. I think that a ring anchor is justified in more earthquake-prone regions than our Nizhny Novgorod region.
At the end of the article, I suggest you look short video, which deals with the choice of floor slabs:

The ceiling is supported on aerated concrete using special armored belts. Its manufacture is necessary to accept loads from gravity and construction materials next floors or roof. What is an armored belt? This monolithic design made of reinforced concrete, following the contours of the walls. The armored belt is erected on load-bearing walls, which are built using aerated concrete.
To fill the reinforced belt, formwork for concrete is prepared, which is a structure for creating a mold into which reinforcement is placed for rigidity.
If the slabs are supported on the internal walls of the house, the walls are built in such a way that they rest on the foundation. Armopoyas on interior walls under the floor slabs strengthens the structure, as the load is distributed over the entire area of the slab. An armored belt is not considered to be a structure made brickwork for aerated concrete, as well as strengthening aerated concrete masonry reinforced mesh.
To support floor slabs, the following requirements apply:
- ceilings and coverings must be installed on anti-seismic belts;
- the connection of the plates and the belt must be made mechanically strong using welding;
- the belt should line up across the entire width of the wall; for external walls of 500 mm, it can be reduced by 100-150 mm;
- To lay the belt, it is necessary to use concrete with a class of at least B15.
Support depth

The support of the floor slab on the wall must be at least 120 mm, and reliable adhesion of the slab to the load-bearing wall must also be ensured.
To fill the reinforced belt, reinforcement is first installed, the quantity and installation location of which is determined using calculations. On average, at least 4 12 mm rods are accepted. If aerated concrete is not insulated, but only plastered, then the belt is not made the entire width of the wall, but less by the thickness of the insulation layer.
The armored belt must be insulated, as it is a cold bridge. The formation of such a bridge can destroy aerated concrete due to the accumulation of moisture. When reducing the thickness of the armored belt, do not forget about the minimum depth of support of the slabs on the walls.
The depths of support of the slabs on the walls have standardized values:
- when supported along the contour of at least 40 mm;
- when supported on two sides with a span of 4.2 m or less, at least 50 mm;
- when supported on two sides with a span of more than 4.2 m, at least 70 mm.
By maintaining these distances, you can be sure that your house will not collapse.
Purpose of the armored belt

When arranging places for supporting floor slabs, it is necessary to take into account the thermal performance of the walls and the materials from which they are built.
So is an armored belt really necessary to support floor slabs on aerated concrete? Let's try to figure it out.
Firstly, the armored belt increases the resistance of the structure of your house from deformation by loads various kinds. For example, shrinkage of the structure, precipitation of the soil underneath it, temperature changes during the day and changes in the season.
Aerated concrete cannot withstand high loads and is deformed under the influence of external applied forces. To prevent this from happening, armored belts are installed that compensate for the load. The armored belt takes on the entire load, thereby preventing the destruction of the structure. Aerated concrete cannot withstand point loads, so the fastening wooden beams When building a roof it becomes very difficult.
The armored belt provides a way out of the situation. The second name of the armored belt is unloading (due to its ability to evenly distribute the vertical load). Its use allows you to add rigidity to the structure. When steam and moisture move, aerated concrete, as a porous material, can expand, which can lead to movement of the floor slabs.
Taking into account these factors, we can firmly say that an armored belt for supporting the floor slabs of the next floor or roof is simply necessary. Otherwise, with any level deviation, a point load is placed on the aerated concrete, which deforms it and destroys it.
The process of constructing an armored belt is not too labor-intensive and expensive, and it will preserve your home longer.
Making an armored belt

The armored belt is installed around the entire perimeter of the building, and the reinforcement is connected by welding or knitting with special wire.
In order to begin work on the construction of an armored belt, you need to prepare tools and accessories:
- hammer and nails for assembling wood formwork;
- fittings for frame assembly;
- welding machine for welding reinforcement bars at corners and at joints;
- container, bucket, spatula for pouring mortar into the formwork.
They are erected under the floor slab, under the roof to facilitate the installation of the roof. If you plan to build an attic in your house, then its slabs also need to increase the rigidity of the base.
To fill the armored belt, aerated concrete and formwork are prepared. Formwork is a structure for creating a form, which will later be filled with cement mortar. Formwork units:
- the deck, which is in contact with the concrete, gives shape and quality to the face;
- forests;
- fasteners that support the system in a stationary state at the installation level and connect individual elements between themselves.
To construct an armored belt for supporting floor slabs, horizontal formwork is used. The formwork material can be steel (sheet), aluminum, wood (board, plywood, the main condition is low hygroscopicity), plastic. If necessary, formwork materials can be combined.
Lightweight and available material for formwork is wood.
If you don’t have time to prepare the formwork, you can spend money and rent it. Today there are many construction companies who provide such a service.
How to make formwork? The design of the formwork is not very complicated. Use boards 20 mm thick, 200 mm wide - this is optimal sizes. Too large a width can lead to destruction of the formwork as a result of cracks. It is recommended to wet the boards before use. The panels of wooden formwork elements are tightly connected to each other. However, avoid large gaps.
If the gap is up to 3 mm wide, you can get rid of it by generously moistening the boards. The material swells and the gap disappears. With a slot width of wooden elements 3-10 mm it is recommended to use tow; if the gap is more than 10 mm, then it is clogged with slats. The horizontality and verticality of the formwork is controlled using building level. This is necessary for the evenness of pouring the reinforced belt and further placement of the floor slab on the belt. Repeated use wooden shields you can wrap them plastic film, this will also get rid of wide gaps.

The smoother the board used in the manufacture of wooden formwork, the geometrically even the armored belt will be.
Reinforcement is placed in the formwork. Ideal option The use of four rods with a diameter of 12 mm or a ready-made reinforcement frame is considered. Minimum requirements Consider laying two 12 mm rods. The reinforcing bars are connected with a “ladder” in increments of 50-70 mm. At the corners, the reinforcement is connected with steel wire or welding. The ladder is obtained by installing jumpers between two solid rods.
For heavy loads from slabs, a three-dimensional frame structure is used. To ensure that the manufactured frame does not touch the aerated concrete blocks, it is laid on pieces of brick or blocks. Before pouring the solution, the location of the frame is checked by level. Having prepared the solution, fill the armored belt. For the solution, use 3 buckets of sand, 1 bucket of cement and 5 buckets of crushed stone. For ease of work, small crushed stone is used.
If the installation of the armored belt is planned in stages, then the filling is carried out according to the principle of vertical cutting. That is, the frame is poured completely in height up to a certain place, then the lintels are placed. The material for the jumpers can be brick or gas block.
Work is suspended. Before further work the material of the jumpers is removed, the frozen filled part is well moistened with water, as this ensures a better connection. Pouring concrete should be carried out without the formation of voids; for this purpose, the surface is leveled with reinforcement.
After 3-4 days, the formwork can be dismantled.
On the received armored belt. In practice, hollow-core slabs made of heavy concrete, cellular concrete, and prefabricated monolithic are used. They are selected based on the span size and load-bearing capacity.
Most often, hollow-core slabs PC and PNO are used, the bearing capacity of which is 800 kgf/sq.m. The advantages of such floor slabs include high strength, manufacturability and complete factory readiness for installation.
The support of the floor slab on the reinforced belt of the aerated block structure should be 250 mm. The usual support is 120 mm.
Armobelt in openings
Creating an armored belt over openings has some minor features. In this case, the support of the slab will be incomplete, since the ceiling hangs over the void. To support the slab, pillars with lintels in the form of beams are erected.
Pillars can be erected using bricks and blocks. Each pillar is laid out in one and a half bricks.
Reinforced concrete lintels are erected between the pillars. The height of the beams should be 1/20 of the length of the opening. If the distance between the pillars is 2 m, then the height of the beams will be 0.1 m. The width of the beams will be determined by the height from the ratio 0.1 m = 5/7. If the distance between the supports is 2 m and the height of the beams is 0.1 m, then the width reinforced concrete beams is 0.07 m. For filling beams use removable formwork from boards.
Current discounts on blocks and current promotions are constantly reflected
We make low-rise buildings from Itong foam blocks with foundation calculations based on IGI. Prices are reasonable.
You can order a landscape design project for your site from us.
Hollow core slabs and aerated concrete walls
SPECIALLY FOR MASONRY OF INTERNAL PARTITIONS, Xella Ytong launches new product sales" Polyurethane adhesive for aerated concrete Ytong Dryfix 750 ml". On this page you will find information on glue. Regarding the purchase of glue Ytong Dryfix contact the phone numbers on our website.
Considering the construction of a cottage using Ytong aerated concrete blocks or regardless of the manufacturer. Aerated concrete blocks Grasse, Ytong, bonolit- the customer asks the question, is it possible to cover the floor with hollow-core floor slabs when constructing aerated concrete walls from ytong aerated concrete blocks, Gras aerated concrete blocks, and foam blocks? The answer is clear - if you are constructing aerated concrete walls of a cottage in accordance with the standards for the design and construction of buildings and structures set out in STO-501-52-01-2007 and accordingly use aerated concrete Ytong block or aerated concrete block Gras, a foam block with physical and technical characteristics corresponding to this standard, then its use is moreover advisable.
Let's consider the feasibility of using hollow core floor slabs:
1-reinforced concrete hollow core slabs have a service life that does not require overhaul or replacing a similar operational period of the entire house for 100 years. The same cannot be said about wooden floors.
2-hollow slabs are fireproof and have good fire resistance, which also cannot be said about wooden floors
3- Having a lower weight of 1 m2 of about 300 kg/m2 compared to a monolithic reinforced concrete floor with a minimum of 450 kg/m2. They have an equal load-bearing capacity, which reduces the supporting part of the foundation and, accordingly, reduces the consumption of materials for the construction of the foundation and the cost of the entire foundation of the cottage.
4- Taking into account the construction costs of 1 m2 monolithic ceiling and the cost of constructing 1 m2 of floor slabs from hollow core slabs - it becomes clear that the cost of 1 m2 of monolithic floor slab is 45-60% more expensive, depending on the thickness of the monolithic reinforced concrete floor and its reinforcement.
5-The use of hollow-core floor slabs, in comparison with a monolithic reinforced concrete floor, does not require highly qualified workers, which is important today.
6- Application of prestressed hollow core slabs type P.B. reinforced according to the principle of tension "STRINGS" make it possible to cover a span of up to 9.0 meters with hollow core slabs, which is very, very difficult to achieve using simple wooden beam beams, and monolithic reinforced concrete floor 9.0 meters long is practically impossible to use on a cottage with aerated concrete walls.
However, it must be understood that the use of hollow-core floor slabs requires, in turn, compliance with certain requirements, which are set out in design standards and construction standards. In particular, the supporting part in the hollow slab in the support unit and the design of the support unit itself are strictly regulated. On an aerated concrete wall built from aerated concrete blocks Ytong or aerated concrete blocks Grasse, a hollow-core floor slab can only be supported under certain conditions, and these conditions are calculated; of course, such a calculation is hardly available to an ordinary developer, and therefore I do not recommend using it in the absence of a project. The “neighbor” principle often fails and is not acceptable when installing hollow-core floor slabs. Still, it hangs over your head...
A more accessible and understandable principle of supporting a hollow-core floor slab is on a monolithic reinforced concrete belt, and the support zone is on concrete part monolithic reinforced concrete belt should not be less than 80mm. And the end of the slab must have thermal insulation in the aerated concrete wall to prevent freezing of this zone aerated concrete wall cottage built from Ytong aerated concrete blocks. When constructing walls from aerated concrete blocks 375 mm thick from other manufacturers without additional insulation V climatic zone the central region is indispensable. With a greater thickness of the aerated concrete wall at certain constructive solutions, additional thermal insulation of the aerated concrete wall in the area of the ends of the mounted hollow-core slabs may not be required.
There is one more feature in the support units used, provided that the floor is covered with hollow-core floor slabs; the use of large support units for large spans, where deflections occur, increasing the support part beyond 150 mm is no longer safe for the wall. And in the absence of a project, we must not go beyond this figure.
Today, along with traditional PC-type hollow-core floor slabs, so-called hollow-core floor slabs are widely used. So, these reinforced concrete hollow-core floor slabs do not have transverse reinforcement and can only be supported on two sides. But these slabs have an advantage over reinforced concrete hollow PC slabs. Since they do not have transverse reinforcement, and these reinforced concrete hollow-core slabs have prestressed reinforcement, both in the lower flange of the hollow-core slab and in the upper flange of the hollow-core slab, then sections can be cut from these hollow-core slabs along the hollow-core slab and used as slabs floors, lintels or beams with appropriate spans and under appropriate loads.
We are ready to answer all questions regarding the use of prefabricated reinforced concrete hollow-core floor slabs in cottage construction at our telephone numbers listed on the website.