We carry out the correct dismantling of apartment walls: professional advice. Dismantling brick walls and partitions Review of necessary tools
Read also
The dismantling of partitions and internal walls is always associated with the redevelopment of housing. Such events are held in old apartments such as “Khrushchev” and “Stalin” buildings. This is due to the desire of tenants to optimize and improve the existing space, to get rid of an inconvenient layout: adjacent rooms, tiny unnecessary storage rooms, incomprehensible nooks, etc.
Methods for dismantling partitions
There are two ways to dismantle partitions:
- On one's own.
- Calling the specialists.
We will consider each option separately.
Do-it-yourself - removing a wall with your own hands
The main advantage of this method is cost savings. From the beginning to the end of the process, you do not pay anyone and, what is also important, all work is carried out at a convenient time set by the owner of the property. The disadvantages include labor intensity and the need to independently remove construction waste.
Hiring specialists in a construction company
It would seem that everything is wonderful here, but it will take a lot of money. Depending on the region, dismantling a brick wall costs from 200 rubles. per m, concrete partitions are removed for a higher price - from 300 rubles / m. To this you need to add: power outages, removal of wiring, garbage removal - the amount adds up to a considerable amount.
It is unnecessary to say anything about the second method: look for builders, draw up an estimate, pay and get the desired result. But it’s worth stopping at the first method and analyzing the whole process in detail.
Do-it-yourself wall dismantling
Tools:
- hammer or sledgehammer;
- wire cutters;
- perforator;
- screwdriver;
- saw;
- mount.
Dismantling the partition: procedure
We clear the wall of carpets, wall lamps, etc. We take the furniture out of the room, if this is not possible, we carefully cover everything with film. We de-energize the room, that is, we completely turn off the electricity in it.
Important! Electrical wiring with the voltage not turned off when dismantling partitions can not only leave the entire apartment without light, but seriously harm your health.

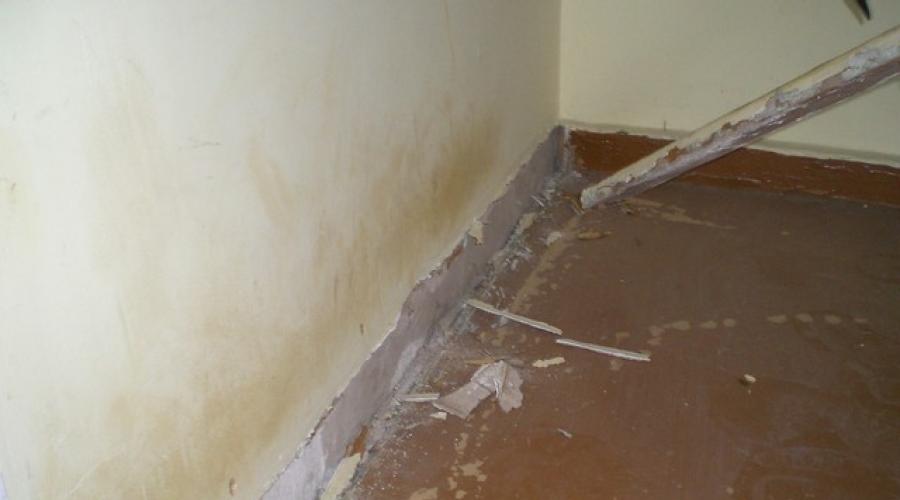
Using a pry bar, remove the baseboards.

Carefully, starting from the junction box, it is necessary to free the wires from the covering covering them (mortar, wallpaper, panels, etc.).
Dismantle the wiring (remove the wires from the wall).

We remove the old doors.

We dismantle the door frame and all existing wooden elements.

Dismantling the wall must begin from the top; the most difficult thing at this stage is to pull out the first fragment of masonry (brick, block).

If the wall material is planned to be used somewhere in the future, then the external covering (mortar, wallpaper, etc.) must be cleaned off.

Gradually dismantle the partition.
Advice! If you don't have a hammer drill, you can gouge out the seams between the blocks using a chisel and hammer.

Collect all construction waste in special bags.

After dismantling, thoroughly clean the junction of the destroyed partition with the main wall and ceiling from poorly adhering fragments of mortar; this will protect you from destruction of the surface layer after subsequent plastering and finishing of the walls.
Dismantling walls and partitions or how to remove a wall in an apartment?
Every person is a designer and creator in his own home. Sometimes this manifests itself in the little details of decor: buying a new vase or sofa cushions, chandelier or painting, and sometimes you want to radically change the decor. Then a decision is made to begin a major overhaul, which involves the dismantling of partitions and, less commonly, the dismantling of walls.
It is important to understand the design of the living space so as not to damage the load-bearing wall. Demolishing it is dangerous for the entire building. Any redevelopment must be agreed upon and formalized in accordance with current legislation.
What walls can be dismantled?
Demolition of a wall in an apartment refers to housing redevelopment. According to the laws of the Housing Code, any change entails approval and modification of the technical passport.
Demolition of a load-bearing wall is prohibited, as it leads to a violation of the rigidity of the building and may lead to the destruction of the ceiling.
Dismantling the window sill wall is possible through drawing up a project and agreeing with the housing inspection.
The wall between the kitchen and the room is not always load-bearing; you need to measure its thickness. If this is a partition, then the figure will be 80-120 cm depending on the type of house: brick or panel.
The partition between the bathroom and the toilet can be safely demolished; it is not load-bearing.
Dismantling services: methods of dismantling work
We offer our services for wall dismantling. We will complete the work quickly and efficiently, turnkey!
At the time of dismantling, it is necessary to carry out a number of preparatory work: agree on changes and obtain permission, empty the room of furniture, turn off the electricity supply and, if necessary, turn off the water, dismantle doors/windows and baseboards.
We carry out dismantling work of two types: capital and partial:
- capital method: preparatory work, dismantling the wall/partition, garbage removal.
- partial method: preparation, dismantling the window sill block or partial dismantling of the wall (creating an arch or doorway), garbage removal.
How we are working
Application
You leave an online request or order a call back
Consultation
Our manager advises and clarifies the details of the service
Cost calculation
Visit of a specialist and preliminary estimate of the cost of work
Agreement
We place an order and conclude an agreement
Execution of work
Prompt execution of work in accordance with the contract
Acceptance of works
Acceptance of work and payment by the Customer for our services
We can work with walls made of any building materials!
The process of dismantling walls/partitions made of various materials has its own characteristics.
Brick
Before starting work, decorative trim, heating pipes, water pipes and power cables are removed from the brick wall. If there are door and window blocks, they must also be removed. If it is necessary to preserve the material for further use, the work is carried out manually, selecting each brick and cleaning it from the mortar. If you need to inexpensively remove a structure, dismantling work is carried out using special tools.
The manual method is used if the brickwork was laid on a small cement or lime layer. Analysis begins from the top rows, gradually moving to the bottom. If the bricks were laid on a thick layer of mortar, craftsmen use special tools. Accelerated demolition of a brick partition is carried out if the material is not planned to be reused in the future.
During the work, the following rules apply:
- If there is a window or doorway, disassembly begins with the demolition of this element;
- If there are steel anchor parts, they are removed using a chisel, sledgehammer or grinder;
- If partial dismantling is required, Diam-Service technicians use a grinder with a diamond wheel.
Our specialists use a similar method to dismantle buildings made from cinder blocks. Usually, builders, using cinder block to construct buildings, lay it on a cement-sand mortar. By carefully removing the mortar from the components of the stone wall, our craftsmen will save the cinder blocks for the customer for future use.
Concrete
Our company's specialists carry out turnkey dismantling of concrete walls.
First of all, the craftsmen remove switches, wires, sockets and other communications from the working surface. To protect the floor covering, remove the decorative layer and cover it with boards on top. Upon completion of the preparatory stage, they proceed to the demolition of internal concrete structures:
- Special markings are made on the surface, dividing the working area into squares with a side of 40-45 cm;
- Holes are drilled on the lines in increments of 40 mm;
- Making cuts on each side of the square, carefully knock out the sawn square;
- The procedure is repeated until the concrete wall is completely destroyed;
The technique used by our specialists allows us to dismantle a concrete wall as quickly and efficiently as possible.
Foam concrete
Our specialists carry out not only preparation and dismantling, but also the subsequent removal of waste that accumulates upon completion of the work. Before dismantling the foam block structure, all furniture, accessories and other attributes are removed from the room. Baseboards and trim will also need to be removed. It is important not to forget to dismantle the electrical network running along this wall before starting to dismantle the structure. Are you wondering how much it costs to dismantle foam block structures? You can find this information on our website. Or by calling the phone number also listed on the company’s website.
Drywall
Partitions are made from plasterboard in rooms. Therefore, their demolition can be carried out without obtaining permits. Since sheets of gypsum craton are usually used repeatedly, dismantling of structures is carried out as carefully as possible. Decorative finishing and communications are first removed. Then they begin to unfasten each sheet and dismantle the metal frame.
Wood
Our company's specialists dismantle wooden interior and exterior elements. Our experts take into account the purpose of the structure if the wooden wall is load-bearing. To distribute the load evenly, special spacers are used. The cost of dismantling wood elements depends on the complexity and size of the object.
Glass
If there is a need to demolish a partition made of glass, we recommend the help of our specialists. Considering the fragility of the material, you should not attempt to demolish the structure yourself. It is better to entrust the dismantling work to professionals. To preserve the integrity of the glass material, specialists carefully disassemble the structure element by element. This is a lengthy process that will preserve the glass parts for later use.
Calculation of the cost of services or what determines the price of wall dismantling?
We offer to dismantle walls and partitions using diamond drilling. This method allows you to make even holes in concrete and reinforced concrete walls of any thickness. Advantages:
- no vibration load on floors and foundations;
- drilling depth up to 10 meters;
- absence of dust and noise when performing work.
Prices for work vary depending on the volume of work to be done.
The cost of the service will be calculated upon inspection of the property; it depends on:
- surface material: concrete, reinforced concrete, brick;
- wall width;
- the need for inclined drilling;
- carrying out preparatory dismantling work.
The cost of drilling decreases as volumes increase!
We will tear down the walls in your home in the shortest possible time!
The duration of work on dismantling walls and partitions largely depends on the agreed volumes of work, the thickness and materials from which they are built. This also includes the need for preparatory and final work, the number of construction specialists required for the demolition of walls. Also, the cost of the ordered services is summed up. This may include:
- removal of furniture and household items;
- cleaning the wall from wallpaper and plaster;
- dismantling doors, windows and baseboards;
- checking and disconnecting electricity and/or water supply;
- cleaning the premises;
- removal of construction waste.
Z Here I will look at how to dismantle an apartment, what needs to be dismantled and how to do it correctly, I will tell you some of the secrets and subtleties of dismantling. You will also find out what you will have to face when you start dismantling your apartment.
Dismantling work is quite complex and responsible work and cannot be treated with disdain. The first thing you need to know is that not everything needs and can be broken. There are things that can and should or cannot be broken technically, from a construction point of view, and there are things that can, should or cannot be broken specifically in your case.
Content:
1.
2.
3.
4.
5.
6.
6.1
6.2
6.3
6.4
7.
8.
Video: Where to start repairs, preparatory and dismantling work
Sequence of dismantling work
- The first step is to dismantle the built-in furniture, doors or at least trim (then you can carefully install old ones or buy new ones; without removing the trim it will be more difficult to finish the walls), floor skirting boards.
- Lamps and sockets. Without knowledge → it’s better not to get involved in this matter. The main thing is to provide yourself with temporary lighting and make temporary sockets. You can leave the old sockets, the main thing is that it is possible to connect to them, they do not interfere with the finishing and everything is safe, for example, when priming or wetting the wallpaper, so as not to flood them (!!!).
- Then the partitions are dismantled and niches and openings are arranged. Here you also need to understand whether they have electrics, →. Well, the point is that there is no need to tear off wallpaper from a partition that you will tear down anyway. But the tile will need to be removed, because dismantling the partition together with the tile is problematic. Do not forget that redevelopment, enlargement, reduction of premises require approval and permission.
- Next comes the dismantling of the finishing coating. Finish coatings, if you don’t need them, are wallpaper, laminate (although you may not have one), parquet, all cladding, tiles, etc. I will write below how everything is repulsed and dismantled.

- After all the finishing has been dismantled and everything is put into garbage bags (you bought garbage bags, right? The green or white ones made of polypropylene) you need to understand whether you should change the screed, make a new one, perhaps some partitions will also be needed... Well, at least strengthen it, or demolish it and build it anew. The screed is a special moment, and if you are repairing a secondary one, then the screed is almost always left as is. Even after 50 years, it is often in quite usable condition for another 50 years.
- In general, I wrote in a separate article, → and it should be clear to you, if you have read it, what you see in front of you, and if it is not clear, then sometimes you need to pick or tap the surface. Read the article “What does your repair consist of” just in case you don’t know where to start and don’t understand what we’re doing here. Also ask questions in the comments.

Tools for dismantling work
- Crowbar nail puller, preferably 2 pcs. 300 and 600 mm long. The small one will come in handy for picking something up and then when laying the laminate it will also come in handy, the big one will come in handy for not just picking at something, but breaking it out. These are required tools for dismantling. A large crowbar may not be useful, but it would be better if there was one.

A nail crowbar is a useful tool for dismantling work.
- Screwdriver. If you are starting a renovation, then a “Shurik” is a must. Without a “shurik” it is impossible to work quickly, and working, for example, with gypsum board is generally impossible. Often home craftsmen already have “shurik” and there is no need to buy a new one; we will kill the old one.
- “Bulgarian” or angle grinder (Angle Grinder), usually everyone calls it “grinder”, the name comes from the 70s of the USSR, when this device began to be produced and came from Bulgaria. The grinder is an almost universal thing, it cuts and grinds and does a lot more, but for repairs we need it almost only for cutting. When dismantling, its use is to cut off something that cannot be unscrewed or removed in any other way. And to simplify the work. If you haven’t held a grinder in your hands, then it’s worth starting. Next there will be a little about how to use it.
- Protective gloves. Dousing gloves are quite suitable for all work. Just don't go wrong with the size. There is no need to take expensive ones, they will spoil anyway. It is much more profitable to take several pairs of cheap ones. Such as in the photo below cost about 15 rubles. and are fully functional, do not slip and do not allow solution or dirt to pass through, but they also do not allow air to pass through. You can find ordinary cotton gloves for 4 rubles. In general, expensive ones are of little use, they are all torn anyway, maybe they will just last a little longer, and, accordingly, working in expensive ones is a little more pleasant. After work, gloves can be washed under running water and hung to dry.

Cotton dousing gloves - affordable and relatively durable gloves (enough for 2-3 days)
- Continuing the theme of protection, safety glasses are a must. It’s better to buy 3 of them at once, or as the first ones break, since they cost about 50-80 rubles. Not expensive for eye safety. They will just get lost and, having bought one pair, you may not find it, spit and start working without them, so it’s better to buy 3 of them and by the time you lose 3 points, with a high degree of probability the first ones will be found. This way you will always be protected. In addition, plastic glasses break and, most importantly, get scratched, and after 3-4 days of intense, dusty work, you may no longer be able to see anything.

- Next you need to take care of respiratory protection. We need respirators, again 2-3 pieces. Which? I will insert photos of those that have been tested and work well, protecting them from dust. There are some small issues; inexpensive respirators often have rubber bands that come off the mask and meth also falls off. a clamp plate that ensures a good fit of the mask to the nose. If you buy inexpensive respirators, stock up on a tube of super glue to glue the meth. a plate clamp and a stapler to fasten the elastic bands back into their place. These are the moments. Respirators cost closer to 100 rubles. at a price such problems are practically absent. A mask like the one in the photo below on the left costs about 30 rubles. and for the price it works great, but you still have to glue the clip. The mask on the right is more expensive, about 100 rubles, but it is also a little more pleasant to work in and there are practically no problems with it. In general, both respirators work and protect against dust.

- Of course, you also need: a hammer, pliers, possibly a chisel or chisel.
These are the tools that will be required for dismantling work. How to break furniture? I think you will understand, I indicated the main points above. The main thing is to put on protection and be careful, first remove the doors by breaking them or unscrewing them from their hinges, then pull out the shelves, then dismantle the lid, walls, racks, bottom.
Next, remove all fasteners from the walls. The main rule and sequence of using the tool: if you can’t unscrew it with a screwdriver/screwdriver or it just takes a long time and is not necessary, try breaking it off with a crowbar; if it doesn’t unscrew or break off, try cutting it off (with a grinder or a hacksaw). Breaking is not building, but you also need to be able to break. The main thing is to look up more so that nothing falls on you, calculate what consequences your actions will lead to and not rush.
That's all, don't forget carefully push construction waste into nearby containers :)
Leave your tips and comments below. Subscribe to our newsletter. Good luck to you and good luck to your family!
To begin dismantling walls and partitions with your own hands, you must be sure to disconnect all utility networks that are in the walls - water, thermal systems, radio and electrical wires. If it is necessary to stop the water supply or power supply to the entire entrance (house), special services are called in to notify residents in order to avoid conflict situations.
Basically, the owners of apartments built during the Soviet era want to implement a new housing layout, accompanied by redevelopment. The same type of buildings with long corridors and small rooms are gradually being replaced by new designer reincarnations. for which it was also created in the last century, it is possible (even necessary!) to be redesigned for comfortable living.
When the project for a new home has already been prepared, an estimate has been drawn up, and the innovations have been agreed upon with city authorities, you can begin the final stage of the renovation - dismantling the walls, the cost of which will be insignificant if you do it yourself. To facilitate the demolition of the walls in the apartment, the platbands and baseboards are first removed, and the plaster is removed if necessary.
During major repairs, it is often done, but if the floor covering cannot be replaced, then it is necessary to arrange a “shock-absorbing” covering made of cardboard, rags, and old blankets. This will protect the floor from flying heavy pieces of the monolith, without which the demolition of walls in a panel house cannot be done.
Dismantling load-bearing walls
The walls and partitions of any building can be:
Bearing
Load-bearing-enclosing
Fencing
Load-bearing walls serve as the capital structure of the building, so independent dismantling of the wall, the price of which from the master depends on the amount of work, as well as cutting large openings in them requires permission from the design company. Illiterate intervention in load-bearing construction schemes made of brick, concrete, reinforced concrete, which is fraught with illegal redevelopment of an apartment, entails the danger of compromising the strength of the structure. The building ceases to be safe for life, and in the future, unauthorized demolition of walls in the apartment may cause the destruction of the entire house. Therefore, it is recommended to dismantle a brick wall or partition with your own hands only in case of emergency with the permission of the relevant city services.
Load-bearing walls are an intermediate element between the foundation and other building elements. Identifying its location is quite simple: you need to determine the area where the ceiling slabs are located, which are supported by crossbars or beams. These walls transfer the load of the entire structure of the house along with the roof, interfloor ceilings, and its own weight to the foundation.
If dismantling a permanent brick wall is inevitable, all precautions must be taken. The load on it is redistributed by creating an auxiliary load-bearing beam, which must rest at its ends on a solid foundation.
After making sure that the temporary reinforcement made of reinforced concrete lintels or steel beams has reliable stability and high strength, you can begin dismantling the brick wall. Depending on the building material used, different methods of demolishing capital structures are used:
When dismantling brickwork, the top brick, located in the center of the future opening, is first knocked out. Then the top row of masonry is sequentially dismantled to the right and left of the removed brick. In this case, the opening must be formed so that there is a slight expansion along the top line in order to secure the reinforcing jumpers. Strong iron beams are placed at a distance of at least 15 cm from each other, securely fixed. The top of the opening is then filled with bricks that fit tightly to the ceiling slab. It is advisable to remove temporary supports only after the mortar in the brickwork has completely dried.
Demolition of walls in a panel house is performed a little differently. When dismantling the block base, the surface is divided into several sectors, and each part is destroyed in turn using a jackhammer. If metal mesh or reinforcement is found, cutting is done using a grinding machine.
Destruction of enclosing partitions

Walls that are not permanent are created with a finer structure.
Dismantling partitions in an apartment involves the same technology as for load-bearing walls. Their demolition does not require any additional devices.
Quick dismantling of partitions in an apartment that are not load-bearing does not involve the installation of fasteners. Their disassembly is carried out in the reverse order of assembly.
Usually, when building partitions, a gap is left between it and the ceiling, which is filled with gypsum mortar and tow. When dismantling the partitions in the apartment, they clear it, remove the baguette, platband, plinth, and then demolish the wall itself, the thickness of which is about 10-14 cm:
Concrete partitions can be removed using diamond cutting, which will significantly speed up the process and avoid noisy vibrations, as well as large amounts of dust.
The sheathing is first removed from the plasterboard partition, and then the frame is dismantled.
Demolition of a glass block structure is carried out similarly to plasterboard: first the external elements are dismantled, and then the frame is demolished.
If the partition is made of blocks or bricks, it is better to demolish it by impact using a traditional sledgehammer, hammer drill, hammer and chisel.
Wooden partitions are removed by sawing. The elements are disassembled, starting with the struts and beams.
Regardless of the material of manufacture, the dismantling of partitions in an apartment is carried out from top to bottom: bricks or other structural elements are removed one by one, row by row. It is recommended to moisten the surface to be destroyed generously with water or cover it with a wet cloth due to the fact that dismantling work will produce a lot of dust.
You need to stock up in advance on large and durable bags for collecting construction waste, of which a huge amount is expected. Breaking is not building. This folk wisdom will be understood only by those who have experienced this difficult and responsible type of preparatory work. You also need to break it wisely, so that later “it won’t be excruciatingly painful”...
Two decades have passed since the late nineties, when the Knauf company began investment activities in Russia and introduced technology. Currently, during repair work it is necessary to dismantle the plasterboard wall that was installed earlier. Some of the material can be saved; the profiles located inside the wall are often reused. In some cases, the ones removed from the wall themselves are used.

The reason for dismantling may be planned repairs or redevelopment. There are emergencies caused by neighbors flooding. Moisture sometimes penetrates into the layers of walls in the form of condensation. It leads to the formation of mold and mildew, so the wall has to be dismantled. Dismantling is carried out in case of replacement of communications that are covered with plasterboard sheets. Depending on the specific situation, the wall is completely or partially dismantled.
In the process of renovating a house, an apartment with redevelopment, or constructing new structures, the walls are dismantled while preserving the material.  Dismantling plasterboard partitions Drywall is left if it is dry and not deformed.
You will need the following tools:
- screwdriver;
- hammer;
- magnet;
- if the walls are covered with wallpaper, then a bath and a spatula are needed.
When the walls are painted or textured plaster is applied to them, but the drywall needs to be preserved, it must first be cleaned before the putty is applied. Remove the decorative layer using an abrasive painting mesh or an angle grinder with sanding attachments. The prepared slab can be reused.  Removing plaster from drywall sheets Before starting dismantling, it is necessary to prepare a place for storing the material. If the floor covering remains, you need to cover it with a protective film. Before starting work, it is necessary to turn off the electricity and disassemble the switches. To be on the safe side, it is better to insulate the ends of the wire.
Disassembly sequence:
- Removing old wallpaper. To do this, pour water into the bath and apply it to the wall surface with a roller. We give time for the water to absorb. Then we take a thin metal spatula, find the seam, place a metal spatula under the wallpaper, and carefully peel it off. It is more convenient and faster to remove in large pieces. If the walls are pasted in two layers and PVA wood glue was used, which adheres more firmly to the surface, it is necessary to wet the wallpaper several times. You can use special means. Construction stores sell wallpaper removers such as Kelid, Methylane, Anti-Wallpaper and others.

- For further dismantling of plasterboard walls, it is necessary to remove. It is applied using putty. Find the bottom end and pull it. In most cases, the sickle comes off quite easily, along with the putty layer.

- Next, remove the insulation, if any.
- The next stage is dismantling the fasteners. It's often not visible underneath. In order to find them, magnets are used. Apply magnets to drywall. They are attracted and fixed in places where it is screwed in. We mark these places with a pencil. Using a screwdriver, lightly knock down the putty, unscrew the fasteners and put them in a box.

- When all the screws are unscrewed, carefully remove the gypsum board sheet.
- We dismantle. It is well preserved if moisture does not get inside the wall and condensation does not accumulate. First, unscrew the jumper fasteners. We lightly tap them with a hammer and remove it from the frame. After this we unwind and dismantle. Thus, we analyze everything.


Read also
The process of installing lathing on a wall under drywall
If you get used to it, you can easily do the dismantling yourself. Watch the video on how to look for screws in drywall.
Dismantling a gypsum plasterboard wall without preserving plasterboard sheets
For this you will additionally need. First, use a hammer to punch a hole in places where the profile is not installed. In order to orientate ourselves, we use a magnet. Where there are no racks, it will not be fixed to the wall. We cut out a piece of drywall large enough for you to grab with your hands and pull. We tear off the sheets. Well-fixed screws should remain in the profile. Further dismantling is done according to the scheme described above.  The process of dismantling a plasterboard wall


If so, then maintaining drywall is problematic. They just rip it off. The glue on which the sheets were attached is cleaned from the wall using a drill or grinder.