DIY projector: various designs for different sources. How to assemble a projector from a smartphone, a magnifying glass and a shoe box How to make a projector with your own hands at home

Many people like to watch movies. Fortunately, nowadays there is a lot of suitable equipment: from smartphones and tablets to large plasma and LCD TVs. But what to do if there is no large plasma nearby, but there is a large group of people eager to watch another good movie? That's right, make a projector. You can read about how to make it yourself in our article.
All you need
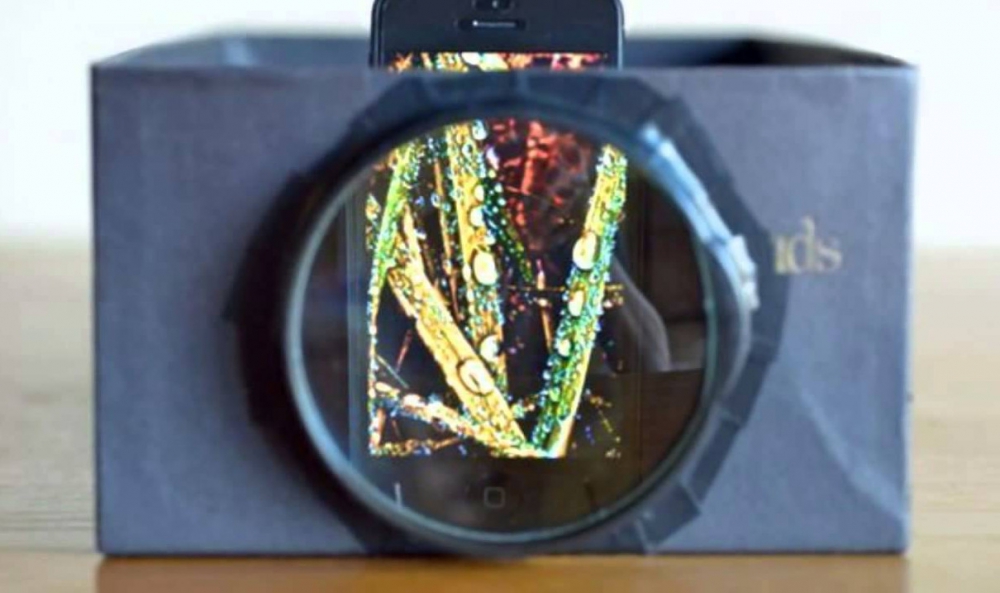
If we are making a projector for a smartphone, then we will need: an ordinary cardboard box (for example, a shoe box), a large lens that can be safely pulled out of a magnifying glass, a small amount of cardboard, tape and glue.
The projector box will block light from outside, preventing refraction and scattering of the smartphone image. The lens in this project acts as a lens. When properly configured, it will begin to focus the light and transfer the image to the surface.
Of course, such a simple device will not turn out perfect, with a clear and high-quality image, but you will be able to study the primitive structure of the projector and enjoy watching a movie in the company of loved ones, and this is the most important thing.
Making a projector
First we need to ensure a good “cameraness” of the image. Using black paint or paper of the same color, we ensure that the inside surface of our box is matte black. Thus, we will significantly reduce the reflection of light from the walls of the box and improve image quality.
Then we make a slot in the end of the projector box that matches the diameter of the lens. This is necessary for good fixation of the lens and the absence of gaps, i.e. extraneous light that would definitely interfere with our viewing.

Next we move on to the lens and smartphone. There are at least two ways, which we will tell you about. They differ fundamentally based on the composition of the moving elements. In the first option, we will move the lens to focus correctly and increase image clarity. In the second option, we will move the smartphone for the same purpose.
- If you decide to make a movable lens, then you need to make a cardboard cylinder whose diameter matches the diameter of the lens, then use glue applied to the end of the lens to secure it to the base of the cardboard cylinder. The length of this design should not be very large; it is enough that it provides a lens travel of 5-7 centimeters. The smartphone is fixed in one place and does not move anywhere.
- Here the smartphone acts as a moving element. In this case, we need to make a stable platform for the phone (from foam, cardboard or even a paper clip), which we will move around the box, thereby achieving maximum image accuracy. The lens in this version is fixed at the end of the box and serves as a static element for focusing the smartphone’s light code.
Final preparations
After installing the entire structure, our preparations are almost complete. But it’s worth paying attention to a few nuances:
-
Inverted image
The image from the smartphone, passing through the lens, turns out upside down. Naturally, watching a video in this format will not suit anyone. The easiest way in this case would be to flip the original image 180 degrees. In this case, you will get a normal picture at the output. -
Image clarity
You need to achieve maximum image clarity. This is achieved by manipulating the lens in the first case, using a homemade lens, and moving the smartphone along the walls of the box in the second case. When maximum image clarity is achieved, you can consider the setup complete. -
Surface preparation
It is advisable to prepare a wall, table or other surface on which films and other images will be broadcast. Ideally, it should be white, smooth and matte. For our little experiment, you can hang a regular sheet or take large thick white paper. -
Preparing the room
The room should be dark. Then, and only then, your image will be as clearly visible as possible, and you will enjoy viewing. If your private viewing takes place in the evening, it will be enough to turn off the lights in the room. Well, if the action takes place during the day, you can close the curtains tightly and try to minimize the flow of light into the room with the projector. Don't forget to increase the brightness of your broadcast smartphone to maximum - this will ensure the clearest and most colorful image.

Enjoy watching!
That's it, now the entire process of assembling and preparing the projector is complete. All that remains is to choose your favorite movie, get together with a friendly group and enjoy the movie. Let the movie show bring you a lot of joy, and let the assembly of a simple device from a shoe box go quickly and efficiently.
For additional information on assembling your own projector, we suggest you watch the following video:
Take it for yourself and tell your friends!
Read also on our website:
show more
You can make a projector yourself using Android mobile devices or a laptop monitor. This device is perfect for viewing slides. Also, the homemade projection will make it possible to watch movies. Assembling a simple device is not difficult.
An option on how to make a projector from a phone with your own hands
You can make a projector at home using a regular cardboard box and a phone. This device is not difficult to make with your own hands. To begin with, they carry out the preparatory work and stock up on the necessary tools. For the projector you will need a cardboard box, a magnifying glass with 10x magnification, a sharp knife, a pencil and electrical tape.
The magnifying glass can be a regular magnifying glass or a Fresnel lens. This item can be purchased at any household store.
If desired, the lens can be made at home. This will require certain knowledge and skills. You can use any box as a base, for example a shoe box.
The sequence of creating a projector from a phone:
- First you need to make a hole for the lens. It is performed in the center of the box.
- Next you will need to secure the lens in the hole made. To do this, use electrical tape. In some cases, silicone or special glue is used.
- Next, you will need to install a stand for your smartphone. To do this, choose the right place. At the same time, the phone must hold tightly and not wobble, so that the image does not end up blurry.
- The resulting device should be tested. To do this, close the curtains in the room. After a trial time, the correct placement of the device becomes clear.
- On the smartphone itself you will need to install a special program that will flip the image, because the lamp bends the picture by 180 degrees.
- On the other side of the box you will need to take care of the hole for charging the phone.

At this point, the homemade cardboard mini projector is considered ready for use. This creates a home theater where you can watch movies with the whole family. In addition, this is a great option for viewing photos with a large group.
A way to make a projector at home from a laptop
A smartphone is a great option for creating a projector. But if you want to improve the quality, you can use another gadget. So it is advised to take into account a laptop or tablet. Due to the higher screen resolution, the video quality will be much better.
When using a laptop, you should understand that the screen resolution will be much better. But the design will be more cumbersome.
The box for building a home theater from a tablet must be large enough. So the length should be at least 50 cm, and the end part should be slightly larger than the device screen. It is better to choose a large Soviet magnifying glass.
A hole should be made in the end using a knife. It should be slightly smaller than the magnifying glass itself. The lens is attached using double-sided adhesive tape. Then you should secure the tablet inside the box. It should be taken into account that the lens reverses the image.
Creating a projector from a laptop has its own characteristics. You will need to cut rectangular holes on both ends. The device is placed with the monitor facing down, while the keyboard is located at the top. This placement will help to get the correct image in the final result.
Original 3D projector with your own hands: features of creation
You can make an original 3D projector based on a smartphone. For such a design you will need a plastic pyramid. You can purchase such a device on the Internet, where you can also get acquainted with the dimensions. Then you just need to fix the pyramid on your smartphone strictly in the center and start the required video. The type of design is determined by the purpose of such a device. Therefore, it should be determined in advance.

Purposes of 3d projector:
- You can show a real fairy tale from a technologically progressive future. Such tricks will appeal to both the older and younger generations.
- This design will interest kids and you can show children cartoons.
- A laser slide projector creates the effect of a cinema and you don’t have to spend on unnecessary expenses, this will help you save on the costs of hobbies.
This design does not require special costs and materials. It is enough to show a little imagination. You will only have to spend money on a plastic pyramid, but this is not a significant expense.
Rules for making a projector with your own hands: main features
Before you start building the projector, you should study its design. Only then can you evaluate your chances of getting the right device. The right projector includes a lens and a lens. They affect the uniform distribution of light. Light must enter the lens at a certain angle.
The image source is usually a liquid crystal matrix. She works for the light. Each pixel increases by several sizes. Therefore, the original image should be of the highest possible quality. The brightness of the projection lamp determines the maximum screen size.
For good image quality, the source material must be FULL HD - this is 1920x1080 pixels.
The simplest video projector is made using a smartphone, a cardboard box and a lens. The box should be larger in size than the gadget, and the diameter of the lens should match the size of the screen. Its focal length determines the distance to the screen.
The principle of arranging a simple projector:
- A hole is made in the box for the lens;
- Any gadget can be secured inside.

The phone frame should be easy to move around inside the box. Often, another box, which is smaller in size, is used for this. Reflection of light should be minimal. That is why the inside surface of the box is covered with black applique paper. You can also paint it with matte paint. In some cases, shoe polish may be noticeable. You can also take a thick artist’s canvas
A way to make a magnifying glass at home
The purpose of the lenses is clear. This is a magnifying glass that helps you magnify objects. To make your own lens you will need a plastic bottle, water, plasticine or window putty. When you fill the bottle with water, the magnifying device will be ready, but this is clearly not enough.
Sequential creation of a magnifying glass:
- 2 identical circles are cut out of a plastic bottle.
- Then the two circles will need to be connected using plasticine or window putty. You should not forget to roll out the plasticine before work.
- Next, you will need to cut the straw into two parts and attach it to the surface of the lens.
- One end of the straw is inserted into a slit in the lens, and the other is used to remove air. This will help force water inside the lens. But all connections must be tight.
- Then the lens is lowered into the water and liquid is drawn inside.
After all, the lens is removed and the gap is sealed with sealant. At this point, lens manufacturing is considered complete. For convenience, it is recommended to attach a lens to the structure.
DIY projector screen (video)
To make your own projector, you will need to take a magnifying glass, a gadget and a cardboard box. After simple manipulations, such a filmoscope will project films onto the wall if you make a special elevator. But you can purchase a ready-made Avon mobile projector. Reviews about it are positive.
We continue to look at the most and now we’ll tell you how to make a projector with your own hands at home. You will need such a homemade device to replace your home theater and watch personal photos or even movies on the big screen. Even a child can assemble such a projector from a cardboard box and a magnifying glass, and he will do it in no more than 5 minutes. So, we present to your attention the technology for making a simple projector from improvised means
Step-by-step instruction
To make it clear to you how to make a projector from a box and a phone, let’s look at all the steps step by step with photo examples:
- We prepare materials and tools for assembly: a shoe box, a 10x magnification lens, a stationery knife, a simple pencil, electrical tape, a paper clip and of course a smartphone.
- We cut out a window for installing a magnifying glass. The magnifying glass must be installed centrally. To center the lens yourself, we recommend drawing diagonals on the desired side of the box. This way you will know where the center is and then it will be easier to make an even cut. After measuring the diameter of the magnifying glass, use a compass to make a marking along which you can simply and accurately cut the hole.


- We secure the magnifying glass to the box with electrical tape. You can use any other fastener that you have on hand, for example, silicone or a glue gun. You need to try to make the mount strong so that the lens does not come off and break.

- We prepare a stand for the smartphone. You can use a regular paper clip, bending it accordingly, or you can make a stand with your own hands from scraps of cardboard. The stand should hold the phone in an almost vertical position.
- We turn off the lights in the room and test the homemade projector. You need to choose the right distance from the smartphone to the lens in the box. By experimenting with the location of the device, you can choose the most suitable angle at which a clear and bright image is projected.

- Download an application to your phone that allows you to flip the image. This is necessary because when projecting a video or picture from a phone, the image is flipped 180 degrees according to the laws of optics. Android users can install Ultimate Rotation Control, and iPhone and iPad owners can use Video Rotate And Flip or something similar. On some phone models, it will be enough to simply turn off “auto-rotate screen” and turn the phone upside down.

- The final touch is to make an input in the box for charging your mobile device so that it does not run out of charge while watching.

You can clearly see the entire assembly process in the video:
A simple way to make a cheap movie theater
Using these instructions, you can make a projector with your own hands at home. As you can see, there is nothing complicated and there is no need to spend money on purchasing materials, because... box, tape and even a magnifying glass can be found in your own workshop.
What else is important to know
If you want the image on the wall to be brighter and clearer, it is better to use a tablet or laptop rather than a phone. In this case, the magnifying glass should be larger, because The screen size itself is larger. In this case, we use a special type of lens - a rectangular Fresnel lens, since finding a suitable glass lens is not an easy task. You can buy such a lens on the Internet. You can see an example of how to quickly make a projector from a laptop or tablet in the photo below:


Another important point - if a homemade device projects a not very good picture on the wall, and at the same time you have already tried to change the location of the smartphone, then the problem is with the lens. Try wiping it or replacing it with a better one if you previously bought a cheaper option. Increasing the lens size can also improve the picture.
In addition, I would like to draw attention to an important nuance - in order for a homemade home theater to show a clear picture, the brightness on the mobile device must be set to maximum. You can improve the clarity of the projector by painting the inside walls of a cardboard box black, for example, with spray paint or a regular marker, or you can cover the inside with black paper.

The wall on which the slide show or video will be displayed also has its own requirements. It is best to direct the projection onto a special canvas for the projector, but if this is not available, an A1 size Whatman paper, mounted in a frame or simply on the wall with buttons, will do. Here I would like to clarify that you can use such a homemade cinema at home only if the room is dark enough. The light will interrupt the image.

A projection device (in everyday life - a projector) is an optical-mechanical device with the help of which an image from flat illuminated objects is projected onto a screen. Its design depends on the purposes for which the device is intended (viewing regular slides or high-resolution video content) and the image projection technology used. However, the design of the simplest samples is not particularly complex. Therefore, in order to get a kind of home theater, it is quite possible to assemble the projector with your own hands. How to do this is described in the material below.
Operating principle of multimedia projectors
More recently, on the domestic market one could find projectors that use light for projection:
- passing through a transparent object (slides, films) - overhead projectors (diascopes);
- reflected from an opaque object (book page, etc.) - epiprojectors (episcopes);

- passing through constantly moving frames on transparent film - film projectors.
There were also universal models with which it was possible to project images onto the screen from both opaque and transparent objects. They are called epidiaprojectors (epidiascopes). However, with the development of digital technologies, these projectors were replaced by multimedia projection devices that successfully compete in the market with modern Smart TVs in the home theater segment.
A modern multimedia projector is a small set-top box with which you can reproduce images received from various digital devices (camcorder, DVD player, USB drive, etc.) on a large screen. Today, there are two types of multimedia projectors, the operation of which is based on the use of different digital technologies. The image in them is obtained through the light flux:
- reflected through color filters from a matrix of controlled microscopic mirrors - DLP (DMD) technology;
- passing through a transparent matrix of liquid crystal elements - LCD technology.

Structurally, multimedia projectors are quite complex devices in which optical, electronic and mechanical components operate synchronously with high-precision technical parameters.
On a note! Projectors using DLP (DMD) technology provide high-contrast images with optimal color rendition, while LCDs are characterized by high image brightness and color saturation.
How to assemble a projector yourself
It is almost impossible to build a high-quality multimedia projection device at home. At the same time, it is quite possible for a person with basic knowledge in the field of electronics and skills in electrical installation work to assemble a projector of the simplest design with their own hands.
Before you begin assembling your home projector, you must decide exactly how it will be used. For example, if:
- If a projector is used to show cartoons for a child, you can make a simple mini-projector even from a phone;
- If you need to get color effects when listening to music tracks (color music), you will need a homemade laser projector;
- If you want to surprise your loved ones with something unusual, you can make a simple holographic projector yourself.
The simplest projector
The simplest video projector can be made from a smartphone and a lens capable of providing 10x magnification. To do this, you should additionally prepare a box made of hard cardboard, and the tools you will need are:
- stationery knife;
- "Constructor" type pencil with hardness 2M;
- electrical tape, silicone glue or glue gun;
- big paperclip.

Important! When the light flux passes through the lens, the image is flipped 180°. Therefore, you need to download a special application to your mobile device that allows you to flip the image on its screen. For example, for cell phones running Android OS, the Ultimate Rotation Control application is most often installed.
The manufacture of parts and assembly of the projector from the box and magnifying glass is carried out in the following order.

Advice! It is advisable to make a hole on the back wall of the box for connecting cables from the charger and USB adapter, with which you can connect flash memory to the smartphone.
A simple 3D projection device can be made from a mobile phone and a truncated plastic pyramid with the following dimensions:
- base, mm - 60x60;
- small (truncated) square, mm - 10x10;
- height, mm - 45.

The 3D projector is based on the design, the manufacture of which was described above. Now, if you download special holographic video tracks to the memory of your mobile device, install an inverted pyramid in the center of its display and turn on playback of recorded videos, the resulting image can surprise viewers. This is especially true for older people.
Projection apparatus based on a slide device
A high-quality image can be obtained without a magnifying glass. In this case, to create a homemade device you will need a slide projector for slides that are projected from a sheet of white paper measuring 210x297 mm (A4 format). The advantage of this projector is that all optical components are assembled and adjusted at the factory, and the user only has to worry about finding the image source.

The matrix from a 10.1 tablet (217x136 mm) will cope best with broadcasting photo or video content. True, for this it will need to be carefully removed from the case without affecting the functionality of the gadget. Having installed the matrix in the projector, it is connected to the tablet, which in this case acts as an image source, and the slide projector is turned on. The best image is obtained if use an overhead projector to illuminate the slide(in our case a matrix). If an overhead projector uses a reflected beam of light to project an image, the quality of the image will be noticeably worse.
You can make a similar projection device based on an overhead projector to view smaller slides. To do this, you will need a matrix from a phone or MP video player, which is placed in the slide window.

Gobo projection
To obtain original moving pictures, an overhead projector instead of a matrix they are equipped with sets of special gobo lenses, which are easy to make with your own hands. In this case, you can use a projector from a filmoscope as a light source. This option (gobo projection) is most often used when conducting various types of presentations.
Note: a gobo lens is a projection filter (stencil, frame) that is installed in front of the light source.
Home theater projector
Quite often, movie lovers are put off by the high prices of the equipment needed to organize a home theater. In this case, you can try to make a fairly good projector yourself, using a powerful LED and LCD matrix from a computer monitor or laptop as a basis. This matter is far from simple and requires engineering knowledge in the field of optical instrumentation. You will have to develop drawings of the necessary parts at home, adjust the optical units, etc.
In addition, you will need a number of components, including:
- Fresnel lens with a focal length of 220 mm;
- Fresnel lens with a focal length of 317 mm;
- lens 80mm/1:4/FR=320;
- intermediate lenses (condenser);
- 2 fans with power and control units;
- LED with a power of at least 100 W with a radiator and driver;
- LCD matrix with a size of at least 15″ and a resolution of at least 1024x768;
- remote monitor control (via Wi-Fi).

You will have to develop drawings of body parts for such a projector yourself and order their production externally or also using your own abilities and skills. Installation of components into the assembled housing must be carried out in accordance with the diagram provided so that the light is distributed evenly across the screen.

Attention! All distances between the optical elements of the projector are determined experimentally.

For people who have sufficient skills, backed by knowledge, and are going to make a projector at home on their own, there are a number of recommendations from craftsmen who have experience in such production.

Numerous Internet community sites display a large number of a wide variety of designs made from scrap materials (which can easily be found in any home) with instructions and reviews from people who have used the advice. Well, everyone determines the feasibility and economic feasibility of such crafts independently, based on their own capabilities and skills.
In conclusion, you should note that a carefully assembled and correctly adjusted projector will allow you to get a fairly high-quality image on a screen located at a distance of 4 meters from the device. In this case, the diagonal of the output frame will be 100″. This is a completely acceptable solution, if not for watching videos in maximum resolution, then at least for spending time together as a family watching an interesting film.
Popular projectors of 2018
Epson EB-X41 projector on Yandex Market
Projector Epson EH-TW5400 on Yandex Market
Acer X118 projector on Yandex Market
Projector XGIMI H2 on Yandex Market
BenQ TH534 projector on Yandex Market
30.05.2017 11:41:00
The cell phone has long ceased to be solely a means of communication. With the development of high technologies, a mobile gadget absorbs more and more possibilities, becoming a device with a truly limitless number of functions. One of the latest examples is the introduction of NFC technology, thanks to which you can pay for purchases in a store using a smartphone.
Naturally, the improvement of telephones is not complete without some very bold experiments. Designers of mobile gadgets often try to combine several functions from different technological areas in one device. For example, about 10 years ago attempts began to combine a telephone with a projector.

The goal of such an experiment is quite obvious - to create a compact and mobile device with which one could project an image on the wall to view photos, videos or presentations. In our article we will talk about how this idea was implemented and how successful it became. In addition, we will tell you how to turn your phone into a projector with your own hands.
Phone with a projector: the beginning
The history of combining a mobile device and a projector began in 2009. Then Korean designer Min-Sun Kim created a concept phone with a projection lens.

In his concept, the designer had to face two serious problems. Firstly, operating the projection module put a lot of strain on the battery. Secondly, while the phone was operating in projector mode, the device became very hot.
To solve the first problem, Min-Sun Kim proposed using a battery based on polycarbonates, which would provide greater capacity compared to the lithium and sodium batteries common at that time.
Polycarbonate was supposed to solve the second problem. It was from this that the phone body was supposed to be made. And to remove excess heat, aluminum inserts were installed along the edges of the gadget, which served as a kind of radiator.
The first mass-produced projection phones
Min-Sung Kim's concept was implemented in the W7900 from Samsung, which became the first production phone with a projector. The model was presented at the international exhibition CES 2009. The phone was equipped with a 3.2-inch OLED display with a resolution of 240 by 400 pixels and a 5-megapixel camera. The built-in projection module displayed an image with a resolution of 480 x 320 pixels. The lamp power of 10 lumens was enough to watch home videos.

The most famous models
After a fairly successful announcement, Korean developers decided not to stop there and over the course of several years released two models of phones with a projector: Samsung Galaxy Beam and Samsung Galaxy Beam 2. The first Galaxy Beam, released in 2012, became an updated model W7900. The device ran on the Android 2.3 operating system, was equipped with a 4-inch TFT display with 16 million colors and a 5 megapixel camera.

Two years later, the company released the second model in the series, the projector of which displayed an image with a resolution of 800x480 pixels. It is worth noting that in this model the lamp power has increased significantly - up to 15 lumens, which gave a fairly bright and clear projection.
In 2011, the Japanese company Sharp joined the development of projector phones with the SH-06C model. The phone had a 4.5-inch screen, an 8-megapixel camera and a battery with a capacity of 1520 mAh. The 9-lumen projector produced an image of 640x360 pixels. A distinctive feature of this model was a fairly high moisture protection index: IPX5 or IPX7, depending on the modification.

The same year, the MFU P790 projector phone was released in China. The device contained a rather simple and not the most powerful filling: a 3.2-inch display, a 1.3-megapixel camera, and the built-in memory was designed for only 73 megabytes. The main feature of the phone was the combination of a TV tuner with automatic channel search and a projector. Despite the fact that the model was released in a rather limited edition in China, it can still be bought in online stores for approximately 4.5 thousand rubles.

In 2015, Lenovo decided to go a little further than its competitors in producing phones with a projector. The announced Lenovo Smart Cast model was equipped with a special projection module that turned a flat horizontal surface into a touch panel. An infrared sensor on the front panel sensed movements on the projection. That is, it was possible to display, for example, a numeric keyboard or piano keys from a music application on the table surface.

The module rotated 270 degrees, so the Smart Cast system automatically adjusted the projected image depending on the surface. You can watch the presentation of the miracle smartphone in this video:
One of the latest quite interesting solutions is the Motorola Moto Z smartphone, which was released in 2016. The design feature of the device was compatibility with various Moto Mods. You can connect a stereo speaker, a Hasselblad photo module or an additional battery to your smartphone.
With the help of the $300 Insta-Share module, the phone became a projector that displayed an image in a resolution of 854x480 pixels.

It is worth recognizing that the idea of combining a phone and a projector has not become widespread. Such models were distinguished by decent dimensions and weight and were quite expensive at the time of their appearance. In addition, phones with projectors clearly did not match the quality of the projected image. After all, phones running the Android operating system are much more convenient to connect to a regular TV to achieve better image clarity.
Relatively good demand for phones with a projector has been observed in recent years only in Southeast Asia. Such models are almost never imported to Russia. The only reliable way to purchase a branded projection phone is to order it through an online store and reflash it for greater convenience.
How to make a projector from a phone
However, if you want to watch a projection image from your phone, you don’t have to spend money on rare equipment. You can make a projector from your phone yourself, without leaving your home.
To do this you will need:
- Telephone
- shoe box
- 10x magnifying glass
- Sharp knife
- Pencil
- Insulating tape
- Paperclip or piece of foam
The clarity and brightness of the picture, first of all, depends on the source of the image, that is, on the smartphone screen. It is desirable that the device be equipped with a large and high-quality screen, at least 5 inches. We recommend using a new product from the British company Fly – the Cirrus 13 model – as a basis for the projector.

The 5-inch IPS display of the smartphone produces a bright, rich and contrasting picture thanks to Full Lamination technology, which eliminates the air gap between the layers of the screen. The image becomes as realistic and rich as possible. It is also important that the screen transmits images in FullHD resolution.
Thanks to a 2400 mAh lithium-polymer battery, the Fly Cirrus 13 can work up to 4 hours as a projector for watching movies. This is quite enough for a couple of excellent blockbusters for the whole family.
So, if you have stocked up on everything you need, you can start creating a home theater:
Step 1.
On the box you need to cut a round hole the diameter of the magnifying glass lens. It is important that the hole is located exactly in the middle. To do this, connect the corners of the box with diagonals. The point at the intersection of the lines will be the center for the lens.

Step 2.
Insert the lens into the hole or secure the glass with electrical tape.

Step 3.
Make a phone stand from a paper clip or cut a frame out of foam to fit the size of the device.

Step 4.
Place the phone in the box. It is necessary to find the optimal distance between the screen and the lens. This is best done in a dark room, moving the gadget back and forth from the lens.

That's it - the projector is ready. Additionally, you can make a hole for a charger or USB cable. Enjoy watching!
Watch the video instructions for creating a projector from your phone:
Did you use our instructions and make a projector from your phone? Tell us about it in the comments to this article or