Brick stove project for home. Do-it-yourself brick oven for the home: step-by-step instructions with photos. Requirements for the operation of a brick kiln
Read also
Most brick stoves used for home use have fundamentally the same design and manufacturing technology. Therefore, no matter what type of brick you choose, you must adhere to certain rules and requirements for its manufacture. This applies to the place of its installation, and to the material used during installation, but, most importantly, to the brick laying technology.
Choosing a place where the stove will stand
First of all, you need to decide on a place for the stove. It must be installed in such a position that it not only heats the largest possible area, but safety rules must also be observed.
There must be a gap of at least 15 cm between the rafters and the chimney. In addition, highly hot parts of the stove must also be kept away from the walls, ceiling and other fire hazardous elements.
There are several basic schemes for small rooms, how you can place different types ovens. As a rule, a brick stove for a home, the designs of which provide for location in such a way as to heat as much as possible large quantity premises, placed at the junction of two or three rooms, one of them being a kitchen. The only exception is the fireplace stove, which is usually installed in the very big room, on the wall opposite the entrance.
Safety requirements for the installation site
Due to the fact that a brick stove for a home is installed on a foundation poured especially for it, it is necessary to select a location in such a way that you do not have to cut the ceiling and underground joists. A separate foundation, not connected to the foundation of the house, is required in almost all cases, even if the furnace was designed along with the house.
An exception can be made only for certain types of stoves that have low structural weight. For example, a low and wide brick cooking stove for a home, the designs of which involve the use minimal amount material, installed only on thermal insulation.
If the floor is on joists, it is a good idea to strengthen the floor covering with additional jumpers before installing the stove. In case there is a mortgage under the house monolithic foundation, then an additional base is not necessary; it is enough to lay a bedding and you can lay out the brick.

The pipe must be at least 1.5 m from the roof ridge and 0.5 m higher than it.
Once the location is determined, you can lay out a perimeter of bricks on the floor to better visualize what it will look like in the future.
Foundation
As a rule, a brick stove for a home, built with your own hands, is used in wooden houses installed on strip or in this case, a full-fledged reinforced concrete base or, if the stove is planned on trenches, a strip filled base is required.
After the place where the stove for a brick house will stand has been determined, it is necessary to make a foundation. The reliability and uniformity of the masonry, as well as appearance future oven. Therefore, pouring the foundation should be approached with due care.
The base is poured 5 cm wider on all sides than the future oven, according to general technology making foundations. If used modern materials, for example, “Izospan D”, it is enough to lay two layers of waterproofing: on a sand cushion under the base and on top of the foundation itself. Another way to perform waterproofing: sheets of asbestos 4-6 cm high are laid on top of the top layer of roofing felt. Then, as the last layer, felt is soaked in a very liquid masonry composition. After the felt has dried, you can lay the bricks.
Basic rules when laying a brick kiln
If you want to fold the stove so that it lasts as long as possible without requiring repairs, much less re-arranging, you must comply with some requirements for the materials used and installation technology.
A homemade brick stove, built with your own hands, heats up rather unevenly throughout the body. Particularly high temperatures in the firebox area, which is caused by the use different material for masonry. Firstly, this will allow you to significantly save on raw materials, since for some parts of the furnace you can use more cheap material. Secondly, the use of a clay-sand mixture throughout the entire body of the stove is unjustified. Such a solution has the ability to strongly absorb moisture, which leads to the destruction of masonry in places that are not subject to heating and drying.

Requirements for bricklaying
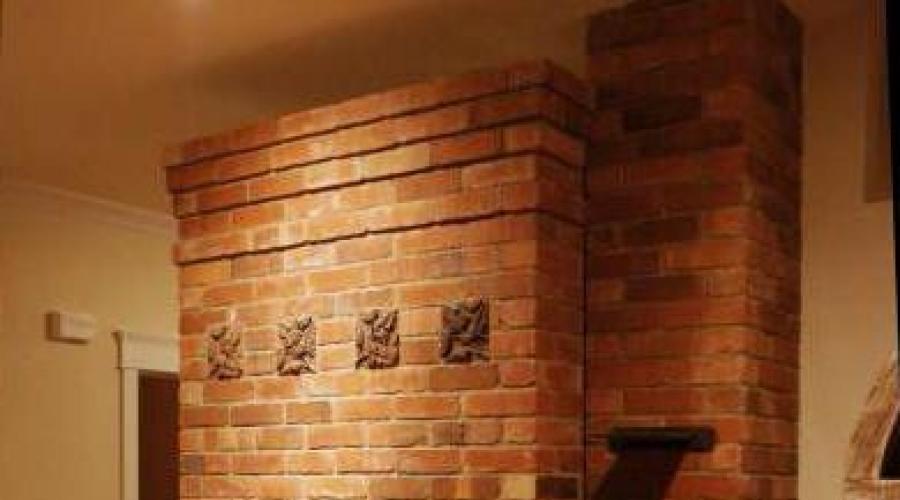
When choosing a brick, pay attention to its quality, which can be determined even visually. Good, quality brick It is distinguished by a pinkish tint and a clear ringing sound. You should not choose orange-red material for laying a stove for a brick house (photo below) - this is unburned raw material, but purple shade speaks of burnt brick.

The first rows of the flood part are laid from ordinary red bricks with cement-based mortar.
Firebox and part of the convector in place maximum heating It is made from mixed masonry of a conventional stove and a clay-sand mortar is used.

The part of the furnace, which also heats up, but not higher than 200 degrees, will be made using ceramic bricks, but already on a cement mixture.
In the upper part of the chimney, where the heating temperature does not exceed 80 degrees, ordinary red brick is again used.
Types of brick kilns
There are several main types of ovens:
- heating, designed exclusively for heating the room, therefore it occupies a minimum of usable space;
- hob, intended only for heating the stove, such a stove can be used even in summer time, since it does not heat the surrounding air much;
- Heating and cooking, combining the characteristics of the two previous types. The most common option when making a stove for a brick home (photo below);
- stove-fireplace, used not only for space heating purposes, but also as decorative element for the interior of the room.

Heating or Dutch oven
The design of a stove for a brick house, the drawings for which are given below, is the simplest, thanks to the minimum structural elements during its manufacture. In addition, such a stove requires the lowest fuel consumption.

One of the main advantages is the ability to fit it into almost any room. At the same time, a similar brick stove for a home warms up quite quickly, in just 1.5-2 hours, although it cools down quite quickly compared to other types of stoves.
Among the disadvantages, one can note a rather low coefficient useful action- less than 40%. In addition, to build a water heater into it, you will have to seriously rack your brains. The problem is that the flow of hot air that moves in the furnace cannot be disrupted by adding additional elements. This leads, firstly, to a large decrease in efficiency, and secondly, to the appearance large quantity soot
Cooking ovens
“Cooking” does not mean at all that this stove is not capable of heating a home with a room of up to 50 square meters. she can handle it quite well. However, its main function is still cooking, so the main heat is spent on heating a thick cast-iron stove with two burners. Cast iron is used to increase heat transfer.
The main advantage of such a stove is the ability to cook food in areas where there are frequent power outages; besides, any food turns out much tastier over a live fire. It is beneficial to install such a brick stove for the home, using wood, and for preparing feed for livestock and poultry, steaming cereals and drying dried fruits. In addition, the design of the stove assumes its use in the summer, when there is no need for excess heat in the house.
Flaw cooking oven- it is unrealistic to use it for full heating in winter time. Even if you increase the overall dimensions of the device, this will not increase its effectiveness. Therefore, as an alternative, a generally accepted option is used, which combines the advantages of both types, while successfully compensating for their disadvantages.
Heating and cooking stoves
The most preferable option for permanent housing are heating and cooking stoves for brick houses, which combine all the functions of these devices. In addition, such stoves can be easily oriented indoors to obtain the most efficient heating of the home, and standard set basic characteristics can be supplemented with an oven, a drying niche, a sun lounger and a water tank. It all depends on the design of the heating and cooking stove you choose.

For heating in such furnaces, a channel or bell-type design is used, each of which has its own advantages. A duct stove made of brick for a home, using wood, warms up the room faster, while a bell-type stove allows you to maintain the optimal temperature for a long time. Therefore, for a residential building it is better to use an option that combines these two designs.
Traditional Russian stove
The most common is the Russian stove, which can be used in two various modes. In the summer, it is used exclusively for the cooking process, due to the fact that the heating ducts are closed with an additional damper and the hot gas goes directly into the chimney. In winter, the damper is opened, which ensures heating of the room. As a rule, a Russian oven has a built-in oven, which is a kind of additional heat accumulator.
Often, a heated sunbed is additionally attached to a brick home stove through the use of caps, which are done without losing the efficiency of the entire device.
The main disadvantage of the Russian stove is its rather impressive size due to its remote location. hob separate from the body.
Swedish stove
Another option This is a more compact device in which the hob is hidden in a recess. In addition, there is additionally a special niche above the stove for drying various herbs, berries and other products.

Another name for such stoves for a brick home is “Swedish”. Such a device has a lot of advantages compared to other stoves. Thanks to its design, the device has the highest efficiency - more than 60%, since the heating channels go to the entire brick stove for the house.
From time immemorial in Rus', stove masonry has been valued. And today, despite huge assortment fireplaces, many prefer to make brick stoves themselves. At the same time, everyone is trying to use old-fashioned methods both in the preparation of the mortar and in the method of laying bricks. In our article we will tell you how to properly make brick ovens for your home, drawings with procedures, recommendations from craftsmen, video tutorials and much more. At the end of the article we will publish step by step guide on production sauna stove, and also give general recommendations.
Photo 1 Brick oven
Returning again to the roots, it should be noted that the stove has always been given a central place. This was connected not so much with superstitions, but with the ability to heat the entire house evenly. And today this arrangement is wooden house is optimal.
.png)
The design of the furnace includes several basic elements, namely:
- base - regardless of the area of the furnace, it must be installed on a specially prepared concrete base;
- body - made of decorative and heat-resistant bricks;
- view - controls air flow and combustion intensity;
- valve - controls the amount of heat released into the pipe;
- fire door - door in combustion chamber, through which firewood is laid;
- blower door - for traction control;
- cleaning doors - for cleaning chimney channels and pipes;
- grates - a grate on which firewood is placed and through which air circulates in the stove;
- barrier - mainly used only in the Russian stove, where a large mouth is provided.
When making brick stoves for the home, drawings with orders are the first thing you need to look for, since in this case there is no need to calculate the number of bricks and the laying radius.
The choice of a stove, as well as a fireplace, depends on the period of residence and use of the room, as well as the materials from which it is planned to make such a structure. To make your choice easier, here is a table of classification of furnaces according to the specified parameters:

In any type of stove, especially in bathhouses, the first laying of bricks is carried out on a waterproofing layer (bitumen or roofing felt), which covers the foundation. In this case, the bricks from the first row are necessarily wetted in water.
How to make a Russian brick oven - drawing with order
Previously, such a stove was in every home, without exception, and performed the function of not only heating, but also cooking. Even today, its exotic “appearance” combines beautifully with various interior solutions. Optimal size, which is suitable even for small room, the oven will be 238 x 65 x 127 cm.
- fireclay brick - 1610pcs;
- solution - 1250 liters in prepared form;
- screen;
- 2 views;
- samovar;
- jointing;
- hammer-pick;
- shovel for mortar;
- bracket;
- rule
- tamping;
- mopping
.jpg)
In a Russian stove, the pipe should also be made of brick. Some people prefer to use sealed ready-made designs, which is not a constructive violation, but the general style is not respected.
Scheme of a Russian stove
.png)
Video 1 We build a Russian stove according to an ancient model
How to make a Buslaev stove
Buslaevskaya stove (Swedish) - a design ideal for small houses, dachas and country cottages. It differs from the classic Russian stove in that it has a built-in kitchen hearth and hood.
Despite its small dimensions, such a stove very efficiently heats two-level rooms due to bottom heating.
Drawings with the order and description of each stage will help you make such a stove for your home.
Required materials and tools:
- full-bodied masonry brick(red) 382 pieces;
- refractory bricks - 43 pieces;
- doors for the firebox and ash pan;
- cast iron stove with removable burners 70 x 40 cm;
- oven - 20 x 30 x 50;
- valves;
- grate;;
- 2 meter corners 4.5 x 4.5 cm;
- 4 meter strips 4 mm;
- 4 strips 25 cm thick 2 mm;
- 1 strip 35 cm thick 3 mm;
- heat-resistant metal sheet 30 x 28 cm;
- cast iron stove;
- trowel (trowel) - for laying the mortar;
- jointing;
- hammer-pick;
- shovel for mortar;
- bracket;
- rule
- tamping;
- mop.
Scheme of the Buslaev furnace

In the video detailed information about the order and laying of each row
Video 2 detailed instructions on furnace laying
It is not recommended to replace solid brick clinker. To increase the life of the stove and complete the style, use tiles - their potential lasts for centuries, they are easily dismantled and can be reused to decorate the stove.

How to make a brick sauna stove
When starting work on laying bricks for the stove, you should familiarize yourself with the order. It depends on both the material and the size of the oven. In this case, it is necessary to measure the edges each time. Because with any gap, even a miniature one, smoke will enter the room. The bricks always fit very tightly, which depends not so much on effort. How much from a high-quality prepared solution.
The thickness of the seam in each row of bricks should not be less than 3 mm and more than 5 mm.
Ordering a sauna stove

- The first row, as mentioned earlier, must be laid out on a previously prepared base. To do this, the foundation under the furnace is tightened bitumen waterproofing or roofing felt. Wet all bricks from the first row with water.

- Install a plumb line with a weight, as shown in the photo

- Lay the second and subsequent rows of bricks in a checkerboard pattern.

- On the 3rd row, as a rule, the blower door is mounted and reinforced with strong wire.

- To securely fasten the door, the bricks around it should be trimmed

- On the 4th row, check the evenness of the walls and the future stove using a plumb line

- The laying of the ash pan and grate begins from the same row. Before installing the grate, make holes in the surrounding bricks that will level out expansion when heated.

- In the 6th row, a door for the blower is installed. In the 7th, a door for the firebox and a grate are installed. From the 8th row, the laying of the chimney begins, which continues until the fourteenth inclusive. On the 14th row, corners are mounted, and on the front side an opening is prepared for a container of water. It is imperative to cover the tank and all doors with asbestos.


- From rows 15 to 18, the walls are laid out in half a brick and at an angle. This begins the formation of a dividing wall, where each subsequent brick will cover the joint in a checkerboard pattern.

- In the nineteenth row, a door is installed that removes steam. Before laying 20-21 rows, steel strips are laid on the bricks to strengthen the fastening (this is where the water container will be installed). Next, the entire container is covered with bricks, possibly even incomplete parts or leftovers.

- For laying the stove it is recommended to use the so-called. fireclay brick, which contains refractory clay. This brick can withstand even the highest temperatures and does not burst when water gets on it. Besides, decorative characteristics beyond all praise.
- If you are going to build brick ovens for your home, drawings with procedures and safe operation- the most important thing you should pay attention to.
- Minimum permissible distance from pipe to wooden surface- 10 cm;
- The gap between the roof and the chimney must be insulated with a sheet of metal;
- The area in front of the stove is insulated with a similar sheet.
In a country house or country house, in order to live comfortably during the autumn-winter cold weather, it is necessary to equip a heating system. Therefore, many owners wonder what is the best and most economical brick stove, or maybe a fireplace or metal structure. If the building area is small, then compact products should be considered, and for large-scale houses, modern energy-saving options for heating devices would be ideal.
If we look at authentic stone structures, they have significant dimensions, heavy weight and take a lot usable space. Although they are great for heating a home. How to do it right choice and not waste time and money, we will try to talk about all this in this article.
Neatly stacked brick structure
Choice for a country house
Currently available in heating equipment stores a wide range of products that are usually installed in homes country type. Each model will be effective in its own way if its choice is made taking into account technical characteristics and operating conditions.
Depending on the individual requirements homeowners, the products have a number of specific differences, for example, a fireplace stove can be:
- rectangular;
- round;
- triangular;
- square;
- in the shape of the letter "T".
There are also original ones combination ovens. Such structures are characterized by the fact that they have a heating function combined with the ability to cook food on their surface, and this is very convenient for small country houses.
The essence lies in the implemented ability to switch modes, that is, the design can simultaneously perform both options, or work with them separately. This combination is truly the best, since in the warm season it is possible to save fuel.

Construction of a furnace during the construction of a house
Talking about which oven is best in each specific cases, first of all you need to pay attention to the area that you plan to heat. Perhaps one or two rooms are to be heated, and the rest will not be used. In this case, you will have to worry about drawing up a plan. country house, where it will be described how the heating system works.
There are many options for stoves for cottages and houses. Some of them involve financial expenses, others require direct hands. What should we do for those who have not succeeded either with money or with skill? A simple brick stove that even a “humanitarian” can put together will help out.
The article discusses two options. The first is suitable for those who want more or less “decent” heating and cooking equipment. The second will be useful to readers who generally do not pretend to be either a penchant for handicraft or any kind of aesthetics of the result.
Figure 1. Simple brick oven
How to make a simple but effective stove?
This option can serve as an alternative to the simplest metal heating devices - for example, a potbelly stove. With the help of this stove you can heat the room, cook food, and even admire the flames.
The structure occupies just over half square meter. Unlike full-fledged brick ovens, this one does not require. The weight of the structure is not so great to do strong foundation– just lay down a strong board.
The oven can be made in just a day. One of the advantages of this option is that starting heating is possible in the evening. Certain skills are necessary, but they do not go beyond the skills of the average male.
On a note! No qualifications are required to build stoves. But it is necessary to maintain order - this will make the design as effective as possible in the context of its potential.
What will you need for the job?
It is not only simple, but also a budget option. To build the structure you will need:
- brick:
- *fireclay – 37 pcs.;
- *red – 60 pcs.;
- ash door;
- firebox door;
- lattice;
- valve;
- hob made of cast iron.
Clay solution is used as a binder. In total you will need about 20-25 liters of the mixture.
It will also be interesting: - types and characteristics.
Preparation
The first step is to decide on the location of the stove. Since the mass of the structure is small, there are no limitations inherent in traditional brick solutions. By securing strong boards or suitable alternative material, the “foundation” is heat- and waterproofed.
The role of an insulator can be played by non-flammable material- For example, basalt wool. Polyethylene or roofing felt is placed on top of the base. The size of the latter corresponds to the dimensions of the base plus a small allowance.
A layer of sand 1-2 cm thick is poured on top. The bedding is leveled. It is important to make the base level - the quality of the design and the convenience of subsequent work depend on this.
Masonry scheme
Figure 2. Order of the stove masonryThe oven order is as follows:
- The first row is laid on sand without using a solution. A dozen bricks are leveled strictly. The bricks are coated with a thin layer of the mixture, after which the blower door is mounted at the end. The door is pre-wrapped around the perimeter with an asbestos cord, which compensates for the thermal expansion of the metal.
- After fixing the door with wire, lay the second row according to the diagram. Form a ash pit.
- Fireclay is used (it is different in the diagram yellow tint). After laying, a grate is installed above the ash pit.
- Before this, bricks were laid flat. On this row it is placed on its edge. A smoke exhaust channel is formed, inside which a base for the partition is made. One of the bricks (seen in the illustration) is laid “dry” - it will later be removed. After this, the firebox door is installed, which is wrapped several times with asbestos strips before installation. But this must be done so that the door opens well to the top. The element is fixed with wire and a pair of bricks.
- The brick is laid flat again, duplicating the previous row.
- Again the “rib” sequence is the second and last row in which the brick is laid in this way. The exception is the next row, in which one of the walls is formed by laying on edge. The walls of the chimney channel should be wiped with a damp cloth.
- The brick is laid flat according to the diagram. The back wall is made using the edge-on format again.
- This row closes the firebox. A couple of bricks should hang over the firebox so that the flame moves to the middle of the hob - in case the stove will be used as a fireplace (without closing the firebox door).
- The bricks are moved slightly towards the back wall to support the firebox door. Before brickwork lay strips of asbestos soaked in water. Thanks to this, they ensure sealing of the gap between ceramics and cast iron. A cast iron panel cannot be placed directly on a clay solution, otherwise the difference in the thermal expansion parameters of the materials will lead to the appearance of cracks.
- At this stage, the formation of the smoke exhaust pipe begins. The latter, according to the plan, should gradually expand towards the back side. But only the chimney base is made of brick. The rest is made of light metal. Otherwise, the excess mass of the element may lead to a shift in the center of gravity of the stove.
- A valve sealed with asbestos strips is installed here. It is recommended to pre-coat the latter with clay mortar. This is the final row, which is used to complete the construction of a brick oven directly with your own hands. The remaining couple of rows are given to the chimney, which will then be connected to a lighter metal channel.
After this, those bricks that were laid “dry” on the 4th row are removed. At the same stage, the smoke exhaust duct and the surface of the stove are cleaned of construction debris.
Final works
The simplest stove does not require serious decorations. The only decoration is whitewashing. It is recommended to add a little blue and milk to the composition - this will protect the coating from the formation of a yellow coating and bleaching.
Important! Brick and metal should be protected before work. If this is not done (for example, using film), you will not be able to get rid of the stains.
It is necessary to coat the seams between the brick and the metal of the chimney very well, as well as the seams between the ceramics and cast iron.
It is imperative to close the joint between stove brick and the floor. This will prevent oven sand from getting into the room. It is advisable to cover the joint with an L-shaped sheet. Then they make a plinth edging, which serves as both decor and additional element, preventing the “foundation” bedding from spilling out.
 Figure 3. Functioning oven
 The stove is ready. The entire process took no more than one working day. Now you can try to make a low-power one. You cannot use logs - only wood chips or paper. Wood burning will create too high a temperature and the structure will crack. For the mixture to fully set, you need to give it a week or two. After this, you can already heat it “like an adult.”
This is interesting: ? Review of 10 options.
An even simpler version of the stove
If previous version someone seemed complicated (although this is not so), we can offer an extremely simplified heating structure. You can lay out this oven with your own hands in literally an hour, even if your hands are far from being called golden.
 Figure 4. The simplest option brick ovens
 The operating principle of the structure is simple. Solid fuel burns below, and settles here under the influence of its own mass. Temperature changes create a draft that carries hot air currents up. In this case, the firewood burns almost without a residue - the smoke is minimal.
For masonry you will need only two dozen whole bricks and two halves. The stove consists of five rows. The design is so simple that there is no point in describing the order. The procedure is clearly shown in the illustration.
 Figure 5. The simplest order brick construction
 If you lay the bricks correctly (and it is very difficult to do otherwise), the result will be similar to that shown in the photo. It is recommended to bind the bricks with clay mortar. But in hiking conditions You can do without any binding material - just put the components on top of each other according to the order. In this case, the stove is built in five minutes.  Figure 6. Masonry process
  Figure 7. Finished mobile brick oven
For those who want an intermediate option, we can recommend a slightly more complicated option.
 Figure 8. Diagram of a simple stove
 According to this diagram, the output is an L-shaped three-section stove. The first compartment is designed for loading firewood. The second is a chamber in which the logs are burned. The third compartment is the chimney duct.  Figure 9. L-shaped stove
To create this structure you will also need 20-30 bricks. This option can be completed by yourself in a couple of hours, if the skills of a mason are completely absent. A specialist will complete the construction in a matter of minutes.
Once upon a time, classic brick stoves for a home were a mandatory attribute and the only method of heating. Professional stove makers were in demand and respected. Today, there are many new means for heating premises that operate from different energy sources, starting with solid fuel, ending with electricity. However good stove makers remain in demand and the online request for “brick stoves for home drawings with instructions” remains frequent.
Some build stoves for a bathhouse, for a summer residence, or simply because their home is remote, which is why there is no alternative. Different types stoves can perform a heating function; on some models you can cook traditional dishes. Some are large in size, others are compact and quickly erected. Some are planned before the house is built, while others need to fit into an existing space. Stoves are ordered or made by hand in order to save money, others are built to fill the decor. In any case, all such equipment must be constructed from high-quality and suitable materials, in accordance with existing SNiP. You can find any drawings with instructions on the Internet, but you need to understand that building a stove for your home with your own hands will not be so easy.
Why does the brick kiln remain competitive, more and more being built, with so many advantages?
It would seem that today there are many alternatives for heating that are much more convenient to use, and according to manufacturers, they have greater efficiency (coefficient of performance). But why are brick ones still in demand in some areas or buildings? One of the reasons is that a brick stove “breathes.”
This means that when the furnace warms up, moisture is released from the base of the structure. As it cools, moisture is absorbed back. Thanks to this, it maintains the normal dew point in the room. It is this indicator that indicates that “a cozy atmosphere is maintained in the house.”

Ability brick oven“breathe” not only has a positive effect on human health, but also allows you to feel comfort even without household level. When calculating a house's thermal engineering, temperature indicators in heating season are set between 18-20 Celsius. Air humidity should be optimal for health. Home oven provides optimal humidity air, at a warm-up temperature of about 16 degrees Celsius. At this temperature, a person does not feel discomfort; clothes and bedding remain dry. At the same time, in panel houses, when using centralized water heating, even at a temperature of 18 degrees Celsius, excessive air humidity may be felt.
For water heating, the optimal temperature range will be 20-23 Celsius. And for electric heating with infrared emitters, the temperature should be even higher (since they greatly dry out the air). It turns out that a brick oven with an efficiency index of about 50% will be more profitable, in terms of savings, than modern systems, with rates of 60-80%. Thus, the savings will be more significant, because the loss of heat in the house depends on the difference in temperature inside and outside the room.
Selecting oven surface size
Before you begin construction, you must select the type and model future design. The main criteria for selection will not be its appearance and ease of construction, but heat transfer (the ability to heat the required area).
When choosing a location for its placement, you should know that side surfaces furnaces have the greatest heat transfer. This is a determining factor when choosing a location.
Different models have different shapes:
- Rectangular;
- In the form of the letter T;
- With a bed or kitchen equipment for cooking food.
They can perform functions heating device For living rooms, or be a space divider.
For a small home area, you should not choose too massive structures; even if they have a wide range of functions, they will take up too much space and give off too much heat. To heat the entire furnace you need a lot of fuel, and the heat transfer will be too great.
The location of the stove relative to the living rooms is also important, and the insulation of the entire house is also a criterion.

Table of stove sizes, taking into account the area of the room
The structure of a stove for the home, stoves for the home of the classical design
The oven consists of 3 main parts. The body of the stove, the foundation and the chimney leading to the roof.
Furnace diagram example: 
The oven consists of:
- Foundations - foundation;
- Waterproofing material;
- Shantsy. They are holes, they are made to create heating in the lower part of the room. They serve as “legs” in the structure;
- Blower;
- Hole air channel, promotes heating of the room over the entire height;
- Blower door;
- Grate grate;
- Kindling door;
- Furnace part;
- Vault of the combustion part;
- “Hailo” (Sometimes the vertical part of the firebox with the nozzle is called the hailo);
- Door for cleaning;
- Strangler Pass;
- Dushnik;
- Valves that regulate the direction of travel;
- Convector channel;
- A valve that closes the chimney after heating the stove. Close it after firing so that the oven does not cool down.
- Exhaust door;
- Chimney hole;
- Cover (top of the furnace);
- Cutting the chimney under the ceiling;
- Overlap;
- Chimney on the roof (otter or fluff).
Foundation
The foundation for the furnace is made separately from common foundation Houses. Use ordinary reinforced concrete strip foundation. Insulation is laid on it in several layers of roofing material, and on top of them is a sheet of asbestos. Asbestos is covered with an iron sheet (preferably cast iron, but it is very expensive, an ordinary one will do roofing metal), and the top is covered with felt. The felt bedding is pre-moistened, laid on the foundation and allowed to dry. Only after this do they begin laying. By itself, the litter is needed so that the foundation does not take over all thermal energy ovens. In simple words“so that the heat doesn’t go into the ground.”Masonry base
The base of the masonry is made in oblique shading from simple red brick, on a cement-sand mortar. This part is located under the firebox and will not experience high thermal loads. The firebox is made of red ceramic bricks, combined with fireproof (fireclay) material. A clay mixture with sand (sometimes with the addition of fireclay) is used.
A sheet of metal and asbestos is placed in front of the blower door. The thickness of the asbestos layer should be about 5 mm. Its edges should be laid in the masonry of the stoves. Takeaway metal sheet not less than 250 mm. The edges are tucked in, pushing them towards the floor.
Unlike cement-sand mortar, a mixture of clay and sand dries rather than sets. Therefore, with constant exposure to moisture (especially in winter), the solution becomes wet. For this reason, some part of the furnace that does not experience high temperatures (up to 300 degrees Celsius) is placed on a cement-sand mortar. Portland cement grade 400 and quartz are used quarry sand.
To ensure the accumulation of soot in the lower part of the channels, the edges of the transitions are made rounded. Every new channel should be greater in height than the first (lower transition). It is much easier to remove soot from the lower channels.
Chimney
It is laid out from red ceramic bricks and ordinary cement-sand mortar. Such bricks are cheaper than fireclay bricks, and the mortar is much stronger. We must not forget about cutting the chimney inside the apartment (in the ceilings). The cutting performs fire-fighting functions. A thick layer of bricks warms up more slowly in the event of a soot fire, and thereby transfers less heat load to the ceiling.
The upper chimney pipe (otter), which is located above the roof, performs decorative functions and is a side for drainage of precipitation. The draft in the furnace will depend on the height of the pipe.
Place for a stove in the house
It will depend on where the stove is installed effective work. Best location there will be an intersection of all the walls in the house. If not larger area, it will be possible to effectively heat the entire space. The closer the oven is to the exit, the better. The heated air will prevent cold air from entering from the outside. In addition, in this case it will be easier to deliver fuel for the furnace.

Factors to consider:
- The structure must be installed so that all side parts can be reached. This is needed for correct operation and full cleaning capabilities.
- The stove should not be part of the general foundation of the house, since its foundation will experience completely different types of loads.
- The location should be such that the chimney pipe does not rest against the floor beams. This needs to be calculated when building a house or when laying the foundation for the stove.
- There must be a fire-resistant floor in front of the firebox door. (sheet metal or ceramic tile), to prevent accidental fires.
Equipment and building materials for building a stove with your own hands
Brick
There are sources on the Internet claiming that bricks for stoves and fireproof bricks are one and the same. In fact, they only have linear dimensions in common. Dimensions of a regular single building bricks are 250 by 125 by 65 mm, and a standard stove has a size of 230 by 114 by 40 mm. Sometimes 230 by 114 by 65 mm is found. In the construction of the furnace, special high-quality brick of grade 150 is used. It is resistant to temperatures up to 800 degrees. It would be possible to build an entire furnace from it, but it cools quickly and is not suitable for a full-fledged furnace.
Fireclay bricks are used to lay the furnace channels in the combustion chamber. It can withstand high thermal loads. It is used in Swedish ovens or in sauna stoves. It can withstand temperatures up to 1800 degrees, but in home ovens this temperature does not exist. He is valued by others qualities - ability keep warm for a long time. It makes no sense to build the entire body of the furnace from it, since it is very expensive and has weak strength.

To distinguish high-quality fireclay from low-quality one, there is an opinion that it should have a yellowish tint. But such a calculation is not correct, since fireclay can change color depending on its deposit. A sign of high-quality fireclay is the fine grain of the brick. Another way checks - check to the sound. The brick is tapped with a hammer. The sound should be clear and clear, not dull. Last method determining the quality of a material is radical. They break the brick in half and look at the break. High-quality fireclay is broken into large pieces.
As a substitute for expensive fireclay, sometimes in furnace construction use clinker brick. It is just like red ceramic, but it is fired at elevated temperatures. It has greater strength and fire resistance.
White silicate is not suitable for any parts. It is not resistant to thermal stress and absorbs moisture too much.
Sand
As sand in cement-sand mortar Medium grade quarry sand is used. It is sifted through a sieve to remove large fractions and various organic inclusions. Availability of additional inclusions in in this case very important. All organic impurities will burn from heat, causing the masonry to crack and begin to crumble.
Masonry mortar
To lay the stove you will have to use several types of mortar based on:
- Cement;
- Lime;
- Clays;
- Chamotte.
Characterized by its plasticity. It is used in places experiencing high temperature loads. This solution is cheap in price. Clay can be easily found on almost any plot of land after cleaning it first. It can withstand temperatures up to 1100 degrees Celsius. This mixture dries when exposed to high temperatures, but becomes wet when exposed to moisture. The furnace masonry can always be disassembled and reassembled. But you cannot lay a foundation on such a solution.
A mixture of clay with the addition of fireclay is used in the combustion chambers. This solution can withstand the highest thermal loads.
The lime mixture is used on the foundation masonry or for the chimney. This solution is quite strong, but can only withstand 450 degrees Celsius.
Cement-lime is even more durable than ordinary lime, but fire resistance is reduced even more. Used in the foundation.
Cement-sand mortar is used for masonry chimney. It has the best strength and resistance to precipitation. The seams of such a solution will not allow smoke and digging into the room and will provide good draft for the firebox.
Examples of brick stove projects
Stove for a summer residence
Medium sizes country house are about 15-20 sq. m. With a consumption of only 280 bricks, you can build a small stove with dimensions of 2 meters by 3 and a heat capacity coefficient of 1.90 kW. As mentioned earlier, the combustion part is made of refractory brick, and the entire body is built of red ceramic.

The figure shows a sectional view of the furnace design
This simple option can be easily made by every beginner out of brick with his own hands, without even making mistakes.
Scheme with order, order instructions
Despite its small dimensions and light weight, it still requires construction separate foundation. The foundation must also withstand the pressure of the chimney.

The thickness of the seam for masonry should be standard 8-10 mm, while the thickness of the seam between refractory bricks should be half as much.

It is better not to change the drawing if you do not have your own experience.

For such a stove, the chimney is laid in a brick floor.
Quantity of material:
You will need about 210 pieces of regular bricks, about 75 pieces of fireclay bricks. The clay solution will take about 70 liters. Sand 0.4 cubic meters m. One grate, door for combustion chamber, ash chamber and cleaning room. Two smoke valves. Sheet of metal for the foundation. For waterproofing, about 3 meters of roofing material.
The number of bricks is approximate, since there will be a certain percentage of broken bricks.
Russian stove
Such a furnace has an efficiency of 80 percent. She has a beautiful appearance. You can cook food on such a stove and its design includes a bench. The masonry and construction schemes are quite simple. Its main disadvantage is its design feature, due to which it only heats the upper part of the room. But in our country, it is still popular.

What it consists of:
- A) heated part;
- B) niche;
- B) pole;
- D) forge;
- D) shower part;
- E) shield;
- G) valve;
- H) chimney pipe;
- I) Repainting the furnace.
Large, small and medium furnaces are built according to their size. Let's consider a small one, measuring 1270 by 650 by 2380 mm.
Necessary materials:
Red bricks, about 1620 pieces. The clay solution will take about 1000 liters. Made of steel, a plug measuring 430 by 340, a valve measuring 300 by 300 (two pieces), a samovar measuring 140 by 140 (one).

Order of the Russian stove:
Row No. 1 is laid out from solid ceramic bricks, on a lime mortar with the addition of cement. The formation of the furnace part occurs;
Row No. 2 to No. 4 a well is laid out. All seams are tied. On the one hand, they leave room for baking;
Rows No. 5 to No. 7 erect a vault over the oven;
Row No. 8 to No. 10 a castle for the vault is being erected;
Row No. 11 lay out a cold stove. Sand is poured into the remaining space between the stove and the oven;
Row No. 12 is laid out “under”. It is made from special bricks;
Row No. 13 is the beginning of the cooking chamber;
Rows No. 14 to 16 are done in the same way as the previous one;
Row No. 17 installs the arches of the mouths;
Row No. 18 laying the furnace walls;
Row No. 19 vault walls;
Row No. 20, using half bricks, narrow the hole above the pole;
Row No. 21 aligns the walls;
Row No. 22 is the stage of leveling and reducing the front pipe part;
Row No. 23 lay out the samovar;
Rows No. 24 to No. 32 installation of view valves;
Row No. 32 chimney laying. In a Russian stove, the chimney is made of 2 bricks.
Some features can be seen in Fig.

Before you start laying stoves, it’s worth trying to lay out at least one without mortar to understand the essence of the schemes. But with effort and patience, everyone can make a stove with their own hands.
Video
In this video you can see the order of the heating stove: