Star map app for pc. Star map with constellation names - description. Location of stars and constellations
Constellations - these are areas of the sky into which the celestial sphere is distributed in order to make it convenient to navigate in the starry sky. In ancient times, various kinds of figures were called constellations, which were formed by bright stars, often these were the names of the heroes of Greek mythology. Our entire starry sky is divided into 88 constellations, which were recorded in the International Astronomical Union in 1930. To date, the names of these constellations have been decided to be considered unchanged, as well as other names of bright stars. Some famous astronomers have named discovered stars after themselves, but such names have never been officially recognized. There are some companies that sell so-called "certificates" for naming your favorite star. So if you think what to give your girlfriend for March 8 or Valentine's Day then give her a "star in the sky."
The constellations are considered to be the reminders of the ancient culture of mankind, its myths and its first interest in celestial bodies. They help historians, astronomers and mythologists very well to understand the way of life and thinking of ancient people. Today, constellations help the bright minds of astronomy to navigate the sky and quickly determine the positions of various kinds of objects.
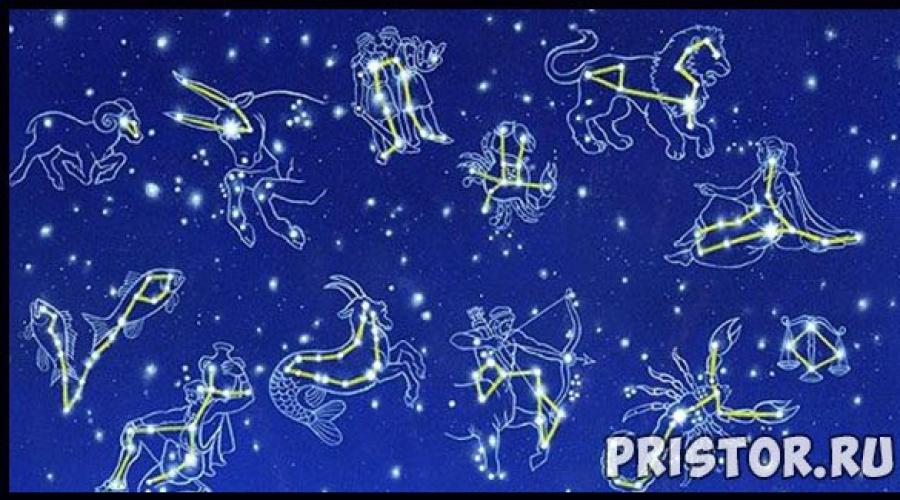
The most famous and most notable constellations of the zodiac signs

Constellations of Orion

Location of stars and constellations

Finished work and uploaded to the site Maps and atlases A mobile map of the starry sky in the appropriate section.
A moving sky map can be used when planning observations to quickly look at the sky pattern observed at the moment we need, and it can also be useful for beginners to study the appearance of the sky in different seasons of the year, as well as at different times of the day.
So, a moving sky map allows you to determine the type of sky at any time of an arbitrary day of the year in the northern hemisphere of the sky at a given latitude. In addition to the classic set of such a map, I increased the number of stars up to the fourth magnitude, in order to draw memorable constellation shapes. The brightest galaxies, clusters and nebulae are also marked on the map. Known double and multiple stars are noted, as well as some variables. For a clearer idea of the conditions of observation, I provided the map with two diagrams of the duration of navigational and astronomical twilight.
The set of the map, collected in one archive file in zip format, includes: the file of the map itself with the values of the dates and months of the year plotted in a circle, the file of the overlay hour circle with information and diagrams - along its outer edge there are risks with the values of the time of day, as well as small manual text file. After printing the card, I recommend either sticking it on cardboard or thick paper for strength, or simply laminate it.
An hour circle with a pre-cut inner circle along the observation latitude is superimposed coaxially on the map itself and rotated so as to match the required value of the observation date and time. In the hourly circle window, we will see a picture of the sky at a given moment. For clarity, a picture with explanations can be viewed in the appropriate section of the site - Movable star chart .
You can download the map kit both from there and from this post directly.
I give links:
JPG format(3.8 MB).
Moving map of the starry sky PDF format (large resolution)- (11.4 MB).
Moving map of the starry sky PDF format (small resolution)- (3.7 MB).
This, as well as the materials listed below, are absolutely free for me, but editing and changing them is not allowed. In addition, when writing articles, projects, etc. please refer to the author's website.
I also recommend for beginners my "Map of the Starry Sky"- it shows all the stars visible to us with the naked eye (up to 6.5 magnitude). Map page - Star map .
- TO Star map I prepared contour maps. You can download them from a separate page - contour maps .
- For a more thoughtful study of the starry sky, I have "Atlas of constellations". Here are detailed maps of all constellations (both northern and southern skies). The atlas gives all the stars up to magnitude 8, and for some constellations up to magnitude 10. The maps give the designations of nebulous objects accessible to small amateur devices, stars according to the Bayer and Flamsteed catalogs. You can download the atlas either from its page here - constellation atlas, or from the atlas page in this blog -.
- I have also prepared for the Atlas of constellations contour maps. You can download them both from a separate page - Contour maps for constellation atlas, and directly from the blog -.
A virtual guide to the starry sky that allows you to travel almost like in a real spaceship, but without restrictions in time and space, as well as learn a lot about the structure of the Universe.
Previously, children dreamed of being pilots and astronauts. But the formidable aunt Perestroika came, and they, reconsidering their views, decided to become businessmen and managers :) However, childhood dreams still remained somewhere at the very bottom of consciousness (or subconscious) ...
Looking at the starry sky, we involuntarily admire all the splendor of the Universe, and sometimes we regret that we exchanged our childhood dreams for a more prosaic way of existence.
But... If you are still irresistibly drawn to the stars, you may well make, albeit a virtual, but quite realistic journey through the near and far space. To do this, you only need to have a computer and the appropriate program.
The range of applications of this type is not particularly wide, but almost all of them have the status of free, so there is plenty to choose from. In my opinion, for a free journey through the Universe, it is most correct to opt for the program Celestia.
It allows you to fully view not only our solar system, but also distant stars, as well as nebulae and even galaxies! Similar functionality is offered to us by the paid program Pocket Stars:
Comparison of the free Celestia sky map with the paid counterpart Pocket Stars
Despite the fact that Pocket Stars introduced support for a 3D observation mode, it is still clearly not up to the level of Celestia in terms of texture quality or ease of use.
In addition, the paid analogue does not have a support system for third-party plug-ins that could significantly speed up the improvement of the display of celestial bodies in detail. Therefore, Celestia is far ahead of its competitors in all respects.
Installing Celestia
To install the program, it will be enough for us to open the downloaded archive and run the installer. Despite its English language, I think there will be no problems with installation, since the whole process is practically reduced to confirming all the forms proposed by the application. Upon completion of the installation process, the program itself will start:
![]()
During the download, Celestia will first show us our Sun, and then center the image on the Earth. This completes the download, and we can start working directly with the program.
Demo video of the program
For a better understanding of the purpose and capabilities of the application, I would advise you to first run a demo. To do this, go to the "Help" menu and activate the "Run DEMO script" item:

In the demo video, we will see that with the help of Celestia you can observe any planets in the solar system, stars, or even our entire galaxy! At the end of the scenario, we will return to our original position, that is, back to Earth.
View settings
Before you start working with the program, it will not be superfluous to also go into its settings and adjust them “for yourself”. To do this, call the "View" menu and open the "View Settings" item:

Here we can activate the display of those components that we need and remove the extra ones. For example, we can enable the display of constellations in the corresponding section by checking the "Shapes" box. And, by unchecking the item “Names in Latin”, we will get the usual Russian-language names of the constellations! In general, try and experiment;).
Program management
A few words about program management. In fact, only the mouse can be used for this (although it is possible to work with hot keys as well). By holding down the left mouse button, we will be able to move the viewport in a two-dimensional plane. For three-dimensional movement, you need to hold down the right key. With the help of the wheel, you can approach or move away from the selected viewing point.
A single click of the left mouse button is used to select the desired object, and a double click is used to center the view on the selected celestial body. Clicking with the right mouse button brings up the context menu:

Using this menu, we can get detailed information about the selected celestial object, put a mark on it (to use as a guide) and/or navigate to it.
When you select the "Go" item, an animated virtual "flight" is launched in outer space, after which we can see the selected object up close:

In this case, in the upper left corner, fairly detailed information about the celestial body will be displayed.
Navigation through the starry sky
Now I propose to consider one of the main menus of the Celestia program - "Navigation". Here, all items are divided into three categories. The top contains functions that allow you to select any celestial bodies and travel to them.

Guide
Interesting facts about various space objects (mainly the solar system) can be gleaned from the Guide. By selecting a specific celestial body in the drop-down list, we will be able to read about it and, if desired, proceed to its observation.
If you are “lost” in the Universe, the item “Select the Sun” (hot button “H”) will help you return to the solar system. Select the Sun and then activate the item "Go to the selected object" or press the "G" button. Well, here we are at home :).
Also, to move in the virtual space of the Celestia program, it is convenient to use the menu items "navigation" "Select object" and "Go to object". The first allows you to find a celestial body by its name, while the second, in addition to the name of the object, can also use exact coordinates to search for it:

time travel
We figured out how to move around the Universe with Celestia, but the program allows you to easily overcome not only space, but also time! With its help, we can model the location of celestial bodies, both in the past and in the future. To do this, just go to the "Time" menu and select the "Set time" item:

In the window that opens, you need to go to the "Julian date" window and use it to set the required point in time. For example, we can, without waiting for 2022, calmly observe a large parade of planets;).

Installing add-ons
If you're serious about astronomy, you'll also appreciate the expandability of Celestia. With the help of plug-ins you can get, for example, a detailed drawing of the relief of distant planets, the display of nebulae and even fantastic elements in the form of spaceships and fictitious planetary systems.
At the same time, installing the add-on comes down to simply unpacking them into a special directory "Extras" in the folder with the program.
Advantages and disadvantages
- good detail of outer space;
- convenient management;
- the ability to manage time;
- plugin support;
- many settings.
- there is no way to observe the sky from the surface of the Earth;
- the basic version has very few images of nebulae and galaxies.
conclusions
Celestia is useful to anyone who wants to learn more about the space around us. For example, at school, teachers and students can use the program in astronomy classes to observe celestial bodies in real time.
With Celestia you will always be aware of all the events in the sky. It will help you to find out when this or that comet will be visible, or where to look for the planet you want to observe with binoculars or a telescope;).
Finally, the program will allow you to look into the most remote corners of our galaxy and see even stars that are millions of light years distant! In general, as Big Wow said, there are a lot of miracles in the sky! And to see them it is enough to install Celestia;)
P.S. It is allowed to freely copy and quote this article, provided that an open active link to the source is indicated and the authorship of Ruslan Tertyshny is preserved.
Click on any object for more information and photos of its surroundings up to 1x1°.
Sky map online- will help with observations through a telescope and just when orienting in the sky.
Sky map online- an interactive sky map showing the position of stars and nebulous objects that are available in amateur telescopes at a given time over a given place.
To use the starry sky map online, you need to set the geographical coordinates of the place of observation and the time of observation.
With the naked eye, only stars and planets with a brightness of up to about 6.5-7 m are visible in the sky. To observe other objects, you need telescope. The larger the diameter (aperture) of the telescope and the less illumination from the lights, the more objects will be available to you.
This online star map contains:
- the SKY2000 star catalog supplemented with data from the SAO and XHIP catalogs. In total - 298457 stars.
- proper names of the main stars and their designations according to the HD, SAO, HIP, HR catalogs;
- information about stars contains (if possible): J2000 coordinates, proper motions, brightness V, magnitude Johnson B, color index Johnson B-V, spectral class, luminosity (Suns), distance from the Sun in parsecs, number of exoplanets as of April 2012 , Fe/H, age, data on variability and multiplicity;
- position of the main planets of the solar system, the brightest comets and asteroids;
- galaxies, star clusters and nebulae from the Messier, Caldwell, Herschel 400 and NGC/IC catalogs with the ability to filter by type.
It is possible to search for foggy objects on the map by their numbers in the NGC / IC and Messier catalogs. As you enter the number, the map is centered on the coordinates of the desired object.
Enter only the object number as it appears in these catalogues: without the "NGC", "IC" and "M" prefixes. For example: 1, 33, 7000, 4145A-1, 646-1, 4898-1, 235A, etc.
Enter three objects from other catalogs: C_41, C_99 from Caldwell and the light nebula Sh2_155 into the NGC field as written here - with underlining and letters.
As NGC / IC, its refined and somewhat supplemented version RNGC / IC of January 2, 2013 was used. There are 13958 objects in total.
About the maximum magnitude:
The faintest star in the SKY2000 catalog, which is used in the online sky map, has a brightness of 12.9 m . If you are interested specifically in stars, keep in mind that already after about 9-9.5 m gaps begin in the catalog, the farther the stronger (such a decline after a certain magnitude is a common thing for star catalogs). But, if the stars are needed only to search for nebulous objects in a telescope, then by introducing a limit of 12 m you will get noticeably more stars for better orientation.
If you set the maximum 12 m in the "stars brighter" field and click "Update data", then the initial download of the catalog (17Mb) may take up to 20 seconds or more - depending on the speed of your Internet.
By default, only stars up to V=6 m (2.4Mb) are loaded. You need to know the downloaded volume to select the interval for auto-updating the map if you have limited Internet traffic.
To speed up the work, at low map magnifications (on the first 4 steps), NGC/IC objects are fainter than 11.5 m and faint stars are not shown. Magnify the desired part of the sky and they will appear.
When "turning off the pictures of the Hubble telescope and others." only black-and-white images are shown, which more honestly show the image available in an amateur telescope.
Help, suggestions and comments are accepted by mail: [email protected].
Materials used from sites:
www.ngcicproject.org, archive.stsci.edu, heavens-above.com, NASA.gov, Dr. Wolfgang Steinicke
The photographs used were declared free for distribution by their authors and transferred to the public (based on the data obtained by me in the places of their original placement, including according to Wikipedia, unless otherwise indicated). If this is not the case, please email me.
Thanks:
Andrey Oleshko from Kubinka for the initial coordinates of the Milky Way.
Eduard Vazhorov from Novocheboksarsk for the initial coordinates of the outlines of the Foggy Objects.
Nikolai K., Russia
- this is a free program - a virtual planetarium that allows you to see:
- star map;
- constellations;
- planets of the solar system;
- and other objects of vast space.
Observations of the planets and the study of the constellations of the starry sky will be interesting for both children and adults.
Night sky over Japan
Mars with moons

Stellarium is easy to learn and use.
The program interface is completely Russified. In the settings menu, however, there are items in English, but they are not particularly important (for example, the help item “about the program”).
The settings panels are equipped with tooltips.
Program settings.
In the lower left corner, when you hover over the cursor, two panels with settings appear

The top icon on the left panel opens the window for setting the location when observing the stars:

Here you can select a location by entering coordinates, selecting a city and country from the list, or by selecting a point on the map. You can use the default location of your choice, for this you need to check the corresponding box.
The second icon opens the time setting window.
The third one will show you the view settings.

On the first tab, which is called "Sky", you can configure the display of stars: absolute and relative magnification, turn on / off flicker and dynamic adaptation of sensitivity.
You can also turn on / off the display of the atmosphere. Planets and satellites settings include enabling/disabling planets, their markers, orbits, modeling the speed of light, and scaling the moon.
You can also turn star, nebula, and planet labels on or off, and change the label size. And even adjust the number of flying meteors per hour ...

In the "Designations" tab, you can configure the "celestial sphere": displaying the equatorial grid, the j2000 equatorial grid (this is the grid of the j 2000 epoch, that is, the times of 2000), the azimuth grid, the equatorial line, the meridian, the ecliptic and the designations of the cardinal points in the sky .
There are also constellation settings: constellation lines, names, contours and images of constellations (more on this below) and image brightness. You can also select projections, descriptions of projections are displayed to the right of the name.

In the "Landscape" tab, you can choose the landscape that will be shown when observing, such as the ocean, or the landscape of other planets, such as Mars or Saturn. You can also control the display of the earth, haze above the ground, set the selected landscape as the default landscape.

The Star Knowledge tab allows you to learn ancient knowledge about the stars of various civilizations, such as the Aztec or Polynesian. If you choose one of these knowledge models, the names and shapes of the constellations will be displayed in the sky in accordance with the names of these peoples.
The next icon in the left pane will open a search box for the item you want to see.
The penultimate icon opens the settings window:

In the "Basic" tab, you can select the language of the program, the option to display information about the selected object: all available, short or nothing.

In the "Movement" tab, you can enable/disable movement with the keyboard or mouse, and also select (set) the start time of observation.

In the "Service" tab there are settings for the planetarium parameters, such as: spherical mirror distortion, disk field of view, for more realistic stargazing, non-horizontal object labels, if you want to change the position of star labels, etc. Screenshot settings, purpose /change folder for screenshots.
Star catalog settings, you can additionally download nine catalogs of stars.

Scripts tab. Here you can run the monitoring script, the program will act "on the machine", you will only have to observe.

In the "Plugins" tab, you can enable the loading of the plugin when the program starts, configure it. There are eight plugins in total. The last icon on the left toolbar is help.
The first and second buttons on the bottom toolbar include constellation lines and their names, respectively.
The result of their actions in the figure.

The third button shows constellations in the sky:

The next two buttons enable the display of grids.
The sixth button turns on the landscape.
The seventh button turns on the display of cardinal points.
The eighth and ninth buttons allow you to see nebulae and marks of the planets of the solar system in the starry sky.

The next button toggles between equatorial and azimuth occurrences.
The twelfth button sets the selected object to the center of the screen.
Thirteenth turns on night mode

The next icon enables full screen mode.
This is what the moon looks like when this option is selected.

The next button turns on the display of the Earth's satellites.
The last group of buttons controls time, slows it down, speeds it up, etc.
And the last button on this panel is the exit from the program.
Free download Stellarium - star map on your computer