Correct installation of the kitchen set is the key to long service life of the furniture. We assemble a kitchen set with our own hands like a designer Installing a corner kitchen with our own hands
Installing a kitchen unit with your own hands will not only significantly reduce the cost of kitchen refurbishment, but will also make it possible to ensure the quality of work we require. That is why, when purchasing a kitchen, many of us refuse the services of master assemblers and prefer to do all the work ourselves.
In our article we will describe in detail all the nuances of assembling the main elements of the headset, and tell you how to install it correctly.
Preparatory stage
Before installing a kitchen set, you need to carefully prepare and stock up on all the necessary tools and materials:

- First, we check the complete set of the headset so that during installation we do not accidentally discover a shortage of any part or fastener element. If something is missing, you need to either buy this element or contact the company from which we purchased the furniture.
- Next, we should prepare all the tools that we will use when assembling and installing the headset. We definitely check the functionality of the power tool, and if we use cordless screwdrivers or screwdrivers, we make sure that the batteries are fully charged.
- We check the functionality of the sockets to which we will connect the power tool.
- We clear the assembly area of construction debris and remove all items from the kitchen that may be damaged.
Advice! When assembling furniture, there is a risk of damaging the floor covering, so you should cover it with thick polyethylene, tarpaulin or non-woven material.
You should also prepare all communications necessary to connect to the headset. First of all, these are water supply pipes that will be hidden under the sink, as well as a ventilation pipe for connection to the hood.
When everything is ready, you can unpack the headset and begin assembling and installing it.
Furniture assembly
Assembling kitchen cabinets
Installation of kitchen units is carried out in the following sequence:
- First, we collect all the details of the headset.
- Then we apply markings on the walls for the installation of hanging modules.
- We hang the upper cabinets.
- We assemble the lower part, connecting the cabinets to the tabletop.

It is in this order that our instructions will describe all these operations.
We start assembly from the lower stands:
- First, using the Euroscrews included in the kit, we connect the bottom to the side walls.
- We install the upper strips, on which the tabletop will then lie. We check the diagonals of the cabinet using a tape measure. If the length of the diagonals differs by no more than 1.5-3 mm, proceed to the next operation.
- We fasten the back wall of fairly thin fiberboard using small nails or a construction stapler. To ensure reliable fastening, the step between the brackets should be no more than 8-10 mm.

- We install the legs on the bottom of the cabinet, securing them with self-tapping screws.
- We install hinges in the pre-made nests and secure them with self-tapping screws, after which we attach the lower facades to the hinges.
- Having placed the cabinet in a vertical position, we align the doors using the adjusting screws on the hinges.
The final stage of assembly is installing the handles.
Assembling pull-out cabinets
The technology for assembling drawers is somewhat different:

- First, we apply markings on the side walls for the installation of metal guides.
- Using the markings, we strengthen the guides themselves, after which we connect the side walls with the bottom and upper slats.
- We assemble the retractable elements by installing the mechanisms on their side surfaces.
Note! The weak point of such boxes is the bottom. It must be secured using a construction stapler, hammering in staples in increments of 5 - 8 mm.
- We install handles on the front of the drawer.
It is better to assemble the cabinet body and pull-out elements not immediately, but only after installing the entire set. This will make all manipulations much easier for you.
Wall cabinet
This element is the easiest to assemble:

- First, we assemble the “cabinet box” by connecting the bottom, top and side walls using Euroscrews.
- Then we attach the back wall with nails or staples.
- When the base of the cabinet is assembled, we install the hinges in the sockets and fix them with self-tapping screws. At this stage, it is better not to hang the doors, as they will complicate the installation of the cabinets on the wall.
- The final stage of assembly is attaching the hangers. When we have dealt with this, we can begin installing our furniture.
Note! The procedure for assembling all the parts is clearly shown in the video; in addition, the sequence of all operations must be indicated in the instructions that come with the headset.
We install furniture
Installation of wall-mounted modules
We begin assembling furniture by installing its upper part, since the assembled lower module with the installed tabletop may interfere with the installation of hanging elements.
First, we apply markings on the wall for mounting wall cabinets:

- We measure the height of the tabletop and add 50 to 60 cm to the resulting figure, depending on our height. This will be the height of the lower edge of the hanging modules.
- From the line thus obtained, we set off the distance to the attachment point of the wall cabinet and draw another line. It is on this that we will fix the fasteners.
Advice! If the kit includes a corner cabinet, start assembling the upper segment from there, and only after leveling it, proceed to installing all other parts.
After marking, we proceed to install the fasteners:
- If we are going to hang the cabinets on hinge fastenings, then we drill holes in the wall with a diameter of 8 mm into which we hammer plastic dowels.
- We screw locking screws with hooks at the ends into the dowels, after which we hang the cabinets.
- An alternative way is to hang the modules on a special metal bus. To do this, specially shaped fasteners are attached to the cabinet itself, which cling to a metal profile fixed to the wall (see photo).

- Mounting to a tire is considered more reliable, so if possible, use this method, especially since the price of the tire itself and the mounts is low.
When the installation of the modules is completed, we hang the facades and align them with adjustment screws.
Bottom assembly
The floor part is assembled a little easier:
- At the first stage, using a jigsaw or a hacksaw with a thin blade, we cut holes in the back walls of the cabinets for the passage of communications. We treat the edges of the cuts with silicone-based sealant, protecting the furniture from getting wet and deforming.
- We install the cabinet in its designated place, level it, and then connect it with furniture ties to the adjacent cabinets.
When all the cabinets are in place, you need to install the tabletop:
- If necessary, we cut the countertop panel to the size of our kitchen, and then install a protective end cap.
Note! When installing a countertop, there must be a gap of at least 5 mm between it and the kitchen wall to prevent deformation.

- We attach the countertop to the cabinets, and on its lower surface we mark the location of the sink.
- Having removed the tabletop and laid it on a table or workbench, we make a “hole” for the sink. The easiest way to do this is to drill several holes with a drill and connect them with a jigsaw.
- We install and secure the sink to the countertop, treating the joint with silicone sealant.

- We place the countertop with the attached sink on the kitchen cabinets, align it horizontally and flat, and then fix it on the kitchen modules. To do this, you can use special fasteners, or you can simply drive the spikes on the tabletop into sockets drilled in the walls of the cabinets.
- We mask the joint between the table top and the wall using a special plinth.
This completes the assembly of all furniture. You can connect the sink to the water supply and sewerage system, install household appliances and begin operating the kitchen as normal.
If you carefully study all the above recommendations, then you should not have any questions about how to properly install a kitchen set. This means that you can cope with this work without turning to the experts for help - and thereby provide yourself with not only a legitimate reason for pride, but also significant savings!
In a modern apartment, the kitchen is the most visited place by all family members, so when choosing a kitchen set, an important task is its correct installation.
For example, errors when installing modules of built-in kitchen appliances are one of the reasons for their failure, and too high placement of kitchen cabinets, along with improving the jumping training of all family members, can lead to injuries and a decrease in the amount of dishes in the house.
When deciding how to install a kitchen set, you should sensibly assess your capabilities in the case of single-table options with a complex configuration or built-in household appliances.
Necessary tool
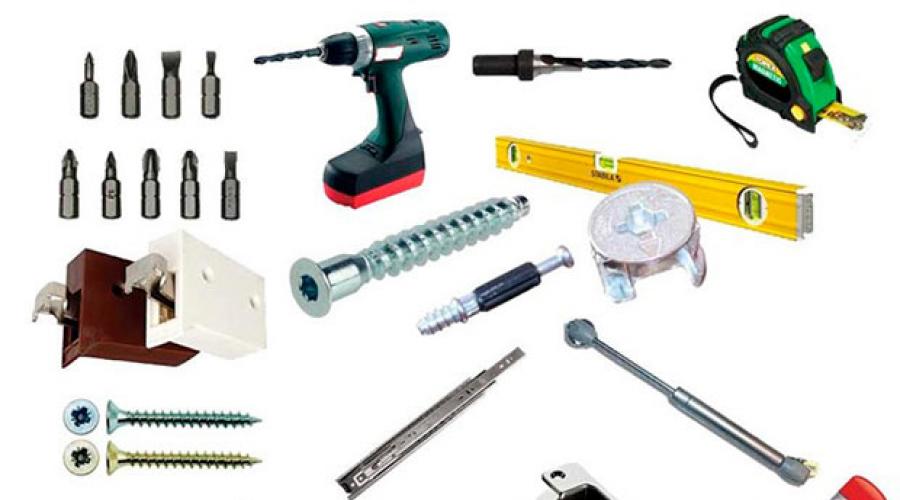
Depending on the type of kitchen unit, you may need different construction tools. If the bottom row of the kitchen consists of free-standing cabinets, not interconnected by a common countertop and without built-in household appliances, the following tool may be needed to install the kitchen unit:
- building level;
- tape measure or ruler, pencil;
- hammer drill or electric drill with impact drilling mode, drill bits for concrete and wood;
- flat and Phillips screwdrivers, wood saw;
- components: dowels with screws, wall plinth.
In cases where you need to cut a niche in the countertop for a hob, sink, or install a kitchen from several parts of the countertop, you need a special construction power tool for sawing it and cutting mounting holes in the sheets of the countertop, and fittings for fastening its parts.
Even if you have the necessary tools, the task will be quite difficult to cope with on your own; you may need the help of a specialist.
Installation of kitchen units
When determining how to properly install a kitchen set, you should follow the basic rules:
- The refrigerator, stove and sink should not be located next to each other.
- The distance from the oven walls to any work surface should be less than 40 mm. (the rule does not apply to special types of ovens with forced cooling of the body).
- Kitchen assembly begins with setting up the base - kitchen modules of the bottom row: cupboards, sink, dishwasher, hob, oven; installation begins from the corner.
Depending on the furniture manufacturer, the kitchen may be delivered assembled or disassembled; in the latter case, you will have to assemble it yourself first.
Installing the lower modules
Before installing the kitchen unit, it is necessary to prepare all communications: remove sockets for connecting kitchen appliances, prepare plumbing pipes for supplying water to the sink, dishwasher and washing machine in the module, install the necessary pipes to drain used water from kitchen appliances or sink.

Pipes and electricity will pass through the lower part of the headset, so you need to first calculate the presence of all communications
All outlets for water and sewer pipes and sockets must be located in accordance with the plan for the future placement of the kitchen unit, so as not to interfere with further assembly.
Work must be carried out in the following sequence:
- If the kitchen is delivered assembled, before installing it, you must first disconnect the facades (doors) from the cabinets.
- Holes are cut in the side and rear walls of the cabinets for hoses and pipes for water supply and drainage, and electrical cables for connection to kitchen equipment.
All cut holes must be additionally treated with a special water-repellent compound.
- The installation begins with a corner cabinet, then the rest are connected to it in sequence. It is advisable to install them by level, if the kitchen is equipped with complex household appliances (hob and dishwashers, ovens), installation of floor modules by level is a strictly mandatory condition.
All modern kitchen sets are equipped with adjustable height of the cabinets using legs, by screwing which you can achieve a horizontal position of the cabinets according to the level.
- If the floor in the kitchen is uneven, in some cases it may be necessary to trim the decorative skirting boards covering the legs of the kitchen cabinets.
- Next, the cabinets are fastened together using self-tapping screws or furniture ties into a single rigid block.
- When installing and assembling a laminated MDF or chipboard tabletop from several parts, you will need high-quality cutting and joining. Here it is difficult to do without a special circular saw or jigsaw for cutting thick MDF or chipboard boards, or special devices for precise cutting along the line. During installation, parts of the tabletop are fastened in various ways: using tenons, a standard furniture fastening system using special fittings, and gluing sheets of connecting materials to the bottom of the fastened sheets.
- A new-fangled phenomenon is the installation of hydraulic door closers in kitchen units, which absorb the impact of the door leaf on the furniture body when closing. To do this, using a special template, holes are drilled at the ends of the side walls of the cabinets into which the closer rods are placed.
- Inside the cabinets, shelves are mounted and metal structures are screwed, fasteners for a hanging trash bin are installed, the doors are hung again, they are adjusted and the handles are screwed in, and the drawers are put in place.
- Then you can install a washing machine, dishwasher, oven, hob.
- A metal or plastic plinth is attached to the tabletop; the latter more hermetically seals the connection between the tabletop and the wall surface; an external electrical wire is often hidden in it.
Installation of wall-mounted modules
To facilitate installation, it is necessary to remove the doors from wall-mounted modules if the furniture was supplied assembled.
- For an aesthetically pleasing kitchen, it is necessary that wall-mounted kitchen cabinets be located strictly above the lower rows of cabinets: this is especially true in kitchens with separate modules. Therefore, it is necessary to draw on the wall the vertical dimensions of all modules standing on the floor.
- The usual height of installation of wall cabinets is 50 - 70 cm from the tabletop; it can be determined more accurately by placing the cabinet against the wall and checking the ease of access to the top shelf of the tallest member of the family, with the exception of children. The top of the cabinet is marked on the wall; using a level, a line is drawn along the entire length for the location of the top of the drawers.
- If the cabinet fasteners are placed above or inside their dimensions, a parallel line is drawn at the required distance and two fastening points are marked on it, taking into account the distance between the fastening fittings, this is done for all wall-mounted kitchen unit modules.
- Using a hammer drill and a drill, holes of 8 - 10 mm are drilled, dowels are driven in, and ordinary screws or hooks are screwed into them. The cabinets are hung on metal plates with slots (“ears”), which are usually built inside the cabinet; the height of the suspension is adjusted by a gear system with an additional metal plate (in older models, bolts and nuts were used for adjustment).
Currently, the method of attaching wall cabinets using a special metal rail of different lengths (can be cut), which is attached to the wall, is widely used. In this case, inside the cabinet in the upper corners there are fastening plastic modules with hooks, through which they are suspended from the upper edge of the tire. The fasteners are designed to be adjustable up and down and the distance from the wall. The method of fastening to a rail is convenient because the cabinets are easy to hang and remove, and can be moved and swapped.
- Next, shelves are installed in the cabinets, handles are screwed on and doors are hung, which are then leveled with special screws of the fastening system.
Backlight
One of the ways to illuminate the kitchen work area is to install lighting elements on the kitchen set in a system of wall cabinets. The most common option is to install the lighting on a wide canopy made of laminated chipboard, which is installed above the hanging cabinets and protrudes beyond their dimensions.

The backlight can serve as an additional source of lighting when cooking, but not the main one
With a standard cabinet width of 30 cm, a 50 cm canopy plate is selected; almost any type of lamp can be used as lamps.
It is structurally quite difficult to install lighting with spotlights at the bottom of hanging cabinets; you will have to use overhead types of lamps. The use of fluorescent and other lamps looks quite cumbersome; the solution is to use LED self-adhesive strip - this will greatly simplify the design task of local lighting of the work area by installing the lighting on the lower surface of the kitchen cabinets.
Problems installing the headset
Depending on the type of kitchen space, when installing the set, some nuances may arise that will interfere with the work or disrupt the aesthetic appearance.

Gas pipes are quite difficult to move, so first calculate the pipe output for your stove
Gas pipes and meter
When installing a kitchen unit, you often have to deal with the problem of gas pipes and a meter, which spoil the appearance of the kitchen. In this case, the best option is to integrate them into a kitchen wall cabinet. You will have to remove the back wall and shelf of the cabinet and cut out the necessary niches in them.
Uneven floor
The lower kitchen modules of the set must be level; if the floor in the kitchen is very uneven, trimming the lower decorative plinth may be necessary. It is best to do this with a jigsaw; it gives a smooth and even cut; it is advisable to cover the cut edge with a water-repellent compound (sealant, paint, hydrophobic compound).
Windowsill
Part of the interfering window sill can simply be cut off or replaced with a narrower one. If the window sill is at the level of the unit, you can, on the contrary, expand it by replacing it and making it an extension of the kitchen countertop.
Unstable walls

A heavy kitchen cabinet can tear out drywall, it is advisable to strengthen the place for the furniture
Sometimes, during redevelopment, a situation may arise when wall cabinets in the kitchen have to be hung on plasterboard or gas silicate walls. In the case of drywall, you will have to additionally strengthen the place where the cabinets are hung. This is easy to do if you dismantle the wall and strengthen it in the right place using a wooden beam or profile.
It is best to fasten cabinets to a weak wall made of plasterboard or gas silicate using a metal mounting rail, which is attached to the surface at many points in increments of no more than 20 cm, and you should use special dowels for plasterboard - TT22, DRIVA.
The process of arranging the installation of a kitchen set is somewhat reminiscent of a huge puzzle or puzzle. Even with detailed instructions with drawings and diagrams, it is not so easy for a person who is faced with the need to assemble kitchen furniture with his own hands for the first time to understand in detail the sequence of work. However, if you have even a little experience working with furniture, it is quite possible to install the set yourself, and at the same time save up to 20% of the cost of the furniture.
Scheme and sequence of work
Regardless of the chosen furniture model and the place of purchase of the kitchen set, the furniture will be delivered to the house or apartment in the form of packages packed in paper, laminated panels, boxes with fasteners and furniture fittings. In fact, assembling a kitchen set begins with a thorough inspection and counting of all delivered packages, checking for scratches and damage and the completeness of all parts. As a rule, the kitchen set includes:
- Packages with side walls, shelves and doors of cabinets of the lower tier of furniture;
- Kits for assembling lower tier drawers are supplied separately;
- Panel kits for assembling and installing the upper tier of wall cabinets;
- Sets of canopies, handles, support slides, door closer parts and door closing shock absorbers sealed in polyethylene.
Before assembling the kitchen set, it is necessary to sort and arrange the bags with fasteners and accessories into packs with packaged laminated panels. This will avoid fastener loss, confusion, and improper use.
Most manufacturing companies mark the packages, and in the summary sheet for the kitchen set they indicate information about the belonging of a particular package with accessories to a specific kit for assembling a cabinet. This greatly simplifies the preparation for assembling the kitchen set with your own hands.

Kitchen set assembly sequence
There are no strict instructions on the order in which the work should be performed; there are manufacturer’s recommendations and a flow chart describing how to assemble a kitchen set with your own hands at the most difficult stages of assembly work. If the installation of kitchen furniture in the kitchen is carried out by a team of several people, work on assembling the set can be carried out simultaneously for the upper and lower tier of cabinets.
The only condition that must be observed is the sequence of installation of the assembled kitchen cabinets on the prepared area in the kitchen:
- The top tier of cabinets and drawers are hung first., if you intend to assemble a corner kitchen set, then the installation process first begins with the installation of a cabinet located in the common corner of the set;
- The second stage is the installation of the lower tier, cabinets and cabinets are connected with through fasteners, drawers and pencil cases are installed;
- The third stage is to lay the countertop set, installation of ovens and hobs, sinks and mixers is carried out.
One of the most common defects in hasty assembly and installation of kitchen units is the formation of gaps between the walls of wall cabinets. This is usually due to either crooked or insufficiently rigid kitchen walls, or inaccurate assembly of the kitchen cabinets themselves. The formation of cracks is especially noticeable in corner cabinets. Therefore, the craftsmen recommend that before assembling the kitchen corner set on the kitchen wall, try on and adjust the joints on the cabinets in the corner of the room.

For your information! To ensure the correct assembly and installation of the upper tier of the set, the hanging cabinets are loaded with the working weight of dishes and kitchen utensils.
If the weight of the load between the hung cabinets does not increase the gaps, you can tighten the upper tier of the set with through fasteners and proceed to installing the lower tier of kitchen furniture.
Lower tier cabinets
The most difficult stage of installing kitchen furniture is traditionally considered to be the assembly of cabinets with drawers, so before you rush to study the instructions on how to install a kitchen set, you will need to stock up on useful tools:
- Electric screwdriver with a set of conventional and carpentry tubular drills;
- Construction level, carpenter's corner, tape measure, set of clamps;
- A wooden strip or glazing bead for cutting mounting plugs, a tabletop electric sharpener.

It may seem that the given set looks quite unusual, like for assembling kitchen furniture with your own hands, but this is a deceptive impression. Kitchen sets made of fiberboard or chipboard, solid wood, have always been assembled on wooden pins or dowels; sometimes the grooves and pin tenons do not match or break during assembly and installation.

Therefore, you have to drill new holes, grind out additional sets of tenons and join the bodies of kitchen cabinets, and only then screw furniture screws into the parts of the set.
Many kitchen furniture manufacturers offer to assemble furniture cabinets and cabinets using steel corners and clips. One of the options for such a DIY kitchen set assembly is shown in the video. This is the cheapest, but not the best technology.
Lower tier cabinet with door
First of all, the selected parts of the future cabinet are laid out on a clean and dry surface of a sheet of chipboard or plywood laid on the floor. An example of such a kitchen set assembly is shown in the video.

Assembly operations are performed virtually on the floor, that is, the kitchen cabinet is laid on the back side and assembled from start to finish, remaining in a horizontal position. This is why it is important that the base of the floor is perfectly flat.

The cabinet is assembled in the following order:


Once the glue has dried, you can install and secure the cabinet front door. Furniture canopies are pre-aligned and adjusted so that the side end of the door is in line with the cabinet wall.
The final part of the assembly and installation of any element of kitchen furniture is the installation or tightening of furniture screws. It is enough to mark the installation point, drill it with a thin drill to a depth of ¾ of the length of the fastener and screw the self-tapping screw into the end of the wall using a screwdriver with a hexagon installed.
All cabinets with doors are assembled in a similar way, regardless of which tier of the kitchen set they belong to. The only difference is that plastic legs or racks need to be installed on the cabinets of the lower tier, and steel hanging hinges are attached to the back of the wall cabinets of the upper row.

Advice! If possible, it would be a good idea to purchase one set of furniture canopies in stock. As a rule, standard hinges are enough for 3-5 years of intensive use of the cabinet.
Assembling a cabinet with drawers
Assembling and installing a cabinet with drawers is a little more labor-intensive. Today, in almost any model of kitchen set, cabinets with drawers remain one of the most popular furniture elements.
The first part of the installation process, namely, assembling the cabinet body is no different from the gluing scheme of the cabinet body with the door. The only difference is that the cabinet does not have a door, there is only a facade formed by a vertical row of front panels of drawers.
Step one, installing the drawer slides
To install each drawer, you will need to attach a pair of guide slides and one plastic closer strip to the inside of the cabinet body. You can install drawers without a closer, but using the lower tier of the kitchen set is much more convenient if the design has a finishing mechanism.

First you will need to draw the skid mounting lines. This can be done using a regular building level, the main thing is to maintain the horizontal direction of the marking. The gaps between the supporting surface of the guide slides and the rollers of the drawers are large enough, so that if a small error is made during fastening, this fact will not particularly affect the quality of installation and functioning of the sliding parts of the kitchen set.

The closer design consists of a hinge that will need to be installed on the side of the drawer, and a small plastic mechanism that is attached just below the guide slide.
Step two, assembly and installation of boxes
The drawer is made of two sides, a back strip, a wooden bottom and a front panel. The first three elements are attached to the bottom with ordinary self-tapping screws, resulting in a wooden box without a front wall. Sidewalls are usually made of metal or plastic, with support rollers installed on each side.

All that remains is to correctly install the front panel for each drawer separately.
The main difficulty is to install the front panel exactly according to the profile of the cabinet, so that the front part of the lower tier of the set looks as even and symmetrical as possible.
To install the facade panel, we use two metal fasteners, first transfer the markings from the box to the inside of the laminated board and screw the “pieces of iron” with ordinary self-tapping screws.

The last step is to adjust the position of the panel in such a way as to ensure a small gap of 1.5-2 mm between the drawers and align the façade panel as accurately as possible along the line of the future countertop. To do this, use additional adjustment screws located on the metal corner mount.

We assemble the upper tier
Before hanging wall cabinets and shelves, you will need to do two small preparatory steps. Firstly, it is necessary to draw a marking line on the wall along which the upper tier of the headset will be installed, and secondly, lay wiring in the wall to which the hood and lamps will be connected.
The upper tier of kitchen cabinets can be attached in two ways:
- Hanging on metal hinges attached to the back of each cabinet;
- Direct fastening with self-tapping screws through plastic “ears” - hangers installed on the inner surface of the vertical walls of wall boxes.

The first option is much simpler, as it does not require special skills in working with furniture. It is enough just to install hanging dowel hooks according to the completed markings. When installing the cabinet on built-in hangers, anchor studs are sealed into the kitchen wall, after which the cabinet is inserted onto them and the plastic hanger is tightened so that the entire structure of the set fits as tightly as possible to the kitchen wall.
Subtleties of the lower tier assembly process
After all the cabinets and cabinets of the kitchen set have been assembled, we proceed to installing the lower tier on the prepared kitchen area. First, you need to move all the cabinets and bedside tables to the installation site and place them in the same plane so that the distance from the facade to the wall surface is within 50-55 cm.

At the second stage, a rough adjustment of the height of the working surface is performed. For this, height-adjustable legs of a bedside table or cabinet are used. By rotating the screws, we ensure that the upper plane of each cabinet or cabinet is aligned in height and horizon. After leveling, all components of the lower tier are pulled together with through fasteners into one rigid monoblock.
Tabletop installation
As a rule, the kitchen countertop is assembled from two separate parts, joined in a corner or in the area where the hob is installed. The same wooden pins and glue are used to secure the tabletop. Initially, holes for dowels are marked and drilled in the upper part of the installed cabinets. Next, install the pins into the holes, after which the fasteners are carefully pressed down with light blows with a wooden hammer. Using a ruler, a building level and a sharp knife, the upper parts of the pins are cut so that their ends are at the same height and in the same plane.

At the next stage, it is necessary to determine the exact position of the tabletop on the base of the lower tier. To do this, apply bright paint to the ends of the cut pins and lay the countertop slab exactly as it should be located according to the diagram for the kitchen unit. Using the paint imprints on the back side of the slab, blind holes are drilled and it is re-applied onto the pins. After the countertop is in place, mark the cut-out holes for installing the sink and hob.

For the final installation of the countertop, the pins and the top of the cabinets are glued with silicone or polyurethane glue, after which they are installed in place and evenly loaded with pressure. The edge of the junction with the wall apron is sealed with a plastic profile made of transparent silicone.
Conclusion
Installing a kitchen set remains in many ways a creative process; you often have to look for ways to improve or improve the assembly and installation technology. The only rule that almost all furniture makers are advised to follow is the maximum use of detachable joints instead of permanent ones and silicone compounds instead of adhesives. The advice can be appreciated in a situation where the kitchen unit requires repair and updating.
Kitchen furniture from a workshop or factory arrives in disassembled condition. You can entrust the assembly to specialists, but few can do it better than the owner. Only those who work “as if for themselves,” and such are extremely rare. That’s why many people prefer to assemble the kitchen set themselves. It will take a decent amount of time, but the quality will be excellent.
Tools
Before assembling the kitchen set, you need to assemble the tools for work. Simple tools are required, but they make the job much faster and easier.
It's a good idea to have a plane builder or laser level. It makes arranging cabinets in one plane much easier.
Assembly of kitchen cabinets
The disassembled kitchen set is a set of boards of different sizes, a certain amount of fittings and a set of fasteners. From all this you need to assemble cabinets. Usually there are wall-mounted and floor-mounted ones. How to assemble a kitchen set, in what order - the choice is yours. Some craftsmen find it more convenient to assemble them in pairs - the top one, then the bottom one, and install it that way. But there are two other ways: first collect all the top ones, hang them on the wall, then all the bottom ones. They do the opposite - assemble and install the lower ones, then the upper ones. In general, any method is correct, do what is convenient for you.

The correct installation of the confirmat is in the middle
Assembly of wall cabinets
In any case, let's start assembling the cabinets. A typical wall cabinet consists of two side panels, a top, a bottom, a back wall made of HDF and two doors - the facade. The assembly order is as follows:
Installing hinges
The facades (doors) are finally hung after everything is assembled and put in place, but the hinges are installed from the very beginning. They come in mortise (considered more reliable) and overhead.

Types of hinges - mortise overhead
The mounting points are marked on the sidewall and door with holes. Place the side panel and the door on a flat surface (table or floor) close to each other, aligning the marks. We put the hinges in place (included in the kit). Screw it first to the side, then to the facade. In this case, the door turns out to be slightly lower in level than the side panel. Place a block of suitable size or a rolled-up rag under it so that it is at the same level, then screw the loop.
We disassemble the hinge itself (it consists of two detachable hinges that are connected by a screw. We unscrew this screw, put the doors aside, and continue working with the sides.
Assembling the body
We attach the top and bottom to the sides. They are attached to confirmations - special furniture fasteners that come with a hex head. If there is an appropriate bit, we put it on the screwdriver; if not, we work with a hand wrench.

The installation locations of the confirmations are marked on the outer part of the sidewalls. We fold the side panel and the top part, install the fasteners, then the bottom, and then the second side panel.
We turn it face down, lay and align the sheet of laminated fiberboard, which serves as the back wall. It is nailed down with small nails or staples from. First they nail it in the corners, carefully aligning the edges, then in the middle of each side and then, dividing each section in half. As a result, the installation frequency is 1 nail/staple per approximately 10 cm.
Installation of corners or hinges, shelf holders
The hinges on which wall-mounted kitchen cabinets are hung are different, and they are installed in different ways. We'll talk about them in more detail below. Shelf holders also come in different materials and shapes, but they are mounted basically the same way - into holes in the wall. Holes are drilled in the sides for them. Sometimes we install plastic choppers (small hollow plastic cylinders) in them, hammer them in by lightly tapping them with a furniture hammer, then place stops for shelves in them. But most metal stops (which are probably what you need in kitchen cabinets) simply fit into the hole.

Actually, you know everything about how to assemble a wall kitchen cabinet. For a visual demonstration, watch the video. Floor cabinets with shelves without drawers are assembled in the same way, only first the legs are installed on the bottom and the top part is the countertop, which is common to all cabinets and is installed after all the floor cabinets are installed and fastened.
Assembling a cabinet with drawers
We continue to assemble the kitchen set with our own hands. Now the most difficult moment is the cabinets with drawers. The general procedure is as follows: install the hinges, bottom and back wall. The top-tabletop is installed after all the cabinets are assembled and fastened together with ties. There are also features - drawer guides need to be attached to the sides. Go.
Installing the feet
Before assembling the kitchen set, legs are installed further on the bottom. You can install the legs after the frame is assembled, but rotating a heavy bedside table is not very easy. In any case, it is best if they are adjustable - the floor is not always perfectly level. With adjustable legs, it is possible to set them so that the load is redistributed across all legs. For small cabinets - up to 80 cm in length - 4 stops are installed; for cabinets over 80 cm, 6 support points are needed.

If there is a partition in the closet, we place the legs under it. If there is no partition - in the middle. 5-8 cm are removed from the edges, screwed onto self-tapping screws 15 mm long (with a chipboard thickness of 18 mm). Most finished furniture also has countersinks for the legs—small-diameter holes. Align the slots in the legs with the holes and install the screws.
Installation of guides and assembly for drawers
On the sides of the lower cabinets there are markings for installing guides (they are included in the kit). For their fastening, an M6*13 euroscrew is used. We install the required number of guides on both sidewalls.

The boxes are assembled using 4*45 screws. First, the guides are installed. Depending on the design, they can be mounted on the walls of the box or on the bottom edge of the sidewall. If there are markings (holes) on the wall, then they are placed on the sides. If not, go to the end. To be sure, check the assembly instructions. There should be pictures of the installation process.

After the guides are connected, the sides are connected to the back wall, then the front wall is installed, followed by the bottom. Before installing the bottom, check the diagonals. They must match down to the millimeter. The bottom is secured with nails or staples.
Assembling the body
The assembly of the case is already familiar: we attach the lid to the sides, then the lower part with the legs. We put the cabinet in place, tighten the legs so that the top lid is at the desired height and is horizontal. We check the horizon using a bubble or laser level. Then we install the covers.
Features of assembling a corner cabinet
The main feature is that in budget kitchen sets the bottom consists of two parts (to reduce costs). If a sink is installed in this cabinet, the back wall is almost absent, but there are several collet ties that add rigidity to the structure. Otherwise, everything is the same as when assembling a regular cabinet with doors.
How to hang cabinets in the kitchen
Even before assembling the kitchen set, you need to purchase canopies and intersectional furniture ties for attaching wall cabinets. Let's start with awnings; they come in different types, so we'll talk about them.
You already know how to assemble a kitchen set, you need to figure out how to install it in place. Kitchen wall cabinets are mounted on the wall. They are secured using furniture canopies. They come in the form of metal plates with holes for fasteners, but there are also more complex designs. Cheaper ones are ordinary metal plates. They can be of different shapes, made of ordinary or galvanized steel.
Simple awnings
The most common option (top left) is a plate with two small holes for fasteners and one large one (a hook or a screw head installed in the wall is inserted into it). It is installed on the end of the sidewalls - on the right and left. Under heavy load, this type of canopy can break, since the fasteners are located at a short distance from each other and the chipboard can fall apart. The bottom option is more reliable - more fasteners, but there is still a risk.

The other two types of furniture canopies are more reliable, since one of the screws will also be installed in the cabinet lid, that is, the load will be distributed over a larger area.
The corners performed well. One edge of this canopy is attached through the lid. A through hole is made, a bolt with a washer is installed at the bottom, and a nut (also with a washer) is tightened at the top. They are installed at a distance of 5-10 cm from the edge; if a large load is expected, you can install three or four pieces, which was impossible with previous models.

Kitchen cabinets are hung on corners with pads - to compensate for the difference in the thickness of the apron
The common drawback of all these mounts is that they are not adjustable. As they hanged, so it will be. There is no way to move it away from the wall or towards the wall. If it protrudes above the plane. walls, you have to mount a plank on the wall or select a lining (a piece of plywood, a piece of wood, etc.) for each fastener. The second drawback is that a separate hook or dowel must be installed under each canopy. Not very comfortable.

Adjustable
A more complex and expensive canopy consists of a plastic body, a metal canopy and an adjustment system that allows you to move it forward/backward and up/down. These canopies are attached to the side walls of the cabinet from the inside; a small hole is cut in the back wall. These canopies are paired with a mounting rail or strip. It is mounted on the wall, and the hooks of the awnings cling to its upper protrusion. Installing and removing wall cabinets with this fastening system is very simple, and they have a sufficient “loading capacity” of 20-50 kg per canopy (depending on the model and manufacturer).
How to install a kitchen unit
As already mentioned, the order in which the lockers are installed is arbitrary. You can hang the top ones first, then the bottom ones, or vice versa. It doesn't matter. The installation order is important: always start from the corner. How smooth this first cabinet will be will determine how easy the subsequent installation will be.
The installation height of wall cabinets depends on the height of the “users”, but not lower than 45 cm from the level of the countertop. When hanging cabinets on the wall, mark a horizontal line. It can be drawn using a bubble or water level, but the easiest way is to expand the plane to the required height using a level or plane builder. The upper edge of the mounting strip is installed along this line or the cabinets are aligned when installed on conventional canopies.
The task is both simple and difficult at the same time - to arrange the cabinets so that they are on the same level, and their walls are vertical and horizontal. In this case, there will be no problems during operation.

Since kitchen furniture consists of separate cabinets, they are fastened together. There are two options - install, then fasten, or first fasten, then hang. The second option is possible if you have helpers - hanging even two fastened cabinets alone is not an easy task.
The cabinets are fastened together using intersectional ties. They are of different diameters and different lengths - under laminated chipboards of different thicknesses. At least two ties are needed for one wall. They are placed in the area of the loops - a little lower or a little higher. Two cabinets are placed in the same plane, their walls are fastened with clamps, a through hole is made - along the diameter of the tie, into which the fasteners are installed, tightened with a screwdriver or screwdriver.
How to install a countertop on a kitchen unit
To finally assemble the kitchen set, you need to install the countertop. It is fastened after the cabinets are pulled together. Steel corners are installed on the walls, which secure the tabletop. Watch the video for details on processing ends and cutouts for sinks.
19.04.2018
Hello, friends.
What is an independent one, and what is its general algorithm? We will talk about this today in this article.
But before we talk about installation, I’ll say a few words about what should be done the day before.
And the day before, all kitchen modules should be assembled and packed as much as possible for transportation (they are usually packed in a special film that protects them from scratches). All facades must be hung on them (at first the facades do not need to be adjusted - they will be adjusted at the end of the installation itself), handles must be hung on the facades, etc. In a word, everything that can be done before installing the headset must be done.
The room itself must be completely ready for installation. This means, if repairs were made to it, then:
- The floors must be made (the installation area for the kitchen unit, you can no longer crawl under its supports)
- The working wall made of tiles (if any) must be laid out
- All old furniture located at the kitchen installation site must be removed from the premises
- There must be working sockets in the room (or somewhere nearby for connecting a portable device)
- All built-in appliances must be available (sink, hob, oven, hood)
- As a guide, at least a whole day should be allocated for the installation of a kitchen unit.
When all the above conditions are met, it is delivered (disassembled, of course) to the installation site.
Any kitchen is usually installed from lower modules. If this is a corner kitchen, then installation always starts from the corner (corner modules are installed first).
Before installing the modules, all facades are removed from them.
Having aligned the lower modules and fastened them together with coupling bolts, they need to be aligned “level” using adjustable supports. The modules are displayed, taking into account all the gaps (relative to the walls and relative to the countertop) that are taken into account in the project.
After all the lower modules are exposed, the tabletop is “adjusted” to them. When the countertop is fitted and aligned, the sink and hob fit into it. Then the tabletop is installed on the lower modules and secured.
When the lower base of the kitchen is installed, the level of the upper modules is measured, holes are marked on the wall for canopies for the upper modules.
Then the upper modules are hung, adjusted “by level”, and tightened together with the same tightening bolts.
When the lower and upper bases of the kitchen set are installed, the plinth is installed (on the countertop), the facades are hung and adjusted, and, in general, that’s it, the kitchen is installed.
The owner connects water and gas to the equipment. I especially don’t recommend messing with water, because if something is done incorrectly and the kitchen floods, it will be your own fault. And it’s stupid, to say the least, to do a lot of work and then screw it all up.
If you plan to attach an apron made of MDF, chipboard or plastic to the working wall (wall panel), then it is attached at the very beginning (before installing the lower modules).
That's all, see you later!
- Preparing for the main process
- Assembling regular bedside tables
- Assembling cabinets with drawers
- Installation of headset parts
A new kitchen set is an important moment for any housewife. After all, it is in the kitchen that a person has the opportunity to both realize himself and feel like himself. A new kitchen set is usually delivered to customers' homes in disassembled form. Therefore, it is also necessary to assemble it correctly.
But in our time, assembly with the help of furniture makers is not always carried out with high quality and as it should be. After all, most workers are in a hurry to assemble and install furniture as quickly as possible, without spending significant effort on the process itself. But not only the decorative appearance and ease of use of pieces of furniture, but also personal safety directly depend on the quality of assembly and installation. After all, if you hang a cabinet poorly, it can fall off the wall at any moment.
Preparing for the main process
It is for these reasons that many people prefer to install kitchen units with their own hands, without involving specialists. And they do it right. After all, it is not difficult for any man to do this work with his own hands if he follows some useful tips. The whole process is divided into three main stages: the preparation stage, the assembly stage and the stage of fastening and installation of the kitchen set.
Let's look at everything in detail and in order.
Figure 1. Diagonal measurements are carried out using a tape measure or a long ruler.
- building level;
- First you need to prepare for the furniture assembly process. To do this, purchase in advance all the materials and tools necessary for the work. This will provide significant time savings during the work process. You will definitely need:
- screwdriver with various attachments;
- electric drill;
- tape measure and pencil for marking;
- self-tapping screws;
- hammer;
- furniture stapler;
- nails;
- wood glue and a thin brush;
a set of all necessary accessories for furniture, which always comes with the furniture.
It is advisable to immediately check the presence of all the necessary fittings and fasteners using the assembly diagram that comes with the furniture set. If you don’t have something, you definitely need to buy it. Before work, you need to free up as much space in the room as possible so that assembly can be carried out unhindered. The floor should be freed, if possible, from carpet and linoleum. And be sure to cover it with a thick tarpaulin, burlap, or several layers of polyethylene so that you don’t catch or scratch anything during assembly.
Immediately, without waiting for the furniture to be assembled, prepare access in the kitchen to the installation locations for the furniture. In this case, it is advisable to pay the greatest attention to all kinds of pipes, washing and hood. It is very important that all this is in good condition, otherwise if there is a leak, the furniture can be seriously damaged. When you do this, unpack the furniture, study the drawing and start assembling.
Return to contents

Figure 2. The rails should be spaced close together so that there are no gaps between the boxes.
Since you need to assemble the set directly according to the drawing, this will not cause you any particular difficulties. As a rule, the assembly process occurs one by one for each individual piece of furniture. Therefore, unpack one by one so as not to get confused later. We begin to consider the process of assembling furniture from ordinary bedside tables and drawers.
At the beginning of work, using a pencil and tape measure, be sure to take measurements according to the marking diagram where the connections and fastenings of the parts will be located. Now, using a screwdriver and screws, we fasten the bottom of the cabinet and the side walls, and then fasten its upper part. The space that remains free inside is checked diagonally with a tape measure (Fig. 1). If they differ from each other by more than 2.5 mm, this problem must be resolved immediately. Usually everything falls into place either after lightly tapping it with a hammer (preferably a rubber one), or after driving the screws deeper, or, conversely, by unscrewing them a little outward. The correct location of the upper part is checked with a building level.
After this, you can mark the locations for the door hinges and install them. We put the doors on the hinges, which are then adjusted when the cabinet is installed in a vertical position using the force of screwing in the screws, which can even be done with an ordinary screwdriver or chisel, depending on the screw head. After this, you can attach the tabletop to the upper part, which is best done using self-tapping screws. All you have to do is attach furniture legs or wheels, which is also done using self-tapping screws.
Immediately, without waiting for the furniture to be assembled, prepare access in the kitchen to the installation locations for the furniture. In this case, it is advisable to pay the greatest attention to all kinds of pipes, washing and hood. It is very important that all this is in good condition, otherwise if there is a leak, the furniture can be seriously damaged. When you do this, unpack the furniture, study the drawing and start assembling.
Assembling cabinets with drawers

Figure 3. The distance from the countertop to the cabinet is usually 500-600 mm.
Things are a little different with the cabinet for drawers. Here, before fastening the bottom to the sides, the so-called rails (Fig. 2) on which these boxes will ride are immediately marked and fastened on their inner part. All this must be done extremely carefully, constantly taking measurements. After all, the slightest deviation can cause a distortion, as a result of which the boxes will move quite poorly. Also, carefully calculate the distance between the rails so that large gaps do not form between the boxes in the future and so that they are not very tightly located on top of each other. After all, in the end everything should work freely without much effort.
Before installing the fastenings for the drawers, it is advisable to immediately assemble the drawers themselves for the cabinet. To do this, markings are made on the back side of the front of the drawer for fastening the walls and for installing the handle. The side, back and front walls are connected to each other using screws. But it may also happen (in cheaper headsets) that the pin is connected to the hole. Then the markings are usually already made, and you just have to pour wood glue into the hole, where you will then secure the walls with tenons. In this case, it is advisable to additionally secure everything from below with a powerful construction stapler or nails when you nail the bottom.
Make sure that 90-degree angles are maintained everywhere during installation. When assembled correctly, all parts should fit perfectly together. Now all you have to do is attach the handle to the front, which is also done in most cases using screws (depending on the specific type of handle). Now just slide the drawers into the cabinet: if everything works well, then the assembly is done correctly. If not, then you will have to make adjustments with a hammer, and if that doesn’t work, unscrew everything again and reinsert the guide “rails”.
Immediately, without waiting for the furniture to be assembled, prepare access in the kitchen to the installation locations for the furniture. In this case, it is advisable to pay the greatest attention to all kinds of pipes, washing and hood. It is very important that all this is in good condition, otherwise if there is a leak, the furniture can be seriously damaged. When you do this, unpack the furniture, study the drawing and start assembling.
Installation of headset parts

Figure 4. The rail for the kitchen unit is attached to the wall using self-tapping screws.
In this way, all the details of the kitchen set are assembled. Once this is done, the DIY begins. You need to start with markings. So, first place one cabinet on the floor, and measure 50 cm or 60 cm up from it, depending on what is more convenient for you (Fig. 3). Place a dot in this place and draw a straight line. This line will show the lower level of the wall unit. Now the full height of the wall cabinet is added to this line, the dot is placed again and a straight line is drawn again. This strip will indicate the upper level of installation of hanging furniture.
Now we install the entire set that will be below. To do this, if necessary, immediately cut in the rear walls with a jigsaw or file places for the passage of pipes. And we treat the cut areas with silicone sealant to prevent them from crumbling and deformation from moisture getting into the thickness of the wood. During installation, we immediately check everything with a building level, and in case of distortions (and this often happens, since the floors in the rooms are often uneven), we tighten the legs so that all the furniture stands level. As a last resort, you can place special rubber pads under the legs, which are sold in the store.
Now we place specific points on the top strip on the wall where the hooks for hanging cabinets will be located. Just first measure the distance from the tabletop to the bottom base of the hanging drawer and to the top line again, and if necessary, adjust the markings.
Now we proceed to installing the mount for the kitchen set. There are two main types of fasteners: a special metal bus, for which holes are made in the right places, dowels are driven in, after which the bus is applied and self-tapping screws are driven in (Fig. 4). Then the cabinet is hung on the bus.
The second option is installation on special hooks. To do this, we drill a hole, drive in plastic dowels, screw metal hooks into them very tightly, onto which we then put the cabinet. For more reliable fastening, if the cabinet is heavy enough, there may be not two, but four hooks: two on top and two on the bottom.
So, the DIY kitchen installation is complete!
Features of the assembly and installation of the main standard structures were discussed here.
There is nothing complicated when working with custom cabinets. It will just take you a little longer. But if you strictly follow the drawing, then everything will definitely work out, and you will be confident in the reliability of assembling and installing the furniture yourself.
A beautiful, comfortable kitchen should include many details. A prerequisite is the presence of a kitchen set that contains all the dishes, kitchen utensils, bulk products and household appliances. This is exactly how multifunctional a kitchen set should be. But it’s one thing to choose and purchase furniture in a store. And it’s completely different to install cabinets and pencil cases in the kitchen. Of course, in any furniture store, customers will be offered the services of craftsmen. But, installing a kitchen unit is not such a difficult matter. Therefore, any man can successfully cope with this task.
Aids
To assemble the parts of a kitchen unit into a single structure with your own hands, you need to prepare auxiliary devices that will help you cope with the task. To work you will need:
- Drilling tool, screwdriver.
- A carpenter's jigsaw that will help cut the tabletop.
- Screwdriver, hexagon.
- Set of strips for joints and decorative trim plinths.

Stages of work
Do-it-yourself installation of the headset begins with attaching cabinets and drawers at the bottom of the structure. First of all, install the body part, to which shelves and drawers are attached. In order for the cabinets to be connected into a single strong base, they need to be fastened with metal ties and corners. Then, be sure to check how tightly the cabinet adheres to the wall. To prevent the top edges from crumbling, they should be protected with a silicone-based sealant.

The next step is the installation of facades using metal hinges, which are screwed with self-tapping screws. Remember that before you begin installing the kitchen unit, you should take care of the drainage and water pipes. Gas and electricity are also supplied in advance.

Installation of sink and countertop
The kitchen sink is installed by cutting into the surface of the countertop. Preliminary measurements and markings are made corresponding to the size of the sink. The hole for the sink is cut with a jigsaw. To properly fix the sink, know the design features.

There are two types of sinks:
- With fastening on top of the cabinet before installing the tabletop.
- With fastening after installation of the tabletop.
However, in both cases, utility networks must be installed before installation work begins.

Installation and assembly of kitchen units in the photo involves the installation of a countertop. The dimensions of this element should be 1-1.5 cm larger on the front and end sides than the lower cabinets. The remaining gaps between the table top and the wall are covered with a decorative plinth.

Protecting the work wall
Any kitchen has an apron - a wall between the countertop and the upper cabinets. No matter how carefully the housewife prepares food, the apron area becomes contaminated with droplets of fat. To protect the wall, many people tile it. But another option is also possible - to purchase a kitchen set with ready-made panels to protect the working wall. Such panels are simply attached using dowels. The color of protective screens can be very different. But, it is wiser to purchase panels that match the colors of the kitchen set.

Upper cabinets
The assembly of the kitchen set continues with the installation of wall cabinets. To secure the cabinet, you first need to assemble it. Typically, cabinets are delivered to the consumer in disassembled form: a separate body and hanging facades. To secure the cabinet part, it is necessary to apply markings at a level of 60 cm from the tabletop.

Having marked this distance with a flat, horizontal line, we mark the place where the lower part of the cabinets is attached. To determine the mounting point, you need to measure the height of each cabinet.

As soon as the upper horizontal line is drawn, you can attach the strip necessary for fixing the cabinets along it. The plank is fixed to the wall using dowels, and then plumb lines are fixed to the plank. And on the back wall of each cabinet there are hooks. After hanging, you should check that the upper part of the headset fits tightly to the wall. Then the facades are attached to the body.

In order for the installation of the kitchen unit according to the video to go flawlessly, you should start with the installation of corner cabinets. After assembling it yourself and installing the structure, you need to tighten each element with special tightening clamps. If, after following this recommendation, there are still gaps and cracks between the cabinets, we cover them with special decorative plinths.

To finish the end parts, plugs and beautiful, elegant corners are used.
In custody
In order for the assembly of the kitchen unit to go smoothly, it is necessary to carry out the installation step by step. First, the dimensions for installing the kitchen unit are determined. Then a marking is created that will clearly show where and how each structural element will be located. If the walls in the kitchen are lined with plasterboard, you should take care of special fasteners that will secure the cabinets to the wall. Having prepared everything you need, you can begin the step-by-step installation work.
You may encounter many non-obvious nuances, which we tried to describe in the first part of the article. But what lies ahead is the installation of a headset, which may puzzle you with its pitfalls.
How does the installation work?
Before hanging cabinets and installing tables, you need to take care of choosing the right furniture fittings.
Fittings include bolts, screws, hinges, handles, shelf supports, drawer guides - everything that is not made of chipboard.
Let's start with the main point: confirmation screws. Such screws are often called “Euroscrews”, and they can be purchased at any furniture hardware store. This screw is tightened with a special hex key or hex bit for a screwdriver.
The choice of handles rests entirely with you: in any accessories catalog you can find dozens and hundreds of their varieties, and depending on the color of the facade you will have to choose the appropriate handle option.
Loops are also an important point. Exactly The quality of the hinges determines whether the doors will open smoothly, how long will the hinges themselves last and will they withstand the load. The standard option is loops with a “cup” diameter of 35 millimeters. For each door up to 800 millimeters long, it is enough to install two hinges.
It must be said that drilling a facade for hinges at home is not an easy process, and even if you find and buy a special cutter, you will need an assistant when drilling with a drill. The facade must be held firmly, and when drilling, press the drill hard enough so that the cutter does not tear out pieces of chipboard.
When drilling holes, the main thing is to correctly calculate the indentations. The distance you choose will affect the entire installation process.If you have no experience in such matters, practice on scraps of chipboard: with manual drilling it is easy to pierce the facade right through, so it is better to order this work from professionals: drilling one hole costs about 30 rubles.
If you decide to do this yourself, pay attention to the photo:
Note: This is a reliable photo that shows the main thing: the distance from the edge to the BEGINNING of the hole is strictly 4 millimeters.
The best option is 12 centimeters from the top (or bottom) edge to the CENTER of the hole.
We'll hit the sink
As a small digression, let us explain some points regarding the choice of sink. This is not a fitting, but a full-fledged element of any kitchen.
The sink can be either overhead or mortise, and they differ in both cost and appearance. Built-in sinks look more representative and are mounted directly into the countertop itself.
Each sink is different, so you need to measure carefully before you start cutting up the countertop.
An electric jigsaw is used to cut a hole for the sink, but it is impossible to give clear instructions on how to insert a sink: there are many manufacturers of sinks, and each of them makes bowls in accordance with their own ideas about the correct design.
Therefore, it is best to use the instructions included with the sink or study materials related to installation, which can be found directly on the manufacturers’ websites.
Otherwise - from configuration to size - the choice of sink will depend on your tastes and financial capabilities.
What to do with all this?!

So, all the modules are assembled, the fittings are installed, the facades are secured, which means you can proceed to the last and most important stage: installation.
Let us immediately note that you will need an assistant for installation, but you don’t need to invite all your friends: one person is enough, and a large number of people will not speed up the process and will only create chaos in which everyone will interfere with each other.
You will need the following tools:
- Stepladder or stool;
- Hammer;
- Phillips and flathead screwdrivers (or better yet, a screwdriver with interchangeable bits);
- Pliers and a chisel (just in case);
- Jigsaw and hand saw for metal;
- Construction level (the longer the better);
- Tape measure, ruler and pencil;
- Electric impact drill (ideally, a drill and a hammer drill separately);
- Wood drills of various diameters (many of them can be useful in different specific cases);
- Pobedit drills with a diameter of 8 millimeters (for drilling walls);
- Dowels complete with screws for them (dowel size – 8x60 millimeters);
- Wrenches (may not be useful, but it's better to have);
- Silicone sealant;
- Special tie bolts.
Get to work!
Installation always starts from the bottom of the headset. Tables must be level. The vast majority of headsets are made on adjustable support legs, which allow you to easily raise or lower tables.
If you designed tables with a common solid tabletop, it should be fastened after all the tables are level, but before that it is better to tighten the tables using tie bolts. The sink should already be attached to the countertop.
After this, you can begin hanging the cabinets. For this we need a stepladder. One person climbs onto the tables along it and, together with an assistant who remains below and helps, lifts the cabinet. The classic option for fastening cabinets is corner brackets, which should already be attached to the cabinet.
In this case, you need to outline the holes of the bracket ears with a pencil while an assistant holds the cabinet from below.
If the cabinet is equipped with internal brackets, it is immediately hung on a special metal rail, which is pre-attached to the wall.
If the kitchen is corner, installation begins with a corner cabinet, and it must be leveled. You can read about the design of a corner kitchen with a bar counter.
In the case of a straight kitchen, cabinets also begin to be hung from the corner. The average cabinet, 800 millimeters wide, weighs approximately 12-15 kilograms, but is extremely inconvenient to lift.
 A mandatory component of the kitchen unit installation process is precise adjustment.
By making the correct adjustments, your cabinet doors will open properly and last longer.
In order to make the task easier, you can first remove the shelf from it, if it is inset, or even remove the fronts, but two men, even those who are not athletic, can easily cope with this task without removing the door.
After the cabinets are hung, what remains is the last but important step: adjusting the facades.
The fact is that the installed modules can become skewed: this mainly happens if the furniture is not installed level.
Adjustment is carried out using a screwdriver, the photographs show in detail which hinge screws are responsible for the adjustment, and this process is clearly presented in the video on installing the headset.

How much?
That's all: the kitchen set is installed and washed, the doors are adjusted and the furniture is pleasing to the eye. But let's see how much the materials cost, and how profitable was it to spend a few days of your life on this exciting, but not the most difficult activity?
Let's look at the cost of a kitchen unit using an example:
The cost of the presented straight and not the most complex headset with a width of 280 centimeters in the store is about 37,000 rubles.
- This set took about one and a half sheets of chipboard. One sheet of chipboard costs 1,050 rubles, the cost of cutting at the rate of 120 rubles per square meter was approximately the same. Result - 3000 rubles invested in the material. The cost of the softforming facade used is approximately 900 rubles per sheet 2.5 meters long. This set took about 10 meters of the facade, so its cost was 3,600 rubles.
- The retail price of the melamine edge used for gluing is 3 rubles per linear meter. The total cost of the edge used was approximately 220 rubles.
- The total cost of fittings, including euroscrews (retail price 80 kopecks per piece), hinges (50 rubles per piece) as well as glass, decor, sink and handles, amounted to about 3,500 rubles. Due to their low cost, we will not take components such as shelf holders and support legs into account; besides, the price of fittings in general can vary greatly in different regions, and therefore there is no point in focusing on the cost of fittings.
- Another optional expense item is tools. If we assume that you have an impact drill, you can subtract 6,000 rubles from the estimate.
- Let’s not forget about the delivery of the material, which can cost from 500 to 1,500 rubles depending on the distance and the total cost of such services in each region.
- Let's not forget about the friend who helped with the installation, who also needs to be thanked with money or a bottle of good cognac.
Below is a table detailing the costs at all stages of the work.
|
Material |
average cost |
Quantity used in the manufacture of the headset |
Total cost for this headset |
Explanations and Notes |
| Chipboard |
1050 rub./sheet (sheet size – 2.5x1.5 m) |
1.5 sheets | 1575 rub. | – |
|
Sawing work |
120 rub./m 2 | – | 1500 rub. | – |
| Facade | 900 rub./sheet |
4 sheets or 10 linear meters |
3600 rub. | The price is indicated for the softforning façade, which was used specifically for this set. When using other types of facade, the cost may vary, but the cost when ordering ready-made furniture increases exponentially. |
|
Melamine edge |
3 rub./linear meter | 70 m | 220 rub. | – |
| Accessories | – | – | 3500 rub. |
The total cost of euroscrews, shelf holders, support legs, handles, glass, decor, roller guides for drawers, self-tapping screws, dowels for installation and a dish drainer in a wall cabinet above the sink is indicated. |
| Washing | 1900 rub. | 1 PC. | 1900 rub. | In this case, an overhead sink manufactured by Franke was installed. This is one of the inexpensive and high-quality models. For reference, the cost of kitchen sinks, depending on the material, type of installation and design, ranges from 900 to 22,000 rubles. |
|
Delivery of material |
Depending on the region | – | 500-1500 rub. | This refers to payment for cargo transportation services, which varies depending on the region and distance. This point can be ignored if you have your own car: all the parts of such a kitchen can be taken out yourself in 1-2 visits and in a passenger car. |
| Tool | – | – | 200-6500 rub. | This point also does not need to be taken into account if you have an impact drill. It is its cost that ranges from 4,000 to 6,000 rubles. In any case, 200-300 rubles. It’s worth adding to the total estimate, since you definitely won’t find something you need at home: the necessary screwdrivers, a level, or even an ordinary hammer. |
conclusions
As a result, it turns out that If you manufacture such a headset yourself, its cost will be a maximum of 15,000 rubles. Of course, it’s no secret that companies specializing in the manufacture of cabinet furniture mark up prices by up to 200 percent.
In our case it turned out a little less, but the difference is noticeable. And now that you've spent a few days making your kitchen set, you can answer the question: is the game really worth the candle?