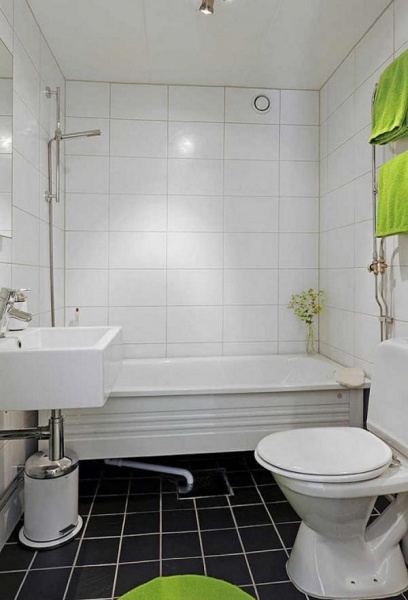
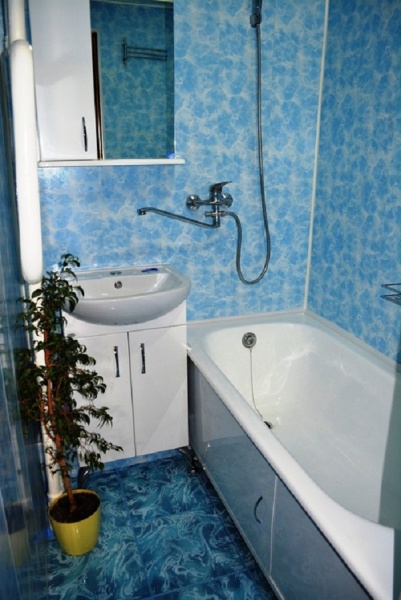
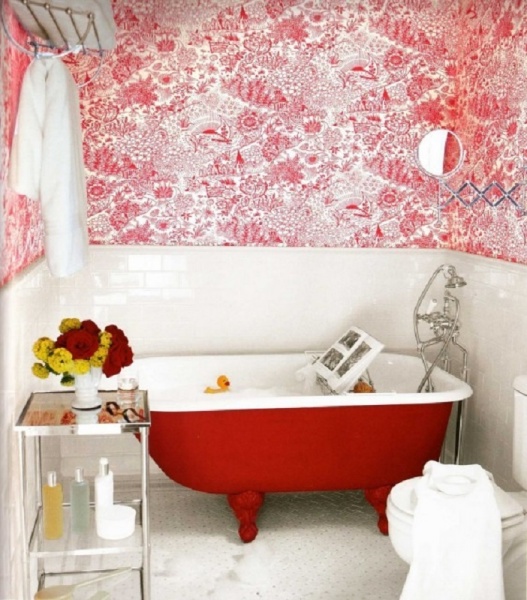
Step-by-step DIY bathroom renovation. DIY bathroom renovation. A mirror in this design will look impressive in any bathroom
The bathroom is one of the key rooms in every home. There are always a large number of different communications located here. Due to the fact that there are constant changes in temperature and humidity in the bathroom (due to the use of both hot and cold water), the renovation of this premises requires the most responsible approach. Moreover, step-by-step renovation of the bathroom is of particular importance, since a competent sequence here determines the success of the idea.
First of all, its successful completion depends on a well-planned enterprise. It is necessary to take into account all the little things that can negatively affect the task. It follows from this that the instructions are simply necessary so that in the future you do not have to redo everything several times.
To do this, you first need to decide on the type of future repair.
- Unplanned. From the name it is clear that this type repair is urgent and unforeseen. This option is possible if, for example, a pipe leak occurs or repairs are required due to moving to a new apartment.
- Planned. This type is divided into two more subtypes: capital and cosmetic. Therefore, it is already possible to determine the type of repair in advance, depending on the degree of need and the financial component. Most often people do redecorating, since it requires less preparation time and materials costs.
Knowing in advance about the upcoming repair, you need to perform a number of actions that will ensure the quality and durability of the repair.
Future renovation plan
Any competent repair requires a clear design plan, which will be based on the factors taken into account.
- Initial examination. Initially, you need to inspect the condition of the bathroom and decide for yourself what requires changes, additions or a radical change. To be a little more specific, you need to find out whether redevelopment is required, replacement of plumbing, whether it is necessary to add any household items etc.
- Calculation of forces. This point implies an assessment of your own strength for repairs; that is, it is necessary to decide which things a person can do with his own hands, and which require the involvement of a professional and experienced employee.
- Design. As you know, technology is developing day by day, and now it is possible to create the design of your future bathroom without leaving your home. To do this, just open your Internet browser and look at modern design options. In addition, you can add some details yourself if you have at least minimal taste. Also, the web resource can provide the necessary information about what can be done to create a practical and at the same time compact bathroom.
- Analysis of the financial component is a very important point, since the further progress of work will depend on it. You need to sit down and spend a couple of hours calculating your available budget, and based on this, plan your bathroom renovation.
- Selection of building materials. It is very important already at the planning stage to clearly determine the material that will be used in the repair. The most important thing is to choose the facing material, for example:
- marble mosaic;
- porcelain tiles, etc.
After following all the above rules, you need to calculate general estimate bathroom renovation. The estimate should include an item such as Unexpected expenses, for which it is necessary to make a reserve equal to about 10 - 15% of the total cost. After this, you can safely begin the necessary purchases. building material.
Preliminary work
- The first thing you need to do is remove all furniture and utensils from the bathroom. Everything is taken out gradually, slowly, according to the rule - from small objects to large ones. You need to finish the removal with the bathroom, which is the most voluminous and heaviest object in the room.
- Next, you need to disconnect all plumbing components and communications.
- After this, you can begin dismantling old pipes and sewer drains.
- The next step is to remove from the hinges old door so that it does not interfere with passage and repairs.
- Demolish partitions if redevelopment or new design requires it.
- Completely clean the walls and ceiling of old cladding material. To do this, you will need to take a hammer drill and completely remove old tiles, plaster or other coatings.
- Clear the room of old debris, pipes and other unnecessary consumables.
The most important thing is not to demolish unnecessary things and not to destroy anything that may later have any value.
Materials and tools for repair:
- ceramic tile;
- tile adhesive;
- cement;
- putty;
- paint/wallpaper;
- sealant;
- foam concrete blocks;
- polyurethane foam;
- hammer;
- screwdrivers;
- screwdriver;
- perforator;
- Bulgarian;
- insulating tape;
- nails;
- self-tapping screws;
- building level.
Laying and installation of communications
At this stage after complete dismantling you need to lay all the necessary communications: pipelines and electrical wires. The beginning (the entrance of communications to the apartment) must be brought to the point where the plumbing is connected - the future sink, bathtub, washbasin, etc.
 Modern plastic pipes very easy to connect to each other using a soldering iron. But with metal pipes you will have to tinker a little, since they require welding. When laying pipes, the main thing is to pay attention to the slope. Water pipes due to water pressure, you can even pull parallel to the floor, but sewer drain must be installed at least 3 - 5º downhill. This is necessary in order to wastewater did not linger in the pipe in case of blockage.
If the bathroom is combined with a toilet, then you should also pay attention to the location of the tray as low as possible. After this, it is necessary to secure it tightly, preferably lining it with brick or concrete mixture followed by tiling. When laying electrical wiring, you should always mark locations for sockets, leaving a spare cable.
Installing a new door
As many have probably noticed, windows and doors are installed first when renovating a room. After installation, naturally, even the dirtiest work will take place, so the door will need to be covered with something like polyethylene. If the door is released in advance with protective film, then it can be removed only after the repair is completed.
Cladding works
To begin with, the walls and ceiling of the room are finished.
- You need to start from the ceiling. It is advisable to level the ceiling using special water-repellent plaster. You can also simply paint the ceiling a new color or make a ceiling made of wood, suspended, etc. - everything was as planned according to the pre-prepared plan.
- Then you need to start tiling the walls and floor. After removing the old cladding, you need to re-level the walls first using cement mixture, and then treated with either plaster or alabaster. It is advisable to make the floor self-leveling, since leveling it using any other means will be extremely expensive. After this, you need to carefully sand the surfaces using regular sandpaper (0-2).
- . The main rule when laying tiles is that you need to lay them 1 - 2 cm above the level of the rest of the floor in the room. This is necessary in case there is a sudden leak or water breakthrough in a pipe or drain.

Installation and connection of plumbing
When installing plumbing, the most important thing is to mount everything exclusively horizontally. A building level is used for this. In addition, modern materials make it possible to do this with the help of adjusting bolts and basic adjustable legs.
The sink, bathtub, everything and taps should be installed, and everything must be correctly connected back to the communications.
Additional installation
Lastly, mirrors, cabinets, various hooks and other little things. In addition, we must not forget that to complete the work it is necessary to connect switches and lamps. All electrical appliances should be installed as a last resort due to the possibility of water, building material, etc. getting into them.
From the above, we can draw a bold conclusion that by following the step-by-step instructions for renovating a bathroom, you can quite achieve decent results. As a result, not only apartment residents, but also people who come to visit will enjoy it.
All photos from the article
A bathroom is a place where a person is left alone with his thoughts and emotions, where, while basking in a bath or taking a warm shower, he can mentally relax after a difficult day at work. Irritation and fatigue go away in the bathroom, and in it, despite the situation around, the eye should be happy, and therefore, it is very important to know how to make a bathroom with your own hands correctly.
Here you need to think through everything down to the smallest detail - the arrangement of appliances and bathroom furniture, the texture and color of coatings, the reliability and design of plumbing fixtures.
Bathroom renovation: how to do it right
Repairs must begin with careful preparation. To do this, you will need to take several sheets of paper, a tape measure to measure the dimensions of the bathroom, and calculate the area of the bathroom.
How to make a bathroom beautiful is a purely personal opinion. Some people prefer floors and walls lined with ceramic tiles, others paint facades with water-based paint, and some, in addition to everything else, replace sinks, bathtubs, faucets and other accessories with new ones.
After all the preliminary calculations, it will become clear what color and design the new bath will be in, where it is better to hang a mirror and install a washing machine. Next, having an approximate picture, you need to purchase everything you need - equipment, materials and accessories that meet the plan.
The next stage of bathroom renovation will be cleaning the ceiling and walls of old tiles (of course, if they were glued there) - a very dusty and dirty job.
In Soviet-era houses, bathroom walls were often painted regular paint– it must be completely removed.
This can be done mechanically, i.e. beat off, and with the help of new technologies: using solvents or hair dryers ( this method The good thing is that the tiles are removed together with the adhesive mixture).
Waterproofing joints in the bathroom
The first and dirtiest stage of the renovation is over. Next, the clean ceiling needs to be puttied, the walls treated with a primer, new electrical wiring installed, and a preliminary determination of where the mirror and washing machine will be located.
The next step in the bathroom renovation sequence will be replacing the sewerage system, water supply and risers (pipes between floors).
It would be right not to save at this stage, since in the future, decrepit and old pipes, most often, can make themselves felt at any time.
We must not forget about waterproofing the floor so that spilled water does not leak to the neighbors. The bathroom floor must also be screeded.
The joints between the walls and the floor must be sealed with a waterproofing solution, and in addition, waterproofing must be done over the entire area of the bathroom - in case water starts to flow over the edge of the bathtub or breaks a pipe.
Once your bathroom is in order, you can start laying tiles - either yourself or hiring a tiler. It is better to start laying tiles on the side where the bathtub will be located, since in this case the bathtub will be less dirty with the mortar.
Next, the bath is installed. In cases where the front side of the bathtub is planned to be closed, to save money, the floor under it may not be tiled. If it was planned to replace the door in the bathroom, then this needs to be done now, and then lay the tiles on the wall where the door is located.
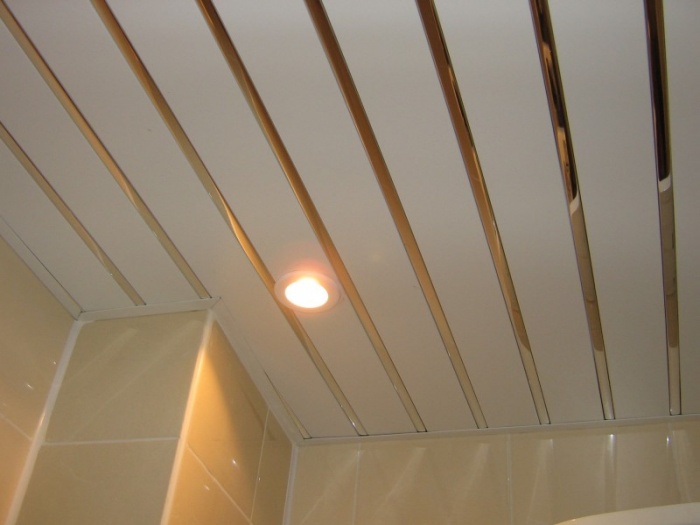
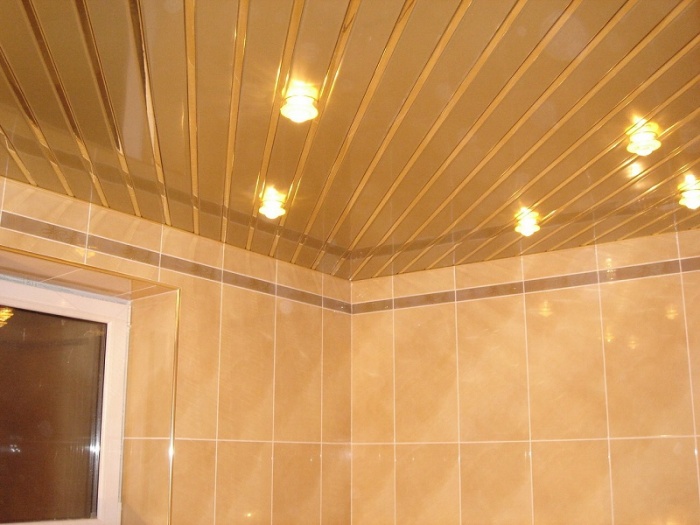
PVC panels for the ceiling in the bathroom
After laying the tiles on the walls and floor, a plinth is installed around the perimeter of the ceiling. The ceiling must be painted with waterproof emulsion paint - it looks beautiful, and you can also choose a shade to match the color of the laid tiles.
It has been verified that in the future moisture will not accumulate on the ceiling and, therefore, it will not darken over time. This is one of possible options how to make a bath.
An alternative would be installation on the ceiling stretch ceiling or plastic panels. When you complete all the above steps, you will get a very attractive bathroom.
Bathroom interior
Now let's look at how you can make your bathroom beautiful:
Use bright colors. Individual approach in bathroom design - advice from modern designers.
You should deviate from the usual understanding of color combinations and combine bright palettes.
- The bathroom will become special if it contains upholstered furniture. Of course, if the size of the room itself allows it. For upholstered furniture a special water-repellent coating has been created. Consequently, such furniture will not deteriorate even in conditions of high humidity.
The stereotype of a bathroom standard with good tile or ceramic tiles is becoming a thing of the past. How to make a bath with your own hands so that it is unique? To do this, it is necessary to use other finishing materials that were previously not typical for the decoration of bathrooms and bathrooms.
Designers can offer many options when creating latest looks and types of bathrooms. To create a unique, cozy bathroom, you can use various types and types of stones - from valuable species to the river pebbles. Alternatively, for bathrooms you can use wood, which is pre-treated with moisture-proof materials.
One of the most difficult stages that includes cosmetic renovation of an apartment is the renovation of the bathroom and toilet, which is associated with the characteristics of the room and the work itself - for example, you need to carefully select materials for finishing the walls and floor, since everything that is used for renovation must be absolutely waterproof. The difficulty is caused by the dismantling of old coatings and equipment. In a new building with a bathroom area of several m2, it is much easier to renovate apartments.
Before you start trying to make the perfect budget renovation of a bathroom and toilet on your own, you need to analyze this process in all its details, take into account all the nuances of installing materials and equipment.
To renovate a bathroom or apartment bathroom correctly, it is advisable to strictly follow the recommended sequence of bathroom renovations. Then possible mistakes it will be easy to fix, and the amount of effort and time required will be optimal.
Economy class repairs include the following stages of work:
- drafting - quantity calculation, selection plumbing equipment, interior design development, choice color scheme. Here you need to carefully sort through and weigh all the examples and ideas for bathroom renovations so that the fresh cosmetic renovation of the bathroom does not get boring too quickly;
- complex preparatory work;
- assessment of the quality of the floor and its repair: heat and waterproofing, screed design;
- laying water supply pipes and heating circuits;
- laying electrical wires;
- rough finishing of surfaces with plaster;
- insulation and fine finishing ceiling;
- styling finishing coating gender;
- bathroom wall cladding;
- new ventilation equipment is being installed;
- New plumbing equipment is being installed.
A number of important nuances works:
- you cannot create cavities between the main and decorative surfaces - it will definitely develop dangerous fungus. Therefore, you cannot decorate the walls with plastic or waterproof plasterboard;
- high humidity causes a high risk of injury electric shock, therefore, building codes state: sockets and switches cannot be installed here. However, there are ways to get around this limitation;
- It is not recommended to renovate a bathroom using corrosive, rotting and hygroscopic materials;
- if the apartment area is small and the bathroom is only a couple of m2, it makes sense to replace the bulky bathtub with a compact shower, and also combine the bathroom.
Design and selection of plumbing fixtures
Before you renovate your bathroom, you need to draw up detailed project, which includes all dimensions and estimates for materials and equipment. You should start with design development - this is especially important when the renovation is not done in the old panel house, but in a new building. The premises in them are usually atypical, the finishing needs to be done from scratch, there is usually nothing to start from.

Bathroom design
You need to choose the right equipment. So, modern washbasin can simplify the process of laying pipes, but the walls will have to be finished with high-quality smooth tiles, since splashes and dirt will quickly spoil the relief material. A good faucet can also make the plumbing installation process less of a chore.
There are many nuances, and variations in their implementation lead to the fact that cosmetic renovation of economy class apartments may require more money than working on a grand scale in the same apartment in the same entrance. So calculating everything correctly is perhaps the most important task.

Selection of plumbing
When choosing plumbing, you need to remember that it is inadmissible to use built-in faucets in panel houses - it is prohibited to make wall niches there.
Pipeline
The range of pipes is wide - there are expensive options and economy class models. When redecorating a bathroom with your own hands from scratch, it is best to choose polypropylene pipes. They are best suited in terms of their performance characteristics, are easier and more reliable to install, do not leak, and can be easily built into walls.

Bathroom piping diagram
A thrifty person will decide that it is better to use a cheaper one in a new building. modern material– steel. But steel pipes require complex work, quickly deteriorate even when coated on the outside with paint, and their efficiency becomes questionable when installed in such a small room.
To lay a water supply, you will have to drill into the walls, so you should remember that the internal diameter is indicated on the pipes, and you need to measure the outer one yourself and select the appropriate tool.
Connections and shut-off valves
When connecting sections of pipes in a bathroom in a panel house, you should only use plastic fittings. Metal is used only when joining polypropylene pipeline to water consumers - faucets, water heaters. Plastic fittings will allow you to hide the components without fear that it will leak.
The fittings used are plastic, all mechanisms are securely sealed into the polymer water supply. The reinforcement is connected to the metal using a carved pipe with thick walls. All this will ensure maximum durability of the water supply system.

Required fittings
Surface finishing
The traditional choice is ceramic tiles, and there is no need to consider other options for bathroom renovation. Using tiles you can create a bathroom not only in sterile white color, but in almost any color. color scheme. In any case, this applies to the walls, but the ceiling can be finished with plastic.
As for the floor, it is better to choose high-quality porcelain tiles yourself, which are less smooth than tiles. It is more expensive, but due to the small amount of m2 the difference will be insignificant. The bathroom floor is almost constantly wet, and the low slip coefficient of the floor finish could one day save your life.

Ceramic tiles are most often used to decorate a bathroom.
Before purchasing, you need to check the quality of the material, for which several tiles from the batch should be carefully examined, compared, and evaluated.
Not only the aesthetic side of the room, but also the hygiene of the surfaces depends on the quality of the tiles. Only ideal material should be used, because even a small flaw or unevenness will become a hotbed for the spread of fungus and infections.
Materials for work must be stocked in quantities corresponding to the area to be finished in m2 plus a few percent for cutting and trimming. Bathroom finishing in wooden house carried out in the same way.
Tile adhesive
Everything is simple here - you don’t have to choose for walls cheap glue economy class, better to rely on reputation famous manufacturers. To decorate the walls of a bathroom and toilet in a new building, it is worth using slow-hardening glue so as not to rush and have time to eliminate defects. The adhesive consumption for walls will be 3-4 kg/m2.
The process of laying tiles will require the following tools:
- fine-toothed trowel;
- tile cutter;
- plastic crosses;
- grout smoother;
- rag.

Basic tools for laying tiles
Preparing a bathroom or toilet for renovation
Where to start renovating a white bathroom once the design has been completed and the materials have been selected? The first thing you need to do is prepare the bathroom - remove everything old and unnecessary and bring the surfaces of the walls and floors to a condition suitable for repair.
If the cosmetic renovation of apartments is not being done in a new building, you need to decide what to do with the old plumbing. good cast iron bath You can leave it with a little restoration with paint. Tin can be updated acrylic liner, if it is not completely spoiled. If you want to do a complete redevelopment by combining a bathroom and installing a shower, old bath is thrown away.
After this, the water supply is shut off, the pipe with cold water is disconnected, a temporary pipeline is installed into the kitchen and toilet, even from a rubber hose. Then all the furniture and appliances are removed from the premises, and the electricity is turned off at the switchboard.

Old coatings are removed
All surfaces are cleaned of old coating, starting from the ceiling. To do this, use a hammer drill to remove everything to the base. You need to protect yourself from dust with a respirator and mask. In a panel house you can sometimes find GVL insulation under the tiles. When renovating a bathroom, it needs to be completely removed because the sheathing is probably rotten through. You can find worse things, even black mold. You should get smooth, clean walls, the horizontalness of which must be checked with a level.
Stages of floor work
The process of preparing all m2 floors is similar, only the screed can be left alone if it is of high quality. You just need to sand it with a grinder to get rid of any remaining tile adhesive. After this, the floor is washed, the screed is repaired and, if necessary, a fine layer of self-leveling mixture is used.

Screed in the bathroom
In a panel house, leveling with a self-leveling floor is perfect option, since in this case you will get a budget renovation in the bathroom. Building codes They say that the total thickness of the screed should be at least 3 cm. But before leveling, you need to isolate the floor from water.

Self-leveling floor
Humidity protection
Economy class polyethylene is not recommended for waterproofing a bathroom in a new building - the reliability of such protection will be insufficient. Only suitable special material for special wet areas, for example, modern polyester. The joints of the material are fused with a hairdryer. The film must be laid overlapping, with an overlap on the walls and with folds in the corners. In this case, the insulation can withstand 4 tons of water for every 10 m2 of area.

Bathroom waterproofing - important stage on the way to comfort
Material selection
Finishing the floor should be done last. To do this, you can choose any material, since almost each of them is suitable for finishing the floor:
- linoleum - this choice, although not very presentable, is quite economical. But in this case, it is worth purchasing high-quality linoleum with improved characteristics;
- laminate - the material must be moisture resistant and of high quality. By saving on material, you can replace the fact that after a short period of time it will begin to swell;
- tiles are the most the best choice for those who are planning to renovate their bathroom. The tiles are laid on the floor independently end-to-end, without seams. Each tile must be tapped after installation. rubber mallet so that there are no cavities left;
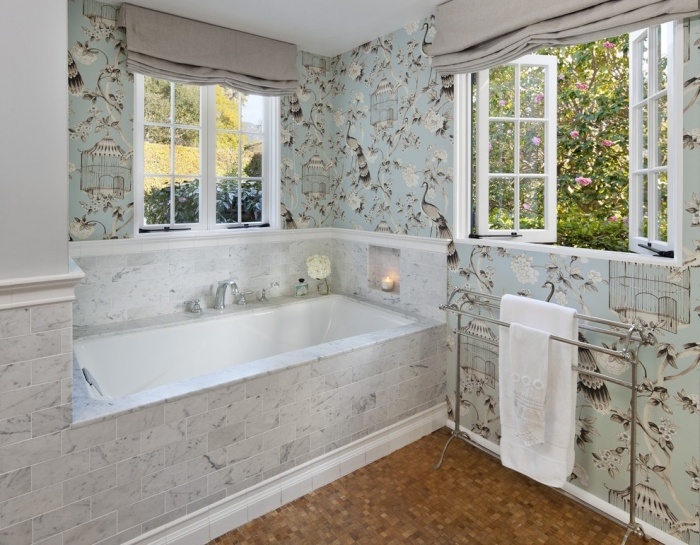
- parquet - this material for the bathroom will become a real exclusive. But the choice will be completely justified, because parquet is a warm, durable and, most importantly, environmentally friendly material, although it will require careful maintenance;
- cork – by choosing a moisture-resistant material option, you will get a soft, environmentally friendly and easy-to-clean floor;
- self-leveling floor – this new product will fit perfectly into any bathroom renovation options. In addition, absolutely any 3D pattern can be applied to such a floor.

Linoleum on the floor

Self-leveling floor


Floor tiles

Cork covering

Light laminate flooring
Conducting communications
Pipes sticking out everywhere greatly spoil the aesthetics of apartments, and making grooves for them in the walls is too difficult and dirty a task. In a new building, it is often impossible to violate the integrity of the walls at all. How to hide the water supply? There are different ways to do this.
The best solution is to run all the pipes (hot, cold and sewer) in a bundle around the perimeter of the bathroom and cover it with galvanized slopes. Using silicone, the slopes are hermetically decorated with plastic panels. If the pipes need to be serviced (unlikely if polypropylene is used), the slope can be quickly cut off and then glued back. In a standard bathroom, no such elements will be required. more than a meter, the rest will hide itself behind plumbing fixtures and furniture - any thrifty owner I will be happy with this option.

Conducting communications
The grooves will have to be punched only under vertical pipes for mixers. Important: the process of replacing communications should begin with the sewer system. The wiring is hidden in the corrugation. Plastic will do, although if desired, you can also use metal and cover it with paint. The heating pipes in the bathroom are replaced with metal-plastic ones, which can be bent at any desired angle, so they are ideal for assembling a heated towel rail.
Ceiling
First of all, the ceiling is insulated to prevent the formation of condensation. The most suitable material for finishing is plastic panels in any color. They are warm, moisture-resistant, and durable. Stages of laying the material:
- panels are mounted with stickers or silicone;
- A thin strip of glue is also applied to the ridge of each board;
- the two outer boards need to be laid together, folded at an angle, after which they snap into place and snap into place;
- Before the glue hardens, each panel must be supported with wooden slats.

Plastic panels on the ceiling in the bathroom
Walls
Crosses must be inserted between the tiles on the surface of all square meters of bathroom walls to maintain the same size of seams. In the places where the pipes will be brought out, you need to pre-drill holes required diameter. The corners need to be filled with silicone sealant.
You need to choose a special tile adhesive that is resistant to moisture. It is applied in an even layer of small thickness using a notched trowel. You should not use a tool with large teeth - in this case, the grooves will be too wide, and the cavities in the thickness of the glue will not allow the tile to hold securely. After placing each element, you need to check its evenness with a level. If the tile protrudes too much above the neighboring ones, it will either have to be knocked down with a rubber hammer, or removed and removed excess glue. If the tile sags, glue needs to be added.

Installing tiles on bathroom walls
To make the seams even, you can use a leveling system - devices consisting of clamps that allow you to maintain a constant width of the joints. In a small area and in the absence of masonry experience, the use of such a system is completely justified.
The tiles are rubbed with diagonal movements; after drying, excess material is removed with a clean rag.
Plumbing and ventilation
The technology for installing equipment in a new building is quite simple. The main thing is to connect all the pipes correctly. This completes the sequence for renovating a white bathroom.
When installing a bathtub, the first step is to connect the drain siphon, for which it is recommended to use a corrugated hose. Its tightness should be checked by passing 20-30 liters of water through it, wrapping the hose with a dry rag. After this, the bath is grounded.

The washbasin is either hung on the wall, mounted in a cabinet, or placed on a pedestal, depending on the existing drainage system. If the bathroom is combined, you also need to install a toilet. This can usually be done in one specific place - where there is a sewer outlet. The toilet is again selected in accordance with the type of exit - it can be wall-mounted, floor-mounted or corner-mounted. It is advisable to hide the highway so as not to spoil the appearance of the room by carrying out construction work for this.
Organizing a budget bathroom renovation with your own hands is a doable task. The right strategy when choosing finishing materials and a clear understanding of the progress of work will allow you to transform a bathroom without compromising quality, even with a modest budget.
Organization of the process
Proper planning is the first step towards successful completion. Most of the work in the bathroom during a budget renovation can be done with your own hands. Removing old coatings, dismantling plumbing fixtures or painting can be done even by a novice craftsman.

But if there is not enough experience in tiling walls, you should think about inviting specialists to certain areas of the bathroom renovation. Don't overestimate your strengths and capabilities. Sometimes redoing your own mistakes will cost more than inviting a specialist in the first place.

When the bathroom renovation work has been distributed, we move on to the selection of finishing materials. It is better to avoid well-known imported brands. A significant part of the cost is the brand fee, which budget option repairs look impractical. Cheap Chinese goods are also not the best option.
Advice! Choose a domestic manufacturer or an assortment from Poland, Slovenia and Bulgaria.
This applies to both finishing materials for the bathroom and plumbing fixtures. The combination of reasonable cost and good quality– a distinctive feature of the products offered.
An important condition for a high-quality result when doing it yourself budget renovation is compliance technological process. If any stage of the work is in doubt, listen to the recommendations of specialists; improvisation may be inappropriate.
Remodeling a bathroom automatically increases the repair estimate significantly, so there is no need to talk about a budget option. Leave your ideas for moving walls or plumbing to another place until better times, when there are no financial restrictions.

The amount of preparatory work for removing old cladding depends on the choice of new materials. Sometimes this stage can be avoided. Mandatory dismantling of plumbing fixtures is required if plans are to replace them.
Wall decoration
Economical bathroom renovation includes several wall finishing options:
- coloring;
- installation of PVC panels;
- wallpapering, including self-adhesive film;
- tiling from the budget segment.
Each method has undoubted advantages and some negative points.

Coloring
Coating walls with paint is a leader among economical finishing options due to its ease of execution and low costs. A competent approach when choosing paint and quality training walls - the beginning of the path to success.
Advice! It is not recommended to completely cover the walls of the room with paint.
A project where areas near the sink and bathtub are lined with inexpensive tiles or moisture-resistant ones is characterized by greater efficiency. PVC panels.

Moisture resistance and antibacterial properties are mandatory conditions when purchasing paint, otherwise it will not be possible to avoid the development of fungus and peeling of the coating in the bathroom. High performance characteristics against the backdrop of budget cost are inherent in paints:
- latex;
- acrylic;
- silicone.
The absence of a pungent odor is a definite plus water-based compositions, A silicone paints perfectly perform the function of a water barrier. It is better to avoid using oil mixtures. After a short time after renovation, the bathroom walls will become covered with cracks.
 4
4
When conducting economical repairs bathroom, it should be remembered that paints with an attractive glossy effect highlight any unevenness of the walls and make all defects more visible. Therefore, careful alignment of the walls is mandatory. The advantage of gloss is the ability to visually increase the space of a small bathroom.

Often, during renovations, it is necessary to remove the old paint coating from the walls of the bathroom. You can do this in several ways:
- use a drill with a special grinding attachment;
- purchase paint removal liquid; during the work process you will also need a spatula and a scraper;
- use thermal methods when the old coating heats up construction hairdryer or a torch, and the swollen paint is cleaned off with a spatula.

Naturally, after the removal process is completed and before painting begins, the whole range of measures is carried out: sealing cracks, eliminating protrusions, priming.
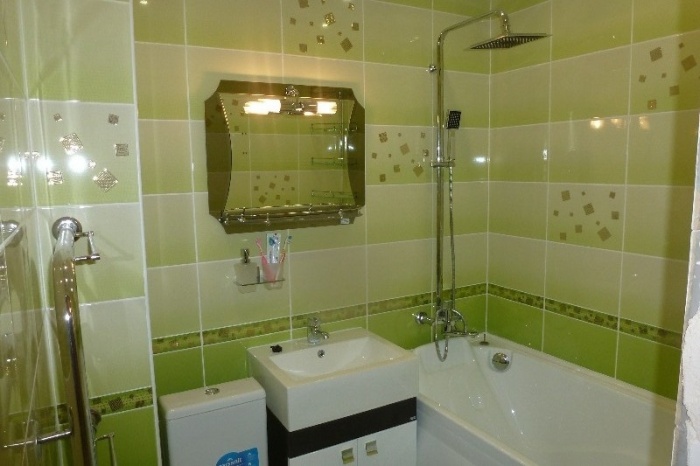
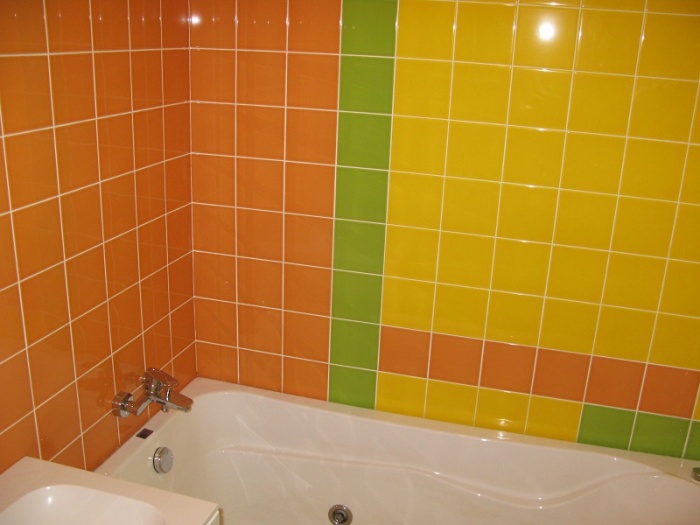
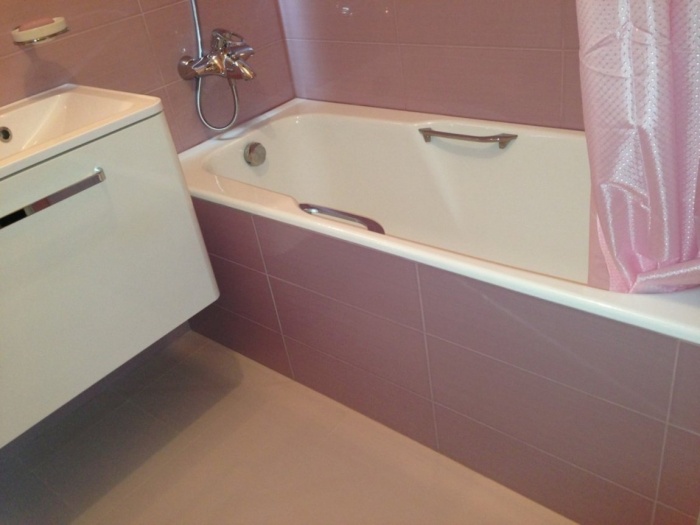
The photo shows a bathroom with a DIY budget renovation:
PVC panels
You can repair bathroom walls with PVC panels. In terms of cost, this will cost slightly more than purchasing paint, but the method has two clear advantages:
- The appearance of the bathroom after a budget renovation using PVC panels, from a design point of view, is incomparably better.
- No thorough preparation of the wall surface is required.
The panel installation process does not contain complex steps and can be done with your own hands. After calculating the need for material, the lathing is formed. For these purposes, plastic profiles with clips are used. Wooden slats are also suitable for economical bathroom renovations. Pre-impregnation of the material with antiseptics will protect the slats from increased moisture.
Wallpapering
The option of renovating a bathroom using wallpaper also has a right to exist; the main thing is to choose moisture-resistant products. The work is being carried out at a fast pace; removal of the old coating is not required in all cases. There are 3 main types of wallpaper intended for use in the bathroom:
- Vinyl with non-woven base. The price is quite high, for repairs you will need to purchase special glue, which is not always advisable in the conditions of an economical project. But high performance characteristics serve as the basis for popularity among consumers.
- Washable. Compared to vinyl copies, they are less practical and the cost of the product is correspondingly lower.
Note! When renovating with your own hands, it is advisable to avoid covering areas of the bathroom that may be exposed to water.
- Self-adhesive film. Incredible practical material, which is initially equipped with an adhesive layer. A wide range of design solutions is able to create a wonderful transformation in a bathroom after renovation.

The high quality and attractive appearance of the self-adhesive is accompanied by 3 negative points:
- Enough high price products that may not fit into the budget repair estimate.
- Bathroom walls require careful preparation, since any flaw under the self-adhesive wallpaper will be extremely noticeable.
- Quite a complicated application process. The painstaking process takes much longer than standard pasting.
Tiling
Budget renovation also includes the use of tiles for wall cladding. The main thing is to choose an inexpensive product with decent quality. Advantages of the solution:
- the material is resistant to temperature changes;
- not afraid of high humidity, withstands prolonged contact with water;
- washes well;
- resistant to mechanical damage.
The following negative aspects may become an obstacle to use in the bathroom during budget renovation:
- Additionally, you need to purchase a mixture for fixing to the wall and a grout joint;
- walls with old paint need preparation, the coating must be removed;
- the process requires some experience and not everyone can do it themselves; inviting a specialist will increase the repair estimate;
- It takes more time to cover than when wallpapering or painting.
The best option when renovating a bathroom with budget project– combination of cladding. The area near the bathtub and sink is decorated with tiles, and for those less exposed to water, choose a simpler and economical way coverings.
Ceiling finishing
Scope of work budget finishing the ceiling depends on its original condition. It is enough to cover a flat surface with water-based paint or whitewash it. It’s a simple and quick process that you can do yourself. It is recommended to remove significant curvature or disguise bathroom communications suspended structure. The material used is slatted elements or PVC panels.
Main advantages of choice:
- affordable price segment;
- simple lining procedure;
- does not require ideal preparation of the surface of the bathroom ceiling;
- successfully disguise wires and pipes;
- It is possible to install built-in lamps.
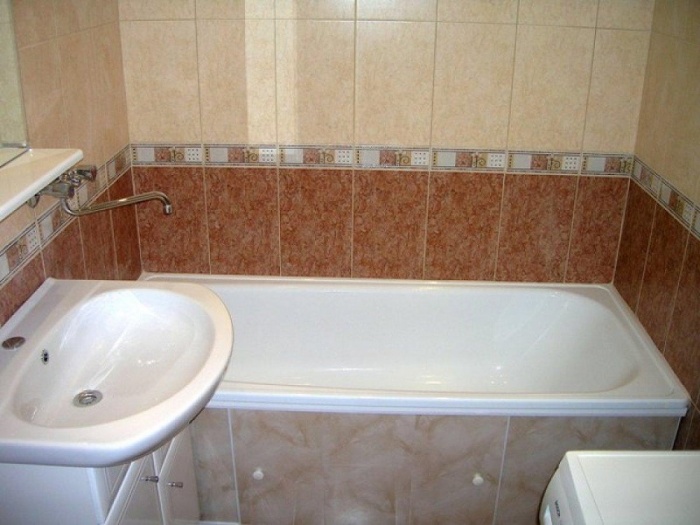
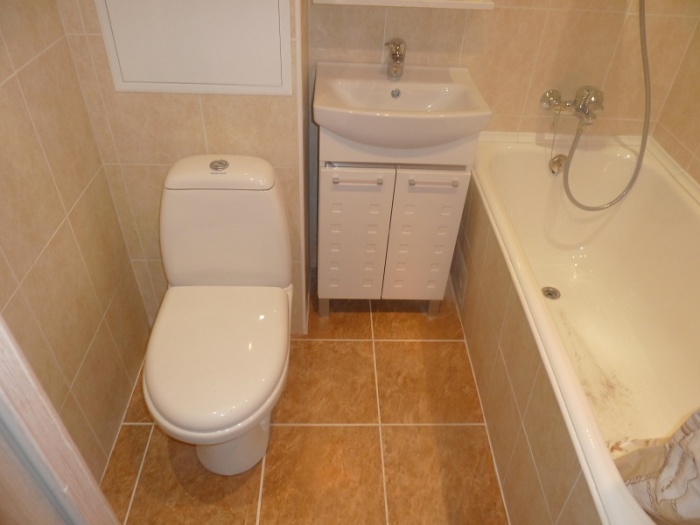
The result of the budget renovation is shown in the photo:
Floor covering
The finishing option depends on the repair estimate and the condition of the old bathroom flooring. Sometimes just refreshing the appearance of the tiles is enough. To do this, you will need to remove the grout and select a new one that matches the color of the tile.
It is quite simple and cheap to lay linoleum, but this measure will be temporary. Increased level humidity in the bathroom provokes the development of mold on the linoleum.
Comment! To avoid negative consequences for budget repairs, purchasing PVC-based linoleum or without a base at all will allow you to purchase it.

When renovating a bathroom, tiles are more practical, even at a budget price. The cladding is carried out without dismantling the old tiles. The screed will require labor and time. To renovate a bathroom floor, choose tiles with a rough texture to avoid slipping and cause injury.
If you are on an extremely limited budget, the most economical option would be to purchase a rubber mat. large sizes, which will maximally cover the free space of the bathroom floor. It can be changed much more often than any stationary coating, and fresh look interior design minimum costs will be provided.
Nuances of choosing plumbing fixtures
Replacement of plumbing fixtures in the case of budget repairs is not always carried out. Sometimes they settle on the option of restoring the bathtub. There are several update methods:
- The inner surface is treated with two-component polyester enamel. The most budget-friendly method.
- Restoration with liquid acrylic is characterized by greater durability and cost.
- Sometimes both methods are unacceptable due to the deplorable condition of the bathtub. An acrylic tab, fixed with sealant, will save the situation.
Each of the methods still involves financial costs, although they will be incomparably lower than purchasing a new bowl.

If a budget renovation involves purchasing new plumbing for the bathroom, consider the following options:
- Acrylic container. Located at the lower end of the price segment. Easy installation and simple maintenance are the key advantages of this product for the bathroom. Short service life and instability to mechanical damage are the main negative features.
- Cast iron is characterized by greater practicality. The cost is higher than acrylic analogues.
- Steel bathtubs in their characteristics are between acrylic and cast iron products.
- If having a bathtub in the bathroom is not important, you can think about installing a shower stall. But the renovation will already go beyond the budget.
When replacing bathroom sinks, choose between hook-on or pedestal hardware. The first option is more budget-friendly, the second is more aesthetically pleasing, as it successfully masks communications. About the nuances of choosing plumbing fixtures and preferences domestic manufacturer was said in the first section.
Conclusion
Small little things can embellish the interior of a bathroom after a budget renovation. An original curtain, decorative stickers and new accessories will enliven the design of the room. Communications are not left open; they will spoil the result even of the most expensive repairs bathroom. A budget way to quickly hide functional elements furnishings - form a plastic box. It will take little time and expense, but the result will be obvious.
The bathroom is the most damp place in our house or apartment. Therefore, when repairing bathroom walls with your own hands, you are limited in the choice of finishing materials. Usually, for this purpose, owners give preference to materials such as ceramic tiles, mosaics, PVC panels, sometimes waterproof paints for painting and wood.
The walls in the bathroom are clearly visible from all sides and are the main design element of the room. The level of comfortable living and the general mood of the space depend on which material will be used to decorate them and which color will dominate.
Main stages of repair
Bathroom renovations need to be done sequentially. First of all, you need to measure the room. It is better to capture the result on paper. The layout is drawn if you want to change it.
Then the material for the walls and ceiling is selected. It is important to remember that from them the right choice The comfort and coziness of the bathroom directly depends. Of great importance color palette bathroom interior. Warm colors, such as pink, red, etc., will visually make the room smaller, while cold colors will, accordingly, expand it.
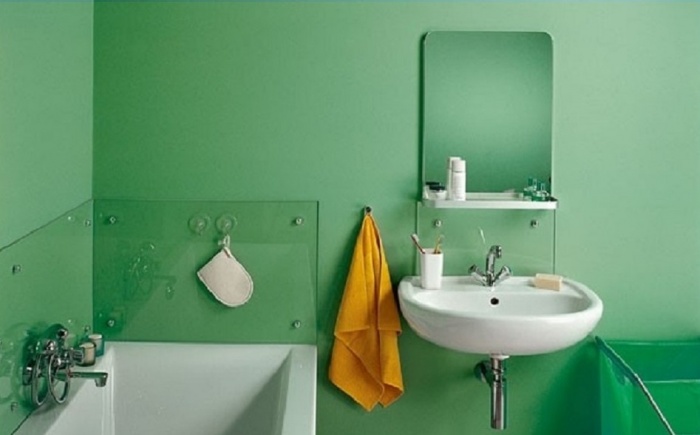
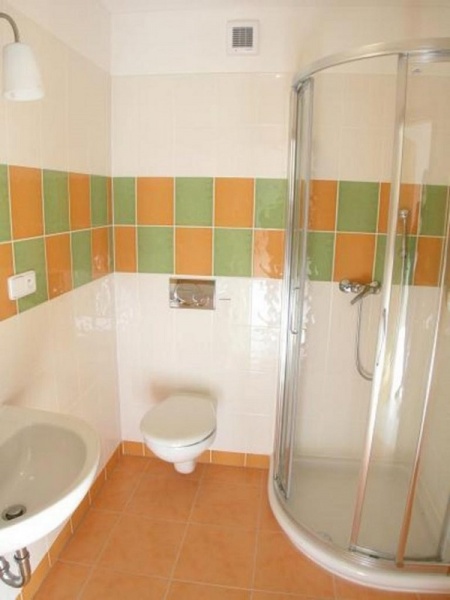
Repairing bathroom walls with your own hands: photos, microclimate features
The main thing you should pay attention to when renovating a bathroom is purchasing materials for renovation. As already noted, the choice will be limited due to the specifics of the room. What distinguishes the climate of a bathroom from the climate of an ordinary room?
- Limited ventilation due to small dimensions.
- High humidity of walls - up to direct exposure to water.
- The presence of various active chemical compounds(usually detergents) - soaps, shampoos, toothpaste, washing powders, etc.
- Great chance negative impact on the floor and walls of the bathroom. Operating in such small space different basins or washing machine, it is difficult to avoid collision with what surrounds us.
- As a result of high humidity, there is a high probability of the formation of various bacterial infections.
In order for your DIY bathroom renovation to be as successful as possible, the choice of materials must take into account all of the above-mentioned features of the microclimate. Naturally, not all materials can withstand it. For example, it is better to immediately exclude paper wallpaper or water-based paint from the list.
The most common materials used when renovating a bathroom:
- ceramic tile;
- plastic panels;
- moisture-resistant paints;
- special moisture-resistant wallpaper;
- MDF panels.
And below we will look at each of these materials and many others in as much detail as possible so that you become familiar with their advantages and disadvantages.
Do-it-yourself bathroom renovation: wall preparation
Any repair must begin with preparation. Bathrooms are no exception. The main requirement for walls is that they must be even. The next question immediately arises: how even? For coloring and stickers roll materials careful preparation is required. Any defect in this case will be hidden, but will also become even stronger, so it is extremely important that the walls are perfectly smooth.
It’s a completely different matter if you are going to cover the walls with different panels or tiles. In this case, evenness is not a determining factor. A layer of glue can hide any defects.Don’t forget about disinfection and waterproofing
After leveling the walls, they need to be waterproofed and protected from any bacterial contamination. For this purpose, special plaster mixtures and primers with additives that should not be ignored.
What to do with old tiles?
Perhaps the most difficult option is renovating a bathroom that is covered with old tiles. If the installation was of high quality, then cleaning the old tiles will not be so easy. One of the most appropriate options is to apply soil-concrete over the tiles. However, you first need to beat off all the smooth surface tiles Although this option is only possible in cases where the old tiles are not dismantled at all.
Do-it-yourself bathroom wall repair: choosing materials
- Painting - easy and practical
With the help of modern paints, you can make your bathroom dark or bright, depending on your desires. Such walls look stylish, and by resorting to different colors one shade, you can create original iridescent shapes. To paint walls, we recommend using latex-based paint, because they withstand moisture. Painted walls are easy to care for, but the technology itself requires maximum care on your part - the walls must be smooth, otherwise any flaws will be obvious.
- Wallpaper is original, beautiful, but not always durable.
Today vinyl or acrylic wallpaper common to see in bathrooms. They protect walls from moisture and are easy to maintain. Plus, with the help of wallpaper you can create an exclusive style when decorating your interior. But there is one “but”: such a DIY bathroom renovation cannot be durable, since water will get into the joints between the wallpaper and they will constantly peel off.
- Plastic panels.
With their help you can in an original way give the bathroom serenity and beauty. The panels can either differ in color or be the same color. They are easy to care for, easy to clean, and do not require smooth walls, hide sewer pipes from prying eyes, and also allow access at any time. The disadvantage is condensation that collects on the surface of the plastic panels and the likelihood of damage.
- Ceramic tiles are a traditional solution.
This finishing material is one of the most common for the bathroom. Nowadays, many manufacturers offer collections, the peculiarity of which is to create a unified interior style.
However, the construction industry does not stand still and offers a huge amount alternative options finishing materials for the bathroom, and traditional tiles sometimes do not meet modern aesthetic requirements.
- Mosaic is an original solution.
This finishing material is a product tiled type, relatively small size. May be one or several shades. This original material They are offered in several versions - made of stone, smalt, glass and ceramics.
As soon as the boom in decorating walls with ceramic tiles passed, many designers returned to mosaics again. And this is not surprising, since since ancient times it has been considered the most popular decorative decoration, surpassing ceramic tiles in its characteristics. This material can easily and quickly finish smooth wall surfaces and inclined, rounded and other surfaces of any complexity.
It is impossible not to note the aesthetic appearance of the mosaic. Thanks to the mosaic, you can assemble any drawing, composition, symbol, panel, inscription, etc. strong desire even your own portrait.
- Drywall is a universal material.
Anyone who believes that drywall is not intended for DIY bathroom wall repairs is greatly mistaken. It is only necessary to use special moisture-resistant brands, the manufacturing technology of which implies protection from high humidity. The only obstacle to use moisture-resistant plasterboard maybe the size of the room is too small, because this way you will reduce it on each side by 5-7 centimeters.
- Wall panels.
Today panels of this use are considered one of the most popular facing materials. It is best to finish the bathroom with products made from polyvinyl chloride. They are installed very quickly, add little weight to the wall and do not require complicated maintenance. By using plastic panels for cladding, you can easily level the walls, no matter how uneven they may be.
The panels are installed on the working frame or with glue from the outer or inner corner of the bathroom.
To attach them to the frame, special fastening brackets are used. It is important that the panels are at the same level, for which you need to regularly monitor the progress installation work through the building level. In order to ensure long-term operation of the panels, we recommend ventilation holes in inconspicuous places (the holes should prevent the possibility of water getting in). Designers and specialists believe that for such purposes, a sheathing line that practically borders the floor is best suited for such purposes.
- Adhesive tape.
With the help of self-adhesive film, you can quickly restore a surface that has lost its appearance. Today on the building materials market you will see wide choose films of various colors and shades, with imitation of cork, wood, marble, with the image of abstract drawings and various figures.
The composition of the self-adhesive film ensures reliable attachment to the wall surface. Another clear advantage of film is its relatively low cost. At the very least, decorating the walls with ceramic tiles in the bathroom will be much more expensive. Well, if you like bathrooms decorated with ceramic tiles, but you do not have the necessary amount to purchase them, then you can buy a self-adhesive film with imitation tiles. At the same time, you can give preference to a film that reflects the surface of stone, metal, gold, leather, silver, mirror or holographic image.
- Natural materials.
When finishing the bathroom, you can use natural materials - marble and wood. However, the tree must be covered special composition, otherwise fungus may form, or you will have to face the process of rotting. Marble, on the other hand, requires the most careful services. In addition, the cost of these materials will be quite high.
If you are determined to clad the walls with stone, first you need to decide what type of this material you plan to see in the bathroom. Because there is a huge selection of finishing stones. For example, slate, granite, quartzite and marble look equally beautiful. These are beautiful stone products with a unique texture and unusual design.
Those who decide to do their own bathroom renovations often face the problem of treating the walls before tiling. If you live in an old building, then you simply cannot do without treating them with an antiseptic substance. In the main buildings it will also be required.
The main purpose of using an antiseptic is to protect walls from mold and mildew. Therefore, during repairs, it is worth treating the surface before applying the facing layer.
To perform this procedure, you need to use special solutions containing a water repellent. It is an effective water repellent that provides additional protection walls. Particular care must be taken to handle the seams between the bathtub and the tiles.
If the wall in the bathroom is adjacent to a room without heating, for example, a street or entrance, then think about insulating the room. Moreover thermal insulation materials can be used not only inside, but also outside.
For this, roll insulation materials such as cork, mineral wool, polystyrene foam boards, etc. are used. Since there is almost always high humidity in the bathroom, you need to take care of moisture insulation. For example, sheets of moisture-resistant plasterboard can be fixed on top of the insulation. After plastering it, you can cover the surface with almost any material you choose.
Sometimes apartment owners plan to expand the space of their bathroom. The most common way is to combine a toilet with a bathtub, which is usually located nearby. Before you start combining a bathroom, you should find out from housing control whether this is justified. To carry out redevelopment, you may need to obtain special permission.
When decorating a bathroom with your own hands, it is not recommended to use simple paper wallpaper. They will last a maximum of two feed cycles hot water and will quickly begin to peel off. High-quality performance of your task is only possible synthetic materials. It is better to focus on wallpaper and vinyl-based fiberglass.For those who, above all, value the aesthetic component, paintable wallpaper is perfect. Painting will look especially beautiful and unusual on them. It is worth noting that when purchasing any wallpaper for the bathroom, you need to pay attention Special attention their water resistance. Quite often it is indicated on a roll of material with a two-wave icon.
What's new on the wall cladding materials market?
As noted above, new products include self-adhesive film. to his appearance it resembles wallpaper. There is a drawing on it - a panel. The back side of this finishing material has an adhesive layer. This is a great solution for the bathroom. Moreover, it is much easier to use than washing wallpaper.
Also, not so long ago, linoleum intended for bathtub walls appeared on sale. But don't think that he has anything to do with floor linoleum. It is more suitable for wallpaper, because its thickness is only one millimeter. As for the composition, the finishing material is made from PVC with the addition of various synthetic additives. It is characterized by high resistance to mechanical stress and good flexibility. Wall cladding using linoleum is a pleasure.
Agglomerate is especially popular today. In terms of its characteristics, it is not inferior tiles, and even surpasses it. Agglomerate under influence high temperatures can be deformed and take any shape. For this reason, it is important to use it for intricate repairs. Take your time when choosing a material for the walls in the bathroom; evaluate all the disadvantages and advantages of each material.
conclusions
If you want to achieve a bathroom that meets all modern requirements, you should wisely choose the materials with which you are going to cover the walls. Above we have reviewed all the most popular and most suitable materials that are often used in finishing bathrooms. Each of the materials has an inherent custom technology installations, but also distinctive features regarding operational and technical characteristics and raw materials. But be that as it may, they all have one thing in common - high quality and reliable moisture resistance. That is, they are endowed by manufacturers with those indicators that, first of all, are required for materials used for working in conditions of high humidity - in the bathroom.