Shelves, a rack or a cabinet above the toilet: an advantageous solution for space and storage. Shelves in the toilet - create additional space for storing necessary small items by spending a couple of hours. Examples of making shelves with doors in the toilet
When receiving a long-awaited apartment in a new building, moving to another home, or when planning renovations in an old familiar place, the first thing people pay attention to is, of course, the usable area. Namely, its size. I really want every centimeter of space intended for housing to be used. There are things in every home that you don't want to show off. For example, rolls of toilet paper “in reserve”, all kinds of jars with toiletries, cleaning products, brooms, rags, etc. The question arises: how to make a cabinet in the toilet behind the toilet with your own hands?
Many will agree that a closet for a toilet is quite a useful, practical piece of furniture for such a room.
There are many options for such solutions. It is necessary to take into account the design features of such a cabinet.

A beautiful design will add zest to the interior, plus provide the necessary functionality.

One way or another, it is better to make the facade from chipboard in order to achieve an attractive appearance of the structure.
The main ones are:
- material intended for use in sanitary facilities (must be moisture resistant);
- ensuring free access to equipment control levers, which are usually located in bathrooms; water consumption meters, valves for hot and cold water, ventilation duct, sewer pipe fastening);
- the size of the built-in wardrobe in the toilet, since it must be precisely built into the dimensions of the room, which often have a complex geometric shape, especially in old houses;
- integration of the plumbing cabinet into the overall interior of the apartment, its harmonious design solution;
- cabinet design with a maximum number of shelves;
- reliability of fastenings.

There are a lot of options for using cabinets; you just have to choose how exactly you will use the free space of shelves, drawers and other elements.

If you wish and have the money, these sheets can be sheathed, covered with decorative films, and decorated to your taste.
Before you start work, you need to make a plan, take measurements and draw a plan of the plumbing cabinet in its actual dimensions on a piece of paper. A plan is needed from the facade and the side. It is necessary to take into account the number and size of shelves, as well as select the option and mounting locations. You need to think about how to make a closet for the toilet with your own hands step by step, write a short instruction plan so that you do not subsequently redo the already formed material.

Before you begin the actual assembly, you should decide on the materials that will be used to assemble the cabinet.

We use serious fasteners for the wall.
Choosing material
What is better to make a cabinet, doors, shelves from, what will cover the hatch, designs of shelf holders? A hatch, for example, can be made of plastic; this is an economical and practical option, but a built-in hatch under the tiles will look more aesthetically pleasing - this will make it almost invisible.

If the objects are heavy, it is better to use laminated chipboard sheets.

Not every ready-made toilet cabinet meets the availability of free space, wishes or requirements of the client.
If you hang a mirror in place of the hatch, it will disappear from the angle of view; if it is decorated with artificial modern materials, for example, stone or tiles with bright patterns, then this can become a particularly attractive composition. There are many options!

Obviously, purchasing a ready-made cabinet for a toilet is not difficult, just like installing it.

Calculate the dimensions accurately so that obvious problems do not appear during installation.
It is better to choose the material from which the doors can be made based on the design of the room. Wood, ceramic tiles, plastic, chipboard, MDF, laminate, metal, etc. are suitable. The main thing is to ensure waterproofing.

You will be satisfied with the work done, you will have something to be proud of, plus you will be able to create exactly the furniture that is ideal for your particular case.
Blinds can be a budget option. They are easy to install, light weight, easy to dismantle and change. Also, the easiest way to use the space above the toilet is to install regular shelves. To do this, you will need bars, corners, screws and the shelf itself, cut to the size of the opening or slightly smaller. The depth of the shelf is calculated separately depending on the design features of the space behind the toilet.

Preparing to create a toilet cabinet with your own hands begins with design.
For those who are accustomed to more expensive materials, glass can be successfully used. Since moisture accumulates in the plumbing room, it is better to choose tinted glass with a matte finish. When cutting glass, it is necessary to process the edge of the glass with special grinding so that all edges are smooth. It may also be interesting to have a metal sanitary cabinet option. Designers like to use this material when designing loft-style interiors.

The frame is made of bars measuring 30 by 30 millimeters. Try to make all markings evenly, using a level and tape measure.
An interesting material for cladding the facade of a toilet cabinet is a mirror. It has the amazing property of expanding space, which can be important for small bathrooms. In addition, the refraction of light through a mirror prism can play an interesting role in the overall interior.

Mark the wall where you plan to install the cabinet.
When using wood, you need to take into account that it easily absorbs moisture and the prepared material must be covered with a special protective coating before installation.

Assemble a frame from the cut bars, connecting the elements together with corners and self-tapping screws.
When making a cabinet from ceramics, you first need to make a frame from bars, cover it with moisture-resistant plasterboard and glue ceramic tiles.

It is most convenient to mount the shelves to the wall using an aluminum corner profile 25x25 mm.
Shelves can be made open or closed, located inside the structure. When installing shelves, it is necessary to take into account the height of packages of standard detergents, rolled paper blocks, the height of the holder for floor rags and other toiletries and household items. It is better to strive to make such a design that everything that needs to be hidden can harmoniously fit into the niches. You should not make shelves at the same distance from each other and strive for a symmetrical design of the shelves in the filling of the cabinet. It is better to measure the distance for their fastenings in accordance with the existing standard set of things intended for storage in the toilet.

Making and installing a toilet cabinet with your own hands is unthinkable without the appropriate tools.
Some structural elements, for example, false panels, can be purchased ready-made in specialized stores. In this case, the dimensions of the structural elements of the sanitary cabinet must be adjusted to the size of the pre-purchased façade elements.

However, before starting any cuts, it is necessary to calculate the position of the shelves - the pipes do not run vertically and the holes are made to specific dimensions for each shelf.
To work we need the following tools and materials
- level and tape measure;
- screwdriver and screwdriver with self-tapping screws;
- electric drill;
- jigsaw;
- covering material for plumbing and flooring to ensure cleanliness in the work area.

Of course, a closet in a toilet cannot be called complete if it does not have doors and fittings.
As accessories you may need:
- loops;
- magnets;
- door handles;
- furniture corners, false panels;
- fasteners;
- furniture corners, etc.

Take measurements for the doors, cut blanks for them.
It is better to purchase fittings from good manufacturers, since this is an actively used part of the structure and all mechanisms must be reliable in operation.

As you can see, making a closet in the toilet with your own hands is not as difficult as it might seem.
Door handles can be made integrated from aluminum profiles. They differ from ordinary handles in their attachment location and appearance. They are a long thin aluminum strip mounted into the upper end of the door; usually they are made along the entire length of the upper end of the door. Thus, they seem to “disappear” from the overall appearance of the facade, and besides, it is quite easy to care for such a smooth surface of the door, since it has no protrusions. And to install standard handles, you need to drill through holes in the facade doors and the handles turn out to be protruding, visually creating a rather bright accent.

Of course, doors can be made not only from wood or chipboard. An alternative is roller shutters, characterized by practicality and modern design.
Separately, it must be said that before installing a cabinet in the toilet, it is better to take care in advance and check the condition of the plumbing networks. It may be necessary to carry out preventive maintenance, eliminate possible weak points that could lead to leaks, and replace valves and gaskets.

Plus, if there are tiles in the toilet, you can use simple sheets of plywood, which are then covered with the same tiles that are mounted on the walls of the bathroom.
VIDEO: Wardrobe in the toilet
50 photo ideas for DIY toilet cabinet design

The toilet in modern houses and apartments, as a rule, is not so large in area. But this does not mean at all that nothing can be stored in this room. It is very convenient to make practical shelves in the toilet, where you can put different containers with household chemicals and other necessary products. Moreover, this applies not only to the bathroom, where the toilet is combined, but also to a separate room specifically for the toilet.
A shelf is needed to store cleaning products and other toiletries.
Many will ask the question: how can you hang shelves in the toilet if there is extremely little space there? However, there is an excellent solution here - to arrange a shelf directly above the flush cistern. Well, or to the side of it, if the width of the room allows. Let's look at the best way to make a shelf in the toilet below.
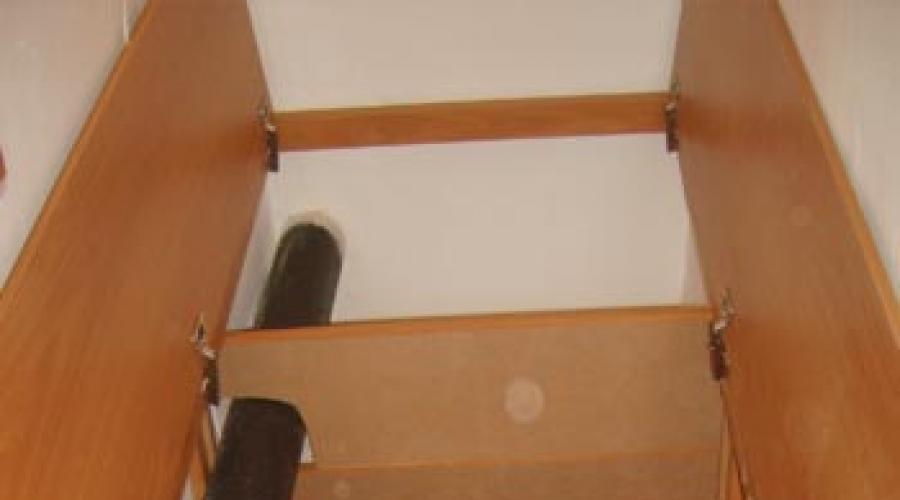
To install the shelf in the toilet quickly and correctly, you need to stock up on all the tools and materials in advance. In this example, 4 boards will be needed as the main material: 2 of them are long, and the other 2 are short. Long boards will determine the length of the shelf, and short ones will determine its height. The length of the shelf is usually chosen to be approximately 5-7 cm less than the width of the wall (if the shelf will be mounted above the flush cistern). The height should be arbitrary, but not less than 30 cm, so that all the bottles fit there. Besides all this, you also need:
- 2 thick metal canopies and hooks for attaching the shelf;
- self-tapping screws;
- perforator;
- screwdriver;
- varnish or paint;
- dowels;
- brush;
- finishing edge;
- large scissors;
- tape measure and pencil for markings.
Preparation and connection of parts

Diagram of the arrangement of a shelf for a toilet.
Now you can begin the main work. First, all the necessary markings are made. To do this, use a pencil and tape measure. It is necessary to make markings for the shelf fastenings so that in the end, when everything is ready, the distance to the wall on both sides of the shelf is the same. It is also necessary to take into account that the shelf will have a certain height, equal to the smaller boards.
After this, on a flat, hard surface, try to assemble all four boards into one shelf. If everything worked out, then there is no need to adjust anything. But if certain inconsistencies are noticed, then you need to level the wood with a jigsaw and sand that area.
When all this is done, start joining the boards into a shelf. To do this, it is important to use a screwdriver, with which the work will be completed quite easily. Decide where the top of the shelf will be. In its upper part, it is necessary to install metal fasteners using screws or self-tapping screws, due to which the shelf will be hung on the wall. If you plan to place heavy objects on the shelf, then it is best to play it safe and make exactly the same two additional fasteners from below.
Shelf design and installation

It is better to paint the shelf in 2 layers.
Now we are working with the wall. Those places where markings are made for fastenings must be drilled with a hammer drill to such a depth that the dowels will fit there. Then we simply drive the dowels into these holes as securely as possible. Special hooks will be inserted into them, on which the shelf will be hung using fasteners. These hooks need to be screwed very well into the holes, which is best done by a strong man.
So, everything is ready to install the shelf. Now you need to arrange it and finally fix it on the wall. To decorate the shelf, it is good to use high-quality paint or, even better, wood varnish. It is better to cover the shelf in two layers so that the surface shines and is more protected from moisture. After the varnish has dried, the edges of the shelf need to be trimmed with tape, which is simply glued with a hot iron. Immediately smooth out the resulting wrinkles and press the lagging edges well. After an hour, when the tape is also completely strong, you can hang the shelf on the hooks in the toilet.
The work on installing the shelf in the toilet is completely finished. Now, even in such a small room, you will have space to store various hygiene products, so necessary for any good housewife.
Making a shelf in the toilet with your own hands is quite simple and easy, but you won’t pay a lot of money to have it made to order.
This was considered only one of the simplest options for a toilet shelf. Of course, you can improve the shelf by making it more compartments or complicating the design. But the principle of fastening and the operating procedure will remain the same.
Every housewife wants to create coziness and comfort in her home, where all things are in their place. You should not ignore rooms such as the bathroom and toilet. Shelves and various bedside tables will become a convenient place where the things you need will be stored. Such elements for the toilet can be purchased at the store or made with your own hands.


Features and Benefits
Few residents of city apartments can boast of a large apartment area. Bathrooms and toilets are often very small. Many residents have small bathrooms, in which only a toilet can fit. If you hang shelves in the toilet behind this piece of plumbing, you can easily organize a convenient place where detergents, toilet paper and other necessary items will be stored.
The shelves should be hung behind the toilet so that they do not disturb anyone or hang overhead. You can take one or several small shelves, place or hang a larger cabinet. When choosing the shape and dimensions, you should consider what purposes the shelf will serve. This could be just a small place for decoration or storage for detergents, tools and other important little things needed in the household.
You can make the shelf yourself or go to the store and find ready-made options that you like best. The selected furniture will fit perfectly into the design of the bathroom or toilet.

Advantages of shelves in the toilet:
- this is a convenient place where you can lay out the necessary things;
- the design allows you to hide pipes and other communications from view;
- with their help you can diversify the design of the room;
- you can hang a variety of designs: hanging shelves, cabinets with doors, open shelving, or place a cabinet next to the toilet;
- cabinets with doors allow you to hide possible clutter on the shelf;
- an open shelf can become a place for decorative items - there is room on it for scented candles, original vases and other trinkets.


Layout
When deciding to hang shelves in the toilet, you need to think about how to do it correctly. When installing shelves behind the toilet cistern, take into account that they should not be bulky or bulky. Bathrooms and toilets are rooms with high humidity, so this feature must be taken into account when choosing shelf material.
When choosing a place for shelves or a cabinet, you should remember that it should not interfere with quick access to valves, meters or boilers, that is, those items that can be used urgently. Access to these items should be easy and quick.


When planning the design, you should pay attention to the option where the cabinet is placed around the riser. Such cabinets are usually made independently, since store options do not always offer models in the required size or design. In addition, products made independently will cost less than the purchased option. If you make shelves or a cabinet yourself, you should first draw a picture, and then make a drawing based on the sketch, taking into account all the details.


Manufacturing materials
If you make toilet shelves yourself, to make them it is better to take:
- drywall;
- plywood:
- tree;
- laminated chipboard.

Most often, plasterboard is used to make shelves, because this material is easy to work with. With its help, you can make comfortable and aesthetic shelves yourself. It is recommended to buy moisture-resistant gypsum plasterboard sheets for the bathroom and toilet.
When choosing plywood for making shelves, a material with a sheet thickness of 15 mm is more suitable. Products made from such raw materials will serve for many years - plywood has high strength and durability. When working with this material, it should be taken into account that the shelves may sag over time due to weight. If possible, it is better to use wood instead of sheets of plywood. Wooden shelves will definitely not sag even under heavy loads. In addition, wood products look very beautiful. Laminated particle board is usually used in the manufacture of doors, since this material is not moisture resistant.


Varieties
Open shelving
When entering the toilet, the attention is immediately drawn to hanging shelves or open shelving, so they should not be in disarray. All things on them must be neatly folded. The basic rule for open shelving is constant care of the things on them, as well as regular wet cleaning.
To make shelving with open shelves you can use:
- tree;
- metal;
- plastic.


Forged shelves and racks will look impressive in the toilet. Such original designs can decorate any interior. Forged products are distinguished by their special beauty and grace. Such air structures are very comfortable and functional. In a toilet or bathroom, open wrought-iron shelving will look great, where personal hygiene products, towels, paper, napkins, and detergents can be placed on the shelves.
An open shelving is more suitable for big fans of cleanliness and order. A stack of plain towels, matched to the overall color scheme of the room, looks very nice.


Shelves above the toilet
When choosing simple shelves for a toilet, you can find very interesting and original models on sale or make them yourself. Such shelves are usually simply attached to the wall. This option does not require a base. The shelves above the toilet will become a convenient place to place toiletries and stacks of towels. You can also place various decorative items here.


Closet
If the size of the room allows, you can place a closet next to the toilet. Such cabinets are often installed in private homes, as they take up enough space, which is so lacking in small apartments. When choosing a cabinet behind the toilet, keep in mind that it may look somewhat massive. The advantage of this choice is that this design has closed doors that protect the contents from prying eyes.
For closed cabinets, constant cleaning is not so important. When choosing such furniture, you should take into account the color and texture of the material. A correctly selected model will successfully fit into the overall interior of the room.


Cabinets with legs
The easiest way is to install a cabinet on legs in the toilet. Such designs will be more spacious. The width of the shelves should not be larger than the toilet cistern, otherwise the cabinet may touch visitors.
Cabinets with legs can be chosen with either open or closed shelves. On open options you can place wicker baskets, original vases with flowers, candles, figurines, which will immediately make the room more comfortable and interesting.


Mounted
For mounted models, a niche is used above the installation. Also, such a cabinet can be built into the wall or hung above the toilet. The store offers a large selection of wall cabinets with shelves for the toilet. In addition, these designs can also be made independently.
To install wall-mounted structures, the toilet is not installed next to the wall - a distance of up to 40 cm remains behind it. This is just enough to place a cabinet or rack. Hanging structures are not intended to hide pipes and other objects.
You can hide plumbing connections behind the toilet in a simple way - put a cabinet in the toilet. This structure is multifunctional: it closes the pipes and provides a large space for storing household chemicals and other small items needed in the bathroom.
Why do you need a cabinet behind the toilet: advantages
Due to the design features, the toilet cannot be placed close to the wall; there is always free space behind the plumbing structure. In a separate bathroom, the toilet is a narrow room, where there is no space left to install even a small bedside table for storing household cleaning supplies.
A cabinet behind the toilet makes use of wasted space and provides storage options for toilet paper or towels, cleaning products and utility tools. A neat structure allows you to decorate a wall, hiding communications behind the doors of a piece of furniture. The advantage of a cabinet over a false wall is the presence of doors that do not restrict access to communications.
Types of structures
Making cabinets is possible in different ways. Depending on the design of the product, there are open and closed types, niches, special structures, etc.
Freestanding models
Homemade furniture for the toilet room can be made in the form of a tiered rack. This design most often represents a full-fledged cabinet. The design of the free-standing product allows you to place it behind the toilet cistern and use all the free space above the plumbing fixture. The height of the furniture is calculated based on the ease of removing items from the shelves; such a cabinet is not made too high.
The facade of a free-standing rack is designed in the form of open shelves or doors are hung. In one model you can combine open and closed shelves.
Wall cabinets
Wall-mounted structures include structures of various types, mounted on the wall and not supported by the floor. These models are suspended above the tank. The cabinet above the toilet can be made specially or the old kitchen one can be slightly remodeled if it fits in size. As in the previous case, the facade can be completely closed or a combination of open shelves and doors can be made.
Open niches
A niche is a recessed section of the wall. To make a niche or built-in cabinets in the toilet, you don’t have to hollow out the wall. To make such a structure, a false wall is made, bringing it to the level of the rear wall of the tank.
With this method of arrangement, the cabinet will look like a niche behind the toilet. Part of the space under the ceiling can also be covered with a panel or shelves up to the top.
Niches covered by a facade
The difference between a closed niche and the previous one is the use of a facade, masking what is behind the false wall. The door in this case is common, single- or double-leaf, and closes the opening of the niche. Different materials are used for finishing: blinds, MDF, tiles, etc.

Full height wooden cabinet
In a narrow toilet, it is most convenient to build a shelving structure made of wood, attaching the shelves directly to the walls. To fasten the doors along the contour, make a light frame, securing its parts to the walls and ceiling. You can use only part of the rack for storage, but in small apartments it is convenient to use the inaccessible top shelf for storing necessary but rarely used household items. It is convenient to place mops, brooms or other relatively large items in a tall cabinet.
How to make a closet in the toilet behind the toilet yourself
The construction of the structure consists of several stages:
- planning;
- preparation of parts according to the project;
- frame assembly;
- installation of the internal part;
- hanging doors and decorating.
All operations are easily performed without an assistant.
Dimensions and design
Before making a closet in the toilet behind the toilet, you should measure the height, width and depth of the future structure. If you choose to install a free-standing structure, then its dimensions are determined by tying them to the width of the wall. In a small room where the cabinet takes up the entire wall, you will need to take several measurements of the width and depth along the entire height of the structure. This will allow you not to make a mistake if the walls are not too smooth, and not to adjust an already assembled cabinet to the location.
When drawing up a project, you need to think about the location of the shelves and the distance between them. External design consists of the choice of facade panels or doors, their size and quantity. For free-standing models, you will also have to choose a method for finishing the visible parts. A hanging cabinet above the installation will require solving the same problems, but it is recommended to evaluate the height at which its lower edge will be located: if it protrudes beyond the front wall of the tank, there is a risk of hitting your head when rising from the toilet.

Preparing material and tools
Among the tools that will definitely be required when hanging or building a cabinet of any model should be a drill or hammer drill with different attachments. They will be needed for drilling concrete or brick walls of a room to which parts of the structure or hooks for hanging need to be attached. The hammer drill will also require fasteners: self-tapping screws with dowels at least 7-10 cm long.
The rest is selected depending on the material from which the cabinet is built:
- hacksaw or electric saw for wooden parts;
- metal scissors and a screwdriver for drywall products.
Measuring tools (tape tape, building level, square) will come in handy.
The materials for making shelves in a rack must withstand the weight of objects that will be placed on them. The best choice would be boards or metal lattice structures of various types. You can buy them at a hardware or construction store. To attach them to the walls, a block with a cross section of 2x2 or 3x3 cm is used. Its quantity is estimated by calculating the total length of all supports of the rack.
A niche or built-in wardrobe is often made from gypsum plasterboard. This material is easy to process and allows you to build light and durable false panels placed at the required distance from the wall. The frame for the structure is made of a bar or a special profile.
Exterior finishing can be done using various materials. The main requirement for them is moisture resistance.
Tree
Wooden panels can be used to cover part of the walls where shelves are not installed. If the wood will not be covered with other materials, it must be painted or varnished to protect it from moisture. It is desirable that the wooden panels are in harmony with other furnishings.
To make a cabinet, you can use different types of wood materials:
- solid wood board (lining, floor slats, etc.);
- furniture board;
- plywood with a thickness of at least 0.5 cm;
- Chipboard and its varieties.
Plastic
Panels can also be made from leftover plastic wall coverings or slope finishing. These materials are convenient for the construction of frame structures (niches, built-in cabinets). They are also suitable for hiding the presence of shelves. To do this, you can use a finish that matches the panels on the walls of the toilet.
You can choose another plastic material that is well suited for this purpose: polycarbonate. Rigid sheets will allow you to make transparent or translucent doors and beautifully decorate the wall above and below the cabinet. The main advantages of plastic are moisture resistance and easy surface care.

Ceramics
Ceramics are used only for finishing a structure already assembled from other materials. Using adhesives, the tiles can be fixed not only to the fixed parts of the structure, but also to its doors. You can use tiles, imitation stone, mosaic or mirror varieties. Even broken tiles after renovation are suitable for finishing: you can create mosaic panels from pieces of ceramics and hide both a temporary wall and doors under the tiles.
Drywall
A homemade closet in the toilet is often assembled from gypsum plasterboard. Depending on the design option and the size of the room, the structure can only serve as a false wall with a niche or be used as the walls of a free-standing shelving unit. Only shelves that are going to be heavily loaded should not be made from gypsum plasterboard: the material breaks easily.
What are the doors made of?
For making doors, ready-made pieces of old furniture are suitable if their size matches the cabinet rail. In the absence of ready-made parts, they can be easily assembled yourself. Each prefabricated door consists of a frame (2x2 cm timber) and an insert into it. It is convenient to make one-piece models from sheet materials (chipboard or plywood).
Doors with lathing
Calculate the length and width of the product and cut 4 bars for the frame: 2 vertical and 2 horizontal. Connect the parts into a rectangle using corners and self-tapping screws on the wrong side. From the facade, the door is strengthened and at the same time finished with lathing.
You can use thin slats as sheathing parts, placing them vertically or horizontally and attaching each one on top of the plane of the frame with self-tapping screws. Gaps are left between the planks or they are fastened closely.
The lathing can be made from parts of a decorative screen (for example, for radiators). This is a panel made of sheet material with holes, which can be easily cut and secured with screws around the perimeter of the frame. Other sheets are also used in the same quality: plywood, gypsum board, plastic, etc.

Louvre doors
To make your own blinds, you will need many thin strips of wood (plywood) or hard plastic. On the side vertical parts of the frame, parallel cuts of 0.5-1 cm are made at an angle. It is important to carefully mark both parts so as not to warp the blinds. After this, the frame is assembled, and strips are inserted into the cuts, securing each with glue. Finally, a finishing strip or shaped baguette is attached to the front side of the door around the perimeter, slightly overlapping the junction of the blinds and the frame.
Plumbing plastic hatch
A convenient option for a small cabinet is a ready-made inspection hatch. This product can be purchased in a store and installed in a false panel.
Plumbing hatch for tiles
A large hatch can be disguised as tiled panels. First, they assemble the frame and hang false wall panels on it, and then install the hatch. Finally, the wall is covered with the same tiles as the walls of the toilet. The material must be glued with a gap so that the increased distance between the edge of the hatch and the panels is noticeable.
Roller shutters
It is better to buy this product ready-made, with a lifting mechanism. It must be installed according to the manufacturer's instructions. The design is convenient in moving the curtains up and down: with this opening, the doors will not require space if the toilet is small.
Glass
Glass inserts are fixed in a frame or a sliding door system is mounted. For its simplified version, you can use plastic runners without a roller insert (it is not needed for a small door). Sliding glass in furniture walls is designed using this principle. If you cut the glass yourself, you need to sand all its edges so that they are not sharp.
When equipping a cabinet with glass doors, you should give preference to matte varieties of material: opaque glass will help hide the contents of the niche.

Installation
You can make a closet for a toilet with your own hands in different ways. The simplest option is to install wall or free-standing cabinets:
- For a free-standing product, parts are cut out from sheet material (MDF, chipboard or plywood 2.5-3 cm thick). The sides and roof are connected with self-tapping screws and a corner. For shelves, horizontal bars are attached to the inside of the sidewalls. The level of the bottom shelf should be 15-20 cm higher than the top of the tank to provide access to the flush button. The distance between other shelves can be arbitrary. At the back of the lid and shelves, a cutout is made for the riser and pipes. The doors are hung at the end of the assembly.
- Ready-made wall cabinets for the toilet are mounted on special hooks. Holes are drilled in the wall at the required height, and then the dowel bushings are inserted into them. Self-tapping screws are screwed into the holes of the hook, securing it to the wall. The cabinet is hung on a bracket.
To assemble a built-in cabinet, frame structures are made from a bar or profile:
- on the floor, walls and ceiling, vertical and horizontal parts are attached to dowels at the level of the back side of the tank;
- make horizontal jumpers where the edges of the niche will be;
- cut plastic panels or gypsum board sheets according to the size of the part of the wall to be sewn up and fasten them with self-tapping screws to the frame bars;
- Inside the niche, rows of supports for shelves are placed: 2 at the height of the lower edge, focusing on the facade, 2 pieces each. for each shelf (on opposite walls);
- the bottom shelf should cover the entire surface of the niche inside, and the rest can be slightly narrower if doors are provided; all shelves are secured with self-tapping screws to the support bars;
- hinges are attached to the vertical bars on the sides of the niche and doors are hung;
- perform external finishing.
As a finishing coating for the walls of a built-in or other cabinet, paint and varnish materials, tiling, and film are used.
To connect plumbing fixtures to the water supply network, a flexible water supply is used. It is in demand when connecting faucets, showers, toilets and other water intake points, and significantly simplifies the installation process. Flexible connections are also used when installing gas equipment. It differs from similar water devices in its manufacturing technology and special safety requirements.
Characteristics and types
The flexible hose for connecting plumbing is a hose of different lengths made of non-toxic synthetic rubber. Thanks to the elasticity and softness of the material, it easily takes the desired position and allows installation in hard-to-reach places. To protect the flexible hose, there is an upper reinforcing layer in the form of a braid, which is made from the following materials:
- Aluminum. Such models can withstand no more than +80 °C and retain functionality for 3 years. At high humidity, aluminum braiding is prone to rust.
- Of stainless steel. Thanks to this reinforcing layer, the service life of the flexible water line is at least 10 years, and the maximum temperature of the transported medium is +95 °C.
- Nylon. This braid is used for the manufacture of reinforced models that can withstand temperatures up to +110 °C and are designed for intensive use for 15 years.
The fasteners used are nut-nut and nut-fitting pairs, which are made of brass or stainless steel. Devices with different permissible temperatures differ in the color of the braid. Blue ones are used for connecting to a pipeline with cold water, and red ones for connecting to hot water.
When choosing a water line, you need to pay attention to its elasticity, reliability of fasteners and purpose. It is also mandatory to have a certificate that prevents the rubber from releasing toxic components during operation.
Features of gas connections
When connecting gas stoves, water heaters and other types of equipment, flexible hoses are also used. Unlike water models, they are yellow and are not tested for environmental safety. For fixation, end steel or aluminum reinforcement is used. There are the following types of devices for connecting gas appliances:
- PVC hoses reinforced with polyester thread;
- made of synthetic rubber with stainless steel braid;
- bellows, made in the form of a corrugated stainless steel tube.

The Santekhkomplekt holding offers engineering equipment, fittings, plumbing fixtures and devices for connecting them to communications. The assortment is represented by products and materials from well-known foreign and domestic manufacturers. Discounts apply for bulk purchases, and product quality is confirmed by standard certificates. For information support and assistance, each client is assigned a personal manager. The ability to arrange delivery within Moscow and to other regions of the Russian Federation allows you to quickly receive the purchased goods without unnecessary hassle.
Drainage is a drainage and drainage measure to remove excess groundwater.
If water does not leave the site for a long time, the soil becomes gleyed, if shrubs and trees quickly disappear (get wet), you need to urgently take action and drain the site.

Causes of soil waterlogging
There are several reasons for soil waterlogging:
- clay heavy soil structure with poor water permeability;
- aquifer in the form of gray-green and red-brown clays is located close to the surface;
- high groundwater table;
- technogenic factors (construction of roads, pipelines, various objects) that interfere with natural drainage;
- disruption of the water balance by the construction of irrigation systems;
- The landscape area is located in a lowland, ravine, or hollow. In this case, precipitation and the influx of water from higher places play a big role.
What are the consequences of excess moisture in the soil?
You can see the results of this phenomenon yourself - trees and shrubs die. Why is this happening?
- the oxygen content in the soil decreases and the carbon dioxide content increases, which leads to disruption of air exchange processes, water regime and nutritional regime in the soil;
- oxygen starvation of the root-forming layer occurs, which leads to the death of plant roots;
- the supply of macro and microelements by plants (nitrogen, phosphorus, potassium, etc.) is disrupted, because excess water washes out mobile forms of elements from the soil, and they become unavailable for absorption;
- intensive breakdown of proteins occurs and, accordingly, the processes of decay are activated.
Plants can tell you at what level groundwater lies
Take a close look at the flora of your area. The species inhabiting it will tell you at what depth the ground water layers are located:
- perched water - it is best to dig a reservoir in this place;
- at a depth of up to 0.5 m - marigold, horsetails, varieties of sedges grow - bladderwrack, holly, foxweed, Langsdorff's reed;
- at a depth of 0.5 m to 1 m - meadowsweet, canary grass, ;
- from 1 m to 1.5 m – favorable conditions for meadow fescue, bluegrass, mouse peas, rank;
- from 1.5 m - wheatgrass, clover, wormwood, plantain.
What is important to know when planning site drainage
Each group of plants has its own moisture needs:
- with a groundwater depth of 0.5 to 1 m, vegetables and annual flowers can grow in high beds;
- depth of water layer up to 1.5 m is well tolerated by vegetables, grains, annuals and perennials (flowers), ornamental and fruit shrubs, trees on a dwarf rootstock;
- if the groundwater is more than 2 m deep, fruit trees can be grown;
- The optimal depth of groundwater for agriculture is from 3.5 m.
Is site drainage necessary?
Record your observations for at least some time. You yourself can understand how much drainage is needed.
Maybe it makes sense to simply redirect melt and sediment water along the bypass channel, rather than allowing it to flow through your site?
Perhaps it is necessary to design and equip a storm drain and improve the composition of the soil and this will be enough?
Or is it worth making a drainage system only for fruit and ornamental trees?
A specialist will give you the exact answer, and we strongly recommend calling him. But after reading this article, you will gain some awareness on this issue.
Upon completion of the technological and production tasks associated with the arrangement of a sewer system in an apartment building, industrial building, as well as in a private household, it is necessary to test the involved system using the forced flow method. This task is used to identify possible defects or improper installation of the entire involved sewerage part, and the test report for internal sewerage and drainage systems will be material evidence of the work on acceptance of the facility.

A visual inspection should be accompanied by inclusion in the test report of internal sewerage and drainage systems according to SNIP, which is currently represented by the current regulations of the “D” series appendix, which corresponds to SP 73.13330.2012 “Internal sanitary systems of a building”, recently a new one has been applied updated working edition according to SNiP 3.05.01-85.