Polycarbonate roofing. How to properly lay polycarbonate on a canopy - clear instructions. Required materials and tools
Read also
Polycarbonate is new building material and began to be used for the manufacture of roofs relatively recently. It is characterized by sufficient strength, transparency, stability and the ability quick installation. This is why the material is so popular. Also, its properties make it possible to make roofs of completely unimaginable shapes, and even an inexperienced builder can do this.
Features and characteristics of polycarbonate roofing
Polycarbonate is sheet polymer material, and surpasses many similar materials in its performance characteristics. For example, it is 200 times stronger than glass and 8 times stronger than plexiglass.
Polycarbonate can be of different colors
In addition to strength, its other characteristics are also valuable:
- light weight;
- flexibility;
- ease of processing and installation;
- fire resistance, chemicals and aggressive environment;
- impact resistance;
- long service life.
The scope of application of polycarbonate is quite wide, including it being suitable for roofing.
Polycarbonate is stronger than glass
Polycarbonate for roof
Polycarbonate allows you to increase the functionality of your own home. For example, if desired, you can equip the second floor, which will serve as a pavilion, greenhouse or greenhouse. This allows for rational use of space, which is especially important if the area of the site is too small to realize all your ideas.
Polycarbonate allows you to equip round roof, which will eliminate the retention of snow and rainwater on it, due to which the service life of such a roof increases many times.
The round roof will not allow snow to linger
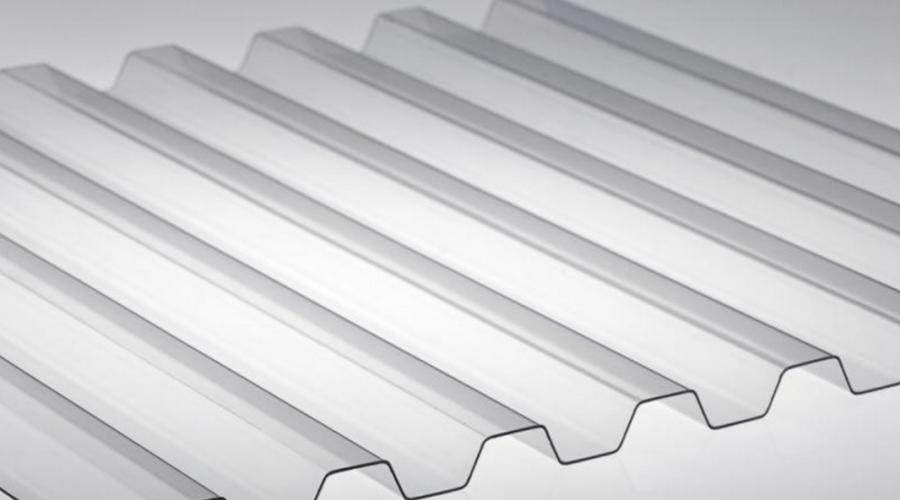
Polycarbonate for the roof is a material with a multi-chamber cellular structure, which is formed by several stiffening ribs. This type of material is called honeycomb because it resembles the honeycomb of bees.
There are other types:

This material may have different thickness, and for making a roof various buildings this parameter is very important:
- for a private house, you can use polycarbonate with a thickness of 8 or 16 mm (the second option is suitable for arranging surfaces with large area, since it can withstand significant loads);
- for canopies, garages or terraces, material with a thickness of 8 mm is suitable;
- greenhouses and canopies can be made from 3.5 and 4 mm polycarbonate.
You can also choose a color, and this parameter affects performance characteristics material:

Video: how to choose a good polycarbonate
Polycarbonate roof for home
A polycarbonate roof is erected only over those rooms that do not require the installation of an insulated roofing pie. In case of residential building this is most often attic spaces, terraces, attics or balconies. The shape of the roof can be absolutely any, since the material is quite flexible and allows the construction of various structures.
Polycarbonate can be used for attic or attic roofs
The peculiarity of a polycarbonate roof for a home is that it does not require any arrangement rafter system in its classical sense. In addition to the rafters, profiles are installed and the frame is formed. Polycarbonate profiles can be detachable or non-detachable. They are characterized by increased tightness and strength, low weight, protection from ultraviolet rays, and they can also be selected in a color that matches the main fabric.
The process of installing a polycarbonate roof on a residential building occurs according to the following plan:
- Installation of rafters. It is recommended to use timber with a cross section of 60*40 mm or 60*80 mm. Install at a distance of 1.01 m if these are central rafters, and 1.04 m between the side rafters.
To install polycarbonate you need to install profiles
- Installation of profiles. They need to be attached to the end and connecting profiles. Additionally, it is recommended to fix the limiters. They should be placed at a distance of 2 cm from the edges.
Sheets can be joined using profiles or sealant
- End protection. Side surfaces need to be protected from exposure to ultraviolet rays with tape. Moreover, the upper part can be covered with ordinary tape, and the lower part with perforated tape.
The ends of the polycarbonate must be sealed with tape
- Laying the material. After installing the frame, the polycarbonate sheets should be mounted directly. This must be done in such a way that the joints are airtight. This will make the roof structure waterproof. Additionally, the seams can be finished with waterproofing mastic.
- Fastening covers and plugs.
Polycarbonate roof for garage
Separately, polycarbonate roofs for garages are not erected. Most often, a full-fledged structure is built from this material, which can have completely different shapes. To install the structure you need:
- Remove part of the soil to a depth of 30–35 cm.
- Install the formwork, which is recommended to be reinforced with supports, and then cover the structure with film. Additionally, this structure can be insulated.
- Make holes for the pillars 1 m deep. The diameter of the wells can be 20 cm. In these holes you need to install pillars, which can be made from asbestos-cement pipes.
- Now we need to prepare the site for the garage itself. It needs to be covered with sand, and it needs to be moistened and compacted thoroughly. Next, the site should be filled cement mortar, and the pipes also need to be filled. After this, you need to install plates in the pipes and leave the structure to harden for several days.
Asbestos-cement pillars are suitable for the garage foundation
- After the concrete has hardened, attach to the plates bottom trim. To do this, it is recommended to take boards with a cross-section of 15*5 cm. You need to fasten them on an edge, two at a time.
- Install wall studs.
- Do top harness.
- Cover the entire structure with sheets of cellular polycarbonate.
- Install vertical beams for the roof, on which you need to attach rafters and sheathing directly to polycarbonate sheets.
- Remove the film from the material.
After installation, the film must be removed from the polycarbonate
Polycarbonate roof for terrace
For the roof of the terrace, you can use lighter polycarbonate, which is much cheaper, which means the whole structure will be democratic.
A polycarbonate roof will add the necessary light to the terrace and protect it from rain
An arched roof is most often built over the terrace. It's very easy to do:
- Manufacture elements of the rafter system. They can be made of metal or wood. Treat these elements with special compounds to protect them from moisture.
- Install the rafters on the top frame of the terrace. Self-tapping screws can be used for fastening.
- Cut the polycarbonate sheets into pieces of the required size.
- Drill holes in the material for fastening. It is recommended to install them every 30–40 cm. The diameter of the holes should be 3–5 mm larger than the diameter of the screws. This is necessary to ensure that the polycarbonate is not damaged as a result of thermal expansion.
Do not overtighten screws on polycarbonate
- To the extreme rafter leg attach the profile, insert the first sheet of polycarbonate into it. Remember that they need to be mounted lengthwise, not across. Polycarbonate sheets must be fixed with special galvanized self-tapping screws, and the attachment point must be protected with thermal washers or rubber seals. This must be done, otherwise water will flow into the holes.
Stiffening ribs should be placed along the rafters
- The bottom of the material must be sealed with perforated tape, otherwise debris will accumulate in the cavities.
For the ends you can use regular and perforated tape
Video: rules for installing cellular polycarbonate
Polycarbonate roofing tool
Working with polycarbonate is only possible if you have the following special tools:
- Circular saw or grinder. This tool can only be used to cut thick polycarbonate. You can make an even cut if you fix the sheet on two fiberboard sheets, and the cut line must exactly coincide with the joint line of the two fiberboard boards. Work can be carried out in a circle on metal with a diameter of 25 cm, and it is recommended to adjust the rotation speed of the disk and set it at 4000 rpm. Before cutting, it is recommended to moisten the polycarbonate sheet with water, and after work, treat the cut area with fine sandpaper.
To cut polycarbonate you will need a grinder or jigsaw
- Electric jigsaw. This tool is ideal for cutting polycarbonate if the roof is complex shape. Moreover, you can work even with the most thin material, it can be cut several sheets at a time. To do this, you need to lay two boards on the cardboard with a slight gap (no more than 5 mm). Place a sheet of polycarbonate plastic on them and secure. To cut, insert a carbide metal file into the jigsaw, and you need to choose one that has frequent and low teeth.
Together with a jigsaw, you need to use a file with fine, frequent teeth.
- Stationery knife. When using this tool, the cut will be perfectly straight, but you won’t be able to make it quickly. And this is the only drawback. To cut a polycarbonate sheet, you need to make a mark with a knife, placing it on a flat surface. Next, follow the markings and make a cut along the stiffener rib. Make a fold along the cut line and cut through the bottom layer of plastic. In case of cutting monolithic polycarbonate This procedure can be carried out without bending, just run a knife along the guide.
It will take a long time to cut polycarbonate with a stationery knife.
- Hacksaw. This tool is recommended to be used only if there is no other tool at hand and there is no way to get it. If you do it carelessly, you can easily damage the sheet. If, however, there is no other way out, then you need to fix the polycarbonate sheet, make a cut according to the markings made earlier, and then process the edges stationery knife and sandpaper.
A hacksaw cannot be called the most the best tool for cutting polycarbonate
- Milling cutters. Use this tool if you want to get an openwork pattern on plastic sheet. With it, you can round corners, cut edges, cut curved elements, and engrave. To do this, you need to fix the polycarbonate sheet on a flat surface, install the cutter in manual machine, insert the roller on top. When cutting out curved shapes, you need to prepare cardboard stencils in advance. Additionally, care must be taken to remove sawdust in a timely manner, as they can damage the material itself. To do this, you can install a fan that will immediately blow them away during operation.
It is strictly forbidden to use pruning shears, guillotine knives, or blades with high teeth. This will not give you the desired result. The cut will be wavy, and it will be very difficult to mount such a sheet. Also, under no circumstances should you make a cut and then break the sheet. This cut will be uneven.
Video: how to cut cellular polycarbonate
Rules for installing a polycarbonate roof
When arranging a roof made of polycarbonate plastic, you need to follow certain rules:
- seams can be sealed exclusively with neutral compounds; polyurea is ideal for this;
- polycarbonate sheets have a special coating from ultraviolet radiation, it must be directed upward for the protection to be effective;
- holes for self-tapping screws can be made not round, but oval, this will ensure thermal play;
- when installing the roof, it is necessary to prevent people from walking on the material;
- It is recommended to pre-paint metal parts White color, this will not allow the polycarbonate to heat up locally;
- It is necessary to exclude direct contact of polycarbonate plastic with wood and metal; rubber gaskets must be placed between these materials.
Polycarbonate roof slope
There are also features in the arrangement of the sheathing, which is capable of giving the roof the required slope. The minimum slope should be 30 degrees. Despite the fact that the material is considered durable, it is still not able to withstand heavy snow loads. The optimal value is 50.
The polycarbonate roof should be as steep as possible
The calculation of the parameter largely depends on the climate of your area. How more snow falls per year, the steeper the roof should be. In this case, an arched structure is considered ideal, as it practically does not retain snow on its surface. And if we take into account the even surface of the material, then even an angle of 30 degrees is sometimes enough.
Features of installing a polycarbonate roof
The service life of a polycarbonate roof depends not only on the material used, but also on the correct installation.
Polycarbonate roof sealing
Sealing seams and ends of polycarbonate is very important stage arrangement of a plastic roof. There are different sealants that can be used when working with polycarbonate:

Mistakes when installing a polycarbonate roof
Despite the ease of installation polycarbonate sheets, some errors may still occur:
- The sheathing was chosen incorrectly and did not match the thickness of the polycarbonate. The distance between the rafters must be strictly observed and not be excessively large. The result of this may be deflection of the sheets and their damage.
- Usage aluminum profiles as carriers. Not all of them are able to cope with such a load. That is why it is necessary to attach the sheets to the rafters.
- Strong fixation of screws. As a result, when exposed to the sun, the sheet expands and breaks, since there is no reserve for this.
- No thermal washers or rubber gaskets. Because of this, the polycarbonate plastic sheet may be damaged at the junction.
- The protective shipping film has not been removed. If this is not done immediately after installation, it will gradually peel off during the operation of the roof and damage it. appearance.
Features of polycarbonate roof operation
Polycarbonate is a durable material, but only if correct use designs based on it. After installing a polycarbonate roof, you need to ensure its proper care:
- IN summer period periodically wipe the roof, promptly eliminate structural defects if they appear, and clean from dirt and debris. But under no circumstances should you use abrasive chemicals or powder to clean the surface. You can wash the roof only when the material is not heated by the sun.
- Periodically adjust the pressure level of the thermal washers.
- IN winter time remove snow, but under no circumstances scrape it off with hard objects, as this may damage the integrity of the polycarbonate.
It is strictly prohibited to clean the roof surface with products intended for cleaning cars. This also applies to special shampoos and brushes with long handles.
The polycarbonate roof must be cleaned on time
Lifespan of a polycarbonate roof
The average service life of polycarbonate is considered to be 10 years, but it can be significantly increased if you carefully follow the rules:
- storage before installation (this should be done in a well-heated room in original packaging and protective film, and the packages should not be stacked close to each other);
- transportation (they can only be transported in a lying position in the original packaging, and they must be carefully secured);
- installation;
- operation.
Polycarbonate roof repair
The service life of a polycarbonate roof can be extended if structural defects and repairs are addressed in a timely manner. They may consist of either replacing the damaged sheet, or eliminating the damaged integrity of the sheet if the crack is minor.
If a small crack or hole has formed on the sheet, then you can:
- patch up silicone sealant(it can be matched to the color of the material itself);
- tighten with thermal washers and self-tapping screws.
If the damage is significant, it is worth replacing the damaged sheet with a new one. This must be done in the following sequence:
- Remove the damaged sheet in such a way as not to damage nearby material.
- Remove the sealant from the rafters, and then apply a new layer.
- Lay down new leaf polycarbonate, you need to make holes for fastenings on it in advance. Secure with self-tapping screws, insulating them with thermal washers.
In the event that the outer sheet needs to be replaced, the operation scheme is almost the same, but the material must be inserted into the limiting profile.
Video: replacing old polycarbonate on the roof
Polycarbonate is a very reliable and practical material that can be used for arranging the roofs of gazebos, greenhouses, terraces, canopies and even residential buildings. And all because of the attractive cost and the ability to do the installation yourself.
A “house” greenhouse made of glass, film or polycarbonate can often be seen on summer cottages. This type of greenhouse is not without its drawbacks: it is more difficult to build than a lean-to or arched greenhouse; it requires a lot of material and a rigid frame. Why does a greenhouse with a gable roof appear so often on our sites?
- This is a durable, rigid structure.
- Water does not linger on the roof, it drains easily and does not create additional load on the frame.
- The design allows you to grow plants of different heights, from small to tall.
- You can build a year-round option with heating and lighting.
- You can make vents in the greenhouse for effective ventilation.
- You can build a greenhouse according to Mittleider with a special ventilation system.
Types of greenhouses
A greenhouse with a gable roof can be of two types:

Greenhouse covering
Depending on the type of greenhouse, choose different materials. The coating can be
- polyethylene film,
- glass,
- polycarbonate sheets.
Polyethylene
This is the cheapest of the listed materials; it is used for summer options greenhouses Polyethylene film It transmits and scatters light well, but this material deteriorates quite quickly from ultraviolet radiation, so the film coating has to be changed every year.

Glass
This traditional material for covering greenhouses, it transmits light well and retains heat. Disadvantages: heavy weight, fragility, difficulty of installation.

Polycarbonate
Polycarbonate is replacing glass - structures made from it are light and durable. Cellular polycarbonate is a slab of two sheets of plastic with stiffening ribs between them. It is available in two sizes: 2.1 * 2.6 m and 2.1 * 12 m. There is also a monolithic version, but it is more expensive, so cellular (cellular) polycarbonate is usually used for greenhouses. In addition, the air inside the cellular sheets helps retain heat.

Polycarbonate greenhouses with a gable roof are now gaining popularity; thanks to the lightness of this material, it is much easier to build a greenhouse with your own hands than a traditional glass greenhouse. In addition, polycarbonate has an ultraviolet protection coating, which extends its service life.

When choosing a polycarbonate sheet, you need to consider several points.

- The thicker the sheet, the better it retains heat, but the less light it transmits.
- It is not advisable to use lightweight polycarbonate (less than 4 mm thick) for greenhouses. It will be cheaper, but justified only for greenhouses small sizes. For large structures, the price of the frame will negate all savings, especially since thin polycarbonate may not withstand snow loads in winter.
- The optimal sheet thickness is 6 mm or more. If you are planning a heated winter greenhouse, then it is better to take material with a thickness of 15 mm.
- The price/quality ratio is the best from Russian manufacturers.
The greenhouse frame can be made of
- profiled pipes,
- galvanized metal profile.
- wooden beam,
- plastic profile.

The last option is suitable if you plan to build a summer greenhouse from film. For a more durable structure, profiled steel pipes, metal profile or wooden beam.
Profiled pipes
They are made of stainless or galvanized steel. If the pipes are stainless, then there is no need to cover them with anything, otherwise they need to be painted. The pipes are connected to each other by welding or using tees and bolted connections. This is the most reliable option, especially if you are using thick greenhouse polycarbonate. The disadvantage of this material is high price and heavy weight.

Metallic profile
You can also use a galvanized M-shaped, U-shaped or V-shaped profile. It weighs less than pipes and costs less. A gable greenhouse made of profile and thin polycarbonate can do without a foundation, which also reduces costs. To do this, simply take a profile 80 cm longer than the height of the greenhouse and drive it into the ground.

Wooden beam

It's less durable material, how metal pipes. The tree must be protected from moisture and pests by impregnating it with appropriate means, but in special conditions greenhouses, they will be ineffective, and if effective, they can be poisonous.
Important! It is better to choose a wooden frame if it is possible to regularly care for it.
Where to put the greenhouse
Typically, greenhouses are placed so that their long side is located from west to east. It is better to place it in an open, well-lit place.

Important! If it is not possible to position the greenhouse so that it is illuminated by the sun all day, choose a place that receives sunlight in the first half of the day - it is the morning sun that is most beneficial for plants.
If there are two or more greenhouses on the site, position them so that they do not block the light from each other.
Construction stages
Design
For easy water drainage gable roof made of polycarbonate on the greenhouse should have an angle between 24 and 30 degrees. Such a roof does not require a particularly complex rafter system. Typical dimensions of a greenhouse with a gable roof:
- width - 2.5-3 m;
- length 5-7 m;
- maximum height - 2.5 m.
- Recommended door sizes are 180*80 cm.
- An example drawing with dimensions is shown below.

Foundation
For easy wooden greenhouse will be sufficient columnar foundation. It requires 6 concrete pillars 3 m high and 120 mm wide. 4 pillars are placed in the corners, two in the middle of the long sides. They are dug into the ground to a depth of 0.5 m and filled with concrete. Remember that in hot weather, concrete must be periodically moistened with water while it hardens to prevent cracks from forming.
For a heavier greenhouse, especially year-round and big size, you will need a more serious foundation: strip concrete, brick or rubble stone.
For a strip base, dig a ditch 30-40 cm deep, the base should rise 20-25 cm above the ground.

To attach a wooden frame to the foundation after it hardens, install a frame made of timber with a cross-section of at least 50*50 mm or install vertical wooden posts before pouring concrete. Before installation, all wooden parts must be protected from rotting by impregnation with an antiseptic.
The metal frame is attached to the base using brackets, corners and hardware. It can also be attached to a wooden frame.
Frame
There are two options here: either assemble the entire frame completely next to the installation site, and then transfer it to the foundation and attach it to wooden harness, or, if you have already installed wooden posts, attach the remaining elements to them.

If you choose a wooden frame, use 100mm thick timber. If the posts are already installed in the foundation, then the beams must be attached at the top of the posts and in the middle. The rafters are placed at a distance of 0.5 m. To fasten the beams together, use corners and screws, not nails.
For greenhouses made of polycarbonate and profile pipe The frame posts and rafters are placed at a distance of 0.7 or 1 m. The main posts, rafters and ridge beams use a profile measuring 20*40 mm, for other elements - 20*20 mm.
Important! Gable roof polycarbonate greenhouses should be designed so that the joint of the sheets falls on the profile.
When sheathing the frame, move from top to bottom. Windows and doors are done last.
Cutting and installation of polycarbonate
It is important to correctly outline the sheets of material and then carefully cut them. For cutting, use special scissors for polycarbonate or a jigsaw. Careful cutting will avoid waste of material. It is especially important to accurately cut out the sheets for the gables.
The durability of a gable greenhouse made of polycarbonate sheets depends on proper installation.
Attention! Keep in mind that the stiffening ribs of cellular polycarbonate must be finished design positioned vertically. It is also important not to mix up the sides of the sheet and secure it to the outside with the side with the UV-protective coating.
Polycarbonate tends to shrink and expand with temperature changes, so the holes for fasteners should be slightly larger than the diameter of the screws or self-tapping screws. A rubber gasket must be placed between the screw head and the sheet. If you are making a frame from wood, then you also need to put a rubber gasket between the wood and the polycarbonate at the attachment point. The sheets are fastened together using connecting strips.

To protect open edges, use a vapor-permeable profile to keep water and debris out, and leave the bottom edge open to allow condensation to drain.
The video below shows how to build a portable gable greenhouse.
Year-round greenhouse - lighting and heating
For year-round cultivation For vegetables and herbs, the greenhouse must be illuminated and heated, because plants need 12-16 hours of daylight.

Metal halide or LED lamps are best for plants, although they are quite expensive. Mercury lamps are also suitable, however, you will need a lot of them. They provide the appropriate spectrum of light.
When choosing lamps for lighting, consider not only the spectrum, but also heat transfer. Fluorescent lamps They fit the spectrum, but their heat transfer is low.
Heating using hot water And solid fuel. Also for the greenhouse on personal plot can be used infrared lamps. They not only provide heat, but also kill fungus. The greenhouse is also often heated by connecting it to the home heating system.
The most popular roofing material for gazebos, greenhouses and verandas is cellular polycarbonate. And for good reason, because he copes with this task very well. The polycarbonate roof perfectly transmits light and provides reliable protection from precipitation.
Positive qualities of polycarbonate
It is perhaps difficult to find material that has only positive qualities. There are no ideal products. And we do not consider this reinforced plastic to be an exception to the rule.

From positive qualities The following can be noted:
- Lightness and strength. Thanks to the cellular structure, even 24 mm of thickness of this material in combination with the lathing (cell size 75x150 cm) cellular polycarbonate can withstand a load of up to 200 kg per 1 m2. This safety margin is quite enough to withstand winter snowfalls and icing.
- Low thermal conductivity. The honeycomb structure forms cavities filled with air. They create air insulation inside the material. As in double-glazed windows. In addition to this, plastic itself has lower thermal conductivity than glass. This property allows you to successfully use this material for the construction of greenhouses.
- Good optical properties. Polycarbonate panels can be painted in various colors. And depending on the color, they transmit from 11 to 85% sun rays. In addition to this, it is capable of scattering light. Does not transmit ultraviolet radiation.
- High degree of safety and impact resistance. Due to its ability to withstand significant impact loads, 200 times higher than the characteristics of glass, this type of plastic is used for the manufacture of protective and armored vandal-proof glass. Even if the material breaks, it does not form sharp fragments. Therefore, it is gladly used for the construction of public transport stops. In addition, polycarbonate also has high fire safety.
- Large, easy to use sizes. The construction of glass roofs and canopies requires the creation of numerous individual frames. Or use rather tricky ones suspension mechanisms and fastenings. Otherwise, the appearance of the structure suffers. Unlike glass, cellular plastic does not create such inconvenience. dimensions polycarbonate sheets can reach 1200 x 105 cm. And this is with 44 kg of weight for a 24 mm sheet thickness.
- Ease installation work. Due to its low weight, sufficient strength and large dimensions, a team of assistants is not required to install a polycarbonate roof. One master who knows his business is enough.
- Heat resistance. This material “feels well” at temperatures ranging from -40 to +120 degrees.
- Reasonable prices.
- Ease of processing.
Disadvantages of polycarbonate
When choosing this material, you need to take into account the fact that large hail can penetrate polycarbonate roofing. Although currently manufacturers have learned to combat this problem with the help of a protective film coating.
One more significant drawback is that this plastic has a high coefficient of thermal expansion.
Polycarbonate roof rafters

Despite the fact that polycarbonate is quite lightweight material, yet it’s worth thinking through and building for it load-bearing structure. The lathing is made of thin profile. You can use a square with a cross section of 20 x 20 mm or 20 x 40 mm. Usually this is quite enough for the roof to gain the necessary strength.
The arched shape of the roof significantly increases the rigidity of the structure and allows it to withstand more significant loads. This feature is fully exploited when using polycarbonate. 16mm sheet of honeycomb plastic laid on arched design, having a pitch of 125 cm, with a radius of curvature of 240 cm, does not require the construction of sheathing. Just guides of individual arched supports connected to each other are enough.
When designing rafters for a polycarbonate roof, you need to remember that the slope for the slope should be 45˚ or more. Optimal parameter is the angle of inclination of the rafters 50˚.
Features of polycarbonate installation

Polycarbonate sheets are attached to the rafters, so their pitch must correspond to the parameters of the sheets.
To prevent dust and other contaminants from accumulating in the polycarbonate cavities, as well as to insulate from cold winter air, the ends of the sheets must be sealed with silicone. If possible, you can use special plugs. In this way, you can obtain excellent sealing and thermal insulation of the material, bringing its performance closer to that of a double-glazed window.
The sheets are attached to the rafters and supporting structures with self-tapping screws and press washers.
When installing, it is worth considering the ability of plastic to expand in heat. Therefore, expansion joints are provided. They are performed at the junctions of individual plates and are practically invisible. It is enough to leave a gap of about 5 mm between the sheets. Sometimes such seams do more, as a result of which they also perform a decorative function, creating elegant roof reliefs.
Cutting polycarbonate

We have already noted the fact that the surface of plastic is easily damaged. Therefore, you need to cut the sheets very carefully, making sure that the protective shockproof film remains intact.
A grinder and a jigsaw with a fine-toothed file can handle cutting polycarbonate. When working with a jigsaw, its platform touching the material is glued soft material. This will preserve the surface of the sheet from unwanted damage.
Thanks to your unique properties, cellular polycarbonate is great solution in the manufacture of roofs, canopies and greenhouses. The main thing is to correctly develop the roof design and take into account the characteristics of the material.
Create, live and enjoy every moment. And may your home always remain a place of joy and satisfaction.
Polycarbonate today is widely used in construction industry. The material is produced by melting plastic granules and passing the resulting mass through a special mold - a die. As a result of this technology, sheets are obtained that have a cellular structure, in which several polycarbonate sheets are connected by means of longitudinal stiffeners. Polycarbonate is credited with universal qualities; in the modern construction industry it is the optimal substitute for glass. Let's look at the features of application and installation in this article.
One of the areas of application of this material is the installation of roofs. Material suitable for installation roofing structures the most various forms. It can be a gable, single-pitch polycarbonate roof or a hip roof.
Polycarbonate can be used to cover not only the roof of a living space, because... This suitable option and for the terrace. It will make it more comfortable and cozy. The terrace area increases usable area at home and at the same time allows you to enjoy a good rest in nature. The roof of the terrace should be a continuation of the architectural ensemble of the main building. Mostly she builds without an attic. The main function of a terrace roof is to protect the site from bright sun and precipitation. Polycarbonate will cope with this task successfully.
Roofs made of polycarbonate. Photo:


Types of polycarbonate
You can make a polycarbonate roof from two of its varieties:
- Material monolithic type used for arranging curved and flat shapes. This polycarbonate has significant advantages, the number of which is not inferior to glass. But at the same time it also has a drawback that prevents it wide application- this is a high cost.
- Structured polycarbonate, also called cellular, is more affordable financially and therefore has gained great popularity. This material is also called light-transmitting plastic. A roof made on its basis will allow you to stay on the terrace in hot weather and not feel discomfort from the sun's rays.
Advantages polycarbonate material:
- high thermal insulation rates;
- light weight, which simplifies the installation process;
- elasticity, thanks to which you can independently install arched ceilings without the help of specialists;
- resistance to various chemical influences;
- long period of operation – up to 20 years;
- low flammability - the material is able to restrain the spread of fire in the event of fire;
- ability to maintain operational properties at temperatures from -40ºС to +120ºС.

Which polycarbonate to choose for the roof?
High-quality polycarbonate is produced on the basis of primary granulate. But there are technical specifications, which allow the manufacturer to add secondary raw materials to products. The content of the last component can reach 70% of the total mass of polycarbonate sheets. Such material can be distinguished by its low cost, but at the same time it also has low performance qualities. Define quality products A visual inspection will help:
- A high-quality sheet has an absolutely smooth surface.
- If bubbles, inclusions or other defects are observed on the surface of the material, it is not recommended to purchase such polycarbonate.
- Also, during the selection process, you should take into account the weight of the sheets. Polycarbonate for the roof, the thickness of which is 0.4 cm, should weigh 0.8 kg. The mass of sheets 1 cm thick is 1.7 kg.
- On sale you can find products marked “light”, which indicates that the weight of the material is 15% less than the established norm. When working with these sheets, you cannot use standard methods determination of atmospheric loads. The situation is complicated by the fact that not all manufacturers put this label. This material can be distinguished by its low cost.
- When purchasing, you must pay attention to the availability protective film. Its function is to protect sheets from negative influence ultraviolet rays. If polycarbonate does not have this coating, it will lose its performance characteristics without serving for even one year.
- The thickness of the film should also be taken into account. If this indicator does not exceed 35 microns, the material will last no more than 5 years. With a thickness of 60 microns, the sheets will retain their properties for 10 years.
- You can determine the thickness of the protective coating by reading the certificate that comes with the product. This is impossible to do visually.
In general, according to quality indicators, the material is divided into 4 categories:
- “premium”, which can last for 20 years;
- “elite” – the service period is about 12 years;
- “optimal” – maintains performance characteristics for 10 years;
- “economical” - will last for 5-8 years.

- Polycarbonate requires special storage conditions. It should only be kept in a dry room.
- Before installation, it is recommended to seal the cells with adhesive aluminum tape or sealant. This will help prevent dust and moisture from accumulating.
- If condensation is found inside the material, it can be removed by blowing the sheets with compressed air.
- There is no need to remove the protective coating from the surface before installation.
- Polycarbonate cannot be covered with polyester or metallized film, since the contact of these materials will result in the formation of condensation. As a result, the film and sheets will lose their performance qualities.
- During installation work, do not step on polycarbonate. Failure to comply with this requirement will result in the formation of cracks on the surface of the material. For movement, special ladders should be installed on the sheathing or rafters.
- A polycarbonate roof cannot be completely flat. The minimum acceptable slope should be 5%.
- If the material is inserted into frames, the coefficient of linear expansion must be taken into account when designing their size. This indicator is determined based on the thickness of the sheet.
- When working with material, you may be faced with the need to use not entire sheets, but individual fragments. This problem can be easily solved. Polycarbonate sheets lend themselves well to cutting, welding, gluing, and drilling. A jigsaw, hand saw or hacksaw is used for cutting, and an automatic or automatic one is used to form holes. hand drill equipped with a metal drill.
- Polycarbonate makes it possible to install roofs non-standard forms. For this purpose, cold, vacuum and thermal forming methods are used. When transporting and storing the material, mechanical impact should be avoided.
A do-it-yourself polycarbonate roof must be made in such a way that snow cover can be freely removed from its surface. Also, the structure must have sufficient strength. The roof can be given a wide variety of shapes. Initially, the frame is installed on which the sheets are installed. For frame structure use profile elements made of steel, aluminum or polycarbonate.
The latter option has several advantages over the first two materials. Profiled polycarbonate for the roof allows you to install the roof without visible connection areas. Also, this material has tightness, low weight, and high strength. This creates the visual effect of a roof floating above the building.
Polycarbonate profiles are divided into two types: detachable and one-piece. There are cavities inside the polycarbonate material. The sheets should be placed so that the arrangement of the cavities is parallel to the direction of the structure. If this condition ignored, the material may become deformed during operation.

How to cover a roof with polycarbonate with your own hands
For installation you will need:
- boards;
- beams with a cross section of 40-60 mm;
- hammer;
- axe;
- nails, self-tapping screws, screws;
- saw;
- building level;
- screwdriver;
- scotch;
- polycarbonate sheets;
- mastic.
The installation process is performed in the following sequence of actions:
- The work begins with the installation of the frame structure. For this purpose, you can use one of the three types of profiles described above.
- The sheets have standard width– 2.10 m. The space between the beams should not be greater than this distance. In order to be able to join several sheets, the gap between the rafters should be calculated so that the junction of the sheets is in the central part of the bar.
- The next step after installing the rafters is installing the frame. If metal profiles are used, the end sides of the cut sheets must be sealed with tape. This will prevent debris and moisture from getting into the grooves.
- Using polycarbonate profile this measure is not necessary, since these profile elements are initially equipped with a special film. It prevents various contaminants from penetrating into the cells of the sheet that have opened due to pruning.
- If the profile is collapsible, installation is performed in the following order:
- Initially, the profile parts are attached to the bars with the lower part;
- after which polycarbonate is mounted, on which the upper part of the frame structure is installed.
- The non-separable type profile is immediately attached to the rafters using self-tapping screws. On these fasteners, thermal washers are located every 20-30 cm, to which the polycarbonate sheets will be installed.
- There are two ways to cover a roof with polycarbonate. The first involves a point method, in which fixation is carried out after 30 cm.
- According to the second, fixing profiles are used. The seam area must be treated with mastic. There is an inscription on the sheets. They should be placed on the frame so that the side with this inscription faces up. A compensation space of 5 mm is left between the sheets. Then the profile covers are secured and the plugs are attached.
- From the edges of the profile elements, limiters are installed, which are fixed with rivets.
- On last stage the side parts and the surface of the sheets are covered with tape. This will help protect the material from negative impact ultraviolet radiation. Regular tape is suitable for this purpose. Bottom part also needs a protective coating. In this case, you will need perforated tape that will prevent insects from entering the cavities.

Rules for cutting and drilling
Cutting sheets into fragments must be done as carefully as possible to avoid damage to the top protective layer. This procedure is carried out through circular saw or jigsaw. It is important to choose the optimal speed. If the cutting is done too slowly, it will cause chipping. Excessively high speed will result in overheating and melting of the polymer. Sheets should not vibrate when cutting, this will lead to the appearance of microcracks.
If fastening is carried out using self-tapping screws, you must first prepare holes in the sheets, the diameter of which should be 1-2 mm larger than the size of the fastening elements. To do this, use a drill for non-ferrous metals. Self-tapping screws should not be tightened to the maximum. Sheets will move under temperature changes. A polycarbonate roof for a terrace should be installed taking this condition into account.

Conclusion
Polycarbonate is an innovative material and is used in construction field relatively recently. But at the same time it is already actively used. This material is used for various purposes, one of which is the installation of roofs. It has all the properties necessary for a roofing material. Installation of polycarbonate sheets does not require qualified knowledge. You can do this yourself by first reading the instructions.
Roof made of polycarbonate. Video:
To protect the house from bad weather or make the garden more attractive, you need to build a roof over the balcony or make a gazebo. One of the most popular solutions is a polycarbonate roof.
Features of polycarbonate roofing
Today carbonate is actively used in construction due to its technical characteristics:
Despite its strength and flexibility, care should be taken when transporting it as the material may bend and deform. Polycarbonate is still inferior to glass in quality and requires more careful attention during storage and installation. Experts also talk about low abrasive resistance, that is, the ease of scratches and cracks.
But considering all the pros and cons, it should still be recognized that polycarbonate is now recognized as one of the best materials for the construction of roofs, greenhouses and installation of corridors.
 The polycarbonate roof does not transmit ultraviolet radiation, which will protect people indoors
When choosing polycarbonate, you will be offered several types to choose from. Polymer slabs vary in color, structure, thickness and some characteristics; in each subtype certain qualities predominate:
- Monolithic. A smooth material made from a single sheet, reminiscent of glass, but unlike the latter, it is lighter in weight.
- Cellular or cellular. One of the most affordable. Consists of several layers that connect special lines with voids. In cross-section, a sheet of such a polymer looks like a honeycomb. Thickness can be from 5 to 25 mm. Popular also due to its low price.
- Profiled. It has all the characteristics of a monolithic polymer, but is more durable. In addition, you can choose any suitable color, size and shape. However, it is significantly more expensive.
Video “Installation of cellular polycarbonate”
From this video you will learn how to properly make a roof from cellular polycarbonate.
Preparing for installation
Before starting work, you must prepare necessary tools. You should have a screwdriver, drill, welding machine, hacksaw, glue or liquid nails, screwdriver, gloves, screws, tape measure and level with you.
You must decide what type of roof you want to see in your yard.
There are several main options:
- Flat. This is a design with one plane and an angle of inclination of no more than 5°. Due to its shape, it is subject to a large load of snow and precipitation, so it is made only from a monolithic polymer.
- Sloping. This roof consists of several slabs that are attached at an angle of 30–40°.
- Arched. Honeycomb carbonate is excellent for this species.
- Dome. Honeycomb polymer is also used, but this type of roofing is more difficult to assemble on your own.
 A polycarbonate roof can have different shapes, each of them has its own nuances during construction
 Technology
A carbonate roof consists of two main elements: a frame, which can be made of wood or metal, and the roof itself. We suggest looking at an installation example pitched roof using cellular polycarbonate.
To get the job done as correctly and quickly as possible, you should start by preparing a project or drawing.
Drawing up a drawing
There are several options for drawing up a drawing:
- you can find them on the Internet and adjust them to your specifications;
- order from a specialist and assemble it yourself;
- calculate the project yourself.
 Before building a polycarbonate roof, you should make detailed drawing
 Installation of rafters
- You can make rafters for polymer from wood or metal profile. If you choose wood, you should first process the boards antiseptic to extend the life of the material. You can also change the shade with a special varnish.
- Next, you should install the boards vertically at a distance equal to the size of the polycarbonate plate.
- The joints of the polymer sheets should lie on the rafters.
- The transverse lathing is made of 50x20 mm bars. They are cut into the frame board laid on the end. As a result, you should get a reliable sheathing and strong, stable rafters.
 Make the rafters with high quality, as the stability of the entire polycarbonate roof structure depends on them
 Pin a profile
At the connection and fastening stage, it is important to select suitable profiles. The profile dimensions must match the thickness of the polymer sheet. If you chose metal rather than wood for the frame, it is better to seal the end parts of the sheets with tape.
The collapsible profile is attached in several steps: first the lower element, then installation of the panels and the upper part. Non-separable profile additional work does not require.
Cutting polymer panels and subsequent installation
Now you should cut the polymer into sheets and complete the installation.
This part of the work is performed according to the following algorithm:

So, when building a polycarbonate roof, you should carefully choose the type of material and type of roof you would like to see. Take the installation steps responsibly to ensure the result is high-quality, safe and durable.