Useful tips for the home. Useful tips for the home: how to make useful things with your own hands. How to make a garden bench
Despite the fact that in the modern rhythm of life we rarely manage to find time to prepare food, we still want to live in comfort and eat well. And to eat well, you need to know how to cook. Especially for you, we have collected recipes for the simplest home-cooked dishes, without which not a single person can live.
1. How to properly boil an egg
A perfectly hard-boiled egg should have a soft and bright yellow yolk, not pale or even bluish (bluish or greenish yolks indicate that the egg is overcooked).
To properly boil multiple eggs, you will need a saucepan large enough to hold all the eggs without them touching, but not so large that the eggs will move around in it. So, fill the pan with water - enough to cover the eggs when you add them. Bring the water to a boil and carefully lower the eggs into the boiling water. It is advisable to do this with a tablespoon so as not to get burned and not to drop the egg, damaging the shell. The eggs should boil for 8 minutes. After exactly 8 minutes, remove the eggs (also with a spoon), drain the hot water and fill the eggs with cold water (it is advisable to place them under running water). The result should be perfectly hard-boiled eggs.
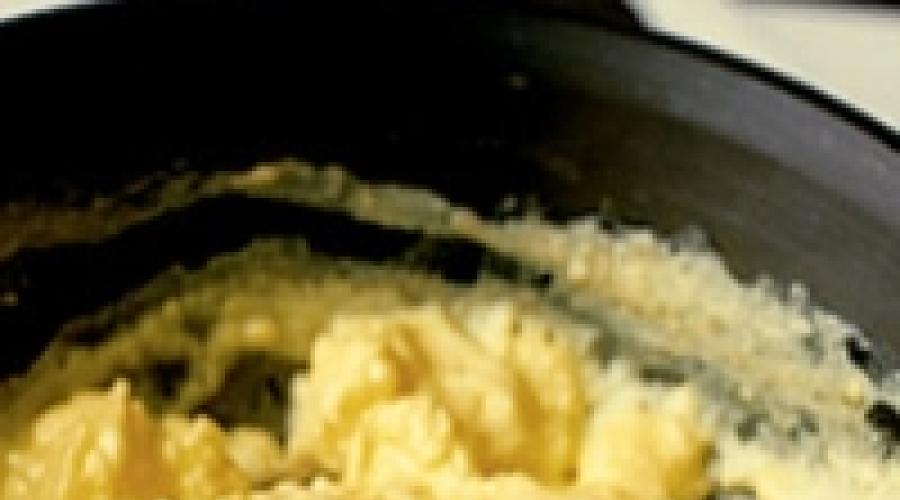
2. How to cook scrambled eggs
 It is best to cook scrambled eggs according to the French recipe, when the finished scrambled eggs have a semi-liquid sauce consistency (English scrambled eggs are dry, with a firmer consistency). Previously, cooks used a double boiler to prepare this type of scrambled egg so that the prepared dish had a thick consistency. We suggest using a faster method at the rate of 2-4 eggs per person.
Place 30-40 grams of butter in a medium-sized saucepan and place it over low heat. While the butter is melting, crack the eggs into a ceramic bowl. When the butter is completely melted (but it should not be boiling and the heat should not be too high), season the eggs thoroughly with salt and pepper, then beat them with a fork until smooth. At this stage, do not add anything to the eggs. Slowly pour the beaten eggs into the pan with the melted butter, stirring constantly. If the mixture does not thicken, you can increase the heat. Clumps of ready-made eggs should soon appear on the surface. Continue stirring until the eggs are completely cooked, then immediately remove the pan from the heat. Add another 20-30 grams of butter and stir until the butter has melted, then add 3-4 tablespoons of cream or sour cream (more if you prefer thinner eggs). If necessary, add more salt to taste.
3. How to cook an omelet
To cook a good omelette, you need to know only one rule - the omelette should not burn. To make an omelet you will need a small frying pan. Turn on medium heat and add a little butter to the heated frying pan. While the butter is melting, crack the eggs into a ceramic bowl, add salt and pepper to taste, and whisk until the yolks and whites are combined until smooth. When the butter is melted, pour the eggs into the pan. Using a wooden spoon, stir the omelette gently to prevent it from hardening and forming a crust. When the eggs are almost done, remove the pan from the heat and place on the grill for a few minutes to form a yellowish (but not brown!) crust on top. Remove the pan from the grill, fold the omelet in half and place on a plate. If desired, you can add cheese or cream to the omelet before placing the pan on the grill.
4. How to cook pasta
There is nothing complicated about making pasta. To do this, you will need a large saucepan - for example, the pan in which you usually prepare broth is ideal. Fill the pan halfway with cold water and salt well - this is necessary to highlight the taste of the pasta. Do not add oil or other ingredients to the water. Place the pan on the fire and bring the water to a boil. When the water boils, add the pasta to it. The water needs to be stirred from time to time to prevent the paste from sticking to the bottom of the pan and sticking together. Different types of pasta take different times to cook (but generally take about 8 minutes), so we recommend checking the pasta package for instructions. You need to check the readiness of the pasta two minutes before the time indicated on the package. To check if the pasta is ready, remove one piece of spaghetti (or other variety) and taste it. If the pasta is soft on the outside but firm on the inside, it is ready (this stage of cooking is called "al dente"). Drain some of the water in which the pasta was cooked into a separate container, after which the water can be drained, but not completely, otherwise the pasta will be too dry. There is no need to rinse the paste with running water. In Italy, pasta is often served with butter and Parmesan cheese. If you prefer a sauce, use the water you drained from the pasta to make it.
5. How to cook the perfect steak
 This is a French steak recipe, and the French love their steaks rare. So, you'll need a heavy, heavy-bottomed frying pan or grill rack. Place the frying pan or grate over the highest heat. Take a thick steak (at least 2cm thick) and lightly salt and pepper it on both sides. If you use a grill grate, grease the meat with sunflower oil, then the technology is the same. Pour one or two tablespoons of sunflower oil into a hot frying pan (enough to grease the surface of the pan). Now add 20-30 grams of butter. The butter should melt and boil. The bottom of the pan should be covered with a 1-2 mm layer of boiling butter. Place the steak in the pan and leave it undisturbed for a few minutes (depending on how well done you like your steak). The steak should not move around the pan, otherwise an appetizing crust will not form on it:
Almost raw: 1 minute per side
Half raw: 2-3 minutes per side
Medium: 4 minutes each side
Well done: 5-6 minutes per side
You can add more butter (if needed) before turning the steak over to the other side. Turn the steak over and don't touch it until it's time to cook. Remove the cooked steak from the pan, place on a plate, cover with foil and leave for 3-5 minutes. After this time, the steak can be served.
6. How to cook rice
For most people who are far from cooking, cooking rice terrifies. Cooking rice is actually very easy. So, what is the secret to fluffy rice? You will need long grain white rice, such as basmati rice. The recipe is for 3-4 people.
Pour a little vegetable oil (2-3 tablespoons) into a medium-sized saucepan and place the pan over medium heat. When the oil is hot, place the finely chopped half of the onion into the pan (the onion is optional, but oil is a must!). Fry the onion until light golden brown. Add a full glass of rice to the fried onions and mix thoroughly. Pour two glasses of hot water (unboiled) over the rice and onions. When cooking rice, maintain a 1:2 ratio (for one glass of rice - two glasses of water). Season generously with salt. For variety, you can add half a cinnamon stick to the rice. Wait for the rice to boil again and cover the pan with a lid. Reduce heat to low and set timer for 15 minutes. During this time, do not remove or lift the cover. After 15 minutes, remove the lid and check if there is any liquid left in the pan. To do this, tilt the pan towards you, holding the rice with a fork. If there is any liquid remaining, cover the pan and leave for a few more minutes, this time checking the rice every minute for doneness as described above. When there is no liquid left in the rice, remove the lid and cover the pan with a towel for 4-5 minutes. That's all!
7. How to make mashed potatoes
This is a tried and true method for making lump-free mashed potatoes and is used by chefs in French restaurants. So, peel and cut 6 medium-sized potatoes in half. Place the peeled potatoes in a saucepan (the saucepan should be 2/3 full). Cover the potatoes with water and salt generously (the water should be salty). Bring the water to a boil and cover the pan with a lid, but not completely, otherwise the water will escape. Depending on the type of potato, cooking takes 10-25 minutes. When the potatoes are ready, that is, soft, but do not fall into pieces, they need to be removed from the pan, after thoroughly draining the water. Pour 3/4 cup of cream or sour cream into another saucepan or fireproof dish and bring to a boil. As soon as the cream boils, turn off the heat immediately. Rub the boiled potatoes through a sieve (the same one you use to sift flour), helping yourself with a tablespoon. The task is quite difficult, but your efforts will be worth it. Place the potatoes, mashed through a sieve, into a saucepan and place over low heat. Add butter (30-50 grams) and gently mix it with the potatoes (with a wooden spoon!) until smooth. While stirring the potatoes, slowly pour in the hot cream - this will speed up the process of softening the butter and make the potatoes taste softer. Carefully monitor the amount of cream - the potatoes should not turn into slurry, their consistency should be thick. Add grated nutmeg to the finished puree. Add salt and pepper to taste. Serve mashed potatoes hot.
8. How to cook fried potatoes
 First of all, it is better to fry potatoes in goose or duck fat. If this is not possible, replace the fat with lard or cracklings. Cut the peeled potatoes into medium-sized pieces (small potatoes - in half, large potatoes - into four parts). Melt the fat in a preheated frying pan at the rate of 50 grams of fat per 500 grams of potatoes. Add the chopped potatoes to the pan and stir until all the potatoes are coated with fat. Season with salt and pepper. Cook at 190C for 40 minutes. The finished potatoes should be golden brown, crispy with a light crust. .
9. How to cook vegetables
Different vegetables take different times to cook, but this method is versatile and you can use it to cook any kind of vegetable. So, peel the vegetables and cut them into approximately equal medium-sized pieces. Place the chopped vegetables in a saucepan and add boiling water just enough to cover them. Salt the water thoroughly. After this, place the pan over medium heat and bring the water to a boil. Periodically check the readiness of vegetables using a match. Vegetables should be soft enough to pierce, but not fall apart when touched. Green vegetables should not change color radically, they should remain green. If the vegetables are too soft, they are overcooked. When the vegetables are ready, drain the water and serve them immediately.
10. How to cook fried chicken
Surprisingly, making fried chicken is very simple. Add a bay leaf, a crushed clove of garlic and a few cumin leaves to the gutted chicken (or chicken), after salting and peppering it. Generously brush the chicken skin with softened (but not completely melted!) butter and salt. Place the prepared chicken on a baking sheet breast side down (this will prevent the breast from burning and becoming dry). The oven should be preheated to 200 °C. This temperature should be maintained for half the cooking time of the chicken (cooking time is calculated using the formula: 15 minutes per 450 grams of chicken, plus an additional 15 minutes). Halfway through the cooking time, turn the chicken breast side up. Place the finished chicken on a heated dish and wait 15 minutes before serving it (this is necessary so that the fat drips off, the meat softens and soaks in juices). Chicken prepared this way has a crispy skin and soft, juicy meat.
"Magazine about luxury Luxurynet.ru"
The ability to make some useful things with your own hands very often helps out economically. A person who knows how to handle tools and has ingenuity replaces many purchased goods with homemade ones. Moreover, these are not only some little things, but also quite serious devices needed for the home.
Making them saves a lot of money and gives sincere pleasure from the opportunity to create something useful with your own hands and thanks to your own imagination. Perhaps our advice will be useful not only for beginner Kulibins, but also for experienced home craftsmen who cannot sit without work.
Do-it-yourself barbecue-smokehouse from a barrel or gas cylinder (with video)
Let's start not with small things, but with something quite serious and useful at any dacha, like a barbecue. It can also be a grill and smoker. If you can’t sit at home on summer days, and relaxing at the dacha doesn’t amaze you with its variety, it’s time to make just such a barbecue and invite friends for picnics in nature. Such devices never stand idle and are always very popular during the warmest months of the year.
To make a homemade grill, you will first need to find an old barrel or a couple of empty gas cylinders. Its size and some functional features depend on the format of the product. Of course, in order to make devices such as a barbecue, you need to be able to work with metal and handle welding equipment. So these tips are only suitable for experienced craftsmen.
Useful tips for making a homemade barbecue:

1. First you need to cut out a lid in the barrel for the future barbecue. The photo shows a cutting diagram. If you want to make a more complex design with three sections (grill, smokehouse and barbecue) from used 50 liter gas cylinders, watch the video. It describes in detail and shows how holes are cut in cylinders.
2. You need to weld a handle to the lid. Be sure to have a wooden handle, which will help avoid burns during frying.

3. If the smokehouse is made of cylinders and will subsequently have 3 sections, then they will need to be welded to each other, as shown in the video. Pay attention to the design of the homemade product. It provides such things as a blower, a hole for draining the “soup” that is formed during the smoking process, etc.
4. The grill can be installed on iron legs. For example, how in the same video the master used a stand from a foot-operated sewing machine. This rarity can be found at a flea market. If you have no luck with interesting finds, ask your friends if anyone has grandma’s old car lying around in the attic. As a last resort, you can make homemade legs from scrap.

5. Then the lid is attached to the grill. If desired, you can build a spit into the grill for roasting large carcasses (suckling pig, nutria, goose, etc.). To avoid turning the spit yourself, a motor is connected to it. How to do all this is shown in the video.
6. A grate is placed on the “bottom” of the grill. Since both the cylinder and the barrel have rounded shapes, the grate does not lie directly on the bottom, but is located at some distance from it. You can use a ready-made grate or weld it yourself. For experienced welders this is not difficult. After the structure is fully assembled, you can test it in action (video).
Homemade products from empty plastic bottles: hanging gardens
With your own hands you can make not only such “high-tech” devices as a grill-smokehouse, but also various pleasant little things for your home and garden. These small and fairly simple crafts are very useful things that can cost a fortune in specialized stores.
Useful little things for the interior can be made from empty plastic bottles, which are visible and invisible in cities. For example, you can make a chic hanging garden on a brick wall. Usually, climbing plants themselves “crawl” up along wrought-iron fences, forming a thick green and sometimes even a flowering wall. It makes the garden very beautiful and cozy.

But if the fence around the house is solid (stone or brick), and you want more greenery, the inventions of home craftsmen will help out. To set up hanging gardens on your property, you don’t even have to buy pots and then think about how to attach ropes to them. Basic homemade products made from plastic bottles and fishing line will help.
How to make homemade pots for a hanging garden around the house
To make these extremely useful, but at the same time very simple things, you will need to collect about 20-30 bottles. The volume should be chosen depending on what plants you want to decorate the fence around the house. For those who like more space and have an extensive root system, you should choose 1.5-2 liter bottles. A “window” for the flower is cut on one side. The cap must be screwed on so that the soil does not spill out of the bottle.
Holes should be made on both sides for fishing line, which will be used to attach the homemade pots to the top of the fence. Then you need to fill the bottle with soil (preferably immediately fertilized and prepared for planting an ornamental plant). It should fill the container about halfway so that the plant has room to take root. But you shouldn’t add a lot of soil, otherwise the homemade pots for hanging gardens around the house will be too heavy.

At the end, you need to plant flowers and secure homemade pots made with your own hands on the wall. It is better to do this in a checkerboard pattern, so that subsequently the overgrown plants form a thick green “wall”. Climbing flowering plants look very good: they grow very thickly and delight the eye with bright colors almost all summer and a good half of autumn.
Useful little things for a country house: a curtain and a spray bottle made from plastic bottles
You can make other crafts and useful things for a cozy life from plastic bottles. Our tips will help you arrange your dacha as cheaply as possible. For example, it is not at all necessary to buy curtains for a gazebo or loggia. They can be made from the bottoms of plastic bottles.
They already have a pretty nice shape. All that remains is to cut them out and fasten them together with fishing line, as in the photo. Even a child can make such crafts, and they look quite impressive.

Our advice concerns not only decorative interior aspects. From used plastic bottles you can create such useful things as a sprayer for watering your garden or lawn. Such devices are quite expensive in stores, and their design is so simple that you can literally make such useful little things at your leisure in a couple of minutes.
Tips on how to make a sprayer for watering the garden/lawn around the house
If there is a lawn around your country house that requires regular watering, you will find our tips for creating a simple device for this useful. For work you will need such little things as several used ballpoint pens and one empty plastic bottle.

You need to make holes in the bottle. Their diameter should match the diameter of the ballpoint pen body. The rods from the handles need to be removed, and the bodies themselves must be secured in the holes in the bottle. After this, we make a hole in the lid for the hose mount and screw the latter to the neck of the bottle. Now all that's left to do is throw the sprayer on the lawn and turn on the water.

Such simple and at the same time extremely convenient devices make the life of a summer resident much easier. A plastic bottle sprayer can be easily moved to another part of the garden (lawn) after the first area is well watered. Even a child can cope with this task, because plastic is a very light material.
Such useful things can be made literally from garbage - ordinary plastic bottles, which in cities are thrown into landfills by the ton.
Tips and inventions needed in everyday life: do-it-yourself summer shower
You simply don’t want to spend money on many devices, because their production takes nothing at all. For example, things like an outdoor shower are very easy to do yourself. You will need 1 piece of metal, nails, a water hose, electrical tape and an empty aluminum beer can.
Tips on how to make such crafts:
1. To make a water spray device, you first need to cut off the bottom of the beer can.
2. On the other side, the hole should be slightly widened so that the hose attachment can be attached.
3. To prevent water from leaking into the holes of the craft, the attachment point is carefully covered with electrical tape.
4. To attach this simple invention, the corner must be attached to the fence. We drill holes and simply nail it.
5. All you have to do is turn on the water and enjoy the summer shower.

Any home craftsman collects a huge number of different things that need to find a specific place. These are all kinds of little things: nails, screws, rolls of electrical tape, etc. In order not to lose all these things needed in the household, special storage devices are used. Of course, you only need to do them yourself.
An excellent storage for various small items can be easily made from 2 empty plastic bottles. First, we cut off the bottom of each of them, then attach a zipper to the cut of the future craft and simply fasten it. That's it, now you have somewhere to put various important things with which you will make your crafts or even create real inventions.

Simple crafts are the first step towards great achievements
All the crafts we presented are fairly simple versions of what you can do with your own hands using available materials. The most savvy craftsmen know how to turn commonplace everyday things into amazing inventions. By the way, many of them are real inventions, often worthy of some kind of award, if not on a global, then certainly on a regional scale.
If you want to join the cohort of self-taught craftsmen, try making the simple crafts presented to your attention. Perhaps over time you will develop a taste for manual creativity, and you will become a brilliant craftsman or even an inventor.
DO NOT THROW AWAY YOUR OLD MEAT GRINDER
When you need to cover a lot of glass when repairing a garden house, prepare a sufficient number of putty flagella by running the putty through an old meat grinder.
Lana Ishanova, Volgograd
IF THERE IS NO STOVE AT YOUR Cottage
You can cook over a fire, but it takes a long time. I offer my proven method.
Immerse the dry red brick in kerosene for a day. It burns for a long time and is not affected by the weather.
S. Shagiakhmetova, Krasnoyarsk region
HOW TO MAKE A GARDEN BENCH
The bench is made from planks and its dimensions can vary.
First, two sidewalls of the same size are made, the width of which should not be less than 20 cm. The height is selected as necessary. Then a fastening rectangle is prepared, which is fastened with nails or screws. Then they nail the lid, which is made 5-10 cm longer than the frame and 3-5 cm wider. The nails are nailed so that the lid connects all parts of the frame.
Yusup Gelazov, Ulyanovsk region.
RACK FOR COUNTRY TOOLS
I suggest making a pencil stand. It will be possible to put all the tools in it.
Dimensions - according to your wishes. The base is determined by the edges; you can paint it any color you like. Furniture varnish is suitable for covering the counter. The stand can hold the bags upright.
At a distance equal to the width of the bag, hoops are attached to the stand, to which the bags can be attached using clothespins, ties or elastic bands.
N.V. Popov, Betlitsa settlement, Kaluga region.
LEAVE WATER IN BARRELS FOR THE WINTER
My advice to those who prefer to leave water in barrels for the winter.
WARM FRAME FOR TOILET
Not everyone has a toilet in the house, but the frame I propose will, I think, be useful to everyone who has “convenience on the street”: it does not “get cold” and does not become covered with frost.
It's easy to make: take 10 mm thick pressed plywood and cut the frame to the size you need. Then, using PVA glue, glue foam plastic 40 mm or 20 mm thick in two layers onto this frame. This frame can be placed on a toilet seat or bucket.
V.P. Belev, village Oktyabrsky, Krasnodar region
BIRD FEEDERS
A five-liter water bottle makes a spacious bird feeder. You need to cut two rectangular window holes on the sides of the bottle, and attach the cut out pieces with adhesive tape as visors above them. Paint the bottle in bright colors with oil paint, hang it on a tree, sprinkle some bird food, and your feeder is ready.
A.A. Zakharyina, s. Kapyrevshchina, Smolensk region.
WE REPAIR GAPS
I seal cracks in wooden structures at the dacha like this: fill newspaper paper with hot water, and use the resulting slurry to seal all the cracks. Simple and fast.
YES. Kilina, Novokuznetsk
INTERESTING WATERING SYSTEM
Not everyone likes to lug around with buckets.
I would like to offer readers a home smokehouse. For the smokehouse you will need: an old pan with a wide bottom, a lid from it, a ceramic electric stove with a spiral, with a fork and cord, steel wire for skewers. And if you have ready-made skewers, those will do too.
In the aluminum pan, just above the bottom, you need to make a hole for the wire. The hole should be large enough to allow the wire to pass through it freely. Using a hacksaw, you need to make 10 vertical cuts - 5 on each side - on the walls of the pan up to half the height of the pan.
File all burrs and sharp edges.
IMPORTANT!
The width of the cuts should be such that the skewers can be easily inserted and removed.
Then you need to thread the wire inside the pan, attach it to the contacts of the ceramic tile and insulate it. The ceramic tile should lie loosely on the bottom of the pan, and the wire should be long enough so that the entire heating element can be easily removed, cleaned of sawdust and put back in the pan.
Use steel wire to make skewers larger than the diameter of the pan so that they do not fall inside. You will also need sawdust. They will be coals. Birch or hawthorn are suitable. But pine and spruce are not suitable - they are too resinous.
In a real powerful smokehouse, raw products are cooked, and they are smoked for quite a long time. And in our smokehouse we do not smoke, but bring it to a smoked state, and the process lasts 20-25 minutes. During this time, the smoke manages to saturate the product sufficiently. At the same time there will be a unique smell and specific taste.
The spiral will become hot, and the sawdust will not burn, but will smolder, actively releasing smoke, which will come out through the slits, and therefore the pan should be placed in the garden. Sausage, cheese, sausages are suitable for smoking.
After finishing smoking, turn off the stove (let the coil cool) and remove it from the pan (this is where a long cord comes in handy), shake out the processed sawdust. That's it, the smokehouse is ready for use again!
G. S. Yakovleva, Perm
FOR EXAMPLE
Take 200-300 g of pork, cut into 6-10 pieces and fry in a frying pan in the usual way with spices and salt. Then we put the pieces of meat on skewers, pour a handful of sawdust onto the surface of the tile, insert the skewers into the slots, close the pan with a lid and plug in the cord.
DIY METAL SHAVINGS COLLECTOR
It often happens that after drilling metal, for example with a drill in the country, even after cleaning, tiny particles of metal shavings remain.
 They are dangerous because they can unexpectedly pierce the skin at any moment. I offer a simple device for clean cleaning of steel shavings, including the smallest dust.
Take a cardboard box for milk, kefir, 1 liter or 0.5 liter. Cut out two sides as well as two holes as shown. Inside the box, place a magnet, for example from an old speaker, with a string tied to it (household magnets secured into a briquette with tape or tied will also work).
Take the box with the magnet by the upper ears and move it closely over those places where there are or could be chips, even if they are not immediately visible.
Anything metal will be attracted to the bottom of the box. Then place the box on the spread newspaper, remove the magnet by the string, holding the box. Remove it, and all the metal dust and shavings will remain on the newspaper. Carefully roll it up and put it in the trash. And the magnet and the box will remain clean.
Let's talk about our life today? I know, I know, there is no harder conversation for women than talking about cleaning, but nevertheless, I decided to look at useful DIY tips for the home.
Advice one
How to wash a microwave and remove burnt food from it?

Take a dishwashing sponge and wet it thoroughly with water. Then we drop some dishwashing detergent on it and create foam. Place the sponge in the microwave and heat it for 30 seconds. Then we take it out and wipe the entire inside surface of the microwave with the same hot sponge.
Tip two
How to achieve perfect glass cleanliness?

Wash the glass in the usual way using detergents, but at the very end, before wiping it dry, use newspaper to wipe the glass. The glass of your windows will shine, these DIY life hacks for the home that we gleaned from the old days will be very useful in the modern world.
Tip three
Protection from a distance

To protect silverware, and some families still have it, you need to wrap a piece of chalk in gauze or a napkin and park it in a desk drawer.
Tip four
How to remove a terrible stain from a new shirt?

Just imagine the situation: you put on a new blouse to work and immediately managed to put a stain on it. How, you ask? Yes, it’s very simple, especially when you’re having lunch in a terrible hurry. Personally, chalk came to my aid, which I crushed and generously rubbed into the stain. After a few hours, the chalk had absorbed all the grease and I removed the stain.
Tip five
Oh those horizontal blinds!

Every owner of such blinds has more than once encountered the problem of how to wipe all the slats without removing the blinds from the window. The answer lies in an old sock without it - we pull it over our hand and voila - a special cloth for blinds is ready.
Tip six
Getting rid of odor from a mattress

We had a new and beautiful mattress, but after several years it became ugly and smelled a little bad. Well, after a small child playing with juice in his hands and from constantly bursting treats in bed. Take traditional baking soda and sprinkle it on the bed, leaving it for a couple of minutes. Then we simply vacuum and the mattress returns to a completely acceptable form.
Tip seven
Stain on the carpet

My friend has extremely light carpets in all her rooms and a small child who really loves juice and candy. Therefore, take a life hack from her - how to remove a stain from a carpet - take 1 part vinegar and 2 parts water (look at your stain), and then spread this mixture onto the stain. Cover it with a damp cloth and then iron it with an iron.
Tip eight
Let's continue the topic of smells - how to eliminate an unpleasant smell in an apartment?

For this we will need vanilla concentrate (the confectioners grinned rather contently here) and an oven. We will dissolve 1 spoon of vanilla concentrate in water and place it in a preheated oven.
Tip nine
Cleaning a wooden board

To clean a wooden cutting board, you need to pour salt and dab lemon slices into it, and then scrub the board thoroughly.
Tip ten
How to protect your faucet from stains?

Yes, it’s easy - take wax paper and rub the faucet thoroughly after cleaning. A kind of protection against grease will help keep the faucet shiny and clean longer.
And more useful tips and ideas for the home.Hello, dear readers! I continue to post a series of useful tips for the home, which have already been found in sufficient quantities, but there are no limits to people’s imagination and ingenuity! And all we can do is use their experience, making our life easier and saving our budget on many projects :)
It turns out that vinegar can be used to make an excellent wood stain when you add a metal object in a glass container to it. You need to keep the metal with it for a week. A handful of copper pennies will exhibit a beautiful pale blue. And steel added to vinegar will give you a rich reddish tint. The combination of tea and a metal object in vinegar will show a black tint.. Be sure to save this information :)
In this master class you will be able to recreate homemade hanging planters from cans, in which greenery will grow upside down :)
Homemade stain remover.

For a homemade stain remover, you will need one part dishwashing liquid mixed with two parts hydrogen peroxide. Pour this mixture directly onto the stain, which will immediately begin to disappear, as if by magic. (To remove old stains, you can add baking soda and even a little sand for scrub.stains.)
How to add shine to a countertop.

Take a spray bottle and fill it with 1/8th alcohol, to which you need to add a drop of dishwashing liquid, a few drops of fragrant oil (for smell), pour water into the remaining free part of the container, shake it all together, and spray it on any countertop, wipe thoroughly with a cloth , thereby achieving shine and a very smooth surface

An easy and simple way to fasten book pages using a large paper clip.
Portioned minced meat in the freezer.

Thanks to this method, you can always break off the required amount of minced meat that is frozen in the freezer :)
1. Compact clay pot roaster :)

2. Hidden place for the beach :) 
3.The trampoline turns into a chic hanging bed:) Below you will find several more ways to use it:)

4. Oh, those who are involved with the excavator are lucky :)) The bucket turns into a wonderful swimming pool :))
The outside can also be painted :)) 

6.toilet paper holder from a hanger.

7. Chandeliers made of crystal decanters.

8. It’s a wonderful idea to use PVC sanitary insulation, in which you need to make slits in which the tassels will be held.

9. I recently posted the idea of using cans for a beehive, and here is another unusual idea for constructing a hive from hollow sticks.

10. :))) Fountain using a fountain installation, three pools and buckets))

11. Promised uses of the trampoline.

12.
13. Homemade bowling alley at the dacha. Great idea - how to keep children busy and polish their ability to throw balls :)
For this project it is better to use bakelite plywood, which does not get wet from rain and has a very smooth surface :) All that remains is to fix the edge with paving stones and set the pins :))

14.Using such containers you can always pour out the required amount of bulk mixture.

15. A dishwasher tray placed on wheels can serve you for a very long time as an under-bed organizer for all sorts of little things :)