Paint the ceiling with acrylic paint. How to paint a ceiling with acrylic paint using a roller. Composition options and their features
Read also
Tell me how to paint the ceiling acrylic paint, a professional painter can, as they say, “without regaining consciousness.” Indeed, the technology of work in in this case It’s quite simple, so no particular difficulties are foreseen at any stage.
For a beginner, it will be much more difficult: if you have never picked up a brush or roller before, then finishing the ceiling, especially if it has not been previously prepared for painting, can turn out to be very labor-intensive. However, after carefully studying the recommendations in this article and with a little practice, almost anyone can cope with the task.
Why acrylic?
You can answer the question posed in the subtitle with another question - why not, actually? Performance properties and other parameters of such paints are quite suitable for most situations.
Among the advantages of acrylic water-dispersed pigments are the following:

- Good adhesion to most surfaces, including concrete, plaster and putty.
- Easy application both manual and mechanically(using spray guns and spray guns).
- No toxic volatile compounds in the composition. Plain water is used as a solvent.
- High hiding power. Qualitative acrylic composition masks the color heterogeneity of the base even with a two-layer application.
- Persistence. After polymerization, an elastic film with low shrinkage and moisture absorption is formed, while the coating retains vapor permeability.

Advice! If you are deciding which acrylic paint is best for the ceiling, then for rooms with high humidity you should take semi-gloss or semi-matte acrylic, since it is characterized by greater moisture resistance. Matte paint is suitable for rooms with a normal microclimate.
As you can see, such compositions are superior in their parameters to both white and water-based paints, so their popularity is justified. For a beginner, this is exactly what you need.
Preparing for work
Required Tools
The easiest way to finish large areas is with spray guns or spray guns - special devices that spray paint under pressure and apply it to the base in a thin, even layer.
However, you should only master the technique of working with such devices if you already have at least a little experience. For a beginner, it would be best to first learn how to paint by hand.

For this we will need:
- wide (about 30 cm) ceiling roller with natural or artificial pile;
Advice! Foam rubber products, no matter how attractive their price, are not worth buying - it will be very difficult to achieve acceptable quality, since microscopic bubbles will always remain on the surface.
- telescopic handle for the roller (the so-called fishing rod);
- wide flat brush for painting edges;
- corner roller for processing the junction of the ceiling and walls;
- container for dispensing paint - a special tray is best;
- trestles or rack for working at height;
- mixer for mixing the composition;
- sieve for straining pigment;
- facilities personal protection(painting overalls, gloves, hat, glasses, respirator).

If this is your first time painting the ceiling with your own hands, then you should not skimp on the quality of tools, otherwise you will not achieve the desired result. At the same time, there is no need to purchase expensive professional equipment: if your plans do not include regular implementation painting works on a commercial basis, then such expenses will be unreasonably high.
Purchasing paint and other supplies
When the tools are ready, you can start purchasing. First of all, we will have to deal with the volume, which is determined by the material consumption.
Here you should focus on the following values:
![]()
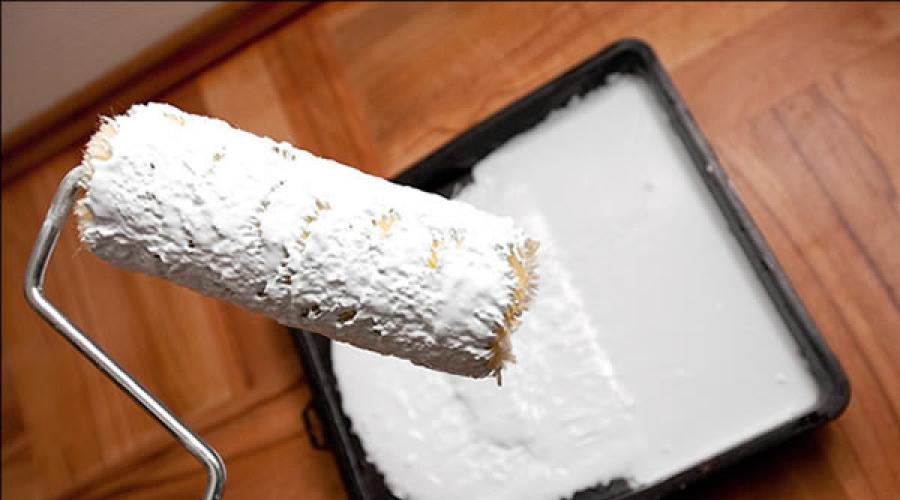
- The average consumption of water-dispersed paint for finishing ceilings and other prepared surfaces is 100 – 120 g/m2.
- For high-quality design, we need to apply at least two or three layers.
- Taking into account the fact that we have no experience, and we have not yet learned how to rub paint as efficiently as possible, we can take into account the value of 300 g/m2.
Advice! For the entire ceiling area, it is worth purchasing paint of the same brand and from the same batch. Ideally, it is advisable to take one container altogether - even if it is a little larger than we need in volume, but we will be reliably insured against the appearance of areas with different shades.
The next nuance that we need to note is tinting. In 90% of cases the ceiling is made white.
But if we need to give the paint a particular shade, then a special color is added to the base. It is better to entrust the coloring of the composition to specialists - they will select the shade more accurately and mix the components on a special stand in such a way that we do not have color spots.

In addition to the paint itself, we will need others Consumables. We list them in the table below approximate cost, which you can focus on when planning your budget:
| Material | Unit | Average cost, rubles |
| Matte acrylic paint DULUX Magic White | 2.5 l | 1500 -1600 |
| Matte acrylic paint DULUX 3D White | 2.5 l | 950 -1100 |
| Acrylic matte paint “Rainbow” | 2.5 l | 310 — 380 |
| Acrylic matte paint PARADE W1 | 2.5 l | 260 – 350 |
| Matte acrylic paint Tikkurila EURO | 2.9 l | 2400 — 2700 |
| Universal primer CERESIT CT 17 | 10 l | 550 — 650 |
| Putty for painting Fugenfuller | 25 kg | 380 — 500 |
| Paintable putty Uniloft | 25 kg | 1200 — 1600 |
| Masking paper tape, 5 cm | 30 m | 40 — 60 |

Painting technology
Preparing the room and ceiling

A story about how to properly paint a ceiling with acrylic paint should begin with a description of surface preparation.
This stage will be the most labor-intensive, so beginners should pay close attention to the recommendations given here:

- We begin to prepare the ceiling... from the floor. Even if we do major renovation, screed or concrete floor The bottom should be covered with at least old newspapers. If the floor covering needs to be preserved, then we completely cover it with dense polyethylene, which we fix at the edges.
- We do the same with everything - everything that can get dirty will definitely get dirty, no matter how carefully we work.
Advice! If we are updating the ceiling in a room with bulky furniture, we don’t have to take it out. But it is simply necessary to protect it from contamination.
- Now let's move on to the ceiling itself. First, we need to clean it from the old finish either to concrete or to a dense plaster layer. To do this, we wash away the whitewash, remove wallpaper or clean off the paint by heating it with a hair dryer. To remove the most firmly adherent paint particles, use a solvent or special remover.

- Rust stains and greasy areas must be cleaned. If this is not done, the stain will definitely appear even through several layers of opaque acrylic. To remove such contaminants you will have to spend money and purchase special compounds, which are sold in construction supermarkets (Maxi DC 250 and analogues).
- We carefully inspect the plaster layer, tapping the entire area of the ceiling. If there are voids under the plaster, then it must be knocked down, otherwise sooner or later it will fall off on its own.
- Small cracks that do not reduce the overall strength of the plaster are sealed with a cement-based repair compound and smoothed.

- If after this there are irregularities of more than 5 mm on the ceiling, we invite a professional to plaster the surface or (if we know how) we do this work ourselves. If there are no defects, then we move on to the next stage - putty.
- Carefully level the surface of the ceiling finishing putty. We apply the material using a construction float, leveling it with a spatula.
- When the putty dries, rub it with an abrasive mesh. For more high-quality processing We perform the operations twice: first using a starting grid, and then using a finishing abrasive with fine grain.

- After grouting, take a short-nap roller and apply a penetrating universal primer in two layers. acrylic base. After drying, the primer will ensure the most effective adhesion of the ceiling to paint and varnish materials.
- Before starting painting, we cover the perimeter of the ceiling with masking tape.
Ceiling painting
And only now, when we have mastered the methodology for performing preparatory work, can we begin to figure out how to paint the ceiling without streaks with acrylic paint.
First, we bring the pigment itself to condition:

- Open the container and mix the acrylic with a stick. This must be done in order to understand whether there is any dense sediment, films or other solid inclusions.
- If the paint has been standing for a long time and has partially polymerized, you should stop using it. As a last resort, if there is no alternative, we filter the material through a special sieve, on which all dense particles should settle.
Advice! Instead of a sieve, old nylon tights are sometimes used, which are placed over the neck of the jar. The quality of straining will be so-so, but it’s still better than nothing.
- Mix the strained paint using a drill attachment. It is necessary to work only at low speeds, otherwise the composition will stratify due to the action of centrifugal force.

- If before painting the ceiling with acrylic paint, we need to tint it- Let's start this operation. At the same time as mixing, pour the corresponding pigment into the white base, adding it in small portions until we get the desired result.
- Pour into a separate container the portion of paint needed to apply the first layer. Dilute it with water by about 5-10% and mix again. This one is more liquid composition we will use it as a makeshift ground.
Instructions for painting the ceiling involve the following sequence of actions:
- First, use a brush or a small angled roller to paint the perimeter of the ceiling. The tool should extend slightly onto the masking tape - this way, after removing it, we will get a perfectly smooth edge.

- Pour the paint into the tray, dip a roller in it and roll it over the tray area to remove excess material.
- We begin to apply the first layer of paint, moving the roller in a direction perpendicular to the flow of light from the very large window in room. We thoroughly rub the paint, making sure that there are no untreated areas.
- We also apply the second layer using a roller, while moving away from the window, parallel to the light flow. For painting we use undiluted composition, since now our task is to mask all color defects as much as possible.
- We rub the paint over the entire plane, while again controlling the uniformity of its distribution. All identified defects can only be eliminated “wet on wet”, i.e. before the composition begins to dry. If you paint over the missing area later, it will stand out.
- If even after this the result does not satisfy us, we apply a third layer according to the same principle. However, with sufficiently thorough surface preparation, such a need arises extremely rarely.
- After the composition has completely dried, carefully remove the masking tape.
Applying the first layer
Advice! While the paint dries, it is advisable to protect the room from drafts, humidity fluctuations and temperature changes. If this is neglected, the water evaporation regime will be disrupted, and the pigment will either peel off from the base or crack.


How to paint a ceiling with your own hands, and which acrylic paint for the ceiling is best? Users often ask a similar question when they undertake home renovations with their own hands. Let's take a closer look at the rules for choosing the composition, as well as the step-by-step work to prepare the ceiling for painting with an acrylic mixture.
Choosing acrylic paint for the ceiling

The best option is considered water-based composition based on acrylic resins. The main advantage is the elasticity and good covering ability of the layer. Available for sale big choice water-dispersion, vinyl acrylic, acrylic silicone, and other mixtures, the components of which are various copolymers.
You need to choose the composition according to its intended purpose - this is indicated on the packaging of the material. There is also information on product consumption per 1 m2 of surface, and other data necessary for the master. Colored compositions are sold ready-made, but the owner does not always know the shade in advance, so it is easier to buy white paint and tint it with the chosen pigment. To ensure perfect coloring, the pigment is purchased in liquid form.
Based on the type of mixture, they are divided into matte and glossy:
- Matte acrylic paint has the property visual increase premises. Hides minor defects and surface imperfections.
- It is more convenient to cover with a glossy composition large areas, allocate areas of ceiling space for zoning the room. In this case, it is important to perfectly level the surface, since gloss emphasizes but does not hide defects.
What else to consider when choosing products:
- The compositions vary in density, decorative, and performance qualities. It is necessary to pay attention to the manufacturer's instructions: paints for dry, wet rooms, rooms with variable humidity.
- The degree of whiteness is determined: super white, white, milky white. It is customary to paint ceilings with a super white composition, but each manufacturer has its own shade of white. To avoid mistakes, you can ask the seller to open the lid slightly and look at the tone; it should match the tone of a sheet of office paper.
Advice! Colored ceiling coverings look advantageous in a glossy version.
Time-tested product manufacturers: Tex, Innetak, Dulux, Tikkurilla, Caparol, Supermatt.
Advantages and disadvantages of acrylic paints

The advantages of the compositions include the following factors:
- Fast polymerization. After applying the composition, a durable elastic film is formed on the base, which dries almost instantly.
- Abrasion resistance, pollution, mechanical and other external aggressive influences.
- Good coverage. If you apply several layers of paint, it will “heal” minor defects and cracks (up to 0.2 cm deep). But this does not apply to glossy compositions.
- Resisting Burnout under the influence of UV rays. In addition, acrylic resins do not burn when high temperatures do not allocate harmful substances and do not spread fire.
- Moisture resistance. Painting walls and ceilings with acrylic paint is an ideal option for rooms with variable humidity levels. Durable decor will preserve the integrity of the base, extending its service life.
- Easy to care for. The surface coated with the composition is easy to clean with conventional means, without abrasive particles.
- No chemical smell. Products may have a light aroma that quickly dissipates and is no longer visible under any influence.
- Ease of painting. Mixtures based on acrylic resins are water-based; they are easily diluted with water and applied with a brush, roller, or spray gun.
- Wide range color solutions both ready-made and individually selected. For picky users, white paints and huge assortment color pigments. The compositions are easily mixed, allowing you to create unique decorative ornaments, shades.
- Application to any surface. You can paint wood, concrete, glass, plaster with acrylic; it is only important to choose a composition that matches the base.
Lack of organic compounds, environmental friendliness and hypoallergenic mixtures - additional benefits. Painting the ceiling with acrylic paint is allowed in rooms with high safety requirements: medical centers, preschool institutions.
As for the shortcomings, there are practically none. The high price is an inconvenience quality products up to $12 per jar. However, the cost pays off over a long service life.
Preparing the ceiling surface for painting

Before you start painting the ceiling with acrylic paint yourself, you should prepare the necessary tools and the base surface.
What you will need:
- roller;
- paint bath for distributing the composition over the surface of the roller;
- brush for painting hard-to-reach places, corners, joints;
- a set of spatulas for applying putty;
- telescopic extension for the roller - it is more convenient to work with it from the floor;
- a stiff brush or scraper to remove old coating;
- masking tape;
- wide paint brush for priming.
Materials required: gypsum putty, primer deep penetration, acrylic paint.
And now, how to prepare the ceiling for painting with acrylic paint:
- Clear the room of furniture and interior items. If something cannot be taken out, protect it with film and cover the floor and window sills with it.
- Cover the doorway with cellophane or a damp cloth.
- Prepare protective equipment: mask, goggles, gown, gloves.
- Clean the ceiling. The old coating is cleaned until the base is exposed. If it is whitewash, plaster, water-based emulsion - the surface is wetted, kept in a draft (not for long), and then old decor Easily removed with a scraper.
Important! If there is a layer of paint left on the surface that sits firmly and has no cracks or gaps, you can paint over it. However, if there is no repair for a long time, mold may be found under the old paint, and pockets of plaster falling off. Therefore, painting the ceiling with acrylic paint over old paint is permissible, but only if the previous layer is perfectly preserved. For small defects, zonal cleaning and smoothing (grinding) of the area boundaries is sufficient. After this, you can use acrylic paint to paint the ceiling over the old coating, and to ensure perfect adhesion, the surface is first washed and sanded with No. 8 sandpaper.
- After removing the old coating, the entire surface is washed clean water. Particular attention is paid to the yellow areas on the ceiling. Such stains tend to appear after finishing. To remove defects, you will have to use all methods, including deep cleaning.
Advice! You can determine whether a stain will appear after painting or not: apply several layers of acrylic paint to this part of the ceiling, wait time. If the defect does not stand out, we can do without deep cleaning.
- Fill uneven surfaces, cracks and chips with gypsum putty (trowel). Knock out concrete sagging and other defects with a chisel and hammer.
- Joints and corners are washed with a stiff brush.
- After the surface has dried, you need to saturate the base with a primer, and do this twice. The last layer is applied after the first has completely dried.
- Preparing a ceiling for painting with acrylic paint involves sanding the surface before applying the coating. This is necessary to ensure adhesion - the paint adheres better to a rough layer. Sanding should be done with sandpaper No. 40-60.
The final stage of preparation is fixing the necessary decorative elements: sockets for a chandelier, borders, baguettes. And in order not to stain the decor with paint, it is protected with masking tape. To help novice craftsmen paint the ceiling with acrylic paints, see the video below with a detailed demonstration of surface preparation.
Preparing the paint

The final result of the work depends on the correct preparation of the composition. In particular, a thick mixture will not be able to hide the joints between paint strips.
A few rules to ensure that whitewashing the ceiling with acrylic paint goes flawlessly:
- Dilute the composition with water to the consistency specified by the manufacturer (approximately like milk), mix everything with a mixer or drill with an attachment.
- If adding water is required, then it must be poured in portions, no more than 5-10%. Sometimes they write that it is enough to mix the mixture well, especially if the paint is supposed to be applied in only one layer.
- The film formed on the surface cannot be mixed with the main composition. It needs to be removed and thrown away - this is dry paint that will not dissolve in the mixture, but can flake and tear, the pieces will then appear on the finishing decor.
To increase the quality and performance characteristics of the coating, components against biological life forms (fungi, mold) can be added to the paint. Now the paint is ready, all that remains is to choose which roller to paint the ceiling with acrylic paint.
Roller selection
High-quality painting of ceilings with acrylic paint with a roller requires careful selection of tools. Rollers are offered from the most different materials, therefore it is important to take into account the task at hand: monochromatic or decorative finishing, the use of a textured tool. The simplest type is a wooden or plastic structure on a handle with a cover and nozzle attached. Simplicity has many advantages:
- improved performance;
- qualitative change in paint shading;
- applying mixtures to any surface.
Advice! When choosing which roller is best to paint the ceiling with acrylic paint, you should take into account the material of the cover so that there is no lint, hair, or other defects left on the surface.

Types of covers for rollers:
- Polyamide material Suitable for applying solvent-based paints and water-dispersion mixtures. Polyamide absorbs and releases paint well, does not require special care, is easy to clean and has the required resistance to aggressive elements included in the mixtures. In addition, polyamide is considered a wear-resistant material that does not lose its structure when applying paint to a rough, bumpy surface.
- Polyacrylic case used for water-based paints and others decorative compositions with a small amount of organic solvents. Polyacrylic has all the characteristics of polyamide, but is considered less durable.
- Polyester cover Ideal for acrylic ceiling painting. The uniformity of the structure minimizes the risk of material residues appearing on the ceiling, but there is a drawback - wear. Such rollers are suitable for one-time work, but the plus is the ideal application of the mixture.
- Foam cover not suitable for enamels, oil mixtures. Incoming aggressive components corrode the foam rubber, leaving pieces of material on the surface. But for water-adhesive mixtures, foam rubber is ideal.
- Fur covers have proven themselves when applying enamel and oil paints. To ensure evenness of the coating, a merlushkovy roller is used.
There are also velor, structural, and pressure rollers suitable for decorating the surface and forcing air out from under the wallpaper. There are rollers on sale for creating a textured base, paneled ones - they ensure the evenness of the pattern, but are not suitable as a roller for painting the ceiling with acrylic composition.
Roller painting technology

Now about how to properly paint a ceiling with a roller with acrylic paint:
- You can try working on a small area to adjust the pressure level and the amount of paint applied to the roller. At first, it is better to make the pressure not very strong, as the mixture is consumed, gradually increasing the pressure, but without fanaticism.
- Start by painting the ceiling with acrylic paint yourself, as in the video below, from the corner and the areas where the wall panels adjoin.
- When thinking about how to paint a ceiling with acrylic paint, you should not apply the composition to one place several times - this increases the risk of non-uniformity of the coating.
- Particularly complex joints, corners, and transitions should be painted with a brush, also avoiding multiple layers of the mixture.
- After processing the corners and joints, the main surface is processed. If the area is large, the process of painting with a spray gun will be easier: the mixed mixture is poured into the tank, then sprayed in an even layer over the surface. The work requires some experience.
- Working with a roller is simple: apply the mixture in even stripes, following the direction and leaving no dry areas.
- The second layer of the mixture is applied only after completely dry first, in a perpendicular direction. To eliminate joints, they are smoothed with a wrung out roller.
Advice! After applying and drying the first layer of the mixture, it is still possible to eliminate imperfections, but you should not cover the unpainted areas with a thicker composition - this will create a spotty effect. The second layer should be as thin (liquid) as possible, blurring and eliminating possible defects.
- Usually 2-3 layers of paint are applied, the last one perpendicular to the plane window openings or towards the center of the room. At final painting you need to ensure that there are no joints between strokes or other imperfections.
- As soon as the decor has completely dried, it is necessary to check the consistency of the tint solution on all surface areas. If stains are found, the defects will be corrected by sanding with sandpaper. You will have to sand the entire surface, otherwise the stains will be noticeable.
During the polymerization period of the composition, the use of heaters is unacceptable, a draft must not be created, direct hit rays. It is better to curtain, close windows and doors. And some advice
When renovating an apartment, you should definitely think about giving the ceiling a beautiful and at the same time unobtrusive color. One of the most popular methods of doing this is painting the ceiling with acrylic paint - a video lesson on this topic in addition to detailed instructions will be very useful for a novice repairman.
This type of paint is attractive primarily for its versatility. The properties of acrylic paint, as well as how to paint a ceiling with acrylic paint, will be discussed in our article (see).
Features of acrylic paints
First of all, acrylic paint can be various types depending on its purpose. Thus, there are paints for rooms with normal humidity conditions, for example for rooms, as well as with increased level– bathrooms, kitchens, etc.

It is advisable to select and use acrylic paint strictly for its intended purpose., since the surface of the ceiling, painted regular paint, will quickly become unusable, while moisture-resistant acrylic paint used in an ordinary room costs more than usual, which is simply not profitable from a financial point of view.
Indications for the use of a particular paint can be checked with the seller or found on the label.
Advice! When applied correctly, acrylic paints are quite economical in consumption, and their cost is also very affordable.
Returning to the types of paints, it should be noted that they are found in a glossy version of the final surface and in a matte version (see).
Most often, the paint solution is sold in white, with the ability to achieve the desired shade using special colors. However, there are brands of paints with different, ready-made shades and colors.

Acrylic paint is not afraid of contamination, has good elasticity, which is especially good for covering particularly small cracks. It can be applied either directly to a concrete or plastered ceiling surface (see), or to wallpaper for painting. Paint is usually applied in several layers in order to increase its durability and achieve a more saturated shade, but often two layers are sufficient.
Instructions for painting the ceiling with acrylic paint
Preparing the ceiling for painting with acrylic paint
Before painting the ceiling with acrylic paint, the surface should be carefully prepared.
Let's consider the rules for preparing the ceiling for painting:
- If the surface has already been painted, the preparatory process will take slightly less time, provided that the base is reliable and does not require leveling.

- The first step is to remove the layer using a spatula. old paint.
- If the previous layer has not lost its durability and cannot be easily removed, you can, in general, apply paint on top of it, but then the paint should have a thicker consistency, and also be applied in a greater number of layers.
Advice! Partial removal of old paint from the ceiling is not allowed, since in this case the surface after painting will be uneven. As a last resort, the ceiling must be leveled using a putty solution.
- If there are cracks and/or chips on the base of the ceiling, before painting the ceilings or walls with acrylic paint, they should be thoroughly primed and puttied (see), placing a special reinforcing mesh under the putty, which will prevent reappearance cracks
- After the putty has dried, fine sandpaper should be used to rub away any minor irregularities and stains on the ceiling, then re-prime the ceiling for painting (see).
- If the ceiling has not been painted before, then, depending on the degree of curvature of the surface, it should be plastered (or a suspended ceiling made of plasterboard), and then putty and primer work should be carried out in the same way (see).
Applying acrylic paint to the ceiling
Now let's look at how to properly paint a ceiling with acrylic paint.
The process is quite simple and is performed as follows:
- Everyone is getting ready necessary tools and accessories - a roller with medium-thick pile, brushes, a paint tray, a stepladder, and also, in fact, the paint solution.

- Painting the ceiling with acrylic paint should start from the corners of the ceiling and its perimeter using brushes. This will then allow you to simply and quickly paint the remaining central square roller without stopping in hard-to-reach places.
- The first and all intermediate layers of paint can be applied in any direction, ensuring only their uniformity. As for the finishing layer, it should be applied in the direction of the light source - the window. In this case, the paint will look smooth and free of flaws after drying.
Since acrylic paint dries quickly enough, you can completely paint the ceiling of one room in one day. This quality, combined with the lack specific smell, makes acrylic paints very popular.

So, we looked at how painting with acrylic paint is carried out and noted the features and characteristics of this type of paint. Let's hope that our recommendations, combined with your desire and diligence, will allow you to ultimately achieve the desired result in the form of a beautiful and durable painted ceiling surface.
A beautiful ceiling is an integral part of the design of the room. Acrylic ceiling paint is one of the popular materials used in renovations. Knowing the little subtleties of painting technology will help make the ceiling surface smooth and even, which will correspond to the chosen interior concept.
Features of acrylic paint for walls and ceilings
In construction, acrylic dyes are used for interior and exterior work.
The material is suitable for any ceiling surfaces.
Due to the water-dispersion structure, dyes are diluted with water, which is why the material is characterized by low toxicity.
Based on polymers esters acrylic, methacrylic, cyanoacrylic acids. Such compositions are formed from two or more components. They don't enter into chemical reaction, do not mix with each other. Substances are evenly distributed one within the other.
The composition creates an elastic, durable, chemically resistant film on the treated surface of walls and ceilings, which evens out and fills all defects.
Thanks to the water structure, the painted elements dry quickly, becoming moisture resistant. This paint is used when painting walls and ceilings in kitchens and bathrooms; it has bactericidal and antifungal properties.

Working with such material does not require high professionalism and is safe. When applied, they do not emit toxic substances due to the absence of organic solvents. The acrylic composition is well tinted with aqueous paste pigments, so it has many colors and shades.
Which acrylic paint is best for the ceiling?
Brands of acrylic paints have next view: VD-AK (index), where:
- VD – water-dispersion paint;
- AK – acrylic;
- index – color number of paint and varnish products.
To correctly determine the choice of product index, experts take into account various factors:
- area of the room - you should calculate the consumption, amount of material;
- purpose of the area to be painted and the required layer density;
- desired color;
- acceptable moisture resistance and vapor permeability;
- drying speed;
- need for antibacterial and antifungal properties.
It is easy to calculate the area of the ceiling and look in the annotation for the material to see how much paint will be consumed when applying it to 1 square meter. Before starting work, it is worth calculating how much painting is needed for what area and doing a small comparative characteristics acrylic paint from well-known manufacturers.

Acrylic paint PARADE
The manufacturer describes the technical characteristics, composition, instructions for use. Consumer reviews are positive. The paint is moisture-resistant, frost-resistant, and has a dense and durable coating. After tinting, it retains color saturation. Showed itself well when painting walls. Used in children's and hospital facilities. Thick, covers small imperfections on the surface. The ceilings are even and smooth and truly snow-white. Costs 400 rubles. Without smell.

Acrylic paint from the manufacturer DALI
Bactericidal, moisture resistant. This is a washable acrylic paint for walls and ceilings. Quite suitable for kitchen and bathroom. Thick. It applies well when painting, is used sparingly, but has a characteristic smell. After painting, the surface becomes matte and silky. Abrasion resistant. Prevents the development of fungal mold and does not absorb dirt. Easy to clean from household contaminants.
Price for 1 liter 260 rubles.

Acrylic paint from Russian manufacturers “New Technologies”
Paint consumption is 4 kg per 20 square meters. Washable. Over time, it retains its strength and whiteness. Frost-resistant. Doesn't fade in the sun. Has a bactericidal effect and contains silver ions. If you leave the paint for the winter in unheated room, then she will gain bad smell, delaminates and becomes unusable.
1 liter of paint is relatively inexpensive - 90 rubles.
How to paint a ceiling with acrylic paint
The market provides a huge line of acrylic ceiling paints, which differ in their technical characteristics, purpose and price corresponding to the quality of the product.
Therefore, it is not difficult to choose acrylic paints for the ceiling. But in order to paint the ceiling so that it retains its beauty and durability, it is important to take into account all the nuances. Choose which paint option is better: matte or glossy, where the painting will be done, in what room.
Don't forget about quality instruments, which will be necessary for painting - spatulas, brushes, paint rollers.
Attention! Matte paint will hide all defects and imperfections, but gloss, on the contrary, will emphasize the bulges and depressions formed during putty.
Preparing to paint the ceiling with acrylic paint
Having used all the criteria for choosing an acrylic dye, having decided on the brand and index, you can proceed to preparatory work for painting the ceiling surface.
Advice! If the ceiling is covered with chalk whitewash, it must be washed away to avoid loose connection of the acrylic suspension with the surface.
Blur the ceiling with an ordinary sponge or thick fabric, as if erasing chalk whitewash with a soap solution. If there is more than one layer, then the soaked whitewash is removed with a spatula.
Having previously worked with putty and primer, hide minor defects, small cracks, using material, for example, from German manufacturer KNAUF.
Attention! The primer mixture will save paint, reducing its consumption. A smooth ceiling base requires less material consumption.
Putty, porous and heterogeneous surfaces, as well as wood boards, are primed with PIONEER VD-AK-015 acrylic hardening primer.
Which roller to paint the ceiling with acrylic paint
If the ceilings are multi-level, then it is better to use a small roller. For wide ceilings, professionals use wide rollers with a telescopic handle. The rollers are dressed in a short-pile fur coat. Usually this is terry. Their cost is reasonable, and the coating goes on smoothly and beautifully. In addition, with such rollers the paint is absorbed inside, which allows you to wet it less often and paint a larger area in one go.

Using rollers offers some advantages over brushes:
- The time required to apply paint to surfaces is reduced.
- The material is evenly distributed over the entire area.
- Various patterns can be applied.
An ordinary brush is useful for hard-to-reach places.
Preparing paint for painting the ceiling
Manufacturers of acrylic coloring material produce their products in finished form. Usually they write instructions for use on the container, where they sometimes recommend adding a little water if it is too thick. But as a rule, it is not worth breeding. It loses its richness and becomes less frequent. She is uncomfortable to work with. Paint spills on the floor and runs down your hands.

If it is necessary to create color, add color paste.
Then they count approximate consumption and prepared in a separate container, and only then the acrylic composition is poured in parts into a plastic ditch or it is rolled out on a piece of drywall so that it is evenly absorbed into the roller.
Comment! To obtain a rich color add large quantity color paste than acrylic varnish. When washing an object, the paste is washed off and stains the water. It is best to add 20-30% acrylic varnish to the paint. The result will not be long in coming.
Technology of painting the ceiling with acrylic paint
First they paint hard to reach places with a brush or small roller. If you do the opposite, then the surfaces tinted with a brush will sharply emphasize the boundaries of the ceiling color.

Apply acrylic dye on the ceiling in two layers. The main thing is not to leave any gaps. The first layer of paint is applied from the window along the wall. At the same time, they capture five centimeters of the previous one, carefully monitoring this. Give the painted surface time to dry.
Then they begin painting the second – transverse layer. Upon completion, the ceiling dries for a certain time specified in the instructions. One should not forget this detail: all defects are corrected between the first and second painting of the ceiling. If you do everything at the end, time and money will be wasted.
Video: painting the ceiling with acrylic paint yourself
A practical guide will help you make repairs yourself.
Painting the ceiling with acrylic paint on a whitewashed ceiling
As described earlier, experts do not recommend painting a whitewashed surface with acrylic. This can lead to various flaws and defects in the form of cracks and chips. The best option is to wash away the whitewash.
As a last resort, you can do the following. If the whitewash lies thin layer, then the ceiling surface is first primed with acrylic hardening primer PIONEER VD-AK-015. The primer will thoroughly hide and secure the chalk coating, and after drying, the ceiling will receive a solid base on which acrylic paint can be applied.
Conclusion
Acrylic ceiling paint is a commonly used material for apartment renovation. Having become familiar with the basic rules of coating, everyone will be able to paint the ceiling and walls of their own home with their own hands.
Painting the ceiling in an apartment with acrylic paint yourself
IN modern world together with oil paints and enamels, acrylic water-dispersion composition is increasingly used for finishing premises. Thus, painting the ceiling with acrylic paint has its own characteristics due to the unique characteristics of this material.
Despite the large selection of methods for finishing and repairing the ceiling, painting it still remains the most economical option.
In this regard, the method is extremely popular, because making such repairs on your own, provided you acquire some skills and become familiar with the nuances of finishing, will not be difficult for anyone.
Paint the ceiling with acrylic paint
Recently on the market paint coatings The leading position is occupied by acrylic composition.
Methods of whitewashing ceilings, etc., are long gone. Manufacturing companies building materials keep up with the times and offer a wide range of products at an affordable price, which will allow you to create a ceiling to suit every taste, creating a unique design.
Modern acrylic-based solutions have the following physical, technical and operational properties:
- environmental friendliness of the material;
- safety in operation;
- no odors;
- possibility of cleaning the coating;
- vapor permeability;
- ease of application;
- wide range of prices.
Here are some more advantages of acrylic ceiling covering:
- It perfectly tolerates any friction and strong increases in room temperature.
Acrylic is not affected by fire and is even recommended for use in the kitchen.
- Acrylic paints belong to the group of water-based coatings.
They do not emit unpleasant or pungent odors, even despite their composition. This distinctive feature compared to solvent based paints.
- Applying acrylic based paint is a pleasure. In addition, it dries quickly, but over time it may darken slightly. This feature must be taken into account before painting the ceiling. The application process will not take much time.
- Acrylic paint has a low cost.
 Features of acrylic paint for painting the ceiling
Choosing the right paint
Initially, it is important to understand that acrylic paint can be of various types - for example, for covering walls, ceilings, or universal.
Before purchasing the material you like, you must read the instructions, paying special attention to the following points:
- painting option - glossy or matte effect can be used.
If there is high humidity in the room, then it is better to give preference to glossy paint, since it has no pores and adapts better to high humidity in room.
The price for one type or the other is practically the same;
- In addition, it is equally important to pay attention to the shade of the paint. There is a huge selection of white shades, from which it is important to choose the right one;
When painting a ceiling with acrylic paint, you need to purchase material for the entire room at once, because different series, but the same color, can have different shades.
And on a flat ceiling, color distortions will be very noticeable.
- paint consumption is relatively small, but with a matte finish the consumption is slightly greater than when painting in glossy tones;
- It is recommended to immediately decide on the number of layers of paint, since the previous coatings may not overlap in one layer.
To do this, experts advise first priming the surface to match the color of the chosen paint.
Types of coverage
When answering the question of which ceiling covering to choose, experts say that, of course, acrylic.
The advantages of paint have already been indicated above. To this we can add that acrylic will help to densely paint the entire ceiling in just two layers, and will even close microcracks less than 1mm wide. The film on the ceiling will be elastic, durable and will last for many years.
 choosing a roller for painting the ceiling with acrylic paint
Naturally, acrylic paint is not the only one used for painting ceilings.
You can find many on sale paint and varnish materials in accordance with modern standards. This directly applies to silicate paints. They are most often used for finishing production premises– in saunas, basements, swimming pools, etc.
Silicone analogues of silicates are also well known, which also have their own advantages in operation and application. But both types are much inferior to acrylic coating in terms of price and ease of application.
It turns out that a person who has decided to start decorating the ceiling in his home is better off using acrylic analogues.
There is an opinion that acrylic paint belongs to the category of “facade”, but for the ceiling, manufacturers produce special latex types of coating.
 preparing the coating for painting with acrylic paint
The paint option for interior finishing work must take into account that it is applied to a smooth surface, and therefore the following properties are important:
- slight spreadability;
- minimal splashing.
Also when finishing interior spaces Latex ceiling coverings can be used.
Much has been said about the advantages of acrylic paints, but we must not forget about the main disadvantage. Wet cleaning of the ceiling after painting is only permissible after creating a barrier to water penetration, otherwise the paint will simply wash away.
There are also highly specialized options on sale - for covering the surface with greasy spots and other marks, as well as matte acrylic-based latex paint.
The latex version has the same characteristics as the regular one acrylic coating, with the exception of the main advantage - it can be applied in a thin layer, which guarantees quality.
Before purchasing, you need to clearly familiarize yourself with the advantages and disadvantages of acrylic, because in stores the buyer is faced with a huge selection of options.
But you can’t make a mistake in the selection process so that the coating lasts as long as possible and looks attractive for as long as possible.
Preparing the ceiling for painting
Acrylic paint can be applied to various surfaces:
- Plaster of any type, this includes stucco.
- Drywall.
- Wooden bases.
- Metal constructions.
 leveling and sanding the ceiling before painting
In the process of renovating an apartment with your own hands, it is often necessary to paint the plastered surface or plasterboard sheets.
The quality of preparation determines by 70% the results of the painting process as a whole and the appearance of the ceiling in the room, so it is important to follow the sequence and correctness of the stages of ceiling preparation:
- Putty with finishing mixture.
- After puttying, the surface is treated with a special grout or, if it is not available, with sandpaper in order to eliminate any unevenness.
- The final stage of preparation is applying a primer.
It increases the strength of the base, reduces paint absorption and its consumption, respectively. When purchasing a primer composition, it is important to follow this rule: the base of the primer and paint must be the same.
The type of primer should also be related to the type of surface.
Thus, for a freshly plastered ceiling, a deep penetration primer is used. It can saturate the ceiling to the required depth and prevent the formation of fungi and mold.
 preparing a plasterboard ceiling
When processing drywall, you can use a special strengthening primer-paint, which helps improve the adhesion of the material.
Any primer requires application with a brush or a brush, with the obligatory preliminary removal of dust.
The composition must be mixed, and the drying time will be from 4 to 6 hours - exact time depends on humidity and temperature.
- After priming, you can begin painting.
Carrying out staining
After high-quality preparation of the surface and selection of materials for painting, you can begin the painting process, which also consists of several stages:
- Preparation of tools: medium-length paint roller, spray gun, paint brush, stepladder.
You can also always use a spray gun.
It will be a little more difficult to work this way, but the coloring process will be completed faster
- The paint will adhere well if the ceiling is first treated with fine sandpaper.
- You need to start applying from the corners of the room using a brush.
- Then the paint is applied to the surface of the ceiling using a roller.
- First, coloring is carried out in one direction, then perpendicular to the first layer to achieve a uniform, rich color.
You should not take a lot of paint onto the roller.
The taken paint must be applied until it is completely used up, and only after that the solution must be applied to the roller again.
- The last layer must be applied strictly in the direction from the window, because the window is a source of daylight, and such an application will help hide any unevenness on the surface.
- It is forbidden to apply the next coat of paint until the previous one has dried.
- After application, you need to wait a little - the recommended time is about 2 hours, then make sure that the coverage is even.
The ceiling should be painted evenly, without dark spots or overflows. Stains can be removed using fine-grit sandpaper. But you need to involve the entire surface for the stain to completely disappear. This method is only suitable for painting in a maximum of two layers, otherwise you will have to completely redo the work.
 apply acrylic paint in several layers
All work will need to be carried out with careful protection of the eyes and respiratory tract.
Penetration of paint can be harmful to health.
There is no need to rush and then the paint will be applied efficiently and for many years.
Painting the ceiling with a spray gun
A spray bottle helps apply acrylic paints directly onto the primer or first coat of paint made with a roller.
To obtain the ideal layer, you must first dilute the paint to the density recommended by the instructions.
Apply the coating with a spray bottle using uniform, gentle movements, keeping an equal distance from the vacuum cleaner to the ceiling.
The distance should not be more than 70 cm, but it is not recommended to bring the device closer. It does not need to be kept in one place for a long time so that the area does not stand out due to an excess of paint and to prevent the formation of smudges.
If you try, painting the ceiling with acrylic paint can be done not even by a professional, but by a person with minimal skills in construction and finishing work. Simple painting technologies will allow you to carry out the work at the proper level, not inferior to painters with extensive experience.
Based on materials from the site: http://abvmaster.ru
The video conveys the original source: http: //www.rembrigada.ru/video-remont …. Painting the ceiling roller by hand using color video indicator.
Which video is better to paint the ceiling? so that the surface is evenly covered and less energy is consumed?
This is often considered before painting begins. The type of roll depends on whether there will be spots and streaks on the surface after work. It is also unpleasant to extract fresh pieces of color from the cylinder material. To avoid these problems, it is necessary to choose the right quality cylinder for painting the ceiling.
1 Meaning of cylinder size and diameter
First, pay attention to the diameter and size of the tool.
The choice according to these criteria depends on the work area: what larger size cylinder. However, you need to choose wisely, consider your strength. This is simply explained. With longer length and cylinder diameter, so suitable color.
This affects his weight.
Thus, a tool up to 20 cm long can be very convenient and not heavy, but at a size of 30 cm its weight becomes more and more difficult. As a result, the artist quickly gets tired, and work efficiency decreases. If you want to work with a large roller for comfort, you can attach a long handle. This will save you from having to constantly climb the stairs and save energy for work.
Ceiling painting is rarely found with hard to reach places, but it happens.
So if there is a ceiling for lighting or canopies, it is difficult to get and machine the joints and corners. However, producers considered this scenario. This problem can be solved by purchasing small tools with long non-standard handles. They are ideal for working in difficult places, such as canopies and niches.
2Types of rollers and their use
Ceiling roller has some of the most common types:
- made from natural sheepskin;
- foam rubber;
- made of nylon plush;
- from mohair.
The sheepskin instrument is undoubtedly very good, but its cost is the highest of all the options.
Foam and plush rollers are an excellent analogue. They are suitable for painting walls and ceilings.
Acrylic paint for ceilings and walls - properties and application
It is best to use oil, water or acrylic paint for them.
NB! Synthetic resin paints work best with mohair rollers.
Another important factor is the length and diameter of the hoof.
A larger pile will absorb more liquid and will result in thicker and stronger layers. The cup size also affects whether the ceiling texture has a rough grain pattern or not.
Which roller paints the ceiling to make a drawing? For these purposes, there are special tools with decorative patterns on the surface. This roller leaves a relief pattern and is most often made of leather or plastic.
3Technology for painting the ceiling using a roller
What type of roller coating and what colors are most suitable for each type of roller is already known.
Now let's look at color technology to achieve the best results. The selected color type is diluted according to the instructions. If the manufacturer recommends not to dilute it, the material is mixed.
In addition, the selected roll is immersed in a container with color, it does not fall, it dies.
Often only one is wet, the other remains dry. It is necessary that the entire surface is evenly saturated with paint. This is achieved by rolling the roller on the gutter, but in no case on the ceiling.
When everything is evenly saturated with paint, the application begins to be applied to the surface. If the impregnation is not uniform, spots appear on the surface after the ceiling.
In the video - a cylinder is best to draw a ceiling
Working video with ceiling roller roller
In the photo - Ceiling roller, diynetwork.com
Ceiling painting - ceiling - repair technologies - repair and construction workshops + video
 According to experts, to obtain high quality coating only two layers of acrylic should be applied to the surface latex paint. The most common, but also suitable, is a ceiling covering with watercolor paints.
Currently on the market there is a large number of colors that differ in their characteristics. Most often, acrylic, latex, silicate and silicone paints are used for home renovations.
 When planning a ceiling repair, the worker needs to think about the accuracy, beauty and elegance of the work being done. Currently, there are many ways to do this, but painting the ceiling with acrylic paint is still in the lead.
Properties of acrylic paint
Manufacturers offer many types of this material, intended for ordinary rooms, bathrooms and even paint with increased moisture resistance.
It is not recommended to use paint for other purposes, as this will not lead to anything good. The advantage of acrylic paint is that if used correctly, the buyer can save a lot, and our time is quite necessary.
But if your budget allows, you can buy expensive material, thereby its quality will be simply gorgeous. The paint is mainly sold in white, but some manufacturers have it in a finished color.
For a better effect, add a certain number of tubes with the color mixture. According to the rules, paint is applied in several layers for better color transfer and reliability.
Preparing the ceiling for painting
What needs to be said about preliminary preparation ceiling for painting.
If the ceiling has previously been painted, this will make the task easier and reduce the time spent on work. You just need to remove it with a spatula old layer paints. After this it is necessary to prime and putty. To ensure long paint life and prevent future cracks, it is advisable to use a reinforcing mesh.

Painting the ceiling with acrylic paint
It takes very little to paint the ceiling.
The master will only need a stepladder, brushes, a roller and, accordingly, paint. You should start painting from the corners, so that you can then roll over the entire free area, without stopping at hard-to-reach places.
The first layer of paint can be applied as you please, but the second must be painted by rolling the roller in the direction of the light source, so that in the future the paint will look smooth and streak-free, even and will not create shadow areas.
It only takes a day to paint as it dries quite quickly and has no odor.
Do not forget that the choice of paint depends on the type of room being painted. For example, to paint dry rooms, you cannot use paint for painting, say, an ordinary kitchen; for a bathroom, you need a moisture-resistant one.
Many consumers ask the question: why do they choose this particular type of paint these days?
The answer is simple because there is a huge selection of shades; painting with this particular type of paint does not require high costs, both financial and temporary. In addition, painting does not require much skill and experience.
Acrylic paint does not have a strong unpleasant odor, unlike paints made on an organic basis.
This type of painting process gives excellent and amazing results and will please even the most sophisticated adult buyer. The durability of the paint is about 13 years, which is a lot important advantage of this product.
At the moment, there are many manufacturers of these paints, but, according to consumer reviews and experience, European manufacturers are still the leaders.
They present the product correctly to customers and have an excellent price-quality ratio for their products.

Acrylic paint is a safe product that does not contain organic solvents or toxic substances.
Thus, it is absolutely safe for humans. Based on these paints, the consumer can create a magnificent harmonious design your apartment, while over time the color and saturation are not lost. You can also create a decorative painting that will delight children, and maybe even an adult.
The fire safety of these paints is high because they are water-based.
By making a choice in favor of acrylic paints, the buyer guarantees himself high quality work, harmony and comfort in the home.
Consequently, he will not spend a lot of money and very little time, but he will get everything that he wanted to recreate in his renovation plans. To this day, people are recreating new fantastic ideas and turning them into reality.
In conclusion, it should be noted that acrylic paints give you all the advantages in renovating your warm home.
Painting is still one of the most popular options for finishing the ceiling surface. Painting ceilings is mainly done with acrylic paint and a roller as the main tool. The availability of materials at a price and ease of application make it possible to use this method of finishing even for a person who is not experienced in matters of repair.
Preparation stage
To obtain the best results when painting, you must be patient and carefully prepare the floor surface for this finish.
The ceiling must be cleaned of all traces of previous repairs.
Peeling areas of the coating are removed using a spatula or other suitable tool. Particular attention should be paid to those areas that are covered with stains. You must try to remove them completely, and if this is impossible, treat them with special solutions.
The question often arises of how to remove old whitewash before painting.
Be sure to treat all greasy and rusty stains. They tend to bleed through the new coating even after several applied layers and over a long period of time.
For processing it is better to use special chemical compositions, sold in stores, and not rely on “folk” remedies.
After these steps, the plane must be leveled using putty or plaster mixture. The last operation to prepare the surface will be priming with deep penetration compounds.
Preparing the instrument and room
To achieve the best results, the correct work attachments must be used.
Among them should be:
- Paint bath
- Roller, if it is chosen as a working tool
- Not too wide brush for painting corners and stripes along walls
- Protective glasses
- Ladder
- Masking tape
It is important to use the right tool. When painting with acrylic paint, it even matters which roller you use to paint the ceiling.
It is best if it is covered not with synthetics, but with natural threads or fur and the pile is of medium length. This “coat” is best suited for acrylic paints.
All areas not intended for painting must be carefully sealed with masking tape, and the floor and those furnishings that could not be removed from the room must be covered with plastic wrap.
Coloring
Almost everyone who has encountered painting ceilings with acrylic paint has wondered how to paint a ceiling without streaks.
It's not that difficult and you can learn it on the job.
You can start by first preparing a paint solution, slightly diluted with water. It is needed to apply the first layer, which will “reveal” all the existing defects and imperfections of the overlap. This will allow you to identify the most “problematic” fragments of the floor, which need to be approached with special attention during work.
When the first layer has dried, you need to pour undiluted paint into the paint bath.
Ceiling paint - which is better: 9 answers to the question
All subsequent layers will be applied without diluting it with water. Next, the roller is dipped into the ditch and rolled along a horizontal platform to remove excess emulsion. This way you can put the required amount of solution on the roller so that it does not leave drops on the overlap and does not create areas with too thick a coating.

You need to start rolling from the walls, gradually moving towards the middle of the ceiling.
Each new strip is placed edgewise on an already painted area. If a sprayer is used, the application technology changes somewhat, but the direction of applying the emulsion layers remains the same.

It is important to follow the correct direction of the layers when rolling out the emulsion.
Their direction should alternate and each new one is superimposed across the previous one. There will be several layers and you need to calculate them in such a way that the last of them is applied in the direction of the light entering the room.
You can learn more about how to paint a ceiling with acrylic paint yourself by watching the video below.
According to many, painting the ceiling after whitewashing is hardly an impossible procedure, this process is considered so complex.
And there is a certain explanation for this, since even despite the fact that whitewash paint is applied quickly and without any difficulties, there is a very real danger that such a ceiling coating will not be able to last for a long period of time, and the paint for whitewashing the ceiling will begin to gradually move away from the surface along with the whitewash itself.
Therefore, consumers often have to choose which finish fits better just whitewashing or painting the ceiling.
In this case, there is the only correct solution, the essence of which is to completely eliminate the whitewash layer. This is quite difficult to do, and the process is far from the cleanest. All work on finishing the ceiling must be carried out in a room from which all furniture and other interior items have previously been removed.

So, thinking about how to paint whitewashed ceiling, it should be remembered that there are two main options for removing whitewash from the ceiling: dry and wet methods.
- The essence of the dry method is to remove whitewash either using standard tools, for example, a spatula, or an electric drill equipped with a special attachment, or a grinding machine. During work, it is imperative to use a respirator or a cotton-gauze bandage. However, the smallest dust particles will still remain in the air for a long time, and removing them will be very problematic. Therefore, this option is far from the safest for health (read also: “How to whitewash a ceiling with chalk”).
- The wet method of cleaning the ceiling from whitewash involves pre-wetting the surface.
This is done using different equipment: brush, roller or spray.
How to paint a ceiling without streaks with your own hands
To achieve a better effect, add a soap or ammonia solution to the water, or, alternatively, soda. The whitewash layer softened by the liquid is carefully removed using a spatula. If difficulties arise with some areas of the ceiling, you can re-treat them with the solution and try to remove the whitewash layer again.
Ceiling cleaning
Often, many cannot decide which finish is best for such an important part of the room as the ceiling: painting or whitewashing.
But before making the final choice, you should remember the features of using both coatings.

It is equally important to know not only what to paint the ceiling after whitewashing, but also how to do it correctly. A completely cleaned ceiling must be treated with a primer, with which it is necessary to eliminate all visible surface defects.
Drying of the putty should be followed again by applying a layer of primer, which must then be left to dry. Only after completing all these steps can the ceiling be considered ready for painting.
How to remove whitewash from the ceiling, more details in the video:
When deciding how to paint a whitewashed ceiling, you can use either enamel paints or water-dispersion paints, which are very popular today.
Such paints have good vapor permeability, and the materials included in their composition allow paints in this category to be easily cleaned and washed. Read also: “Proper whitewashing of the ceiling according to old whitewash- a proven method."
So, if you are wondering how to paint a whitewashed ceiling, you can always seek help from specialists who can provide information with photos and videos of finishing options or recommend one or another finishing material.