Preparing greenhouse soil for spring. How to prepare a greenhouse for the new season in spring? Fumigation with sulfur bombs
The snow has melted, the garden has dried out a little - it’s time to start preparing for spring planting. An important task for every summer gardener is to prepare a greenhouse, because this is where the early plants will be planted first. The RMNT website will tell you how to prepare your greenhouse for planting in the spring.
We are sure that thanks to the detailed instructions on the portal website, you have carefully prepared the greenhouse for winter. In this case, you will have much less work in the spring, but there is still a lot to do. First of all, you need to inspect the greenhouse - after a snowy winter, damage is quite likely.
Under the weight of the snow, the polycarbonate coating could burst or bend, and damage to the glazing is not uncommon. And the frame itself could well break, bend, or crack in some places. In such cases, repairs are required, strengthening the base of the greenhouse, replacing polycarbonate, film or glass. Gaps in frames and transoms can be sealed with sealant, and minor damage to the film can be sealed with tape.

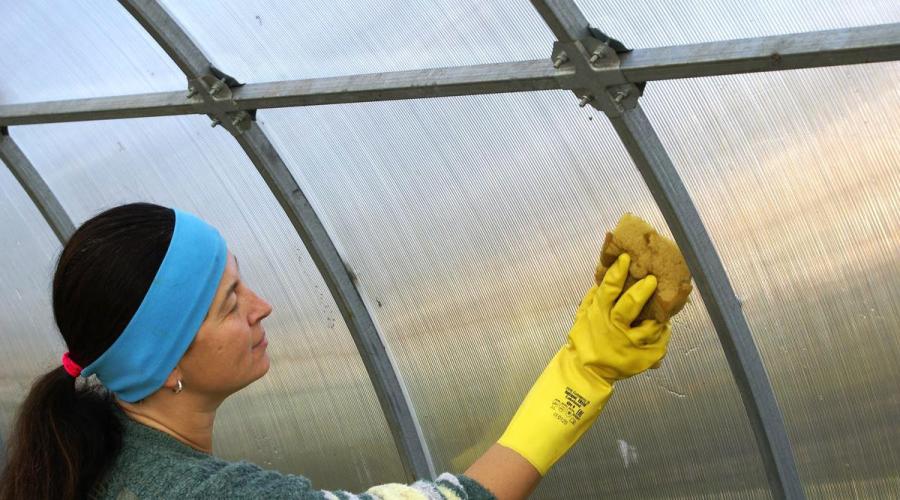
The next stage is cleaning. You carry out general cleaning of the house in the spring, so the greenhouse simply needs it. We understand that in the fall you already washed the polycarbonate or glass, washed, dried and hid the film. But over the winter, they all definitely became dusty, dirty, and everything needs to be done anew to provide the plants with normal access to sunlight. We remove garbage from the greenhouse and remove everything unnecessary.
Wash glass and polycarbonate inside and out; we recommend adding a little copper sulfate (100 grams per 10 liters of water) or bleach (300 grams per the same amount of water) to the soap solution. This will allow surfaces to be disinfected. You should work with gloves. Many summer residents simply use a solution of laundry soap, without any additives; it also disinfects surfaces quite well.
Important! Polycarbonate is washed with soft sponges and brushes, without abrasives, so as not to scratch it.
The frame of the greenhouse is also washed, preferably with water and vinegar. After such a thorough cleaning, the greenhouse should be left open to ventilate and dry.


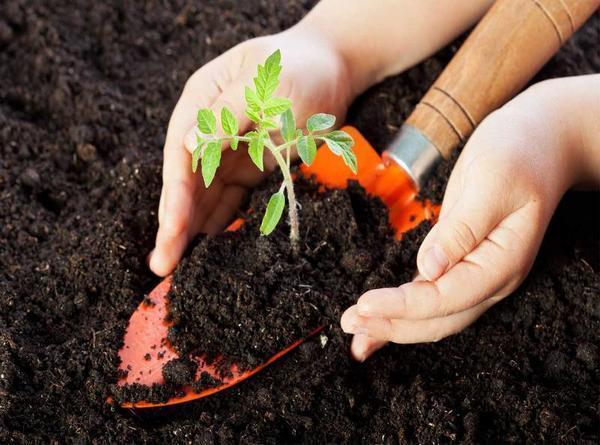
Before you start arranging the beds, you need to prepare the soil. This is a very important point! Firstly, pests could remain in the soil since the fall, which you will then have to fight, and secondly, the soil in the greenhouse is depleted quickly, you need to improve its quality before planting.
The cardinal method is to completely remove the top layer of soil to a depth of 20-25 centimeters. That is, dig up and remove all the soil from the greenhouse, and then fill it with new, more fertile and pest-free soil. In a small greenhouse, this method, of course, can be used, although it is quite labor-intensive. But in larger greenhouses this is no longer practical, there is too much work.
The following simple methods are used:
- Thermal. The soil is simply poured with hot water, almost boiling water. It will simultaneously kill harmful microorganisms and warm the soil, which is important for early planting of vegetables and herbs.
- Chemical. Use smoke chamois bombs, copper sulfate, phytosporin, bayleton, fitoverm, and other ready-made preparations that are diluted with water, according to the instructions on the package. They work well, but many summer residents try to do without chemicals.
- Biological. The most acceptable and effective. Such drugs as “Fitop-floras-S”, “Emochka-Bokashi” and others are used. They are used according to the manufacturer's instructions.

To improve the quality of the soil in a greenhouse, experts advise sowing green manure in it in the fall. In winter, winter oats and rye are sown. If you haven't done this, don't worry, there are other methods. Of course, the easiest way is to use ready-made fertilizers, but many gardeners prefer to simply dig up the soil, adding compost, humus, and peat prepared from last year. Such a natural fertilizer as sapropel has proven itself to be excellent. Add it to the soil and it will be almost completely renewed, and for several years to come.

Now we move on to arranging beds, paths or updating them. By the way, if you use raised beds made of boards, slate, or other materials, such a frame also had to be disinfected beforehand!
We wrote in detail about what should be in a greenhouse for convenient and fruitful work. That's all, now you can wait a little until the soil temperature rises to the +17 °C we need during the day and at least +5 °C at night to start planting cucumbers and tomatoes.
Video on the topic
Similar articles
clean the internal surfaces of various debris that inevitably accumulates in the corners;
In my opinion, this is the only correct direction in crop production. For example, the drug “Fitop-Flora-S” will not only relieve plants from fungal diseases, but will also suppress the growth of pathogenic microflora in the future. To treat the greenhouse you will need a working solution: 100 grams of the drug per 10 liters of water. Attention! Water must not contain chlorine! For 30 sq.m of greenhouse surface, 10 liters of working solution will be required. After 2 weeks the treatment will need to be repeated.
We are preparing greenhouses for spring
I didn’t have the slightest idea how to do this, so I had to turn to familiar gardeners for help and study literature on the topic. As a result, this is the list of spring work in the greenhouse:
pour warm water;
Preparation stages
March cannot be called a full-fledged spring month; it is the threshold of spring. The snow is melting, the ground is clearing, but the air temperature is not yet stable, the ground has not completely thawed, and therefore an experienced summer resident will wait until April. After all, even he can swoop in with a sudden snowstorm, freeze the ground with night frost and take a careless owner by surprise. However, the beginning of April (and in warm winters, the end of March) is the time when you need to start preparing the greenhouse for planting.
- Let's look at some of them:

Pour 400 grams of lime into the water and mix thoroughly.
- Disinfection can be carried out using several methods:
- Advice! It is advisable not to dump plant remains on a compost heap, but to burn them or remove them off site. Experienced gardeners sometimes cut the remains of tomato stems, laying them out in a thick layer under the berry bushes. Phytophthora does not harm berry bushes, while stems laid in a continuous layer will warm the bushes in winter.
- If the frame is wooden, then check the strength of all guides and lintels, as well as the roof. All loose and rotten elements must be replaced.
What it looks like in practice
Any owner of a summer cottage who is seriously involved in gardening or gardening dreams of building a greenhouse. This design allows you to prepare seedlings for the season or grow crops all year round. The microclimate and temperature conditions depend on the characteristics of the greenhouse, and each plant has its own requirements for these parameters.
Complete design revision
disinfect the greenhouse premises;
In a greenhouse, we usually plant the same crops year after year, so the soil here requires more attention than in conventional garden beds. What options for its improvement and enrichment with nutrients are offered?
- cleaning and repair;
- There is a lot of work ahead, but you will be pleased with the first harvest very soon.
If the beds in the greenhouse are sufficiently warmed up, then in April you can already plant seedlings: tomatoes, peppers, herbs, seeds of cucumbers, eggplants, watermelons and other crops. The amount of preparatory work will depend on how conscientiously you carried out the cleaning work in the greenhouse in the fall, whether you removed the remains of plants after harvesting, whether the soil and the greenhouse itself were disinfected, and whether fertilizers were placed in the ground. If any of the above has not been done, you will have to catch up at an accelerated pace in the spring.

Legumes (beans, lupine, peas, sweet clover, lentils, soybeans, clover, wildflower, seradella, sainfoin, etc.).
We leave the solution to infuse for 4 hours.
For gas, sulfur bombs of the “Climate” type are usually used
Preparing the soil in the spring in a greenhouse can be done in several ways:
For metal frames, it is necessary to inspect to find deep traces of corrosion that may compromise the strength of the structure. If profiles corroded by rust are found, they should be replaced.
- In order to obtain high results in greenhouse cultivation of crops, this structure should be properly maintained. Therefore, before each season it is necessary to carefully prepare the greenhouse, and we will talk about how to prepare the greenhouse for spring planting in this article.
- Add the necessary fertilizers to the soil.

Replacing the top layer of soil
disinfection of the greenhouse and soil (if it is not replaced);
- With the arrival of spring, greenhouses begin to prepare for upcoming plantings. And although many consider the list of spring work in a greenhouse to be small, it is still quite labor-intensive. In order to get a wonderful harvest at the end of the summer season, it is important to carry out all the necessary measures without missing anything.
Removing plant debris
Before starting any work, carefully inspect the structure of the greenhouse, check the strength of the supports and beams, whether they have rotted or become loose over the winter. Anything that does not satisfy the inspection results must either be repaired or replaced. For metal structures, it is necessary to inspect to ensure the absence of deep corrosion. The frame of a greenhouse or greenhouse may suffer in winter during heavy snowfalls: structural parts may be partially deformed. Everything needs to be brought into proper shape. You will have to replace the broken glass and seal or re-tighten last year's damaged film.
Cereals (rye, oats, barley, wheat).
After infusion, the liquid should be carefully drained, subsequently used for spraying, and the wooden parts of the structure should be coated with the sediment. To do this, use a washbrush.
- . In addition to sulfur, they also contain flammable material. During the combustion process, they release gases that penetrate everywhere, even into the smallest crevices that are inaccessible for washing and spraying. It is advisable to remove 5-7 cm of the top layer of soil

Advice! To prevent metal corrosion, it is necessary to treat the profiles with special protective compounds that will extend the service life of such a building.
- And of course, inspect the structure for integrity and strength.Experts recommend replacing the top layer of greenhouse soil every year, removing 10-20 cm. Instead, add purchased soil for seedlings or prepare the soil mixture yourself. For greenhouse beds, mix turf soil, river sand, humus and peat (1: 1: 3: 5). To neutralize the acidic reaction of peat, add 3 kg of lime per 1 cubic meter of mixture. This is perhaps the most time-consuming and expensive method, definitely not for me. Click on the photo to enlarge
increasing soil fertility.
Disinfection in spring

All remnants of weeds, as well as last year’s crops, should be eliminated from greenhouses. All kinds of strings used for tying, as well as pegs that served as supports, are either disinfected or removed completely.
This must be done in order to prevent the entry of pathogens from greenhouse crops preserved in the soil on last year’s plant residues. If last year the plants in your greenhouse were sick, for example, late blight was annoying, then all plant residues should be burned without regret: in the compost heap, the infection will find a second life and will again enter the greenhouse.
Phacelia, sunflower.
- Advice! If a spider mite was found in the greenhouse, the amount of bleach should be increased to 1 kilogram per 10 liters of water.
- Interacting with moisture, oxides form sulfurous and sulfuric acids, which spread over all surfaces and destroy slugs, mites, fungi, microbes, mold and infections.
. It is this layer that is characterized by the largest accumulation of fungi and bacteria that cause various diseases in plants. And in order to prevent infection of young plants, the soil should be removed. In place of the removed soil, place a layer of humus, then manure or mineral fertilizers.
- Preparing a polycarbonate greenhouse for spring begins at the end of March, since many gardeners already plant seedlings of peppers, tomatoes, etc. in the ground in mid-April. Therefore, you need to prepare for the season in advance.
Let's start by checking the greenhouse itself. How did it survive the winter, are all its parts in satisfactory condition? Wooden parts must be checked for rot and harmful insects. You also need to test the strength of the frame by applying force and try to swing it. Any rotten areas found in the wooden frame elements are cut out and replaced with new ones. In addition, the wood of the greenhouse in the spring must be treated with antiseptics, if this was not done last year. The simplest is freshly slaked lime, which is used to paint all the wooden elements of the greenhouse.
Sowing green manure
Everything is clear with cleaning - remove the remains of last year's crops and weeds. Everything that served as a temporary support (pegs, twine for tying) will also have to be removed or disinfected.

If the film covering of greenhouses has overwintered directly on the frame, then a thorough inspection to ensure its integrity will not hurt. All detected damage must be repaired. Not only from the inside, but also from the outside, the greenhouse film covering must be washed so that the subsequently planted vegetation can receive sufficient light. The frame, ceiling and all internal walls of greenhouses are disinfected. If the film was removed from the frame for the winter, all parts of the greenhouse are first treated separately, and only then the film is attached back to the frame.
However, if you are cleaning the greenhouse in the fall, then, like zealous and experienced owners, you can find a use for the remains of the stems. They need to be cut into pieces 10-20 cm long and laid out on the soil near the berry bushes. You need to add humus (compost) on top and then cover it with a layer of straw. This warm coat will help the bushes survive the winter, and they will not be afraid of tomato diseases.
Use of biological products that are safer than chlorine and sulfur
- Advice! Experts recommend the following dosage of sulfur: 50-80 g per 1 m3 of greenhouse. If the room is infested with spider mites, the dosage is doubled.
It often happens that under the influence of snow load the frame can bend or even “collapse”. This occurs due to insufficient rigidity of the structural elements. In this case, you will have to partially disassemble the frame.
- At first glance, the greenhouse is a simple structure that requires little maintenance. In fact, this is not the case, and the success of the summer season depends on proper care.

The metal frame is examined for corrosion. Detected areas of rust are cleaned to bare metal and painted with paint for exterior use.
- Nobody argues about the benefits of green manure, so you can safely sow rye, oats, vetch, mustard, phacelia, and watercress in greenhouse beds. In order not to waste precious time, during the fruiting period of green manure crops planted in a greenhouse, green manure can be sown between the rows, and in the fall the harvested ridges can be sown with winter rye or oats.
- Greenhouses with film coating
- As for greenhouses coated with glass or polycarbonate, these fairly durable structures are also not immune to various damages over the winter. Therefore, it doesn’t hurt to take a good look at them either, and all identified damage needs to be repaired. And only after this the greenhouses are washed and disinfected.
The largest accumulation of harmful bacteria is in the top layer of soil. Do not be lazy to remove and remove 5-7 cm, thereby improving the health of the greenhouse soil. Replenish the removed soil with humus or mineral fertilizers. The removed soil will be useful in flower beds or ridges with other crops. You can not remove the soil, but thoroughly disinfect it, for example, using copper sulfate or Bordeaux mixture.
- Cruciferous vegetables (colts, oilseed radish, rapeseed, mustard).. They are not as strong, but are excellent preventive measures. In addition, biological products have an effective effect not only on pathogens, they can also significantly increase soil fertility.
Soil preparation

This procedure can only be carried out at a temperature of 10-15 degrees. Before burning sulfur, tightly close all cracks so that the gas does not escape from the room.
Advice! The removed soil can be used on open ground - beds or flower beds, where there are no related crops.
Advice! Bent metal elements can be straightened and returned to their places. However, in this case, the greenhouse must be strengthened with additional racks.
Let's look at what stages the spring preparation of a greenhouse includes:
If corrosion has already severely corroded the metal, then it is better to remove such parts and replace them with new inserts. It happens that the frame can change its geometry under the weight of a large snow cover. In this case, it is necessary to strengthen it by installing additional spacers, racks or corners.
Use of EM drugs
- If the film has been overwintered on the frame, you need to carefully inspect it for integrity. We repair any damage found, if possible, or replace the damaged area. To ensure that the plants receive enough light, it is advisable to wash the film coating outside and inside. The internal walls, ceiling and frame need to be disinfected (read below on how and how this can be done). Some people remove the film from the frame for the winter; in this case, they are processed separately, and then a clean film is attached to a clean frame.
- It is possible to disinfect greenhouses in various ways. Often, a solution of slaked lime is used for disinfection, which needs to be passed over the surface of the walls and ceiling, as well as along the frame. To obtain this solution, take half a kilo of copper sulfate and 3 kg of slaked lime per 10 liters of water.
The most important enemy of greenhouse plants is the well-known late blight. Late blight is not afraid of even severe frosts; it overwinters safely in the ground, remaining viable for several years. This is why disinfection is simply necessary.
Some tips for sowing green manure:
- The process of changing soil is quite labor-intensive, so it can be replaced by using special disinfecting chemical solutions

We carry out a coverage audit.
- Cleaning from plant debris and checking the frame and coating for strength.
In the same way, the greenhouse is prepared for spring, checking the condition of the translucent coating. Polyethylene film, if it is not reinforced, usually needs to be replaced, since, having endured heat and frost, it becomes fragile and breaks with just one touch. Reinforced film, if defects are detected, is patched with transparent tape or replaced completely.
- They will help protect plants from diseases and pests, get a richer and (most importantly) environmentally friendly harvest. At the same time, they will populate the soil with beneficial microorganisms, healing it and improving its structure.
- Greenhouses covered with polycarbonate and glass
- Sulfur bombs, also known to many, are widely used for disinfection. If in the previous year there were relatively few different pests, then for one cubic meter of greenhouse it is enough to take 50 g of sulfur. Well, if there were quite a lot of pests, the sulfur dosage is increased to 150 g. However, despite the fact that this method is quite simple, summer residents who use it note that it does not save from fairly annoying downy mildew, as well as from destructive bacteriosis and dangerous late blight. They are also a little confused by the fact that sulfur dioxide formed during the combustion of sulfur bombs penetrates the soil, and in considerable doses. And since the soil in greenhouses is almost always dry, all this will subsequently affect the ripening vegetables and herbs.
- In order to simultaneously rid the greenhouse of any harmful little things (mites, bacteria, fungi, etc.), sulfur bombs are used. The dosage is calculated depending on the area of the greenhouse and the degree of damage. The sulfur is set on fire after being mixed with kerosene. In order for the procedure to be as effective as possible, take care to plug all the cracks. For your own safety, wear rubber gloves and a gas mask. Ventilate the greenhouse after a few days.

You can sow in both autumn and spring, before planting the main crops. In this case, planting is carried out at the end of March - beginning of April.
Conclusion
Now let's look at how to prepare a polycarbonate greenhouse for planting in the spring. Every year, plants take a significant portion of nutrients from the soil, and these reserves must be replenished.
oteplicah.com
Preparing the greenhouse for spring
Sulfur is mixed with kerosene (in no case with gasoline), after which the resulting mixture must be burned on iron baking sheets, which are placed in advance along the entire length of the greenhouse. First, sulfur should be set on fire, poured onto the baking sheet furthest from the door, sequentially moving towards the doorway.
. An excellent option would be to use a solution of copper sulfate, which is poured onto the soil after shallow digging.
Depending on the material, at this stage you will need to perform the following actions:
External inspection of the greenhouse
Glass elements, if they are broken or cracked, must also be replaced so as not to risk your health and the plants in the greenhouse. After all, at the slightest tension, glass can fly out of its nest and injure both the gardener and the plants.
Cleaning up plant residues
Biofuel-powered ridges
These materials are stronger than film, but over the winter they can also get damaged. If any are found, we eliminate them; if not, we can begin washing and disinfecting.
A good way to disinfect greenhouses is to use all kinds of biological products. For example, a product called “Fitop-Flora-S” not only helps to rid vegetation of various fungal diseases, but also perfectly suppresses the growth of pathogenic microflora in the future. For 10 liters of water (it is very important to ensure that it does not contain chlorine) to prepare a working solution, take 100 g of this product. Ten liters of working solution should be enough for 30 square meters of surface. A couple of weeks later, the treatment is repeated.
Greenhouse disinfection
If you are disinfecting a greenhouse with a steel frame, then it needs to be thoroughly painted before the event begins.
In spring you should sow thickly, in autumn - more rarely.
Such nutrients are found in the humus layer. Therefore, it is very important to fertilize the soil with various organic fertilizers, which contain almost the entire range of nutrients necessary for the normal development of plants.
Advice! For safety reasons, such disinfection should be carried out wearing a gas mask and rubber gloves. If you don't have a gas mask, you can use a respirator. The greenhouse can be ventilated no earlier than 3 days after the work.
Such products are excellent in the fight against late blight, spotting, downy mildew, gray mold, scab, and rust.
Soil preparation
If the coating is glass, then all cracked and broken glass is removed.
Disinfection of both the greenhouse itself and the soil.
Warming up the soil
Polycarbonate, although it is highly durable, also sometimes becomes unusable in individual parts. Somewhere there may be darkening, which indicates a violation of the integrity of the air channels; somewhere the polycarbonate may bend. If there is no way to fix this, such fragments are deleted and replaced with new ones.
- They can be made both outdoors and in a greenhouse. This is roughly the list of spring work in the greenhouse that we ended up with. The task is new and unusual for me, so I have little confidence. There is a lot of information around, and often the recommendations given in one article contradict the opinion of gardeners who have had their own greenhouse for more than one year.
- So we have reached the most difficult (in my opinion) topic. Honestly, my head is spinning: which processing method to choose? I would like to protect plants as much as possible from possible diseases and pests, but not at the expense of product quality. How to find the golden mean?
The soil of greenhouses, compared to beds, requires more careful attention, since almost the same crops are planted in greenhouses every year. In this regard, the soil in them needs to be healed and enriched with various nutrients.
xn--e1aelkciia2b7d.xn--p1ai
Preparing greenhouses for spring
Sulfur can be replaced with bleach and wet treatment can be done (400-1000 grams of bleach per bucket of water).We put things in order in the greenhouse and carry out the necessary repairs.
When carrying out early spring plantings, you should select cold-resistant early ripening plants - fodder peas, mustard, oats, vetch, fascia.
Experienced vegetable growers know that up to 90% of the harvest directly depends on the condition of the soil. The soil should be airy, loose, light, with beneficial microflora.
Since sulfur compounds are aggressive to greenhouse structures, to avoid corrosion you should cover the steel frame with several layers of paint. Aluminum and wood do not suffer significantly, and plastic and glass do not interact with sulfuric acid at all.
Mandatory sanitation of the greenhouse
The film is inspected for tears, punctures, etc.
Fertilizing soil beds.
Ways to increase soil fertility
spider mite
/ By admin / In DIY greenhouse / Leave Comment
Sulfur checkers
One of the options for increasing soil fertility is partial replacement of the soil, more precisely, its top layer, which experts advise to replace annually, removing 10 - 20 cm. Instead, the soil purchased for seedlings is filled up. You can prepare the soil mixture yourself by mixing peat, humus, as well as river sand and soil (turf) in a ratio of 5:3:1:1. In order to neutralize the acidic reaction of peat, 3 kg of lime should be added to each cubic meter of the prepared mixture. This method, of course, compared to the others, is very labor-intensive and quite expensive.
asienda.ru
Preparing the greenhouse for spring planting | Homemade crafts, crafts for the garden, do it yourself
Biological preparations are also widely used for pest control.
Green manure should be plowed in a week or two before planting the main crops. They are cut with a flat cutter or hoe and plowed in by 2-3 cm.
The more organic matter you add to the soil, the better. How to prepare a greenhouse for planting in the spring using organic fertilizers?
- Wet disinfection
- Late blight is one of the most dangerous enemies of greenhouse crops.
Spring cleaning and repairs in the greenhouse
Warming up the soil for planting.Over the summer, a lot of pathogens of various diseases accumulate in the soil, which are perfectly preserved in the winter. Therefore, it is recommended to remove the top layer of soil from the greenhouse beds in the fall. If this was not done on time, then in the spring such a procedure is simply necessary, otherwise you cannot count on a good harvest of tomatoes in the greenhouse. If possible, you need to at least remove a layer of soil 5-10 cm thick, where there is an accumulation of fungal spores and harmful bacteria. The removed soil is replenished with fresh or humus, with the addition of mineral fertilizers. Such a long winter, it seems, is already on the wane, and gardeners, in anticipation of a happy season, begin spring chores - prepare, buy, seeds of flower and vegetable crops, sow sweet seedlings peppers, eggplants and tomatoes. And some flowers require seedling propagation. And one of the main tasks is preparing the polycarbonate greenhouse for spring. After all, already in April in some regions you can plant seedlings in a greenhouse, especially if there is heating. 50 grams of sulfur are needed per 1 cubic meter of space, if there were few pests last year. And if there is a lot, then the dose is increased to 150 g. In our village this is the most popular means of disinfecting greenhouses, which seems a little strange to me. According to reviews from gardeners who use sulfur bombs, they do not protect against late blight, bacteriosis and downy mildew. It is also confusing that sulfur dioxide, formed during the combustion of sulfur bombs, will end up in the soil in huge quantities. In the greenhouse it is non-drip, and in the end everything will end up in greens and vegetables. Another option is to sow green manure, the benefits of which have long since ceased to be debated. In greenhouse beds it is not forbidden to sow watercress, phacelia, vetch, mustard, oats and rye. At the fruiting stage of planted crops, green manure is often sown between rows, and in the fall, the harvested ridges are sown with oats or winter rye.
Disinfection of a greenhouse - what do we use?
First of all, preparing the soil in a greenhouse involves replenishing minerals. It is absolutely impossible to do without organic fertilizers, which allow soil microorganisms to create a rich humus layer necessary for a good harvest. To do this, you can use one of two methods: characterized by a lower price and ease of use. To carry out such work, you will have to generously spray the inside of the greenhouse over the entire area with a solution of bleach. This fungus reproduces in two ways: Advice! Places where the film is torn can be sealed with wide transparent tape.Since you can prepare the greenhouse for spring at the end of the previous season, you could do some of the above actions in the fall. If you did not prepare in the pre-winter period, then all events can be carried out in the spring.
Improving soil fertility
If it is impossible to remove the soil, the soil can be disinfected using chemicals such as Bordeaux mixture, copper sulfate, Maxim and others. Manure is placed in the greenhouses for warm beds, so that on the first convenient day they can be poured with boiling water and covered with film. Many people do not have the conditions for growing seedlings in an apartment, therefore, as soon as days come with stable positive temperatures, despite night frosts, they try to sow the seeds of those crops that have a long growing season - peppers, eggplants. And of course, everyone is looking forward to their first greens - radishes, onions, dill, which can only be obtained in a greenhouse or greenhouse. Slaked lime solution The use of preparations of effective microorganisms, or, as they are also called, EM, will also be effective - drugs. Numerous beneficial microorganisms populating the soil will improve its health and significantly improve its structure. Also, such preparations will provide good assistance in protecting against pests and various diseases, providing the opportunity to harvest not only a richer harvest, but also an environmentally friendly one. The earth needs to be loosened, and worms will do further work for you, provided that the soil is well fertilized. In addition to fertilizers, it is good to use plants that create a green layer, and later are plowed into the soil (cruciferous crops, legumes, cereals). In this article, we looked at how to prepare the soil in a greenhouse in the spring with your own hands in order to get a truly rich harvest. From the video in this article you will learn more useful information. Preparing the soil in a greenhouse in the spring may involve the use of manure as a fertilizer, which perfectly enriches the soil with useful substances. Instructions for preparing the solution:Asexual (condia).
handmade-garden.ru
The polycarbonate coating should be examined for sags, broken channels, and darkened areas that should be replaced.
First of all, you need to inspect the greenhouse from the frame to the covering for defects.
disinfection of the greenhouse premises
What work will be done in the greenhouse in the spring?
Some disciplined gardeners do a lot of work in the fall, trying to prepare the greenhouse as best as possible for the spring reception of plants. Well, those who for some reason did not do this in the fall, will have to do the necessary work and treatment of the greenhouse before planting in the spring:
- For 10 liters of water you need 3 kg of slaked lime and 500 grams of copper sulfate. Treat the frame and surfaces of the ceiling and walls with the resulting solution.
- Last year I became the happy owner of a polycarbonate greenhouse - my husband made it with his own hands. It so happened that the greenhouse was assembled in late autumn, so I didn’t have time to grow anything in it.
- Before you start planting, the soil needs to be warmed up well. It takes longer to heat up than air, and in order to speed up this process, you can:
- During the long winter, gardeners sat in warm, cozy houses. The sun is getting higher and higher, its rays are getting warmer, more and more you want to go to the dacha, not in order to check whether the fence is intact after winter, whether the windows are broken, but in order to begin the pleasant spring chores - preparing the farm for new plantings.
Use green manure - plants that form green mass in a short time. They are grown to be plowed into the soil, where they become a source of organic matter and soil microorganisms. When using green manure, you can forget about fertilizing with manure, since 3 kg of such green mass successfully replaces 1.5 kg of manure.
We check the strength and integrity of the greenhouse
Pour 10 liters of water into a container.
Sexual (oospores). Oospores, hiding in the ground, can safely endure even the most severe frosts, maintaining viability for several years. Therefore, spring disinfection is very important.
Preparing a greenhouse in the spring involves cleaning the building from the remains of last year’s plants. This is very important, because, for example, tomatoes can be affected by late blight, the pathogens of which do not disappear with the plant and can be transmitted to other crops through the tops.
Checking the transparent roof
Since most greenhouse frames are made of metal or plastic, inspection is carried out as follows:
In order to eliminate any foci of plant diseases and pests overwintering in the greenhouse, disinfection is carried out with various preparations. Sulfur bombs, iron sulfate, Lightning and others. But when using any drug, you must first of all protect yourself, work in a gauze bandage, and in the case of sulfur, then in a gas mask and rubber gloves. The greenhouse room should be tightly closed for several days, after which it should be ventilated. Now there are quite a lot of such disinfectants that do not require ventilation. In any gardening store you will be offered more than one product to choose from.
Preparing gladioli tubers for planting
Let's talk about preparing for spring planting. Preparing the greenhouse is an important task before planting.
The snow has melted, the garden has dried out a little - it's time to start preparing for spring planting. An important task for every summer gardener is to prepare a greenhouse, because this is where the early plants will be planted first.
Preparing the greenhouse for spring planting
Under the weight of the snow, the polycarbonate coating could burst or bend, and damage to the glazing is not uncommon. And the frame itself could well break, bend, or crack in some places. In such cases, repairs are required, strengthening the base of the greenhouse, replacing polycarbonate, film or glass. Gaps in frames and transoms can be sealed with sealant, and minor damage to the film can be sealed with tape.

The next stage is cleaning. You carry out general cleaning of the house in the spring, so the greenhouse simply needs it. We understand that in the fall you already washed the polycarbonate or glass, washed, dried and hid the film. But over the winter, they all definitely became dusty, dirty, and everything needs to be done anew to provide the plants with normal access to sunlight. We remove garbage from the greenhouse and remove everything unnecessary.
Wash glass and polycarbonate inside and out; we recommend adding a little copper sulfate (100 grams per 10 liters of water) or bleach (300 grams per the same amount of water) to the soap solution. This will allow surfaces to be disinfected. You should work with gloves. Many summer residents simply use a solution of laundry soap, without any additives; it also disinfects surfaces quite well.
Important! Polycarbonate is washed with soft sponges and brushes, without abrasives, so as not to scratch it.
The frame of the greenhouse is also washed, preferably with water and vinegar. After such a thorough cleaning, the greenhouse should be left open to ventilate and dry.


Before you start arranging the beds, you need to prepare the soil. This is a very important point! Firstly, pests could remain in the soil since the fall, which you will then have to fight, and secondly, the soil in the greenhouse is depleted quickly, you need to improve its quality before planting.
The cardinal method is to completely remove the top layer of soil to a depth of 20–25 centimeters. That is, dig up and remove all the soil from the greenhouse, and then fill it with new, more fertile and pest-free soil. In a small greenhouse, this method, of course, can be used, although it is quite labor-intensive. But in larger greenhouses this is no longer practical, there is too much work.
The following simple methods are used:
- Thermal. The soil is simply poured with hot water, almost boiling water. It will simultaneously kill harmful microorganisms and warm the soil, which is important for early planting of vegetables and herbs.
- Chemical. Use smoke chamois bombs, copper sulfate, phytosporin, bayleton, fitoverm, and other ready-made preparations that are diluted with water, according to the instructions on the package. They work well, but many summer residents try to do without chemicals.
- Biological. The most acceptable and effective. Such drugs as “Fitop-floras-S”, “Emochka-Bokashi” and others are used. They are used according to the manufacturer's instructions.

To improve the quality of the soil in a greenhouse, experts advise sowing green manure in it in the fall. In winter, winter oats and rye are sown. If you haven't done this, don't worry, there are other methods. Of course, the easiest way is to use ready-made fertilizers, but many gardeners prefer to simply dig up the soil, adding compost, humus, and peat prepared from last year. Such a natural fertilizer as sapropel has proven itself to be excellent. Add it to the soil and it will be almost completely renewed, and for several years to come.

Now we move on to arranging beds, paths or updating them. By the way, if you use raised beds made of boards, slate, or other materials, such a frame also had to be disinfected beforehand!
That's all, now you can wait a little until the soil temperature rises to the +17 °C we need during the day and at least +5 °C at night to start planting cucumbers and tomatoes.
Apr 16, 2019 Olga
All preparatory operations of the greenhouse and greenhouse for the new planting season should begin after harvesting, in the fall. However, intensive preparation begins in early spring, in March or April, depending on the region. The main spring stages include cleaning the greenhouse and preparing the soil for planting vegetables or ornamental plants. Soil preparation is the most important point, since not only a successful harvest, but also the composition of the grown fruits depends on its composition. The ideal soil composition is selected by trial and error and requires more than one season of experimentation. The optimal solution is the golden mean, since an excess of various fertilizers can cause intoxication, and as a result, the death of the plant, or the accumulation of negative substances. After sowing the seedlings, care and due attention should also be given.
After the snow has melted and freed the greenhouse, it is necessary to completely or partially dismantle the greenhouse. Namely, check the structure for defects, connecting parts, frame and covering material. After winter, if there is a lot of snow, even the most reliable greenhouse structure can become deformed.
If the greenhouse has a wooden frame, then it is necessary to check for loose elements, guides and beams.

All loose wooden guides and supports must be securely secured with nails and bolted joints. If the paint on the wooden frame is cracked or worn off, then it needs to be covered with a new paint and varnish material. If the greenhouse has a metal frame, then you need to check for the strength of the connecting elements - whether there are any breaks in the welding, whether the bolts are tightly tightened. In places where corrosion appears, treat with paint and varnish material.
The main thing in these actions is the safety of being in the greenhouse, as well as ensuring safety for the crop. Plants need to be grown safely.
Preparing the greenhouse for spring
After checking the structural strength of the greenhouse, the next step is to remove all plant debris and dry leaves from the soil. The remains of last year's plants may contain larvae and pests that will awaken under favorable conditions. They can also contain pathogens of many diseases for seedlings.
Using a rake, it is necessary to remove all remnants of last year's withered leaves, branches and dry plants.
If plant roots remain in the soil, then they need to be pulled out, dug up, that is, completely removed without any residue. Next, you need to dig up the soil and leave it to dry. The next step is to treat the walls and ceiling of the greenhouse.

To do this, you first need to wash the walls and ceiling of the greenhouse from dirt and dust, then you need to treat and disinfect it from pests. Disinfection is carried out with a soap solution; for this, take a piece of laundry soap and grate it in a ratio of 100 grams per bucket of hot water.
The prepared solution is foamed and wiped with a rag inside and outside the greenhouse. The solution should be applied with a generously dampened rag to the walls and ceiling of the greenhouse, then wiped dry with a clean, dry cloth. Pests do not like alkaline solutions and begin to run out of the cracks, and their larvae die. You should not resort to glass cleaners and various chemicals, as this can have a detrimental effect on the seedlings, and therefore on human health.
Greens in the greenhouse in spring: sowing
As soon as the climate in the greenhouse has returned to normal, which means above-zero temperatures day and night, you need to prepare the soil for seedlings. Preparing the soil for sowing begins with the formation of beds and loosening the soil, removing plant debris, roots and stones. Before planting seedlings, you need to determine the acidity of the soil, which is determined by several methods, including both free and the purchase of a special device.
Methods:
- Put a little earth on a spoon and pour vinegar over it; if the reaction is similar to quenching soda in vinegar (boils), then the acidity is normal. If nothing happens to the soil, then the soil is acidic.
- Three leaves of black currant are placed in a glass and poured with boiling water, filtered and a spoonful of soil is placed in the solution, if the solution turns red, then the soil is very acidic, if it turns pink, it is of medium acidity, turns green, then it is neutral, and if it is blue, then it is alkaline.
- A special device is an acid meter. In stores, both conventional acid meters and those with a combination of various functions are available (measurement of soil acidity + measurement of soil moisture + measurement of light level).
Depending on the type of plants being planted, soil preparation is carried out. For tomato seedlings, dig up the soil, sprinkle with sawdust, and cover with lime and manure. Next, fill the resulting “sandwich” with a fresh layer of soil and sprinkle it over the area. The ash fraction corresponds to flour, boil water at a temperature of 60 o C, water the soil and cover with film, after two weeks you can plant tomato seedlings.
A month before planting cucumbers, the soil is dug up and beds are formed with a height of 30 cm to 50 cm and a width of 80 cm to 100 cm. The formed beds are fertilized with a solution of potassium sulfate, tree resin and urea. After this, the beds are dug up and watered with a solution of bird droppings and covered with film. After a week you can sow cucumbers.
Work in the greenhouse in spring: installation and processing
After removing the remains of last year's plants and cleaning the walls and ceiling of the greenhouse from dirt, you should begin processing the upper layers of the soil. One method is to use sulfur balls to prevent fungal infections. Sulfur balls should be in proportions of 1 m 3 per 50 grams of sulfur.
A metal bucket is placed in the middle of the greenhouse, in which a sulfur ball is placed with a couple of sheets of newspaper or paper and set on fire, and fumigation is carried out in a tightly closed greenhouse.
At this moment, being inside the greenhouse is prohibited, as this can cause poisoning and dizziness. You can open the greenhouse after it has been closed for about a day. To increase soil fertility, you can replace the top layer of soil by removing from 10 cm to 25 cm. Next, add purchased soil or prepare the soil mixture yourself.

To independently prepare the soil mixture, mix turf soil with river sand (fine fraction without stones), humus and peat in a ratio of 1:1:3:5. Also, to normalize the acidity of the resulting soil, add lime per 1 m 3 per 3 kg.
Hanging beds for seedlings also need to be prepared and then installed. All last year's soil is replaced with new one. The boxes are checked for rot and deformation and replaced or repaired. Before sowing the main plants, you can plant cold-resistant seeds of mustard, radish, lettuce and onions.
Ordinary preparation of a polycarbonate greenhouse for spring
After wintering, polycarbonate covering material may develop sagging, deformed and cracked channels, and darkened areas that need to be replaced. The main element in a polycarbonate greenhouse is the transparency of the roof. If darkened areas are found in places, this indicates damage to the air channels in the polycarbonate; in this place, it may burst over time.

If no deformations are detected or have been eliminated, the next step is disinfection of the entire structure.
To disinfect and wash polycarbonate, you need to prepare a soap or vinegar solution. In order to make a vinegar solution, you will need clean warm water and vinegar in the ratio of a bucket of water per 100 grams of vinegar. Next, apply the solution to the walls and ceiling of the greenhouse using a generously moistened rag. This work should be done with rubber gloves to avoid skin burns from the vinegar solution.
Preparing the greenhouse for spring (video)
To plant and grow healthy and tasty vegetables, you need to start preparing the greenhouse for the new season in the fall and plan all operations step by step until spring. This includes proper storage of covering material, its dismantling, and repair of the greenhouse.
We install any greenhouse or greenhouse so that in the future, in these “houses,” we can create the necessary conditions for the crops that we are going to grow there. But what is good for plants is also very good for their pests and diseases. If you cultivate monocultures in a greenhouse for a long time, this seriously increases the concentration of dangerous pests in the soil. These are, as a rule, insects, and in addition to them various pathogenic fungi, as well as harmful microbes. That is why any greenhouses where the soil is constantly closed must be disinfected - the soil, as well as the structure of the greenhouse itself and all the equipment you have there. This needs to be done every year. Greenhouses made of polycarbonate are usually not often disinfected. The opinion of experts is to hold all such events in the fall (more about this is written here). It is best to do this disinfection as soon as you harvest. But we all have our own things to do, and perhaps it was these very things that prevented you from working on your greenhouse in the fall. Then you will need to prepare the greenhouse for planting in the spring. This is usually done in February, or a little later, in March, when a prolonged thaw sets in.
How to prepare a greenhouse for planting in the spring? What and how should you do?
I think it’s clear that such preparation is far from quick. Usually it consists of several successive stages, which are designed together to expel from your greenhouse all (or almost all) insects harmful to your plants, as well as pathogens of any diseases. This is exactly what should be your final result, based on the results of these preparatory activities. Let's figure out where to start disinfecting the greenhouse, what to do next, and how to complete our efforts.
Removing plant debris from the greenhouse
This is the first step you will need to take in preparing your greenhouse for spring planting. Many people include only tops or last year’s fruits as such residues. But that, of course, is not all. Be sure to remove all roots from the greenhouse, as well as those weeds that are present there. Due to the planting density that is typically present in most greenhouses and due to limited space, some pests are bound to live in the greenhouse, even if there have been no outbreaks of any diseases at all. There is no need to leave remnants of garter material in the greenhouse, the same twine or trellises, all for the same reason. Always processing a greenhouse in the spring should be accompanied by thorough burning of all hazardous waste. This garbage may consist of last year's plants, the same garter material and other unnecessary things. If you have any difficulties with burning all this, then here it is written how you can significantly speed up this process.
Some people recommend using tops from a greenhouse for compost. Of course, it may be suitable for this, but not always. The following conditions must be met:
If all the above conditions are quite feasible for you, then you can use all the tops from the greenhouse to produce compost.

We process structures
The design of a greenhouse involves not only its frame, but also the covering material itself, in most cases today it is polycarbonate. When processing all these component parts, you need not to damage them (especially the polycarbonate itself), and at the same time fulfill the main task, that is, to destroy everything harmful that may be present on the components of your greenhouse.
As for polycarbonate, just start by washing it with plain soapy water or something similar, where there are no abrasives. After this, the surface of the polycarbonate is rinsed with clean water. You can limit yourself to this if everything was fine in your greenhouse the previous year. If there were any problems, in terms of pests or dangerous diseases, then during such treatment it is necessary to use drugs that will destroy the pathogen. To do this, such preparations are simply added to the same soapy water.
IMPORTANT! In spring, polycarbonate in the greenhouse should only be washed using SOFT sponges or brushes, as well as rags. Polycarbonate, of course, is convenient as a covering material for greenhouses, but with this treatment it can be scratched very easily. You don’t even need a hard brush for this; scratches can be left with a hard burlap. So immediately forget about metal brushes or meshes for cleaning this transparent covering material. They will only ruin your polycarbonate.
Before planting, the greenhouse will need to not only be mechanically cleaned, but also disinfected. This applies to racks (if you have them), equipment, containers and other components of your greenhouse. To disinfect all these components, you can simply use boiling water (of course, it is not suitable for plastic) and some useful substances. The same copper sulfate (we use it as a solution), also iron sulfate, and in addition to them formaldehyde and bleach are well suited for this. For shelving and wooden supports, it is ideal to treat with lime mortar, which must sit well for this purpose.
Disinfecting the soil in the greenhouse
This sanitary stage of preparing a greenhouse in the spring is one of the most difficult and troublesome. If your greenhouse is small and, accordingly, there is not much soil mixture there, then you can do all this with the help of boiling water. Just a few buckets of good boiling water (that is, the water should just boil) can destroy most pathogens of various diseases in a small greenhouse.
If you live in any southern region, then this method will suit you: you will need to spill the soil, wash the covering material of the greenhouse, close all the windows in it, and also caulk all the cracks - a week will pass and the greenhouse can be “unsealed”. But many live far from the south and can carry out such a procedure only in June or July, when active fruiting is in full swing. Then how can we neutralize the soil in our greenhouses? This is quite difficult to do; it is easier to simply replace it. Maybe not all of it, but definitely 5-8 centimeters of the top layer. You can simply distribute this same layer throughout your garden, or cover this greenhouse soil with manure. 3 or 4 years will pass, and you will be able to use this seemingly waste soil again in your greenhouse. The soil in the greenhouse itself, where you removed this top layer, is usually covered with some kind of organic fertilizer, or simply dug up. You should also know that in the spring only fully “ripe” compost is added to greenhouses. Manure should be the same.
To disinfect the soil, you can use “chemistry”. The same solution of copper sulfate (or iron), as well as various special preparations that are intended specifically for this. If the soil in your greenhouse is acidic, you can use bleach. But, nevertheless, it is best to use “chemistry” for these purposes in the fall. In the spring, such events most likely will not contribute to the growth of plants in your greenhouse.
We carry out fumigation. How and with what?
This procedure will help you treat the greenhouse well, while your costs will be very small. There are some insects that can be “defeated” with an ordinary smoky fire. After this, the greenhouse will need to be tightly closed all night. Fumigation is annual; greenhouses with polycarbonate coating should be carried out more thoroughly. Here you can’t do without lump sulfur or a sulfur bomb.

Before you begin the process of disinfecting your greenhouse with sulfur, it will need to be prepared for this. The first thing, of course, is to remove all the debris, then water the soil, and carefully caulk the greenhouse. Only after these procedures will it be possible to process the greenhouse. To do this, sulfur in its pure form or ready-made checkers are laid out on suitable metal sheets. If you use lump sulfur, be sure to add a little kerosene to it.
ATTENTION! The gas that comes out when burning such bombs is extremely dangerous. That is why you should be present in a fumigated greenhouse to a minimum and be sure to take care of your protection. The greenhouse after treatment should be closed for 4 or 5 days. Then it can be opened and be sure to thoroughly ventilate.
Preparation of the greenhouse will go faster over time. Do you do this in spring or autumn. The main thing here is to practice all these skills and choose the most convenient methods for processing it. Don’t forget to do this every year, because when the greenhouse is clean and the material for sowing in it is of high quality, it will definitely give you a good harvest in the end.
Here is another useful video where they will tell you about preparing the greenhouse for the new season. All these events can be carried out both in autumn and spring. The main thing is to completely disinfect the greenhouse.