Crafts made from polyurethane foam. Garden sculptures and crafts made from polyurethane foam Figurines made from polyurethane foam for kindergarten
Having the opportunity to travel outside the city is great, and if you also have a vacation at your own summer cottage, it’s generally great. But the standard dachas, where we see only cucumbers, tomatoes, potatoes and other necessary vegetables and fruits, evoke melancholy more than the desire to relax. And I don’t want to work in such an atmosphere at all. What if you put in a little imagination and effort and turn your summer cottage into a real miracle? Believe me, your household members will not want to return to the city after the transformation of the dacha. And for such a transformation to take place, you will need DIY garden crafts. What do we mean? Watch, read, choose and be inspired.
Original DIY crafts for the garden and dacha from scrap materials
Of course, today most farm stores and flower stalls offer various options garden sculptures, pots and other beauty. But this pleasure is by no means cheap: to completely transform your site, you will need to shell out a tidy sum. Do you want to spend money? No? Then you've come to the right place. We will tell you how to create all this beauty with your own hands from materials that almost every thrifty owner can find.
So, this section of our website contains ideas that are worthy of taking a place on your site. We invite you to get acquainted with the technology of making flower beds from tires, original flower beds from plastic bottles, bird figurines, animal gnomes from the same bottles and other materials. And with us you can create real castles for your children, small fountains, relaxation corners, etc.
In addition to “traditional” materials, we will use completely unusual ones, for example, old typewriters, cases of different toy cars, children's buckets and much, much more. In principle, from our articles you will learn that you can decorate your garden or summer cottage with anything, and such DIY garden crafts will definitely delight your loved ones and guests.
Collection of ideas for crafts
Our articles and reviews are devoted not only to materials from which you can create, but also to various ideas.
We will tell you exactly what you can create in your dacha. How do you like the idea of such DIY garden crafts as:
- garden gnomes and other fairy-tale characters;
- children's slides;
- fountains;
- hammocks and loungers for relaxation;
- benches;
- swing;
- flower beds and flower beds;
- figurines from plants;
- Japanese stone gardens;
- original armchairs and sun loungers;
- play areas;
- houses and huts;
- birdhouses and bird pens;
- interestingly decorated booths.
Do you think this is the whole list? In vain! This is only a small part of what can be placed on your summer cottage.
Arrangement of crafts in the garden or on the site
It’s not enough to come up with and carry out a craft, you need to find a place for it on the site. Therefore, we have devoted a number of articles to how exactly you can place everything that you create.
In the articles there are many descriptions of different gardens and dachas with photographs in which you will see entire families of pigs walking in the garden, swans made of tires strewn with flowers, which are located near the porch of the house, and so on.
It is important when decorating the site not to overdo it and to correctly combine crafts for the garden with your own hands. The fact is that a large pile of everything will only repel.
How to combine different crafts, create entire scenes from them, organize a recreation and games area - all this will be discussed in our materials.
Creating with us will not only be easy, but most importantly, it will be interesting!
Polyurethane foam, universal sealant- one of those building materials that, as they say, “everyone has been waiting for a long time,” and which one day came into our lives seriously and for a long time. IN Western Europe it began to be widely used in the eighties, in our country - in the second half of the nineties. This application has become so commonplace that it is difficult to imagine how construction used to be done without such a convenient sealant.
And our craftsmen demonstrate non-standard use polyurethane foam. As a material for creating magnificent sculptures to decorate areas. As raw material for manufacturing original crafts. Take a look, maybe this experience will be useful to you too!
An aerosol that can be an excellent material for a sculptor.
Contained in sections:Showing publications 1-10 of 34.
All sections | Polyurethane foam. Master classes, crafts from construction foam
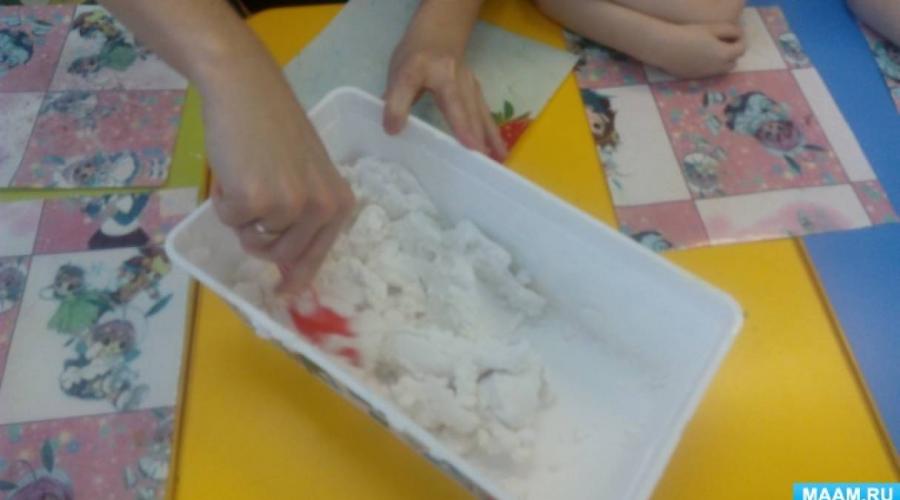
Scenario of a master class for parents on non-traditional drawing “Miracles of Foam” Target: creating a festive mood, formation of positive parent-child relationships. Involving parents and children in joint creative activity Tasks: 1. Introduce parents to the techniques and methods of unconventional drawing with shaving foam 2. Develop...
Master class using shaving foam and obtaining a drawing “Unusual in the ordinary” for teachers Relevance of the selected topic master class : In classes on creative development the tasks of comprehensive development of children, which is necessary for successful learning at school, are solved. In the process of work, children develop mental operations(analysis, synthesis, comparison, etc., skills...
Polyurethane foam. Master classes, crafts made from construction foam - Master class for teachers on the topic “Drawing using the monotype technique using shaving foam”
Topic: “Drawing using the monotype technique, using shaving foam” Goal: to expand the knowledge of teachers in the use of non-traditional techniques in visual arts children. Objectives: - to introduce teachers to the techniques of unconventional drawing, using the example...
Image library "MAAM-pictures"
Summary of educational activities on drawing “Balloons” using shaving foam Abstract educational activities on drawing using unconventional technology(shaving foam. Purpose: 1. Development communication skills children at the level of intergroup communication between children of different ages Tasks for children senior group 1. Ensure that you receive a positive...
Master class “Magic foam. Using non-traditional materials in working with children" Master class of the participant of the municipal competition “Teacher of the Year - 2018” Yulia Ivanovna Golubeva Master class summary Slide 1: Dear members of the jury, dear colleagues, I am glad to welcome you to our meeting. To organize a master class, we need 4 people from the audience. To...
 I wanted to try a recipe I wrote down a long time ago. artificial snow made from shaving foam and soda. How to make artificial snow from shaving foam and baking soda? To make artificial snow, I used Nivea shaving foam in a can. I chose foam for...
Polyurethane foam. Master classes, crafts made from construction foam - Formation of artistic and aesthetic skills of preschoolers using non-traditional drawing techniques. Shaving foam
"Formation of artistic and aesthetic skills of preschool children using non-traditional drawing techniques - shaving foam." Master Class Educator: Semenova I.N. 2018 Slide 1 Good afternoon, dear colleagues! I would like to present to your attention my master class on “Formation...
 Dear colleagues! Winnie the Pooh favorite bear. Very kind. Even too much. It's from a cute children's fairy tale: Soft plush and button eyes. Perhaps now cartoons are about Winnie the Pooh They are no longer as popular as they were twenty years ago. But he remembers poems about Winnie the Pooh well...
Crafts from polyurethane foam can be made with your own hands in just a few hours.
If you have a disposable bottle that hasn't run out yet, why not put it to good use? landscape design.
In this case, it is still better to resort to professional foam rather than household foam, since a small gun with a diameter of 2 mm is added to it.
Unusually simple and beautiful figures made from polyurethane foam will become the property of your site. They will not leave either neighbors or people simply passing by indifferent.
Materials for fakes made from polyurethane foam
You will need:
- gloves;
- sprayer with pre-prepared water;
- polyethylene;
- aviation kerosene.
Kerosene is needed so that upon completion of work with polyurethane foam, hands can be easily washed from building material.
It will also be useful to create a base for crafts made from polyurethane foam with your own hands.
You can take an ordinary plastic bottle, an old saucepan, or something else that you don’t mind.
With foam coating auxiliary material the creation of the craft will begin...
They need to be painted carefully, and before this procedure
dry thoroughly in the shade. It takes at least a week to dry, but if the layer of foam is large, it is better to wait longer.
The paint is applied to the foam craft with your own hands every spring. If this is not done, the foam may crack and the craft will be damaged.

Ideas for crafts made from polyurethane foam
If you have a small pond on your site, you can make a large green toad. This is especially true where there are many plants, especially large-leafed ones. In some cases it is easier to make a lizard or a crocodile - whoever succeeds.

In order not to make a mistake with the sizes and “get your hands on”, you can practice on plasticine. No matter how strange it may sound, it was after trying this simple material, you can make gorgeous crafts from polyurethane foam.
The same goes for dough - if you like to bake delicious buns, sculpt animals - this will help you figure out what you can do better.
Perfect solution- make turtles from polyurethane foam. And it is not at all necessary to have a pond on the site. Besides, White paint Almost everyone has it, and it’s now cheaper than the colored ones.

Turtles are easier to paint; their shells can be alternated with natural ones. If, during the creation of a craft, bumps appear that should not be there, they can be cut off sharp knife.
The situation is similar with rounded parts - if they need to be sharpened, the excess is simply cut off.
Crafts made from polyurethane foam not only decorate outdoor spaces; they can also be made for the home. Funny frogs will make people passing by smile!


Yes, as original New Year's decor You can make a snowman out of foam, but you need to start creating it in advance so that the material has time to dry thoroughly.
If you paint the foam ahead of schedule, it will quickly crack.
A dacha is a place where we relax and enjoy life. But decorations for the garden and yard cost a lot of money. Therefore, some owners make crafts from polyurethane foam, which are in no way inferior to expensive figurines made of plastic, metal and wood.
To decorate your personal plot, you don’t need to complete art courses and have “golden hands”. A small set of tools, a little diligence and abstract thinking will allow you to acquire gnomes, frogs, sheep and Christmas trees from quite affordable materials.
Manufacturing technology
First things first, you need to stock up necessary materials and tools. This will determine how high quality and quickly the manufacturing process goes:
- The products are suitable for the frame plastic bottles boards filled with sand, metal objects and thick wire. Even an ordinary brick can become the basis for a future mushroom on your site!
- Polyurethane foam.
- Gun for polyurethane foam.
- Gun cleaner.
- If you plan to grow flowers in a sculpture, then in the center of it you need to mount some kind of container such as a bucket, tin can or the same plastic bottle.
- Varnish, paint and brushes for them.
- Stationery or other knife.
The process of creating garden figures itself consists of two alternating processes. First, apply foam to the base and let it harden a little. Then we apply it again and so on until we get closer to the shape we need.
After this, the excess protrusions are removed with an ordinary stationery knife, the sculpture acquires its finished shape and can be coated with paint. The entire work can take from an hour to several days, depending on the size of the figure and the thickness of the applied layer. It is advisable to do all this in a separate dry room, where there is no excess dust and children do not run around.. Otherwise, you will have to wash off the extremely sticky substance, which is polyurethane foam, with gasoline or acetone.
Manufacturing examples with instructions
Below are a few examples of different figures that even a beginner can create on their site. The main thing is to strictly follow the sequence of all operations. And after a few hours you will definitely feel like a real creator, from whose hands comes an excellent decoration for summer cottage!
Read more about crafts made from tin cans.
Christmas tree
Making a Christmas tree from polyurethane foam is as easy as shelling pears. To do this, you need to collect twigs and attach them to iron pipe. This can be done with tape or wire.
After this, you need to wet the workpiece with a spray bottle so that the foam “sticks” to the base more firmly.
Green acrylic paint is perfect for creating New Year's mood using such simple things as scraps of sticks, twigs, foam and fishing line. 
You will find all the information about paths made from plastic bottle caps.
Ball
The ball is the easiest figure to make. It is recommended to start your creative experiments with it, and only then move on to more complex decorations and sculptures.
- Take a paint can and fill it with sand;
- Layer by layer we apply polyurethane foam;
- Upon reaching the required size and more or less spherical shape, remove excess parts with a knife;
- We coat the product with varnish;
- We choose paint for our decoration depending on our preferences;
- If it is a bun or the head of some animal, we make eyes, a nose and mustache from buttons, fishing line and wire.
It is possible that you will find the material about .
Ram and ewe
- First we make the frame. We take several plastic bottles and fasten them with tape. The result will be something like a “skeleton” of an animal. The lower “limbs” can be filled with sand to make the figure more stable.
- Next, you can apply foam. But to save it, it is better to wrap the frame with isolon or other polymer material. The first layer of polyurethane foam - you can already roughly imagine what the end result will be!
- We make ears from pieces of leather. You can also make them from plastic bottles by preheating and bending them.
- We process the muzzle with a knife, carefully giving it the necessary features.
- We coat the product with varnish.
- We paint the eyes, mouth and other “features” of our sheep or lamb with paint!

Scheme for making a sheep.
Goat
- We make a frame from thick wire, which we wrap around several plastic bottles.
- As a frame for legs (bones) it is better to take metal pipes. They can be welded to a pedestal, dug into the ground, or secured with bolts. Your figurine must withstand wind and rain, so take the time to securely secure the base.
- Apply one or two layers of polyurethane foam.
- We make horns and a tail from wooden sticks or plastic cuts and secure them.
- After applying the last layer, we cut off all excess and wrap the product with sickle or fishing line.
- Cover the surface with primer and paint. You can choose any color, because it is completely your creation!
- Making eyes from buttons.
- We place our goat next to a pond, in a clearing, in the company of other decorations, etc.
In total, this sculpture will take one to two weeks to complete, as each layer of foam must harden. As a result, from unnecessary pipes, plastic bottles, wire scraps, other “garbage” and several cans of polyurethane foam, you get an excellent decoration for your summer cottage!
What a plastic border for paths is will tell you.
New Year's crafts
Even with nothing on hand other than wire and a can of polyurethane foam, you can create excellent New Year’s decorations. Various ornaments, Christmas decorations, simple and complex figures - all this is accessible and simple!
For example, you can make a snowflake. We take a wire of such thickness that it can be bent without effort. We make the frame of a future snowflake out of it. Carefully apply one or two layers of foam. Before it hardens, we achieve even and smooth surfaces. If something goes wrong, you can always add a little foam and cut off the protrusions with a regular stationery knife. 
The Christmas ball is made even easier. The tennis ball is covered with a layer of foam. After hardening, apply a layer of paint and decorate our New Year's toy in bright and positive colors!
A simplified version of the Christmas tree is made using cardboard or isolon, wound on a rigid base in the form of a cone. Even a child can apply several layers! We level the surface, paint it and place it in a visible place.
How to make a swan from a tire is described.
Basic rules for working with polyurethane foam
- Shake the container periodically.
- The ideal temperature for work is room temperature.
- Polyurethane foam does not like straight lines Sun rays. Therefore, it is necessary to work in the shade, and ready product cover with paint.
- The hardening time of the foam varies depending on the manufacturer, temperature and operating speed.
Important points
- The paint used to coat the finished product should not contain nitrocellulose. Otherwise, the polyurethane foam will soften and the decoration will lose its shape.
- Gloves are required element work. Without them, washing your hands will take much more time than the process of making the craft itself.
- Polyurethane foam is very lightweight material. Therefore, inside any product made from it it is necessary to place heavy objects. This could be a jar of sand, a plastic bottle filled with water, an iron base, metal pipes held together with wire, and other massive things.
Video
This video explains how crafts are made from polyurethane foam:
Conclusion
You can add beauty and originality to your summer cottage without spending a lot of money. Crafts made from polyurethane foam are easy to make, non-toxic and can have the most different shapes. Starting from a simple ball and ending with figures of animals, birds, gnomes and even people!
For most owners, the dacha seems to be a place for relaxation. However, in order to properly design the site, you need to spend enough large amounts. In this regard, some summer residents are looking for opportunities to save money, which is why they are trying to create crafts from polyurethane foam that look no less aesthetically pleasing than figurines made of plastic, metal and wood. And today this option continues to compete with another equally common method - creating crafts from plastic bottles.
Every person who does not have special skills and knowledge is able to make their personal plot more attractive. The main thing is to have abstract thinking, be patient and prepare minimum set tools. All this will be enough for cheerful gnomes, frogs, sheep and Christmas trees to appear in the garden area, the creation of which will require quite available materials.
Manufacturing technology
The first issue that must be resolved by the summer resident is the preparation of materials and tools, without which it will be impossible to make crafts from polyurethane foam. Moreover, you should not neglect any element of the list, since this will subsequently affect the quality of the work and the time it will require.
To make a product frame, you can use plastic bottles, which are pre-filled with sand, boards, metal objects and thick wire. In some cases, you can use ordinary brick to create the basis for a future mushroom on your site.
- polyurethane foam;
- spray foam gun;
- gun cleaner.
A good idea is to use a sculpture for growing flowers in it. But to do this, in its center you will have to install a certain container, like a bucket, tin can or the aforementioned plastic bottle.
- varnish, paint and brushes for them;
- stationery or other knife;
- several pairs of gloves. You should definitely have them, as this will help protect your hands from polyurethane foam, which quickly and firmly sticks to your hands.
If we take a closer look at the process of making garden figures from polyurethane foam, we can distinguish two stages that are carried out in a certain sequence.
- work begins by covering the base with a layer of foam, after which they wait for a pause, which is necessary for the material to harden;
- Then we apply the next layer of foam and so on until we achieve the required shape of the product.
When the desired result is achieved, take the usual stationery knife and with its help we cut off the excess protrusions. In the process of such work, we give the sculpture the desired contour, after which we can proceed to painting it. To complete all the work, you will have to spend from 1 hour to several days. The specific period is determined by the size of the product and the thickness of the applied layer.
It is recommended to make garden figures from polyurethane foam in a separate dry room which should be clean and have limited access for children. Otherwise, you will have to spend a lot of time and effort to remove the foam from the surfaces, and for this you will need gasoline or acetone.
Manufacturing examples with instructions
Next, we will consider examples of various figures for the garden from polyurethane foam, which can be made even without having experience in this matter. But in order to achieve the required result, it is necessary to perform all operations in the exact sequence. A couple of hours will pass and you will feel like a real creator, in whose hands ordinary polyurethane foam turns into real masterpieces of art.
Christmas tree
The master class on making a Christmas tree from polyurethane foam is quite simple and understandable. Required in advance prepare the branches, which need to be fixed to the iron pipe. You can use tape or wire as a retainer.
Then, using a spray bottle, the workpiece is moistened, which will improve the adhesive properties of the foam when it is applied to the base.
After this, we begin to process the structure with polyurethane foam; in this matter, you can completely rely on your imagination.
Having such accessible things as scraps of sticks, twigs, polyurethane foam and fishing line on hand, it will not be difficult for you to do it yourself christmas tree. And to give a natural look, the tree can be painted acrylic paint Green colour.
Ball
If you are afraid to take on complex garden figures made of polyurethane foam, then you can choose the simplest product, which is a ball. Those who do not have experience in making figures from polyurethane foam with their own hands to decorate the garden are recommended to take the first steps by creating this particular figure. And, once you get the hang of it, you can try to create more complex decorations and sculptures.
The master class itself includes the following actions:
- first we need a paint can into which we need to pour sand;
- Next, we take polyurethane foam and cover our workpiece in layers;
- when will the product be purchased required dimensions, and the initial shape will change to spherical, take a knife and cut off the excess parts;
- we treat our ball with varnish;
- we complete the work of making the ball by painting it, for which we can use the colorful material whichever one you like best.
Ram and ewe
 We begin the master class on making this garden figure from polyurethane foam with our own hands by creating a frame. To do this we need several plastic bottles that need to be connected to each other using tape. As a result, the craft should resemble something like the “skeleton” of an animal. To give our figure greater stability, the lower limbs can be filled with sand.
After this, you can begin to process the craft using foam. To avoid wastage of material, it is recommended to wrap the frame with isolon or other polymer material. After covering the figure with the first layer of foam, it should already be clear to you what you should get upon completion of this work.
To create the ears we use pieces of leather. You can also use plastic bottles to make them, which will first have to be heated and bent
To make a muzzle, you will have to use a knife, using it to form the necessary features.
To make our animals look beautiful, they need to be varnish.
Goat
To make the frame you will need thick wire, which must be wrapped around several plastic bottles.
To make the leg frame, it is recommended to use metal pipes. They are attached to the pedestal by welding, after which they are fixed to the ground, or they can simply be fixed bolted connection. Make sure that the base of the figure is firmly secured, otherwise the wind or rain will cause it to fall to the ground.
Then the craft needs cover with 1-2 layers of polyurethane foam.
To make the horns and tail, take wooden shelves or we use plastic cuts and attach them to the base.
Having finished applying the last layer, it is necessary to remove excess parts, after which we wrap the product with sickle or fishing line.
We finish the job by painting, but first we need to apply a layer of primer. When choosing a color, you can completely rely on your own preferences, because this is your creation and you can show all your imagination here.
We use buttons to make eyes.
Now our goat is ready and can be installed where you see fit - next to a pond, in a clearing, surrounded by other design elements.
Keep in mind that the process of making this craft it will take you 1-2 weeks, since you will have to wait a pause so that each layer of foam can harden. Thus, using abandoned pipes, plastic bottles, pieces of wire and other garbage and a couple of balloons of polyurethane foam, you can easily create beautiful decorative elements for your summer cottage.
New Year's crafts
 If you only have wire and a can of polyurethane foam at your disposal, then only with their help you can make wonderful New Year’s decorations for the garden. These materials will be enough to make a variety of ornaments, Christmas tree decorations, as well as crafts of varying degrees of complexity.
A good idea is to create a snowflake. For this you need to take a wire of a certain thickness so that you can bend it easily. It will serve as material for creating the frame of a future snowflake. We begin to cover it with 1-2 layers of foam. Needed immediately adjust the shape, giving it an even and smooth surface, and this must be done before the foam hardens. If any part of the figure turns out incorrectly, then you can add a small amount of price at any time and remove excess parts using a stationery knife.
More less complications you will encounter during production Christmas ball. The master class on implementing this idea will boil down to the following. To do this, you need to take a tennis ball and apply a layer of foam. When the material has hardened, we paint the craft, adding bright and positive colors to create a New Year's mood.
You can also offer a simpler option for making a Christmas tree. It will require cardboard or isolon, which is wound on a rigid base, giving it the shape of a cone. You can easily apply a couple of layers of polyurethane foam. Next, it remains to give the craft flat surface, color and find a suitable place for the Christmas tree.
Conclusion
 In order to make your backyard more attractive, you don’t have to go to the store and buy special decorative ornaments. It is within the power of any site owner to make their own beautiful crafts for garden. Moreover, for this you can use the most affordable materials, one of which can be polyurethane foam.
It's quite easy to work with, so even an owner who has never had to do such a thing can easily cope with this task. Just study the master class on creating figures for the garden, and you will succeed.