Plastic corner for slopes: do-it-yourself installation. Perforated corner How to attach a corner to slopes
Puttying the corners of a two-level ceiling begins with the installation of perforated corners
If you do not live in a round tower without windows and doors, then your home must have corners - internal and external. And during repairs, you have to decide how to finish them so that they turn out perfectly smooth and protected from mechanical influences.
If the joint between the walls and the ceiling or floor is easy to hide with a plinth/cornice, then the filling of the internal corners between the walls and the external ones formed by window and door slopes, niches and protrusions must be done efficiently. To simplify this task, special perforated corners are used, the purpose and types of which you will learn from this article.
Perforated corners are often called painting or plaster corners, as they are used during putty/plaster to strengthen corners before decorative finishing.
They serve two purposes:
- They reinforce corners, especially external ones, giving them additional strength and resistance to damage. It is no secret that protruding corners are more likely than flat surfaces to be subject to chips, scratches and other mechanical impacts, for example, when carrying large furniture through a doorway.
- They allow you to quickly and easily create a joint between perpendicular surfaces, making it smooth and clear. This, in turn, makes subsequent finishing easier: gluing wallpaper or tiles in even, not “cluttered” corners is easier, and the result is of better quality.
What are the corners?
Materials for production
First of all, these products differ in the type of raw materials from which they are made.
There are three main types:
- Made from galvanized steel. Durable, reliable, corrosion resistant thanks to zinc coating applied on all sides.
However, prolonged use in a humid environment may cause rust stains.

- Aluminum. Lightweight, durable, non-corrosive. But they are not resistant to close proximity to copper and some other substances.

- PVC (polyvinyl chloride). The price of these products is the lowest, and their advantages are no less than those of metal corners.
First of all, it is absolutely inert to the effects of moisture and aggressive chemicals - plastic corners do not corrode, do not rot, and do not deform.
For reference. Every year, PVC products are becoming more and more popular. There are various modifications of plastic perforated corners on sale, including those combined with sickle tape and with an adhesive applied to the inner surface to facilitate installation.

Configurations
The line where two surfaces meet is not always straight. When making arches (see How to beautifully decorate an arch from plasterboard), curved multi-level plasterboard ceilings and other structures, it can take on very intricate shapes. These corners simply cannot be protected with the products pictured above.
Special arched corners are produced for them. Most often, the raw material for their production is plastic polyvinyl chloride. An arched corner for putty differs from a straight corner in that one of its sides is cut into “petals”, allowing it to be bent in any direction with any radius of curvature.

Curvilinear corners are much more difficult to give a clear shape when finishing, especially if you do not have certain skills in putty and plaster. Arched corners allow you to do this without any problems.
How to install perforated corners
We will tell you in detail how to finish corners with your own hands using the products described.
Let's take one of the most difficult options, when it is necessary to “remove” the joints of window or door openings with walls, when plastering which the workers did not bother themselves with maintaining the level.
Note. When finishing corners formed by sheets of plasterboard, such problems usually do not arise: their surface is even and smooth, and the sheets themselves, as a rule, are attached to a frame leveled. In such cases, it is best to use PVC corners with an adhesive inner surface.
So, puttying the corners of walls and slopes begins with the installation of corners, which is carried out in the following sequence:
- Measure the length of each joint and cut the corners to size. Plastic ones are cut with ordinary scissors or a paint knife, metal ones - with metal scissors;

- To avoid thickening due to overlapping corners, their outer side is cut at an angle of 45 degrees;
- Then a building level is applied to each side of the slope to determine the degree of its evenness and “tilt” in one direction or another. You can make marks on the wall so you know where to apply more putty and where to apply less;
- Prepare the required amount of solution and apply it to the slope on both sides, but not in a continuous layer, but at intervals, focusing on the marks made earlier;
- Place the corner on the slope on top of the putty slaps and press lightly into it so that a small part is squeezed out through the holes;
- After removing the squeezed out solution with a spatula, use a level to check the vertical or horizontal position of the corner. Achieve its correct position by pressing harder where it is required;
- Next, the instructions require you to wait a while for the putty to set and fix the corner. After which you can putty the corner, filling the empty spaces with the solution and leveling the adjacent surfaces.
Advice. If the corners and walls are almost even, you can immediately use finishing putty. If they require serious correction, it is better to start with the starting layer and apply the finishing layer as a second layer.
As in the case of a straight plane, ideal smoothness of the angle is achieved by grinding (see How to grind walls after puttying and how to do it correctly). During the grinding process, it is advisable to smooth out and round the corner itself a little - this will facilitate subsequent finishing and make it more resistant to mechanical damage.
Conclusion
Professional finishers can easily cope with the task of leveling corners without any additional equipment. But they also often use perforated corners precisely for the purpose of giving protruding joints greater strength. You can see how they do this in the video in this article. And try to repeat it during repairs. It is not difficult.
After any repair, for example, wallpapering, installing doors or windows, finishing work remains, including attaching corners to slopes. They will protect walls and other surfaces from mechanical damage that occurs from careless touch, for example, when moving furniture, and will give the interior an aesthetic appearance. They are used to hide corner joints, which is especially important when using different materials. Most often, rigid PVC is chosen for finishing, which is made by “hot” bending the sheet. You need to know how and with what to glue such corners to the slopes so that the product lasts as long as possible.
Wall plastic corner
Buyers choose plastic corners for slopes for the following positive qualities:
- ease of use - when installing and cutting out the desired size and shape, which is done using scissors or a knife, and the burrs and ends are sanded with appropriate paper;
- smooth out unevenness, forming a 90° angle in the finishing areas;
- strength - protect corners from damage, while remaining unharmed;
- resistance to moisture, ultraviolet radiation, temperature changes;
- light in weight, which is also important for ease of installation;
- long service life - 20-25 years, during which they do not lose their qualities, including color;
- affordable price;
- do not require painting;
- unpretentiousness in care, in which they are easily washed using home remedies.
It is worth mentioning the disadvantages of the material:
- melts in the event of a fire, releasing harmful substances;
- fades after the expiration date;
- contact with sharp objects leaves unsightly scratches.
Types of plastic corners
Before gluing a plastic corner, you need to understand its types in order to choose the right option. The product is available in a wide range of colors, including plain versions, as well as wood, marble, metal and other natural materials.
They are made in different shapes and sizes. The most popular two options are in the shape of the letter L with the same or asymmetrical width of the shelves (from 10 to 50 mm in width, from 2 m in length), and curved, which are used for similar openings (arches, etc.), from Why are they called arched corners? They are produced in two versions – for angles of 90° and 105°. Standard length – 3 m.

Plastic corners of different sizes
They are also manufactured in a T-shape, which hides the joints between the slope and the wall cladding. The most rarely used option due to the increased cost is removable. This corner is made with a latch, which allows you to carry out repair work without removing the profile. It bends easily, and at the end of the process it falls into place.
Corners are also classified by type of finish - external and internal. The latter are made with double-sided coloring.
Important! The wider the sides of the finishing material, the greater the load it can withstand, which is especially important on curved openings.
Types of adhesives
Before gluing the plastic corner, choose the right product for the procedure. Today, there are four items to choose from, familiarize yourself with the characteristics of them before work - how to apply, how long it takes to set, whether it is suitable for the material, etc.

Types of glue for plastic corners
- Liquid Nails.
They have good durability. This glue spreads easily over the surface of the plastic corner. Apply dotted or zigzag. Liquid nails are capable of connecting glued products for more than 20 years without losing their properties. The setting force after complete hardening is 40 kg/m2. It has anti-corrosion properties and does not damage or pollute plastic. When purchasing, give preference to a colorless composition, especially if you have to work with light-colored surfaces.
- Silicone sealant.
Used to connect corners with wallpaper, as well as tiled and ceramic walls if acrylic is present in the composition. It is characterized by the absence of toxic chemicals and high adhesive properties.
- Polyurethane glue. Durable, elastic and does not leave stains. Hardens quickly.
- Liquid plastic. Suitable for use only on plastic surfaces (for example, window slopes). Fast-acting, highly durable and reliable.
You need to apply glue from the inside of the part, closer to the middle. The spaces between dotted drops are 1-1.5 cm.

Example of glue application
There are also self-adhesive corners, which are glued immediately after measuring and creating the required size and shape. To do this, remove the protective tape and press the product against the protruding corner.
Preparatory work
Before you start finishing the walls with plastic corners, you should clean the working surface from dirt, dust and other construction debris. To apply glue, purchase a glue gun, and for installation, additionally the following tools:
- scissors or hacksaw for metal;
- square (preferably metal);
- stationery knife;
- roulette;
- masking tape.
You may also need a miter box, which can be used to make blanks with an angle of 45°. But if a tool is missing, you can cope without it using certain skills and our recommendations.

Tools
Degrease the place where the corner is attached and the part itself using a weak solvent or white spirit. The workpiece must be clean. Avoid exposure to moisture.
Options for installing corners on walls
Before gluing the corners, decide on the installation method. There are two of them.
- To the wallpaper.
This option is suitable for wallpaper with shallow relief, but be careful when finishing slopes with deep embossing, as due to the loose fit of the corners, cracks may form in which dust collects.
- With cutting a strip on the wallpaper to apply the glue directly to the wall. To do this, follow this action plan:
- Attach a corner to the installation site, level it and press it to the wall surface;
- using a sharp knife, cut off the wallpaper on both sides of the overlay;
- Apply glue to the plastic corner and install it in the intended place;
- secure the corners with tape designed to set the adhesive;
- After 24 hours you can remove the tape.
If you are not sure of the accuracy of cutting the blanks, you can first try on the part for the finishing area, and mark the place of the cut with a pencil.

Marking
How to glue a plastic corner to a door and window slope
Before placing corners on the slopes of windows or doors, you need to check the quality of the surface finish. This is done using a level, bar or rigid ruler. If the surface of the slope is severely curved, and this cannot be corrected, then it is better to install flexible plastic corners here.
There are three types of slopes:
- plasterboard;
- covered with wallpaper;
- painted after plastering.
Regardless of the choice, the installation technology is the same in each case. The only important thing is the choice of adhesive composition so that it is suitable for both the plastic and the finishing surface.
- Measure the height to make the blanks. Leave a margin at the top. The cuts are made with metal scissors. You will get an angle of 90° from the inside, and 45° from the outside.

Example of a cut
- Place the part on the glue and wait for it to set.

Press the corner firmly
- Now measure the width and cut the required size with a margin to match the side strips.
- The face blank is cut at an angle of 45° from both ends.
- Test the corner against the side slopes to make marks in place with a cutting knife.
- Take a ruler, apply it to the glued part and cut off the excess.
- Now apply glue to the top strip and attach it to the corner. Secure all elements with tape for a day.

An example of securing corners with tape
If the slopes are decorated with wallpaper with a three-dimensional relief, then you first need to cut strips on them for plastic corners. Be careful that no drops of glue or liquid nails remain on their surface.
How to attach corners to the ceiling
Here you will need additional preparation and tools - a sponge and a soap solution, with the help of which the remaining glue is removed. In addition to leveling the surface, it needs to be primed. Next you need to measure the dimensions and cut out the required blanks. The gluing begins from any corner of the room. For this it is better to use liquid nails. Apply adhesive to the corner and press firmly against the wall and ceiling. Putty the joint area and then sand it down with sandpaper.
Useful tips will help beginners with DIY installation.
- Be precise when marking so that there are no gaps between the joints. To prevent this, you can increase the length of the workpiece by 0.5-1 mm. They will still fall into place due to the elasticity of the material.
- It is not recommended to fill the joints with silicone, as over time it will darken and it will stand out against the background of the slope.
- To be on the safe side, do not glue the corners right away, but first attach them with tape and take the necessary measurements.
- To create the correct shape for the arch, use a hair dryer.
- When processing areas in openings where the angle is not 90°, but more or less, it is necessary to take measurements locally and cut them with a knife.
Plastic corners serve as reliable protection for slopes from damage, and also add aesthetic completeness to the entire interior. Among the wide range of shapes, sizes and colors, it is easy to choose the best option for a specific design. And it’s also easy to attach them yourself, having all the necessary tools and work skills. Reinforce your knowledge by watching the video.
To properly take care of your interior design, it is important to pay attention to every detail. The decoration of windows and doorways is no exception in this regard. Decorate openings and will give them an aesthetic appearance decorative plastic corner.
It will not only emphasize the clarity of the corner lines, but also will hide the imperfections of the plaster, if it was used as a finishing material.
What are these products?
This is a hardware part intended for decorative finishing window and other slopes, as well as to hide corner joints when using different materials.
Corners made from rigid PVC by the method of “hot” bending of the sheet using a special technology.
Scope of application
To have a more complete understanding of the purpose of the products, it is worth considering this issue in a little more detail.
PVC corners can be used in the following cases:
Advantages and disadvantages
A plastic slope corner, like any material, has its pros and cons, let's talk about them in more detail.
First, about the advantages of the products:
- allow you to close corner junctions of various materials;
- smooth out unevenness and form a 90° angle in finishing areas;
- service life is 20–25 years;
- easy to process during installation;
- you can choose the desired color (corners are available not only in white, but also in colored ones)
- reasonable price, which makes PVC corners stand out against the background of wooden and metal products.
Minuses:
- weak mechanical strength - when cutting, the material may crack in the cut area, products are easily scratched;
- flammability, heated and burning plastic emits caustic smoke and gas.
Types and sizes

PVC corners can be divided, guided by two criteria: area of application and type of finish. The main types will be discussed below.
Based on the nature of their purpose, products are divided into the following types:
- Equilateral. This type is used mainly to give strength to slopes. Available in sizes from 20x20 to 50x50 mm.
- Not equilateral. They are used to finish arched openings. Dimensions – 5x17 and 20x25 mm.
- T-shaped products. Most often used to hide the joints between wall cladding and slope.
- Removable (with latch). Allows you to carry out repair work without resorting to dismantling the profile. If necessary, simply bend it back and return the shelves to their place after the repair is completed.
According to the type of finishing, the corners are:
- external;
- internal;
What glue should I use?
One of the most effective options– polyurethane glue. It is possible to use either a special adhesive for plastic corners or any other composition suitable for installing PVC products.
When finishing areas with low loads, you can use a silicone-based sealant.
This glue is also used for fixing corners to ceramic tiles in the kitchen or bathroom.
Another option is liquid nails. When installing light-colored products it is better to use a colorless composition, and for dark products any option is suitable.
How to glue plastic corners to slopes?
Installation of corners should be carried out only after finishing work has been completed (wallpapering, painting, etc.). Myself The installation process is carried out in several stages.
The first thing you need to do is remove all protrusions from the surface, if any, be it plaster, putty, etc. If wallpaper is pasted on the wall, you need to remove it where the corner fits.
Otherwise, it will be glued to the wallpaper and not to the wall. The wallpaper should be cut so that after installing the corner there is no gap between it and the cladding. Next you need a place to attach the corner degrease with a weak solvent or white spirit.

The corner must be attached to the wall and mark it with a pencil- at the top and bottom on the vertical parts and along the edges on the horizontal corners that will be located between the slopes.
It is advisable to measure the vertical elements after gluing the top horizontal ones, and the bottom ones after installing the vertical ones. In this case Reduces the risk of gaps forming between their edges.

According to the applied marks cuts are made using metal scissors. The inner part of the corners is cut at an angle of 90°, and the outer part at an angle of 45°.

The glue is applied in a narrow dotted strip to the inside of the product, closer to the middle, at intervals of 1–1.5 cm.

Next you need Place the corner on the surface and press well, then secure it for a day with masking tape or tape in several places. After the glue has dried, the tape should be carefully removed. This completes the installation.
When the doors and windows are installed, you need to finish the slopes; as a rule, this is the final stage. To hide small roughnesses and give a complete aesthetic look, many people use ready-made corners. How to correctly cut and glue a corner made of plastic, cork or MDF? Below are detailed recommendations for their installation.
Let's start with the most important thing - why is this necessary? What role do the corners play - only decorative or do they have more serious functions? Let’s not argue with the fact that if you frame the slopes of doors or windows with special decorative elements that fit perfectly into the design of the room, then the interior will immediately change for the better.
Corners will protect slopes from damage
But besides this, they also perform a very important protective function. Sooner or later you have to carry large items through the opening, which can damage the corners, and you can simply accidentally touch the outer corner and damage it. There can be a lot of situations, the main thing is that the result is the same - a damaged surface and, accordingly, a damaged appearance. In addition, as practice shows, most often the wallpaper begins to peel off in these places. So it is best to protect the outer corner of the slope with the help of a decorative element, which will also transform the interior.
Corners are not only protection, but also a neat aesthetic appearance
Plastic, wood or MDF - which one to choose?
Having made sure that installing corners is not just a whim, but a necessity, we will study the construction market in order to make the right choice. These products are divided into types depending on the material from which they are made. So, the corner can be plastic, wooden, bamboo, made of cork or MDF. Absolutely each type has its own pros and cons; let’s look at them in more detail.
To trim the corner, use a fine-toothed hacksaw
How to glue
Finally, we got to the main question, how to glue the corners onto the slopes. However, before proceeding directly to fixation, you should carry out, so to speak, fitting. Once you are sure that everything is trimmed correctly, you can move on. We apply an adhesive solution to the inside of the corner, at the junction of the sides, in increments of approximately 10 cm. At this stage, a mounting gun will be an indispensable assistant. After this, we quickly press the product to the surface and fix it in this position with masking tape. You should start with a horizontal slope, and then proceed to the side slopes. We remove excess sealant from the surface of the walls with a damp cloth and let it dry thoroughly. You can remove the tape only after 24 hours.
Video: attaching corners to window slopes
Thus, plastic corners can be placed on the slopes of a window or door. As you can see, there is nothing complicated in this process.
Video: how to cut and glue corners to door slopes
Having figured out what such products are made of, what their features are and having decided on the choice, you should learn how to install corners on slopes. Detailed instructions are given below.
Galvanized corner for plasterboard 25x25 mm is one of the types of material that is used to level parts of walls. As you know, drywall is popular in construction and is easy to work with. However, prefabricated ones have problem areas - corners, which are most often subject to mechanical stress. This is where the different types of existing corners come to the rescue.
 Existing types of corners for drywall
 They perform the protective function of parts of the walls and will help to build even corners. Knowing their classification, you can choose a suitable specimen.
The most common product options are:
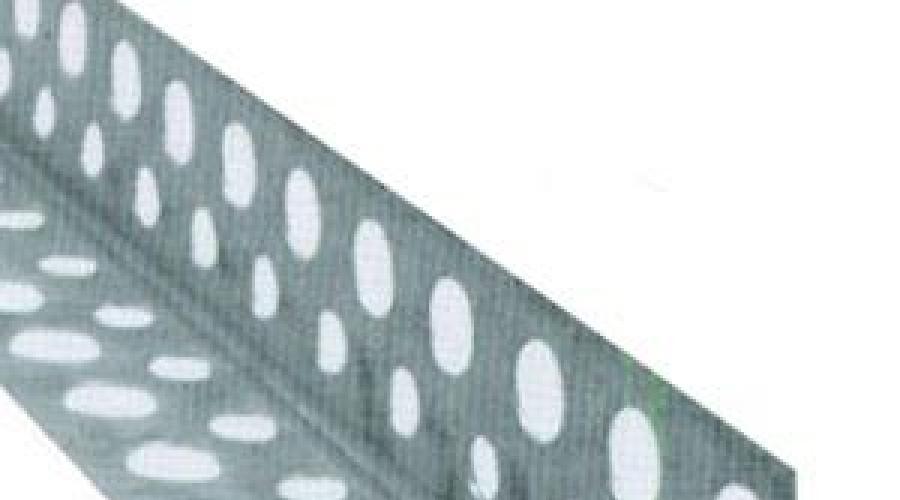
Metal perforated corner
This type is a thin sample made of a profile with perforation and a rigid edge along the edge. There are basically 2 types of similar corners for drywall:
- straight;
- arched.
These representatives have many subspecies. The corners are not glued, they are practically “slung” onto the structure and secured with putty or.
Straight perforated corner is used for processing the inside and outside of corners.
It is a V-shaped profile with many holes - perforations.
 Options for metal perforated corner for drywall
 Actually, with their help, a high-quality connection with the processed corners occurs, and the top, located at the internal corners - inside, and at the external corners - outside, is a guide for the spatula. Excess air also escapes through the holes. Straight perforated corners are made of plastic, aluminum, and galvanized. The latter is tougher than the others, and the wide one can generally be used as a plaster beacon.
Plastic corner
This sample is more resistant to moisture than the profile, but its resistance to mechanical damage is lower. Among the advantages are the low price and the absence of corrosion of the material. There is also a type of plastic corner, for example, AquaBead, which has special paper with glue applied in the inside.
Putty is not required for fixing here; just moisten the adhesive surface with water and simply glue the corner to the desired place.
Arched
- Various finishing materials are used, such as plaster, wallpaper, panels and others. But in order to preserve the transition points between planes, an arched corner, which has great capabilities, is used. Arched corners are divided into the following types:
- Installed under plaster, perforated. They have separate petals on one side of the corner, allowing you to place a sufficient strip on any arched curve. There are plastic and profile ones;
Read also
Decorative, which are glued to the plaster.
 How to check the building level
 This is what an arched corner for drywall looks like
Before attaching the arched corner, you need to match it with the main finish or in contrast, so the design will look more original.
Products with mesh 
Such elements are used in places that require strengthening corners and protecting them from damage. Plaster mesh corners are designed for internal and external corners. They can be made of either plastic or metal profile. The choice will be influenced by the shape and material of the finishing surface.
Installation of corners on drywall using corners
When starting to install a corner on drywall, you need to have tools and material on hand.
- the selected type of corner will need to be purchased with some reserve;
- by using ;
- It is best to buy Vetonit putty, which is of high quality.
Tools
- metal scissors will help you cut out the necessary parts correctly and quickly;
- a brush that will be needed to apply the primer;
- wide and narrow spatulas will be needed for;
- The sanding block will remove all unevenness on the plane, while the angle will be perfectly even.
 This is what mounted corners look like on drywall
 When starting installation, you need to familiarize yourself with the sequence of leveling the corners with putty so as not to damage this fragile material.
Stages of work
- First, the surface must be thoroughly cleaned and treated with a primer. You need to proceed to the next stage only after it has completely dried.
- Measurements are taken and the required length of the corners is cut. They are applied to the drywall as a sample.
- For further work, you will need non-woven tape, serpyanka mesh for the internal corners, one of the types of perforated corners: plastic, adhesive, rounded, either made of a metal profile or paper-based.
- Before you make a choice, you must make a choice. To form internal and external corners, it is better to buy a dry gypsum mixture. It has a reasonable price, good quality and can securely fasten elements to the structure.

- The putty is prepared following all the steps: poured, poured, stirred, allowed to settle, kneaded again.
- When working with external corners, you need to remember that they are most often subject to mechanical stress; it is better to mount metal samples, in some cases having a rounded shape.
- Check the flatness of the end.
- Putty is applied to the area to be treated with smooth movements. Without allowing the composition to dry, you need to secure the corner with pressure, check the accuracy with a level, and if necessary, you can tap with a rubber mallet.
- Sometimes the corner is attached to the drywall with a stapler or glued with glue, and then covered with putty.
- Another layer of the mixture is applied to the installed element and now alignment occurs with the general plane of the wall.
 Applying a second layer of putty
 - After thorough drying, the slope corner is polished.
- Installing corners inside the structure looks similar, even a little easier. Carefully coat the adjacent sides and the gap between the corners with a spatula, and remove excess mixture. On a dry, sanded surface that has the desired shape. You can buy it, just apply it to wet putty.
- check the fastening of the corner on the plasterboard, then use the next layer to hide the unevenness.
- After thorough drying, the surface is finished with sandpaper or a sanded block, forming a perfect angle.

- To facilitate the leveling process, so-called beacons are used, attached to the surface with a plaster solution; here you can do without fastening parts.
- Separately, I would like to mention the semicircular plastic corner, used in rooms with the maximum possible impact on the corners. It is made of flexible plastic and has a semicircular angle rather than an acute one. Its price is quite reasonable, and its durability is beyond doubt. It differs in some features at the installation stage, namely cutting the end by 1.5-2 cm with an angle of 45 ͦ . A corner is pressed into the applied initial putty, fixed with a stapler, and the edges are treated with the mixture.
A video of arranging corners will help you see how parts of the drywall are reinforced, and will also allow you to select and buy the necessary elements.
Finishing internal and external corners will not seem difficult with the right approach and the necessary training. The main thing is that during installation there should be items that require minimal finishing.