Remodeling of kitchen facades. How to update a kitchen set with your own hands (42 photos) without special expenses. New life for an old headset
Kitchen is an expensive pleasure. Good kitchen- even more expensive. It often happens that there is not enough money for the repairs that you really want - to update furniture, buy new equipment, hang new wallpaper or tiles. But we have a solution on how to update a kitchen without renovation so that it will be pleasing to the eye: you just need to use a special self-adhesive film for the kitchen, which is an excellent and, most importantly, inexpensive solution. In our article you will find many great ideas to use it in your kitchen, many options for colors, designs and patterns.
Self-adhesive film for kitchen facades
So, we decided to update the kitchen interior without renovation. Please note that there are films for various surfaces: kitchen facades, countertops and even household appliances. We recommend starting with kitchen facades, since this is the first thing that catches your eye when entering the kitchen, and, in addition, takes up quite a lot large space. This will refresh the kitchen and create the feeling that you have purchased new kitchen furniture, while you will only have to spend money on the material itself, which is much cheaper.
When finishing facades, handles should be removed so that there are no unpleasant irregularities, and, in addition, it is advisable to level the surface in advance in case of roughness and deep “wounds”. Covering the kitchen with film is a simple solution that will allow you to decorate most of the visual space kitchens, and it turns out that you can easily update the apartment without major renovations.
Practical film for tabletops
You can give kitchen countertops the new kind, pasting them in some neutral colors or, conversely, giving them life by choosing bright colors. Most kitchen adhesive films are water repellent, heat resistant and truly durable, making them ideal for everyday use. We recommend that you do not skimp on such film, because usually these places are used most often and require special protection. But this will still be the best solution.
Filming kitchen cabinets
Another way to decorate your kitchen with your own hands is to paper the kitchen cabinets, not only the fronts, but also the back surfaces. Look at this great solution for updating old things in the photo - old furniture plays with new colors and clearly adds “value”. It turns out that we not only saved money by deciding to change the kitchen, but also made money? Not a bad solution, we recommend it. If you are not planning to renovate your kitchen in the near future, then read useful tips, . In addition to film, there are many more interesting options.
Kitchen wall design using vinyl stickers
The wall next to the sink and the wall behind the stove are the most vulnerable places to dirt. You can, of course, use standard tiles, but they are often very difficult to clean. A protective film will help to avoid these problems, and, in addition, you can always choose a beautiful color and pattern that matches the interior of your kitchen. This is why kitchen wall stickers are so popular - they are both a practical and bright solution against splashes.
Stickers for household appliances photo
Everyone loved to stick something on the refrigerator as a child. Perhaps some even received a slap in the face for such a unique kitchen update. But many have already grown up, and have the right to decide for themselves how to decorate the refrigerator. Some people choose magnets from their travels, while others cover their refrigerator with film and turn it into a designer product. So what if the designer is sitting next to him at the table and eating lasagna from this refrigerator. But what scope for creativity?
Changing the color of kitchen facades
There are several options for changing the color of the kitchen facade - sanding and further painting, varnishing, and, finally, our option - simple pasting. You don't even need any special tools, just simply apply a layer of film evenly.
Decorating the kitchen with stickers
It is not at all necessary to cover the entire surface. Everyone does this, but you can go further, for example, in the photo above - an elegant solution to create a simple, but unusual interior in the kitchen using red ribbons. You can choose the width and color to suit your taste.
Wood-like film
Using film to change the design of an apartment without renovation can confuse everyone. There are various options for using it to “replace” the facade material. You can paste over an ordinary boring monotonous surface under Scandinavian style, and it will only be possible to discover that it is not a tree upon careful examination.
Brick Adhesive Film for Kitchen
We have already studied options on how to do brick wall in the kitchen. Another solution is “brick-like” film. The main thing is not to miss the mark with the color, otherwise you will end up with a Soviet factory workshop in your kitchen.
Paintings on kitchen facades
Exists big choice patterns and paintings with which you can easily decorate your kitchen space. For connoisseurs, you can transfer some objects of art or landscapes to the surface. In this case, you should choose expensive films, because large bright surfaces Low quality will be immediately in your eyes.
Decorative pattern for a white kitchen
White facades are a universal place for decoration; practically any patterns and stories, colors and shapes can be placed on them. You can use different designs for the top and bottom.
Self-adhesive film with tile pattern
How to save money on wall decoration? That's right, instead of expensive tiles, buy inexpensive film. As they once said in advertising - when there is no difference, why pay more?
And the patterns that are placed on the wall in the form of tiles are not limited to boring squares. You can use the "tile" in spanish style, you can add flavors of the east with Moroccan designs. Anything is possible - go for it!
To make the dishes and services in the cabinets look more expressive, use film with the correct geometric shapes for decorating the back wall of cabinets. We assure you that your guests will be pleasantly surprised!
Updating kitchen facades - right choice when the budget is small, but you need a high-quality result. If your kitchen furniture is intact, but is already pretty tired, then do not rush to spend money and buy a new set. You can do it easier - update the kitchen facade with your own hands. At first glance, this may seem like a very complicated procedure. But, following all the rules and showing all your accuracy, the restoration of kitchen facades will take place quickly and as efficiently as possible.
- Accessories for facades
- Materials for replacing facades
- Facade replacement process
- Pasting with film
- Rattan façade finishing
Preparation for renovation of facades

To replace facades suitable for kitchens standard set a tool that, as a rule, is in every home
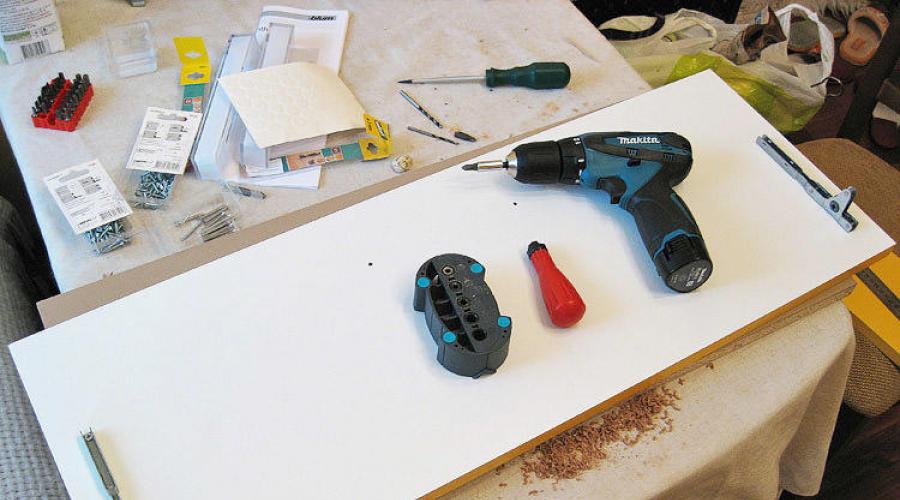
Before you start updating kitchen facades with your own hands, you need to prepare all necessary tool and materials. In order for the work to be successful, you will need:
Important to consider: Even if you don’t use some tools while working, they should be ready so that you don’t have to waste time looking for them later.
Accessories for facades
No kitchen furniture is complete without fittings, the quality of which determines the life of the furniture. That is why you should not save on accessories. And if you are planning to update your kitchen facades, then you will need:

High-quality fittings mean pleasure from using new furniture facades, and this pleasure is as important as aesthetic
When repairing or updating kitchen furniture, try to select fittings so that all elements match the same style.
Materials for replacing facades

Facades are the face of the kitchen. This is why, as a rule, after replacing the old kitchen it is difficult to recognize
If you don't have the skills carpentry work, and you don’t know how to update kitchen facades with your own hands, then you can purchase finished goods or made by custom sizes in special workshops. It is important to remove accurate measurements from old furniture, and having previously purchased the material.
Best to use:
Wood is considered the most preferred material for those purposes when it is necessary to update kitchen facades with your own hands. This material is distinguished by its strength, durability, environmental friendliness, and has a solid appearance.
MDF is a board made from wood fibers coniferous trees, obtained by pressing under high pressure and temperature. When repairing a kitchen unit and trying to update its facades with your own hands, MDF can become indispensable assistants. In progress this material unpretentious, and its quality is always at its best.
Facade replacement process
The process of replacing wooden or MDF facades consists of several stages:
Updating facades with paint

Painting the facades is easy, and the result is a completely updated look for the kitchen. 
After painting the facades, you can try to update the apron in the same style
You can update the facades of kitchen furniture using a method such as painting. This method of repairing old kitchen furniture can be called the simplest, but radical.
It is important to remember that painting facades is only suitable if wood covering or the MDF coating is kept in good condition.
When repairing old furniture in the kitchen, using painting, you cannot do without the following materials:
Before repairing facades using a method such as painting, you must:

Using paint and a stencil, you can add new details to the facades that will refresh the kitchen design
After the façade repair is completed and the paint has dried, you can begin decorating. You can use a stencil to apply the pattern. You can also use plant leaves by first opening them with varnish. Such accessories, by the way, will look great on furniture made of wood or MDF.
After all the work on updating the facade is completed, you can screw the fittings into place and install the doors in place.
Pasting with film

To prevent the kitchen set from being monochromatic and boring, you can cover only its lower part or the upper part with film. 
Films for facades come not only in different shades, but also with imitation wood or metal
If you are planning to update the facade of your kitchen, you can use self-adhesive film. Such material is available, has good characteristics, and its range is amazing.
Stages of work:
- Before you start gluing, remove the facades and lay them on a horizontal surface;
- Remove all fittings;
- Next, you should wash the facades well with soda or soap;
- Wipe dry and degrease;
- After this you can start cutting necessary elements from self-adhesive film, having previously decided on its color;
- The cut out elements are laid face up on the facade and lifted from one edge;
- The paper backing must be peeled off and applied to the surface of the facade, gradually removing the paper from underneath;
- The film must be leveled using a spatula or a simple clean cloth, moving it from the center to the sides;
If small bubbles form during the process of gluing the facades, they can be pierced with a needle. If they are large, it is better to cut them with a cutter and smooth them out.
Rattan façade finishing
Rattan can add a feeling of warmth and comfort to your kitchen interior. The most important thing in the process of decorating facades with rattan is to choose the right color that will match the rest of the style.

Rattan is ideal for kitchens in retro, country style and their varieties. Do-it-yourself finishing of kitchen facades with rattan involves the following steps:
Inexpensive renovation of the kitchen facade (video)
Updating or replacing facades has recently become increasingly popular. People understand that the appearance of their kitchen largely depends on the facades. And by using some techniques for updating kitchen facades, they have a great opportunity to show all their imagination and independently make changes to the interior of their kitchen.
Kitchen renovation is a labor-intensive, nervous process, full of doubts, therefore, when it is completed with a positive result, every housewife has a desire to turn this hard-won decor into a unique and cozy nest. This can be done different ways, but real needlewomen and keepers of the family hearth believe that there is nothing more unique than decorating the kitchen with your own hands. Only in this case can you be absolutely sure that you will not find an interior similar in beauty and comfort to a close friend.
beautiful inscription on the wall in the kitchen
The kitchen space allows itself to be decorated with a wide variety of techniques, however, in the process of transformation the following changes must certainly be made:
- Changing the background of the walls and their additional design.
- Adjusting the appearance of furniture.
- Decorating the kitchen apron.
- Changing or decorating curtains.
- Decor kitchen table and chairs.
- Decoration of household appliances.
- Filling the interior with different-sized decorative elements.
With this approach, the interior of even the most unprepossessing kitchen will amaze with its splendor.

decor open wall shelf in the kitchen
How to decorate a kitchen with your own hands?
If you don’t have any special talents in needlework, then try decorating your kitchen with borders. They can be placed along the edge of the tile or just along the wall. Borders can be different in shape and color. Their beautiful drawing can decorate, for example, a window or cabinets. Take small pieces glass mosaic or multi-colored tiles and try laying them out as borders along the edge of a windowsill or table.
Decorative elements of this type can also have the form of embroidery, so they can also decorate tablecloths or towels.
Involve your children in creative processes. Kids will certainly enjoy creating a wall panel from multi-colored mosaic pieces or drawing something “tasty” on a sheet of paper, which you will then turn into a real painting.

refrigerator decorated with a beautiful floral print
About floors
You can update your kitchen and make it beautiful by simply restoring the old floor. The option of replacing worn-out boards with new ones made of hard and high-quality wood is not affordable for many today. But shabby floors are not at all aesthetically pleasing, and how can you decorate the kitchen with your own hands in this case?
If the floor is not yet in a catastrophic condition, then it can be sanded and covered with stain, in other cases it is worth replacing flooring. There is no need to philosophize here. Use linoleum or laminate, by the way, the latter imitates solid wood with great success.
You can cover the kitchen floor with carpet or hand-woven paths.

inscription on the wall in the interior of a vintage kitchen
About the walls
You are free to do whatever you want in your kitchen, so the walls in it also don’t have to be left plain. You can easily decorate them with paintings, drawings, and patterns. This is not difficult to do, even if you have no artistic talent. You just need to pick up a stencil and paints, or even easier, use vinyl stickers.
If the kitchen was originally “dressed” in plain tiles, then this mistake can be easily corrected. Self-adhesive film with cheerful colors will help you transform it quickly and inexpensively. Make a stencil using the existing tile and cut blanks from the film. Now stick them on the tiles in any order. You can complicate the process and figure out how to decorate the kitchen using a DIY film pattern. This option will require much more time to implement, but the result will be amazing.

unusual solution: wall decor with chairs
About household appliances
A slight restyling may also affect your household appliances. This will help to better fit it into the decor of the updated kitchen.
Stickers and other textured materials will also come to the rescue here. Refrigerator doors, for example, can be hidden behind a wooden panel. This is a great way to remove metal surfaces from your decor. In general, the free surface of the refrigerator body allows your imagination to run wild. With certain skills it can be painted acrylic paints. For those who are completely far from drawing, there are fun magnets that can also easily be used to decorate the surface of any household appliance. This technique is incredibly uplifting.

the inscription will turn the most ordinary refrigerator into a unique decorative item
About the tabletop
An old countertop is also not a reason to run to the store. Even if it is covered with stains and scratches, you probably won’t change it, because you know exactly how to decorate the kitchen with your own hands in this case too. That's right, you can attach a sheet of plywood on top of the tabletop and lay it out in mosaic patterns. You can laminate the damaged surface or hide it under a beautiful oilcloth. Last option the least practical, but progressive. Frequently changing the oilcloth will allow you to regularly update the decor.

beautiful kitchen utensils in the interior
About kitchen cabinets
This is where you have the opportunity to let your imagination run wild when decorating a kitchen, on the surfaces kitchen cabinets. They are really the easiest to arrange. With a little effort, old cabinets can find new life. Sand the facades, putty them and simply paint them in some fashionable color. Today, eggplant colors and shades of lime green are at the peak of popularity. New colors will add style to your kitchen decor.
How else can you decorate kitchen furniture with your own hands? Try using the decoupage technique. It will breathe new energy into an old set and give the atmosphere a special charm. You can decorate your kitchen using materials such as:
- Decorative photo wallpaper.
- Stencils.
- Self-adhesive films.
- Vinyl stickers.
- Textile.
The latter can also perfectly update the facade of cabinets and decorate the interior.

unusual handles for kitchen cabinets
About lighting
“When deciding how to decorate kitchen lamps with your own hands, remember the purpose of the room and use any “tasty” motifs”
This may be a revelation for some, but lighting a room is also a way to decorate it. Moreover, in in this case The lamp has a dual role. It, of course, must have a presentable appearance, fit into the style, but above all, emit streams of light that are “correct” in direction and power. For example, bright directional light is needed in work area, but the table may well remain in twilight. As you can see, functionality and aesthetics kitchen space, is directly proportional to lighting.

to create a creative kitchen, just hang lamps in the shape of a bottle
Any type of lamps in the kitchen can be used:
- Hanging.
- Built-in.
- Wall-mounted.
If possible, be sure to provide additional lighting along the cabinets and do not refuse pendant lamp. Without it, it will be difficult to create a unified space in the kitchen.
When deciding how to decorate kitchen lamps with your own hands, remember the purpose of the room and use any “tasty” motifs. For example, cherries or a bunch of grapes may appear on a sconce, and butterflies and bees on a chandelier.

green wallpaper with pattern
Stylistic changes in the appearance of furniture
Sometimes the situation does not give us the opportunity to throw away in one fell swoop old furniture to the landfill and furnish your kitchen with trendy furniture. And is it necessary to do this? Maybe it would be much more practical to give furniture that has served faithfully and faithfully a second birth? It’s quite possible to saddle it, and you can not just decorate the facades, but completely change the style of your furniture in accordance with general design decor.
Before you get started, take a look around and think about how you can most stylishly decorate your kitchen with your own hands.
If the kitchen design clearly shows a country direction, then decorate the furniture in a patchwork style. Special attention it is necessary to pay attention color harmony. Are your walls covered with a film that imitates a log house? Great! Furniture facades can be safely decorated with film with a wicker pattern. The kitchen in a modern high-rise building will instantly look like a real village hut. In general, working with film is beneficial in all aspects. A wide range of drawing at low cost and ease of use is the best advertising.

the print “revitalized” the monochrome facade of the white kitchen
Your kitchen shines with elegance French style? Make the furniture fronts light, ideally white, and decorate them with gold and silver inlays. You can easily find everything you need for this in construction stores.
How to decorate a completely old kitchen with your own hands? Furniture can be turned into stylish vintage accessory, which will be indispensable in a Provence style interior. Simply treat the frame with sandpaper and artificially add antiquity to the item by applying gilding or patina to the surface.
You can completely transform the set with the help of decorative glass overlays. Glass inlays are often decorated with beautiful patterns reminiscent of frost. For the same purposes, you can also use mirror inserts, which, in addition to decorative effect have the ability to expand space, which would not be superfluous in any kitchen.

bright kitchen: kitchen facade decor with multi-colored PVC film
Decorative elements for kitchen design
Designed to fill the kitchen interior kitchen utensils decorative purpose. These things include:
- Painted plates.
- Cutting boards.
- Wooden spoons.
- Themed porcelain figurines.
- Towels, etc.
All these accessories can be purchased in modern stores, and many of them will actually be self made, but how I want to decorate the kitchen with my own hands! Therefore, it is worth trying to make such items yourself, using stained glass paints, then the drawing will be exclusive and you will definitely enjoy the process.

kitchen walls decorated with beautiful plates
You can decorate your kitchen with old forks and spoons. Try bending the fork into an arc and making a rocker “goat”, a victory sign, or other compositions from its teeth. By screwing such a “masterpiece” to the wall you will get wonderful hangers for potholders and towels.
After the guests' visit and happy holiday left as a keepsake for you empty bottles pretentious forms - attach them to the case too. Stock up on acrylic paints, twine, buttons, glue and create original inscriptions and messages from all this. Give your kitchen the floor and let it do the talking.
The old wallpaper itself will tell you how to decorate the kitchen walls with your own hands. Cut out flowers or interesting compositions drawn on them and make a panel out of them. Cover the resulting pattern with thin cling film, and do it very carefully so that there are no folds. Cover the resulting semi-finished product with a thick layer of varnish and leave to dry. Then we repeat the process. Again we apply a ball of flowers, hide them under the film and fix them with varnish. You can make as many of these layers as you wish. We frame the resulting creation with a frame.

panels in the kitchen interior
Let's return to the wine and vodka topic. In addition to bottles, bottle caps can also be used in decoration. Natural corks are especially valuable, from which you can create a lot of useful devices. . How exactly can you use them to decorate the kitchen and what can you make from them with your own hands? Well, for example:
- Panel.
- Reminder board.
- Tray.
- Hot stand.
- Watch.
Corks can also be used for finishing floors and walls.
Tea lovers will appreciate the idea of creating tea bag holders. This convenient, useful and pleasing device is easy to make using clothespins, paints and colored paper.

beautiful coasters for hot dishes
How to decorate windows
You can write treatises on options for decorating a kitchen window, but the lion's share of such proposals are developed by curtain and accessories stores. If you don’t like trivial finishing methods, and you are ready to start making accessories yourself, then following tips can help you a lot.
The most common way to decorate a window is by landscaping it. They put it on the windowsill houseplants V beautiful pots, which can be painted in an unusual way to decorate the kitchen, or generally made with your own hands from materials at hand. Old, unsightly pots can be tied up with twine, decorated with buttons, shells, unusual pebbles, or covered with leaves.

window decor
In addition to plants, candlesticks, figurines, photographs in original frames and other eye-catching objects can settle on the windowsill. These items can be any accessories. It all depends on your design plans. In country or Provence decor, old clay jugs, a great-grandmother’s coal-burning iron, a copper samovar shining with polished sides, and beautiful but somewhat worn plates will look great. With such decorative elements, your kitchen will turn out to be unusually colorful.
Particularly advanced decorators don’t spend much time thinking about how to decorate the kitchen, and with their own hands they turn the window sill into a real ART object. They paint old wood, use decoupage and do many other unimaginable things that transform kitchen window into a bright accent interior spot.

textiles as decor for tables and chairs
How to decorate a kitchen with textiles in an original way and what can you use to saddle with your own hands? It is natural to create unique curtains, with ruffles and frills, with unusual tiebacks. For curtains, it is better to choose light, airy fabrics, like chiffon. In addition to curtains, housewives can easily sew bright potholders, pillows for chairs or covers for stools. The main thing is that the rest of the textiles are in harmony with the main element - the curtains.
IN modern decors will be required modern curtains. Particularly popular today are Roman blinds, decorated with elements of photo printing or ornate patterns. Such curtains do not “steal” space; on the contrary, a successful design can make it endless, leading into the distance. In addition, the material of Roman blinds is easy to care for. It can be washed indefinitely, which kitchen area important.
I can’t think of a better way to emphasize the modernity of the decor than to decorate the kitchen with hand-made products from specific textiles. To do this, you need to use fabrics of pearl or steel shades with a matte, smooth and certainly flowing texture.

Austrian curtains and a long tablecloth will create cozy atmosphere in the kitchen interior
Of course, tablecloths will help convey the spirit of the Renaissance. Tender, in pastel colors, with tassels that go to the floor, they look incredibly harmonious with the same curtains and furniture upholstery.
Having chosen the style of ancient centuries, you will have to take into account all aspects of the situation at that time and select the right decorative elements. IN spacious kitchens, when trying to convey the features of eighteenth-century life, you need to make an extravagant and lush design. In small rooms, it is better to stick to the strict lines of Roman architecture. How to decorate too “correct” kitchen decor without extra costs, with your own hands? Of course, with arches and various columns, which will also change the visual perception of space.
Many people are faced with the need to refresh their interior quickly and as cheaply as possible. Such a need may arise among people who have removed inexpensive apartment for a long time. Or those who have spent all available funds on purchasing their own home, postponing repairs and changing furniture until better times. Those who live in temporary territory are also in no hurry to invest in the situation. In general, the situation is ordinary. Even if it’s temporary, I want to live in cleanliness and comfort now, and not someday later.
Is it possible to transform the interior literally for pennies without doing complete renovation and without changing furniture? Yes, and there are plenty of opportunities for this. Today we will talk about improvement appearance kitchens. We bring to your attention 16 ideas for a low-budget, easy metamorphosis. Of course, the patched one will not look completely new, but old kitchen It will remain old, but if you approach the issue creatively, with imagination and sparkle, you can achieve an excellent result.
How to transform your kitchen without breaking the bank?
1. Paint the facades of kitchen furniture
This will not only refresh the doors, hiding the signs of time, but also change the color to a more current/light/cheerful one.


9. Cover the apron with new material
If the wall in the work area looks more than deplorable, you can hide it behind laminated chipboard, MDF panels, plywood sheets, mirror, etc. In this case, it is not necessary to remove the old finish of the apron.


10. Cover the wall in the work area with wallpaper and cover it with glass
Tempered glass, if it is not decorated with photo printing, is not too expensive. This method of installing a backsplash is easy, clean and quick. However, the old finish, if any, will most likely have to be removed.

11. Cover the floor with PVC tiles
Exist vinyl coverings in the form of tiles, the size of which corresponds to the dimensions of the floor tiles. However, there are also variations for parquet. You can glue them directly onto tiles or onto boards. This will allow you to quickly and very inexpensively update and transform the floor. Of course, such a finish will not last too long, but how temporary option will definitely justify itself.


12. Lay a large carpet
Not that bad carpets in the kitchen. They make you feel warm and cozy. And it’s not difficult to maintain order if there is a vacuum cleaner in the house. It is better, of course, to take a dark carpet so that the stains (and they will appear sooner or later) are not so noticeable.

Woven carpets are hygienic - they can be washed with a rag and a mop, like a regular floor.
13. Decorate the wall near the dining table
A stylish and comfortable dining area can become the main decoration of the kitchen interior. It will attract attention, making the shortcomings of the old kitchen much less noticeable. It's good to transform dining area much easier than the working one.

Particular attention should be paid to the wall near which the table is located. If the decoration in the kitchen is very old and there is no way to change it, you definitely need to refresh at least this wall. It is not at all necessary to remove the old coating and thoroughly prepare the surface. Even on top of old wallpaper, tiles or paint, you can install, for example, lining, panels, laminate, mirror or glass panels, etc.
14. Change the dining chairs
This will instantly change the look of the kitchen (for the better, of course). Especially if the choice falls not on classic elegant models, but on something modern and/or bright.


15. Introduce bright accents
Colored elements will make even the most gloomy kitchen more lively, modern and cheerful. However, it is important to avoid chaos and excessive diversity. Accents should be one or two colors. Quantity bright details also needs to be limited. Everything is good in moderation.

In the photo: the tiles on the walls and floor were painted, the facades were painted, the fittings were replaced, and accents were added. The kitchen looks completely new.


16. Decorate the interior
Decorative little things turn the kitchen into a cute, cozy nest. Minimalism is good in an expensive interpretation, and old interior you need to decorate it properly - new design elements will draw a significant part of the attention from old surfaces and shabby objects.
There will be wall decorations that hide old decoration (paintings, posters, mirrors), baskets and storage boxes, and living plants (visually refreshing the decor). However, don't overdo it! Don't let the decor clutter your kitchen.
Low Budget Kitchen Makeover: More Examples


When your kitchen furniture has become dilapidated or you just don’t like it anymore, don’t rush to buy new ones, because, most likely, you can update it yourself. All you need for this is a couple of free hours or days, a well-thought-out idea for a remodel, some money and one of our instructions.
Method 1: Painting the kitchen with chalk paint
Do you want to update your kitchen set beyond recognition with your own hands? The best way to do this is to repaint the facades with chalk (mineral) paint. Why chalk?
- The fact is that this type of paint has a thicker consistency and increased adhesive properties, due to which it fits perfectly on any surface - even on laminated chipboard/MDF. Moreover, chalk paints eliminate the need for tedious sanding and sometimes even without primer.
Chalk paints are also good because they give the painted surface a texture similar to that obtained when painting a wooden surface. Therefore, even the most ordinary kitchen with film facades will look much more noble after such an “update”.
- In Russia and the CIS countries you can buy chalk paints from designer Daria Geiler, foreign manufacturer Annie Sloan, Kazakh Vernenskaya Manufactory, etc. You can also make chalk paints yourself using recipes that are easy to find on the Internet.
Here are some photo examples of kitchens before and after restoration.
Photo of a kitchen with film facades before and after painting with Daria Geiler paint. Here the author of the alteration restored the peeling film on the facade near the stove, and then painted the furniture without removing or sanding the film

Old kitchen with veneer cabinets before and after painting with Annie Sloan paint. By the way, in this kitchen even the tiled floor was painted with chalk paint, and the patterns on it were painted using a homemade stencil


Inspired? Then it's time for a master class.
To paint the kitchen you will need:
- Primer (special for chalk paints or alkyd if the furniture was painted with oil stain);
- Chalk paints (preferably with a 10% margin);
- Matte moisture-resistant varnish (acrylic or polyurethane).
Useful tips
- Material consumption is calculated following the manufacturers' recommendations. It is especially important to correctly calculate paint consumption. If there is not enough of it, you will have to repaint the remaining areas with paint from another batch, which, due to the nature of production, will be slightly different in tone.
- Which varnish is better - polyurethane or acrylic? To ensure that the kitchen coating can withstand extreme loads, it is safer to use polyurethane varnish. However, if you rarely cook and do not have pets, acrylic varnish is perfect, especially since it dries faster, does not have a strong odor and is cheaper.
- Brushes: two synthetic brushes for primer and varnish, as well as one natural or synthetic brush about 4 cm wide (a natural brush gives a more pronounced texture);
- Degreaser, such as white spirit;
- Sandpaper with a grain of 100–180 microns;
- Ladder;
- Film and masking tape (to protect non-paintable parts);
- Screwdriver;
- Gloves.
How to paint a kitchen set:
Step 1. Preparation
First you need to remove the handles from the facades. Floor, walls, apron, countertop, glass inserts, fittings and other surfaces that you do not want to paint should be covered with film and masking tape. Next, clean all parts from grease (preferably with a degreaser), stains and dust.
- Do the facades need to be removed? It is not necessary to do this, but it is more convenient to paint this way.

Step 2: Primer and/or sanding
It is not necessary to sand the old paintwork, film or lamination, but it is necessary to treat it with a primer in 2 layers. In this case, each layer of primer must be allowed to dry, and then the primed surfaces must be sanded to even out the coating and enhance paint adhesion.
- However, if the lamination has a strong gloss, then it is advisable to remove its top shiny layer with fine-grained sandpaper - this will make the coating even stronger.
- If you are not too picky about the result (for example, if the kitchen is temporary, very old or got for free), then you can do without a primer. All you need to do is: wash the facades from grease, then paint them in 2-3 layers and finally cover them with 1 layer of varnish.
- Do you want to achieve the most even and durable coating? Then it’s worth sanding the surfaces after each layer of primer, paint and varnish (except for the finishing layers).
- Before starting work, test the paint on any object.
- If you want to save money, paint only the facades and visible parts of the frame, and internal walls and cabinet shelves can be painted cheaper or left unchanged.

Step 3. Coloring
Once the primer is dry, begin applying paint in 2-3 layers, allowing each layer to dry completely (one coat chalk paint It only takes about 30 minutes to dry.)
- It may take 5-6 coats to cover a dark finish with white paint.
Step 4. Varnishing
When the finishing coat of paint has dried, you can begin applying the varnish in 2-3 thin (!) layers with a synthetic brush (not used). It is advisable to allow each layer to dry completely for about 24 hours.
Step 5. Finally, we return the fittings and facades to their places.
Voila, the old kitchen is as good as new!

Method 2. Pasting facades with self-adhesive film
The fastest, most affordable and easy way restoration of kitchen furniture - design of its surfaces self-adhesive film(self-adhesive wallpaper). Unlike painting, gluing film is also good because it allows you to return the look of the kitchen to its original state after some time. For those who live in rented apartment or just loves change, this method of updating the kitchen will help out with a bang.
- The service life of furniture covered with film will be 2-3 years in good condition.
- This remodeling method is most suitable for kitchens with solid facades without panels or relief details.
Below are photos of kitchens before and after film restoration.


It is possible to cover the kitchen with film only partially. For example, one of the tiers, the back of the set, the base or panels. Examples of such kitchen remodeling are presented in the following selection of photos.


If the facades of your set have glass inserts, then you can decorate with film only back walls cabinets

You can cut out patterns and designs from vinyl “self-adhesive” tape.


By the way, you can use film to update your apron, table top or table top, and appliances.


If the refrigerator is not built into the set and does not fit into the interior of the kitchen, simply cover it and the furniture facades with film of the same tone


To remodel your kitchen you will need:
- Vinyl self-adhesive paper (with reserve);
- Sharp scissors and a breadboard knife;
- Ruler and centimeter;
- Squeegee for smoothing with hard and soft sides;
- Lint-free rags.
- Screwdriver.
How to cover a kitchen with self-adhesive film with your own hands:
Step 1. Using a screwdriver, remove the handles from the facades; if you wish, you can also remove the facades themselves - this will make it more convenient to paste them over.
Step 2. Wipe all surfaces, including the ends (!), clean and dry, especially paying attention to grease deposits - it is better to remove it with a degreaser.
Step 3. We begin to glue the film. Remove part of the backing from the film and attach the canvas to the facade, leaving a free 3-5 cm on the top and sides - we will later wrap this excess onto the edges. Take a squeegee and start smoothing the film, pushing out the bubbles, gradually going down and peeling off the backing. Movements should be smooth and slow. Having reached the lower edge of the facade, step back 3-5 centimeters from it and cut the canvas.
- If you wish, you can pre-cut the canvas to the size of the facade with an allowance of 2.5-3 cm (for facades of standard thickness).
- The film sets completely only after a few hours, so don’t be afraid to make mistakes - all mistakes can be corrected.
- If there are small bubbles left on the film, they can be carefully pierced with a thin needle and smoothed out again.
- You can purchase the film in 2 colors to create a stylish contrast: light top - dark bottom.
Step 4. Now that the facade is almost completely covered with film, let's work on the edges and corners:
- First, cut the corner portion of the loose film at 45 degrees as shown in the photo below. This way you will have two “wings” along the two edges of the façade.

- Now carefully wrap the free edge of the film over one of the edges and smooth it out. Next, wrap the remaining corner onto the adjacent edge of the facade as shown in the next photo, and cut off the excess.

- Cover the second edge with film in the same way, but this time cut the corner at a right angle.

- Finally, press the seams tightly and repeat the process on the remaining corners.

Step 6. Using the described method, cover with film all the front parts of the headset, visible areas of the frame and the base. If desired, you can use vinyl to decorate the shelves and interior walls of cabinets. However, this is not at all necessary.
Step 7. On last stage put the facades back in place if you removed them, as well as the handles, making holes in the right places using a knife or awl.
You can also watch a visual master class on how to cover a kitchen with self-adhesive film in this video.
Method 3. Kitchen decoupage
Hand painting is very beautiful, but difficult or expensive. But even a beginner can decorate boring facades of a set or hide local damage (scratches, chips, stains, etc.) with drawings created using the decoupage technique. The result is guaranteed to be excellent! We offer ideas for kitchen decoupage in the following selection of photos.


Decoupage kitchen in shabby chic style


Decoupage buffet
Decoupage will help decorate not only the facades of the set, but also other kitchen furniture and even technology.


To work you will need:
- Three-layer napkins with a pattern or decoupage cards;
- 2-3 flat squirrel brushes (for applying glue and drawings on the glue, as well as varnish);
- Scissors;
- PVA glue;
- Pencil;
- Acrylic varnish (matte, glossy or with craquelure effect).
- For do-it-yourself kitchen decoupage, decoupage cards are more suitable than napkins - the designs on them fit perfectly together and can be large in size.
- The main thing in remaking furniture using the decoupage technique is the correct choice of patterns. They should fit into the interior of the kitchen in color and style.

How to transform a kitchen using decoupage technique:
Step 1. First you need to degrease the selected area with alcohol or degreaser.
Step 2. Carefully separate the layer with the pattern from the napkin, then cut out the desired print from it. At this stage, you can “try on” the drawing on the facade and at the same time make a note where it should be located.
Step 3. Now apply PVA glue reverse side cut out design and apply it to the facade in in the right place. Next, carefully smooth the napkin with a brush, moving it from the center to the edges, and blot the excess glue and remove it with a slightly damp rag.
Step 4. Glue all the remaining napkins in the same way.
Step 5. If desired, the kitchen decoupage can be finished with hand painting. When the glue and paints have dried, the design can be sealed using acrylic or polyurethane varnish in 2-3 layers (allow the design to dry completely between layers).
Some more useful information
- Do you want to turn minimalist kitchen with continuous facades in classical? This is possible by gluing moldings or carved parts onto them and then painting them following our instructions.

Also, before painting the headset, wall cabinets can be supplemented with figured brackets (they can be bought ready-made or cut out yourself), and the base can be supplemented with baluster legs.


- For best result it is worth approaching the “update” of the kitchen comprehensively and, if necessary, changing not only the color of the facades, but also table top With an apron , curtains, dining table and chairs.
- Sometimes the thirst for change can only be satisfied by replacing/painting furniture handles.

- Of course, before painting the kitchen or covering it with vinyl, it needs to be repaired: tighten/change the fittings, glue and iron the peeling film a little, polish the scratches, and fill the chips, cracks and holes from furniture handles with furniture putty.