Soldering galvanized iron at home: advice from professionals. How to solder steel parts How to solder metal with a soldering iron
Read also
Soldering wires with a soldering iron is not difficult, so even an inexperienced electrician can handle this method of connecting copper wires. Next, we will tell you how to properly solder wires in a distribution box - the place where electrical wiring is carried out in rooms. The technology will be provided step by step, with pictures and video examples, so that you can more clearly understand how to solder two wires together. We immediately draw your attention to the fact that we will tell you how to solder copper wires. This is due to the fact that aluminum conductors are practically no longer used at home. GOST standards recommend avoiding the connection of different non-ferrous metals (aluminum and copper conductors), so the only safe option for a private house and apartment is to solder the copper wires of the cable.
Step 1 – Prepare the tool
First, you need to prepare a soldering iron for soldering wires with your own hands. All that is required is to thoroughly clean the tip from solder residues or other possible contaminants.
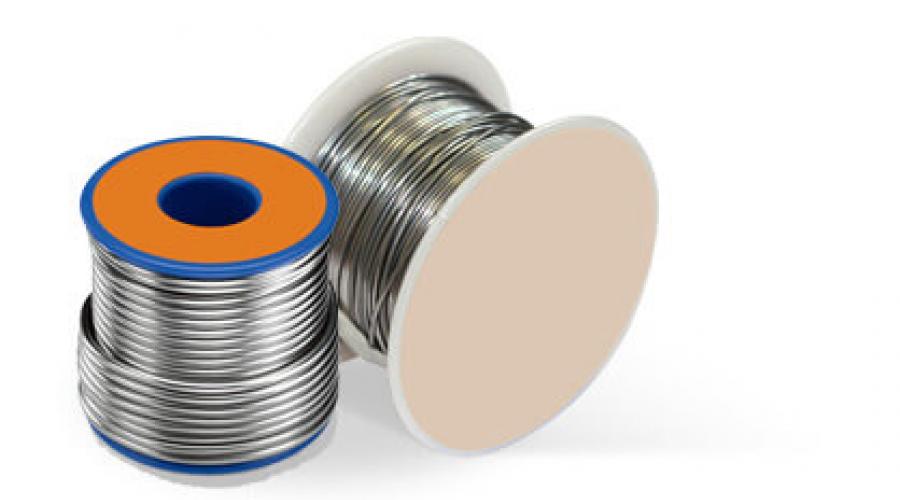
For this you can use a regular file. In addition, you must prepare solder and flux, without which you will not be able to solder wires with a soldering iron. As for solder, in order to solder the wires, you can use either an alloy of tin and lead, or a special thread, as shown in the photo below. 
Flux is necessary so that during soldering the solder evenly covers the materials being soldered. In addition, flux removes the oxide film from copper conductors, which significantly impairs the reliability of the connection. As a flux, you can use either rosin or special soldering acid. Both options are popular among craftsmen. 
Another important stage of preparation is creating a suitable workplace. You should have a power outlet and a stand for a soldering iron nearby so that the technology of soldering wires with your own hands is safe.
By the way, you can, which won’t take much time and effort. A homemade device will serve you for quite a long time, as you can see for yourself!
Step 2 – Tinning
So, if you need to solder two power wires together, then first of all you must remove the polyethylene insulation and tin the exposed wires, especially if they are very thin. Before soldering, the stranded conductor is first twisted and then treated with flux, on top of which a thin layer of heated solder is applied. Before soldering, be sure to prepare the tip of the soldering iron - dip it in flux (in the same rosin as shown in the photo), and then in tin so that the tip is covered with a small layer of solder.

For soldering, it is quite simple - first you must place the bare wire on the rosin, then heat this place with a soldering iron so that the wire is immersed in the flux. After this, you need to take it out and treat it evenly on all sides with solder. To properly apply the heated tin-lead alloy to the surface, twist the wire in your hands while tinning. If you need to connect the wires in a junction box, for convenience, you can use acid instead of rosin. It is enough to simply apply it with a brush to the surface that you need to solder. 
If the conductors have a large cross-section (thick), tinning is performed in a similar way. The only difference is that you do not need to pre-twist the cores, like with a stranded conductor.
After you have completed the tinning, you can proceed to the soldering process. We immediately draw your attention to the fact that it is necessary to carry out work only when the electricity is turned off. Soldering live wires is strictly prohibited!
Step 3 – Solder the wires
Well, the last thing left is to solder the two prepared wires in the junction box. All you need to do is twist or overlap the wires and heat the joint with a soldering iron. The solder will melt and after it hardens, it will reliably connect the electrical conductors. We considered tips for this separately. 
An important point - do not move the wires during soldering, otherwise the connection will not be reliable enough.
It should also be noted that preliminary tinning does not need to be done, but simply twist the wires together in a junction box, treat them with flux and solder them properly. However, we do not recommend you soldering this way, because in this case the connection will be much worse.
The final touch is to insulate the cooled area. We told you about that. It is best to separately insulate each core with electrical tape and use heat-shrink tubing on top of it. In the video below you can view in detail the entire soldering procedure:
Learning to solder wires with a soldering iron
It is important to know!
Above we told you how to properly solder wires in a junction box, but this procedure will not work if you need to solder contacts to a diode strip or even on a board (chip). So, we provide a brief overview of possible soldering technologies:
- . If you need to connect an LED strip, which means solder the contacts from the power supply with the leads on the strip (copper circles), then first tin the plus and minus wires, then treat the leads on the strip with acid and drop molten solder on them. All that remains is to press the wires to the junction and heat them with a soldering iron. Once the solder has hardened, seal the exposed area using a glue gun or heat shrink.
- Working with boards. If you decide to solder wires on a microcircuit, then the soldering technology will be more responsible. To solder a capacitor, transistor, resistor or the same LED, you need a soldering iron with a power of 5 to 20 watts. A more powerful device may overheat the board and then your efforts will be in vain. In addition, the tip must be very thin, because excess tin will act as jumpers, which in turn will “short”.
- Soldering headphones. If you suddenly decide to repair headphones with a 3.5 plug, which often break in the connector area, then first watch videos on the Internet that tell you how to learn how to solder thin enameled wires with a silk thread inside. In short, you will have to strip the enamel down to copper, tinning and then just solder the plug to the wires.
Knowledge of how to solder correctly is needed not only by radio amateurs and electrical installation specialists. Every home handyman has to deal with the need for soldering when repairing electrical appliances.

Preparing the soldering iron for use
Before soldering with a soldering iron, you should properly prepare it for work. In everyday life, an electric soldering iron with a copper tip is most often used, which, during storage and use, gradually becomes covered with a layer of oxide and is subject to mechanical damage. To obtain a solder joint of good quality, the soldering iron is prepared for use in the following sequence:
- Use a finely cut file to clean the working part of the tip to a length of 1 cm from the edge. After cleaning, the instrument should acquire a reddish color, characteristic of copper, and a metallic sheen. During stripping, the tip is given a wedge-shaped, beveled, cone-shaped shape in order to solder what the master needs.
- Plug in the soldering iron and heat it to operating temperature.
- The tip must be tinned and covered with a thin layer of tin - the same solder used to solder the connected conductors. To do this, the tip of the tool is immersed in rosin, and then a piece of solder is passed along it. You should not use a solder rod with rosin inside for tinning a soldering iron. To distribute the solder evenly, rub the working edges against a metal surface.
During operation, the half-plate will burn and wear off, so the soldering iron will have to be cleaned and tinned several times during the soldering process. You can clean the tip with a piece of sandpaper.
If the master uses a tool with a nickel-plated, non-burnable rod, it will have to be cleaned with a special sponge or damp cloth. They tin such a sting in molten rosin, running a piece of solder over it.
Soldering can only be learned on the job, but before that it is advisable to become familiar with the basic operations.
Fluxing or tinning
The traditional and most affordable flux is rosin. If desired, you can solder with a solid substance or its alcohol solution (SKF, Rosin-gel, etc.), as well as TAGS flux.
The legs of radio components or chips are covered with half-milk at the factory. But to get rid of oxides, you can tin them again before installation, lubricating them with liquid flux and covering them with an even layer of molten solder.
Before processing with flux or tinning, copper wire is cleaned with fine emery cloth. This removes the oxide layer or enamel insulation. Liquid flux is applied with a brush, and then the soldering area is heated with a soldering iron and covered with a thin layer of tin. Tinning in solid rosin is done as follows:
- melt a piece of the substance on a stand and heat the conductor in it;
- feed the solder rod and distribute the molten metal evenly over the wire.
Correctly soldering massive copper, bronze or steel parts should be done using active fluxes that contain acids (F-34A, Glycerin-hydrazine, etc.). They will help create an even layer of poluda and firmly connect parts of large objects. Tin is applied to large surfaces with a soldering iron, spreading solder evenly over them. After working with active flux, acid residues should be neutralized with an alkaline solution (for example, soda).
Preheating and temperature selection
It is difficult for beginners to determine at what temperature the tool can start working. The degree of heating should be selected depending on the type of material:
- soldering microcircuits requires heating no higher than +250°C, otherwise the parts may be damaged;
- large individual radio components can withstand heating up to +300°C;
- Tinning and joining of copper wire can occur at +400°C or slightly lower;
- massive parts can be heated at the maximum power of the soldering iron (about +400°C).
Many models of instruments have a thermostat, and it is easy to determine the degree of heating. But in the absence of a sensor, it is worth keeping in mind that a household soldering iron can be heated to a maximum of +350... +400°C. You can start working with the tool if the rosin and solder melt within 1-2 seconds. Most POS grade solders have a melting point of about +250°C.
Even an experienced craftsman will not be able to solder correctly with a soldering iron that is not heated enough. With low heat, the solder structure becomes spongy or granular after solidification. Soldering does not have sufficient strength and does not ensure good contact between the parts, and such work is considered a defect.


Working with solder
When heated sufficiently, the molten solder should become flowable. For small jobs, you can take a drop of alloy on the tip of the tool and transfer it to the parts to be joined. But it is more convenient to use thin wire (rod) of different sections. Often inside the wire there is a layer of rosin, which helps to properly solder with a soldering iron without distraction from the process.
With this method, a hot tool heats the surface of the connected conductors or parts. The end of the solder rod is brought to the tip and pushed a little (1-3 mm) under it. The metal instantly melts, after which the remainder of the rod is removed, and the solder is heated with a soldering iron until it acquires a bright shine.
When working with radio components, you need to take into account that heating is dangerous for them. All operations are performed within 1-2 seconds.
When soldering connections of single-core wires of large cross-section, you can use a thick rod. When the tool is heated sufficiently, it also melts quickly, but you can distribute it over the surfaces to be soldered more slowly, trying to fill all the grooves of the twist.
One of the most reliable methods of connecting wires is soldering. This is a process in which the space between two conductors is filled with molten solder. In this case, the melting temperature of the solder must be lower than the melting temperature of the metals being connected. At home, soldering is most often used with a soldering iron - a small device powered by electricity. For normal operation, the power of the soldering iron must be at least 80-100 W.
What you need for soldering with a soldering iron
In addition to the soldering iron itself, you will need solders, rosin or fluxes; it is advisable to have a stand. While working, you may need a small file and small pliers.
Rosin and fluxes
To get a good connection between the wires, it is necessary to clean them of contaminants, including oxide film. While mono-cores can still be cleaned manually, multi-core conductors cannot be cleaned properly. They are usually treated with rosin or flux - active substances that dissolve contaminants, including oxide film.
Both rosin and fluxes work well, but fluxes are easier to use - you can dip a brush into the solution and quickly process the wires. You need to put a conductor in rosin, then heat it with a soldering iron so that the molten substance envelops the entire surface of the metal. The disadvantage of using fluxes is that if they remain on the wires (and they do), they gradually corrode the adjacent sheath. To prevent this from happening, all soldering areas must be treated - the remaining flux must be washed off with alcohol.

Rosin is considered a universal remedy, and fluxes can be selected depending on the metal you are going to solder. In the case of wires, this is copper or aluminum. For copper and aluminum wires, use LTI-120 flux or borax. A homemade flux made from rosin and denatured alcohol (1 to 5) works very well, and it’s also easy to make with your own hands. Add rosin to the alcohol (preferably dust or very small pieces of it) and shake until dissolved. Then this composition can be used to treat conductors and strands before soldering.
Solders for soldering copper wires with a soldering iron use POS 60, POS 50 or POS 40 - tin-lead. For aluminum, zinc-based compounds are more suitable. The most common are TsO-12 and P250A (made of tin and zinc), grade A (zinc and tin with the addition of copper), TsA-15 (zinc with aluminum).

It is very convenient to use solders that contain rosin (POS 61). In this case, there is no need to pre-treat each conductor in rosin separately. But for high-quality soldering, you must have a powerful soldering iron - 80-100 W, which can quickly heat the soldering area to the required temperatures.
Auxiliary materials
In order to properly solder wires with a soldering iron, you also need:

Alcohol may be required to wash off the flux, and electrical tape or heat-shrinkable tubes of various diameters for insulation. These are all the materials and tools without which soldering wires with a soldering iron is impossible.
Soldering process with an electric soldering iron
The entire technology of soldering wires with a soldering iron can be divided into several successive stages. All of them are repeated in a certain sequence:

That's all. In the same way, you can solder two or more wires, you can solder a wire to some contact pad (for example, when soldering headphones, you can solder the wire to a plug or to a pad on a headphone), etc.
After you have finished soldering the wires with a soldering iron and they have cooled down, the connection must be insulated. You can wrap electrical tape, put it on, and then heat up the heat shrink tube. When it comes to electrical wiring, it is usually recommended to first wrap a few turns of electrical tape, and then put a heat-shrinkable tube on top, which is heated.
Differences in technology when using flux
If active flux is used rather than rosin, the tinning process changes. The cleaned conductor is lubricated with the compound, and then heated with a soldering iron with a small amount of solder. Further everything is as described.

Soldering twists with flux - faster and easier
There are also differences when soldering twists with flux. In this case, you can not tin each wire, but twist it, then treat it with flux and immediately start soldering. The conductors don’t even need to be cleaned—the active compounds corrode the oxide film. But instead, you will have to wipe the soldering areas with alcohol to wash away the remnants of chemically aggressive substances.
Features of soldering stranded wires
The soldering technology described above is suitable for monocores. If the wire is multi-core, there are nuances: before tinning, the wires are untwisted so that everything can be dipped in rosin. When applying solder, you must ensure that each wire is covered with a thin layer of solder. After cooling, the wires are twisted into one bundle again, then you can solder with a soldering iron as described above - dipping the tip into solder, heating the soldering area and applying tin.

When tinning, multi-core wires must be “fluffed”
Is it possible to solder copper wire to aluminum
Aluminum cannot be combined directly with other chemically active metals. Since copper is a chemically active material, copper and aluminum are not joined or soldered. The point is too different thermal conductivity and different current conductivity. When current passes, aluminum heats up more and expands more. Copper heats up and expands much less. Constant expansion/constriction to varying degrees leads to the fact that even the best contact is broken, a non-conducting film is formed, and everything stops working. That's why copper and aluminum are not soldered.
If there is such a need to connect copper and aluminum conductors, make a bolted connection. Take a bolt with a suitable nut and three washers. At the ends of the connected wires, rings are formed according to the size of the bolt. Take a bolt, put on one washer, then a conductor, another washer - the next conductor, a third washer on top and secure everything with a nut.

There are several other ways to connect aluminum and copper lines, but soldering is not one of them. You can read about other methods, but bolted is the simplest and most reliable.
In a world saturated with electrical metal products, the ability to handle an electric soldering iron and perform high-quality soldering can always come in handy. The well-known advantages of soldering parts of different sizes allow you to independently restore individual samples of household appliances (TV receivers, for example), repair various household utensils, and solder products made of copper, brass, and silver.
Before mastering the correct techniques for handling solder and a soldering iron at home, you should take a special course that includes training in soldering and everything that precedes this procedure. You can study on your own, but when mastering the work with jewelry and complex electronic circuits, you cannot do without an experienced mentor.
From the point of view of organizing the process, soldering metals using special solders is a set of operations that are quite simple in content. However, despite the apparent ease, not everyone can solder correctly the first time. When you first meet, some difficulties arise due to the lack of a clear idea of what needs to be done and in what order.

- it is necessary to correctly select the main working tool that will be used for soldering;
- you should worry about making a convenient and functional stand, prepare a place where you will have to solder most of the time;
- the student must stock up on suitable consumables, without which not a single similar procedure can be completed (solder, liquid or paste flux).

And finally, a novice user must master the basic soldering techniques, which require a certain sequence of targeted actions.
You can solder with an electric soldering iron, gas torch or blowtorch. It is customary to solder boards and microcircuits with special hair dryers and thermal stations that ensure uniform heating. The choice of a particular type of tool and a stand or holder for it is determined by the temperature conditions under which work operations are expected to be carried out.
The next requirement in order involves the preparation of the required components that allow you to correctly solder any metal connection. These usually include various types of solder, flux additives and special soldering liquids necessary to improve its quality (rosin and alcohol compounds for tinning).
All components of the process must be selected for the specific conditions of formation of the solder joint and taking into account the characteristics of the parts used.
Basic operating procedures
The technological map or diagram of “correct” soldering using a soldering iron assumes the following order of operations.
Before directly soldering, the surfaces of the objects to be soldered are cleaned of heavy dirt and corrosive deposits, after which they should be cleaned to a characteristic shine.
After this, the places where the parts are soldered are treated with a previously prepared flux, through which it is possible to improve the conditions for the spreading of solder over the contact surface.
Then the contact pad or soldering zone is subjected to protective tinning, the essence of which is to apply solder melted to a liquid state on them. In this case, the consumable material spreads evenly over the surface of the parts that need to be soldered and ensures the formation of a reliable thermal connection.

When preparing parts for tinning, preference is given to paste-like fluxes, which are convenient to apply and easy to wash off. Before processing and soldering, the parts are pre-connected by mechanical twisting or compression with pliers.
After fixing, flux is applied to them again, and then the contact area is heated while simultaneously introducing a solder rod into it (its composition may differ from the material used for tinning).

It is impossible to learn how to solder correctly with your own hands unless you learn how to tin a soldering iron tip. For tinning, after the soldering iron has completely warmed up, the working tip should be pressed firmly against any foil-covered surface and rubbed over the molten rosin with solder.
This operation should be repeated until a characteristic film of solder appears on the edges of the copper tip, ensuring good adhesion to any metal.
The question of how to solder correctly comes along with an interest in what soldering is for and what can be done with it. Previously, it was mainly pots and samovars that were soldered, but today you can also solder high-tech things.
Soldering capabilities
There are more than enough opportunities to use your ability to correctly solder metal parts and products. This method is used to carry out many assembly and repair operations. Here are a few particularly important ones:
- you can solder copper tubes that are part of the internal lines of heat exchangers and refrigeration units;
- solder elements of various electronic circuits;
- carry out repairs, soldering of jewelry, glasses;
- fix carbide cutting inserts on metalworking tool holders;
- in everyday life, soldering is also often used when it is necessary to fasten flat copper parts on metallized surfaces of sheet blanks;
- the ability to tin high-quality surfaces can be useful for protecting metal structure elements from corrosion.
At the initial stage of learning the art of soldering, it is recommended to use the simplest circuits of electronic devices.
In addition, using the process under consideration, it is possible to solder parts from metals of dissimilar structures, as well as seal various types of rigid connections.
Types of soldering operations
 The variety of soldering methods is explained by many different factors that determine the quality and efficiency of its implementation. Such factors include not only the type of soldering device and the type of solder that is used in the process, but also the technological features of the formation of the seam. To surface mount parts on a board, you need to learn how to use a solder mask correctly.
In any case, in order to solder correctly, you need to know the melting temperature of the metal you are working with. It affects the choice of soldering tools, as well as fluxes and solder. In accordance with the specified parameter, solder materials are divided into low-melting (up to 450 degrees) and refractory (more than 450 degrees).
Solder selection
 Low-melting solders are used under normal conditions that do not require special strength of the elements being connected. They can be used to assemble electronic circuits or solder small-sized jewelry.
During these operations, parts are fused with liquid tin, which contains lead as an additive.
True, lead-free solders have been spreading recently. When choosing the type of heating tool in this case, preference is given to electric soldering irons with operating powers from 25 to several hundred watts.
If it is necessary to solder products made of refractory metals that are operated in extreme conditions in terms of temperature and deformation, so-called “hard” solders will be required. This type of soldering composition is prepared on the basis of pure copper with the addition of zinc or other reactive metal. Refractory copper-zinc solders are recommended for use when it is necessary to join parts operating under conditions of high static loads.

With their help, you can solder products made of brass and other copper alloys, in which the copper content does not exceed 68 percent. To connect steel blanks and parts, pure copper or certain types of brass are most often used as solder.
To summarize, we note that in order to learn how to properly solder metal parts of various structures, desire alone is not enough. It is possible to perfectly master the known techniques of proper soldering only after all the issues related to this process have been studied.
The latter include the choice of a heating tool, a competent approach to the selection of consumables, as well as strict adherence to the established procedure for carrying out soldering procedures.
All this will eliminate possible errors when working with molten solders and obtain a reliable and durable connection.
Soldering with a soldering iron is one of the most common and simplest soldering methods, but it has two significant limitations. Firstly, a soldering iron can only solder with low-melting (soft) solders, and secondly, it is impossible (or, in any case, difficult) to solder massive parts with a large heat sink - due to the impossibility of heating them to the melting temperature of the solder. The last limitation is overcome by heating the part to be soldered with an external heat source - a gas burner, electric or gas stove, or some other method - but this complicates the soldering process.
Before you solder with a soldering iron, you need to get everything you need. The main tools and materials without which soldering is impossible include the soldering iron itself, solder and flux.
Soldering irons
Depending on the heating method, soldering irons can be “conventional” - electric (with a spiral or ceramic heater), gas (with a gas burner), hot-air (heat is transferred by air flow), and induction. Massive hammer soldering irons can be heated not only with electricity, but also in the old fashioned way - with an open flame.
You can learn how to use such a soldering iron from descriptions of the technology of tin work, which is where they were used most often. Nowadays, electric soldering irons are usually used due to their availability and ease of use. But the first soldering irons were heated over an open flame.

The main parameter by which a soldering iron is selected is its power, which determines the amount of heat flow transferred to the parts being soldered. Devices with a power of up to 40 W are used for soldering electronic components. Thin-walled parts (with a wall thickness of up to 1 mm) require a power of 80-100 W.


For parts with a wall thickness of 2 mm or more, soldering irons with a power above 100 W will be needed. These are, in particular, electric hammer soldering irons that consume up to 250 W and higher. The most energy-intensive soldering irons include, for example, the Ersa Hammer 550 hammer soldering iron with a power of 550 W. It is capable of heating up to a temperature of 600°C and is designed for soldering particularly massive parts - radiators, machine parts. But it has an inadequate price.

In addition to the massiveness of the part, the required power of the soldering iron is also affected by the thermal conductivity of the metal being soldered. As it increases, the power of the device and its heating temperature must be increased. When soldering parts made of copper with a soldering iron, it must be heated more than when soldering a part of the same mass, but made of steel. By the way, when working with copper products, a situation may arise when, due to the high thermal conductivity of the metal, during soldering, desoldering of previously completed areas will occur.
Solders
When soldering with electric soldering irons, low-temperature tin-lead (POS-30, POS-40, POS-61), tin-silver (PSr-2, PSr-2.5) or other solders and pure tin are used. The disadvantages of solders containing lead include the harmfulness of the latter, and the advantages include better soldering quality than that of lead-free solders. Pure tin is used for soldering food utensils.
Fluxes
It is generally accepted that tin, silver, gold, copper, brass, bronze, lead, and nickel silver can be soldered well. Satisfactory - carbon and low-alloy steels, nickel, zinc. Poor - aluminum, high-alloy and stainless steels, aluminum bronze, cast iron, chrome, titanium, magnesium. However, without disputing these data, we can say that there is no poorly soldered metal, there is poor preparation of the part, incorrectly selected flux and incorrect temperature conditions.Selecting the right flux for soldering means solving the main problem of soldering. It is the quality of the flux that primarily determines the solderability of a particular metal, the ease or difficulty of the soldering process itself, and the strength of the connection. The flux must correspond to the material of the products being soldered - in its ability to destroy its oxide film.
Acidic (active) fluxes, such as "Soldering Acid" based on zinc chloride, cannot be used when soldering electronic components, as they conduct electricity well and cause corrosion, however, due to their aggressiveness, they prepare the surface very well and are therefore indispensable when soldering metal structures, and the more chemically resistant the metal, the more active the flux should be. Residues of active fluxes must be carefully removed after soldering is completed.
Effective fluxes for soldering steel are an aqueous solution of zinc chloride, soldering acids based on it, and LTI-120 flux. You can also use other, stronger fluxes, of which there are plenty on the market.

The main difference between soldering stainless steels with a soldering iron and soldering carbon and low-alloy steels is the need to use more active fluxes, which are required to destroy the chemically resistant oxides with which stainless steels are coated. As for cast iron, it needs to be soldered with high-temperature soldering, and, therefore, an electric soldering iron is not suitable for this purpose.
For stainless steel, phosphoric acid is used. Specialized fluxes, such as F-38, also cope well with chemically resistant oxide films.

For galvanized iron, you can use a composition containing rosin, ethyl alcohol, zinc chloride and ammonium chloride (LK-2 flux).
Auxiliary materials and devices
You can do without some devices and materials used for soldering, but their presence makes the work much more convenient and comfortable.Soldering iron stand serves to ensure that the heated soldering iron does not touch the table or other objects. If it does not come with a soldering iron, you can purchase it separately or make it yourself. The simplest stand can be made from a thin sheet of tin, cutting grooves in it for storing tools.

Wet viscose or foam rubber sponge, placed in a socket to prevent falling out, it is much more convenient to clean the tip of the soldering iron than with a regular cloth. Brass shavings can also serve for the same purposes.

You can remove excess solder from the surface of parts using special suction or braids. The first one, in appearance and design, resembles a syringe equipped with a spring. Before use, it must be cocked by recessing the rod head. By bringing the nose to the molten solder, the spring is released by pressing the release button. As a result, excess solder is drawn into the removal head.

It is a braid of fluxed thin copper wires. By placing its end on the solder and pressing it on top with a soldering iron, thanks to capillary forces you can collect all the excess solder in it like a blotter. The tip of the braid, saturated with solder, is simply cut off.


A very useful device is called third hand(Third-Hand Tool). When working with a soldering iron, sometimes there are catastrophically “not enough hands” - one is occupied with the soldering iron itself, the other with the solder, but you still need to hold the soldered parts in a certain position. The “third hand” is convenient because its clamps can be easily installed in any position relative to each other.

Soldering holder "Third hand"
The parts being soldered are heated to high temperatures; touching them can cause you to get burned. Therefore, it is desirable to have various clamping devices that allow the manipulation of heated parts - pliers, tweezers, clamps.
Preparing the soldering iron for use
When you turn on the soldering iron for the first time, it may start to smoke. There is nothing wrong with this, the oils used to preserve the soldering iron simply burn out. You just need to ventilate the room.Before using a soldering iron, you need to prepare its tip. Preparation depends on its original form. If the tip is made of bare copper, the tip can be forged into a screwdriver shape, this will seal the copper and make it more resistant to wear. You can simply sharpen it with sandpaper or a file, giving it the required shape - in the form of a sharp or truncated cone with a different angle, a tetrahedral pyramid, an angular bevel on one side. Nickel metal coatings are used to protect copper from oxidation. If the soldering iron has such a coating, then it cannot be forged or sharpened to avoid damaging the coating layer.
There is a standardized range of tip shapes, but you can, of course, use any shape suitable for the particular job.

When soldering massive parts, the contact area between the soldering iron and the part should be maximum to ensure better heat transfer. In this case, angular sharpening of a round rod (2 in the photo above) is considered the best. If you plan to solder small parts, then a sharp cone (4), knife or other shapes with small angles are suitable.
Instructions for working with a soldering iron that has an uncoated copper tip contain one mandatory requirement - tinning the “tip” of the new soldering iron in order to protect it from oxidation and wear. Moreover, this should be done at the first heating, without delay. Otherwise, the “tip” will be covered with a thin layer of scale, and the solder will not want to stick to it. This can be done in different ways. Warm up the soldering iron to operating temperature, touch the “tip” to the rosin, melt the solder on it and rub the solder on a piece of wood. Or wipe the heated tip with a rag moistened with a solution of zinc chloride, melt solder on it and rub it over the tip with a piece of ammonia or rock table salt. The main thing is that as a result of these operations, the working part of the tip is completely covered with a thin layer of solder.
The need to tin the tip is caused by the fact that the flux gradually corrodes, and the solder dissolves the tip. Due to loss of shape, the tip has to be sharpened regularly, and the more active the flux, the more often, sometimes several times a day. For nickel-plated tips, nickel blocks access to copper, protecting it, but such tips require careful handling, they are afraid of overheating, and it is not a fact that the manufacturer has made a sufficiently high-quality coating, for which they require an overpayment.
Preparing parts for soldering
Preparing parts for soldering involves performing the same operations regardless of what type of soldering (low-temperature or high-temperature) is performed, and what heating source (electric or gas soldering iron, gas torch, inductor or something else) is used.First of all, this is cleaning the part from dirt and degreasing. There are no special subtleties here - you need to use solvents (gasoline, acetone or others) to clean the part from oils, fats, and dirt. If there is rust, it must be removed by any suitable mechanical method - using an emery wheel, wire brush or sandpaper. In the case of high-alloy and stainless steels, it is advisable to treat the edges being joined with an abrasive tool, since the oxide film of these metals is particularly strong.
Soldering temperature
The heating temperature of the soldering iron is the most important parameter; the quality of soldering depends on the temperature. Insufficient temperature manifests itself in the fact that the solder does not spread over the surface of the product, but forms a lump, despite the preparation of the surface with flux. But even if the soldering was successful in appearance (the solder melted and spread over the joint), the soldered joint turns out to be loose, matte in color, and has low mechanical strength.The soldering temperature (temperature of the parts being soldered) should be 40-80°C higher than the melting temperature of the solder, and the heating temperature of the tip should be 20-40°C higher than the soldering temperature. The last requirement is due to the fact that when it comes into contact with the parts being soldered, the temperature of the soldering iron will decrease due to heat dissipation. Thus, the heating temperature of the tip should exceed the melting temperature of the solder by 60-120°C. If a soldering station is used, the required temperature is simply set by the regulator. When using a soldering iron without temperature control, its actual value, when using rosin as a flux, can be assessed by the behavior of the rosin when touched by the soldering iron. It should boil and release abundant steam, but not burn instantly, but remain on the tip in the form of boiling drops.
Overheating the soldering iron is also harmful; it causes combustion and charring of the flux until it activates the junction surface. Overheating is indicated by a dark film of oxides that appears on the solder located at the tip of the soldering iron, as well as by the fact that it does not stay on the “tip” and flows off it.
Soldering technique with a soldering iron
There are two main methods of soldering with a soldering iron:- Supply (drain) of solder onto the parts to be soldered from the tip of the soldering iron.
- Supplying solder directly to the parts to be soldered (to the pad).
With any method, you must first prepare the parts for soldering, install and secure them in their original position, heat the soldering iron and moisten the joint with flux. Further steps differ depending on which method is used.
When feeding solder from a soldering iron, a certain amount of solder is melted on it (to keep it on the tip) and the “tip” is pressed against the parts being soldered. In this case, the flux will begin to boil and evaporate, and the molten solder will move from the soldering iron to the soldering joint. The movement of the tip along the future seam ensures the distribution of solder along the joint.

Solder on the jelly may be sufficient if the tip has simply acquired a metallic sheen. If the shape of the tip has noticeably changed, there is too much solder.

When applying solder directly to a junction, use a soldering iron to first heat the parts to soldering temperature, and then apply solder to the part or to the joint between the soldering iron and the part. As the solder melts, it will fill the joint between the parts being soldered. You should choose exactly how to solder with a soldering iron - the first or second method - depending on the nature of the work being performed. The first method is better for small parts, the second for large parts.
The basic requirements for high-quality soldering include:
- good heating of the soldering iron and parts being soldered;
- sufficient amount of flux;
- entering the required amount of solder - exactly as much as required, but no more.
Here are some tips on how to solder correctly with a soldering iron.
If the solder does not flow, but is smeared, it means that the temperature of the parts has not reached the required values, you need to increase the heating temperature of the soldering iron or use a more powerful device.
There is no need to add too much solder. High-quality soldering requires the presence of a minimum sufficient amount of material in the joint, at which the seam turns out to be slightly concave. If there is too much solder, there is no need to try to attach it somewhere at the joint; it is better to remove it with suction or braiding.
The quality of the junction is indicated by its color. High quality - the solder has a bright shine. Insufficient temperature makes the structure of the junction grainy and spongy - this is a definite defect. Burnt solder looks dull and has reduced strength, which in some cases may be quite acceptable.
When using active (acidic) fluxes, be sure to wash off their residues after soldering - with some detergent or ordinary alkaline soap. Otherwise, there is no guarantee that after some time the connection will not be destroyed by corrosion from remaining acids.
Tinning
Tinning - covering the metal surface with a thin layer of solder - can be either an independent, final operation, or an intermediate, preparatory stage of soldering. When this is the preparatory stage, successful tinning of the part in most cases means that the most difficult part of the soldering job (joining the solder to the metal) is done; soldering the tinned parts to each other is usually no longer difficult.Wire tinning. Tinning the ends of electrical wires is one of the most common operations. It is carried out before soldering the wires to the contacts, soldering them together, or to ensure better contact with the terminals when connecting with bolts. It is convenient to make a ring from a tinned stranded wire, which ensures ease of attachment to the terminal and good contact.
Wires can be single-core or stranded, copper or aluminum, varnished or not, clean new or acidified old. Depending on these features, their servicing differs.
The easiest way to tin is single-core copper wire. If it is new, then it is not covered with oxides and tins even without stripping, you just need to apply flux to the surface of the wire, apply solder to the heated soldering iron and move the soldering iron along the wire, slightly turning the wire. As a rule, tinning proceeds without problems.


If the conductor does not want to tinker - due to the presence of varnish (enamel) - regular aspirin helps. Knowing how to solder with a soldering iron using an aspirin tablet (acetylsalicylic acid) can be very useful in some cases. You need to put it on a board, press the conductor to it and heat it for a few seconds with a soldering iron. At the same time, the tablet begins to melt, and the resulting acid destroys the varnish. After this, the wire usually tins easily.
If there is no aspirin, vinyl chloride insulation from electrical wires, which, when heated, releases substances that destroy the varnish coating, also helps to remove the varnish that interferes with tinning from the surface of the conductor. You need to press the wires to a piece of insulation with a soldering iron and drag it several times between the insulation and the soldering iron. Then tin the wire as usual. When removing varnish using sandpaper or a knife, cuts and breaks of thin wire strands are common. When stripped by firing, the wire may lose strength and break easily.
It should be taken into account that melted polyvinyl chloride and aspirin release substances harmful to health into the air.
Also, for varnished (enamel) wires, you can purchase a special flux that removes the varnish.

New stranded copper wire can be tinned just as easily as solid copper wire. The only peculiarity is to rotate it in the direction in which the wires will twist and not unwind.
Old wires may be coated with oxides that prevent tinning. The same aspirin tablet will help to cope with them. You need to untwist the conductor, put it on aspirin and heat it for a few seconds with a soldering iron, moving the conductor back and forth - and the tinning problem will disappear.
To tinning an aluminum wire, you will need a special flux - for example, the one called “Flux for soldering aluminum”. This flux is universal and is also suitable for soldering metals with a chemically resistant oxide film - stainless steel, in particular. When using it, you just need to remember to clean the connection from flux residues afterwards to avoid corrosion.

If, when tinning the wires, excess surf has formed on them, you can remove it by placing the wire vertically, end down, and pressing a heated soldering iron to its end. Excess solder will flow from the wire onto the soldering iron.
Tinning a large metal surface
Tinning the surface of the metal may be necessary to protect it from corrosion or for subsequent soldering of another part to it. Even if a completely new sheet is tinned, which looks clean on the outside, there can always be foreign substances on its surface - preservative grease, various contaminants. If a sheet covered with rust is tinned, then it needs cleaning all the more. Therefore, tinning always begins with thorough cleaning of the surface. Rust is cleaned off with emery cloth or a wire brush, fats and oils are removed with gasoline, acetone or another solvent.Then, using a brush or other tool that matches the flux, flux is applied to the surface of the sheet (this may not be a paste-like flux as in the photo below, but, for example, a solution of zinc chloride or another active flux).

A soldering iron with a relatively large flat tip surface is heated to the required temperature and solder is applied to the surface of the part. It is advisable that the soldering iron power be about 100 W or higher.

Then apply the soldering iron to the solder on the part with the largest plane and keep it in this position. The heating time of the part depends on its size, the power of the soldering iron and the contact area. The achievement of the required temperature is indicated by boiling of the flux, melting of the solder and its spreading over the surface. The solder is gradually distributed over the surface.

After tinning, the metal surface is cleaned of flux residues with alcohol, acetone, gasoline, and soapy water (depending on the chemical composition of the flux).

If the solder does not spread over the metal surface, this may be due to poor cleaning of the surface before tinning, poor heating of the metal (due to insufficient soldering iron power, small contact area, insufficient time to warm up the metal of the part), or a dirty soldering iron tip. Another reason may be the wrong choice of flux or solder.

Tinning can be carried out by applying (draining) solder from a soldering iron and distributing it with a “tip” over the surface, or by supplying solder directly to the pad - the solder melts upon touching the heated metal of the part.
Overlapping sheet metal soldering
When repairing car bodies, all kinds of tin work, there is a need for overlay soldering of sheet metal. There are two ways to solder sheet parts overlapping each other - by pre-tinning them, or by using soldering paste containing solder and flux.In the first case, the overlapping areas of parts after mechanical cleaning and degreasing are pre-tinned. Then the parts of the connection are applied to each other with tinned surfaces, fixed with clamping devices and heated with a soldering iron from different sides to the melting temperature of the solder. Evidence of successful soldering is the flow of molten solder from the gap.
In the second method, after preparing the parts, the contact area of one of the parts is covered with solder paste. Then the parts are fixed in the desired position, tightened with clamps and, as in the first case, the seam is heated with a soldering iron on both sides.
When purchasing solder paste, you need to pay attention to its purpose, because... Many solder pastes are designed for soldering electronics and do not contain active fluxes that allow you to solder steel.


When using the content of this site, you need to put active links to this site, visible to users and search robots.