Finishing the stairs with laminate is an interesting design. Finishing stairs with laminate - simple implementation and elegant look Covering metal stairs with laminate
Are you renovating your home and don’t know how best to decorate the staircase to the second floor? Then this article is written just for you.
Today we will talk about how to finish a staircase with laminate with your own hands: videos, photographs and instructions will definitely be attached. We will show what this could look like to seemingly everyone available material, and how he is able to decorate such a familiar interior detail as a staircase. Let's name its pros and cons in comparison with other materials that can replace it. So, let's go!

Laminate can be safely called one of the most profitable options staircase finishing, and this is facilitated not only by an acceptable price for many. The benefit also lies in the fact that this material is very practical.
A staircase finished with laminate practically does not differ in appearance from a wooden one, but at the same time it is less noisy and does not require pre-treatment impregnations and paints and varnishes.


Installation of laminate flooring for stairs does not require special preparation, and it can be done with your own hands. Just as easy similar designs can be restored - worn parts are removed and replaced with new ones. But before you run to the store for this wonderful material, you still need to get to know it better.
The essence of laminate and its properties
Laminate is multilayer material, and depending on the class, it is used in places with varying traffic. The staircase experiences constant loads, so a laminate of at least class 31 is used for its finishing.

The main elements of any laminated board are:
- Protective layer– it is its thickness and strength that determine the class of the flooring.
Advice! When choosing a laminate, you should not look at the thickness of the product, thinking that the better it will last longer, since the degree of abrasion of the coating depends only on the thickness of the upper protective film. Always inquire about the abrasion class from the seller first, and only then evaluate the other parameters.
- Decorative layer– creates the texture of the material and determines its shade. Laminate can imitate not only wooden surfaces, but also others, such as stone, tile, wood, leather, textiles, etc. When abraded protective surface, decorative layer It will still serve for some time, but we wouldn’t count on much.
- Fibreboard panel- This is the basis of the material, giving it strength and elasticity at the same time. It is made from small wood chips that are pressed under high pressure and is bonded with adhesives.
On a note! Call laminate environmentally friendly pure material The tongue does not rotate, but it also has classes according to this parameter, which we will talk about later.
- Stabilizing moisture-resistant layer– protects the board from moisture, which can be transferred from the base on which it lies, for example, concrete.
In addition, the laminate is protected from moisture by the substrate underneath it, so it is covered quite well from below. Such a coating is much more difficult to withstand contact with water spilled on top of it - it penetrates between the seams and is absorbed into the fiberboard, despite the fact that the locks are usually covered with wax. As a result, the board swells, the locks come apart, and sometimes it happens that the coating becomes like a “house.”
This leads to a simple conclusion that for good long service It is not enough for a laminate to have been treated from the factory. Proper, careful use of the coating is very important.

One small drop on the seam and your coating can look like the one shown in the photo below.

To prevent this from happening to you, always remember one simple rule. Wet cleaning should only be done with a well-wrung out cloth so that any moisture remaining on the surface quickly evaporates into the air. If it happens that water is spilled, then wipe it off immediately, and the sooner the better.

So let's get back to the main point. What should you pay attention to when buying laminated boards?
- Abrasion class – main parameter, which will determine the service life of the coating. Choose more high options. More details in the table presented above. Remember that the higher the class, the more expensive the finishing.
- Product thickness– there are options in 6,7,8,9,10 and even 12 mm. The larger this parameter, the stronger the board. It is easier to work with and will creak less during operation.
- Width– this parameter is especially important when finishing the stairs in a house with laminate. The fact is that both the height and depth of the steps are fixed values, and it will be much more convenient to carry out the cladding if the board is selected correctly and does not need to be constantly trimmed longitudinally. In addition, it is desirable that the treads of the stairs do not have a locking connection, which can come apart over time.
- Now about health. The coating should not in any way harm the people using the stairs. For this purpose, the formaldehydes used in the composition of the board were divided into environmental classes. For interior coatings residential buildings It is best to use E1 class laminate, which complies with European EN standards

- Guaranteed service life specified by the manufacturer - on the packaging you can find numbers from 2 to 6 years– naturally, these are greatly underestimated figures. In practice, such coatings last at least 10 years, but with the condition that all requirements for the operation of the product are met. But, nevertheless, a situation where a plant is confident that its products will last longer than analogues from competitors puts it in a more advantageous position.
- Manufacturer– here you can safely separate the rest of the world from China. We don’t want to offend our friends from the Middle Kingdom, since there are companies whose products are not inferior in quality to the world’s best brands, but most often they buy low-quality products at a lower price. Separately, we note that perhaps the world leader in production floor coverings, Swedish company Tarkett, whose products are always different great design and quality.

When choosing a laminate, also pay attention to the surface texture. It should not be slippery, since moving up stairs, especially for older people and small children, always involves some risk. Therefore, it is better to immediately abandon polished options and choose something matte or semi-glossy.
Accessories for laminate
Laminate flooring is a prefabricated product that can be cut to fit the intended location if necessary. There are also external and internal corners on the flight of stairs.
All this must not only be firmly installed, but also beautifully designed - the cut points are covered with decorative overlays, and moldings are installed on the corners, which, in addition to beauty, may have anti-slip properties.
Corner moldings are attached with self-tapping screws or glue, making the skin almost monolithic and more durable. Installing them yourself will not be difficult.
For cladding external corners L-shaped stair corners are most often used, which are:
| Corner type | Description |
|
|
Metal - made of aluminum, steel or brass. Such corners are very durable - wear resistance depends only on how long the paint on the product lasts. Colors like gold, polished steel and wood are very popular, but it is better to choose the texture and shades to match the main coating and the surrounding interior so that everything looks harmonious. |
|
|
Plastic ones can also be made to match any material, so choosing the exact shade to match the laminate will not be difficult. Such a part will not only serve for a long time, but will also hide all minor irregularities, as it has some elasticity. Separately, it is worth noting the low price compared to other analogues. Such corners are attached with glue, so for a strong connection, purchase especially strong compounds. |
|
|
Wooden - this is the most expensive option. Thanks to it, the corners of the steps can be rounded by purchasing options, as shown in the photo. Such steps are less dangerous because they do not have sharp protrusions that can be hit when falling. They go well with laminate in appearance, and are suitable for restoration: the wood can be sanded, cracks and gouges filled with putty, and re-opened with varnish. |


Besides the simplest standard options discussed above, special laminated profiles are sold for laying laminate on steps.

Such profiles are fastened with the help of special metal plates containing counter protrusions and grooves, due to which the strip is firmly held in place. Particularly popular are products from the Belgian company Quick Step under the Incizo brand, which are produced to all quality standards.
Metal strips come in several sizes, and their shape can vary significantly from model to model.

To install this structure, a metal rail is attached to the steps using self-tapping screws. Next, the overlay is coated with glue along its entire length and installed on top. The resulting connection has no visible fastening areas, therefore it is more aesthetically pleasing.

To hide steps from the sides, use adhesive tape, which has the same pattern as the decorative molding.

In order to cover where the steps meet the wall, you can also purchase a rectangular plinth made of laminated boards. With its help, you can carefully repeat the shape of the steps, hiding all visible flaws.
Inside such a plinth there is a cable channel through which you can run an Internet cable or any other wires to the top.

A standard plastic baseboard will also work, but such a solution will lack elegance. previous version, and the finishing will look more budget-friendly. Among the advantages I would like to note is the ease of installation and the presence of a cable channel.
The underlay under the laminate is used only on large, flat areas where the laminate lies like a large shield under its own weight. On treads its presence is not necessary, and sometimes it is not necessary at all, but if it is necessary to create a heat, sound or waterproofing layer, a preliminary laying of this coating is carried out. To protect against water, it is enough to lay a thin plastic film.

Among other things, the substrate will increase the resistance of the coating to loads - it cushions the board when walking on it, although over time any substrate will be pressed and pressed, losing these properties.
Laying laminate flooring on steps
In the second part of the article we will analyze the installation process in detail, but before finishing the stairs with laminate, we will decide on the materials and properly prepare the base.
Tools and materials
Let's list the main ones, indicating the jobs in which they will be used:
| Name | Type of work |
|
|
An indispensable tool for cutting laminate flooring. With its help, a rough cut is performed, but if you need to cut a perfectly straight line, factory and homemade guides are used. You can use a circular miter saw to make straight, perpendicular cuts. |
|
|
Using a screwdriver, we level the steps with plywood and slats, and fix the decorative corners. |
|
|
If you don’t already have such a device, then buy it soon. They can apply not only glue from tubes, but also various sealants and silicone, in the same container. Always useful! |
|
|
In front of you standard set for marking, which is used for any work with wood. A saw can be useful optionally when fitting wooden corners, or leveling stairs. |
|
|
Preferably hard. Useful when spreading glue over metal rail and smoothing out the adhesive tape. |
|
|
Laminate with a locking connection matched to the decorative overlay (not essential when using L-shaped options). |
|
|
We will consider installation on Incizo profiles, since this option is more demanding in terms of fit. Everyone can guess how to install regular corners. |
|
|
For laminate flooring on steps, it is better to use polyurethane or epoxy glue - this fixation is much stronger. It is applied directly from the tube, or spread with a comb spatula, depending on the type and packaging of the glue. |


From small things you will need to buy self-tapping screws for wooden stairs or dowel screws for concrete. Make sure that the screws are galvanized, otherwise they will be corroded over time.
Preparing the steps
So that you fully understand, laminate is only the outer finishing layer of the staircase, which does not bear any structural load. Preparing the surface of the staircase, its shape and size is the most labor-intensive and critical part of the cladding.
- Remove the old covering from the steps, if any. Remove anything that might interfere with your work: nails, screws, baseboards. If the surface was painted, then it must be cleaned in places where the paint has become frayed and began to peel off.
- If the old steps had protrusions at the treads, then they need to be cut off with a jigsaw.
- Check how reliable your steps are. When areas that have become unusable are discovered, they are dismantled and replaced with new ones.
- The dimensions of all steps are adjusted. For alignment wooden surfaces it is convenient to use plywood, and concrete options top up with solution to the required level.
- If you have a concrete staircase, then its surface is carefully cleaned and leveled, filling potholes and cracks. After drying, the concrete must be sanded manually with an abrasive mesh, or, which is much more convenient, with a grinding machine.

- After this, dust is swept away from the steps and wet cleaning. Before facing, concrete must be primed with compounds deep penetration to strengthen the adhesion to the glue and completely get rid of dust.
- Wooden steps are treated with fire retardants (fire-resistant impregnations) and antiseptics, which will significantly extend the life of the structure.
- Performed finishing the side walls of the staircase or its bowstrings, depending on what you have built.
- Templates for treads and risers are made.
Cutting the material
Cutting staircase parts is a very meticulous process. For greater accuracy, we have already made stencils, but to be on the safe side, you should double-check each piece to make sure it fits correctly.

We have already said that a jigsaw is needed mainly for rough cuts. What to do when you need to make a perfectly even side cut. Use the end circular saw or such an exotic instrument. The guillotine is intended only for perpendicular cutting of the board, but the edges it leaves are perfectly smooth, without chips.
If you are going to cover all the corners with “L-shaped” thresholds, then you don’t have to worry much about the evenness of the cuts. In our case, we focus on the form decorative molding and take into account that the side edges of the steps will be covered with adhesive tape, which requires care.
Finishing process

The installation process is very simple, and fits into one photo that you submitted. But we will still look at everything step by step.
- Cut the profile exactly to the length of your steps.
- Take the metal guide, turn it over and apply a layer of adhesive to the mounting pad. This should be done in waves in order to get rid of excess material consumption and not lose the quality of the coupling.
- Place the metal against the corner of the step and press it with noticeable force so that the glue presses down and adheres to the two surfaces.
- Now screw the self-tapping screws along the mounting holes for a stronger fixation. When laying concrete, it was necessary to drill holes in the base in advance and install plastic dowels in them.
- Start finishing from the top steps so you don't have to step on freshly laid panels. The riser is installed first. Turn it over reverse side, and apply a layer of glue in the same manner. Place it in the installation location and press down lightly. From below, under the panel, insert special supports selected for the thickness of the laminate - this way you can slip the tread of the next step under it.
Attention! Some profile models, such as the one shown in the photo above, require the initial installation of a riser. Read the instructions.

- When installing panels, make sure that the grooves and ridges of the locks on the profile and the board match.
- Next, the tread is installed. Apply glue to the base, grabbing the metal profile. Smooth out rubber spatula glue for metal so that too large a layer does not form and the adhesion is uniform. Lay the panel by sliding it under the riser of the previous step. Naturally, by this point the linings should be removed.
- We attach a plastic guide, which comes complete with the profile, to the tenon of the free lamella.
- We take the decorative overlay and coat it with glue along all the existing grooves. Snap it onto metal profile, tapping your fist along the entire length of the bar.
That's all, the installation of the stage is complete. Although no, wait! We forgot about the tape. Cut it into strips of the required length and width, remove protective film and glue it into place, having previously degreased the surface. The edges of the tape are aligned stationery knife, after which it is carefully smoothed with a rubber spatula.
At this point, finishing the stairs to the second floor with laminate can definitely be considered complete. We hope you liked our article, in which we tried to fit in as much information as possible, removing all unnecessary things. In addition, we suggest watching the video in this article, in which the installation of the mentioned profile takes place in action.
Owners whose houses have stairs know from their own experience that repairing this structure is not as easy as it might seem at first glance. In many modern apartments there are also stairs, therefore everything more people I'm concerned about the topic of finishing the stairs. This can be done with laminate, just like with wood. It’s just that modern laminate is strong enough, so it’s ideal for certain facing works.
Many people generally put off staircase repairs until tomorrow - they are so scared of the complexity and expense. But if there is no other choice, it’s time to think about how to finish the stairs with laminate. Marble is also often used for cladding these structures, but it is expensive, and in addition, laying marble is much more difficult than wood or laminated panels; without some experience it is completely impossible. The conclusion is simple - the easiest and most affordable way out of the situation is lining the stairs with laminate.
Ideal laminate for staircase cladding
Which laminate is suitable for cladding stairs? It is important that it meets the following criteria:
- High strength - necessary in order to withstand significant loads during operation.
- Anti-slip layer - so that a person can move on the stairs safely
- Wear resistance - important for the structure to maintain its strength and attractiveness appearance over a long service life.
Thus, we draw a simple conclusion - in order for the finishing of the stairs with laminate to be truly worthy, you should buy material of at least class 31.

Of course more simple options also exist: you can, for example, simply further strengthen the old structure, and then treat it with varnish. However, an experienced owner will immediately say - this method is not at all as attractive as using lamellas in work.
Remember that during finishing, not only the process of arranging the interior and exterior with various decorative elements is important - the basic components are also important. All necessary protective functions must fulfill and decorative elements, otherwise the surface will wear out very quickly.
To reduce problems when finishing the stairs, try to use materials High Quality– then all the results will correspond to expectations.
Preparation for finishing work
Before covering the stairs with laminate, you need to properly prepare flat surface- they do the same thing:
- All structural elements are sanded, then a layer of varnish and primer are applied to them
- Next, the risers and steps are additionally fastened together - small screws are ideal for solving this task. This measure is necessary so that you will not be disturbed in the future unpleasant creaking. Those holes that appear from screws should also be covered: first with putty, then with varnish.
- Next, you need to measure the length of the front part of the steps.

- When the profiles are fixed to each individual part, the transitions between them and the treads are leveled - for this you need to use putty.
It should be mounted on such a surface directly. It is best to use lamellas on locking ones, reliable connections(only certain ones can be like this). The required strength of the flooring will be ensured.
If there are height differences on the surface - how to prepare it
Alas, it’s not always possible to come across perfectly smooth foundations that have completely identical steps. In order for the laminate finishing of the stairs to be done efficiently, you will have to perform leveling - without this preparatory work One should hardly hope for a decent result. , for example, is often performed in order to hide certain surface imperfections.
How to even out differences:
- All parts of the surface are measured, the highest area is selected
- All others are adjusted to its size - self-leveling mixtures are used for this.
- If there is a slight difference, the solution is simply applied to the surface, then it is leveled as much as possible
- If there is a big difference, you need to make formwork for the steps. Perfect for this plywood sheets, the thickness of which is 0.4 cm. This formwork is secured with dowels so that the upper edge is at the very level that needs to be achieved;
- Before pouring the mixture, the base must be cleared of debris and dust. Next, it is primed so that the coupling is as effective as possible. When the primer dries, the solution is poured;
- When the work is completed, you must wait until the surface is completely dry. Next, you can start fastening the plywood. The purpose of these sheets is to perform all the functions of a moisture barrier layer. Thanks to this technique, the linings will not absorb moisture;
- Now you need to prime this layer and wait until the primer dries completely.

Plywood is laid out level - remember this. The blanks are cut strictly according to the dimensions of the surfaces, the layer thickness is from 10 to 15 mm. The concrete is applied to a special adhesive mastic, a sheet is laid on it, and then it is simply secured with dowels.
Laminate finishing of concrete surface
To finish concrete stairs laminate, you need to properly prepare the boards - otherwise nothing will work. The first rule to remember: for installation it is better to choose panels that have a locking system; the work itself is done in a direct way.

Things to consider:
- In some parts of a given design, the slats will not wear equally;
- If any element fails, thanks to the locking connection it can be very easily replaced;
- With this approach, integrity violations will not occur, which is very important.
How to prepare laminate before covering:
- The boards are cut into pieces;
- Protective pieces are cut to length - for treads, risers, cladding;
- Two boards are placed across one step so that they lie tightly from left to right;
- Sometimes the edges need to be trimmed so that they completely coincide with the surface;
- As a rule, offenses are not so broad; they cannot cover the whole base;
- IN in this case another lamella is simply cut off, this is necessary so that the part of the surface that remains can be filled.
- First, the boards are cut into two equal parts so that one width covers the ledge completely.
- You can also take a whole board and attach a small strip to it so that the entire space is filled.
- Please note: the misdeeds should not cover the entire part - space for the top cladding should also be left.
- Pieces of lamellas are cut to the risers, after which you must make sure that they fit tightly and are flush with the top of the surface.
- If you find imperfect edges, just cut them off.

Now you can safely prepare the material for cladding. To complete this step, the length of the exposed surface is measured, as is the length of the risers. It is important that they match the corners of the stairs.
To make it easier, number each cut piece. This way you will clearly see where each element should be placed.
Finishing stairs with laminate - stages
- Work should begin from the top of the structure. A coating is installed at the top and smoothly moved to the bottom. This way you won't have to walk on the flooring that has already been laid.
- Now it’s time to install the approaches - that is, the very part where a person steps. If you chose boards with locking system, they need to be connected at an angle - nothing complicated. In addition, installation can be done using glue. All elements are assembled, glue is applied to the base, and then the material is attached. Make sure to upper layer The adhesive mixture did not get onto the boards.
- Place the top parts (risers), apply a little glue to the back of them and press firmly to the place where the connection is made. Hold the elements in this position for several minutes - this is necessary for the glue to be absorbed. The point is that this part should sit tightly between the horizontal base above and below.
- Now is the time to take on the cladding. To do this, apply a strip of glue to the base and squeeze the conical end (which covers the approach).

When the job is finished, do not use the new deck for 24 hours. After 24 hours, you can begin processing the front edges. If the bevel is located at a right angle and has no recesses, you can glue lamellas to the vertical sides of the steps.
- What can you say about the shape of the first stage?:
- About the shape of the steps(straight march):
- About the decorative function:
Almost always its shape is really different from all the others: it protrudes beyond the bowstring from the sides. Therefore, it is recommended to prepare a cardboard template in advance. The shape of this element will allow you to competently and accurately cut the laminated board, which will prevent waste of material.
There are no special difficulties here. In the screw version of the design, their shape requires the production of special templates - the same as in the previous paragraph. What is the easiest way to make such templates? Just take measurements from each surface and transfer them to thick cardboard. Yes, if you have little experience, this process can be lengthy and somewhat difficult, but it cannot be avoided: get married a large number of Nobody wants the material.
We bring to your attention a video: covering stairs with laminate. After watching, you will definitely remember that the entire structure must be completely closed. Optimal strength of the decking is guaranteed only in this case - during operation this is an important indicator.
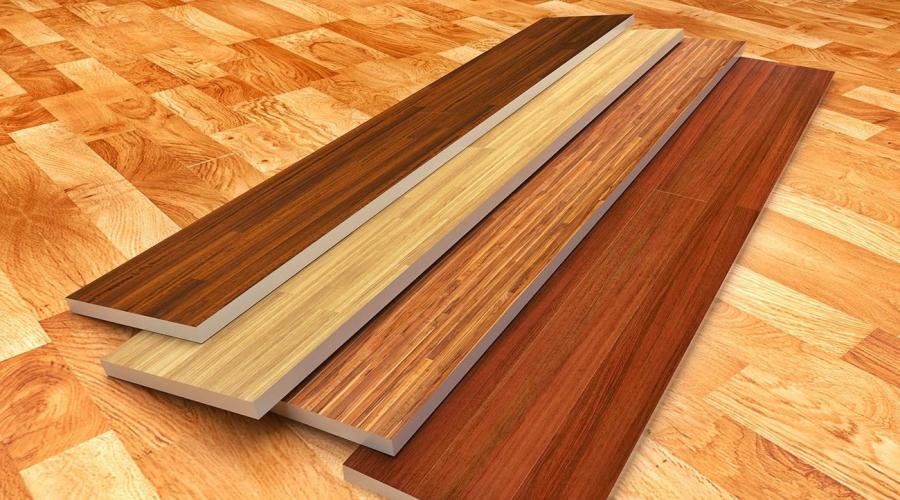
If we talk about color design of this flooring, you only need to choose it personally. In this case, your own wishes are the only correct guideline. Many people choose classic options(which basically just imitate natural wood). The point here is that solutions that can be called unusual go out of fashion very quickly or become boring to the owners. And the lamellas are covered not for several years, but for decades.

Finishing stairs with laminate is done not only for beauty. The material provides protection to the base from various mechanical influences.
Conclusion : self-finishing laminate stairs are a lengthy, very labor-intensive and complex process. To do everything with your own hands, you have to try. But this is quite possible. Calculate all the advantages and disadvantages of such finishing yourself and make a decision - will it be suitable for your family or is it better to turn to professionals.
Are you renovating your home and don’t know how best to decorate the staircase to the second floor? Then this article is written just for you.
Today we will talk about how to finish a staircase with laminate with your own hands: videos, photographs and instructions will definitely be attached. We will show you what this seemingly accessible material can look like, and how it can decorate such a familiar interior detail as a staircase. Let's name its pros and cons in comparison with other materials that can replace it. So, let's go!
Laminate can be safely called one of the most profitable options for finishing stairs, and this is facilitated not only by the price that is acceptable to many. The benefit also lies in the fact that this material is very practical.
A staircase finished with laminate practically does not differ in appearance from a wooden one, but at the same time it is less noisy and does not require pre-treatment with impregnations and paints.
Installation of laminate flooring for stairs does not require special preparation, and it can be done with your own hands. Such structures can be restored just as easily - worn parts are removed and replaced with new ones. But before you run to the store for this wonderful material, you still need to get to know it better.
The essence of laminate and its properties
Laminate is a multilayer material, and depending on the class, it is used in areas with varying traffic. The staircase experiences constant loads, so a laminate of at least class 31 is used for its finishing.
The main elements of any laminated board are:
- Protective layer– it is its thickness and strength that determine the class of the flooring.
Advice! When choosing a laminate, you should not look at the thickness of the product, thinking that the better it will last longer, since the degree of abrasion of the coating depends only on the thickness of the upper protective film. Always inquire about the abrasion class from the seller first, and only then evaluate the other parameters.
- Decorative layer– creates the texture of the material and determines its shade. Laminate can imitate not only wooden surfaces, but also others, such as stone, tile, wood, leather, textiles, etc. If the protective surface wears off, the decorative layer will still serve for some time, but we wouldn’t count on much.
- Fibreboard panel- This is the basis of the material, giving it strength and elasticity at the same time. It is made from small wood chips, which are compressed under high pressure and bonded with adhesives.
On a note! It would be hard to call laminate an environmentally friendly material, but in terms of this parameter it also has classes, which we will discuss later.
- Stabilizing moisture-resistant layer– protects the board from moisture, which can be transferred from the base on which it lies, for example, concrete.
In addition, the laminate is protected from moisture by the substrate underneath it, so it is covered quite well from below. Such a coating is much more difficult to withstand contact with water spilled on top of it - it penetrates between the seams and is absorbed into the fiberboard, despite the fact that the locks are usually covered with wax. As a result, the board swells, the locks come apart, and sometimes it happens that the coating becomes like a “house.”
This leads to a simple conclusion that for a laminate to have a good long service life, it is not enough to be treated from the factory. Proper, careful use of the coating is very important.
One small drop on the seam and your coating can look like the one shown in the photo below.
To prevent this from happening to you, always remember one simple rule. Wet cleaning should only be done with a well-wrung out cloth so that any moisture remaining on the surface quickly evaporates into the air. If it happens that water is spilled, then wipe it off immediately, and the sooner the better.
So let's get back to the main point. What should you pay attention to when buying laminated boards?
- Abrasion class– the main parameter that will determine the service life of the coating. Choose higher options. More details in the table presented above. Remember that the higher the class, the more expensive the finishing.
- Product thickness– there are options in 6,7,8,9,10 and even 12 mm. The larger this parameter, the stronger the board. It is easier to work with and will creak less during operation.
- Width– this parameter is especially important when finishing the stairs in a house with laminate. The fact is that both the height and depth of the steps are fixed values, and it will be much more convenient to carry out the cladding if the board is selected correctly and does not need to be constantly trimmed longitudinally. In addition, it is desirable that the treads of the stairs do not have a locking connection, which can come apart over time.
- Now about health. The coating should not in any way harm the people using the stairs. For this purpose, the formaldehydes used in the composition of the board were divided into environmental classes. For interior coatings of residential buildings, it is best to use E1 class laminate, which complies with European EN standards
- Guaranteed service life specified by the manufacturer - on the packaging you can find numbers from 2 to 6 years– naturally, these are greatly underestimated figures. In practice, such coatings last at least 10 years, but with the condition that all requirements for the operation of the product are met. But, nevertheless, a situation where a plant is confident that its products will last longer than analogues from competitors puts it in a more advantageous position.
- Manufacturer– here you can safely separate the rest of the world from China. We don’t want to offend our friends from the Middle Kingdom, since there are companies whose products are not inferior in quality to the world’s best brands, but most often they buy low-quality products at a lower price. We would like to separately note, perhaps the world leader in the production of floor coverings, the Swedish company Tarkett, whose products are always distinguished by their excellent design and quality.
When choosing a laminate, also pay attention to the surface texture. It should not be slippery, since moving up stairs, especially for older people and small children, always involves some risk. Therefore, it is better to immediately abandon polished options and choose something matte or semi-glossy.
Accessories for laminate
Laminate flooring is a prefabricated product that can be cut to fit the intended location if necessary. There are also external and internal corners on the flight of stairs.
All this must not only be firmly installed, but also beautifully designed - the cut points are covered with decorative overlays, and moldings are installed on the corners, which, in addition to beauty, may have anti-slip properties.
Corner moldings are attached with self-tapping screws or glue, making the skin almost monolithic and more durable. Installing them yourself will not be difficult.
For cladding external corners, L-shaped stair corners are most often used, which are:
| Corner type | Description |
|
|
Metal - made of aluminum, steel or brass. Such corners are very durable - wear resistance depends only on how long the paint on the product lasts. Colors like gold, polished steel and wood are very popular, but it is better to choose the texture and shades to match the main coating and the surrounding interior so that everything looks harmonious. |
|
|
Plastic ones can also be made to match any material, so choosing the exact shade to match the laminate will not be difficult. Such a part will not only serve for a long time, but will also hide all minor irregularities, as it has some elasticity. Separately, it is worth noting the low price compared to other analogues. Such corners are attached with glue, so for a strong connection, purchase especially strong compounds. |
|
|
Wooden - this is the most expensive option. Thanks to it, the corners of the steps can be rounded by purchasing options, as shown in the photo. Such steps are less dangerous because they do not have sharp protrusions that can be hit when falling. They go well with laminate in appearance, and are suitable for restoration: the wood can be sanded, cracks and gouges filled with putty, and re-opened with varnish. |
In addition to the simplest standard options discussed above, special laminated profiles are sold for laying laminate flooring on steps.
Such profiles are fastened with the help of special metal plates containing counter protrusions and grooves, due to which the strip is firmly held in place. Particularly popular are products from the Belgian company Quick Step under the Incizo brand, which are produced to all quality standards.
Metal strips come in several sizes, and their shape can vary significantly from model to model.
To install this structure, a metal rail is attached to the steps using self-tapping screws. Next, the overlay is coated with glue along its entire length and installed on top. The resulting connection has no visible fastening areas, therefore it is more aesthetically pleasing.
To hide the steps from the sides, adhesive tape is used, which has the same pattern as the decorative molding.
In order to cover where the steps meet the wall, you can also purchase a rectangular plinth made of laminated boards. With its help, you can carefully repeat the shape of the steps, hiding all visible flaws.
Inside such a plinth there is a cable channel through which you can run an Internet cable or any other wires to the top.
A standard plastic baseboard will also work, but this solution will lack the elegance of the previous option, and the finish will look more budget-friendly. Among the advantages I would like to note is the ease of installation and the presence of a cable channel.
The underlay under the laminate is used only on large, flat areas where the laminate lies like a large shield under its own weight. On treads its presence is not necessary, and sometimes it is not necessary at all, but if it is necessary to create a heat, sound or waterproofing layer, a preliminary laying of this coating is carried out. To protect against water, it is enough to lay a thin plastic film.
Among other things, the substrate will increase the resistance of the coating to loads - it cushions the board when walking on it, although over time any substrate will be pressed and pressed, losing these properties.
Laying laminate flooring on steps
In the second part of the article we will analyze the installation process in detail, but before finishing the stairs with laminate, we will decide on the materials and properly prepare the base.
Tools and materials
Let's list the main ones, indicating the jobs in which they will be used:
| Name | Type of work |
|
|
An indispensable tool for cutting laminate flooring. With its help, a rough cut is performed, but if you need to cut a perfectly straight line, factory and homemade guides are used. You can use a circular miter saw to make straight, perpendicular cuts. |
|
|
Using a screwdriver, we level the steps with plywood and slats, and fix the decorative corners. |
|
|
If you don’t already have such a device, then buy it soon. They can apply not only glue from tubes, but also various sealants and silicone, in the same container. Always useful! |
|
|
Here is a standard marking set that is used for any work with wood. A saw can be optionally useful when adjusting wooden corners or leveling stairs. |
|
|
Preferably hard. Useful for spreading glue over a metal strip and smoothing out adhesive tape. |
|
|
Laminate with a locking connection matched to the decorative overlay (not essential when using L-shaped options). |
|
|
We will consider installation on Incizo profiles, since this option is more demanding in terms of fit. Everyone can guess how to install regular corners. |
|
|
For laminate flooring on steps, it is better to use polyurethane or epoxy glue - this fixation is much stronger. It is applied directly from the tube, or spread with a comb spatula, depending on the type and packaging of the glue. |
From small things you will need to buy self-tapping screws for wooden stairs or dowel screws for concrete ones. Make sure that the screws are galvanized, otherwise they will be corroded over time.
Preparing the steps
So that you fully understand, laminate is only the outer finishing layer of the staircase, which does not bear any structural load. Preparing the surface of the staircase, its shape and size is the most labor-intensive and critical part of the cladding.
- Remove the old covering from the steps, if any. Remove anything that might interfere with your work: nails, screws, baseboards. If the surface was painted, then it must be cleaned in places where the paint has become frayed and began to peel off.
- If the old steps had protrusions at the treads, then they need to be cut off with a jigsaw.
- Check how reliable your steps are. When areas that have become unusable are discovered, they are dismantled and replaced with new ones.
- The dimensions of all steps are adjusted. To level wooden surfaces, it is convenient to use plywood, and concrete options are topped up with mortar to the required level.
- If you have a concrete staircase, then its surface is carefully cleaned and leveled, filling potholes and cracks. After drying, the concrete must be sanded manually with an abrasive mesh, or, which is much more convenient, with a grinding machine.
- After this, dust is swept away from the steps and wet cleaning is done. Before facing, the concrete must be primed with deep penetration compounds in order to strengthen the adhesion to the glue and completely get rid of dust.
- Wooden steps are treated with fire retardants (fire-resistant impregnations) and antiseptics, which will significantly extend the life of the structure.
- The finishing of the side walls of the staircase or its strings is carried out, depending on what you have built.
- Templates for treads and risers are made.
Cutting the material
Cutting staircase parts is a very meticulous process. For greater accuracy, we have already made stencils, but to be on the safe side, you should double-check each piece to make sure it fits correctly.
We have already said that a jigsaw is needed mainly for rough cuts. What to do when you need to make a perfectly even side cut. Use a miter saw or an exotic tool like this for this. The guillotine is intended only for perpendicular cutting of the board, but the edges it leaves are perfectly smooth, without chips.
If you are going to cover all the corners with “L-shaped” thresholds, then you don’t have to worry much about the evenness of the cuts. In our case, we focus on the shape of the decorative molding and take into account the fact that the side edges of the steps will be covered with adhesive tape, which requires care.
Finishing process
The installation process is very simple, and fits into one photo that you submitted. But we will still look at everything step by step.
- Cut the profile exactly to the length of your steps.
- Take the metal guide, turn it over and apply a layer of adhesive to the mounting pad. This should be done in waves in order to get rid of excess material consumption and not lose the quality of the coupling.
- Place the metal against the corner of the step and press it with noticeable force so that the glue presses down and adheres to the two surfaces.
- Now screw the self-tapping screws along the mounting holes for a stronger fixation. When laying concrete, it was necessary to drill holes in the base in advance and install plastic dowels in them.
- Start finishing from the top steps so you don't have to step on freshly laid panels. The riser is installed first. Turn it over and apply a layer of glue in the same manner. Place it in the installation location and press down lightly. From below, under the panel, insert special supports selected for the thickness of the laminate - this way you can slip the tread of the next step under it.
Attention! Some profile models, such as the one shown in the photo above, require the initial installation of a riser. Read the instructions.
- When installing panels, make sure that the grooves and ridges of the locks on the profile and the board match.
- Next, the tread is installed. Apply glue to the base, grabbing the metal profile. Smooth the glue over the metal with a rubber spatula so that it does not form too large a layer and the adhesion is uniform. Lay the panel by sliding it under the riser of the previous step. Naturally, by this point the linings should be removed.
- We attach a plastic guide, which comes complete with the profile, to the tenon of the free lamella.
- We take the decorative overlay and coat it with glue along all the existing grooves. We snap it onto the metal profile, tapping it with our fist along the entire length of the bar.
That's all, the installation of the stage is complete. Although no, wait! We forgot about the tape. We cut it into strips of the required length and width, remove the protective film and glue it in place, having previously degreased the surface. The edges of the tape are leveled with a stationery knife, after which it is carefully smoothed with a rubber spatula.
At this point, finishing the stairs to the second floor with laminate can definitely be considered complete. We hope you liked our article, in which we tried to fit in as much information as possible, removing all unnecessary things. In addition, we suggest watching the video in this article, in which the installation of the mentioned profile takes place in action.
The finishing of stairs is carried out with almost any materials used for. One of the most correct and beautiful designs is application .
Advantages of laminate for finishing stairs
The use of laminated boards for arranging stairs is popular and has a number of undeniable advantages:
- you can easily choose the right one color scheme, ideal to complement any interior;
- the variety of textures will make it possible to create the most interesting design solution;
- installation of such a coating is quite easy and quick;
- very easy to make major renovation or self-replacement individual elements coverings.
In addition, laminate flooring compares favorably with its low cost compared to natural wood materials.

Preparatory work
Before installation, it is important to ensure that high-quality composition grounds makes it possible to do . The base must be reliable and durable, and also not have any play that could cause the panels to move apart.
Preparing a flat surface
Laminate boards cannot be attached to a wooden base with glue, as such fastening causes the formation of cracks in the finishing material. For fixation, it is advisable to use self-tapping screws to prevent the formation of squeaks. To prevent rust from forming on the self-tapping screws, you should: high-quality waterproofing based on chopik or wood putty.
Also read materials:
Any insufficiently strong elements on the staircase structure must be replaced, and then the entire staircase must be sanded with varnish and primer. Steps under the laminate should be covered with two-millimeter plastic film or what renders positive influence for shock absorption and sound insulation of the structure.

Preparation of steps with differences in level
If there are significant differences in height, based on the measurements taken, leveling with special mixtures should be carried out on a cleaned and primed surface. You can use plywood formwork, which facilitates leveling with mixtures.
Preparing concrete steps
- The concrete base must be leveled as efficiently as possible, removing all visible sagging. Cracks need to be filled with putty.
- Cleaned of debris and leveled concrete surface A deep penetration primer is applied.
- The primer layer must dry thoroughly before installing the laminate.

Material requirements
To ensure that the operation of a staircase equipped with laminate does not cause disappointment, selection is required finishing material in accordance with the work technology and requirements:
- laminated boards must be wear-resistant, which has a beneficial effect on the durability of the finish;
- it is important to carry out initial assessment passability of the stairs and frequency of use of the structure;
- the coating should be anti-slip, which helps ensure safe operation stairs;
- high levels of additional sound insulation are often not superfluous if there are children in the house.

In addition, laminate boards for stair steps must have at least 31 strength classes. It is important to paint or varnish the bowstring and railings, as well as align the protruding parts of the treads flush with the risers. For this purpose, protruding parts are sawed off or the space is filled with plywood. Finally, you should make a template for cutting the material.
Laminate steps (video)
Calculation of the quantity of materials
Predict in advance the amount of finishing laminate, as well as all related materials that will be required during installation is quite simple. Convenient option is to use a special calculator program that makes such calculations as accurately as possible.
For calculations you will need to calculate using a ruler total area steps from staircase openings and substages, and enter the result in a special field. In addition, it is important to know the length and width parameters in advance finishing panels. It is recommended to add about ten percent to the result obtained in case of unexpected damage to the material. Alternatively, you can take the dimensions of the largest step and multiply by total steps.

Tool used
Can be done with parquet glue, liquid nails or profile system fasteners consisting of corners and special strips of appropriate length and width. Based on the mounting method, you need to prepare the following tool:
- jigsaw or saw for work;
- hammer;
- marker or pencil;
- roulette, level and rule;
- notched spatula;
- insulating substrate;
- thin polyethylene film;
- fasteners with copper, zinc or brass coating type.
To complete the installation, it is important to make the correct template of steps for laying the laminate on the base of the structure.
.jpg)
Installation instructions
Laying is carried out in accordance with technology installation work with laminate and consists of the following steps:
- installation starts from the top step moving downwards;
- Initially, horizontal sections of steps, called treads, are installed;
- then the material is mounted on the vertical parts of the steps, called risers;
- then all joints on the structure are faced.

When settling in flights of stairs, large in area, it is allowed to use lock-to-lock fastening. The attached instructions for the laminated panels suggest gluing the joints between the sheets using tape. To connect surfaces located at different levels, profiles are used to decorate the joints and effectively distribute the load.
Finishing stairs with laminate (video)
The staircase in a private house should be safe and comfortable for all family members. Railings should be installed high, with comfortable handrails. The distance between balusters should not exceed 15 cm. These simple rules must be followed - this is the key to functionality and safety.
But what about beauty? After all, the structure installed in the house can become original design solution which will fit perfectly into the interior of the room. For this purpose stair railings can be made from various materials, decorate them with carvings, forging, glass, chrome. You should also not forget about the steps; they are an integral part of the structure.

If laminate or parquet is laid on the floor of the house, then the steps of the stairs can easily be decorated with this material with your own hands.

Safety. The laminate should have an anti-slip coating that will reduce the likelihood of falling down the stairs.
Wear resistance. The material must have increased wear resistance, which will protect it from damage and visual surface defects during long-term use.
Strength. These parameters are very relevant for the laminate used to decorate the steps of the stairs. The material must withstand heavy weight and significant loads.
Preparing various types of staircase steps before laying laminate flooring
Wooden steps

If the steps are slightly loose and creaky, you can further strengthen them with small screws. It is recommended to embed the heads of the fittings into the material and cover the top with wood putty.
If there is a metal protective profile attached to the edge of the steps, it must be dismantled.
It is advisable to cover all gaps between the boards of the steps with putty. This will prevent moisture from getting under the underlayment and laminate.
Concrete steps

If the concrete steps are smooth, without grooves or depressions, then you can skip the preparation stage. If the steps have pronounced defects, preliminary repairs cannot be avoided.

If the differences are not too high, you can use mixtures called self-leveling to level the surface. Working with these mixtures is not difficult for beginners: you just need to distribute the solution over the surface. When it dries, it evens out the surface.
It's another matter if the recesses are large enough. To level the steps, it is necessary to construct formwork. For these purposes, ordinary plywood, 3-4 mm thick, is suitable. Attach the plywood to the concrete with dowels; the upper edge of the formwork should coincide with the level of the step. Before pouring the mixture, the surface to be leveled must be clean and free of debris.


Major repairs of steps
It is advisable to treat the concrete primer mixture, this will improve the adhesion between materials.
The wet mixture must be carefully leveled and the surface level must be checked using a level. The formwork from the steps is removed after completely dry leveling mixture.
After leveling the steps, it is recommended to lay plywood. This requires cutting required quantity blanks that completely match the size of the steps. The plywood is attached using anchors drilled into the concrete. The steps can also be covered in the same way. The subsequent installation of the laminate will be much easier and more convenient than laying the cladding on bare concrete.

Selecting a laminate based on characteristics
Laminate used for floor finishing is divided into classes, depending on purpose and application. Material with a low class - from 21 to 28 is intended for “unloaded” and rarely visited rooms and is characterized by low wear resistance and strength. It is most often used for finishing residential premises. The cost of such material is also not too high.

Commercial flooring - laminate, rated 30 to 34, is designed for heavy-duty use. These materials are characterized by increased impact resistance, moisture resistance, and sound insulation.

It is recommended to use a laminate with a class of at least 31-32 for cladding the stairs in the house. This material is designed for 12 years of intensive use in in public places. It will last twice as long in your home without changing its quality, reliability or appearance.
The simplest process for covering stair steps with laminate

Materials and tools for cladding.
-
Hammer with wooden head.
Electric hand jigsaw.
Limiters.
The underlayment is laminate flooring.
Metal corners.
Self-tapping screws for fastening the material.
The modern choice of laminate varies not only in appearance and technical specifications. Some manufacturers produce material in different lengths and widths. It is advisable to purchase a laminate of such a width that it completely covers the entire step without additional extensions. Or you can purchase narrow material and lay two boards at a time on the step, in a locking coupling.
First stage. Installation of laminate flooring begins with laying the underlay. It is a soundproofing and moisture-proof material, and the substrate also plays the role of a kind of buffer that prevents the boards from deforming under heavy loads. The underlay is laid as a single carpet, covering the steps and risers.

The second stage is cutting the laminate for right size. The cut boards are laid on the step, then at the very edges they are attached with screws to the plywood or wooden base stairs.


It is worth knowing that you cannot cut all the material at once; for each step you need to carry out a separate cutting operation with precise measurements.
The third stage is finishing the risers. The width and length of the gap between the steps are also measured, and the laminate boards are cut to the required size. The width of a step does not always coincide with its height, so it is very likely that you will have to cut the board lengthwise. Then the material along the edges is attached with self-tapping screws to the base of the stairs. Hats fastening fittings It is advisable to recess them into the material; subsequently they will disappear behind the metal corners.

Subsequent steps are faced in the same way until the staircase acquires a new attractive appearance.
Stage four - installation metal corner on the edges of the steps and on the sides, under the railings. The profile is also cut into pieces of the required size and screwed using self-tapping screws to the laid laminate. This hides the seams and further improves the fastening of the laminate.

Laying laminate using special profiles
For these purposes, it is necessary to purchase special profiles that have an invisible aluminum base, which is laid under the laminate. The visible base of the profile protects the edge of the step from abrasion and can be made in the form of a corrugated anti-slip surface. The visible surface of the profile is designed in the same tone as the laminate.
Installing laminate flooring on steps using this profile is very simple. The profile is attached with an aluminum part to the base and side parts of the step. The laminate is cut into pieces of the required size and glued to the base of the step. With the second, removable part of the profile, the step is fixed and shaped. The laminate is attached between the steps in the same way.
A special profile for installing steps greatly facilitates the cladding process, especially if the work is performed by a beginner.
Video - Finishing stairs with laminate with profile
Video - Do-it-yourself laminate staircase finishing
Video - Finishing stairs with laminate