Framing door slopes. We make door slopes. PVC panels: fastening with glue

Read also
You can trim slopes in different ways:
- Cement and carefully putty;
- Install slopes from a sandwich panel. This inexpensive type finishing. But sandwich panels are fragile and short-lived.
- Install MDF slopes. This is a more expensive and at the same time reliable method of finishing. MDF slopes are more durable. In addition, they can be matched to the color of the door. Torex produces slopes that fully match the selected door model in color and texture.
You can perform any of these options either independently or with the help of professionals. You can order the installation of MDF slopes from a certified Torex team. In this case we guarantee high quality executed works. Since installing MDF slopes is the most complex and time-consuming, you need to know a number of nuances. If you decide to do this yourself, use our instructions.
What will be needed to install slopes?
To install MDF slopes you will need the following tools:
- 1 – miter saw;
- 2 – roulette;
- 3 – pencil;
- 4 – angle;
- 5 – knife;
- 6 – hammer;
- 7 – masking tape;
- 8 – fastening elements;
- 9 – screwdriver;
- 10 – polyurethane foam;
- 11 – drill.
Stage 1. Control measurement of the opening after door installation
We produce accurate measurement actual dimensions after installation of the door - even if we know the exact factory dimensions. It is necessary to measure the width, height of the vertical and length of the horizontal extension.
Door trims are decorative strips that cover the walls of the doorway. They are installed if the opening is wider door frame. Most often, MDF panels are used for this.

It is necessary to measure at three points vertically on each side and at two points horizontally (from above).

The additional element must necessarily be adjacent to the door frame, so we measure the length along the width of the door.
Stage 2. Setting aside and marking the required dimensions of the extensions

After we have measured required dimensions additions, put them aside on the blanks of additional elements. We make preliminary markings directly on the panel.

Using masking tape, mark future cutting lines.
On one blank for additional elements, you can put two parts - the threshold and the upper part of the additional elements.
In the same way, we set aside the dimensions of the second part, make preliminary markings on the workpiece and glue it with masking tape.

We re-mark the length of the extension directly on the masking tape.
If you do not glue the edge of the additional element with masking tape, chips may appear on it during sawing.

Once again we check the correctness of the markings.

Use a miter angle to mark a cutting line perpendicular to the edge of the panel.
Stage 3. Trimming the extensions to the required sizes

Using a miter saw, we cut the blanks for additional elements exactly along the marks.

We saw off the first and then the second horizontal parts of the extension.
We repeat the procedure for the vertical parts.
Stage 4. Assembling the accessory box
Before installation, we assemble the extensions into a solid, rigid box.

Using a drill, we drill holes for self-tapping screws - for fastening from the inside. This mandatory stage so that when screwing in the self-tapping screw does not split the MDF panel.

We make several holes at a distance of 10–15 cm from each other.
Stage 5. Installation of the extension box

We install the extension box in the opening. We set it relative to the door so that the gaps between the door and the frame are the same on all sides.

Spacer elements are needed to fix the extension box in the opening. We cut them out of a wooden block. The thickness of the spacer element is selected according to the size of the gap.

A total of 10–12 spacer elements are required. 3-4 pieces for each vertical extension. Top and bottom – 2 pieces each.

Since in the future we will need to install platbands and close the gap, it is important that the spacer element does not protrude beyond the trim and the wall.

In the same way we hammer in all the spacer elements.
Stage 6. Installation of platbands

We attach the trim and mark the required length. The size is set according to the angle of the internal intersection of the horizontal and vertical extensions.

Similarly, we set aside the length of the second casher.

Mark the length according inner corner doborov.

We cut the trim using a miter saw at an angle of 45 degrees.

Polyurethane foam is used to fix the extension box. Gives the structure rigidity and additional sound and heat insulation.

It is important not to overdo it with the volume of foam, so as not to deform the extension.
At the same time, if there is too little foam, the opening will be leaky and not rigid enough.
To remove excess foam, you need to wait for it to cool and cut it off with a knife.
Try to avoid getting polyurethane foam on the boards, walls and flooring.

First we install vertical extensions, then horizontal ones.
We attach the casing to the trim using decorative nails.

To install the trim you will need about 20 decorative nails. They are clogged at a distance of 20–30 cm from each other.
On average, each vertical trim will require 7 decorative nails, and each horizontal trim will require 3–4.

We measure the size of the horizontal platband.
Starting from the larger size, we cut at 45 degrees to reduce it.
The horizontal casing is fixed to the extension box and the vertical casing.

We press the structure against the door frame and fix it with masking tape until the mounting foam hardens - for 1–2 hours. The exact time depends on the drying time of the foam, which can be found on the packaging.
After this, you can remove the masking tape. Your front door is ready!
Installation of slopes: video
If you have never installed doors and slopes before, we recommend contacting the Torex installation team, who will complete the installation as quickly and efficiently as possible. The results of our professionals' work are guaranteed.
When is the repair and installation completed? front door, doorway the area around it often has an unsightly appearance, which can ruin the feeling of joy after the renovation is completed. In addition, unshaped edges allow drafts to penetrate inside and lower the temperature in the room. Therefore, it is very important to properly make and design door slopes in order to prevent the influence of all these negative factors.


Peculiarities
When doors are already installed in an apartment, many people think that protection from external factors, such as noise and cold, is guaranteed. But it is not so. It is necessary to carry out additional finishing in order to complete the repair and give the doorway a harmonious appearance. WITH outside entrance doors are always finished with platbands or a special solution during installation, but internal slopes When installing a door frame, craftsmen always leave it to the discretion of the home owners.

Finishing the slopes is not included in the door installation work. That is why concrete, brick or other materials without exterior finishing. To hide all this, you need to properly design the slopes. Not all companies that install doors provide Additional services on the design of slopes. That is why this task very often it is transferred to the shoulders of the owner of the house, and he has to do this work himself.

The purpose of installing this element is to give an elegant appearance to the door and doorway, as well as to complete its outline.
In addition, door slopes are installed in order to hide all door fastenings from prying eyes and increase protection against burglary. In addition, with their help they provide heat and sound insulation, as well as protection from flying from the street or from landing dust and dirt.
Slopes are a very important and necessary element, who can do doorway more presentable and neat. They are beautiful design, complementing any hallway. The slopes are designed in accordance with the style of the entrance door, as well as in accordance with its color scheme and with the stylistic design of the hallway. That is why choosing the right slopes is a very important task.


Apart from their decorative function, slopes also very effectively insulate the door frame and allow you to hide the joints between the frame and the wall. The slopes also hide the mounting foam. Thus, this element also allows it to additionally serve as thermal insulation. Polyurethane foam, placed in plain sight in a room, absorbs moisture and loses its protective properties, and at the same time it looks very neat.
Thus, the door slope is a very important element that is paid attention to during repairs.
Kinds
There are three main systems of slopes for door structures, differing in the method of installation:
- Applying cement to the wall and subsequent plastering. This finishing system is considered the most reliable and quite cheap. But not everyone can cope with such a task; it is a very labor-intensive and painstaking process. In order to create very even and quality surfaces, you must have the skills to prepare the right plaster mortar and experience on it uniform application and distribution.


- Slope design system using panels and special glue. In this case, an adhesive mixture is prepared and ready-made finishing panels. This principle is quite expensive. In another way it is called wet.
This process is very time-consuming because each layer of glue must dry thoroughly before you apply the next layer. But even though such work takes a long time, it is quite simple and even a beginner in installation can handle it.
Fastening the finish to the finished frame. It's very simple and quick way, which allows you to achieve ideally shaped and very neat door slopes. This way you can not only hide a concrete wall, bricks and foam from prying eyes, but also cover all wires and other communication networks.
In addition, you can install additional lighting in the door frame and play nicely with the light in this area of the room. This option is suitable for both panel apartments, and for a private home.


The only drawback of this method is the low strength and susceptibility of finishing materials, even on a steel frame, to mechanical stress. Thus, this option will be more susceptible to hacking. As a rule, it is used to decorate wooden door structures inside the apartment.
For more information on how to make a front door slope from MDF, see the following video.
Materials
To design slopes, high-quality and sustainable finishing materials are often used.
Dye
This is one of the most popular coatings, which allows you to decorate the door slope in a very bright and interesting way. You can make it an interesting accent in your hallway. In addition, you can choose the paint to match the color of the door. Even a metal door can be decorated this way. You can buy water-based paint or use the regular version. In addition, you can apply a beautiful textured pattern, which will look very original and will decorate any hallway.


Wallpaper
This is an excellent solution for those who have decided not only to change the door in the hallway, but also to completely renovate the hallway. It is quite simple to decorate a door slope with wallpaper, but for this you need a flat base. Very often the same wallpaper is used on the walls as on the slopes. This gives the impression of a monolithic surface. This way you can visually expand the door passage and the hallway space as a whole.


Single-sided sandwich panels
These panels are a sheet of polymer plastic onto which a layer of extruded polystyrene foam is glued. It has a fairly dense texture, which has excellent sound insulation properties and acts as great option for insulation. Thus, you will not need to additionally insulate the doors and take special noise insulation measures.


Such panels have very light weight and therefore stick well to the door even special glue without additional fasteners. In addition, their design can be very diverse; there are even wood-look models and products that imitate other materials and surfaces.
Plastic panels
This is a fairly easy-to-install option that differs interesting decor. Plastic panels are somewhat similar to previous version, but at the same time they are less reliable and thinner. If the slopes are deep, then laying plastic is not recommended. This is due to the fact that it can be easily deformed and damaged. Equal rigidity along the entire door slope plastic panels they won't give it. But their undoubted advantage is their interesting and varied design.


Among plastic options Vinyl panels are very popular. They are quite reliable. In addition, if this element of the door structure is sheathed with vinyl, it will respond well to temperature changes and air humidity levels, which is typical for areas near the front door. Therefore, they are often used for cladding slopes.
MDF
This is a very durable material that is resistant to external influences. It holds up great various influences and there are practically no scratches or other pinpoint damage left on its surface. Externally, this material is similar to wooden panels, so it looks very elegant. In addition, MDF is very easy to install and can be installed on almost any door slopes. These models look best on wooden products , but there are also models for metal doors.


Parquet board
This natural, high-quality material is perfect for decorating door slopes. Usually it is chosen to match wooden doors or to match the color flooring. It is important to choose the most accurately suitable tone, texture and relief. Thus, this composition will look very beautiful and harmonious. Manufacturers present a huge number of types of parquet boards that can externally match any wooden door, models under wenge are especially beautiful.


Laminate
Another option that is perfect for finishing slopes. It can imitate a door pattern, so it is perfect for models from natural materials. They can repeat the pattern of any other materials, including being similar to stone, marble and other finishes. Thus, it can be matched to almost any type of door leaf.


Since laminate is often used as a floor covering, it is distinguished by its strength and durability, so the slopes will last a very long time.
But there are a number of materials that are used to insulate the door frame. For this, polystyrene foam, penoizol, metwat, and other materials are used. But in cases where the width of the slopes is small, insulation is quite difficult to do, so sandwich panels are perfect. For finishing wide doorways often used frame slopes. When installing thin sheets, such as plastic panels, insulation is often used - polyurethane foam, sealant and other materials, acting as a heat barrier.


What kind of drywall should I use?
Any drywall is a layer of gypsum between two strong cardboard sheets. This is one of the easiest materials to install. They allow you to level surfaces without putty or primer. Even a beginner in this matter can handle the installation of plasterboard sheets.

In addition, this design of slopes allows you to get rid of excess debris that could arise when using another finishing method. In this case, the slopes are perfectly smooth and even, which gives room for imagination and their further design.
To design slopes at the front door, it is important to choose not standard models, but materials of high quality and water resistance. It withstands the increased air humidity typical of the hallway. To ensure greater safety, it is better to give preference to sheets with the addition of fiberglass, since such material is non-flammable and provides insulation of the entrance structure.


How to seal a metal sheet?
To finish the slopes of a metal entrance door, the frame method is most often used. To create the base, you must use metal profiles. Finishing is also acceptable wooden blocks. It is important that the canvas fits tightly to the surface.


To strengthen the metal door frame, you need to install lintels on the supporting part of the structure. Their installation at the corners of the structure is especially important. At this stage, you can lay cables and other wires. After this, it is necessary to secure the selected fabric with self-tapping screws or nails.
It is also very popular to seal the slopes of metal doors with a cement-sand slope. But to do this, it is necessary to level all the slopes with a primer and make a stop for the subsequent installation of finishing materials. For metal structureit is important to take into account the thickness of the mortar layer and the thickness of the finishing material so that such finishing is not too massive and does not disturb the overall picture of the door structure.
For sealing slopes around metal door Drywall is perfect. This is due to its small thickness and versatility. But this material requires additional insulation.


Finishing after installation
After installing the door, it is important to properly design the slopes in order to improve the appearance of the entrance to the house as a whole. This can be easily done with your own hands, the main thing is to correctly align the door slopes from the inside. Very interesting option finishing after installing the doors is the use of extensions. You can also use the following options.
Natural or artificial stone
This is a rather elegant and beautiful option that plays a decorative role. It is quite expensive, especially when it comes to natural stone. This method has many advantages, since the material is considered to be very durable and of high quality. Natural stone is a completely environmentally friendly option that is resistant to external mechanical influences.


But cheaper artificial stone is not of the same quality. It has a large number of disadvantages, since it is made on gypsum base. It is easily damaged and wrinkled. In addition, it can easily crumble or become deformed when exposed to water or high humidity.
Tile
This method of finishing after installing the door is quite complex. Not all tile options can be used for this. In particular, it is better to avoid using glazed models, as they will look very strange and cheap on door frames. It is best to give preference to clinker tiles.
This option can simulate brickwork or a natural stone. Therefore, it can be selected for any stylistic design hallway It is best to choose something that is not easily soiled and does not glossy tiles. This finishing option is good because these surfaces are quite easy to care for. In addition, manufacturers present a wide variety of models for finishing.


PVC panels
A very simple finishing material that is cheap, beautiful, but short-lived. Some low-quality models can be easily pierced, even by leaning on them with your elbow or hitting them hard with your foot.

Decorative plaster
This is a very interesting, but rather labor-intensive installation option. Applying decorative plaster is an art, so this process It's better to leave it to professionals. But in the end, the slopes and the space around the door can change noticeably.
All finishing methods are used both individually and in combination with each other. This way you can not only beautifully design the door structure and slopes, but also make the door more reliable, insulate it and protect it from external factors and from burglary.

Installation and design options
There are two main options for installing slopes:
- frameless;
- framed.
Before moving on to finishing, you need to make sure that the structure is installed correctly, that there is an exact parallel between the opposite boundaries of the door frame and that all seams are tight. First of all, you need to check the structure for cracks. To do this, light a match or candle and run it along the entire doorway. Where the flame begins to deviate or even go out, it is necessary to additionally insulate the slopes and add sealant.
When all the insulation work has been completed, you need to cut off the excess dried layer of polyurethane foam and additionally cover the door frame with masking tape. After that it's important to get rid of old plaster and loose concrete and brick wall elements.
After this, you need to move on to plastering. First you need to completely clean the wall of construction dust and level it. Then you need to use a primer deep penetration. It will make the base of the frame stronger and more even.


Very important with special attention treat the concrete lintel on the door. To process it, it is better to use the so-called concrete contact.
If the surface does not absorb moisture well, then it is also necessary to use a special primer. After the soil layer has dried, you will need to install the profiles. But before doing this, it is better to wait about 8 hours until it dries completely. Profiles are necessary to level the layers of plaster on all slopes.


To do this, you need laser or most simple level mark the position of a vertical line on the side of the door, approximately 3-4 cm. There you need to drill several holes with a diameter of 6 mm in increments of 30 cm. Dowels are inserted into the holes, and then the level of their caps is leveled using twine. After installing all these items it is necessary to check their correctness and even verticality. Using the same principle, it is necessary to install the profile on top and on the opposite side of the doorway.


After completing the installation process, you need to do cement mixture. It is best to use sand and cement grade M150 for this. All these finishing materials must be sifted through a fine-mesh sieve. For creating quality solution it is necessary to mix sand with cement in a ratio of 3: 1. You need to add a little to the dry mixture clean water and at the same time stir the resulting solution with a special drill attachment.
When the mixture becomes homogeneous and thick, like dough, the solution can be used to finish the slopes. Using a spatula, you need to sharply and quickly throw it onto the wall and iron it, closing the profiles. This way you can create a perfectly flat surface without unnecessary deformation.
The panel version without a frame is simpler. In this case, laminate, plasterboard, sandwich panels, MDF, laminated chipboard and other options are often used. Moreover, you don’t have to smooth the surface of the slopes at all. Finishing is carried out using glue installation. It is important that the surface is straight. There should be no defects or irregularities on the surface.


Even if the door frame itself has some defects, they can be corrected using this design of the slopes. In this case, it is necessary to additionally plaster the door exactly in the missing areas. flat surface places. If the original surface is flat and smooth, then the finishing frame method will be very simple. Initially, you need to apply primer to the base where the panels will be fixed.
Then you need to measure all the slopes and select the required amount of finishing materials. All notes and dots must be made on the panels. Then you need to connect all the lines and check them using a tape measure and a special square. This must be done very carefully. The sheet of such a panel must be cut into the required quantity individual elements and prepare them for installation.


As for laminate or parquet, they can be installed either vertically, one for each wide slope, or horizontally, using several short panels. Then it is necessary to apply glue to the finishing material using the nesting method in increments of approximately 15 cm in the shape of a square. All glue stains must be dried a little so that a film begins to form on their surface. Only after this can slope elements be applied, but it is important to be very precise, since it will be possible to align the finishing panels only a couple of centimeters, no more.
Then, starting from the top and moving down, you need to gently press the panels against the wall, but do not press them hard so as not to push them through. This is especially true for plastic panels.
Design and decor
The design of door slopes is finishing touch after finishing them. As a rule, models made of MDF and decorative materials do not require additional decoration, since these materials look quite elegant without any additions. This also applies to laminate options, parquet board and plastic panels. To complete the finishing work, in this case, install platbands and mask the joints and all joints using special furniture stickers or mastic, which is selected in exact accordance with the color of the finishing materials.

But if the doorway is only plastered, then it is necessary to use other methods of decoration. So, for this they use paint, decorative plaster or wallpaper. But before this, the slope is covered with two layers of putty to hide the unevenness and get a smooth layer. When finishing with paint, apply a primer first and then a coat water-based paint And bright accent on layer acrylic paint. This way you can decorate the slope in an interesting way and make it very bright, playing in contrast with the door. This decor looks especially interesting in black and white.


Another finishing option is wallpapering. But it’s better to match them to the color of the walls in the hallway, so you either need to choose the most similar coating, or finish both the slopes and all the walls with the same material. If you have chosen wallpaper only to decorate the slopes, then it is better to pay attention to options without a pattern, since they may look a little strange near the door. This is due to the fact that most doors have a classic, simple design.


The wallpaper should completely cover the entire width of the door slope, taking into account the overlap beyond the corner line, so that the excess can be cut off at any time. Wallpaper can be textured, embossed and even have an interesting pearlescent tint. They will look very beautiful and elegant. But try to use dim wallpaper for decorating door slopes, which can also be washed and cleaned. This is due to the fact that dust and dirt from the street often accumulate near the front door.
The entrance door slopes can be finished different ways. Each of the available options has its own advantages and disadvantages and is selected individually. It is advisable to take into account many factors, which include the overall interior design, possible financial costs, as well as the skills needed to complete all stages.
How to finish the slopes of the front door? This question always arises when there is a need for this kind of finishing. There can be many reasons for this work:
- Installation of a new structure. This is the most common situation. During installation work, adjacent areas are destroyed. It often happens, especially in old houses, that the old layer of slopes completely crumbles, because they are made of plaster. Should be considered, new door must be installed correctly, without distortions, to eliminate subsequent repair work.
- The appearance of defects. Over time, any finish becomes unusable. The same situation occurs with slopes, especially if they frame the entrance opening. Cracks, shedding, and traces of mechanical impact appear on the surface. It is very important to assess the situation in time in order to install new door slopes without unnecessary work.
- Changing the general appearance of the room. Indeed, new cladding of entrance and interior doors with your own hands is necessary when the design of adjacent rooms changes. Sometimes it seems that the door slope is an area that does not affect general form interior This is a mistaken opinion, because even such a seemingly insignificant detail plays an important role.

On a note! There is another reason for replacing slopes, which is the appearance of mold and mildew. This situation will require cleaning the surface to the ground, cleaning all affected areas and impregnating it with antiseptics. You should immediately find the reasons leading to this problem.
What material to choose for constructing slopes?
There are many options that allow you to make the front door slopes yourself.
- Plaster.
This finishing material is used everywhere. It must be taken into account that this option has the most low cost. All work is carried out independently, without the use special tools. More recently, this method was one of the main ones, but recently its popularity has begun to decline. There are many reasons for this, among which stands out - not the most beautiful visual appearance. Of course, this state of affairs can be easily corrected if you use decorative and textured plaster.
- Drywall.
The popularity of gypsum boards is only growing. This material allows you to complete all work quite quickly. But this is true for large areas. If you only finish the slopes of the front door from the inside, then there will be a need for additional manipulations. The fact is that during installation, numerous cracks (joints) appear that need to be filled with putty.
- MDF panels.
This includes laminate flooring. Such products are excellent for finishing work. The panels are installed very simply, the resulting surface has an excellent decorative look. But there is one drawback: if the width of the opening is greater than the material used, then it becomes necessary to join. Laminate creates less noticeable seams, but they also impair visual perception. Finishing the MDF entrance door opening
 - Natural wood.
Of course, make door slopes using natural wood- This is a rather expensive procedure. But we must not forget that it turns out very beautiful coating, which has unlimited durability. If necessary, you can carry out restoration work. All activities must be carried out in compliance with numerous technological nuances.
- Laminated chipboard materials.
This option allows you to veneer even very wide openings. Many people mistakenly perceive laminated chipboard as exclusively a material for making furniture. In fact, for cladding areas adjacent to the front door, more thin sheets, which have very impressive characteristics.
Advice! Currently exists big choice Chipboard. For installation, sheets are used that have a thickness of 6 to 10 mm.
- PVC panels.
Plastic slopes- this is an option that is more suitable for working with window openings. The fact is that this type products often come into disharmony with the material entrance structures. Certainly, modern technologies allow you to choose a suitable solution, but this is not always possible.
- Decorative stone and brick.
There is an opinion that this method is rapidly going out of fashion. In reality, the situation is not so sad. This material allows you to obtain an individual and reliable surface. Please note that laying the parts will require large quantity time. Many craftsmen point out that in the future it will be very difficult to complete finishing work on the walls. After all, to work you will have to use a limited set of options. So, for example, cladding with any types of panels will be difficult - they are difficult to fit under the masonry.
- Extras.
This material is most suitable for mounting slopes on interior doors. A box of such designs assumes the use of this option. Therefore, door manufacturers are developing a whole line of extensions that are completely identical in color and texture to the door leaf.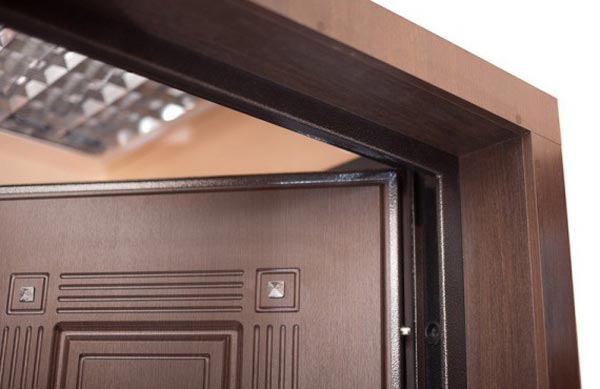
Preparatory activities
Installing slopes on the front door begins with preparation. It is important to perform the work efficiently to avoid correcting possible problems.
The activities are:
- The surface is cleaned of existing remnants of the old layer. If the coating crumbles, it should be completely removed to the base.
- If installed new design, then excess polyurethane foam remains. It is cut using stationery knife. We must not allow excess to be removed.
- All joints and cracks between the frame and the wall are coated. Sealing is carried out around the entire perimeter.
- Sections of the walls are finished with plaster. If sheet and panel materials, then the entrance door slopes are sealed without thoroughly leveling the surface.
- Treatment with antiseptic and priming compounds is mandatory. This will help prevent mold and mildew from appearing. It will also improve adhesion if the door slopes are finished with decorative mixtures after installing the front door.
- It is necessary to achieve the complete absence of areas that may contain small cracks. It is precisely these, sometimes unnoticeable defects, that are the source of drafts and unpleasant howls when it comes to entrance openings.

Slopes on the door are installed only after complete preparation.
Technological aspects of working with certain materials
Each of the materials has its own characteristics and technological aspects, which should be considered in more detail.
Working with plaster: simple and decorative (textured)
Slopes on the front door using ordinary plaster are done as follows:
- The required amount of mixture is prepared, which should be enough for 35-40 minutes of work. If there is a surplus, they will quickly lose their properties.
- The solution should be applied in layers equal to 1-1.5 centimeters. It is taken into account that more than two layers require reinforcement with reinforcing mesh.
- To obtain a flat surface, beacons are installed. They are fixed to a small amount of plaster.
- The existing experience should be realistically assessed. If it is not enough, then it is laid along the outer edge wooden slats around the entire perimeter. It should protrude to the width of the applied layer. That is, it will serve as a guideline in order to prevent curvature.
- After drying, the beacons are removed, which leave behind small defects. They are eliminated with a newly prepared solution. Care must be taken when removing slats. Corners can be reinforced with perforated corners.

After completely dry surfaces - slopes for entrance doors are finished with decorative materials. This could be paint, wallpaper. But it will look much more interesting decorative plaster(). It is applied after priming:
- The decorative mixture is placed on the surface.
- With help various devices relief is formed (watch the video). If a decorative solution is used, the coating is obtained by proper smearing.
- Subsequently, depending on the material used, paint, varnish or waxing is carried out.
Thus, the plaster can still be great solution for finishing slopes, especially if simple repairs or interior renovations are being carried out.
Drywall: installation with putty
How to make front door slopes using gypsum plasterboards? The work is carried out according to the following principle:

How to seal the joints and cracks that appear? Indeed, when you install plasterboard fragments on the front door yourself, finishing measures are necessary. They consist in the fact that the corners are formed using perforated pads, and the surface is covered with a layer of putty.
Installation of gypsum plaster boards differs from plastering in that the base is formed much faster. The work does not require any special skills.
MDF panels: fastening to the lathing
Finishing of slopes using MDF panels is carried out on the sheathing. This method is preferable for situations where the installation seam is more than 4 cm.
The product should be installed using the following technology:
- Mounted around the entire perimeter of the opening wooden beam. The parts are laid horizontally. Fixation is carried out using dowels.
- It is advisable to treat the planks with an antiseptic before installation.
- The resulting cells are filled with insulation.
- All areas are measured. Panels are cut out. They are tried on in their places.
- Fastening occurs with self-tapping screws that are screwed into the very edges. They will be covered with decorative corners.
- Thus, all elements are fixed to the frame.
See photos before and after finishing with MDF panels:
 Sheathing MDF slopes: doorway before and after finishing
 Laminated chipboard: installation on vertical racks
Door slopes with your own hands using laminated chipboard - this is not the best The best decision. But when correct installation– the coating will be durable.
- The whole process almost completely repeats the work with MDF panels. The difference is that the wooden beam is installed vertically. That is, you need to get two racks that are fixed on each edge.
- For work, LDPS is used, which is most suitable in thickness. After taking the dimensions, the parts are cut.
- To avoid repairs to the material due to water ingress, all open ends are coated with sealant.
- The elements are fixed through pre-drilled holes, which at the initial depth should be slightly larger than the diameter of the cap. This will allow you to recess the screws so as not to damage the front side. All holes are covered with special wax or sealed with overlays.
- All corners and joints are covered with decorative corners.
This method is convenient if you are covering the slopes of interior doors, which are less susceptible to moisture.
PVC panels: glued fastening
This material is less often used for such work. Also, many people mistakenly believe that they can give preference to the cheapest options. In fact, such a choice leads to the fact that the coating begins to deteriorate immediately after installation: defects appear, color changes.
Most often, plastic panels are fixed with glue:
- Executed carefully preparatory work. Differences should not be more than 2 mm per 1 m.
- The panels are cut according to the dimensions taken from the areas to be covered.
- Please note that the fastening is done with glue. Therefore, before installing slopes on the door with your own hands, all surfaces must be pre-treated. A primer is used for the walls, and the plastic is sanded a little with inside sandpaper. Such procedures will increase adhesion.
- The glue is applied with a snake. It is important to consider that excess mixture is removed immediately, otherwise the surface may be damaged, which will lead to repair or replacement of parts.
- The elements are pressed against the base, but are not held in place, but immediately come off. After waiting a few minutes, they are finally installed.
- Now all that remains is to secure the decorative fragments.
 The easiest and fastest way PVC installations panels on slopes - this is fastened with glue
 Modern versions of PVC have sufficient strength and beauty. As an alternative, sandwich panels are used.
Decorative stone and brick (tiles): the main thing is to draw up a diagram
How to make slopes on doors made of artificial stone or similar materials? The procedure is:
- It all starts with drawing up a diagram. It should reflect the actual position of the elements. If laying bricks can be outlined on paper, then more work will have to be done with stone.
- Initially, the surface is marked. It is immediately taken into account whether the parts will lie only inside the opening or frame the outer part.
- Detailing is done on the floor. It should be quite detailed.
- Now they start cladding. The stone is fixed with glue or a special mixture. It is important to consider whether suture or seamless technology will be used.
- After installation, if the surface is not protected, it is varnished.
We encourage you to additionally watch this video:
Thus, door slopes can be made of various materials. Each option is selected individually.
Home is a place where everything should be perfect. Thoughtful finishing of the slopes of interior doors is a small detail that can both advantageously emphasize the advantages of the interior and irrevocably ruin even the most thoughtful design of the room.
Slopes for interior doors
Finishing is carried out different sizes and shapes, but it is important to remember that the door and jamb trim should match. Perfect option, when the material from which it is made door leaf and jambs, similar to the surface of slopes. For example, they often use a self-adhesive type of paper that matches the texture and color of the door.
What are the options for slopes: material, installation
The slope is that part of the right opening that is not occupied door frame. In fact, this is an untreated surface that does not represent a serious flaw, but does not have an aesthetic appearance. To make the door group more complete and harmonious, various materials are fastened or installed on the slopes.
Depending on the intended operating conditions, use:
- plaster;
- overhead panels;
- self-adhesive film;
- tree.
Each method has a number of its own disadvantages and advantages, which will be mentioned later. At the same time, they also take into account how often the surface will be subject to mechanical loads - this will help to select the appropriate material.
The installation of slopes itself occurs in two ways:
- Glue. It uses glue or other special solutions. In this case, the surface for the material must be ideal.
- Frame. A simple method in terms of wall alignment. Installation begins with the construction of a metal or wooden frame onto which the selected material is attached.
The quick method is the frame method, since the adhesive method involves previous processing of the wall. In addition, this option is easy to dismantle and provides additional heat and sound insulation.
The glue method is demanding both on the quality and evenness of the wall, and on the skill of the craftsman. Glue and other solutions can stain the door leaf. For this reason, film is a necessary element during the work process.

The classic design option involves a simple plastered opening, sometimes painted to match the color of the interior. Provided the work is done correctly, this option will have a long service life and will not present surprises in the form of mold or mildew.

In order for interior doors to acquire such slopes, use the following algorithm:
- Preparation. The door must be protected from possible damage. Thick film is suitable for these purposes.
- Level the opening as much as possible. Remove protrusions and protruding bricks; it is recommended to smooth out sharp chips or parts.
- Prime. For this stage, a special deep penetration primer with an antifungal effect is used. This will prevent mold from appearing in the future.
- Secure the guides. Metal profiles are used for these purposes. Depending on the desired shape of the opening, they can be fastened either strictly parallel to each other (straight slope) or with a slight difference (oblique slope).
- Alignment. For this you will need special solutions. It is recommended to add a primer with an antifungal effect to them. The starting solution was applied with a spatula to the entire surface, leveling it according to the level of the guides.
- Final alignment. After the initial leveling is completed, the primer is applied and finishing putty. In this case, all irregularities that arise during the process are leveled out.
After everything is ready, you can safely attach the material to the wall.
Read also: - selection of materials, stages of self-design with photos
Using self-adhesive film
A simple and least expensive finishing method is to use self-adhesive film. This special type finishing, when installing which you do not need to use adhesives. If you don’t have time for finishing, self-adhesive film will do. In addition, the self-adhesive type of film is also purchased for financial reasons. It will allow you to save some money on finishing work.
Due to the wide selection of colors and patterns, you can choose a self-adhesive version of the film that suits your interior. The advantage of this material is its plasticity and ease of use.
During the gluing process, constantly level the surface so that there are no air bubbles or folds on the self-adhesive film. Otherwise, it will not be possible to install the self-adhesive material properly. In this case, the door itself will look unpresentable.
Overlay panels for slopes
Plastering a wall is a self-sufficient way to decorate a doorway, as well as necessary stage before attaching materials with glue.

This method received wide application, since it only requires enough smooth walls. Speaking about the adhesive method, it is worth mentioning that the choice of material must be taken seriously.
So, for example, it is important to recall that the use of wallpaper, tiles or laminate implies different adhesive compositions. The surface must be level so that as much as possible big square the overhead panels were adjacent to it.
There are two methods for fastening: adhesive and frame.
Frame involves creating a frame from beams or metal profiles, onto which the selected material is attached. This method has several advantages:
- easy to install;
- quickly dismantled;
- it is possible to create additional sound and heat insulation;
- fast in time;
- the surface does not have to be perfectly flat.
Right installed frame will strengthen the door structure and also help hide wiring or pipes without installing them in the walls.
Before starting work, make sure you have everything you need. In particular, to preserve aesthetic characteristics, the door leaf is covered with a protective shell. More often it is a thick film.
The procedure itself is simple:
- Alignment of the wall. Remove debris and obstructive parts.
- A frame is created. Based on the required shape, the appropriate material is selected.
- Fastening. On at this stage to already finished design The material being attached is MDF, wood, plastic, laminate.
The adhesive method involves applying a solution to the slab and attaching it to the required location.
The door is at risk and requires additional protection.
Wooden slopes
Whatever style the door is made in, wood will highlight its beauty. To secure such material, you will only need a frame method.
The algorithm itself is similar to installing panels, but final stage The primer is used not for walls, but for wood. This will protect the wood from fungus and mold. For reliability, the slopes are treated with varnish.
The disadvantages of this material are its sensitivity to temperature changes. Wooden slopes are installed in rooms where there are no sudden changes in degrees or humidity.
Alternative methods for designing door slopes
How to make original slopes on interior doors is a fairly popular question. However, more often only three are considered classic material for registration, although in fact there are many more of them.

The decorative brick option stands out. Not every craftsman has the necessary installation experience, but if the surface is uneven and has objects protruding from the wall that cannot be removed, then the specificity of decorative brick will come in handy more than ever: it easily changes the shape of the reverse side. Due to this, it can be customized to suit any requirements.
The door can be beneficial if you choose the right matte tiles in natural tones. There is a point to remember: the door leaf should not be combined with glossy or bright tiles. This option will look out of place even in the brightest apartment.
Whatever method you choose, remember that film is a mandatory element, since it is what will protect the door from scratches and other defects.
In contact with
Comments
Unfortunately, there are no comments or reviews yet, but you can leave your...
New articles
New comments
VladimirGrade
plank1957Grade
NovelGrade
IrinaGrade
YaroslavNo one wants to overpay when installing doors. That is why the decision is often made to make the slopes of the front door with your own hands and not hire builders. If you approach the process with imagination, even a non-specialist can handle the work.
Not always at home full set tools for all occasions. And apartment owners in panel houses know very well how difficult it is to drill holes in concrete walls oh, still Soviet-built. Therefore, in some cases, you can sacrifice the correct finishing of the slopes, significantly simplifying your work.
PVC slopes with and without frame
Perhaps the simplest, fastest and “cleanest” way to finish slopes is to decorate them with PVC panels. There are even universal panels on the market that combine a slope, a corner and a platband.

The advantage of such a slope is the flexible connection between the panel itself and the platband, allowing it to be adjusted to walls with angles deviating from 90 degrees.
The installation process of these slopes is incredibly simple:

Due to the flexibility of plastic, such slopes can even be installed on uneven walls. But you won’t get an ideal result - cracks will definitely form, and in places with insufficient amounts of polyurethane foam, the plastic will “walk.” But this is the most fast decision Problems!
PVC slopes on a primitive surface will look much neater and more reliable. wooden frame. You can even use PVC panels with a wood or stone design, without any platbands at all.
For this:

To prevent the panels from slamming when the front door opens, empty place between the bars you can fill with insulation of a suitable thickness or blow out polyurethane foam. This will also provide additional sound insulation.
“Wet” method of finishing slopes with your own hands
Leveling and plastering slopes remains the most economical option. And even if you can’t do everything perfectly smoothly, this will not affect their service life at all. The process takes place in several stages:
- Preparation:

- Application of screed:
- kneaded cement mortar- you can make it yourself or buy a ready-made one;
- for 1 kg of cement you need to take 1 kg of lime and 5 kg of sifted sand - the solution should be moderately thick and not spread, because they are leveled vertical walls and the top of the slope;
- After the screed has dried, you can apply a regular primer and begin applying plaster.


- Slope putty:

- Decorative finishing:
- slopes can be painted or covered with wallpaper, creating a monolithic canvas with walls;
- in both cases, a primer is applied to the putty, and a decorative coating is applied on top.
You should not try to save money and skip any of the stages - this will only worsen the final result and you will have to redo everything again.
Drywall slopes
If working with a hammer drill doesn’t frighten you or bother you cement screed If you don’t want to, you can decorate the doorway with sheets of drywall. This is especially true for houses with thick walls, where the slopes are very wide.

Frame for slopes made of plasterboard
So that the drywall sheets are securely fixed and can even withstand finishing artificial stone or tiles, you will need a wooden or metal frame:

For the slopes of the front door, especially if it faces the street, it is better to use moisture resistant drywall. It is also important to remember that there is always a small gap between the floor and the gypsum board to prevent the drywall from getting wet. At decorative finishing this gap will disappear anyway.
Drywall slope on plaster
Instead of a frame, gypsum boards can be secured with mounting foam and plaster. Is it not strong enough? But if the load on the sheets is small, then the safety margin should be enough. The technology itself is simple, even a non-specialist can handle it:

What should not be forgotten when finishing slopes
Slopes are not only the aesthetic appearance of the doorway, but also its protection from drafts, moisture and noise. Therefore, regardless of the finishing method, it is important not to forget:
- Check the tightness of the door frame installation. For this it is sufficient closed door And open window draw a lighted candle around the entire perimeter. If the flame deviates to the side, you need to add polyurethane foam in these places.
- Protect walls under overhead slopes from fungus and mold. For brick and concrete walls there is a special antiseptic primer, for wooden and frame walls you must not forget about the vapor barrier device and treatment wooden elements fire and biological protection.
- Remove all debris and loose elements around the door, even when installing slopes on the frame. Otherwise, the abrasive dust remaining after the repair will still seep into the room, and pebbles that periodically fall off will add gray hair impressionable residents.
- Insulate the slopes of the door that goes directly onto the street, and not into the dressing room. Otherwise additional expenses heating is provided.
Even MDF slopes can be made without a hammer drill and unnecessary debris. This is clearly shown in the video: