Night photography: how to get a good shot. Night Photography Basics - Tips and Examples
Read also
Night photography, as you know, has its own specifics and often causes significant difficulties for a beginning photographer. Darkness is a low-light shooting location when it is necessary to use long shutter speeds. However, during a long exposure, your hands get tired, and because of this, the camera moves and “shakes”, which leads to blurry frames. That is why the main advice given to beginners who want to shoot in dark time days - the use of a tripod is mandatory. But we understand perfectly well that a tripod is not at hand every time, and besides, sometimes it is not possible to carry it with you. How can you get sharp, high-quality photos when shooting handheld at night?
Click to enlarge
Fixing the camera
Night photography means poor, insufficient lighting and, therefore, long and very long shutter speeds. If the camera is in your hands, then holding it motionless for thirty seconds or more is an almost impossible task. Unless you use a stable tripod. But what if you don't have a tripod? Then you will have to adapt the camera to the unevenness of the earth's surface, as well as find various suitable means to securely fix the digital camera with their help. You can lean the camera not only against horizontal, but also against vertical surfaces. A variety of objects are suitable: parapets, pillars, trees, window sills, fences, earthworks, cabinets... Your task is to ensure greater stability and immobility of the camera and, thus, defeat the notorious “shake”. A regular belt can also be useful as a means of securing the camera. This will help create the necessary tension that works against camera movement during exposure.

Camera settings for shooting at night
It is recommended to shoot at night in manual mode (M), which makes it possible to experimentally select the optimal shutter speed and aperture values to achieve a high-quality result. The built-in automation of a digital camera “loves” daylight and studio lighting, often getting lost in conditions of lack of light. When shooting in auto mode, for example, the camera may suddenly use the built-in flash, causing hard light and hitting only a few meters, which will only worsen the quality of the photos.
In addition, when shooting automatically, you risk getting a poorly designed background, since the camera’s automation simply cannot know that it is important for the given plot. However, sometimes a scene mode such as “night portrait”, which is offered to the user in some models, is useful digital cameras. It can help balance the background and foreground when shooting in low light conditions.
 Click to enlarge
 To get high-quality night shots, it is preferable to take photographs in maximum quality - it is better to set the RAW format, if it is supported by your camera. Thanks to this, the captured footage will contain more information in shadows and highlights, which will provide serious advantages in further processing of photographs in a RAW converter or graphic editor.
As we have already noted, in the dark, you have to use long shutter speeds in order for more light to fall on the digital camera’s matrix. But increasing the shutter speed means that there is not only a chance of getting a blurry photo image, but also filling it with unpleasant digital noise. As for “moving”, then you have to rely only on your experience and available means to securely fix the camera in your hands.
An image stabilization system (based on a lens shift in the lens, or on a sensor shift) in such cases can help get a gain of two to three stops. However, when shooting late at night, this gain matters little. Be that as it may, the included stabilization system can compensate for vibration and, thereby, allow you to increase the “safe” shutter speed several times. Finding a “safe” shutter speed when shooting handheld at night is one of the most important tasks for the photographer.
When shooting in manual mode, it is recommended to first set the aperture, for example, around f/16, and then select the optimal shutter speed, focusing on the readings of the built-in exposure meter. When choosing an aperture, in any case, you should rely on “ golden mean"- as a rule, this is f/8 or f/16, but it all depends on the specifics and features of a particular lens. Take a few test shots and then evaluate the results on the LCD screen.
If the photo image turns out too bright, then you should reduce the shutter speed. If the frame is too dark, the shutter speed, on the contrary, will need to be increased. Built-in electronics often give optimal exposure one to two stops higher than the situation requires. By using the “golden mean” when choosing an aperture and selecting the optimal shutter speed for it, you increase your chances of getting a high-quality, sharp photo without “grain” and digital noise.
It’s also worth saying a few words about the operation of exposure metering in the dark. The point is that the specificity night photography, for example, in urban environments consists of the presence of light sources that differ in their color temperature and character. On the streets of a city at night there is both diffused and reflected light, as well as direct, point light from street lamps. All this creates difficulties for the camera’s built-in exposure metering and provides a noticeable increase in the dynamic range of the photograph - the resulting frames are characterized by high contrast, bright light spots alternate with deep black shadows. In this regard, always try to measure exposure not on the brightest part of the frame, but on a medium-lit object in the scene. Otherwise, you risk getting completely black in those parts of the frame where there was actually something. That is, all the details will simply drown in darkness.
 Click to enlarge
 Problems with flash and focusing when shooting at night
Use on-camera flash only when you are shooting a night portrait and the subject is close enough to the camera, within three meters. Keep in mind that the built-in flash is not very powerful and the light from it can be quite hard and flat. Therefore, it is more advisable to use a good external flash if you have one at your disposal. In addition, in the dark, you can find much more interesting lighting sources outdoors than the built-in flash. For example, Street light, bright advertising windows or the light from the headlights of a passing car.
You may also have trouble focusing accurately at night. The autofocus system often starts making mistakes in the dark, or the camera even refuses to focus when shooting handheld. IN in this case It may be advisable to switch to manual focus mode and use LiveView mode. Magnify the image on your camera's LCD screen ten times and then focus on the desired object manually.
Don't put your camera away when it seems like the day is over. The night opens up many opportunities to continue filming.
This guide will give you some tips on shooting techniques and features that you'll definitely need.
- Winter landscapes
- Portraits
- Cityscapes
- Night photography
- Using filters
- View of the world in black and white colors
- Shooting in JPEG and RAW format
Shake warning
We'll probably not surprise you, but the first thing you'll notice when shooting at night is the lack of lighting. You can make your digital camera sensor more sensitive to light by increasing the ISO value. The amount of light reaching the image sensor can also be increased by shooting with the aperture wide open. However, to get the correct exposure, you will most likely need to use a slower shutter speed.
The main problem when using longer shutter speeds is micro-vibration in the camera. It's very difficult to keep the camera completely still when you're holding it in your hands. Long exposures in and of themselves do not cause camera micro-vibration, but they do increase the likelihood of them occurring. A longer focal length also increases the effect of camera shake, so we recommend using a lens with a shorter focal length for night photography. For example, a lens with a focal length of 18 or 24 mm is perfect.
Tripods
No matter how hard you try to stand still, your body still sways from side to side or back and forth. A sturdy tripod firmly planted on the ground makes long exposure photography possible without camera shake.
When using a tripod, the most critical moment is when you press the shutter button to start the exposure. Touching the camera may cause micro-vibrations. Camera vibrations last a second or two, but are reflected in the shutter speed for several more seconds.
To avoid this, use the EOS camera's self-timer feature. This feature allows any micro-vibrations caused by pressing to fade away before exposure begins. For shooting stationary subjects on a tripod, a 2-second delay is ideal.

“Ray of hope”, © Marco Lieberwirth 2010, Canon EOS 400D
Remote shutter release
If you're shooting a moving subject and need to release the shutter at a specific moment, use a Canon remote to remote control releasing the shutter. Connect the remote control to the camera's remote control terminal using a short cable. At the other end of the cable you will see a small button. Press this button and the shutter will be released without the risk of camera shake.

Lion at night, © Pierre Morlon 2010, Canon EOS 400D
Mirror lock
Many EOS cameras have a mirror lockup feature that can be configured using Custom Functions. A mirror inside the camera reflects light, which then hits the viewfinder. Once you start exposure, the mirror rotates up to allow light to pass through the lens to the image sensor located at the back of the camera. However, this can also cause micro-vibrations as the mirror hits the foam damper located above it during this rapid movement.
Shooting in Manual Mode
Finding the right exposure for night scenes can be very difficult. This is partly because there will always be a lot of unlit areas in the frame, and partly because using different exposure values, you can get pictures of the same high quality.
First, try taking a photo using this value. Then change one of the values on the exposure scale - usually the shutter speed - and take another photo to see if it makes your photo better. Take a few pictures and you'll get what you need. But don't stop! Experiment with different meanings exposure and see what you come up with.

"Museum of Islamic Art", © Rhandy Pelaez 2010, Canon EOS 550D
Long manual exposure
On an EOS camera, you can choose any shutter speed up to 30 seconds. Bulb mode (B) allows you to shoot at slower shutter speeds. The method for switching the camera to Bulb mode varies depending on the camera model. For details, see the camera's operating instructions.
In this mode, the shutter opens when you press the shutter button and remains open until you release the button. By using the remote switch when shooting long exposures, you can lock the shutter open without having to keep your finger on the shutter button to keep it pressed.
When using the mirror lockup function, the mirror is raised when you press the shutter button. This way, you can wait a second or two for the vibrations to subside before releasing the shutter by pressing the button again.
Noise suppression
Long exposure times can increase noise in the image. This can ruin the photo and negatively affect detail. All recent EOS cameras feature long exposure noise reduction, which can be turned on in the camera's settings menu.

“Northern lights and birches, Norway” (Aurora and birches Norway), © Stein Nilsen
Most of the noise is removed by the camera when the image is saved to the memory card. However, this takes the same amount of time as it took to expose the photo. For example, if an image was taken with a two-minute exposure, another two minutes will pass while the camera processes it before you see the finished photo on the screen. You will not be able to continue filming during this time.
We recommend night photography in RAW format as this file format gives more possibilities for editing with Canon Digital Photo Professional (DPP) than JPEG images. When shooting in this format, you also don't need to use the camera's long exposure noise reduction feature - you can reduce the noise level in DPP.
Subjects
Now that you are familiar with night photography techniques, you need to choose the right subject to shoot and choose the lighting.
Spectacular photographs are taken immediately after sunset, during twilight. At this time, the sky on the horizon remains illuminated, despite the fact that the sun has already set. The light of the setting sun is much warmer than the light of the sun at its zenith, which is why during twilight we can so often observe colored Beautiful colors sky. We can observe almost the same thing at dawn. So if you can't shoot your subject when it gets dark, try getting up early. Perhaps pictures with the sun rising will be even better.
If you live in a city, city lights can be a great subject. Try shooting neon advertising lights, light installations and burning building windows. Shoot using different meaning exposure and see how different the photos turn out. Even more interesting are photographs taken immediately after the rain, when the city lights are reflected on wet roads and in puddles on the sidewalks.
Great for shooting and fireworks. Long shutter speeds are used to capture the trails and individual flashes of fireworks. Install on camera manual mode When shooting (M), choose an aperture between f/8 and f/16 and a shutter speed between 5 and 10 seconds. The value of the shutter speed largely depends on the frequency with which individual fireworks flashes will appear in the sky.
You may be able to focus the image using autofocus, but it will likely be very difficult to do so in the dark. Therefore, it is better to set the focus switch on the lens to manual focus (MF) mode and focus on something that is the same distance from you as the fireworks.

Fireworks, © Maciej Blum 2010, Canon EOS 350D
To learn more
We hope this guide has helped you understand how and what to shoot at night. Even more ideas for inspiration, as well as a huge number useful information, you can find on the Canon Professional Network (CPN) website. For example, there you can - night photography of the mountain slopes of his home country, Switzerland.
Greetings, dear readers! In touch, Timur Mustaev. Do you still only take photos during the day? Then we go to you!
I can’t help but agree that shooting on a clear, sunny day promises success in business, but is hiding at home after dusk really the lot of an enthusiast?
In the dark, taking photos with a DSLR can be an adventure, resulting in great shots.
Regardless of the level of skill, any amateur photographer is obliged to convey the surrounding atmosphere of the night and his own attitude to what is happening through a photograph.
Often natural light conditions do not allow full-fledged work, which significantly spoils the mood and discourages the desire to shoot anything.
But what can we do? How to photograph at night, in low light, while still fulfilling the photographer’s direct task?
You will find the answer to this and other questions in today's article.
Night photography
However, the darkness is designed in such a way that it absorbs everything around, so do high quality photo impossible without special settings and accessories.
Let's look at the features of setting up the camera for the dark.
When going on a night photo shoot, remember that shooting without it is impossible, since poor light conditions require increasing the value of and, which can cause movement and, accordingly, blurring of the frame.
Before taking photographs, set the exposure metering for fragments with average illumination.
As already said, shoot without flash ( we're talking about about the built-in one), because it will illuminate absolutely not what you would like, leaving the important in the dark.

Tighten the focus yourself, aiming at the main subject. This is if you use manual focusing, which is most correct at night, since autofocus can fail due to lack of light and simply will not focus.
Set the ISO value to the minimum possible under the given conditions to reduce the likelihood of “wild” noise appearing in dark areas of the frame. For example, for cameras with ISO values above 800, there is a risk of noise.
There are many colorful light sources on the street, such as the moon, lanterns, shop windows, car headlights, attractions, etc. The optimal solution in this case is shooting on AWB (auto white balance).
All color distortions can be corrected in the future in any photo editor by mixing the sliders to the desired level.
In addition to a tripod, use a cable release or remote control.

If you don't have these extras, make do with what you have, which is to turn on the timer mode with a two-second shutter delay.
Thus, the need to press the shutter button will disappear by itself, thereby avoiding physical impact on the camera, which leads to movement.
To reduce the amount of camera shake, you can also use the Mirror Lock-Up feature, which lives deep in the settings. This mode allows you to raise the mirror in advance of the descent.
It is advisable to take photographs in , this will help you better edit your photo.
Choosing a location. Night composition
Before you go to a night photo shoot, scout out the situation, find a good shooting point, and assess the degree of illumination of the object.
If you plan to photograph architecture, be sure to analyze road traffic and the degree of congestion on the streets.
In other words, find the best place where the city lights at night will look most advantageous.

Think through the scene carefully before you pull the trigger. Which parts of the frame are in the dark, and which parts are too overexposed? How can this be advantageously displayed in a photo?
Don't be afraid to zoom in or change your point of view by moving from one location to another.
It is important to find a middle ground, both in lighting and in the composition of the frame, so as not to cut off certain parts of the object.
Take advantage of the reflectivity of water, which can double the amount of lights and color in a photo.
Even in winter time, the reflection of light from wet asphalt or ice can add variety to even the most ordinary, random shot.
How to photograph people at night?
It is a mistake to think that photographing people at night is only possible with a flash, since natural light from lamps and various LEDs will give photographs an interesting, natural look, the kind we are used to seeing with our own eyes.

However, if your plan is to shoot people from behind the bushes (so they can't see you), your shutter speed should be as fast as possible to capture and stop motion.
To stop traffic, as a rule, it is necessary fast lens, with high sensitivity (aperture – f/1.4-1.8).
Sensitivity is adjusted using ISO; the higher its value, the less light is needed for accurate exposure of the photo.
To capture a person in a motionless state, set the aperture to minimum, the shutter speed to 1/15, for a person who is moving - from 1/60 to 1/500, ISO value to 1600.
When you raise your ISO above 800, be prepared to see grain in the photo.
If we talk specifically about a portrait, then the average values of the camera will be as follows. ISO 100-200, shutter speed approximately 1/15, aperture 1.8-3.5. A tripod, a cable release and preferably a diffuser are required.

Car in the frame. A photographer's advantage or disadvantage?
Any car or motorcycle transport can destroy the overall composition of a photo during the daytime. But what happens at night?
The light from headlights and stoplights is projected onto the photo as multi-colored ribbons that permeate the entire picture.
This effect allows you to get quite artistic photo, as well as making the highway the main filming location.
To achieve multi-colored ribbons, you need to set a long shutter speed, about 20-30 seconds. (of course, it is important to use a tripod and a shutter remote control). To do this, it is better to use (Tv - Canon, S - Nikon), or (M). In both modes, we set the ISO to minimum, 100-200. In the second mode, the aperture can be opened within the range of 7.1-11, if necessary, you can set an even higher value, that is, close the aperture hole minimally.

It’s better to shoot from above; it’s perfect for this purpose. pedestrian bridge or the roof of a high-rise building located next to the highway.
When and how to use flash?
Photos taken using the built-in flash can be extremely frustrating.
The light from this source hits you head-on, making objects and subjects overexposed and the background covered in darkness. Hard shadows appear.
The flash will play an important role in portrait photography, in low light conditions from lanterns, lamps, shop windows, etc., and then only provided that an external one is used.
In this case, it is better to use (softbox) to make the complexion more natural, without obvious overexposure.
You can also shoot a portrait in slow sync mode. This can be set either in the camera settings or in the settings external flash.
To enable slow sync, for example, on the Nikon d5100 you need to select the “Slow” mode in the flash settings, and on the canon 600d also in the settings.

conclusions
As you understand from the above, shooting at night is not only possible, but also vital for developing yourself as a photographer.
CAREFULLY: Similar experiment can drag you into the weeds nightlife with the head.
I hope you understand, and I have conveyed my point to you, when you are afraid, everything seems quite complicated, when you do it, everything seems very simple. Practice more and you will definitely succeed.
If you are having trouble with your DSLR camera and need help, you can check out the video course - Digital SLR for a beginner 2.0. I am more than sure that you will find all the answers about your DSLR in it.
Subscribe to blog updates and become closer to the level of a professional! Share this article with your friends, this is your best reward for me!
All the best to you, Timur Mustaev.
This is the last article in a series in which I tried to analyze the differences between expensive cameras and cheap ones. In the previous article (Why is an expensive camera better than a cheap one? How to choose?) we found out that for ordinary photography during daylight hours in natural light, expensive and cheap compact cameras showed almost similar results. In this article we will see how our hero cameras behave during evening and night shooting.
Let me remind you that our impromptu test involves two cameras. One of them is an inexpensive compact in the price range of 3000-3500 rubles. Its rival is a slightly outdated model Canon Power Shoot G9. We've already found that in some cases, such as shooting at home with the flash off, the more expensive G9 benefits in quality due to its larger physical sensor size and larger lens diameter.
To be fair, it is worth noting that for an unassuming user who is not going to sell his photographs to photo banks, printing them in large formats, but shoots for yourself in order to tag the photo in a home digital album or on a website, you can safely buy a cheap compact camera, the capabilities of which are quite sufficient.
True, we found out that the photographs turn out to be quite noisy, but both the expensive Canon G9 and the budget one suffer from this approximately equally. In order for the pictures to turn out cleaner, without grain and ripples, you need to switch to higher high class technology. At least for DSLRs entry level or with a larger matrix size and higher quality optics.
After this, it becomes completely unclear why there are expensive compact digital cameras costing under 20 thousand rubles at all, if they produce approximately the same picture as a camera costing 3000?
Of course, expensive cameras have their own tricks up their sleeves. Of course, some fancy features may not be necessary for the average amateur photographer. For example, it is quite possible to do without seat for an external flash, which the Canon G9 has and its competitor does not have. I'm not even talking about such “absolutely necessary” things as a second screen on the front side of the camera for taking pictures of yourself, or transferring photos via WiFi. How can an ordinary amateur photographer manage without determining the coordinates of the point where the photograph was taken...
They just cram everything into an essentially cheap compact to make it expensive and sell it to us. And with what ardor do sellers talk about these “modern” functions, convincing us, the buyers, that we can’t live without them today.
However, there are some really useful things in expensive cameras, and one of them is what I'm going to write about in this article. We will talk about manual shooting mode. While preparing the material for this article, I took several test photos and now I’m ready to present them to you for your consideration. I hope you will draw the proper conclusions yourself.
Evening photography in automatic mode
First, let's see how our heroes coped with shooting in full automatic mode with the flash off at dusk. I took all the photographs in this report from the window of my apartment. 15th floor, view of the lake and road.

Evening landscape. Camera Panasonic DMC-SZ1. Smart mode
As you can see, the greatly reduced picture is still viewable, but the round area looks terrible in real scale. The shooting was carried out in the so-called intelligent mode, in which the camera itself selects the parameters and sets their optimal ratio. In this case, the following parameters were automatically set: shutter speed - 1/5 sec. ISO 800, aperture - f3.1.
Since the automation had to greatly increase the ISO sensitivity, the picture turned out to be very “pockmarked”, noisy, and unsuitable for serious work.

This photo was taken almost immediately after the previous one, only the intelligent shooting mode was replaced by the " night landscape ". The result was almost the same. The most interesting thing is that all the shooting parameters completely coincided with those from the previous example.

Camera Canon Power Shoot G9. Shooting an evening landscape in automatic mode
And here's what happened with the Canon G9. Same automatic mode, flash disabled. If you look at general form, it seems a little sharper than in the previous two photos. However, when examining a photo with 100% magnification, it becomes clear that with increased clarity, digital noise has become more pronounced. However, this photo does not appear to be as blurry as the Panasonic's.
The shooting parameters set automatically look like this: shutter speed - 1/15 sec, sensitivity - ISO 800, aperture - f2.8. Please note that in this photo, unlike the previous ones, the color saturation is more muted, which is more consistent with the real picture than the photo from the Panasonic SZ1, which is clearly “filled” with blue.
Conclusion: in automatic mode, with a greatly increased sensitivity of the matrix, digital noise negates the quality of photography on both expensive and cheap compacts.
But what happens if on the camera Canon Power Shoot G9 install manual mode:

Since the Panasonic camera does not have a manual mode, we will not be able to compare pictures. However, if you compare the quality of this image with a photo taken with the same Canon G9 camera but in automatic mode, it becomes clear that manual mode is very useful when shooting in difficult conditions.
The settings were made manually and looked like this: shutter speed - 1/2 sec, sensitivity - ISO 80, aperture - f2.8. To obtain the highest quality image, I had to set the lowest sensitivity and aperture that are possible on this model. At the same time, the shutter speed turned out to be quite long - the camera had to be placed on a tripod.
Examples of night photos
That same evening another series of photographs was taken. First, let's see how the Panasonic DMC-SZ1 camera coped with night photography:

This is what he showed us in automatic shooting mode Canon camera Power Shoot G9:

The grain is still the same, but the colors are calmer; The picture is more consistent with the original. If you switch the camera Canon G9 V manual mode, then the sensitivity can again be reduced to a minimum and, provided that a tripod is used, a clearer picture can be obtained.
Conclusion: Photography with manual settings, which is possible in expensive compact cameras, allows you to get a better image when shooting in the evening, at night, and also when shooting in a cave, in a word, where there is very little light.
The downside of this advantage is the need to use a tripod, since the shutter speed can sometimes reach up to 30 seconds.
And finally, I want to show you what this same night picture looks like when performed Canon EOS 5D MarkII digital SLR. Of course, these cameras should never be placed next to each other. The gap in both price and capabilities is too large. However, when I was photographing houses with compacts, I decided to take them with a DSLR, just in case. This is what I got (I apologize for the slightly littered horizon - I didn’t have a tripod; I had to put the camera on the ledge):

I would like to show this fragment separately:

Click on the picture to see full size
The shooting was carried out with a lens. You can see for yourself how different the quality of the photo is from what we saw at the beginning of this article. It got to the point that the car numbers had to be specially slightly obscured so that they were unreadable. I repeat, the shooting took place from the 15th floor.
It is on this optimistic note that I end the series of articles about how expensive cameras differ from cheap ones. I specifically decided to show you samples made professional equipment, so that you may reconsider your position and, after saving a little, buy a DSLR instead of a point-and-shoot camera.
You can, of course, listen as much as you like to the opinions of experienced amateurs and, especially, store clerks who will tell us about super-advanced intelligent shooting modes and nanotechnology-based noise suppressors. The apotheosis of such speeches is usually the thought that, “this unsightly-looking soap dish takes pictures on par with a DSLR in terms of quality.”
Friends! Let's stop believing in fairy tales. Nothing improves the quality of photography like a large full-size sensor and a good lens. And although compact cameras with such full-size matrices have already appeared, they certainly cost more than three or even thirty thousand.
Remember: in the fight between an intelligent mode with super noise reduction and a large matrix with good optics, the latter always wins. At least for now.
Night photography: universal settings for any scene.
Do you only shoot during the day? It's great to shoot on a sunny day, but hiding your camera as soon as dusk sets in means missing out on some great opportunities. beautiful photos hours. In the future, night photography may become one of the most attractive genres for you.
In low light conditions, your DSLR camera can capture beautiful images. But he will need your help. If in such conditions you shoot as usual - “framed the frame and pressed the button” - then either you will get blurry pictures, or you will not convey the atmosphere of the night in the photographs.
Don't be afraid of the dark! We have answers to all your frequently asked questions about how to prepare your camera for night photography.
We'll show you how to set up your camera and what extra gear is worth bringing along. We'll spice it all up with a variety of tips to help you unlock your camera's nighttime potential.
Selecting the appropriate aperture value

Night photography: how to choose suitable value diaphragm.
When preparing for night photography, it is important to ensure that you can securely mount the camera. In low light intensity it is difficult to achieve fast shutter speeds.
In some situations, such as when shooting sporting events in a well-lit stadium, the camera can be held in your hands. But to shoot most night scenes, the camera must be mounted on a fixed support.
The ideal option is a heavy, stable tripod, on which the digital SLR camera will definitely remain motionless even during an exposure of several minutes. In addition to the suggested option, you can mount the camera on a relatively stable support - the roof of a car or the edge of a window - and set the shutter release to be delayed to avoid unwanted camera shake when pressing the shutter button.
So, the camera is stationary - your hands are untied. Freely choose the shutter speed, aperture value and sensitivity (ISO) that can achieve the appropriate exposure for the scene, not just the combination of settings that will not affect camera shake. To estimate what settings you will need when shooting a particular scene, take a look at the table below.
With the camera resting on a tripod (find the best way to mount the tripod), set the ISO sensitivity to 100 (to reduce digital noise) and great importance aperture (f/16). In this case, the shutter speed can be as long as desired, which is not a problem as long as the camera is securely mounted. Read about some common problems that arise when shooting at different shutter speeds and the best ways to solve them.
Here is a short but convenient cheat sheet containing combinations of approximate settings for shooting some popular night scenes:
|
Plot |
Excerpt |
Aperture value |
Sensitivity (ISO ) |
|
Festive fireworks |
|||
|
Attractions |
|||
|
Road traffic |
|||
|
Football at the stadium |
1/125 second |
||
|
Flash of lightning |
In Bulb mode |
||
|
Performance on stage |
1/60 second |
||
|
Rock concert |
1/125 second |
||
|
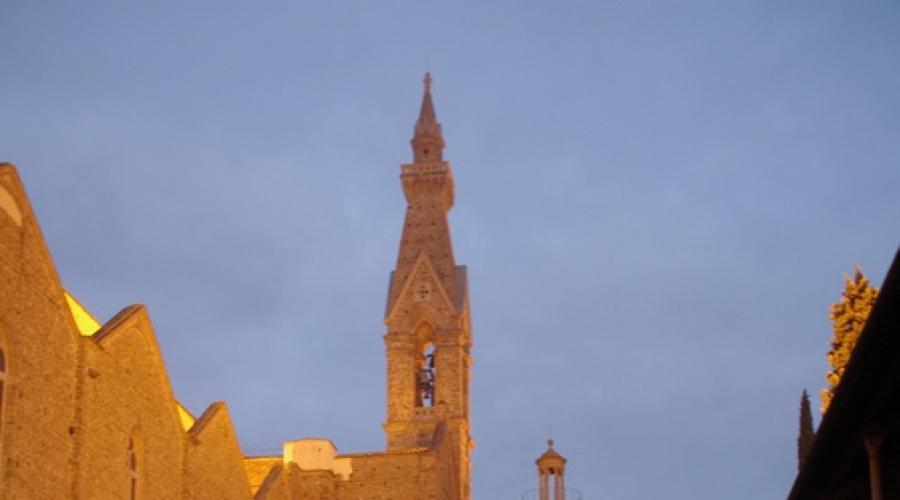
Illuminated Cathedral |
4 seconds |
||
|
Full moon |
1/250 second |
||
|
Landscape bathed in moonlight |
|||
|
Firmament at dusk |
1/30 second |
||
|
Night sky |
How long should the shutter speed be to blur motion beautifully?

Night photography: blurring the movement.
Cars and trucks can ruin the composition of the photo if you shoot during the day. At night, their movement turns into an advantage.
The moving headlights and taillights are depicted in the photograph with red and white ribbons running throughout the image. This effect suddenly turns high-speed highways into film sets. To achieve it, you need to set a moderately long shutter speed.
In this case, shutter speed depends on how fast the cars are going and how much of the space “fits” in the frame. In any case it works general rule: The longer the shutter speed, the better.
Then the ribbons appear wider and more continuous in the photographs. For an average city street, a shutter speed of 20 seconds is suitable (but don't forget about a tripod!). If there is a traffic light on the road, its signals will help you understand at what point to start exposing the frame in order to cover the entire period of movement.
How do I set my shutter speed to be long enough?
The simplest way is to select the “Av” shooting mode. Then use the control wheel located behind the shutter button to set the aperture to the largest aperture your lens will allow (usually between f/22 and f/32).

Night photography: shooting with long exposure- 1/8 second.

Night photography: long exposure photography - 15 seconds.

Night photography: long exposure photography - 30 seconds.
In this mode, the maximum available shutter speed for most DSLR cameras is 30 seconds. To be able to shoot at slower shutter speeds, switch the shooting mode to “M” (“Manual Mode”).
You can also use Bulb mode by holding the shutter open as long as you hold down the remote shutter button (article on that). You may need a neutral density (ND) filter to reduce the amount of light hitting the light sensor.
What sensitivity should you set when taking night photos?
Night photography: the right sensitivity.
When adjusting sensitivity, make a rule: sensitivity is 100 ISO. Change it if you know for sure that it should be different.
Increasing sensitivity increases the ability of the photosensitive sensor to “absorb” light. Therefore, you will have to reduce the amount of light hitting the sensor. For each frame you can set your own ISO value.
But be careful: increasing sensitivity increases the amplitude of the electrical signal generated by the sensor when converting light energy into electrical energy. This increases digital noise and makes it visible in the photo (see how to reduce digital noise when shooting at high ISOs). If you want high-quality photos, set the sensitivity as low as possible (translator's note - on those cameras that allow values less than 100 ISO, to maintain the widest possible dynamic range, set the sensitivity to 100 ISO).
When shooting in low light intensity, you don't necessarily need to increase the sensitivity (for the camera to "see" in the dark). If you're using a tripod or flash, keep the sensitivity at ISO 100 in most cases.
When to increase sensitivity?
Increase sensitivity when you want to avoid directional blur. It's always better to have a little bit of digital noise in your photo than to have a blurry image due to camera shake during shooting. Therefore, only increase the sensitivity when you are unable to shoot on a tripod.

ISOin night photography - ISO 100.

Using Large ValuesISOin night photography - ISO100 + flash.

Using Large ValuesISOin night photography - ISO 1600.
A good alternative to increasing sensitivity is to use flash. Using flash, you can still shoot at ISO 100. But the light from the flash changes the chiaroscuro, which can ruin the atmosphere of the photo (look at the middle photo of the three above).
Long exposure
When the scene is dimly lit, set the sensitivity to ISO 100.

Correct valuesISOfor night photography - adjust ISO 100.
The photo above shows an indoor Polish market late at night. A tripod was used. This made it possible to lengthen the shutter speed so that the light required quantity hit the light sensor. This photo turned out to be moderately lit - normally exposed - without any changes in sensitivity.
What is digital noise?
All digital cameras They are mistaken - an image taken with any digital camera contains digital noise. It is similar to the grain of a photograph taken on film. It is enough to brighten the photo to see the noise. Fortunately, digital camera manufacturers, from model to model, are successfully coping with the problem of digital noise appearing in images.

What is digital noise -ISO 100.
The error increases with increasing sensor sensitivity - digital noise appears more strongly in the photo. It is especially noticeable in dark areas of the image. In addition to the fact that homogeneous dark areas acquire a rough texture, they are covered with colored dots.

What is digital noise -ISO 1600.
Digital noise can be reduced by turning on the camera's digital noise reduction function. Or in a photo editor at the processing stage.
Controlling white balance

Night Photography: How to Avoid Horrible Shades.
How can I avoid terrible color casts?
In most cases, your DSLR camera will reproduce the colors correctly in your photos, regardless of lighting conditions. Internal system The camera's white balance function strives to convey colors as we humans see with our eyes (for a deeper dive into this topic, check out this guide to common white balance problems.
In standard mode (automatic white balance - “AWB”), the system better detects colors when daylight than under low light intensity conditions. For example, pictures of illuminated buildings or pictures taken in your living room may contain a subtle but unpleasant orange-yellow tint.
This is a sure sign that the white balance is not set correctly. This tint can be easily adjusted in Photoshop, especially if you're shooting in RAW format.

Correct white balance setting for night photography: incorrect color shade. The photo will turn orange.

Correct white balance for night photography: Manual white balance adjustment.

Correct white balance setting for night photography: manual adjustments even out color rendition.
However, it is quite simple to adjust the white balance while shooting. All you need to do is set the mode to manual (“PRE”). This approach is especially effective if you're going to take multiple shots of the same building under the same lighting conditions. Standard reception- indicate as a reference a photograph with a gray or white object occupying a significant area of the photograph.
Is there an easier way to avoid color shift?
Even if you adjust the white balance manually, the colors in some areas of the photo may still not match reality as seen by the human eye. The reason is that the building can be illuminated by different types of light sources.

You can adjust the white balance based on one type of light source, but balancing color reproduction across all sources at the same time is a non-trivial task. There is a simple solution. Convert color photos taken in difficult lighting to black and white.

White balance in night photography: converting to black and white.
Shoot in color, and at the processing stage, use a photo editor to convert the image into a monochrome image. This approach will allow you to adjust the contrast and tonal range of the photo as flexibly as possible. It also works great for party portraits.
How to adjust white balance manually?
All digital DSLR cameras allow you to accurately adjust the white balance using a previously photographed reference image. The following technique shows how to adjust white balance on DSLR cameras. Camera settings from other manufacturers may vary slightly.
- A sign that white balance requires “manual control” is when the entire image casts an extraneous tint, such as orange.
- Take a photo of a white or gray object illuminated by the same light as the scene you are shooting. Select manual white balance (“Custom WB”) in the camera menu. Make sure the reference image is displayed on the screen and press “SET”.
- Now change the white balance mode from Automatic (“AWB”) to “Manual” (“PRE” - indicated by a square with two triangles near the tops). Now subsequent images will display colors correctly. Remember, when you shoot a different scene under different lighting, you'll need to re-adjust the white balance.
An alternative way to manually adjust white balance
The traditional way is to photograph a sheet of white paper or a special card for a reference image. gray. But you can do it differently: choose an image of the object being photographed as a reference image.

Alternative way manual settings white balance - white balance is determined automatically
Photo of the castle in Krakow takes off orange. We used this photo as a reference when manually adjusting white balance.

An alternative way to manually adjust white balance is to set the white balance manually.
The application of this is not enough known method allowed us to obtain a more acceptable result.
Creative uses of flash for night photography
Night photography: universal settings for any scene
When to use flash?
Photos taken using flash can be frustrating. Flash light changes the lighting atmosphere, making the subject too light and the background too dark. For this reason, instead of using flash, sensitivity is increased.
However, increasing sensitivity is not enough to shorten the shutter speed or narrow the aperture to obtain a sharper image. The built-in flash is handy here.
Flash is necessary when taking portraits in low light intensity conditions. The subject can be “frozen” even after exposure for a few seconds.
The thing is that the need to use a flash in this case is less obvious. The flash fire is combined with a long shutter speed. This is a feature of the reception.
This technique is called “slow synchronization”. It is simply implemented on your DSLR camera with a built-in flash.
When to use bounce flash?
Reflection luminous flux produced by an external flash is another great technique for creating natural photographs in low light intensity conditions. It works especially well for portraits, illuminating the subject's face evenly and hiding the fact that flash is being used at all.

How to use bounce flash - direct light
The stream of light reflected from a nearby wall or low ceiling is wider and weaker than the original one and is limited by the size of the external flash head. But the thick shadows with clear edges disappear. They are a consequence of the light flux “released” directly onto the subject.

How to use bounce flash - reflected light
Unfortunately, you won't be able to use the built-in flash. You will also need to purchase a tilt-head flash that is compatible with your camera. It is installed in the “hot shoe” connector.
How to set up slow sync mode?
In slow sync mode, the camera sets the shutter speed to the desired length to properly expose the background and calculates the power of the flash pulse to sufficiently illuminate the subject in the foreground.

Flash disabled

Flash on

The flash fired in slow sync mode
The subject was not blurred thanks to the flash light, and the background was normally exposed (compare with the case when the flash fires in normal mode).
To enable , set the flash mode to “Slow Sync.” IN Canon cameras all you have to do is set the shooting mode dial to “Av” and raise the built-in flash. If you have a camera from another manufacturer, check the instructions.
When not using a tripod, set the aperture value, usually by rotating the control wheel under your thumb, so that the corresponding shutter speed is not too slow. Starting from a certain shutter speed, the background will appear blurry and the longer the shutter speed, the more “blurred” the background will be.