Do-it-yourself above-ground cellar. Types of structures. General, wall and buried diagram. Work progress and equipment systems. How to make a cellar with your own hands at the dacha: types and proper design How to make a cellar under a gazebo
Read also
On any private plot or dacha, a huge number of buildings can be erected that are necessary for normal living and comfortable pastime. Don't forget about this required premises like a cellar. The cellar should be constructed immediately after or during the construction of residential premises. This building is needed for storage various types products, canned food, wine and vodka products and meat. Due to the fact that the cellar is a fairly cold room, due to its placement underground, it will be necessary to make efforts to construct it, and in this article you will get step by step instructions How to make a cellar at the dacha with your own hands, step by step. In addition, many other issues will be considered. About everything in order below.
Today there are a lot different types burial buildings, which, in principle, are similar to each other in design, but are somewhat different from each other in the functions they perform.


The main types include:
- Vegetable stores;
- Stone cellars for products;
- Cellars with blocking;
- Burts;
- Underground;
- Finnish glaciers and others.
Depending on the type of accommodation there are:
- Ground cellars;
- Recessed view;
- Cellars located in residential buildings.


Before building a cellar, to achieve desired result and execution by him necessary functions, it is necessary to clarify the standards technological process and check the construction project. Be prepared for the fact that building a cellar is a very labor-intensive process, quite difficult and requires significant investment, but in the end it is completely worth it.
This article provides information on how to build a spacious cellar in your country house with your own hands. If all standards are observed, it will last for many years and will save products from the influence of temperature changes.
The simplest cellar is usually used for temporary storage of food, drinks and others. Its design is quite well known and you may have already encountered it. It is an ordinary dug hole, which is covered with a metal lid or any other with pre-vented ventilation. Such a pit is quite enough to preserve food for a day or more and leave vegetables in it for a long time.
The simplest version of a cellar can be built by yourself or, if possible, use the help of friends, since carrying out such work requires a certain amount of effort. Among other things, you need to have a tool and some materials, which we’ll talk about a little below.
From the very beginning, we select a hill on the site or do it ourselves in order to avoid damage to the building groundwater. After making some calculations, even approximate ones, calculate the depth of the cellar and the amount of materials that can be spent on its construction.
It is completely logical that the next step is to dig a hole for the cellar in the country. It doesn't have to be too deep. A depth of 1 meter with a width of 1.2 by 1.4 meters is quite sufficient.
 Digging a hole. The pit does not have to be large. For a small storage facility, a mini pit is quite suitable.
 Having dug a hole, it is necessary to level its walls and strengthen them so that in the future they do not crumble and the cellar does not collapse. The bottom of the cellar, or rather its floor, is usually made of concrete with preliminary filling and cushion. Afterwards, a metal frame is installed. It must be installed in the corners of the cellar building.
After completing the work of digging a hole and strengthening it, you will have the following structure: a concrete floor holds a metal frame (if you took an iron angle, then from an angle), connected transverse fastenings. Behind the frame there will be a fence that will prevent the earth from crumbling. Usually this is a mesh or chain-link, and a foam cover.
It is necessary to carry out the work one by one in a simple order:
- Dig a hole for the cellar;
- Fill the bottom with concrete;
- Install a metal frame and earth shedding limiters;
- Install the cover.
Afterwards, normal ventilation is done, and shelves are screwed inside the cellar, if necessary. This completes the construction of a basic cellar with your own hands. The scope of work, depending on the number of workers, lasts for 2-3 days, after which you get not the most efficient, but still quite capacious underground warehouse for storage.

To build, you must strictly adhere to the installation instructions and recommendations, follow the plan and instructions described below.
Selecting a location
An important factor is the choice of where to build the cellar. Such a place is usually elevated. As mentioned above, this is necessary for minimal impact groundwater, and you don’t need to invest a lot of money to waterproof the building.
Before construction, decide what type of cellar you should have. Will it be located inside a residential building or stand alone?

Positive factors for building a cellar under a building include:
- lack of influence on it from various precipitation;
- much greater ease of use, especially in the autumn-winter period.
After choosing a construction site, it is necessary to develop a project according to which all further work will be carried out.
Be sure to take into account all the tips provided below before making a cellar in your country house, and then the construction of a room for storing food will happen at less cost in the shortest possible time.
- Construction must be carried out in summer period time;
- The construction of the structure should be on a hill;
- For for long years services do not skimp on materials;
- Be careful, follow all the rules when building walls and structures to prevent the earth from shedding;
- Provide good ventilation;
- When using wood internal structures cellar, treat it with special solutions in advance;
- Observe correct sequence and don’t try to save money on construction.
 Cellar space
 Necessary materials
Taking into account your financial capabilities, in a preliminary plan it is necessary to calculate the amount of materials and their cost. Taking into account your needs, the cellar, depending on the functions it performs, can be built from: wood, concrete slabs or bricks. The cellar can also be made of metal, but it will be almost impossible to regulate the temperature in it.
 Scheme of one of the possible buildings
 Cellar dimensions
- A more acceptable size is 2 meters wide, the same depth and 3 meters long for a fully completed structure. It is necessary to take a reserve of approximately half a meter on each side of the wall in order to comfortably carry out all the work and be able to supply power, as well as perform Finishing work.
- The bottom of the cellar should be at least half a meter from groundwater.
- The ceiling should be 20-30 centimeters below the level at which the soil is still capable of freezing.
- The minimum wall thickness must be at least 25 centimeters.
Organization of waterproofing
If you choose to build a cellar with your own hands, then waterproofing will be done without the intervention of specialized construction organizations. The quality of waterproofing is directly proportional to the overall quality of the construction of your cellar, and it is this that determines how long the underground structure will serve you.

When organizing waterproofing, special attention is paid to materials. The material is purchased taking into account the actual groundwater level. If the groundwater level does not reach the level of the base of the cellar, then it is necessary to use non-pressure waterproofing. If the groundwater level is higher, then it is necessary to use anti-pressure waterproofing.
The walls of the cellar play an important role. They have the main impact environment and corresponding pressure. That is why the material for building walls must be durable and water-repellent, for example, concrete.

The equivalent of concrete can be a brick, which must be treated with special solutions before laying, and then a cement screed is made on both sides of the wall.
Roofing felt can also be used as a protective material for walls. If you want to reduce the influence of groundwater around the cellar, you can organize drainage.
The sequence of building a cellar with your own hands
According to a pre-prepared project, a hole is dug for the future cellar. In this case, a hole is dug half a meter larger on each side of the original calculation. This distance is necessary for quality implementation work and connecting the necessary equipment or lighting. If you have the strength and opportunity to keep the land fertile, excavation work must be carried out manually.
When the pit is ready, it is necessary to make the foundation of the cellar. To do this, create a cushion of crushed stone or broken slate, which is spread in an even layer on the bottom of the cellar and filled with bitumen. This pillow is made to protect against moisture.
The next step is the installation of walls and their strengthening. Proper construction the organization of the foundation, rather than the usual floor inside the structure, stands out. The walls, in turn, are built on the foundation. If it is brick, then masonry is done, if it is concrete, then reinforcement is done.
During the reinforcement process, do not skimp on the rods used or metal corners, since the pressure that the walls will have to contend with is quite significant.
After erecting the walls and carefully strengthening them, we move on to the finishing process. WITH outside The walls are plastered using cement mortar. Next, several layers of roofing material are applied as protection, preferably with preliminary bitumen impregnation for better waterproofing.
Wall treatment with inside is organized by the initial lathing under sheets of asbestos cement, onto which they are subsequently carefully attached with screws, pre-treated with bitumen and primer. It must be remembered that sheets must be processed on both sides, and even more so at the joints.
After external and interior decoration proceed to pouring the floor with concrete, after which a screed is made; the concrete is leveled, and all joints can be treated with special waterproof material. Further decoration of the walls is purely decorative and can be organized according to your wishes. The walls can be puttied again, painted and whitewashed. You can put laminate on the floor or wooden blocks. Any finishing work depends only on your imagination and economic support.

In the process of organizing all the work described above, do not forget about the openings that are left for ventilation and future connection of electrical energy.
Ceiling organization
To make the ceiling, depending on the type of your cellar, different materials are used:
- Reinforced concrete in the form of slabs;
- Wooden materials pre-treated with a special solution;
- Metal materials.
The main support for installing the roof is using the previously installed walls of the structure. Organizing the ceiling is an important stage that has its own sequence.
- We place the stops with channels approximately half a meter from each other;
- We organize perpendicular welding, and then parallel welding. The end result should be squares, one side of which will be approximately 0.25 cm.
- We prepare and install wooden formwork.
- We lead two pipes into pre-prepared openings for ventilation. The material for such pipes is most often asbestos.
- We install supports of sufficient rigidity to prevent the ceiling from bending under the influence of the soil. The support is installed with the calculation of the influence on each of them of about 1.5 square meters of the surface layer of soil.
- We make the formwork airtight.
- Fill in concrete mixture into the gap between the grid reinforcement structure and the channel, making sure that there are no hollow spaces left. The end result should be a uniform overlap with a height of no more than 30 centimeters.
- We strengthen the ceiling from the outside using roofing felt or any other available material, which has the same thermal insulation properties.
- The final stage consists of filling the resulting structure with earth or organizing the roof in the form of an oversized structure in a shape resembling a house or gazebo.
Final works
In this paragraph we will tell you about last stages the buildings, possible difficulties and ways to solve them.
Building a cellar is not a very simple process, but at the same time not so difficult, if you have enough experience. If you have a sufficient budget and desire, and you want to acquire such a building on your site, study the material given above, be patient, and the process of constructing an underground storage facility will go unnoticed.
A bulk cellar can be either a ground structure or a semi-buried one. The dependence of the choice is directly related to the groundwater level. To clarify all the details, you can use one of the well-known methods:
- Drill a hole at least one and a half meters high. We look into the resulting hole after 24 hours and, if water appears in it, then building a cellar at the dacha is only possible on the ground. If there is no water, then a semi-recessed design can be used.
The best time to conduct such drilling work is the spring-summer period, which is associated with a sufficient amount of groundwater during this period.
 Bulk cellar
 Above ground cellar
The ground structure has a fairly simple construction algorithm, which is listed below. If all points are observed, the structure will be of high quality and will last for many years.

Semi-recessed
The semi-buried cellar has a huge number of decorative designs. This perfect storage products and a monotonous climatic environment. Such a structure is built in the event of a high rise in groundwater levels.
Scheme of a semi-buried burial roomThe work is performed in the following order:
- We dig a hole approximately 70 centimeters high;
- We organize a brick or concrete foundation;
- We lay out or fill the walls 20 cm high, leaving a hole for the door;
- Isolate using special material foundation and walls;
- We carry out the installation of the ceiling, the material for which is most often used slab (its thickness is approximately 5 cm);
- Afterwards, a layer of clay is poured, roofing felt is laid, preferably in two layers;
- The soil is backfilled to a thickness of 70 cm;
- The building is covered with turf;
- At the final stage, the door is installed. Afterwards, if necessary, we hang a protective canopy over it and make several steps
Plastic cellar
A plastic cellar for a summer residence is a structure that has certain features that differ mainly in the shape of the structure itself. The structure provides for a wall width of one and a half centimeters. The shapes of buildings in terms of their rigidity are determined by the presence of stiffeners or their absence. Plastic products may differ in their elemental content. Such cellars may include ready-made ventilation, as well as additional communications for the convenience of using the storage.
The absence of a cellar at the dacha can lead to the loss of a significant part of the harvest. For this reason alone, it is worth building such an important object with your own hands. Let's look at this process step by step in our review and video.
Cellar in the basement
Often in country house there is a basement area equal to area Houses. This is convenient because... it can be used as a workshop, a storage room for storing tools and equipment, but in most cases it is a garage. You can’t call it a cellar, the temperature and ventilation system in it are not at all what is needed for storing crops collected in the garden, but some part can be equipped as a cellar by taking several steps:

Having a basement, of course, simplifies the work of building a cellar, but if it doesn’t exist, you’ll have to create it from scratch. In the next section, we’ll look at how to build a cellar in a country house with your own hands, step by step.
What types of cellars are there?
Cellars, as separate structures, come in 3 types:
- Entirely located in the ground. Their depth usually exceeds 2 m.
- One part of the cellar rises above the ground, and the second is buried a meter and a half into the ground.
- The structure is buried no more than 1 m, and the rest rises above the ground.
When choosing the type of cellar, you should know at what level the groundwater is located. When they are very close (from 0.5 to 1 m), then there is only one option - a ground-based project, and when their depth is more than 2 m, you have to choose between a buried and half-buried cellar. If there is a hill on the site, then this is the best place for construction.
Advice: if conditions and funds allow, build a deep cellar. It is the most reliable, because... it always maintains the temperature at the same level.
Construction of a semi-buried cellar
The cellar construction work consists of several stages:
- site preparation;
- foundation device;
- walling;
- waterproofing;
- installation of the ceiling;
- sprinkling;
- final design.
Preparation, installation of the base and walls
To carry out all construction work, we first stock up on tools and materials:
- shovels - bayonet and pick-up;
- tamping;
- tape measure;
- level;
- bitumen mastic;
- roofing felt;
- crushed stone;
- sand;
- cement;
- rolled metal;
- wood.
Preparation consists of clearing the area where it is planned to build the cellar from vegetation. Next we make markings and dig a hole. Professionals consider the following parameters to be the best:
- The maximum width of the pit is 4 m.
- The length is optional.
- Depth - 1.8-2 m.
Where there will be a staircase, we select the soil at a slope, thus forming steps. Having dug to the required depth, we level the floor and walls. Next, we follow the following technology:

Important: to concrete walls were not formed air gaps, while pouring the solution, stir it constantly. This will increase the density of concrete.
The walls in such a unique food safe can be lined with other materials:
- stone, concrete blocks, brick;
- wooden beams, logs, pre-treated with an antiseptic, otherwise they will simply rot after a while;
- asbestos cement sheet fixed on a wooden sheathing.
- Do not use metal for wall cladding; it does not allow you to hold the necessary temperature regime.
- In order not to make racks for storing products separately, you can immediately insert a corner or profile pipe at a distance of about 0.7 m horizontally and vertically. Then boards are laid on these embedded parts and convenient shelving ready.
Cellar cover
The simplest option is to make a frame of 5 x 5 cm timber around the perimeter of the pit and attach a lid to it on hinges. Insulate it and the ceiling with the door is ready. The most reliable overlap is made from reinforced concrete slabs, but this is also a considerable cost, and the need to attract construction equipment, because there is no way to move them manually. There are more economical and less labor-intensive options - using metal profile or logs, slabs, strong blocks of wood.
Let's consider the case when this important element cellar is being carried out from rolled metal. Since the ceiling rests on the walls, its perimeter must exceed the area of the base. The design algorithm is as follows:

If the overlap is performed from wooden beams or logs, after appropriate processing we wrap them in roofing material, securing the latter with a stapler. We lay the wood with emphasis on long walls, in which special grooves are left for this purpose and do not forget about the entry hole. The next step is to secure the ends of the beams by pouring concrete.
The principle of constructing a half-buried and completely buried cellar is the same, only the depth of the underground part remains different. To build an above-ground cellar, we go deep just a little - first we select 40 centimeters of soil around the perimeter, then we go a little deeper, simultaneously increasing the size of each side of the perimeter by 0.3 m. Then, using familiar technology, we arrange the floor, strengthen the walls and build an above-ground compartment.
Construction of the above-ground part
The above-ground part or cellar can be quite simple in the form of a small vestibule protecting the hatch, but sometimes it is a full-fledged room that performs certain functions - a summer kitchen, a gazebo. We set up a primitive cellar as follows:
- We make the frame from logs or boards, previously protected from rotting with an antiseptic.
- We glue roofing felt on the outside.
- We arrange the same wooden floor. Mix clay with straw and coat the structure.
- We lubricate the clay-straw surface with bitumen mastic, wrap it in roofing felt, and cover it with soil.
- We sow flowers or lawn grass.
Interior improvement of the cellar
To go down to the cellar you need a ladder. You can knock it out of wood and lower it down, but this is not very convenient, especially if you visit this place often. It is much more comfortable to go down stationary staircase. When the earthen foundation for this structure was left for another preparatory stage, then the steps are lined with brick, while it is laid flat on the tread and vertically on the edge. They cover it with bricks and side walls, carefully sealing the seams. They also make steps from concrete using a reinforcement frame. Masterfully executed metal staircase It can also be convenient, but the cost is not always satisfactory.
Walls, ceilings, and floors require additional treatment. If the surface is flat, then simply whitewash the walls with lime twice. If brickwork If it turns out not quite smooth, then before whitewashing we plaster it with a solution containing cement and sand. We carefully inspect the ceiling; if there are cracks, we seal them. Wall joints must also be sealed. If possible, we lay linoleum or boards on the floor. We paint the shelves.
Another job that needs to be done is to prevent the cold from getting into the cellar through the door. We line it from the inside with insulation, and to ensure the necessary microclimate in frosty winters, we install additional door, separating the room from the stairs.
We make or purchase special caps for ventilation pipes to prevent snow or raindrops from flying inside.
Attention: do not obstruct anything ventilation holes, this will disrupt the air exchange and condensation will appear in your storage.
Building a cellar in a country house is a difficult task, but with a strong desire, any owner can do it; the main thing is to choose a project that you have enough strength, skill and money to implement.
How to build a cellar: video
Country cellar: photo


In our region, in the Black Earth Region, it has long been customary to make a cellar on the street in order to store numerous supplies in it. This also saves food supplies from spoilage in the summer, and in the winter the temperature in the cellar always stays around plus five degrees. Like a perfect refrigerator. In today's selection I want to offer you ideas for beautiful outdoor cellars and even several plans for these structures.

Of course, you should take into account the groundwater level in your area, but even if it is high, you can dig a pit in the summer, in dry weather, and make a cellar with good waterproofing.

I remember that when I climbed into my grandmother’s cellar as a child, in the middle of summer she had ice in the hole, which had been stored there since winter, just to maintain a low temperature. The second name of the cellar is glacier, with an emphasis on the letter e. Apparently, it occurs precisely because ice is brought into the room from winter.
Approximate cellar plan for a private house or cottage

I won’t describe the plan; everything is clear in the drawing. This rough plan cellars in the form of a hill, when you have close groundwater - this option is the most optimal.
The idea of a cellar combined with a barn

A great idea for a cellar for both a summer house and a private home, in in this case the pit itself is “covered” from above with a barn, in which some of the provisions can also be stored. Very convenient idea, but this option is already for those areas where there is no high groundwater.
Options for above-ground and underground cellars

On the left in the picture a cellar option for extremely high groundwater is shown; in this case, the earth is poured into a hill onto a frame, which almost completely stands on the surface of the earth, only going slightly deeper into the turf.
On right- stone cellar, classic version for dry, elevated areas.
The cellar is not some nondescript barn or nook, but a real food pantry. Like the refrigerator in our modern homes. There used to be a reverent attitude towards cellars, because only thanks to it was it possible to preserve food in the summer.
Even now, even at the dacha, I recommend having at least a small equipped pit in which you can place perishable foods in the event of a power outage. Every summer we ourselves encounter power outages, either because of a thunderstorm or because of the wind, and we have such a mini-cellar. The dimensions of the pit are 50 by 100 cm, the depth is about 50 cm. Even meat can be kept for a day without any problems.
Well now let's see beautiful ideas cellar in a private house. In any village, on the street, you can still find masterpieces of construction art, of course, not all have been preserved good condition, but there are owners who maintain their storage facilities in “shape”.
Just a variant of a bulk cellar, a triangular hut structure. Thick logs keep out the heat from the street, and additional earth is poured onto the roof.
Classic stone cellar with filled earth. Perfect option for storing large reserves of crops from your site.
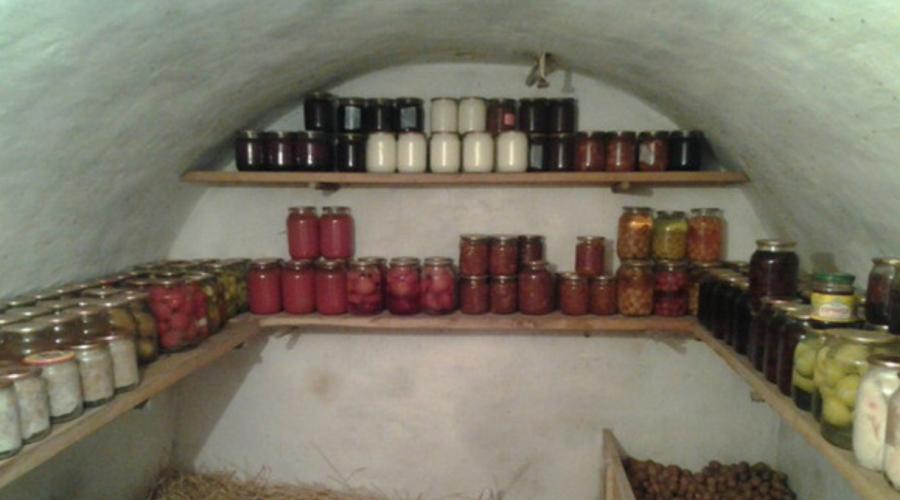
Beautifully decorated cellar door with blanks. It is immediately clear that the attitude towards this building is very reverent!
Another example of a bulk cellar, earth is a very good material for maintaining uniform temperature inside the room.
The façade of the cellar was made of stone; there was even room for a flower bed! Doubly admirable! This is not some hill overgrown with weeds, but a work landscape design in the country.
A cellar made of cement - perfect solution for storing vegetables for the long winter.
Another similar cellar option, which was already shown earlier. A dome-shaped shape covered with earth is perfect solution for those areas where groundwater is located high.
A beautiful bulk cellar that looks like a hobbit house! By the way, some architects design similar residential buildings, arguing that such buildings have low heat losses.
An ancient stone cellar in which Pomor fish were stored. The stone keeps cool for a long time, and if there is ice inside the cellar, then the food will be safe for as long as in a modern refrigerator.
Look, bulk cellars are the most common, as they provide a combination of coolness and dryness.
Be sure to consider the ventilation system in the cellar so that dry air comes from the street, so that there is air movement, otherwise there is a risk of white mold developing.
You can also keep containers with salt in the cellars, which will absorb excess moisture and foreign odors. Even tubs of salt are appropriate in large cellars!
The driest ones are chalk cellars made of limestone. In such rooms mold cannot even grow! Here, in Voronezh region, there are areas where people simply hollowed out a cellar in the chalk rock - convenient and forever!
Even wealthy people make cellars on their property - in this case, the room is intended for storing wine.
The facade of the cellar can be made of brick, and the frame can be covered with earth or stone. By the way, the cellar mound can be designed in the form of an alpine slide!
A very beautiful antique-style cellar! The owner of the building deserves all the praise.
The entrance to the cellar is designed under a canopy so that precipitation does not leak into the pit, since this option is made underground.
The facade of the cellar is made of stones, the retaining walls are decorated with tubs of plants.
The façade of the cellar is made of brick and plastered. It is clear that the structure is ancient, since the tree on the right has literally grown into the embankment.
Rustic cellar with wattle retaining wall. The solution requires regular updating, since such a wall will only last a couple of seasons.
A charming idea for a bulk cellar with stone surrounds and an earthen roof.
And this facade is simply gorgeous! There is paving in front of the entrance, decoration with pots of flowers, and a mowed lawn on top. In a word - magnificence!
So, this concludes our selection! All the best to you, inspiration and positivity! And if you are planning to build a cellar, then build it taking into account these ideas and recommendations. And may your harvest be safe and sound for a long time!
All photos from the article
Country farming requires storage space for prepared foods, vegetables, fruits and pickles. Ideal place For such purposes there will be an earthen cellar, as it maintains an optimal temperature and keeps food fresh.
We want to tell you how to build wooden cellar with your own hands.

Wooden cellar
Peculiarities

The tradition of constructing underground storage facilities has been known for a long time, since previously we did not have refrigerators at our disposal, and there was a need to keep food supplies fresh. One came to the rescue here interesting feature our soil.
The fact is that upper layer the soil freezes in winter or warms up in summer to a depth of no more than 1 - 1.5 meters for middle zone Russia. IN northern regions this value increases for winter, in the south - for summer. Below this depth, an approximately constant temperature remains throughout the year at a level of 5–9 ˚С, which is comparable to the temperature in a modern refrigerator.

Important!
You can check the temperature regime of underground layers by measuring the temperature of spring water in winter and summer.
As a rule, it remains around +8 ˚С.
There are three main types of cellars according to the depth of immersion in the ground:
- Ground. In design of this type a minimum depth of up to 25–30 cm is provided, since such structures are installed in places with very high level groundwater. In essence, this is an ordinary shed or storage shed for storing vegetables;
- Semi-recessed. A depth of up to 60 cm is provided here; in this case, groundwater should be no higher than 1.5 - 2 meters from the soil level. Often the towering upper part of the structure is covered with a thick layer of earth and turf for better thermal insulation;
- Recessed. Structures whose depth exceeds 1.5 meters are considered completely buried. As a rule, such cellars are completely buried underground to a depth of 2–3 meters.

Important!
The most effective option will be a completely recessed one.
It is guaranteed to protect your supplies from freezing in winter and overheating in summer.
Materials for construction can also be different.
The most commonly used are:
- Rubble stone. Allows you to build strong and durable structures, but the work will be labor-intensive, and the price of the material and its delivery will be significantly high;
- Brick. Better to use ceramic brick, since its moisture resistance is higher. Good material for the basement, but quite expensive and labor-intensive to work with;
- Concrete plates. It is possible to construct the room from reinforced concrete blocks and slabs, but this will require the work of a crane. The design will be very strong and durable;
- Monolithic concrete. You can install formwork in the pit and fill the walls with concrete. If it is possible to order ready-mixed concrete, then this option is well worth considering;
- Wood. A traditional, time-tested option that is distinguished by an excellent microclimate, complete environmental safety and availability of materials.

Choosing a tree as building material for a cellar, you should remember its features, such as fear of moisture, rot and mold.

Important!
Wood is the best option in terms of microclimate and environmental safety inside the cellar, provided that all requirements for protecting the structure from moisture and mold are correctly met.
Selecting a location

After you have decided on the type of structure, its depth and the materials from which it will be constructed, you need to find appropriate place for the basement. There are two main options:
| Cellar location | Features and Benefits |
| Under the house | Cellars are often located under residential building. This is beneficial from several points of view: the house protects the basement from surface moisture and frost, it is convenient to go down into it without going outside, and it is easier to install communications. However, if the cellar was not taken into account and dug during the construction of the house, subsequently it will be very difficult and inconvenient to work |
| On a plot separate from the house | This arrangement will require more serious protection from precipitation and frost. At the same time, you are not limited in choosing the size of the room, and the work will not be constrained by the foundation walls. Again, basement odors will not penetrate the house. |

Usually, when building a house, the presence of a basement is provided for in the project, and it is dug out and strengthened at the stage of laying the foundation. Working in a built house will be much more difficult and costly.
Important!
If you want to have a basement inside your home, take this into account when designing.
Digging and arranging a basement inside a finished building is extremely inconvenient and difficult.
If you decide to place the cellar on a site separate from the house, then you should carefully study the landscape here. The best option It is considered a flat, open place located on a small hill.

It is important to take into account the overall ensemble of buildings on the site. Cellars are not placed near compost pits, toilets, septic tanks, sewers, or enclosures with livestock. But about summer kitchen, at home, or in a utility shed, it will be quite appropriate.
It is advisable to provide a convenient and short path from your kitchen to the cellar, since you will have to walk along it quite often. It is better to turn on the lights twice: from the house and directly in the cellar.

Important!
Trees and plants with a powerful and developed root system should not be planted near the cellar, as this can destroy the waterproofing of walls and ceilings.
Construction of a wooden cellar

Construction starts from earthworks. If the groundwater level allows, then dig a pit 2.5 - 3 meters deep so that the room is completely underground and has a ceiling height that is normal for a person.
You can check the groundwater level at the gardening association, with your neighbors, or at the regional geodetic service. You can also measure the depth of the water surface in a nearby well.

As an example, we have compiled instructions for building a recessed wooden cellar:
- We dig a pit 3 meters deep. The dimensions should be 50 - 60 cm larger than the room in each direction for ease of processing the walls;
- The soil should be compacted at the bottom, and four holes 70 cm deep should be dug in the corners at a distance of at least 50 cm from any of the walls;
- The bottom of the pits is covered with a 15 cm thick layer of sand and gravel, and then covered with polyethylene with a full wrap around the walls. 2.5-meter sections of 100x100 mm pine beams are installed in the pits and concreted. The part of the beam to be concreted must be covered with bitumen;
- The floor is covered with a layer of crushed stone, which is spilled with melted bitumen or resin. You can leave the dirt floor if the soil inside is dry;
- When the pillars gain strength, they are tied. To do this, a 100x100 mm beam is laid on the upper ends, connecting it into half a tree and nailing it to the ends of the pillars with two nails;
- The walls from the outside are covered with a strong board 40–50 mm thick or with a slab. For fastening it is better to use galvanized nails or screws with anti-corrosion coating. On one side it is necessary to make a doorway and dig a descent for the stairs opposite it;
- The ceiling can be made of logs or timber. A durable board 150x50 mm or glued is also suitable wood slab. On top of the ceiling you should lay polystyrene foam in a layer of 100 mm or fill it with expanded clay, straw or sawdust;
- Don’t forget to remove the ventilation pipes, one for exhaust, one for ventilation;
- The outside walls should be coated, then the entire structure should be covered. waterproofing membrane, polyethylene or roofing felt. It is desirable that the insulating carpet has a minimum of seams;
- A staircase should be built opposite the doorway. It can be assembled from boards or made of concrete, brick or stone;
- The pit should be filled with clay. It will create an additional barrier to moisture;
- A canopy needs to be built over the entrance. Usually they make a classic basement entrance with a sloping roof or a gable canopy. Subsequently, a barn or summer kitchen can be placed above the cellar.

Important!
Everything wooden parts Before work, they must undergo deep impregnation with a complex antiseptic with antifungal action.
Conclusion
Wooden cellar – a good place for storing any food, vegetables or preserves. You can do it yourself, provided you follow all the rules for preparing the material and waterproofing the structures. The video in this article will make our instructions clearer.
The main purpose of the cellar is to store canned goods, vegetables and fruits. But not every cellar can guarantee the shelf life of food. Therefore, it is worth paying attention to the construction of your subfloor. Special attention. The main thing is to decide for what purposes it is needed.
In a cellar with a temperature of -7 degrees, you can store various products for about one year. Therefore, many housewives value and use such premises for long-term storage vegetables and fruits. After all, its main advantage over a refrigerator is capacity.

Such construction is a serious step, so the work must be based on diagrams and drawings of the cellars. To understand which option is most suitable, you can look at the photo of the cellar. There are many options on the Internet. The picture will show a finished layout of the building, all that remains is to match it.

What is important during construction?
When building a cellar with your own hands, you should adhere to the following recommendations:
- the use of wood materials requires pre-treatment by special means. This procedure protects the room from moisture;
- summer is the ideal time to install a cellar, since groundwater is low;
- It is advisable to immediately equip a ventilation system;
- It is best to build two doors inside the storage room. This will allow you to maintain the correct temperature;
- For optimal temperature It is recommended to provide thermal insulation;
- think about all the equipment in advance so as not to be delayed later construction works due to their absence.


Instructions on how to make a cellar
Place
It is necessary to choose a place for the future cellar. Dry, elevated areas are best suited; in the future there will be no need to install waterproofing. In this case, there is no risk of moisture getting in. The choice of depth depends on the desire of the owner, approximately 2-3 meters.

A certain distance between the base of the cellar and groundwater (50 cm) must be ensured, otherwise flooding may occur.


Material
The construction of a cellar should be approached responsibly, taking into account all the nuances, otherwise troubles are inevitable. Another main point is the choice of material for construction.

Natural stone, wood, red brick and others are suitable for such purposes. Wood lining is required when building an earthen cellar. Metal constructions It is best to avoid, as they are picky about climatic conditions.

Ventilation
This element is necessary to combat moisture and gas accumulation. Most often a pipe is used that connects inner part and the surface of the cellar. But you can install two pipes that will serve as an exhaust hood.


Advantages
A cellar under the house, built with your own hands, has many advantages:
- site saving;
- ease of use. Especially in winter time, you can quickly go down and just as quickly go up;
- waterproofing and underground drainage help you forget about dampness;

Characteristics of the above-ground cellar
When building an above-ground cellar, it is important to consider the soil level. Such a room is built on the surface of the earth, as opposed to underground structures. Above ground cellar takes less space, does not flood, functions all year round, has an impressive size and is very convenient to use.

However, such an extension requires hydraulic engineering work. The storage needs maintenance: periodic cleaning and disinfection.

There is a ground cellar three types: above ground, semi-buried, buried. You can build such rooms with your own hands using bricks, logs or concrete.


Features of building a wine cellar
Wine drinks require special storage, because this affects their taste characteristics. Construction wine cellar very popular.

In such a room it is important to provide a thermal insulation system. Closed-porous materials are ideal for building a wine cellar. They are responsible for maintaining temperature.

The entrance door should be well sealed. Excessive air penetration will negatively affect the quality of the wine. Any materials are suitable for the floor, as long as they do not emit harmful chemical elements.

Drink bottles are stored horizontally and it is not recommended to move them. All necessary equipment there must be good quality using natural materials.


Construction must take place in compliance with all necessary instructions, to avoid additional work and product damage.

DIY cellar photo


