Wooden canopy with polycarbonate roof. Sheds attached to the house: photos, varieties, installation stages and design features. How will we build
Read also
Reading time ≈ 13 minutes
Nowadays, it is difficult to imagine a dacha or yard without various structures in addition to a house or cottage. Cute gazebos, practical carports and much more can be found in the yard. Most often, polycarbonate is chosen for such purposes. Let’s talk further about how to make a polycarbonate canopy with your own hands. Because purchase finished product is often quite expensive, and does not always meet your requirements.
Polycarbonate canopy
Polycarbonate, what is it?
Polycarbonate is a polymer plastic and is widely used today in the construction industry. It is highly durable and lightweight. The material has become excellent alternative option PVC panels. Polycarbonate sheets are produced by extrusion from polycarbonate granules.

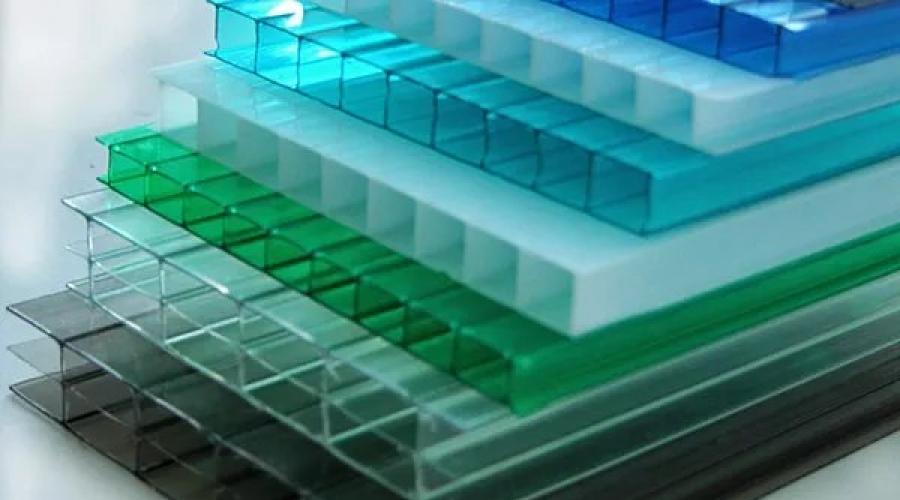
Polycarbonate sheets
Distinguish polycarbonate sheets two types.
- Cellular.
Impact-resistant panels that are transparent or matte. They have two or more balls, which are connected by internal stiffeners that are oriented to the length of the sheet. There is air between the ribs, which provides high thermal insulation. Thanks to the stiffening ribs, strength increases, but at the same time, the lightness of the material is maintained. Despite their rigidity, the sheets can be bent when cold. So it is often used in structures that have complex geometry.
- Monolithic.
Such panels are optically transparent. The construction is solid and impact resistant. There are no empty spaces inside.
Polycarbonate boards have many advantages, which explain its high popularity and prevalence.
- Transparency allows enough light to pass through. But at the same time, it does not transmit ultraviolet radiation, which has a negative effect.
- Good flexibility allows you to create different shapes.
- High impact resistance.
- Light weight, which allows not to weigh down massive structures.
- Polycarbonate is non-flammable, so there is no possibility of fire.
- The constructed structures have a beautiful aesthetic appearance.
- Retains heat inside the entire structure due to its special design.
- Due to the diversity in color solutions, you can choose what is most suitable in a particular case.
- It is easy to work with because it does not require any special equipment or tools. You can cut the sheets using a regular stationery knife. Easy to attach to the overall structure with self-tapping screws.
But, despite such qualities, polycarbonate also has some disadvantages, like any other material. You can encounter them both during construction and after - in the process of using the suspended structure. Namely:
- After some time, the sheets may crack. In this case, you will need to replace the damaged sections.
- The destruction of polycarbonate can be caused by violations of the rules of installation and fastening of sheets.
- If there are errors in the design of the frame, the weight of the snow can damage thin sheets of material. In other words, they simply will not be able to support the total weight of the snowpack.
As you can see, the advantages outweigh the disadvantages. So the formation hanging structures made of polycarbonate is quite reasonable. But you shouldn’t rush headlong into the pool. Before you build a polycarbonate canopy, you need to think through and design everything well. It is important to choose the right size not only, but also to create a sketch.
The use of polycarbonate canopies and their varieties
Today, the use of polycarbonate is very wide. Awnings from of this material can be found not only in the private sector, but also in the center big city. Such structures have different purposes. After all, they protect from bad weather and sunlight:
- car parking;
- Summer shower;
- outdoor swimming pool;
- barbecue and grill;
- places for rest;
- children's playgrounds;
- wickets and gates;
- outlets;
- open summer areas and terraces of cafes and restaurants.
Most often, polycarbonate canopies are used not in white transparent, but in colored ones. This is explained by the fact that such polycarbonate has very low level light transmittance. Using it to create canopies helps to maintain a slight coolness and shade underneath, since the material prevents excessive heating under the arch.
In addition to their wide application, there are many varieties of canopy configurations:
- straight inclined;
- straight, even;
- curved or concave straight;
- single-slope and double-slope;
- domed;
- arched;
- wavy;
- multifaceted;
- pyramidal.
A correctly made calculation will help you personally create masterpieces of the most incredible shape in your dacha. And you don’t need to resort to the help of a team of builders.
Video: polycarbonate canopy
Material selection and preparatory work
Before construction, you must clearly understand why you are making a canopy and what functions it should perform. Therefore, when making calculations, you must first take into account several facts that will help you make correct calculations:
- functional task of the canopy;
- design of structures that are located around the future canopy;
- dimensions of the object that will be covered with a canopy;
- location of the structure;
- dimensions and technical specifications panels;
- wind strength in a given region, what maximum level was reached.
All these parameters are important for design, since not only the beauty of the structure, but also its strength and functionality will depend on it.
If you decide to make a canopy, then you need to decide on the sheets for installation. Consequently, you immediately choose the color of polycarbonate sheets and their thickness to make blanks. The thickness of the sheets of the cellular version can be in the range of 4-12 mm. The standard size of polycarbonate sheet is 2.1 m wide, six or twelve meters long. For a regular canopy, a thickness of 4 to 8 mm is sufficient. The use of 10 and 12 mm sheets is recommended in regions where increased level snowfall and strong winds.
If you wish, you can cut the sheets according to the required sizes (depending on the parameters of the future structure). And to minimize material waste, optimize the dimensions of the canopy itself to fit the dimensions plastic plates. Therefore, the length of the canopy must be a multiple of the width of the sheet. Therefore the length can be:
- 2.1 m;
- 4.2 m;
- 6.3 m;
- 8.4 m;
- 10.5 m and so on.
The width can be a multiple of 2, 3, 4, 6, 12 m and more. This will be the most rational construction.

Polycarbonate sheets of various thicknesses
How to choose the right sheet thickness?
We must be guided by the principle - general design must withstand the amount of snow that falls in winter period. It is worth noting that for the most part this will depend on how reliably the frame of the structure is made, and not on the quality of the material itself. So, with proper calculation, you can install even the thinnest polycarbonate sheets. In addition, such use will significantly save your construction budget.
Selecting design parameters with drawings
After choosing the thickness of the material, you need to select correct sizes future canopy. To do this, you can go in three ways.
In the case of creating a canopy under which the car will stand, you need to add at least 30 cm to its dimensions in all directions. As for the height, it should be at least 10 cm higher than the car itself. This is necessary for normal ventilation.

Canopy over car
- Porch of the house.
When making a canopy over the porch of the house, you need to add 30 cm to the left and right of the entrance door. This way you will keep the floor dry when it rains, and the person will not get wet when they enter.
- Canopy over the pool.
Having measured the dimensions of the pool, make each parameter 30 cm longer.

Canopy over the pool
In any case, the height of the canopy should be no less than the average height of a man - 180 cm. This way the canopy will not create inconvenience for the passage of people and other movements.
After determining the dimensions, you need to draw a drawing. By following it, it will be much easier for you to carry out construction. In addition, he will help you do everything correctly, without forgetting anything. A properly created drawing should include some basic information:
- basic design parameters (width, height, length);
- the roof, what shape it will have;
- the material that must be used to create the supporting elements and the frame itself;
- the required quantity of all fasteners and components for installation of polycarbonate sheets;
- materials and parameters of the site, which is located under a canopy.
The canopy itself is in most cases formed in the shape of an arch on the front side. In this case, the bending radius of the cellular polycarbonate sheet should be the same as the height of the entire extension.

Arched porch canopy
When you already have a canopy diagram ready, you can start calculating the amount of material needed for construction. For example, you need to build a canopy over the porch of a house that does not have arched elements. Entrance door is 80 cm wide.

Drawing of a polycarbonate canopy
Experts suggest using the following formula: the width of the structure is H = 30 (margin on the left) + 30 (margin on the right) + 80 (door width) = 140 cm.
Let’s assume that the distance from the wall of the house to the edge of the first step of the porch is 1 m. The canopy should also be 1 m long.
It is good to use a square-shaped profile pipe as a frame for a canopy. It is better to choose a section of 0.25 x 0.25 cm. Three pieces of 1 m in length are enough, which are connected to each other transversely at the edge, which will support the polycarbonate sheets.

Canopy frame
A steel pipe with a diameter of 32 mm can be used as supporting elements. Two poles are enough, which need to be fixed in the ground. The height should reach the top edge of the door, but not less than two meters. Do not forget about the additional 0.5 m of pipe that will be dug into the ground.
When building with polycarbonate, you need to stock up on the following tools:
- stationery knife for cutting sheets;
- Bulgarian;
- screwdriver for canopy installation;
- tape measure for precise measurement of parameters.
To build a polycarbonate canopy correctly, you must use the appropriate drawings. A detailed photos The construction process is presented below.
Construction of a canopy made of polycarbonate sheets
The construction itself is actually tied to many factors. Including how the structure will be located relative to the walls. And also has important roof shape. It is chosen in accordance with the specified functions, available finances and desires.
Proper extension of a canopy over a porch in a private house
The structure can be attached to the private house itself. To do this, just do the following:
- For the support elements, take a regular square steel pipe. Its cross-section should be 0.25 x 0.25 cm. Using a grinder, cut the pipe to required sizes. Based on the above formula, you need to cut three pieces of the profile one meter each. And one cut should be 1.4 m long. Plus, you need to take two pipes, the length of which is 2.5 m.

When working with an angle grinder, do not neglect safety rules
- Bury two pipes to a depth of half a meter, which will support the canopy. You need to bury it near the edge of the first step. It is better to fill the base of the columns with concrete to strengthen the structure. To do this, you need to mix sand, cement and crushed stone in a 1:1:1 ratio and mix with water. Use this solution to fill the holes where the pipes are installed.
- On the wall of the house, stepping back 20 cm from the door, fasten the ends of square profile sections, the length of which is 3 m. Use metal corners and large self-tapping screws as fasteners. To make work more convenient and faster, use a screwdriver. In addition, it will secure the screws more reliably. Be prepared for the fact that you may have to work with a hammer drill if the house is built of brick. In this case, using a hammer drill, you need to make holes where the screws will then be inserted. But before that you need to insert plastic dowels into the holes. It is important that a couple of segments from the edge rest on the installed pillars.
- Next comes the installation of the transverse profile. Its ends also need to be supported by pipe posts. To connect meter lengths perpendicularly, you need to take self-tapping screws and secure them metal corners. Following the drawings in the end, you will get a frame that has a slight slope.

Frame with slope
- Take cellular polycarbonate of a suitable size from a single piece. Here you need to use a stationery knife. If you cut along the honeycomb, the cutting will be easy. But when cutting transversely, you need to work a little. To speed up the process, you can use a jigsaw.
- Using a screwdriver and self-tapping screws, attach the polycarbonate parts to profile frame. To prevent the sheet from bending or breaking, during installation it is worth laying the sheets so that the honeycombs are parallel to the wall.

Canopy over the porch made of polycarbonate
As you can see, building a canopy using this material is quite simple and quick. This will be especially useful in the country to give even more comfort.
Construction of a canopy with arched elements over the pool
Let's talk about the second option, when the canopy is separate from the house. For example, above the pool. We’ll look further at how to make a polycarbonate canopy with arch elements yourself. There are several nuances to consider here. After all, the house that serves as a support will not be here.
Therefore, the step-by-step instructions for this case are as follows.
- Initially, you need to install support pillars. The technology for their installation is described in the first version. Made from the same steel pipe with a diameter of 32 mm. But there is one peculiarity. They need to be buried with an indentation of 30 cm in the corners along the diagonal of the pool, which we draw in our minds.
- A frame is installed on top of these supporting elements, which is made from a square-shaped metal profile. It is best to use arched elements. IN in this case the best option would be to contact the specialized construction company. Making it yourself is very difficult.

Frame with arch elements
- The frame ends to create a roof must be welded using welding machine to the support pillars. This way the structure will be more reliable and strong.
- All that remains is to lay the polycarbonate sheets one after another. This must be continued until the entire frame is filled. The sheets must be joined together carefully.

Installation of sheets from cellular polycarbonate
The hanging structure over the pool is ready. If you want to make such a canopy over a barbecue, a car, or a recreation area, then you should follow the same principle.
A polycarbonate canopy constructed is renowned for its durability, especially if maintained regularly. All you need to do is inspect the fasteners and see what condition they are in. Special attention It is worth paying attention to the sheets of cellular polycarbonate themselves so that there are no cracks or other damage. If any are found, minor repairs must be made. It involves replacing damaged screws or the coating itself (where there are cracks).
In addition, on such a canopy, like on any other structure, dirt, dust, other debris and contaminants accumulate over time.
It is prohibited to use such substances, which include:
- ammonia;
- alkalis;
- phenols;
- esters;
- acids;
- other substances with aggressive effects.
It is also prohibited to use sharp objects that can easily scratch and damage the polycarbonate, as can be seen in the photo.
Even more interesting features and the nuances of constructing a canopy from plastic slabs of unusual shape can be seen in the video.
Build good canopy Anyone can do it from polycarbonate with their own hands. You don't need to spend a lot of time or effort to do this. You just need to be patient and, of course, building materials. The construction cost is not expensive, but it will bring a lot of benefits and will last a very long time. The main thing is to follow the given instructions and proper care.
(17
ratings, average: 4,35
out of 5)
 Cellular polycarbonate - best material for the construction of canopies and arches for the house, garages for cars and canopies in the country. It is light in weight, holds heat well, and transmits sunlight well. Unlike glass, it does not require special tools and installation skills.
- Variety of shapes, colors and transparency.
- Long service life.
- Attractive appearance.
- Possibility of DIY installation.
- Acceptable price.
Thanks to these properties, the material received wide application in the construction of canopies:
- Canopies in front of the house - protect the porch and entrance from the sun and precipitation. Thanks to the variety of palettes, such a canopy will fit into the exterior of any building. You can also use it to build an elegant decorative structure.
- Car visors - protect the car from rain and snow, ultraviolet radiation, fallen leaves. The design can have an arched or rectangular shape.
- Polycarbonate canopies for pools - thanks to them, the pool can be used at any time of the year. This design protects the water from pollution and prevents it from blooming.
- Polycarbonate canopies attached to the house allow you to create a terrace, veranda or summer kitchen.
Canopy installation
Material selection
 It is better to make a polycarbonate canopy from hollow sheets - they bend well, retain heat, and weigh little. Compared to cell phone, monolithic polycarbonate is more durable. However, construction from such material has lower profitability. In addition, solid polycarbonate has poor thermal insulation.
When choosing a material, its color is taken into account. Transparent plastic transmits light well, but the colored version looks much more attractive. When choosing polycarbonate for a visor, the thickness of the sheets is also taken into account. The larger this parameter, the stronger and more reliable the structure will be. In general, for a carport or a summer house, a thickness of 6-8 mm is sufficient.
Options for canopies for a house canopy:
- The shape of the slopes is straight and arched.
- By the number of slopes - single-slope, double-slope, multi-slope.
Measurements and calculations
When designing a structure, the transverse and longitudinal steps of the frame are calculated. For longitudinal load-bearing supports, the optimal pitch is 700 mm. To calculate the step for transverse supports, take into account the thickness of the sheet. So, for panels with a thickness of 8-16 mm, the step should be no more than 1 m. If the material is thinner than 8 mm, the step should not be more than 700 mm.
Structural design
Construction of polycarbonate canopies start with developing the frame. It is calculated based on the size of the canopy. It must withstand the load of fallen snow and sharp gusts of wind. The thickness of the racks will depend on the material of manufacture - wood or metal. For the roof of a house or garage, a material of a certain transparency and thickness is chosen.
Preparing the base
 The territory is marked, in the places where the load-bearing posts are installed, the embedded elements are dug in and filled with concrete. The top 10 cm layer of soil is removed from the site. The resulting recess is filled with crushed stone or sand, and then compacted. At this stage, a water drainage system is thought through. Before proceeding with the installation of the polycarbonate canopy structure, the platform is laid out with tiles, concrete screed or lay a lawn lattice.
Frame installation
To pre-installed embedded parts steel racks are installed, which are then connected to each other along the perimeter. After this, the frame of the arched or gable roof is attached to the beams. The connection is made by bolts or welding. If hardware is used, additional holes will have to be drilled in the racks.
Installation of polycarbonate sheets
At this stage of work you will need a drill, screwdriver, construction knife, a circular saw. To prevent damage to the material, it is cut without removing protective film. Thin sheets up to 8 mm can be cut with a knife, thicker ones - circular saw with fine teeth. The sheets are mounted with the side having UV protection, facing outward - applied to it polyethylene film with installation instructions.
The sheets should not be adjacent to each other closely - you need to leave a margin of 5 mm for thermal expansion. This factor is also taken into account when creating holes for self-tapping screws - they should be 2-3 mm wider than the fastener itself. To fix the sheets, it is better to use thermal washers with a diameter of 30 mm. Such hardware has a basis in the form of a sealing rubber ring. Thanks to the latter, the entry of water into the connection is completely prevented. The top of the cap is additionally protected by a plastic cap.
The polycarbonate canopy is made carefully, without overtightening the screws - otherwise the plastic will burst. To avoid this, thermal washers are screwed between the stiffeners. Screwing is carried out strictly perpendicular to the sheet - this way deformation of the material can be avoided.
If the canopy near the house has arched shape, bending of the material is carried out along the line of channels. The sheets are fixed with self-tapping screws with a minimum pitch of 30-40 cm. Adjacent sheets are connected to each other with an aluminum or plastic H-shaped profile. Before installing it, tear off the film from the edges of the plastic by about 5 cm.
Outside use continuous connecting tape, perforated from the inside. This measure protects the polycarbonate from dirt, water and insects. The joints are moisture sealed with sealant. It prevents condensation from occurring in polycarbonate voids. After completing the installation of the visor, remove the protective film from it.
Tools

How to bend polycarbonate correctly
To make a canopy, often you have to bend sheets of plastic. Often incorrect bending causes them to burst. It is important to make the bend along the line of hollow channels. To bend, one end of the sheet is fixed motionless, and the other is slowly bent. This must be done taking into account the manufacturer’s instructions, because for a material of a particular grade and thickness there is a minimum permissible deformation radius.
Life time
 On average, manufacturers provide a warranty period of 10 years for polycarbonate. In practice, a structure made of this material will last much longer, but for this you need to do the installation according to all the rules. The canopy of the house will be durable if the material is properly stored in protective film, transported carefully and was regularly serviced. As a rule, the option with thick polycarbonate lasts longer than with thin one.
Rules of care
 To clean the surface of the house canopy from dirt, you need to wash it with water, but it’s not even necessary use detergents
. For cleaning, use a regular soft cloth or sponge. Do not use abrasive household chemicals, alkaline solutions and other caustic substances. It is also not allowed to clean with sharp objects - there is a high risk of damaging the protective UV layer.
To clean the surface of the house canopy from dirt, you need to wash it with water, but it’s not even necessary use detergents
. For cleaning, use a regular soft cloth or sponge. Do not use abrasive household chemicals, alkaline solutions and other caustic substances. It is also not allowed to clean with sharp objects - there is a high risk of damaging the protective UV layer.
Before building a canopy with your own hands, carefully read the manufacturer's instructions. The durability of the structure depends on correct installation. If you install polycarbonate not according to the rules, cracks will appear in it, into voids dirt and water will get in. Gradually this structure will collapse. Sticking to simple rules, you can make a beautiful garage, a canopy for your home, or something else with your own hands - only the flight of your own imagination can limit you.
Polycarbonate canopy structures


With the advent of materials such as polycarbonate, the process of manufacturing various canopies and canopies has become significantly simplified. The excellent strength and flexibility of this product makes it possible to create the most complex designs with unusual geometry. At the same time, the ease of installation allows even novice craftsmen to create a polycarbonate canopy with their own hands.
What you need to know
Before starting work, it is necessary to carefully study the varieties of this material and their properties. It is also worth knowing all the advantages and disadvantages similar designs to understand all the consequences of using a material such as polycarbonate. Prices, sizes and some other parameters are completely different for certain models, which is worth considering.

Sheet thickness and strength
It is very important to choose the right thickness of the material. This determines what loads the sheet can withstand and to what radius it can be bent. You should look for such information from the manufacturer or in specialized literature, which will help you create a polycarbonate canopy with your own hands, taking into account the specifics of the product.
It must immediately be said that we're talking about specifically about honeycomb material, the insides of which consist of specific cells. The fact is that monolithic products of this type are very heavy, although they have simply enormous strength. A single sheet 12 mm thick can stop a bullet fired from a pistol.
It is believed that 4 mm material is not suitable for creating canopies, but products 10 mm or more can already be used for full roofs. Therefore, you should pay attention to sheets with a thickness of 6 to 8 mm. They are ideal for such work, and their cost ranges from 250 to 350 rubles per square meter.

Color
Recently, the question of which polycarbonate is better to choose for a canopy also applies to the color of the material. This is due to various advances in manufacturing that make it possible to produce these products in different color scheme. There are also models with a protective coating applied that prevents the penetration of infrared radiation.
The choice of color is a highly individual matter, but the ability to filter particles or waves of light must be considered very carefully. The fact is that infrared radiation helps to heat the protected surface, which is very important when arranging parking lots. However, if the polycarbonate canopy to the house blocks the plants, they will not be able to receive the necessary lighting, which will affect their development.
Preparatory work
Before starting production, it is very important to create a high-quality drawing future design and correctly purchase everything you need. Usually, when experts tell you how to make a polycarbonate canopy, they recommend using the services of a designer, who will also draw up an estimate. However, if you have minimal skills, you can do this work yourself.

Drawing
- First of all, you need to compare the area that needs to be covered with the dimensions of the sheet. At the same time, a calculation is made of how many pieces of material will be needed, taking into account its location, as well as the angle of inclination or radius.
- At the next stage, a drawing of the load-bearing truss or frame is created. At the same time, it must be designed in such a way that the jumpers are located at the junction of the sheets. It is also recommended to make unique stiffening ribs that would be placed in the middle of the covering area.
- Typically, drawings of polycarbonate canopies also contain installation diagrams on the building and floor. At the same time, sometimes it is necessary to create even small foundations and supports. It all depends on the type of building.
Purchase
This stage is very important and requires a separate approach. The fact is that polycarbonate is a very specific material for which it is necessary to purchase special fittings and fasteners. In this case, it is very important to take into account the model of the selected material.
If you make a polycarbonate canopy with your own hands, then the easiest way is to come to the market directly with a drawing that you can show to the seller. He will not only select the necessary adapters and special screws, but can give advice or suggest his own changes to the project. However, from the very beginning it is worth calculating the quantity yourself necessary elements and their type, which is easier to do using special software.
When purchasing metal for the manufacture of frames, it is recommended to immediately agree that long elements will be cut to size. This will help save on transport and save performers from additional work.
It is worth noting that the cost of profiles for polycarbonate varies greatly. Regular plugs can be purchased for 50-70 rubles, but connecting strips can cost up to 700 rubles.

Step-by-step installation
When you create a polycarbonate canopy with your own hands, you should adhere to a certain work plan. This will reduce time and avoid mistakes during assembly. In this case, the correct sequence is observed, which makes it possible to perform several stages simultaneously.
Base and seats
When making canopies and canopies from polycarbonate, they use both supports and wall mounting systems. Therefore, it is worth considering the option of manufacturing using both methods.
- First of all, you need to install the supports. They are made from a profile or ordinary pipe, which is installed in a hole at least 80 cm deep. Concrete is poured, and the quality is controlled using a plumb line.
- If you plan to install a canopy over the site, then the placement of supports should be thought out in advance. The easiest way is to lay them together with the reinforcement and concrete them with the base. You can also create special nickels in advance, to which metal can be welded if desired.
- The mounting points on the walls must first be cleaned and leveled. The joint density of the frame should be maximum. In this case, it is also worth applying markings to the surface to prevent distortions during the installation process.
If you plan to pour concrete during work, then it is worth remembering that it must be left for at least a week to completely harden. This is when you need to do the truss or frame work. Especially considering that they still need to be primed and painted.

Frame
Trusses or a frame for a canopy are made from a profile pipe, since this material is best suited for polycarbonate. The price, dimensions and methods of fastening of all segments are selected individually. For example, cheaper rods can be used as jumpers, but the base must be very strong to not only withstand the weight, but also gusts of wind.
It is believed that it is best to use welding to connect all structural elements. However, some masters prefer bolted fastenings. They are more practical and reliable, but take a lot of time and money to manufacture.
It makes no sense to describe the design itself, since it is made exclusively according to an individual drawing. However, immediately after creation, the product is treated with a primer and painted. Best to use immediately special composition dye that can be applied directly to the rust.
After the trusses have dried, they must be mounted on supports and fixed to the wall. If the paint was damaged, then after installation the affected area is additionally treated. The result should be a strong and reliable structure that can withstand heavy loads.
Sheathing
Typically, the manufacture of polycarbonate canopies does not have difficult stages, but this process should be treated very carefully. Even at the acquisition stage, you should pay attention to the principle of fixing a specific type of material, the type of adapters, connections and plugs used. That's when they select the right tool with fitting.
Most often, the connecting elements are first pre-fixed and the sheet itself is installed in them. It is secured using special self-tapping screws that do not violate the tightness of the structure. Then the ends are sealed using separate plugs.
Some experts first prefer to seal the ends of the sheet if, when fitting it, it was cut and the internal cavities were opened. This prevents the quality of the material from deteriorating and creates an obstacle to the ingress of dust and moisture.
If the sheet needs to be bent, then fix it first at one end and then along the radius. In this case, be sure to fasten the sheet in the middle so as not to create tension points. This type of work is best done by two people to save time.

- The protective film is removed from the sheets only after the material has been fixed. It will prevent accidental mechanical damage in the form of scratches. However, this does not mean that the product can be handled carelessly.
- If polycarbonate canopies are being made in the yard, then you should first pay attention to how the shadow behaves during the day, and only after that create a design project. This way you can take into account all the moments when the sun’s rays enter the ready-made system and accept additional measures, if they are needed. For example, install additional side sun protection.
- The correct color of the material will create the appropriate atmosphere and level of comfort. Therefore, when choosing it, you need to take into account the wishes of all the people who will use the product.
- It is best to create semicircular structures with a small radius. This way, snow in winter will not be able to accumulate on the surface, creating additional loads. Also very practical are single-pitch systems that allow you to divert rainwater in one direction, which is very important when creating canopies over the entrance or recreation areas.
- To properly drain rainwater, some sheds should be equipped with storm drains. However, it is much easier to immediately think through this moment when designing to reduce costs and installation time.
- If desired, the frame and supports can be made of wood, but finished design will have a rougher appearance and a shorter service life. However, when the right approach to design you can get a real work of art with original style and high-quality coating.
Conclusion
Considering the relative simplicity of this installation, we can safely say that even a novice master can handle this work. However, you need to take into account that you will need specialized tools in the form of a welding machine and a hammer drill. It is also worth acquiring a ladder or other structures that allow you to work at heights.
The fact that there are simply a huge number of different designs of such products, differing in shape, deserves special attention. In this case, you can always create your own truss system with an original slope or broken corners. Therefore, the final choice of project depends only on the imagination of the manufacturer and the limiting capabilities of polycarbonate.
To figure out how to calculate a polycarbonate canopy, you need to clearly imagine the structure and draw up a plan or drawing of the building. By by and large polycarbonate panels are just a coating that defines total area, but, in addition to this, there are also racks and a rafter system. In addition, the necessary materials will include connecting, corner and end profiles, fastening material and (possibly) lighting. It is important to calculate every detail in order to obtain a strong and durable structure.
What parameters to consider when calculating polycarbonate for a canopy?
Bent roof on garden plot
Please note that the strength of polycarbonate is much higher than the similar characteristics of glass (200 times), plastic and polyvinyl chloride. But not all panels can be bent, so their structure should be taken into account (sheets with triangular cells cannot be bent).
Selecting polycarbonate by thickness
First of all, in order to calculate a polycarbonate canopy, you need to take into account the possible mechanical load (snow, wind), on which the thickness of the panels depends. For monolithic panels, the thickness is 2, 3, 4, 5, 6. 8, 10 and 12 mm, they are called “vandal-proof”, since the sheets are difficult to break mechanically.

The difference in the structure of cellular polycarbonate
The honeycomb structure implies not only thickness, but also cell configuration:
- SX is a five-layer 25mm sheet with inclined stiffeners. The thickness can also be 32 mm. Panels with triangular cells are not suitable for curved roofs;
- SW - the sheet also consists of five layers, only the honeycombs have the shape of a rectangle (the ribs are located vertically). Thickness ranges from 16 to 20 mm;
- 3X - the sheet has 3 layers, the thickness is 16 mm, and the stiffeners are adjustable in density:
- 3H - made of 3 layers with a rectangular structure. The panel is produced in 6, 8 and 10 mm;
- 2H is the simplest sheet with square cells. Sheets are made in 4, 6, 8 and 10 mm.

Monolithic standard sheet polycarbonate
The thickness of the polycarbonate honeycomb structure varies only by 2 mm. That is, if the thinnest cellular sheet is 4 mm, and the thickest is 32 mm, then all intermediate dimensions will be a multiple of two.
Dimensions of polycarbonate sheet around the perimeter
Standard calculation of a polycarbonate canopy monolithic type made to dimensions 3050x2050 mm. If desired, you can agree with the manufacturer to change the perimeter of the panel, but a special order usually costs more.

Standard Size of Cellular Polycarbonate
Standards for cellular polycarbonate vary in two parameters, these are 210×600 cm and 210×1200 cm. Long sheets are convenient to use for wide canopies, for example, in collective parking lots with curved roofs, where joints are made only along the side edges. Also, upon request, the factory cuts from 1 m to 9 m, but this is only for colored panels.
There is also a profiled sheet, where the thickness does not exceed 1.2 mm, but, thanks to the wave, the height of which reaches 5 cm, the strength increases and precipitation is easily drained. Standard width is 126 cm and length is 224 cm.

Profiled (wavy) polycarbonate sheets
Calculation of materials by types of canopies and types of roofs
To calculate a canopy made of corrugated sheets, polycarbonate or any other material, you need to take into account the roof configuration and the type of supporting frame. Such canopies are made in three types - single-pitched, gable and curved (oval). The most complex is the bent type, but the whole problem lies only in manufacturing, not in operation.
Sheds attached to the house
In cases where one side of the frame rests on the wall of the house, the calculation of the canopy from rectangular pipe will be minus half vertical supports. That is, one side of the sheathing rests on the wall of the building. In any case, there must be a profile at the joints of the sheets, therefore, the distance between them is 126 cm, 210 cm or 205 cm, but this does not mean that the entire sheathing consists only of these profiles.

One side is attached to the wall of the house
In any case, the width of the roof must correspond to the parameters of the car and this is at least 3 m so that there is free passage. But such a length of the profile will cause its deformation (deflection), and this should be avoided; therefore, a rafter system will have to be made for the canopy.
When calculating a canopy for a house, you will need 6 vertical supports - only on one side, but if the structure is autonomous, then you will need twice as many risers - 12 pieces. The principle here is as follows - for each rafter leg, supports should be installed on both sides, but if one side is attached to the building, then risers are not needed there.
In addition, beams are installed along the length, and for a 6-meter width you will need 6 pieces - 2 at the edges of the overhangs, 2 along the pillars and 2 in the middle of the roof. If the length of the canopy is 10.5 m, then 10.5*6=63 m or 63/6=11 pieces of profiles. The ends of cellular polycarbonate are jammed with an end profile.

Drawing with dimensions for a lean-to building
Calculations for a free-standing canopy
To calculate the canopy in the yard, you should take into account not only its width and length, but also the amount of precipitation that falls in winter. The fact is that snow exerts a strong mechanical load and will have to be restrained in some way. The best option for imparting rigidity to the frame is a triangle - this is the only geometric figure, without any backlash.
For calculations, take a conventional roof width of 6 m, a length of 10.6 m and polycarbonate with a width of 2100 × 600 mm. Rafters can be made from a pipe profile 60×40 mm or from wooden board 100×50 mm. Of course, a metal profile is better than wood and its service life has virtually no restrictions in the foreseeable future.

Principle truss structure
The drawing above shows a design where the upper part of the slope is 240 cm, and rafter device consists of 11 triangles - this is the most best option. Considering the fact that metal profiles are usually 6 m in length, the width will be slightly less, but for each rafter leg 6 profiles will be required, taking into account vertical and inclined jumpers. In total you will need 6 rafters and 5 polycarbonate sheets.
Of course, you can save on metal and make only 2 triangles, as shown in the top photo. In this case, the calculation of the canopy frame will be reduced by at least 2 profiles for each rafter leg, but if there are 6 of them, then this is already 12 profiles. However, for an average amount of precipitation this is quite enough - you can calculate a lean-to canopy on a budget, saving on metal.

Single-pitch autonomous design
Gable carports
For gable roofs, the calculation of the metal canopy frame is very similar to that of single-pitch roofs, that is, the rigidity is created by the same triangles. Such canopies are usually made for large parking lots, the width of which exceeds 6 m, that is, there is room for parking several cars or buses.
The principle of installing polycarbonate does not change - there must be a profile at each joint and in this case it is rafter legs. The number of triangles directly affects the rigidity of the structure - the more, the better. The best option is as follows - each linear meter is divided by a vertical profile, and this figure is divided diagonally into two triangles.

The principle of installing a gable canopy
To calculate a metal canopy, you need to immediately determine the dimensions of the roof, and for example, you can consider the same option of 10.6 × 6 m. To cover here, you will also need 5 sheets, but they will have to be cut in half, connecting in the center with a ridge profile. The number of metal vertical supports is doubled more quantity rafters, if there are 6 of them, then 12 risers will be required.
Longitudinal beams here you need more - 7 pieces - add a ridge beam. Total:
- 2 profiles along the edges of the overhangs;
- 2 on pillars;
- 2 between the supports and the ridge;
- 1 – on the skate.

Scheme of gable construction
If we convert the longitudinal beams into pieces, then 10.5 * 7/6 = 12.25 or 13 six-meter profiles. The cross-section for such beams is the same as the rafters (usually 60×40 mm), but for risers they use a pipe of 80-100 mm or a pipe profile of a similar cross-section.
The advantage for a gable roof is that the calculation of the metal structures of the canopy will be more economical. Two rafter legs with a jumper already form a triangle, which can be divided into two parts in the middle. As a result, you will get two figures with horizontal (bottom) sides of 3 m each.
Calculation of materials for a curved canopy
Calculating a canopy with a curved roof on your own is more difficult, since much here depends on its convexity, that is, the steeper the bend, the more materials are consumed. But you can start from the same dimensions: 10.5 m in length and 6 m in width, although the width here will be reduced due to bending.

Curved Carport
The clear advantage of this design is the saving of material when assembling the rafter system. For a given size, you can get by with only two or three rafter systems, along the edges and in the middle - all other legs are simply made in the shape of an arc without a lower jumper, as in the photo. A curved metal profile, mounted on two supports, in itself represents a rigid figure and the only question here is good fastening risers.
In this case, the design of the carport will consist of 6 bent six-meter profiles, two or three of which are equipped with a jumper and divided into several triangles. Supports will also be required for each arc, which means there will be 12 of them. 6 longitudinal beams are enough:
- 2 along the edges of the overhangs;
- 2 on pillars;
- 2 along the roof.

Arched canopy design
In total, you get 12*10.5/6=21 and 4 more profiles for jumpers.
It is quite natural that for narrower canopies less material is consumed, but here it is important to take into account the length of the polycarbonate. That is, if you work with 6-meter sheets, then they should be used either entirely or cut in half so that there is no waste. In this case, the roof will be 6 m or 3 m wide, and the length will be adjusted as necessary.
As a result, we can say that the most economical design for a canopy will be with a curved roof, although this is the most complex option. However, in such designs you can save on metal profiles, so the benefit here is obvious.
If difficulties arise during the calculation process, you can use special programs and professional services.
Polycarbonate canopies can be used for a variety of needs. These are hanging canopies over the balcony and porch; covered parking for cars and agricultural machinery; covered passages between the house and the bathhouse, summer kitchen, sheds, etc.
This article will discuss different types of polycarbonate house canopies, features of the choice of materials for the frame, and calculations of buildings. You will also find here step by step guide for the construction of a structure based on a metal profile.


Types, calculation and design of canopies, choice of frame material
The most popular options for canopies and canopies made of polycarbonate are arched, cascading, single- and double-sloped. They all have their own advantages and disadvantages.
Arched structures
Arched polycarbonate canopies in the yard are considered the most popular today, especially for organizing parking lots and galleries between the house and outbuildings.
- The semicircular shape of the arch prevents snow from accumulating on the roof.
- When it rains, water drains only on two sides.
- Due to the downward facing sides, the likelihood of the canopy being damaged by wind is quite low.
- The arched design is equally suitable for both a small canopy over the porch and a spacious parking lot for several cars.
The arched polycarbonate canopy has one drawback - if you make it yourself, you may face the problem of bending the profiles.

Arched polycarbonate canopy: the photo shows an indoor parking lot
Cascade system
Cascading canopies are, in fact, a system of several arched ones. This design is chosen for installation above flights of stairs, where the roof slope is very large. And there are two reasons for this:
- When it rains, water pours from the solid arched roof, located at a high angle, into the space in front of the first steps, hitting those entering. With a cascade arrangement of roofing elements, water flows to the sides.
- The aesthetic side of the issue. Several cascading arched polycarbonate canopies look much more interesting than one solid one pointing downwards.
The disadvantages of such a system are the complexity of the design, high time and material costs.

Arched polycarbonate canopy attached to the house: photo of a three-stage system
Shed roof
A lean-to polycarbonate canopy is the easiest option to build:
- No bending of profiles is required, as is the case with arched roofs.
- No bending of polycarbonate sheets is required. Accordingly, you are not limited in choosing the thickness of the roofing material.
- During construction, you can do without using roof trusses, only longitudinal and transverse beams will be sufficient.
Shed structures are often used when attaching a canopy to the wall of a house or garage. The disadvantage is that the roof has a slight slope; in winter, snow will accumulate on it.

Wooden canopy made of polycarbonate: photo of a lean-to structure
Gable canopy
In construction, it is a little more complicated than a single-slope one, since it requires two slopes to be brought together at a certain angle. However, this construction is also more convenient to use:
- Slopes lowered on both sides provide better protection from wind and precipitation compared to a single slope.
- The angle of the roof is greater here, which means less snow will accumulate on it in winter.
- The frame of a gable roof is rigid, so it can withstand wind loads well.
A gable canopy made of polycarbonate can be used in for different purposes: for parking lots, barbecues, barbecue ovens, porches, pavilions between outbuildings.

Gable roof over barbecue oven
Calculation and design of polycarbonate canopies
Even at the stage of creating a project, before starting to calculate a polycarbonate canopy from a profile pipe, you need to find out the following for yourself:
- Size and location of the future building.
- Wind and snow loads– these parameters affect the shape of the roof structure.
- The design of a private house and outbuildings - the choice of frame design and the color of polycarbonate sheets depends on this.
- Specifications of available/desired building materials.
Armed with this information, we move on to calculating and drawing up a drawing of a polycarbonate canopy. Here we already indicate exactly: the dimensions of the building and the shape of the roof; specifications material of supports, frame and roof; quantity and nature of fastening elements.
Note:when determining the features of the structural frame, it must be taken into account that polycarbonate is produced in sheets standard sizes. Their joints must necessarily fall on the transverse profiles - the sheathing.
How to make a polycarbonate canopy: the width of the purlins between the sheathing profiles depends on the parameters of the roofing material
And now about the height of polycarbonate canopies. In principle, it can be anything - it all depends on your needs and wishes. However, for comfortable use of the building, it will be better if the lowest point of its roof is at least 180 cm above the ground.
Options support posts for the manufacture of canopies and canopies made of polycarbonate, it is necessary to calculate based on the following figures:
- The minimum cross-section is 40x40 mm.
- Metal thickness – from 1 mm.
- The thickness of the foundation pillars must exceed the cross-section of the racks by at least 10 mm.
- The recommended depth of foundation pits is from 50 cm.
- For the sidewalls of rafter trusses, a profile with a cross-section of 20 mm is taken, for diagonal gratings - from 15 mm.

How to make a polycarbonate canopy with your own hands: the drawings must be very detailed
Note:It is better to entrust the design of structures with an area of 8 m2 or more to specialists. The roof area here will be large, which means it will be necessary to accurately calculate the level of snow and wind loads. Errors can lead to deformation or collapse of the building.Choosing material for the frame
Typically, the following materials are used to make polycarbonate canopies:
- Metal profile. Durable, easy to install and unpretentious to use. Requires minimal maintenance - only timely treatment with anti-corrosion agents. Disadvantages - heavy weight of the structure and high price.
- Metal pipes. The advantages are the same as metal profiles. The only thing is round shape cross-section is not so convenient for welding and other types of fasteners.
- Wood – profiled or ordinary timber, rounded log. A beautiful, lively material, suitable if the canopy should be stylized as something. During construction wooden canopy Do-it-yourself polycarbonate will require certain carpentry skills.

Wooden frame
DIY polycarbonate canopy construction
The longest part of construction is creating the foundation. The frame itself and the mounting on it roofing sheets It will take at most one and a half working days.
Installation of support pillars and installation of bindings
We install support pillars in the following way:
- We dig foundation holes - 50 cm deep and 30 cm in diameter.
- We install a reinforcement cage inside.
- Fill the holes with a cement-sand (3/1) mixture, cover with cellophane and leave to harden for several days.
- We fasten the supports to the foundation with anchors.

Concreting supports
We tie the supports along the tops with a single beam; the front part of the canopy will then rest on it. This dressing is best done from a square or rectangular section. Usage round pipe This is undesirable, since the abutment area of the elements during welding will be too small.

A polycarbonate canopy attached to the house: the photo shows the location of the front supports
Note:The attachment of the canopy to the wall is carried out on a beam attached to the surface with anchor bolts. At the required height, checking the building level, we mark a line along which holes for fasteners are then drilled. Next, screw the beam onto the wall, tightening the bolts well.
We make a canopy for the house from polycarbonate: the photo shows the installation stage of the binding
Bend the profile for the roof frame
If the polycarbonate garden canopy has an arched roof, then we will have to think about how to bend the profiled pipe. This can be done in several ways:
- With help pipe bending machine. Such a device is expensive, and it makes no sense to buy it just for the construction of a canopy.
- By cutting (6-8 mm) the pipe and bending it in the opposite direction. The cuts are then covered with metal “patches”.
- Manual bending of a preheated profile. To prevent flattening of the pipe, sand is compacted inside before work.

Manual pipe bending machine
Welding the canopy frame
We begin welding the frame by assembling the trusses. This is done on the ground, with the obligatory use of a building level. We start welding the diagonal slats onto parallel profiles from the edges, gradually moving towards the center. Magnets for welding will greatly facilitate the work - they are good for setting angles between parts.
On next video you may want to consider how welding magnets are used.
We place the finished polycarbonate trusses for the canopy on the binding and on the support of the front part. We bait it pointwise and then weld it. All elements must stand strictly vertically, so after installation we check the correct installation with a building level. If necessary, we slightly adjust the position using a sledgehammer.

A canopy attached to the house, made of polycarbonate: photo of the installation of roof trusses
Across the trusses we make purlins from a thin profile of rectangular cross-section. The distance between the parts is from 50 to 60 cm.

Installation of purlins
Next, we proceed to the installation of the sidewalls. We weld sections of the profile to the bases of the outer trusses and screw them along the entire length to the walls. From the lower edges of the sections to the ends of the trusses we stretch and weld profiles of the same thickness. we do a couple or three cross lintels. You can see what it looks like in the next photo. The frame is ready, you can begin installing the polycarbonate.

Sidewall work
Fastening cellular polycarbonate to the frame
And now about how to attach polycarbonate to metal frame canopy Installation is carried out using special fasteners - thermal washers. They consist of sealing and plastic washers, as well as a plug for them. All this is tightened with ordinary self-tapping screws. Particular attention should be paid to three points:
- Strict vertical screwing of self-tapping screws.
- Moderate tightening of fasteners. Insufficient application will not ensure the proper quality of installation, and excessive application can lead to damage to the surface of the material.
- There should be at least 4 cm from the sheet cuts to the boundaries of the hole for the self-tapping screw.
- The hole for the self-tapping screw should be 2-3 mm larger than the diameter of the latter.

How to properly attach polycarbonate to a canopy: you need to use special thermal washers
In addition to thermal washers, the following fittings are used during the installation of polycarbonate:
- Detachable profile. Used to join two sheets of material together. It consists of a base and a cover - the base is attached to the frame with self-tapping screws, and the cover is fastened to it using a special lock.
- End profile and punched tape. They are used for finishing cuts on polycarbonate sheets. First, punched paper tape is glued along their entire length, and then the end profile is fixed to it.

Additional accessories