Clothesline tensioner. Installation of a stretch ceiling

Read also
To give the interior sophistication and originality, stretch ceilings are installed in the room. This work is not easy and requires increased responsibility. But if you follow all the recommendations and have a partner, then everyone can do it themselves.
Features of a stretch ceiling
Stretch ceilings are mounted either from PVC fabric or from polyester-based fabric, which are fixed in a profile. Their disadvantages include the fact that the canvas is easy to cut through with a sharp object. But installing such ceilings has many advantages.
Thanks to this ceiling you can hide any defects on rough ceiling and get it perfect flat surface. When installing it, you do not need to expend effort in removing furniture from the room. Stretch ceilings are guaranteed to last at least 10 years. They are multifunctional, since behind them you can hide heat and sound insulation, all wires and install any lamps in them.

PVC sheets are not afraid of fire, so they can be installed in the kitchen and in rooms with fire communications. They are not afraid of moisture, they can withstand a lot of water, bending to the floor, and not tear. And after pumping it out, the ceiling easily returns to its original position.
PVC ceilings have a strength that is equal to 100 kg per 1 m2. Since they do not collect condensation, they can be installed in rooms with high humidity. Due to the fact that during their installation the height of the room is reduced by only 50 mm, stretch ceilings are suitable for rooms with low ceilings. They are very easy to care for; you just need to wipe them with a damp cloth.
Return to contents
Mounting methods
There are 3 mounting methods stretch ceiling. The harpoon fastening method is used for PVC-based ceilings. In this case, the film must be checked, measured and cut correctly, i.e. its size should be 7% less area the ceiling itself.
Next, a hook in the form of a harpoon, made from the same film on a special machine, is welded along the edges of the canvas. During installation, the tension of the ceiling sheet occurs due to the fact that this harpoon hook clings to the installed profile. If necessary, the canvas can be easily removed and installed back.

The wedge or clip method is the opposite of the harpoon method. In this case, the canvas is not measured and no pattern is made. Its size must exceed the size of the ceiling area. The canvas is stretched and excess residue is cut off. Since this fastening method uses plastic baguette, it is only suitable for fabric ceilings.
The bead or cam method is reminiscent of the wedge method, since the canvas is not measured, a pattern is not made, its size must be more area ceiling. The difference is that the film is fixed to the profile using a special tape that provides tension.
This method of fastening uses aluminum profile U-shaped and a wooden bead, thanks to which the ceiling sheet is clamped. This method has disadvantages. Firstly, the glazing bead may jump out of the groove. Secondly, it is very difficult to securely attach the film without sufficient experience.
Return to contents
Frame installation
You will need:
- laser level;
- cord;
- glue;
- drill;
- self-tapping screws;
- frame material.
Before you start making the ceiling with your own hands, they carry out preparatory work, i.e. change the electrical wiring, prepare the basis for the lamps. It must be remembered that the power of the light bulbs should not exceed 50 W, so as not to damage the ceiling fabric.

Installation of the frame begins with markings. To do this, measure the height of all corners of the room and mark the lowest of them. It is from this that all subsequent measurements are taken. Then they move down from this angle by about 2 cm to make it more convenient to attach the profile. And using laser or building level a mark is made along the perimeter of all walls.
After this, the correctness of the marking is checked, in which the beginning of the line must coincide with its end. Next, the opposite corners of the room are connected using cords; they should converge in the center. For a chandelier, a block is attached at the point of their connection. A hook is fixed on it, the bend of which should protrude 20 mm below the level of the future ceiling.
After all preparatory work the profile is being installed. First, a rail is prepared for it. If its length is greater than the width of the room, then its edges are sawn at an angle that is equal to half the corner of the room. The corners of the room are measured with a folding protractor.
If the lath is smaller than the width of the room, one of its edges is also sawn at an angle, and the second is made exactly 90°. This is necessary so that it fits closely to the next profile rail, which has a bevel for the corner on the opposite side. Then all prepared elements for the profile are glued with glue and pressed against the wall along the marked line. After this, they are fixed with self-tapping screws or self-tapping screws in increments of approximately 80 mm along the entire length of the profile, indented from its edge by 10 mm.
Return to contents
Installation of the canvas

You will need:
- PVC sheet or fabric;
- heat gun;
- construction hair dryer;
- glue;
- putty knife.
After the frame is installed around the entire perimeter of the room, installation is carried out tension fabric. To do this, the room is heated using a heat gun or fan heater to a temperature of 40° and above, preventing it from dropping during all the work. Further, without bringing PVC film close to thermal appliance, you need to unwind it.
To increase elasticity, it needs to be heated with a hair dryer to 60°.
After this, the canvas is fixed in one of the corners of the room, and then in the opposite corner diagonally. With the remaining two corners, the operation is performed by analogy. The sides are fixed from the corners to the center in increments of 80 mm. The film is evenly stretched along the entire perimeter of the profile and secured with a spatula. If the suspended ceiling is made on tissue based, then its fixation begins from the sides and ends in the corners of the room.

When using bead or wedge fastening methods, the remaining part of the web is cut off. All folds and stripes formed on the ceiling are straightened in a circular motion, heating construction hairdryer. After installing the ceiling panel, decorative plugs are inserted. They are necessary in order to hide the fastening elements. Then the lighting fixtures are installed.
To attach the chandelier, a plastic ring is prepared, the outer diameter of which should be less than the decorative trim of the chandelier itself. It is fixed to the ceiling with glue; its center must coincide with a pre-marked point at the place where the lamp is attached. After the glue has dried, a hole is made in the canvas, and the chandelier is attached to the prepared hook. If you make a fabric-based ceiling, you can cover it acrylic paint, creating various effects, for example, clouds, sea waves, etc.
Many people prefer to do repairs themselves, without resorting to the help of builders. But some things are difficult because not everyone knows the details repair work, and what to do if the work doesn’t go well.
Almost everyone can paste wallpaper or paint walls, but not everyone can do more complex tasks, for example, decorating a ceiling. If you are not confident in your abilities, invite specialists, however, after reading this article, you will most likely decide to do everything yourself.
What does that require
So, how to make a suspended ceiling yourself, and what is required for this?
Tools

First of all, the necessary tools:
- Hammer.
- for heating panels and rooms.
- Gas cylinder.
- Stepladder or sawhorses.
- Level (preferably laser).
- Dowels.
- Hammer, screwdriver.
- A sharp knife with a set of interchangeable blades.
Now that you have all the necessary tools, you need to start purchasing materials. Before you make suspended ceilings yourself, be sure to calculate the dimensions of the room, namely, calculate the perimeter and area of the ceiling first.
Consumables

- Baguette. These are profile strips made of plastic or aluminum; the tension membrane will actually be attached to them. Measure the perimeter of the room, and this is exactly the quantity you will need. can be purchased with a small reserve in case part of the profile is rejected. Aluminum baguette is considered more durable and hardy, but plastic is cheaper, so here you have to choose.
- Film or fabric material. It will be stretched just below the main ceiling. Choose the color, structure and material itself according to your taste or the advice of the designer.
- Dowels or screws. Buy them with a reserve, because the more often there are places where the profile is attached, the stronger the entire structure will be.
- Please note that suspended ceilings do not have soundproofing properties. Therefore, if your upstairs neighbors are bothering you, you should take care of appropriate protection. If you have at least once seen how a suspended ceiling is made, you have probably noticed that a gap is left between it and the main ceiling. It is precisely in this gap that it is advisable to lay. It is best to use slabs from mineral wool. They are safe, durable, and, moreover, have excellent thermal insulation properties. After this procedure, your apartment will be much quieter and warmer. However, if no one lives above you, and your roof is well insulated, this item can be excluded.
Note! Even if you partially know how to make a suspended ceiling with your own hands, do not be lazy to recruit someone to help you. The installation itself is quite simple, however, it will be very difficult for exactly one person to tighten the material.
You have quite a lot to do difficult task– select the main material. That is, its color, structure, quality, cost and manufacturer. Let's talk about this aspect a little more.
Choosing the type of stretch ceiling

There are two main types of tension covering - fabric and made of PVC.
- Fabric covering It will work well if you are attaching a homemade stretch ceiling using the cam method. This type of material is made from polystyrene.
- PVC coating. Made from polyvinyl chloride. It can be fastened using the glazing bead, harpoon or wedge method. The harpoon method is considered the most reliable, but also the most difficult to perform. In this case, to the canvas itself special machine weld the hooks. Next, these hooks are inserted into the profile, after which the fabric is carefully pulled. But there is a little secret here - the cut fabric should be smaller required sizes by 7%, for ideal further tension.
On construction market you will be offered a great variety of materials, differing in price, structure, color and manufacturing companies. Of course, you shouldn’t save money and choose the cheapest material.
So how can you determine the quality of a stretch ceiling yourself? First of all, check it for defects. Of course, it is advisable to take with you someone who has already encountered this kind of question. For example, an Edelweiss ceiling is considered a good coating.
Advice! Consider the height of your main ceilings before purchasing. If you want to visually increase the space in the room, buy a coating with a shiny surface. The reflective, “mirror” effect will make the ceilings visually higher.
But designers who are enlightened about how the effect of increasing space is created will definitely advise you to choose light shades. And that’s right, because what lighter ceiling(up to white) - the higher it will seem. The darker the color, the lower it will look.
Now that everything has been selected, calculated and purchased, you can begin the most important thing - installation. If you still don’t dare to get to work urgently, watch how stretch ceilings are made - the video that is on our website. Then the work will go much faster and easier.
Installation of a stretch ceiling
We all know that apartments often have uneven ceilings and skewed walls. Therefore, first you need to take measurements and markings for even mounting of the profile.
Wall marking
- Measure the height of each wall at all four corners and make marks on each corner. You will notice that the difference can even be a few centimeters. Take into account the distance from the main ceiling to the tension ceiling. 3 cm is considered the minimum, however, if you purchased lamps for illumination, you need to take into account their thickness. After all, they must fit in the gap.
- Since the load-bearing profile - baguette will be attached to the walls, draw a straight line around the perimeter of the room. Of course, it is better to use laser level. This is the future marking for the supporting structure.
- The harpoon mount, which we talked about above, although the best, will require not only special devices, but also trained specialists. If you want to learn how to make suspended ceilings with your own hands, it is better to leave the idea of this method. Believe me, other methods, done competently and with soul, will be no worse. Therefore, choose another installation method, for example, bead or wedge.
Profile fastening

Now that the markings are done, you need to attach the molding to the walls.
- It is fastened with dowels or self-tapping screws. They should be located at a distance of 7-8 cm from each other. It is advisable to first glue the profile to the walls before this, this will make your work easier. Make sure that the first and last dowel or self-tapping screw is not located too close to the edge of the profile section.
- Take care of the wiring for future lighting. You have already purchased lamps, consider their width, type and quantity. After the installation of the canvas is completed, you will no longer be able to perform this operation.
Installation of panels

For successful tension PVC sheets on the ceiling you need to warm the room well. This is done using a heat gun. You can rent this device from friends, but it wouldn’t hurt to purchase it. You can use it perfectly in winter to heat your garage or utility room. To begin work, the room must be warmed up to 40⁰.
- Now let's look at how to properly install the canvas. You need to unpack the material clean hands so that it does not become dirty ahead of time. Now you need to secure one of the corners, the so-called “base corner”. Warm up the panel with a heat gun before doing this.
- Next, the corner opposite the base is fixed. These corners are attached to the so-called “crocodiles” - special clamps treated soft material to prevent film damage.
- Now the remaining corners are fixed, and the ceiling warms up even more. higher temperature. Please note that each canvas must be accompanied by instructions on how to properly make a suspended ceiling, taking into account the perimeter of the room. The initial, base angle should be indicated there. Therefore, please read the instructions carefully before starting installation work so as not to redo the ceiling.

- Remembering to gently heat the film, for example, you took the deluxe, remove the clip from one corner. Now, using an angled spatula, which is inserted into the groove of the sheet shell, carefully insert the sheet into the baguette. When you attach the next part, hold the previous one with your hand so that it does not jump out. Until at least two locks on both sides are secured, continue to hold the canvas.
- The remaining corners are mounted according to the same principle. Keep in mind that the closer you get to completion, the more difficult it will be to secure the corners. Therefore, we advised you to invite an assistant, since it will be quite difficult to carry out the process alone.
- After fixing the four corners, the sections are attached in straight lines. This is done with straight blades. Areas with seams are secured to two or three locks. Then the gap between them is divided in half, and it is secured with several locks. Then continue installing the remaining sections. Of course, the video guide on how to make a suspended ceiling will make your work much easier. Watch the videos on our website and you will understand that everything is not as complicated as it might seem.
- While working, make sure that the film is stretched without wrinkles and is pressed evenly and tightly against the baguette. Fix problems as they arise. Otherwise you will have a much more difficult time in the end.
- If you see wrinkles, gently heat the areas with a heat gun and smooth them out with your hand using circular motions. Check all fasteners and connections before the heated room cools down and the film stretches.
- The final stage can be considered. They are attached to special racks in advance, then, after tensioning the membrane, it is cut through sharp knife V in the right places. You need to do the work very carefully, otherwise you will have to do it all over again.
Installation of fabric stretch ceilings is very similar to PVC installation analogues, except that there is no need to heat and solder the fabric.
Advantages of suspended ceilings

So, as you understand, if you wish, you can do beautiful ceiling in your house or apartment. Of course, the process will be much easier and faster with the help of attracted specialists, however, many want to save money, some want to gain moral satisfaction from the work done on their own. Of course, anyone who has done this kind of repair will give you a lot of advice or show you in practice.
Note! You will immediately appreciate the benefits of suspended ceilings. This is an aesthetic appeal, an expensive appearance of the room, easy care, the ability to choose any color and structure. Durable and do not require special maintenance, they are also able to protect you from leaks from above.
The thing is that even if your roof leaks or your neighbors flood, the suspended ceiling will protect you from this. It will simply stretch under the weight of the water. Your actions are extremely simple - you unfasten the cloth from the fastening closest to the bubble and carefully drain the water into suitable container. Next, wait until everything dries and fasten the canvas back.
For those who want maximum details for a successful repair, a video on how to make suspended ceilings is posted just below.
Hi all!
Sooner or later, like everyone else, I have to change the clothesline, which is sometimes very difficult, especially when rollers are installed that serve to move the laundry. When tensioning the rope, it moves from side to side due to the rollers, which does not make it possible to tension it normally, you need to somehow lock the wheels, but on the 5th floor this is not very convenient, and my arms are not too long to reach to them and install something there. Once again, having seen enough of the methods that the Internet offered, and they did not suit me, I realized that I needed to come up with something and make some simple device, what came out of this for me, you will find out at the end of the article. Attached detailed description and photo report.
Materials and tools
To create the tensioner I needed the following:Tool
- wood hacksaw;- pliers;
- drill.
Materials
- ring screws 2 pcs;- wooden slats;
- washers;
- wire 2 mm;
- engraver;
- clothesline.
Making a rope holder
Let's start making!
Using a hacksaw, we saw off such a workpiece.


Next, in the lower part we apply markings for the holes.


Then we take these small ring screws.

Cut off a small gap, you should get the following.

When everything is ready, screw in the screws until they stop.

It turns out to be such a simple device.

How to tension a rope with a device?
Now I'll show you how it all works.I give an example on an ordinary chair, since leaning out of the window on my balcony is not very comfortable.
Let’s take the example of this very ordinary clothesline; in mine I used a thicker and stronger one, but that’s not the point.

We cut off the required length, it is better to make more stock, it will be more convenient.

Next, I chose a regular washer as a fixing element.

Take the washer and push both ends of the rope through it.


Next we tie the ends of the rope.

Now we take the tensioner and hook it onto the loop.


Next, pull back the washer and begin to rotate the tensioner clockwise.


Rotate until the rope is tight enough.

When everything is ready, pull the tensioner up in order to straighten the twisted rope, then take the pliers and flatten the washer.


It turns out the following.

Now unwind the rope and cut it, leaving small ends.


Next, take electrical tape and wrap the ends.


Now, in principle, everything is done, we get a well-stretched clothesline.

This method is more applicable to a thin clothesline, but for myself I used a slightly different one, since my rope was a little thicker, and washers required diameter I didn’t have one, and it would have been more difficult to bend it.
How to tension a thick rope?
I did the following.I took a wire 2 mm thick.

Next, I decided to use a regular handle, it is needed in order to make small rings, we take the wire and wind it around the handle.


It should look like a spring like this.

Next, using a drill with a cutting disc, I cut these rings.

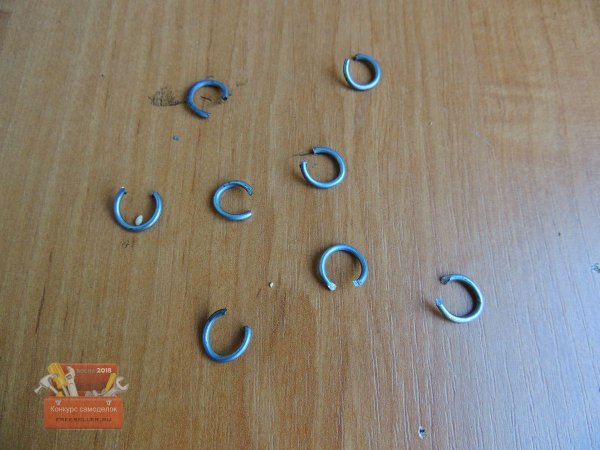
Fixing with such rings works on a similar principle: we wind the rope, then put on the ring and crimp it with pliers, this way you can fix a rope of a thicker section.


You can also use an engraver as a fixing element, the only thing is that you need to bend it a little with pliers.

That’s basically all, this is the way I now pull my clothesline.


This concludes my article!
Thank you all for your attention!
See you again on www.site
The tensioner (tensioner) is one of the important accessories. He performs protective function. Thanks to the damper, the tension of the chain mechanism is regulated, which is especially important when overcoming obstacles. It also protects the chain from damage and slipping from the sprockets. In cycling stores today big choice sedatives. Some allow you to reduce vibration, others prevent the chain from slipping off the sprockets, and still others eliminate shock. The cost of such devices is from several hundred rubles. It all depends on the manufacturer, functionality, installation method, strength and quality of the material. For those who want to save money, there are many ways to make a simple tensioner from practically available materials.
Spoke tensioner
To make the simplest and budget option You will need very little tensioner: an ordinary knitting needle and pliers. This method has been used for a long time on many single-speed bikes. The spoke is bent into a spiral using pliers and placed on the transmission. The edges of the spiral rest on the chain, pulling it back.
Due to its low cost, this type of sedative is used by many. But it doesn't look very nice. And its effectiveness is not very high.
Reflector dampener
One of the simplest to make, but quite effective sedatives. He copes well with main task- does not allow the chain to fall off. At the same time, the chain holds perfectly during a quiet ride and during bumps and bumps.
To make a chain guide with your own hands you will need:
- an ordinary bicycle reflector (it is better if the diameter of the fastening ring matches the diameter of the seat tube);
- nuts;
- bolt;
- screwdriver;
- hacksaw for metal.
When they found all necessary tool and materials, start manufacturing. Take the reflector and unscrew the reflector. All you need is a foot. Mount it to the seat tube above the chain. It should not rub against the chain, but should be as close as possible, just a few millimeters. After this, saw off the excess length so that it does not interfere with pedaling. This type of stabilizer will perfectly hold the bicycle chain during and during lateral landings.

You can screw an asterisk to the foot. You need to install such a tensioner on the pen with the asterisk down. This way you can tighten up the sagging bottom part bicycle chains.
From the rear speed switch
If you have an old derailleur, making your own chain tensioner is not difficult. To do this you will need very little: your old switch, a hacksaw and spanners for installation.
First, the top of the old switch is cut off with a hacksaw. You only need the bottom one. It must be secured at the place where the rooster is attached. And adjust the tension correctly.
other methods
There are a lot of ways to make a tensioner with your own hands from scrap materials. To do this you will need a small sprocket and a fastener. The fastening can be a clamp from a flashlight on the steering wheel, a cut-out aluminum leg in which holes are drilled for attaching the sprocket and bolts that will press it to the frame. Some craftsmen make fastenings even with ordinary plastic cutting board. The main thing is imagination.
The tensioner is usually attached to the chainstay. It is important to take into account that you need to tighten the chain from the bottom (preferably from the bottom up). After all, the upper part is always tense anyway.
conclusions
Making a homemade tensioner is quite simple. To do this you need very few materials and tools. And, of course, your time, desire to do something. At the same time, you will not only save significantly, but also get a lot of pleasure from the manufacturing process itself.