Setting up BIOS to install Windows from a flash drive. Installing Windows XP is an installation process via BIOS. Award BIOS – setting for booting from disk
Read also
There will inevitably come a time when the operating system will need to be reinstalled. For most users, this situation is not a very favorable moment. Some people treat the problem calmly, while others, on the contrary, are horrified because they do not know how to reinstall Windows via BIOS. As a rule, the unlucky person settles on the option that saves the situation: “Hello, is this a computer help service?” As a result, he loses time, patience and money. From now on everything will be different. Right now you will learn the “great secret” that Windows OS installs itself. The user only needs attention and a few confident presses on the appropriate buttons. Are you interested? Then go ahead!
Meet the chief PC manager - Mr. Bios!
Incredibly, the Bios firmware, the abbreviation of which stands for “basic input/output system,” is primarily responsible for the functionality of the computer. If any of you, dear reader, thought that Windows was responsible for the “omnipotence” of the PC, then you were mistaken. Accept the paragraph title as an important fact of reality. You will soon understand that resolving the question of how to install Windows will first of all require turning to a certain Bios program preinstalled by the motherboard manufacturer. Moreover, you should know that the base system may have different versions, since competing companies in the IT industry each have their own idea of the beauty, convenience and efficiency of the ROM (read only read only memory) chip, the “micromonster” Bios. Yet, despite the individuality of the graphical shell of each separately existing program for controlling the hardware of a computer, the functioning of embedded “hardware” systems becomes intuitive when directly entering their environment, since they all use the same notation in the form of standard terminology.
How to reinstall Windows via BIOS: thumbs up!
We won’t rush, because you know that “rush is only needed when fishing...”. Before you get into the PC, that is, when the Bios interface opens in front of you, know: carelessness in actions, which is expressed in mindlessly pressing keys and changing “incomprehensible” parameters, is critical, and in poetic language it’s even like death!

However, you still have to do some “editing” yourself.
The only correct choice: one among many
You can activate the BIOS firmware when you turn on or restart your computer. In order to do this, you need to press the corresponding button on the keyboard several times at short intervals. As a rule, this is the “Delete” or “F2” key. If it doesn’t work, the user will always be able to see the name of the “responsible” button on the initial loading screen (lower part of the display or upper left corner).
Why “boot”?

The most common method of installing an OS is a practical solution to the question: “How to install Windows from disk?” However, the method of implementing the system via a flash drive is becoming increasingly popular, but more on that later.
- Depending on the Bios version, the tab responsible for boot priority may have different names. However, the English word "Boot" will mean that you are on the right track.
- Having opened the above menu or activated the “Advanced BIOS Features” item, pay attention to the “Boot Device Priority” item. Or lines that indicate the order in which devices are loaded. Typically these are Floppy, HDD and CDROM (DVD R/RW).
- Set the boot priority to your disk drive (drive).
- You can save the changes by pressing the F10 hotkey or simply agree: “Yes” (if you used the “Esc” button).
We reboot and proceed to the next stage of the project “How to reinstall Windows via BIOS.”
Where does Windows come from?
Perhaps some of you will feel that this point should have been placed at the beginning of the process being described. Meanwhile, this “discrepancy” in the presentation of the material does not in any way disrupt the sequence of actions; moreover, it is the most acceptable option to learn how to do everything according to the rules. Now insert the Windows distribution disk. If you are using licensed software, and the disk with the system image you purchased is original, then you have nothing to worry about. When you have free Windows, downloaded from a dubious Internet resource, the chances of long-term and fruitful “cooperation” with the OS are negligible.

However, there are exceptions. Perhaps you will be one of the lucky ones, and the “cracked” system will turn out to be quite suitable for work. But do not forget that the final result—the success of the OS installation—depends on the correctness of the changes made to the BIOS settings. It is the microprogram that monitors the “fairness of the game” of the user. Therefore, installation of a system distribution kit from a Windows environment is often fraught with software failures and, as a rule, does not proceed correctly. As a result of using a “treacherous” method when solving the question: “How to reinstall Windows XP?” the efforts of an uninitiated user simply become wasted time. Moral: install Windows from DOS, that is, through BIOS!
When the disc “whispers” - the user is drinking coffee
Once you've designated the drive as boot device #1, then inserted the Windows disc and restarted the computer using the Alt+Ctrl+Delete key combination, it's time to observe. As promised, the system will “become” automatically.
- When the message “Press any key...” appears, press any button.
- After the initialization process, a window will open in which you need to assign the OS installation directory.
Attention: do not mindlessly press “Enter” on a non-functional Windows OS, which usually takes up space in the system partition of the HDD and is designated by the letter “C”. “How to reinstall Windows XP?”, you ask, if the required disk area is occupied by an old copy? Easily! To do this, simply format the partition, first erasing the old data.

- On the highlighted OS, press “D”, which means delete.
- Then use the "L" button to confirm your intentions.
- After the unallocated area appears, press “Enter” and format the created partition to the NTFS file system.
You don’t have to do anything else, except at the end of the installation to make some adjustments regarding the system language for using the operating system, as well as user data. As you have probably already seen, everything is quite simple and transparent, and the solution to the question “How to install Windows through BIOS?” - not a labor-intensive process at all.
Spectacular Windows 7 and royal flush download
Now the time has come to enlighten the attentive reader about the method of installing the operating system using a flash drive. The promised installation method is something more practical, since it does not require participation. However, the feasibility of this method greatly prevails over the traditionally used boot from a CD or DVD. Especially today, in our age of compactness, when modern electronics take on ultra-thin features, and technology gets rid of devices that unnecessarily “devour” time and energy.
Modern solution to the problem: via BIOS?

First of all, it is necessary. This is not difficult to do; it is worth considering that the capacity of the compact storage medium must be at least 4 GB. "Why?" - you ask. The thing is that the standard distribution kit of the seventh OS “weighs” almost 3 GB, so the minimum size of the flash drive must correspond to the above value.
From words to deeds
- Format the Flash media using standard Windows tools. The file system should be NTFS.
- Then you need to prepare the system distribution for recording. That is, if the installation files are on an optical disk, insert it into the drive; when the data is in the form of an image, download it to a virtual device.
- The next step is to use the “WinSetupFromUSB” program. This software is freely distributed on the Internet, you should not have any difficulties downloading it. After installing and launching the specified program, you will be literally two steps away from the moment when you can consider yourself a professional in solving the question: “How to install Windows?”
- In the top checkbox, select the flash drive installed on your PC.
- Check the corresponding box (Windows 7) and, by clicking the button, specify the path to the OS distribution next to it.
- After activating the “GO” toolbox, all you have to do is wait a few minutes. Upon completion of the process, the program will display a corresponding message.
It's time to start a practical solution to how to install Windows through BIOS!
Flash start!

Setting up boot parameters is done in almost the same way as in the case described at the beginning of the article. The only difference is the choice of media. With this installation method, your choice is a USB Drive, that is, a flash drive. There is another way to boot from the desired data source, bypassing the main thing. This scenario of action is possible when the user presses “F8” to call up the Boot menu, so to speak, a hot version of the base system. Of course, on different PCs this option can be activated using a different key.
After reboot, follow the instructions:

You must now understand that the previously described method of installing Windows from a disk is somewhat outdated. Flash drives are an incredibly convenient invention of mankind!
Finally
The article talked about the two main methods of the Windows family. It's up to you to decide which one is optimal. However, there are a lot of programs that allow you to make backup copies of working systems, that is, if the operating system crashes, the user has the opportunity to restore a clean copy (duplicate) of the OS with working programs and previously made settings in a matter of minutes. Incredible convenience, since the user does not need to install the software again and remember forgotten passwords. However, a new question will appear: “How can I launch Windows through BIOS?”, which, in principle, can be solved just as easily as in the case when reinstallation is necessary. But this is a topic for another article. Don't learn from your own mistakes...
the site has prepared step-by-step instructions on how to reinstall Windows 7.
Proper reinstallation of the operating system consists of the following steps:
- Saving data to external media.
- Creating a boot disk.
- Formatting the hard drive (optional).
- System installation.
- Copying a working system using Acronis True Image.
- The system is installed on top of the old one.
- Everything is removed and reinstalled.
The first and last points are required if you are afraid of losing important files when reinstalling.
Saving data
There are two options for reinstalling the system:
In the first case, all data is saved (settings, passwords on sites, files, etc.), but glitches may also be saved. If you install on top, then this section about saving data is irrelevant for you.
Formatting a disk deletes all data. There are several ways to avoid losing the necessary files:
- Copy your personal information to another drive on your computer. Suitable if you have 2 hard drives.
- Dump the files to an external storage device (HDD, flash drive, memory card, smartphone).
- Save files in the cloud (Yandex Disk, Dropbox, Google Drive).
- Confidential files can be saved to a WinRar archive with a password and sent to yourself by email. After reinstalling Windows, the archive will remain in the mail.
What to copy from old Windows? Check out the following places:
- Desktop, My Documents, drive C.
- Bookmarks in the browser.
- Browser and torrent download folders.
- Save games.
- ICQ/Skype correspondence.
Additionally, you can add all installed programs (Start > Control Panel > Programs and Features), so that after installing a clean OS you can easily remember all your favorite programs. Upload the screenshot to VKontakte or Facebook, then it won’t be lost.
Creating a boot disk
If you have a licensed DVD with Windows, you do not need to create a bootable disk (flash drive, memory card), you can skip this section.
More often than not, there is no disk, then you need to download a Windows 7 image from the Internet and correctly burn it to an external drive. We recommend looking for an image of Windows 7 Maximum (aka Ultimate), if you have more than 4 GB, then choose not the x86, but the x64 version.
Simply copying the image will not work; you need to make a bootable drive, for example, through UltraISO. To do this, you will need to download the program itself and find a drive with a capacity of 4 GB or more:
- Run UltraISO with administrator rights.

- From the File menu, click Open.

- Select the downloaded OS image file.

- Select it, click “Boot” at the top, and then “Burn Hard Disk Image...”.

- In the new window, check: 1 – whether the flash drive/memory card/external drive is selected correctly; 2 – is it the same image file; 3 – the recording method should be “USB-HDD+”, click the “Record” button.

- All information from the flash drive will be deleted.

- The image recording process will begin.

- Wait, successful completion of the operation looks like this.

The device is ready, now you can reinstall Windows from it. Save it, it might come in handy later. By the way, you can use the drive after this - upload any files to the free space, the main thing is not to accidentally delete the “system” ones.
Video on burning an image to a flash drive via UltraISO:
It is not necessary to use a flash drive or a special memory card with a card reader. You can take a card from your phone as a memory card, and the phone itself will act as a card reader. Even the built-in memory of a mobile phone is suitable for a boot disk, if it is recognized as a drive in the system when connected via USB.
How to set boot via BIOS
Restart the computer, look carefully at the messages displayed, somewhere they will indicate which button to press during boot to get into the BIOS. This could be Del, F1, F2, Esc, Tab or another. As a last resort, use the “scientific poking” method.
 The button to enter the BIOS is indicated when the computer restarts.
 Bios are different. Something like the following will be waiting for you. In the first case, you need to go to the “Advanced BIOS Features” section. 
In the second “Boot”, control the arrows on the keyboard. 
In any case, this setting is somewhere nearby, you will find the boot order (may look like First/Second Boot Device), first select the drive where you installed the Win7 image.

Look for the section where you exit Bios Setup Utility and save the settings. The computer will reboot and boot from the image, which will begin the installation of Windows 7.

Operating system installation
As we have already said, reinstalling Windows 7 is possible in 2 options: over the previous copy of Win and by removing the old system. If you want to put it on top and save all the data on the disk where you install the OS, then do not format it.
Tip: If you have only one physical drive, but a fairly large one (200 GB or more), first copy important data, and then divide it into logical drives C and D. It is convenient to install Windows on C with formatting, and on D to permanently store files . This is also useful for Acronis True Image. You can partition the disk during the OS reinstallation process.
- You copied the important files, made a boot disk, set the boot in the BIOS, and rebooted the PC. The loading will be shown to you for about a minute.
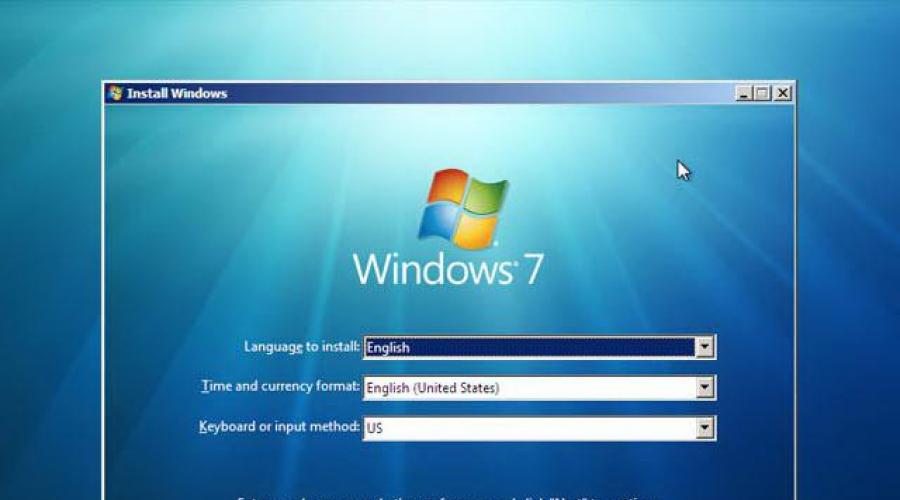
- Then Windows will present you with a window, check your language settings, click “Next”.

- Accept the Microsoft license terms.

- Select your installation type. At the top is “install over the old OS or update”, at the bottom is “complete reinstallation of Windows 7”.

- Specify which disk to install the OS on. You can format it if you wish (do not format it if you want to save data on it), click “Next”. If it gives an error that it is impossible to install on this disk, then turn off the computer, disconnect all other disks and USB drives, and run the installation again. Also here you can divide a physical disk into logical ones, carefully - do not confuse which one you want to divide, when dividing, all information is deleted from it.

- 10-20 minutes of copying files. After this, the computer will restart. This means that the copying of files is completed, and further installation occurs from the hard drive. You need to disable booting from the image in the BIOS and set it back from the HDD. The flash drive is no longer needed, you can get it from USB. If you do not change the BIOS settings, then after a reboot, loading from the flash drive image and copying will begin again.

- After the reboot, a window will appear asking you to specify your username and password (it is not necessary to enter a password).

- If there is a key, enter it, if not, just click Next.

- Select update settings. The license is updated without problems; the pirated version may fail to activate. Postpone the decision until later if you don't know what to do. Many people disable updates.

- Specify your time zone.

- A little download and you're in Windows 7.

Video on reinstalling Windows 7:
- Disable hibernation mode (relevant for systems on SSD, it allows you to free up disk space).
- If the OS is on an SSD, transfer , temporary files and browser files to the HDD.
- Disable updates (there will be no unnecessary traffic consumption, activation will not fail, and you will not have to wait several minutes for updates to install before turning off).
- Install drivers for your video card and sound card.
After installing all the applications and configuration, use Acronis True Image to make a “clone” of the local disk. In case of problems, you can restore an exact copy of the system and the entire C drive in 5 minutes, and you do not need to reinstall everything again.
After this, you are the happy owner of a customized, clean OS, and no experiments or failures are now scary. If something goes wrong – 5 minutes and everything is fine again!
To install almost any operating system from the very beginning, you must configure the computer's input/output system (BIOS) to change the boot priority. You will install the operating system from optical storage media, that is, from (CD/DVD) or from a flash drive, you must set the BIOS settings correctly, believe me, it is not difficult. So, for this to happen in the BIOS, you will have to change the BIOS settings yourself, so that when you turn on the computer, booting from a CD or flash drive is prioritized, and then from the hard drive. Let's take a closer look at everything.
BIOS: boot from disk or flash drive
When you turn on the computer, the first thing to do is test the equipment for functionality, in simple words it kind of tests itself, this is the so-called procedure (POST), then the baton is passed to a special program (MBR), which selects from which partition on the hard drive to boot operating system, so before this choice we must boot from a CD or flash drive.
How to enter (BIOS)? If by some miracle you still have the instructions for the motherboard, then it will definitely be written about it, if not, then when you turn on the computer, we look at the inscription on the monitor, it may look like this: Press DEL to enter SETUP, that is, in order to enter ( BIOS) you need, while the inscription on the monitor is lit, press the key several times
The inscriptions may be different, there may not even be any inscriptions, this should not confuse you, in most cases these are the F2 or Delete keys, less often F1, even less often
Award BIOS

Ami BIOS
For many who will do this all for the first time, and do something wrong, important information will be given, if you have changed parameters unfamiliar to you, you need to go to the (Exit) tab, it is located from the (Boot) tab to the right after the (Tools) tab ) and is underlined in red in the photo. Next, you need to use the arrows on your keyboard to the Load Setup Defaults item, and press Enter, then go to the menu.

Load Setup Defaults will apply the default settings (BIOS), and they will be the same as they were before your experiments, select OK and the settings will be reset to default, remember this.

After all these necessary digressions, let's return to the main topic and the first photo. We need the Boot item, use the arrows on the keyboard to select it, press Enter and then go to the Boot Device Priority item.

At this point we see that the hard drive is set as the first boot device, use the arrows to highlight the first item 1st Boot Device and press the Enter key.

In the Options item we need to select your drive (CD/DVD) using the arrow and press Enter and it will automatically become the first device

You should get it as shown in the photo.

Now all we have to do is save our settings and exit (BIOS).We press the Esc key on the keyboard and exit this menu, then use the arrows to move to the Exit item and press Enter, we are asked if we want to save our settings before exiting, we agree and press Enter.

The computer should reboot and if you have a disk with the Windows XP or Windows 7 operating system in your CD-DVD drive, the installation of the operating system should begin.
BIOS Award
Now let's look at - Award B IOS. In its main window we need the itemAdvanced BIOS Features, select it using the arrows on the keyboard and press Enter.

We need the First Boot Device item, which is responsible for the first boot device, now as we see such a device is a hard drive (HDD-0), select it and press Enter
You can install and reinstall, download, restore Windows using a flash drive, CD or DVD, and the correct actions during installation will lead to high-quality and fast results.
The BIOS is the foundation that is the input/output (I/O) base on the motherboard. Using it, you can configure certain parameters and adjust them on the computer. The I/O system may vary depending on the motherboard.
Step-by-step instruction
You can understand exactly what settings are in the BIOS by looking at the motherboard's passport. Incorrect BIOS parameters can reduce the power of a PC or completely destroy it.
Installing Windows from a flash drive or disk using BIOS depends on certain values set in the Boot Menu.
Installation steps

So, all BIOS settings for installing Windows are ready. As soon as you restart your computer, the system itself will direct you to install Windows from the device you selected. In order for the installation to begin, you must restart your PC.
Possible problems
- There is a black screen on the monitor, nothing happens and the process of loading Windows via a USB flash drive does not work.
- UEFI mode is working.
- The flash card was formatted using the NTFS system.
- BIOSE only supports UEFI and NTFS partitions.
 In the updated version of the BIOS, for installation from a flash drive, permission is requested to enable automatic mode. It is best to refuse this offer from the system, otherwise the software may load into the wrong partition that you need or may lead to partial deletion of your personal files.
Before you start setting certain parameters In the BIOS settings, you need to use the + and - keys to select the tab called Boot.
After the necessary parameters have been set, you need to save them by pressing the F10 key, which allows you to save and exit the system. You can also use a system parameter called Exit Saving Changes instead of F10 (that is, save the changes made and exit the system).
Once the boot priority has been set and all necessary parameter changes have been made and saved, you must reboot for the changes to take effect.
For inexperienced and novice users who need to install Windows using the BIOS, experts in this field have developed certain recommendations to ensure that the process goes as smoothly as possible. In order to correctly configure the BIOS for installing software, it will be useful to carefully study these recommendations.
Requirements for your computer to successfully install Windows 7:
- Driver for video card DirectX 9 minimum
- Processor power 1 Hz minimum
- 1 gigabyte of memory minimum
The process of installing and configuring a new Windows will depend on the following parameters of your computer:
- Cores, that is, the number of cores in your PC's processor.
- Clock Speed, that is, the speed of your PC.
- Main frequency of your PC. You can have 1600, 1333, 1066 or 800 MHz.
The average installation time for Windows 7 or Windows 8 on most modern PCs is an hour of your time.
Types of installations
 There is a “Clean Installation”, which involves starting the device with the Windows system manually when starting the PC. Next, start and press any key as soon as an inscription appears on the monitor called Press any key. After this, the process of specifying the location of the new software in the BIOS system occurs. For example, on a CD or DVD, so that the version that was installed before was no longer used or was deleted from the system. This “Clean Installation” option can be used with absolutely any operating system, for example: Windows 8, 7, XP, Linux, Unix or even DOS.
The “Easy installation” option is used quite rarely and it is not recommended for use, because the new OS is launched from media on an already installed “old” OS. Thus, the simple installation method involves superimposing a new version of the OS on the old one. During a “Clean Installation”, all partitions are formatted, as well as old files and OS versions are deleted.
If it is important for you to reinstall the system, while dividing several disks with important files, it is possible to leave these files unchanged. It is not necessary to format the D drive; however, the C drive with the old version of the operating system will be formatted.
In cases of a faulty operating system, before starting the Windows boot process, you should try to take the last chance to restore the system and clean it of various viruses and malicious software. If glitches and failures in the operating system are obvious, you must first check the hard drive itself , look at how its segments work. If you do not take this factor into account, the formatting process may freeze during the installation of a new OS or simply not work stable.
Saving personal data
 Saving personal information and data is a rather important point when reinstalling the OS, since it is not always possible to restore data that has been formatted. For this reason, you should take care of the safety of your personal data in advance, even before the process of reinstalling Windows. In order to do this, you can copy all important programs, folders, documents and files on any portable storage device, for example, to a flash drive, disk, portable hard drive, etc. It will also be important to save passwords. To do this, you can use a program called Backup, or you can do it with a pen or pencil and a piece of paper.
Thus, following the instructions, recommendations and tips given here for installing new software through BIOS, it is quite possible, without any experience or special skills, to carry out all the installation processes yourself, without resorting to the help of familiar specialists or paid computer help. To install Windows correctly through the BIOS, it is important to accurately follow the steps in the step-by-step guide provided here. It would obviously be a good idea to also find some video courses that would more clearly demonstrate all these processes.
There are just a few problems that newbies face. And one of them is setting up the BIOS to install Windows from a flash drive. This is the first step where it all begins, and this is where almost everyone stumbles.
The problem is that there are different versions of BIOS. And, having studied the instructions on how to enable booting from a flash drive in the BIOS, a beginner may still not be able to cope. And all because it simply has the wrong BIOS version, there is no such line as in the screenshot and, accordingly, nothing works.
It doesn't matter what brand of laptop or computer you have. The version of the operating system (Windows 10, 8, 7 or XP) also does not matter. Only the BIOS version is important. And the easiest way to find out about this is by running it.
How to enter BIOS settings
Before entering the BIOS settings, you need to insert a bootable USB flash drive with the installation image into the USB port. The main thing here is to write it down correctly. Otherwise it simply won't load.
After that, restart your PC or laptop and continuously click the Delete or F2 button until the BIOS window opens. The button may differ depending on the brand of laptop or motherboard on the computer, so see the hint on the first black screen.
Then the BIOS is configured.
Award BIOS setup
How can you tell if you have an Award BIOS? From the screenshot below:

If you have the same blue screen, then this is Award. This option is most often found on PCs.
Control in the BIOS is carried out only using the keyboard - arrows and corresponding buttons (their list is usually indicated at the bottom of the screen).
Before you set the BIOS to boot from USB, you need to check that it is enabled (otherwise the USB flash drive simply will not appear). For this:

The instructions are as follows:


In the screenshot above, the HDD drive is in 1st place, and the USB flash drive is in second place. She needs to be lifted upstairs. As you can see from the prompts at the bottom of the screen, you can set the boot priority in the BIOS using the + and – buttons (plus and minus). Select the USB flash drive and press the plus sign - it should move to the first line. Next, press Esc to go back.
Then highlight the “First Boot Device” item, press Enter and select “USB-HDD”. Press the Esc button again. To exit the BIOS, click the F10 button and then Esc (Save and Exit).

Setting up AMI BIOS
AMI BIOS looks like this:

And most often it is found on laptops. Again, you first need to make sure that the USB controller is enabled. For this:

 Now let's look at how to boot a flash drive through BIOS on a laptop:

Sometimes, to change the boot priority of devices (put the flash drive in 1st place), you need to press other buttons. This can be not only + and - (plus/minus), but also F6/F7, etc. Focus on the tooltips, where it is written what a specific button does (this small instruction is always located either on the right or at the bottom).
Setting up Phoenix-Award BIOS
Phoenix-Award looks like this:

This is a rare (more precisely, old) version, but for the full picture, let’s look at it through the Phoenix-Award BIOS.
First, go to the “Peripherals” tab and make sure that the first two items are set to “Enabled”. If necessary, set what you need.


After that, go to the “Exit” tab (in the top menu) and select the “Save & Exit” line to exit the BIOS.
Setting up BIOS UEFI
BIOS UEFI is a new and improved version of the old BIOS. It has a user-friendly interface, so setting up the BIOS to install Windows is very simple here.
All you need is to find the USB device icon, use the mouse to move it to the 1st place, and then click on the “Exit” item (in the right corner). And don't forget to save your settings!
This is the simplest way to boot from a flash drive via UEFI BIOS. Undoubtedly, this method is the simplest and most understandable. Actually, this is precisely why the new graphical interface was developed.
When your PC or laptop reboots for the first time during the Windows installation process, you need to go into the BIOS again and restore the previous settings. That is, put the HDD drive in first place, and lower the flash drive into second or third.
Or when, after a reboot, a black screen appears with the line “Press any key...” (“Press any button”), do nothing.

Otherwise, Windows will start installing from the very beginning. And you can walk in circles like this for hours.
Once again: during the installation process, after the first reboot, either go into the BIOS and return all the previous settings, or simply do not press anything. Alternatively, you can simply remove the flash drive from the USB port (but only when the PC or laptop reboots).