DIY scaffolding. DIY scaffolding made of wood (photo). How to make scaffolding with your own hands? Use of wood material
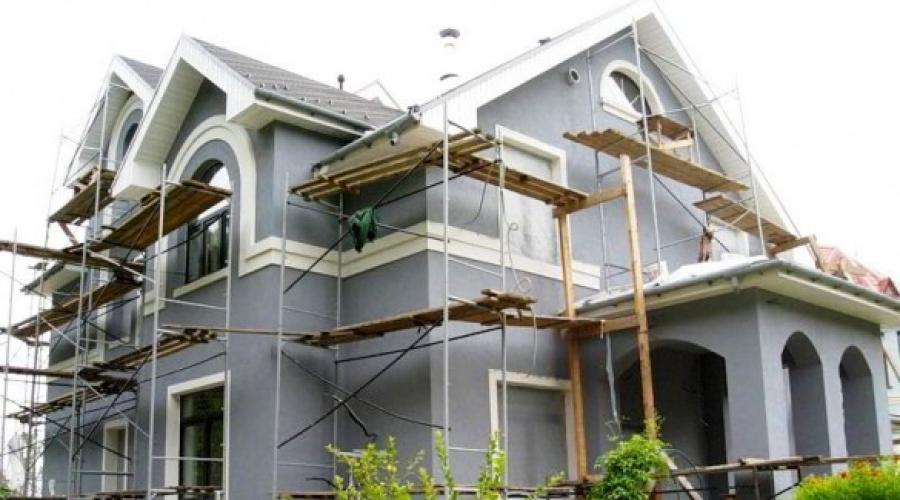
Sooner or later, construction reaches the finishing of the facade. And here the need arises to carry out work in the height range from 4 to 10 meters. After all, the gables need to be hemmed, the siding needs to be installed, the façade elements need to be painted, and drainage system install.
There is only one way out - to install scaffolding or a tower. But industrial building construction expensive, and the price of a tower with a working height of 8-10 meters is very steep. You can rent them, but if the work takes a long time, such a rental will cost a pretty penny.

Metal or wood
Scaffolding can be made of wood or metal. The practical experience of forum members suggests that building metal constructions It is economically feasible only if you have “free” hardware. If you buy metal, fasteners, study welding work, then such structures will ultimately cost more than factory ones and, especially, wooden ones.
While scaffolding can be carefully dismantled and the boards put into use, metal ones are doomed to gather dust in the utility room. Experienced builders They will say that high-quality scaffolding or a tower can then be rented out. But few private developers will want to bother with this. Therefore, the majority of forum users still prefer wooden structures.

HukTo member FORUMHOUSE
Metal scaffolding is better than wooden scaffolding, but the main trump card of wooden scaffolding is the relative cheapness, simplicity and speed of their production.
Advice from FORUMHOUSE: it is better to build your own wooden scaffolding from high-quality lumber. A quality board, unlike waste material, which will have to be thrown away after use, can be used in a new construction project.
 DIY scaffolding for the home.
How to make scaffolding from boards
Before you start making homemade wooden structures, you need to decide on the scope of work. If in one case they can be the simplest - attached (for lining gables, siding country house etc.), then in other cases (finishing the facade with stone or brick, plastering work, etc.) a more serious design is required.
The dimensions of the base unit are as follows:
- Length – 5 m;
- Width – 1 m;
- Height (thickness) – 3.5 m.
 The construction took 60 linear meters boards 150x50mm.

Buryat member FORUMHOUSE
 They are called "scaffolding - envelope".
DIY construction scaffolding
The design itself looks like the letter G attached to. A 150x50 board is taken as a basis, another board is nailed to it perpendicularly - support platform, on which the flooring is then laid.
One of essential elements Such structures are jibs - boards 25-50x100, with which two main boards knocked together at right angles are sheathed on the sides.

Usually 3 jibs are nailed on each side. Thus, the rigidity of the entire structure is achieved.
Such forests do not need a rigid connection with the house. Power load is carried by a supporting board, which at one end rests against the place where the boards are fastened, and at the other - the pointed end - is stuck into the ground.
If the house is wooden or frame, then the scaffolding can be nailed to the wall. If the facade cannot be damaged, then they are leaned against the wall, and the main load is carried by the supporting board.
When choosing the size of “envelopes”, you should adhere to the following requirements. If the area is too narrow, it will be difficult and dangerous to walk on it. If the platform is too wide, then the “envelope” may come off the wall. Optimal size platforms – 400-500 mm.

The main advantage of attached structures is that their manufacture does not require a lot of lumber.

Buryat member FORUMHOUSE
The supporting board and, accordingly, the height of the scaffolding can be increased. If the length of the board increases (more than 6 m), then for the rigidity of the structure, another board rests in the corner between the wall and the blind area, the other end of which is attached to the middle of the first - the main board.
Despite the fact that the design is widely known, at the first glance at such structures you doubt their reliability - it’s scary to look at! Let's turn to practical experience users of our site.

Zark member FORUMHOUSE
We call such forests “Armenian”. When I first saw such a design, I was surprised at how it even held up. I tried it, climbed onto the flooring - quite reliably. I used it myself attached scaffolding more than once on both a wooden and a brick house. They are convenient, quickly assembled and disassembled. They don't take up much space.
 Armenian scaffolding.

Drosha member FORUMHOUSE
This type of forest is quite safe. There is no need to attach the boards to the walls, but the flooring must be screwed with self-tapping screws to the supports (do not knock it down with nails, so that you can quickly disassemble it later).
How to Build Scaffolding for Heavy Duty Work
But such “Armenian” scaffolding is not suitable for all work - mainly for light work. They are good as scaffolding for painting a house, etc. For “heavy” work that requires working with tools, solutions, finishing the facade with stone, etc. a more permanent structure must be used.
The assembly of the structure is done as follows:
- Take a six-meter board (150/200x50) and place it vertically against the wall;
- A second board is placed parallel to it;
- They are secured to each other by horizontal bars. Next, according to the same scheme, the second support is mounted and the flooring is laid;
- For greater rigidity, the racks are supported by additional brace boards that rest against the ground;
- As necessary, the scaffolding is increased in height by attaching additional vertical boards.
Standard dimensions of one span of such scaffolding:
- The step between the racks is 2-2.5 m;
- The width of the flooring for work is 1 m.
 DIY wooden scaffolding.

diews FORUMHOUSE member
We made forests like this last summer. They were not attached to the wall. They placed only one wall at a time and then moved it. The main thing is to make braces and stops, and the structure will stand like a glove.
How to make scaffolding better: gpush against the screws
There is always a lot of controversy about how to put together scaffolding,
how to fasten the boards to each other. The opinions of forum members are divided: some believe that it can be assembled with self-tapping screws, others are categorically against it - only with nails.
The main argument of opponents of self-tapping screws is their fragility. The self-tapping screw does not work well under shock loads and shear loads. The result is that the cap flies off, the structure loses strength, even to the point of self-destruction.
 How to build scaffolding for cladding a house.

Igor Kokhanov member of FORUMHOUSE
I recommend fastening everything with 120 mm nails with the obligatory bend of the tip on the crossbars and on the jibs. And no self-tapping screws! I'll tell you such a case. Builders I knew were doing the roof. They fastened the boards with self-tapping screws. The result is that the structures separated, all four of them flew from a height of five meters. The result is one in the hospital with broken kidneys. The second was a severe bruise to the leg. But they got off easily; if the altitude had been greater, everything could have ended much worse.
That's why this happened. The nail is made of relatively soft metal. Under load it bends and does not break. The self-tapping screw is made of hardened metal and under alternating and shock loads, it will first bend a little and then break. Moreover, the so-called “black” self-tapping screws, due to hardening, are much more brittle than anodized yellow ones.
For collapsible wooden structures, bolts with a hexagonal head (under a washer) with a diameter of 8 mm and special metal fasteners are well suited.
The main argument of opponents of nails is that it will no longer be possible to carefully disassemble the scaffolding that has been nailed together, and part of the good board will have to be thrown away or used for rough work. And it will keep the structural elements from shifting great strength friction that occurs between the boards if you use self-tapping screws 120 - 150 mm long. Therefore, you need to compromise - use self-tapping screws to collect scaffolding"to black." In this case, if an error occurs at the first stage of scaffolding collection, they can be quickly disassembled and rebuilt. And only then additionally nail everything together properly.
In this article: how to do wooden scaffolding; types and characteristics of metal scaffolding; requirements for the design of scaffolding (GOST); the procedure for assembling scaffolding; how to assemble a tower-tour; prices for scaffolding and tower tours; how to choose scaffolding.
A thousand or two years ago, when the need arose to build buildings with a height of more than two floors, full-fledged construction equipment was also required to lift builders to this height so that they could work relatively freely at it. Pile an embankment around the structure being built, like builders Ancient Egypt, was too labor-intensive and troublesome—another solution was required. This is how the first scaffolding appeared, owing its name to the tree from which it was originally created.
Like a spider's web, scaffolding envelops a new building or a building in need of restoration, and workers can work on it with minimal risk to life. Just half a century ago, not a single major construction project was completed without casualties; workers were afraid to climb shaky scaffolding, categorically refusing to work at high altitudes. Today, working on scaffolding has become much safer, largely thanks to specially developed rules for working on them. It’s worth carefully understanding all the details regarding scaffolding - so let’s get to it!
Tree is the oldest construction material and from it it is quite possible to build quite good scaffoldings suitable for finishing works at a low altitude on the scale of a private house.

For the scaffolding you will need: half-meter scraps of boards 150x50 mm (fifty), pieces of thinner boards (for example, 25x100 mm), a board of the required length to form a horizontal flooring. For supports (slightly) you will need two fairly long boards, for example, the same “fifties”.
From the scraps of the “fifty” we knock together triangles of supports for the scaffolding on an overlay, then we cover them with a board of a smaller section. What considerations should be taken into account when choosing the size of triangular supports - sufficient space for someone standing on them and complete exclusion of the possibility of tearing away from the wall/support under its own weight and the weight of the builder. For these reasons, the length of the scaffolding should be between 400 and 500 mm - the feet of the person standing on it should in no case sag over the scaffolding!
The line of supports - they will be attached to the supports under acute angle, so be careful with their length. The upper end of the supports is slightly cut at an angle in order to insert them inside the triangular supports, Bottom part sharpened for strong anchorage in the ground.
After bringing the scaffolding to the required position, the vertical side of the triangular supports must be nailed to the wall, without driving the nails in right up to the head - they will need to be removed upon completion of the work. We place the ladder, lift it one by one, install it and nail the flooring boards to the fixed supports - here each nail should be driven in all the way.
Before starting construction and finishing work, make sure that the scaffolding is stable. Wooden scaffolding should not be raised to a height of more than seven meters!
It should be noted that in addition to wood, scaffolding can be built from grass - bamboo. In Asian countries, where this plant grows in abundance, everything is built from it. However, you should not compare the strength of bamboo with the strength of wood - its strength characteristics are an order of magnitude higher.
Metal scaffolding
Scaffolding made from steel or aluminum pipes is produced industrially in two main versions - frame and modular. Frame scaffolding includes flag scaffolding, pin scaffolding and tower towers, while modular scaffolding includes wedge scaffolding, clamp scaffolding, suspended scaffolding (fastening to load-bearing structures of buildings) and modular (system) scaffolding. The design of scaffolding, regardless of its type, must comply with GOST 27321-87, and be stored in accordance with GOST 15150-69.
Important: before moving on to detailed description metal scaffolding, it should be noted right away - they all require anchoring to the wall of the building along or around which they are installed! The greatest height to which it is possible to raise scaffolding without attaching it to the wall of a building should not exceed 4 m, and only if the site on which the scaffolding is built is perfectly horizontal and compacted, rainwater drainage must be organized. Failure to comply with this rule will result in the entire scaffold structure tipping over or collapsing.
Frame or flag scaffolding (standard load - 200 kg/m2)
Their kit includes: side frames (with and without ladder), racks for diagonal and horizontal mounting side frames between each other, shoes for support on the ground - all these elements are made of steel. The dimensions of the frames and the installation distance between them are slightly different for each manufacturer, but the construction scheme is the same.

This type of scaffolding is popular for two reasons - it is cheap and easy to assemble. The frame scaffolding fasteners are inserted into the holes intended for them and fixed by turning the “flag”. Vertically, the scaffolding elements are connected by inserting the higher frame into the nest located below, without additional fixation.
Frame scaffolding is intended for masonry and finishing work on straight facades of buildings; their assembly height should not exceed 50 m (for masonry - 20-25 m, for finishing - 40 m).
Before you begin installing frame scaffolding, you should consider the scheme of their construction and the location of tiers with stairs (it is better to draw them), find out the types and number of necessary scaffolding structural elements.
The assembly of frame scaffolding occurs in the following order:
- On the finished site, the sections between the frames are measured (usually the step is 3 m) and support boards are laid out, with steel shoes on top. Frames are installed in them, forming the first tier of scaffolding. They are placed strictly vertically - plumb, connected by braces and ties;
- The second tier is the connection of vertical frames with the lower tier, fixing them with diagonal/horizontal ties (a level and plumb line are used). For future laying of decking, horizontal ribs of crossbars are installed. From the first to the final (highest) tier, diagonal ties must be installed in a checkerboard pattern, i.e. their location should not be the same with adjacent sections of tiers vertically;
- Installation of stair structures located at an angle (workers can also climb vertical stairs built into the frames, but this is not convenient and complicates the progress of work). Inclined stairs are positioned as the tiers rise;
- Mandatory fastening of the scaffolding structure being erected to the building using hooks with bushings and plug anchors that reliably connect the scaffolding frames to the wall (check!). Attach the scaffolding to the wall in a checkerboard pattern, step - 4 m;
- Raising the tiers of scaffolding to the required height, repeating the operations described above (starting from the 2nd tier);
- At the ends of the assembled scaffolding, end ties-rods are placed along the entire length of the tiers; in those sections where there are no diagonal ties, longitudinal (horizontal) ties are installed, acting as a fence.
Dismantling of scaffolding is carried out in the reverse order, from top to bottom.
Widely represented on construction market frame scaffolding is offered at an average price of 170 rubles. per m2, their monthly rent will cost 60 rubles. per m 2.
Pin scaffolding (standard load - 200 kg/m2)
In terms of their design and assembly technique, these scaffoldings are as simple as frame ones - their horizontal elements are secured by inserting pins into hollow tube-eyes welded to the vertical posts. The lower supports of the frame struts are inserted into shoes, each new level It is assembled in stages; the scaffolding is given greater rigidity by braces installed diagonally.

Pin scaffolding is built up to 40 meters in height; they are used mainly in masonry and rarely in finishing work. Despite its simplicity and reliability, this type of scaffolding can be combined with clamp scaffolding, making it possible to build complex frame schemes.
The average market price of forests of this type is 550 rubles. per m2, rent - 100 rubles. per m2 per month. The reason for the higher cost compared to frame (flag) scaffolding is the ability to withstand heavy loads, because their design uses steel pipes with a significant wall thickness (for example, LSh 100 - steel pipe diameter 57 mm, wall - 3.5 mm).
Vishneva scaffolding (normative load - 200-250 kg/m2)
The frames of these scaffolds are installed not in a vertical, but in a horizontal position during assembly. They connect vertical racks immediately above the base shoes, and in each new tier they serve as support for the flooring. Strengthening the structure of Vishnev scaffolding does not require diagonal braces; this is the only type of scaffolding that does not require them.

The stairs of Vishnev's scaffolding are not built into the frame; they are an independent element installed at an angle inside the scaffolding structure. Ladders and fencing frames are equipped with pins that are inserted into the eyes of the racks (similar to the fastening of connections in pin scaffolding).
Vishnev scaffolding is intended for restoration and finishing work at a height of up to 40 m, both inside and outside buildings. Starting from the second tier, the racks of these scaffoldings must be fixed to the wall, horizontally in increments of 6 m, vertically - on each tier (anchors, crutches and steel wire, guy ropes and brackets are used).
Their average cost is 300 rubles. per m2, monthly rental price - 80 rubles. per m 2.
Tower tower (normative load - 200 kg/m2)
This design is a kind of compromise in the combination of “price” and “need”. Any building periodically requires repairs of varying levels of complexity, both complete finishing and fragmentary “cosmetics”. And if up to a certain height, say up to 5-8 meters, you can somehow get by with ladders, then at a higher height you will need a more stable and spacious working platform. Building scaffolding around the entire perimeter of a building is expensive. And assembling/disassembling scaffolding again and again, moving each time to a new place, is not an easy task and takes time. Optimal solution here is a tour tower.

The design of any tower tower is the same - it is assembled from ready-made frames equipped with a ladder. Wheels are attached to the base; they can be raised above ground level by several millimeters if the screw supports attached to the lower frame, operating on the principle of a jack, are extended to the maximum. When the tiers are raised to a height of more than 4 m, additional (standard) spacers are attached to the frames of the first tier. Depending on the model of the tower, when the tiers are raised to 2/3 of the maximum height, it is necessary to attach it to the wall of the building with anchors or brackets. The tower-tour is equipped with two or three horizontal platforms, the top one is equipped with a folding hatch for ascent/descent.
Tower towers can have a height from 4 to 21 meters, depending on the number of tiers, the height of each of which is 2 m (longer frames would be difficult to lift). Its operation will require a solid and level platform that does not have any slopes.
The procedure for assembling the tower-tours:
- A frame with wheels is placed on the platform, screw supports are pulled out, and preliminarily placed under them. wooden coasters;
- Connect the side frames to the base frame, secure them to horizontal ties and tighten them with diagonal stiffeners, lay and secure the flooring, connect the side supports;
- Insert the frames of the next tier into the pins of the side frames, connect them with horizontal and vertical ties - each new tier is assembled according to this scheme. As you gain height, install side struts and place a wooden stand under each of them;
- On the upper section, place and secure the decking, safety fencing, vertical and diagonal ties - the fencing should be raised to a height of at least a meter from the decking.
Dismantling of the tower-tura is carried out with upper tier in the reverse order of the assembly steps.
The price of a tower-tour depends on its model, material (steel or aluminum pipe), number of tiers. Steel towers cost an average of 12,000 rubles. (height 4.2 m), aluminum - 44,000 rubles. (height 4.9 m). It is worth noting that it will not be possible to purchase additional elements of new tiers for an already purchased tour tower - its design is designed for a certain lifting height, adding sections will increase the load on the base frame and reduce its strength.
Wedge scaffolding (standard load - 200-300 kg/m2)
These scaffoldings are more complex than those described above - their constituent elements are fixed with steel wedges driven in/knocked out with a hammer. This type of fastening greatly increases the reliability of the scaffolding; they are capable of carrying a greater load than frame or pin scaffolding.

The shape of the wedge, which connects the racks and crossbars of the wedge scaffolding, does not allow spontaneous wedging, and the flange locks on the racks are equipped with eight holes - for constructing scaffolding of the required spatial shape. When dismantling the scaffolding, the wedges removed from the joints are inserted into special holes with which the racks are equipped.
Maximum height the height to which wedge scaffolding is raised is 40 m. They are used both in construction and finishing works, including high-rise ones, and for temporary structures for public purposes - spectator stands and concert stages, staircase descents. This type of scaffolding is popular with ship/aircraft builders.
The average price per m 2 of wedge forests is 200 rubles, renting a m 2 will cost 80 rubles. per month.
Clamp scaffolding (standard load - 200-250 kg/m2)
One of the first types of scaffolding. All prefabricated elements of these scaffoldings are connected by clamps - rotary (repeated) and blind. They are difficult to assemble, but the height to which they can be raised is twice as high as other types of scaffolding - 80 m. The posts and crossbars are inserted into clamps, which are then tightened with threaded bolts.

This type of forest gives access to any spatial design, be it domes or complex architectural projections that create “dead zones” around the perimeter for frame, pin or wedge scaffolding. The ability to build tiers of any height, combination with any type of metal scaffolding - all this justifies them enough high price and complex assembly.
It should be noted that clamp scaffolding is produced in two versions, differing in profile diameter: “professional” - a steel pipe with a cross-section of 57 mm is used; “lightweight” - pipe diameter 48 mm. As a rule, when assembling clamp scaffolding, both standard sizes of racks are used - 2 m and 4 m, alternating during installation. Longitudinal connections are also of two sizes (3.6 and 5 m) and also alternate.
Clamp scaffolding costs about 450 rubles. per m2, rental price - 75 rubles/m2/month.
Suspended construction scaffolding (standard load - 200 kg/m2)
The support for the scaffolding of this structure is the building itself (its floors), i.e. their lower tier does not touch the ground. In cases where partial or complete lack of space near the building does not allow the installation of any other scaffolding option, suspended scaffolding is irreplaceable. Interference in the form of extensions, significant height of the object, architectural elements weak strength, the need to be surrounded by scaffolding around the entire perimeter of the building, simultaneous conduct of communication and landscaping work (tight deadlines) - all these are tasks for suspended scaffolding. They are used for finishing and restoration work.

The elements of suspended scaffolding protruding outwards are securely held by the consoles (material - channel No. 10), fixed in the spacer between the ceilings; they are connected to each other by crossbars and connections on clamps. In other words, with the exception of the support brackets, suspended scaffolding is otherwise a variation of clamp scaffolding (1.5" cross members and braces, 2" posts, 2.5 mm wall steel pipes).
Each new tier is connected to consoles on the same floor of the building and to the lower tier; vertical posts must be anchored to the walls (4 m increments).
Buy at finished form Only part of the suspended scaffolding is possible - that which forms the outer tiers, i.e. elements of clamp scaffolding. Console spacers are calculated and manufactured for a specific object and cannot be unified due to design differences different buildings— they need to be ordered additionally. The price of suspended scaffolding is negotiable only.
Modular (system) scaffolding (standard load - 200 kg/m2)
They allow you to form a structure of almost any shape, capable of bypassing any protrusions, repeating the rounded or angular outlines of an object, facade repair which is needed. Their elements can be connected by a wedge-disc (disc) or cup-lock fastening.

In the first case, the crossbars and scaffolding connections, equipped with a fork-shaped lock, are inserted into the disk lock of the vertical support and locked in it with a wedge (the locking element of some connections is movable, i.e. it can be secured at the required angle).
Scaffolding crossbars with a cup-lock connection are fastened as follows: their posts are equipped with steel cups welded at a certain height, T-shaped crossbar locks are placed in them, and a wedge nut secures the lock on top.
Elements of modular (system) scaffolding are made of steel pipes (d - 48 mm, wall thickness - 3.5 mm) and coated with a layer of zinc (hot-dip galvanized). Supports for them come in three options - conventional (square base and connecting pipe section in the center), screw (like a jack) and wheeled. The maximum lifting height of the tiers is 60 m; starting from the 3rd tier, they must be secured to the wall with anchors.
Modular (system) scaffolding is used for high-rise work on objects of complex geometry, in the installation of formwork, in the creation of temporary spatial structures, such as concert and demonstration areas.
This type of scaffolding is quite expensive - its elements are produced outside of Russia, mainly in the European Union. average cost modular scaffolding - 3,000 rubles. per m2 (depending on the manufacturer and design), rental issues must be negotiated with the owners of forests of this type personally.
What type of scaffolding to choose
The solution to this issue is for the purposes of their application. Volume analysis required upcoming works, their urgency, the presence/absence of sites for scaffolding. Frame scaffolding, for example, is excellent for masonry and finishing work at low heights; they are cheap and unpretentious. For masonry at higher heights, clamp or pin scaffolding will be required - they have a greater load capacity. By the way, the standard load capacity given above for each type of scaffolding is the minimum, i.e. depending on the specific scaffolding model, their load capacity may be higher - this figure, among other things, depends on the thickness and diameter steel elements, scaffolding schemes.
Clamp scaffolding is indispensable for high-altitude work and for objects of complex geometry, however, this type of scaffolding has a major flaw - over time, the tightening bolts on the clamps rust, losing strength and fastening ability. Therefore, you need to choose only clamps with a galvanized layer - they will last longer and without interfering with work. When renting clamp scaffolding, in particular, pay attention to the wear of the clamp fasteners, the degree of deformation of the posts at the connection points (the clamps deform them).
When choosing wedge scaffolding, keep in mind that they cannot be purchased by quadrature - first prepare a draft of the required scaffolding design and have it approved by the supervisory government agencies. And only then buy necessary elements wedge forests according to the prepared list.
A high-quality calculation of their needs will help you save significantly on scaffolding; in addition, you can combine different types scaffolding, resulting in access to working surfaces (for example, combined frame and clamp scaffolding).
The main thing when choosing scaffolding, in addition to cost and versatility, will be its safety for workers - reliable fastening points, comfortable stairs, mandatory presence of safety sides. With each assembly, it is necessary to test the strength of the scaffolding, without relying on chance.
Rustam Abdyuzhanov, specially for rmnt.ru
If you decide to make scaffolding, you will have to choose from two materials: wood or metal. In the first case, you will get a disposable structure that can be made by anyone who knows how to work with wood, and in the second, it will be reusable, but also quite easy to make. In this article we will tell you how to make scaffolding with your own hands from metal ( profile pipe), as well as from wood (boards), we will demonstrate diagrams, photos and video instructions.
Although metal or wood is predominantly used for the manufacture of scaffolding, they may differ in the method of fastening, and accordingly have different functional elements. So, let's look at the main types of forests.

The component elements are connected by a special wedge fixation. Scaffolds of this design are highly reliable. They are able to withstand quite heavy loads. At the same time, they are easy to use and can be quickly assembled and disassembled. The use of wedge scaffolding during construction and lifting is especially important heavy materials and nodes.

The main element of this design is rigidly installed frame. They are mainly used for painting or plastering work. The frame in this design is connected to horizontal posts and diagonal braces thanks to node connections. The main advantage of frame scaffolding is its low cost. Their construction does not require large investments.

In these scaffoldings, the connection point, as is obvious from their name, is the pin. This type of scaffolding is very popular among builders, as they are very easy to assemble and disassemble directly on site. construction site. It often takes a day or even two to assemble the scaffolding. In this case, assembling the pin scaffolding will not take much time.

If the object where repair work is carried out has a complex configuration, then clamp scaffolding is great solution. The fastening method used is professional. And for their manufacture, height and size play an important role. working area, distance between tiers and pitch of racks. All this is selected individually for each facility.

We invite you to familiarize yourself with a simple guide to making scaffolding from boards. To do this, follow a few simple sequential steps:
- Lay out 4 racks or boards parallel to each other on a flat area. Their size must immediately correspond to the height of the scaffolding.
- The racks are connected to each other by horizontal jumpers, on which the flooring will later be laid.
- Place the 2 frames made horizontally opposite each other, tie them diagonally and horizontally with boards that will serve as ties.
- Lay the flooring from the boards on the horizontal ties and attach it to the lintels with self-tapping screws.
- Attach the railings to the posts and secure the stairs.
If it is necessary to lengthen the scaffolding structure, connect several similar sections of boards together. The boards are placed on the support posts.
When assembling wooden scaffolding, if nails are used, it is recommended to pre-drill holes to prevent the boards from splitting.
Design

All forests consist of the following elements:
- racks;
- diagonal and horizontal struts (they give spatial strength to the structure);
- flooring lintels;
- a flooring made of boards on which a person will stand;
- stops (to create stability of the scaffolding and prevent it from falling away from the wall);
- a fencing element (so that a person standing on the flooring does not fall down);
- ladder (stepladder) for climbing to the desired level of scaffolding.
Made of wood and boards

You can find quite a lot of advice on how to make scaffolding on the Internet. Moreover, the recommended designs differ mainly from each other only in the thickness of the board and the size of the scaffolding itself. To avoid getting confused in all this “diversity,” try to focus on the following values:

Let's get started:
- Prepare the necessary materials in advance:
- boards with a thickness of at least 50 mm and a width of 100 mm (or round timber, or timber 10x10 cm) - for racks and stops;
- boards for spacers and fencing 30 mm thick;
- boards for lintels and flooring 50 mm thick;
- nails (screws in this case are less reliable).
Photo instructions
We invite you to view a number of photographs on the topic of how to make wooden scaffolding yourself:


From a profile pipe

Now about how to make scaffolding (collapsible) from metal (dimensions of one section: height - 1.5 meters, width 1 meter, length 1.65 meters). Determine the number of sections based on the height of the scaffolding you need.
- Prepare the necessary materials:
- for racks - profile pipe (square section) 30x30 mm - length 1500 mm;
- for spacers - a pipe with a diameter of 15 mm;
- for connecting inserts (adapters) – profile pipe 25x25 mm;
- Make the flooring from boards 40-50 mm thick and 210-220 cm long.
- for diagonal elements – 2 meters;
- for horizontal elements connecting the racks from the sides of the structure - 96 cm each.
"Pros and cons"

Firstly, scaffolding is not a small scaffolding, but a rather bulky structure that will need to be stored somewhere after the need for it disappears.
Wooden scaffolding, of course, can be disassembled later, but the work is labor-intensive, and the boards, if you don’t need them in the near future, also need to be stored somewhere. Do not forget that wooden scaffolding is assembled using nails, not screws, so the boards will no longer be completely intact. In addition, when working on scaffolding, the wood often gets dirty with mortar or paint.
Homemade metal scaffolding It will be possible not only to disassemble, but also to rent out in the future.
Secondly, non-prefabricated scaffolding is designed to work maximum at the second floor level (from the ground). Operation at higher altitudes homemade scaffolding becomes dangerous.
Thirdly, scaffolding is required quite rarely (only for repairing the facade of a building), so the assembly and disassembly of such a temporary structure is not profitable in terms of the time spent on this work.
Fourthly, scaffolding often has to be made long (for example, at least 6 meters for installing siding). Accordingly, their weight increases, and moving homemade wooden scaffolding to the other side of the house becomes a problem even for three or four people.

It is worth thinking about forests at the stage of designing a house.
If facade works If you don’t plan to do it yourself (but are going to hire a construction team), then you don’t have to think too much about scaffolding, since builders usually come to the site with their own scaffolding and scaffolding.
However, after construction is completed (and after some time has passed), scaffolding may be needed for minor facade repair work. Can this be avoided?
Certainly. And first, make sure that the facade of your house does not require repairs for many years. To do this, it is enough to use it when building walls. facing brick. Now it is produced by many manufacturers and in a fairly wide range of colors.
But others facing materials(such as siding, plaster and others) will periodically require your attention and, accordingly, additional expenses, since you won’t be able to make scaffolding (buy or rent) for free.
Video
From this video you will learn how to make scaffolding for apartment renovation:
Photo
The photographs show various designs scaffolding:


Scheme
The diagrams will help you design your own scaffolding:


All photos from the article
When carrying out various works at height - from laying walls to façade cladding or applying plaster, it is necessary to construct structures that will allow the work to be carried out comfortably and at the same time ensure safety.
Professional builders use metal scaffolding, which is a prefabricated modular systems, which can have very different sizes, but for private use it is easier to build a structure from boards; this is the option we will consider in the article.

What you need for work
Before you build scaffolding from boards with your own hands, you need to prepare all the required materials and tools:
| Racks | For them, either a board measuring 50x100 mm or a wooden beam with a cross-section of 100x100 mm is used, these elements will bear the main load and support the entire structure, so you should use only high-quality lumber without large knots, damage from woodworms and rot, this is very important for ensuring safety |
| Flooring and lintels | For these elements, a board with a thickness of 40-50 mm is used; it is important that the flooring can easily withstand the weight of several people and a small supply of materials (if necessary) |
| Spacers | Elements that impart rigidity and preserve the geometry of the structure being built are made from boards 30-32 mm thick; it is also used to create fences, which are mandatory to ensure a safe working process, because it is never excluded that someone will slip or trip on the scaffolding |
| Fasteners | Either nails or self-tapping screws of large thickness are used to ensure maximum reliability and the strength of all connections. Can also be used modern version– mounting angles and plates, with their help the structure can be made even more reliable and durable, and besides, the price of these elements is low |
Important!
Don’t forget about the tool, as you will need to cut wood, hammer in nails or tighten screws, as well as take measurements; the easiest way to do this is to use a tape measure, a square and a construction pencil.

The working process
The instructions on how to make scaffolding with your own hands from boards are quite simple, it is important to follow all the recommendations and requirements, this is where we will begin to consider the issue.
Basic design requirements
There are several generally accepted rules, the observance of which guarantees the reliability of the scaffolding you collect and ensures the highest safety:
- The distance between the posts should not exceed 2-2.5 meters, since with longer spans the wood will not be able to provide adequate rigidity, especially under high loads;
- The width of the decking to ensure comfortable work should be at least 1 meter, but making the structure wider than one and a half meters is also not recommended, since the stability of the system will suffer;
- The maximum safe height of the structure is 6 meters, this is due to the fact that the maximum length of lumber is the same, and it is not recommended to build up elements.

Stages of work
The whole process consists of several operations that must be performed in a certain sequence:
- First you need to connect the first 4 racks, to do this, first the long side is fastened together, this is done using diagonal struts, the second element is assembled in the same way, after which the end sides are connected using the same spacers, then the resulting structure must be installed and checked for stability, if necessary, reinforcement is made using additional jumpers and perforated corners;

- Next you need to secure the jumpers, their location depends on the level at which the work will be carried out. It is important to calculate everything correctly to ensure the convenience of the process; if two rows of flooring are used, two rows of jumpers are made accordingly; they will also serve as elements providing rigidity; to further strengthen the support, it makes sense to attach them to corners with stiffening ribs;
- The flooring is arranged along fixed lintels, for its construction, only a reliable board without cracks or damage is taken, it is necessary to cut it into pieces of the required length so that unnecessary parts do not stick out at the edges, these elements are best fastened using self-tapping screws, since they cause the wood to crack much less, and fixation is obtained much better;

- Next you need to attach the fencing elements, their location directly depends on the location of the flooring. The general rule is that the elements should not be lower than waist level, sometimes it makes sense to nail two rows of boards for even greater security. Here lumber with a thickness of at least 30 mm is used so that, if necessary, it can withstand a sufficiently large force and not break;
- The next stage is installation supporting elements , their number and configuration depend on the characteristics of a particular situation, the height of the scaffolding and the reliability of the soil around the house. Here it is important to learn one simple rule - install as many supports as necessary to ensure the best stability of the system you have built. The elements rest well on the soil, after which they are attached to the support posts;
Advice!
If the structure is wooden, then for additional reliability the system is attached to the walls, this will significantly strengthen the structure, everything is very simple: one end of the block is fixed on the stand, and the other on the wall.
A person's height is less than the height of the house, so it is impossible to lay walls or finish the facade without scaffolding or scaffolding. These designs allow you to safely work at heights and make it possible to always have a supply of consumables on hand.
Builders have their own terminology used to refer to such devices.
They call forests structures that are quite long and tall. “Goat” scaffolds are usually called low portable tables that can accommodate no more than two people.
If you have to lay walls, insulate, repair or decorate the facade, then think in advance about what scaffolding or scaffolding will be required for the work. For our part, we will tell you how to make scaffolding with your own hands strong and stable, saving a lot of money on their rental.
Scaffolding design options
Despite the wide variety of types of scaffolding, their designs contain elements that are identical in purpose:
- Vertical posts (accept the work load and transfer it to the ground).
- Diagonal and horizontal couplers (provide spatial rigidity of the frame).
- Jumpers (short side elements scaffolding on which the flooring is laid).
- Flooring (boards knocked together that serve as a working platform for builders).
- Persistent slopes (protect scaffolding from tipping over).
- Railings (protect workers from falling).
- Stairs (used for ascent and descent from work platforms).

The material for assembling scaffolding and scaffolding is traditionally wood or metal. A wooden structure is cheaper than a steel one, but can withstand no more than two or three reassemblies. After that, it is only suitable for firewood.

Metal scaffolding is several times more expensive than wood, but has no restrictions on the number of cycles of use. They are easily dismantled and moved to a new location. Their design allows you to build additional tiers as work progresses, increasing the working height.

If your plans include the construction of several residential buildings and outbuildings, then it is better to make homemade scaffolding from profile metal. If high-altitude work will be carried out only once and at one site, then it is more profitable to assemble a structure from beams and boards.
Features of making wooden and metal scaffolding with your own hands
Before you start preparing parts for assembly, you should make a schematic drawing and put on it the main dimensions of the structure.
There is no need to fantasize here, since construction practice has already determined the optimal dimensions of scaffolding:
- maximum height of the structure - 6 meters;
- distance between racks from 2.0 to 2.5 meters;
- The width of the working floor is 1 meter.
Ergonomics has established that maximum productivity is achieved when the builder’s hands during work are 30-40 cm below chest level. Therefore, jumpers for installing the first flooring must be placed at a height of 40-50 cm from the ground level. This will save you from having to put together low scaffolding.
It is better to provide fastenings for the second level flooring at a height of 180-200 cm. The third flooring is placed at a level of 360-400 cm.
If you decide to make a structure from boards, then buy the following set of lumber and fasteners in advance:
- For cutting racks and thrust braces - timber with a section of 10x10 cm or boards at least 10 cm wide and 5 cm thick.
- Spacers, ties and railings can be made from edged boards"thirty".
- For the flooring and the lintels on which it will lie, boards 4-5 cm thick will be required.
When choosing between nails and self-tapping screws, you should remember that nails are more difficult to remove when dismantling scaffolding. Self-tapping screws, on the contrary, are quickly unscrewed from wood with a screwdriver. However, they are worse at breaking than nails, since they are made of brittle hardened steel. Therefore, for making small forests We can recommend the use of nails, and for long and tall structures - self-tapping screws.

Scaffolding from boards is assembled in the following order:
- on a flat area, parallel to each other, lay out 4 racks of timber or boards, cut “to size” according to the height of the scaffolding;
- the racks are connected by horizontal jumpers on which the working flooring will be laid;
- the two resulting “ladder” frames are placed vertically one against the other and connected with diagonal and horizontal ties;
- a flooring made of boards is placed on the horizontal lintels and secured;
- the scaffolding is fixed on two side bevels;
- Railings are nailed to the racks, the ladder is placed and fixed for climbing.

If there is a need to install two or more sections of wooden scaffolding, then they can be tied together with wide sections of boards, stuffed onto adjacent racks. To prevent the nails from splitting short boards, drill holes in them before driving.
Scaffolding made from profile pipes their design is similar to that of wood. The difference between them is the use of adapters. They are used to increase the number of storeys of a metal structure.
A set of blanks for assembling one section includes the following elements:
- Profile pipe 30x30 or 40x40 mm for racks and lintels (4 pieces of 1.5 m and 4 pieces of 1 meter).
- Thin-walled round pipe with a diameter of 20 mm (4 pieces of 2 meters each for diagonal ties).
- Profile pipe 25x25 mm or 35x35 mm (8 pieces of 10 cm each for the manufacture of adapters and bearings). To make railings, you can take the same pipe - 1 piece 2 meters long.
- Steel plates 10x10 cm, 2-3 mm thick (4 pieces) for thrust bearings;
- 10 bolts with nuts and washers for connecting the diagonal ties together and securing them to the frame posts.

The assembly of a single-level section of metal scaffolding consists of several operations:
- to the assembly panel ( OSB sheet) clamps rigidly fix the scaffolding posts ( high accuracy when working with metal - a very important factor);
- horizontal jumpers are welded to the racks;
- adapters from pipe scraps are inserted into the upper ends of the racks 5 cm and fixed by welding;
- having removed the racks with jumpers from the assembly board, they are turned over 90 degrees and in this position are again fixed to the board with clamps;
- the ends and middle of thin-walled pipes intended for diagonal bracing are flattened with a hammer and holes for bolts are drilled into them;
- Having tightened two diagonal ties in the middle with a bolt, they are placed on the racks and the places for drilling holes are marked;
- the couplers are fixed to the racks with bolts and tightened with nuts;
- holes are drilled on the posts and railings for bolted connections;
- plates (thrust bearings) are welded to pipe sections;
- the assembled structure is placed vertically and thrust bearings are inserted into the lower ends of the pipes;
- Flooring from “magpie” boards is laid on the side lintels.
Helpful advice: to prevent longitudinal displacement of the flooring, you need to screw 30x30 mm steel corners to its lower part at the point of contact with the lintels.
Diagonal ties must be fastened on one side of the scaffold, and horizontal ties on the other, so that they do not interfere with each other during assembly.
If the installation of scaffolding is carried out with the extension of a section of the third tier (4.5 meters), then holes must be made in its racks for attaching a profile pipe of a thrust bevel, which protects the structure from falling.
In the lower and upper parts of the racks of each section, it is necessary to drill holes for bolted connections with other sections (when extending the scaffolding in length).