Do-it-yourself reliable door. Welding a metal entrance door with your own hands. Door Making Guide
Read also
The choice of metal doors on the market is quite large, and everyone can choose the best offer for themselves. But the high cost of factory products is often a deterrent, and their developers cannot predetermine all the buyer’s needs. In addition, custom-manufacturing a structure with a unique geometric shape or using atypical materials can result in a significant increase in costs and timescales. When you make it yourself, you can be more confident than ever in the quality and perfection of the door you create.

If you have suitable materials and tools and at least minimal skills in handling them, you can prepare a good metal door quite quickly. The main thing is to strictly observe the sequence of technological operations and the requirements for each of them.


Peculiarities
The manufacture of metal door frames begins only after measurements. Be sure to leave a gap of 2 cm on all sides so that the box fits easily and freely into the opening. There are also necessary gaps from the canvas to the box, and the sheet of metal should slightly overlap the edges of the frame. The weld seam should not be longer than 4 cm, and there must be at least five seams per meter. To make hinges, you need to take a metal rod with a diameter of 2 cm, which is welded to the box on one side and to the canvas on the other. A prerequisite for the success and long service of a homemade door is thorough anti-corrosion treatment.


The choice of materials for cladding and its features vary very widely; in fact, you are limited only by your own stylistic preferences.
How to make: step by step process
Assembling a metal door with your own hands will definitely require the use of:
- Steel sheet (thickness not less than 1.5 mm);
- Metal corner;
- Loops (how many are needed determines the strength of an individual loop and the weight of the block);
- Lock, handle and other accessories;
- Material for cladding the outer surface;


- Polyurethane foam;
- Anchor bolts and electric drill;
- Welding equipment;
- Welding table;
- Assembly goats;
- Angle grinder with a disc for metal.
But this list is only approximate and preliminary; it can be modified and clarified depending on what kind of entrance door you need. High reliability is ensured only thick steel sheet or sandwich option, that is, a pair of sheets separated by insulating material.

An iron door must be made according to exact dimensions. Standard openings reach 80-90 cm in width and 200 cm in height.
To completely eliminate errors in measurement, you need to reach the very base of the walls, knocking down layers of decorative coatings on a certain part of them. Or make a cut through the vertical trim using a hammer and chisel. You need to measure on each of the four sides, both inside and outside.

Leaving a gap of 2 cm, There is no need to be afraid - it will help correct the misalignment of the opening, and when there is no need for adjustment, it can be easily covered with polyurethane foam. A corner is cut strictly to the dimensions of the box and placed on any rectangular plane, ideally on a welding table. If you use sawhorses as a stand, do not forget to check their geometry. Only if the lengths of the diagonals coincide with each other can the corners be welded.

In most cases, it is enough to create a structure from a 1.5 mm corrugated pipe or a 45x3 mm equal-flange angle - a thicker structure still will not become truly armored, but it will also be prohibitively heavy. If you have a low level of welding skill, you should buy a 0.2 cm sheet, there will be less risk of burning it.


Next, a cutout for the lock is made in the profile using a grinder. Wooden slats of a certain length need to be hammered into the frame, this will then simplify the covering of the structure. A hinge block made of a metal profile is welded onto the hinges and the box, which will make the remaining welding work much easier. Pay attention to the accuracy of measuring the distances between loops, they must be the same on the boxes and on the frames, otherwise installing the door at the entrance to the apartment will be too difficult.

Making sliding doors is not much more difficult than ordinary ones. This solution will save a lot of precious space in small-sized housing. The classic sliding system (compartment) can be suspended or cassette; Some options are equipped with top and bottom guides. It is the latter type that should be recommended to those who do the work themselves, because it is more reliable than others. But you will need to take care about the correct alignment and fastening of parts.


The gaps should be as small as possible, and the fit should be done as accurately as possible. A threshold or recess is made at the bottom so that the rail can be mounted.
It will take a lot of time to clean the guide, otherwise under the influence of small debris it will quickly become clogged with dirt and fail.


Hanging systems can be attached to the top of the doorway or to the ceiling itself, depending on how high the door and room are. The canvas in this version is located 1-1.5 cm from the wall, and it will not be possible to place a single piece of furniture in this space. False panels that mask the upper rails can be installed both on the area itself along which the door moves, and on the entire interval from one wall to another. A more labor-intensive, but also more interesting from a design point of view, option is to place a “border” around the perimeter of the room. Such a decision will have to be abandoned, if it is not possible to place the guide high enough.


A cassette door can be made if a special structure (niche) into which the panel should be retracted was initially provided when creating walls or partitions. You can use an additional plasterboard block, but it will absorb 10-12 cm of room space. When the first priority is a tight fit of the end of the door when closing and enhanced sound insulation, and the room is large enough, this can be neglected. Unfortunately, even the simplest designs of sliding cassette doors, created independently, will turn out to be very expensive to implement.


The cascade type differs from the traditional one by using not one, but several canvases at once, each of which has a special rail. If you need to divide a room into two parts, the device should separate like a partition. A group assembled next to one wall will be able to block the entrance to the room only by the width of a single canvas.

Assembling a product according to the accordion pattern is even more difficult. It is not recommended to do this yourself without professional installation skills. In addition, “accordions” almost do not interfere with the spread of sounds and the loss of heat.


To mount a radius sliding door, you will need to build a semicircular wall of plasterboard; Whether to install it in a doorway or use it as a full-fledged partition at full height is up to you and only you. If desired, you can supplement this design with a cassette, inside which the canvas will “hide”. Most often it is formed from hollow walls inside. As in the case of the “accordion”, If you do not have sufficient experience and skills, you should not take on the job.


The easiest way to make a hanging sliding door. Calculate the fittings elements properly. It is better to provide an excess safety margin than to face the sudden destruction of your product. The canvas will inevitably be larger than the doorway itself. The length of the upper guide is determined as double the width of 1-2 canvases.

Double doors begin to be made just like regular doors - by measuring the existing opening. It should be wider than the box, 90-110 mm.


If you need to narrow an excessively large passage, use:
- Lumber;
- Putty;
- Plaster.

By purchasing butterfly hinges, you can avoid screwing them into the wall. When hanging a swing door, it is necessary to take into account the floor level; the horizontal and vertical axes are strictly observed. When gaps appear, they are sealed using polyurethane foam. Don't forget to carefully remove any excess., which necessarily falls on the free surface.

Masking of cracks is done using platbands; holes for installing handles and locks are made before final hanging. When the installation is completed, immediately check whether the doors are level and whether they open smoothly or not. You should choose a safe lock with a cylinder or lever device for the entrance; additional protection against drilling is guaranteed by an armored lining. Never place locks on the ends of doors, such an arrangement will make the home almost defenseless from any intruder.

To insulate a metal door, it is advisable to use mineral wool, which allows water vapor to pass freely and does not accumulate moisture.


Installing a door with a window is almost no different from ordinary work. The required opening can be easily cut with a grinder. Be sure to prepare stiffeners, including diagonal ones.
This opening is filled with a decorative grille, and when the canvas is painted, you can start working with glass.
Welding technology
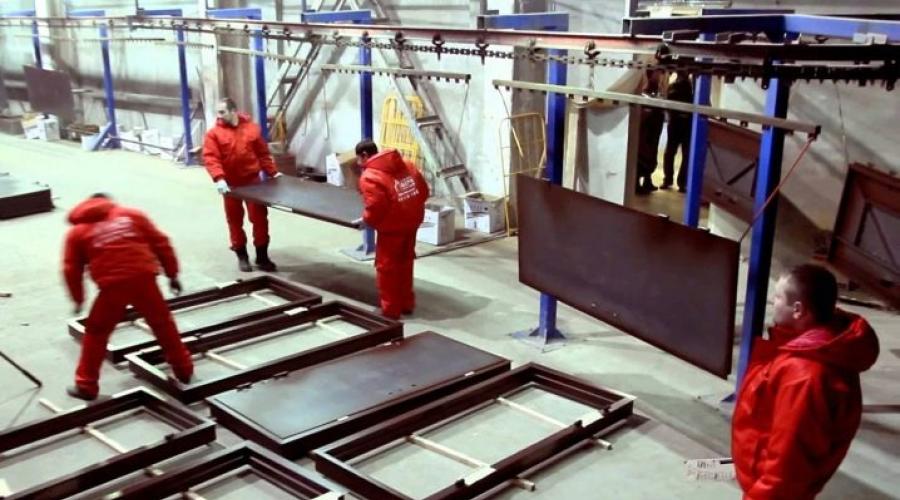
It is not difficult to weld a metal door yourself, but it must be done in small parts. Do not make seams longer than 4 cm. From the beginning of one seam to the beginning of another there should be exactly 20 cm. Work is done from the center to the edge using the reverse step method and from different sides. When cooking a door at home, take your time, Take breaks from time to time to allow the product to cool down.

Then the workpiece needs to be raised above the welding table, pieces of pipes and profiles are placed under the box. The hinges are made of steel rods with a diameter of 2 cm. To make them work better after joining the box, a ball of bearing is placed inside any hinge. Pay close attention to so that the axes of the upper and lower loops coincide. The top of the loop is attached to the sheet, and its lower fragment must be welded to the box.

The tacks must be cut off immediately after the hinges are welded. Entrance doors are brought to perfection by sanding the seams and applying paint. You can insert the lock without any problems: a fragment is cut from the corner of the frame in such a way that the lock can be inserted without problems, but there is no gap left. After installing the locks, mark holes for fasteners, keys, and handles. This marking will help you drill the appropriate holes.


How to finish?
Door decoration can emphasize the asceticism and severity of forms or bring a feeling of lightness and grace to the space. In both cases, solid wood and veneer can be used. Since self-assembly of doors is designed to save money, the covering is chosen cheaper; warm upholstery made of MDF is often used, which is in no way inferior to more expensive products made from elite types of wood.

An insulated metal door is not a luxury! This is a vital necessity in our climate. So, in the corridor there was a door made of hardwood. Its main disadvantages were its enormous weight and the constant cold that passed through the cracks in the wood. This is, to say the least, not good. And in the end, it was decided to replace it with a metal one, and insulated one.
So, making a metal door will be done with your own hands! Why independent production? It's simple! The quality of both the metal itself and the insulation of cheap doors is questionable. I wouldn’t want to come home one day and discover that you were robbed by opening the door with an ordinary can opener. Or, in the cold winter, look at a frozen door... On the other hand, really high-quality doors cost money, and not little. And there is no desire to part with a round sum either. That’s why we focus on making a metal door with our own hands. In this case, you won’t have to worry about quality and you won’t need large financial investments.
What are the requirements for this door? It should be light, not allow heat to pass through, and have a lock. This is more than enough.
What tool do we need?
- Grinder, cutting wheel for metal and grinding;
- welding machine, 3 mm electrodes;
- hammer, chisel, core;
- screwdriver;
- tape measure, chalk;
- drill, drill 4 mm, 9 mm;
- file;
- square
Material:
- corner with shelf 40 mm;
- corner with shelf 25 mm – 1 m;
- rod 8 mm – 2 m;
- metal sheet 2 mm;
- insulation (foam or wool - basalt or mineral).
- lock;
- QSB or OSB sheet;
- wood screws 51 mm long;
- riveter, rivets 12 mm (diameter 4 mm);
- overhead handle;
- mortise lock;
- sealing tape.
First of all, we take measurements from the loot; we will also make it from a corner. In this case, its dimensions are 1880 mm * 840 mm.
Cut the corner to size.
 Then, on the corners of a length of 1880, measure 40 mm (the width of the shelf) and draw a connecting line at an angle of 45 degrees.
 We file the corner and process it with a file, leaving no burrs.
 We perform this operation with the remaining corners. We attach the loot to the doorway. To do this, you will need screws or dowels, depending on the wall material. We mark a long corner, we will fasten it with 5 screws. On each edge we make an indent of 20 mm and mark it. We divide the corner in half, put a mark and retreat 470 mm from each edge, mark the same.
 We core the metal in the marked places and drill with a 4 mm drill. This is done from the back of the corner. Then we turn it over and remove the chamfer. The diameter of the drill should be equal to the diameter of the screw head, in this case 9 mm.
 Let's move on to making the door frame. We measure the wall thickness of the corner - 4 mm. The gap between the hatch and the door should be 5 mm on each side. It turns out that the width of the door frame is 840-4*2-5-5=822 mm. The height, in turn, is 1862 mm. Everything is done in the same way as in the case of loot.

 We clean the welding seam inside and outside the slug with a grinding wheel.
 We weld the door frame in the same way.
 We divide the door frame into 3 parts and apply marks. We weld rods in these places, which serve as spacers and will create a stiffener for the sheet of metal.
 We cut the corner with a 25 mm shelf into equal parts of 30 mm. Quantity – 14 pieces. We will have an OSB sheet attached to these corners. At a length of 820 mm there will be 4 corners, at 1860 mm - 5 pieces. We weld the corner pieces. Don't forget to beat off the slag.
 You should take extra sealing tape. We cut 6 pieces of 30 mm each, and glue them in the corners of the loot, as well as in the middle. This is done so that ultimately the door fits snugly against the hatch.
After this, we put the skeleton of the door in the loot, grab the canopies (you can also make them yourself, more details), and scald them.
 We remove the door frame from the hinges, mark a groove for the lock tongue, drill holes and bore them with a file.

 We weld a plate under the lock and attach the lock to it at three points.
 Place the sheet on the door, mark it, cut it off.
 We will attach the sheet to the skeleton with rivets. Since the thickness of the sheet with the corner is 6 mm, rivets should be taken with a margin. Their length is 12 mm. We fasten the sheet along the contour of the frame and at 4 points in the middle.
 The outer part of the door is ready.
Let's move on to insulation. We cut the mineral wool into pieces, adjust it to the size of the door and lay it.
 We transfer the size of the inner part of the door frame to the OSB sheet, mark it and cut it with a hacksaw for metal (can be slotted). We drill holes for rivets, an overhead handle, and saw a groove for the lock handle. Let's rivet. We glue the sealing gum onto the loot. At this point, the insulated metal door from the corner is ready. In terms of its characteristics, it is not much inferior to expensive store-bought ones, but it costs much less.

Despite the fact that there are many models of entrance doors on sale, in some cases it is quite difficult to choose the right option. Some are not satisfied with the dimensions due to the non-standard opening at the installation site, others are afraid of hidden defects in the product, and others are embarrassed by the high cost of the kit.
Making a metal door yourself, with proper organization of the process, has a number of advantages. For example, you don’t have to worry about the quality of the design; you can assemble it according to any acceptable drawing, and there won’t be any problems with the design - there are many techniques. In addition, the costs of assembling and finishing the block will be minimal.

Preparation stage
Work should begin by dismantling the old door and completely cleaning the opening. Only after a thorough examination of the condition of the base can one conclude whether it is suitable for installing a metal structure or not. It may be necessary to narrow (expand) it in accordance with the required dimensions and further strengthen it. The latter is typical for buildings made of cellular concrete, wood, as well as other materials with a significant degree of wear. Consequently, the necessary technological operations are carried out.

After obtaining a passage in the wall with the correct geometry, you can begin taking measurements. Based on this, a drawing of a metal door is developed. In addition to determining the dimensions of the frame and sash, you should also choose a design diagram. First of all, in which direction is it more convenient to open the canvas, where is it better to install locks, hinges (their number) and fittings (handle, peephole) on it. Sometimes it is advisable to make a “one and a half” version. In it, the small sash is rigidly fixed, but if it is necessary to temporarily expand the opening (for example, when moving large loads), it is easy to open it.
- The design of a metal door is drawn up taking into account the fact that there should be a small gap (about 15 - 20 mm) between the jamb and the base. It is called editing. It allows, firstly, to correctly align the frame, adjust its position, and secondly, to additionally insulate the opening around the perimeter.
- The hinges on the door are placed at an equal distance from each other, and their number is determined by the weight of the leaf; With its light weight, two canopies are enough. But in any case, their distance (top and bottom) from the sash cuts is selected to be about 150 mm (for openings of standard height).

Materials and supplies are being prepared. When working with iron, welding will be required. Plus, a hammer drill (electric drill with a chipper) and a grinder. Everything else is ordinary household tools, a square, a tape measure. It’s a little more difficult with materials; you’ll have to choose.
- Corners or profiles (with a side of 4 cm) are suitable for the frame. Here it is worth focusing on the purpose of the structure, the requirements for its stability and the option for further finishing. If high-quality insulation and increased strength are expected, then a door made of a profile pipe is the best solution. But stiffening ribs can also be made from a corner.
- The frame covering is made of sheet steel. It is necessary to optimally combine such indicators as the total mass of the canvas and its strength. But in any case, it is not recommended to use metal less than 2 mm thick.
- Fastening elements. Any iron door, whether homemade or purchased, is fixed in the opening with anchor bolts. The only exception is for models mounted in wooden (frame) buildings. As a rule, when installing doors yourself at their entrance, they are attached to special frames or to the base using welding or large hardware.
Everything else - seals, thermal insulation and finishing materials, fasteners, fittings - is at the discretion of the master.

If you lack experience in making steel doors with your own hands, it is better to limit yourself to overhead hinges. Hidden canopies are much more difficult to install and require a professional approach.

The procedure for manufacturing metal structures
A do-it-yourself iron door, regardless of its diagram and drawing, is assembled according to one algorithm. Initially, individual elements are made.
Box
There are no problems with it, but provided that all measurements and cutting of blanks are made correctly, in strict accordance with the drawn up drawing. It is not difficult to weld individual parts into a single structure of the correct geometry. You just need to work on a perfectly flat, hard surface and constantly monitor the angles. Once the jamb is assembled, all seams are carefully polished with a diamond disc.

It is mandatory to weld hinges and fastening strips with drilled holes to the box. Using the final details, it is fixed to a wall made of any material.

Door leaf
- The frame manufacturing technique is absolutely identical.
- For reinforcement, stiffeners are installed according to the selected pattern.
- A groove is cut for the lock tongue.
- Frame sheathing on one side. It is produced by fastening steel sheets by welding, with a slight overlap. In the area of the hinges it is about 5 mm, along the length of the frame it is about 10 - 15. It is recommended to “tack” the cladding with several seams, no more than 40 mm in length. To ensure reliability of fastening, the intervals between adjacent sections are selected within 20.

- Depending on the design, at this stage of assembling a metal door, the lock fastening elements are installed, the hinges are welded (those parts that are attached to the leaf) and a window for the peephole is cut out.

- If it is planned to insulate the sash, then heat-insulating material is immediately laid; it is placed between the stiffening ribs, which prevents it from sagging under its own weight.

- All that remains is to weld the second sheet of metal to the wrong side of the frame and also cut a hole in it for the peephole and the lock cylinder.
- The last thing to do with the sash is to carry out a control check of its geometry and sand all joints, welds and paint with primer to prevent metal corrosion.
If the “one and a half” scheme is chosen, then all technological operations for the small blade are absolutely identical, with the exception of the peephole and the door lock. But upper and lower stops should be provided for fixation in a stationary position.
Finishing
Making a metal door with your own hands is not all. It must be formatted accordingly. With blocks installed in outbuildings it is quite simple; as a rule, they are painted. But if we are talking about a door at the entrance to a residential building (apartment), then it is advisable to decorate it. The choice of option is at the discretion of the owner, and some recommendations will help with this.
How you can finish the canvas:
- Solid materials - multilayer plywood, fiberboard, vinyl plastic, wooden lining, laminate, MDF followed by varnish coating (colorless or with tinting components).
- Leatherette and leatherette are used to cover the sash.
- The water door to the apartment can be covered with decorative film. Since the impact of atmospheric factors is minimal, this finish will last a long time. And taking into account the low cost and simplicity of design, it is one of the best solutions.

Assembly of the structure
Essentially, it all comes down to hanging the sash, checking its position, the operation of the locks and adjustments (if necessary). All that remains is to install the handle, lock and peephole. If the door design includes crossbars and lower (upper) stops, then you need to make markings.
The sash is covered, and the places for drilling holes are marked on the jamb. After readiness, their coincidence with the fixing elements is checked. This applies to both the main canvas and the additional, small one.

The final “touch” is installing the manufactured door into the opening and lubricating all rubbing parts (which many people forget about). After this, we can state that everything is complete, the work has been completed.

For those who have skills in working with metals and want to get a high-quality iron door at low cost, making it yourself is the best option. Moreover, the drawing, diagram, and external finishing are chosen not by the manufacturer, but by the craftsman. This means that the entrance to the house will not only be reliably protected, but also designed in an original way, and the block structure will fit perfectly into the interior of a particular building.
The front door is the calling card of any home. Therefore, it should not only look beautiful, but also provide good thermal insulation and be harmonious with the design and architecture of the building. The safety of property, as well as the protection of housing from the penetration of cold air, precipitation and noise from the street, directly depends on the strength and reliability of this structure.

Today, the choice of doors is provided in a wide range, and each model differs in its configuration and external shape. The entrance structure can be purchased ready-made, made to order, or made independently. This may surprise many, but there is nothing complicated about it, you just need to take the correct measurements, choose the right model option and be patient.
It is worth noting that the home-made structure will have an original design and will highlight the entrance to the room in a special way.


Features and models
Entrance doors are installed both in apartments and in private houses. Regardless of the location of this structure, its direct purpose is considered to be reliable protection of housing from cold, noise and burglary. Therefore, when choosing this or that front door model, you need to take into account many nuances. Recently, homemade structures made of metal and wood have become extremely popular, while metal doors are distinguished by their functionality and design features; they are resistant to explosions, burglaries, fireproof and bulletproof.
As for wooden options, they are characterized by an original aesthetic appearance; doors with sliding systems also deserve special attention.


Today there are many types of entrance doors. According to their purpose they are:
- Fireproof and bulletproof. Such products are made of high-strength metal. In addition, these types of doors are additionally treated with reinforcing compounds.
- Shockproof. They are the most reliable option for protecting your home.
- Soundproofing. Prevents noise and sounds from entering the house.
- Sealed. Often installed in outbuildings.


Entrance doors can open in different ways. There are swing and sliding models of structures. In addition, doors are classified by the number of leaves and are:
- Single leaf. Made from solid fabric.
- One and a half. They are a structure consisting of two parts, where only one opens.
- Bivalve. Large doors with two opening leaves.


All entrance doors differ in appearance and shape, so a distinction is made between rectangular and arched products. Designs with a blind transom are also popular.
Recently, manufacturers have been trying to make the entrance to their homes unusual, so they often decorate the doors with glass.


Materials
Entrance doors are made from various raw materials, with metal and natural wood most often used for self-production. It is worth noting that the functional properties of the structure will depend on the chosen material, since a good and high-quality door should not allow cold air to pass through and completely isolate the house from extraneous sounds.
Despite the fact that metal products are very popular, wood does not lose its advantages and is often used in the production of doors. Such models are found both in modern apartments and country houses. As a rule, such wooden structures are made from solid oak, as well as birch and pine. Wood doors provide excellent insulation and retain heat well.


Thanks to the unique characteristics of wood, products made from boards protect homes from the penetration of cold air currents.
To ensure that such products do not rot or become moldy during operation, they are additionally treated with special solutions that reliably protect the canvas from wood pests and increase their service life. In addition, wood is easy to process and decorate with various inserts or carvings. The only disadvantage of this raw material is its high cost, so plywood panels are often used as an alternative.


Unlike wood, metal structures have more advantages. They are strong and durable, and in order for such products to provide optimal insulation, they are coated with a protective layer. Metal doors are also painted with enamels and varnish, this protects their surface from rust and allows installation both indoors and outdoors in country houses.
For self-production of entrance structures, as a rule, steel sheets are chosen.


Recently, you can also find plastic or metal-plastic doors. They are intended for buildings where tambour heating is possible, because plastic does not retain heat. In addition, such products will require additional protection in the form of alarms or grilles. Although plastic is easy to install, it is still not suitable for homes.
A huge selection of colors, the presence of decorative inserts and ease of maintenance make it possible to use plastic doors for entrances to various organizations and offices.


Dimensions
Before you begin work on the manufacture of the entrance structure, you should first determine the dimensions of the future product and correctly measure the doorway. It is worth paying attention to the fact that in each apartment or house the dimensions of the openings may differ. If you plan to install a standard single-leaf door, then you will need leaves 860×2050 mm or 960×2050 mm. If necessary, non-standard panels can be produced. For simple double doors, panels of 1200x2050 mm or 1400x2050 mm are used, but for office premises and private houses it is best to choose larger designs - 1500x2100 mm or even 1600x2100 mm.


Often when installing entrance doors you have to deal with such a problem as non-standard opening sizes. The most optimal solution in this situation would be to expand or fill the opening itself.
Step-by-step instruction
Home renovation takes a lot of time and money, so many owners often decide to take a desperate step and carry out the finishing work and install the entrance doors themselves. Of course, the design can be purchased ready-made, but if you want to save money, then it’s quite possible to make it yourself. Before you start making a door, you need to decide on the external shapes and the load that will be placed on the product.
You will also need to prepare the following tools:
- Roulette;
- Pencil;
- Hacksaw;
- Hammer;
- Self-tapping screws;
- Screwdriver;
- Jigsaw;
- Glue.

In addition, upon completion of the work, the doors must be beautifully decorated, so it is important to correctly measure the extensions, place the frame, and decorate the doorways with platbands or additional elements.
To perform such work, you can choose different materials., but natural wood is considered the most affordable. To make a high-quality product, preference should be given to timber with a width of 5 mm and a thickness of no more than 4 mm. Such canvases will provide excellent sound insulation. In addition, it is easier to install a threshold and put steps in wooden doors. As for the technology of installation work, they are based on correct measurements of the door frame; the maximum connection of the beam with the frame will depend on them. And for an outdoor structure, you will also need to weld the hinges and paint the surface.
To make a standard door, a 205 cm long sheet is assembled, while its width can be different. First, a frame is prepared, which will look like a frame. Then a fiberboard sheet is cut to the size of the frame and secured with self-tapping screws. After assembling such a structure, the fiberboard is glued. It is advisable to strengthen the beams not only with self-tapping screws, but also with glue.


The finished door is thoroughly dried, and then the hinges are screwed on and the lock is inserted. In order for the product to have an attractive appearance, it is recommended to additionally trim it with dermantine on the gasket. This way the door will turn out beautiful and insulated.
When installing the structure, special attention should also be paid to the insertion of the lock. Its thickness should correspond to the thickness of the canvas. In addition, the lock is a thin mechanism, so during its installation a misalignment of even 1 mm is not allowed.


As for painting, this is the final stage of work, and it is carried out only after the box is installed.
How to insulate?
One of the purposes of the entrance structure is considered to be good thermal insulation, so the canvas should be well insulated. Various technologies are used for this. If the box is made of metal, then first of all you need to fill its internal unused cavity. In this case, it is filled with a special insulating material in the form of mineral wool or polystyrene foam. Also, to keep the door warm, it can be covered with wooden beams. The only drawback of this technology is the formation of cold bridges.
The front door is well insulated with dermantine. With this technology, the door leaf is upholstered on only one side, and a thin layer of insulation is applied to two openings. Thermal insulation is glued directly to the door, and then it is decorated with dermantine or genuine leather.


Equally important is protecting the structure from drafts. There are two ways to do this:
- Insulating the gaps between the frame and the canvas. A rubber or foam seal works well as thermal insulation. It is attached using a self-adhesive base and applied both to the box itself and to the canvas.
- Opening the door frame. The outer and inner sides of the slopes are upholstered, and the gaps between the opening and the structure are filled with insulating material.


If none of the types of thermal insulation are suitable, an alternative solution may be to install a second entrance door.
How to weld awnings?
Before installing the entrance doors, it is necessary to weld the hinges (canopies). As a rule, to hold a standard structure you will need two loops, the distance between them should not exceed 20 cm. Before work begins, the canopies are thoroughly cleaned and treated with a special solution. It is advisable to weld the hinges horizontally in relation to the door frame. In the event that the opening is already installed, the welding seam is carried out vertically.
The assortment of the modern construction market is rich: in specialized stores you can. Metal, wood, plastic, combined – all entrance doors have special specifications in matters of manufacturing. The desire to make a metal door block yourself arises for a number of reasons. For example, you want to get a design with specific requirements and additional materials; you need a high-quality product at a minimum cost.
Tools and materials
Making a metal door with your own hands is actually a budget option: creating the product yourself will cost much less than buying a ready-made structure. Of course, in order to make a truly functional and stylish door, you need to own the tool and have some experience in welding.
In addition, you will need competent drawings, high-quality materials and professional tools. We list the main components that are used in the process of creating a metal door composition:

Photo: door perimeter seal
The list of the above materials and tools required to create a metal door is approximate: the final solution depends on the type and functional significance of the future structure. For example, when making a vestibule or entrance door, it is best to purchase a thick metal sheet. You can also use two sheets of metal: in this case, the space between them must be filled with insulation.

A metal workbench will be very useful
Another interesting material for making a door, although not an entrance one, is.
Step-by-step manufacturing instructions
The creation of a metal door consists of four main stages: the manufacture of the frame, the production of the metal leaf, the installation of fittings and the covering of the product. A typical door structure is two meters high and 90 cm wide.

Let's look at the features of working on creating a metal door:
- Frame . The manufacture of the frame must begin after all measurements have been taken. The dimensions of the door frame must be optimal: the metal frame must fit harmoniously into the doorway, so a gap of 2 cm should be left on each side.
- Canvas . Gaps must also be left between the frame and the metal sheet, and the sheets should protrude slightly from the edges of the frame. Welding work must be carried out in small areas. The seams are made no more than 4 cm in length, and the distance between adjacent seams should not exceed 20 cm.
- Accessories . To produce hinges, steel rods with a diameter of 2 cm are used. The hinges are welded to the canvas and the metal frame at the same time. Professionals recommend carrying out mandatory anti-corrosion treatment of the product: with its help, the door will last for decades.
- Facing . You can use any material you like: vinyl artificial leather, PVC film, artificial leather, leatherette and others.


Basic steps in making a metal door with your own hands:
- Take measurements of the opening and leave about 2 cm from the walls to the frame in order to eliminate all the cracks with polyurethane foam. In addition, such a gap will correct the installation of the door if the opening is skewed.
- Cut a metal corner according to the selected dimensions (approximate dimensions - 50x25 mm) and place it on the table for welding. Measure the length of the diagonals of the rectangle: they should be equal. You can start welding only if all dimensions are the same. This is how a door frame is made.
- Measure the finished box along the internal space, taking into account a 1-centimeter gap on each side of the structure around the perimeter. Cut a corner with dimensions of 40*25 cm for the blade. Use a grinder to make a small slot in the lock profile at the optimal level for installing the lock.
- At the same time, wooden slats of optimal dimensions are hammered into the metal profile. This is done to simplify facing work.
- Also, for ease of welding, it is recommended to immediately weld the hinge profile to the metal box and hinges. It is necessary to ensure a perfect match between the hinges and the door frame: to do this, carefully check the distance between them. If this condition is met, hanging the door will be easy.
- You should check whether the profiles of the door leaf and the frame are parallel, after which the remaining profiles of the door leaf are inserted into the latter and welded.
- Then the sheet of metal is welded. First, the canvas is measured: on each side there should be 10 mm on the door slam, with 15 mm on both sides of the lock. The sheet is cut to the specified dimensions and placed on the product from the profiles.
- First, the loop part is welded from the back of the sheet in the internal cavity, then the sheet is welded around the perimeter.
- The false strip is welded on the inside of the metal sheet. To better strengthen the door structure, special stiffening ribs can be welded.
- Clean the weld seams and paint the product. It is recommended to paint the door even if you will be covering it in the future. Additional coating will prevent corrosion.
- Install two locks. To do this, a hole is drilled in the corner for the bolt to enter, then a slot is formed for fastening the lock in the metal sheet. You can also cut a hole for the door lock.
- Cover the door. It can be covered with planks or panels made of wood, glued with PVC film that replicates the texture of wood, or, for example, use leatherette. Many people simply paint the canvas and then weld interesting forged decorative elements to it. You can also use shaped metal sheets or soft elements.


Material on topic. Read directly in our review.