Is it possible to paint airplane models with acrylic spray paint? Coloring models for beginners. How to choose a painting method
In fact, the first model is usually not painted, so we go straight to the second step in the modeler’s development - to the moment when he first thought that a heap of “naked” plastic decorated with “decals” was somehow not very beautiful...
Part 1. Essentials
The very first thing a modeler needs to start finishing models is money. Much money. So much money. Regardless of what and in what ways you paint, you need the following things:
1. Actually, the paints themselves (or enamels)
Paint is something that cannot be dissolved or washed off with something just like that. The ceilings in the apartment, for example, are being painted. water-based paints, dilute them with water, and after drying you will wipe them off. Enamels - they can be washed off, and easily, with their own solvent. Example - watercolor paints, dissolve it with water, and then wash it off with water. Models are painted with both, you don’t have to worry about it for now; in the future in the article they will be, both of them, just “colors”, but if necessary, they will be highlighted.
On various forums you can find fierce debates about “which paints are better”, strong arguments are given, sometimes things will come to blows... Do not get involved in such discussions - firstly, if you have not worked with this, then your subjective opinion is only “ will add fuel to the fire,” and secondly, “every cricket praises its nest,” and every modeler works with the paints and varnishes that he was able to get and to which he had time to get used.
So which paint should you choose?
If in your family Small child, then nitro paints will not suit you - they have a very strong smell. In this case, you should turn your attention to a number of water-based or acrylic paints. If you see the inscription “Diluted with water” or “Diluted with alcohol” on a bottle of paint, you know that these are your paints. If you have a hood and everyone is calm about the smell of the solvent, then you can choose nitro paints - they are easier to use, but they are less easy to wash off your hands. It is also easy to “burn” transparent parts with nitro paints and ruin the plastic. Both cost approximately the same.
To paint almost all models, the following paints are required:
- White
- Black
- Silver
The remaining paints required for a specific model can be purchased gradually, as needed. Remember, do not mix paints under any circumstances. different manufacturers or paints on different bases (nitro and water, for example) to obtain the desired color, the paints may deteriorate!
As a rule, one jar is enough for 2-3 models (if painted with an airbrush) and 1 model when painted with a brush, or 8-10 sets of soldiers. The model is average, like an airplane on a scale of 1:72, or a tank or soldiers on a scale of 1:35. There are also special paints for the airbrush, which are very liquid, but it is better not to buy them yet - they are not suitable for a brush; in jars the paint is universal. Hence the difference in paint consumption - when using an airbrush, the paint is diluted, it “becomes larger” and is enough for large quantity models.
2. Soil
This is a liquid applied to the model that prevents the paint from falling off the model after drying. For nitro paints and water-based paints, the primers are different and cannot be changed.
There is one more nuance. If, when painting with a brush, you put nitro paint on plastic, then it slightly dissolves the plastic, “bites into it,” and the primer is not really needed; then when painting with water-soluble paints, a primer is always necessary - water does not dissolve the plastic, and the paint will collect in droplets on the surface. This phenomenon is called “adhesion”, i.e. simplified “wettability”, or the ability of something to spread evenly over any surface. If you don’t believe me, try “painting the plastic” evenly with plain water. When painting with an airbrush, a primer is always necessary, regardless of the type of paint - the paint is applied to the surface already “at the end” in small portions, and it simply does not have enough strength to “eat” the plastic normally and “stick” to it.
3. Varnish
Varnish is necessary so that your model will please your eyes for a long time, and you could easily, say, after a holiday and a prelude display of your achievements, go and wash the model under the tap, without fear of ruining the decals (transfers) and paint. Varnishes are also nitro- and water-soluble. If you painted with nitro paints, then the varnish can be nitro or acrylic (water- or alcohol-soluble); If you painted with water-soluble paints, then the nitro varnish can ruin everything, the surface will “swell” and “rise.” In addition, when using water-soluble acrylic paints, almost every layer should be varnished - these paints are extremely delicate. Usually companies that produce water-soluble paints also produce varnishes for these paints, so be sure to buy them.
Primer, varnish and paint are also sold in aerosol cans. You can buy for both models and cars - as long as the color matches. They do not need a solvent, they are already diluted. But this is for extreme sports enthusiasts with big wallets - an expense paint and varnish material large, and in the apartment, in addition to the model, you will paint everything that will be “in the line of fire” of the spray can.
4. Solvent
Everything is simple here - take what is written on the paint. At the initial stage, this will save you from unnecessary hassle. Then, when you have experience and a bunch of unnecessary jars of paint, you can start experimenting, buying “third-party” solvents, etc. Just like for varnishes, manufacturing companies must also produce a solvent (sometimes called a thinner) for their paints. If it says “Diluted with water,” then you can safely dilute it with boiled water, or better yet distilled water, if you can get it. It is not recommended to dilute raw water from a tap or spring; after all, it contains a lot of all sorts of salts, minerals, etc.
5. Washing
Unlike the wash used by modellers in the sense of “aging the model,” technical wash is a liquid that is used to wash brushes, tools, hands, furniture, etc. and so on. after painting. As a remover, you can use the same solvent that you used to dilute the paint, or you can buy a special one. If you painted with enamels, then you can wash it off with a solvent, but if you painted with paints, then it is better to use a special remover. It is better to wash the tool immediately after finishing the work, otherwise you will have to worry about cleaning off the dried paint.
6. Tara
As a rule, the paints in a jar are thick, and these jars are sold filled to capacity. To work with a brush, you can drip paint into beer or vodka caps, drip solvent into it, mix it and paint with it. There is no need to throw away the cap after painting - firstly, over time you will accumulate a palette from which you can select the desired shade for a specific model.
Secondly, in this lid you can dilute the same paint again (if you try to dilute another, they may mix and you will get a different shade), and thirdly, if you painted with enamel and you accidentally scratch the old model and paint no, you can try to dilute what is left in the lid and “cover it up” with it. I also recommend going to the pharmacy or walking around your house and asking old ladies for glass medicine bottles. Rest assured, they will be immensely happy if you offer them a cash reward for each bottle. For you, who buys paint (and one jar costs at least two loaves of bread), it will not be expensive at all, and for them, modern world, will be very necessary. If you are embarrassed, then go to the pharmacy and buy the cheapest medicines in the required containers. At the moment, for the price of one jar of paint you can buy a dozen bottles of Naphthyzin.
Part 2. Choosing a painting method
The vast majority of modelers can be divided into two opposing camps - those who paint with a brush, and those who paint with an airbrush. Let's not get into such heated discussions about who is stronger - an elephant or a whale, but let's try to figure out how they differ and what we need.
Now it doesn’t matter to us how we paint - the main thing for us is to get beautiful model so that next time we won’t be told, “You’re doing dirty tricks again.” For the first time, buy a model that practically does not need to be painted - the set comes with multi-colored plastic. Manufacturers who produce models of cars and ships especially like to indulge in this. If you see a large, beautiful, non-Russian box with a car or sailing boat, then most likely it contains multi-colored plastic, although it is better to consult with the seller. All you have to do is glue it together and slightly tint it with a brush for greater effect. But you can say “I painted!” and continue your hard journey in further improving the finishing of models.
Done? Have you received the consent of your family (mothers, fathers, wives, children, etc.) to continue the experiments? Let's move on - we buy a model that needs to be painted ENTIRELY. FROM AND TO.
When painting large surfaces, you should think about whether to paint with a brush or an airbrush? The first method is cheaper and more accessible; but the second one is more beautiful, faster and more expensive. When painting with brushes, you only need brushes, but when painting with an airbrush, you need an airbrush and also a compressor. Take a sheet of glass and try to paint it with a brush so that it is smooth, without bumps or streaks. Happened? Then you don't need an airbrush, keep up the good work. If it doesn't work, try again. Doesn't work even after the tenth time? You are hopeless, you will have to buy an airbrush... Or aerosol cans, for the first time.
Have you chosen what you will paint with? If with a brush, then buy brushes, all kinds and different, tasty and sweet, squirrel and kolinsky, large and small, round and flat... If with a spray can, buy required colors. If with an airbrush, then an airbrush and a compressor. In the last two cases you will also need a hood. Although the prices are both latest methods will be equal by the end of the first year, and in the future the airbrush will begin to become cheaper.
Part 3. Assembling the model for painting
First, carefully review the assembly instructions. As a rule, it is designed in such a way that the model remains unfinished after assembly. How? Very simple - after gluing last detail you can't paint in most places anymore.
Therefore, we CAREFULLY study every detail and evaluate where we can climb after gluing, and where we cannot. If we can, then we glue it, if not, then we paint it first, and then glue it.
For figures you can glue everything except weapons; for armored vehicles - everything except wheels, tracks, boxes, shovels, crowbars, etc.; We also glue and paint the cabin first. As a rule, after gluing the body together, it is no longer possible to reach the steering wheel, seats and pedals with a brush. For models aircraft There is no need to glue weapons, landing gear, antennas - they are painted separately from the fuselage, wings, etc. Choose the time for painting the cabin to the best of your ability: if you can paint it separately and carefully insert it, paint it separately.
Each model is individual, so rely on your experience, ingenuity and luck - you can always tear it off and remake it, there can be no definite recommendations here. But if you are afraid of ruining everything, it is better to buy two identical models, practice on the first, and make the second, focusing on the mistakes of the first.
Part 4. Finishing the model.
There is a certain sequence that should be followed if you want to get a beautiful model.
1. Surface preparation
It is well known that paint adheres better to a rough surface than to a polished one. However, the rough surface on the small model significantly detracts from its appearance. Therefore, before applying the first layer of paint and varnish, the model should be made as smooth as possible, and we will achieve the reliability of the coating in another way. in a cunning way, which we will talk about below.
Most modellers smooth the model with sandpaper. If you buy skins not in model stores, then take M40 and smaller. If in model stores, then they will offer you ready set skins, it’s more expensive, but it’s also less of a headache. Take the sandpaper, soak it in water and rub the model until you erase the glue seams and glue-stained parts to such an extent that they are not noticeable to the touch.
The sandpaper needs to be changed from time to time for smaller ones until you have sanded the model with the finest sandpaper you have. If the model has a lot of small protruding parts, such as rivets, imitation of joints of sheathing sheets, etc., then you will suffer for a long time. It's not scary - don't be shy to admit that you sanded one model for six months. Firstly, it will emphasize your patience, and secondly, it will emphasize that you are thoughtful about modeling, and not a blunder. In the future, you will find many more good things in yourself, and your family will be immensely happy that you do not drink away your salary, do not wander around at night, do not cheat on your wife or just the girl you love (it was once simple), and your golden hands are growing. Well, or at least they pretend...
After you have sanded everything, you need to place the model parts somewhere (usually called a mandrel) so as not to paint your hands, and after painting, do not hold the parts until they dry. Very rarely, model sprues are designed in such a way that parts can be painted without cutting them off from the sprues, so anything that catches your eye can be used - toothpicks, the same sprues from models, ice cream sticks, etc. It is necessary to glue the part to these mandrels in the place with which it will then be glued to the model. After this, the mandrel must be stuck somewhere so that the part does not touch anything. For the first time, you can place the mandrel on the edge of the table and press it with a book, and in the future, come up with a board with a bunch of holes into which you will insert the mandrels, like pencils into the cup of a desktop writing instrument.
Planted? That's it, you can't touch the parts with your hands anymore.
2. Degreasing
In order for paint and varnish materials to adhere better, the model must be degreased. You can use anything you can get your hands on - soap, fairies, gasoline... Anything that dissolves fat. It is best, of course, to degrease thin layer alcohol, but where can I get so much of it? Don't know how to degrease with alcohol? You take a sip, breathe on the cotton wool, and with this cotton wool, in a thin layer, wipe the model. Yes, it’s a pity that the alcohol quickly ran out, and the model is not even half fat-free...
Well, after degreasing, you need to remove all traces of the degreaser - if it’s alcohol or gasoline, it will dry on its own, but if it’s soap, fairy or some other kitchen chemical, then you need to rinse the model under running water and set it to dry. The main thing is not to touch the model with your hands. If you see a speck or hair, brush it off with a fat-free brush.
3. Primary priming
In fact, the need for priming has already been said, but it’s better to repeat: “Primer is a liquid applied to the model that prevents the paint from falling off the model after drying.” If you don't want to prime, please don't. Just do an experiment - apply primer to a piece of sprue from this model, let it dry, and then paint both the primer-coated and uncoated sprue at the same time. Let the paint dry and then try to scratch it with your fingernail. If there is a difference, then do what is best. If there is no difference, then maybe it’s true that the primer on this model, for this paint, with this method of applying the paint and varnish material, is unnecessary.
Apply protective coating to clear parts. As a rule, masking tape is suitable for this. The protective coating will come off after the final varnish (or the last coat of paint if you don't want to varnish it). After this, apply primer evenly to the model. If you planted a drop with soil, do not wash it off, but wait until it dries and move on to the next step.
4. Intermediate grinding
If you are not satisfied with the smoothness of the surface after priming, then intermediate sanding is your chance to make things right. Take the finest sandpaper you have and sand the soil. At this stage, the shortcomings made when preparing the surface for applying primer already become noticeable. If you have a ground leak- We also sand it down. If you got carried away and sanded the soil down to plastic, then the priming operation in this place will have to be repeated.
5. Final priming
If you used intermediate grinding, then you simply need to perform this operation. Firstly, with its help you completely cover the entire surface, and secondly, you are finally convinced that the evenness of the surface satisfies you (at this stage you are imitating the application of paint). If the surface does not satisfy you (risks from the sandpaper are visible), then either you sanded with very rough sandpaper, or you missed something during intermediate sanding. Troubleshooting methods - repeat steps 4 and 5 again, reducing the grain size of the sandpaper and increasing the duration of the sanding treatment.
6. Applying the main tone
Look carefully at the color scheme and figure out which color zones are larger (by area). This will be the main tone. The exception is light colors - yellow, silver, red, blue, light gray, etc. If the main tone is light, then it is best to first paint the entire model with white paint (light colors look brighter on it), and only then apply the main tone. The entire model can be painted with the main tone, provided that it is not red. It is not worth blowing out the model in one go; it is better to apply several thin layers. If you are working with water-soluble acrylic paints, then after applying the last layer you should cover the model with clear varnish.
At this stage, the risks from the skin become even more noticeable. If you do not want to see them, repeat steps 4 and 6. If at the same time you again sanded the paint and primer down to plastic, then you need to follow steps 4, 5, 6; in this case, point 5 is not performed on the entire model, but only in those places where you reach the plastic.
7. Applying camouflage
With a careless movement of a brush or airbrush you can ruin the entire appearance model, so be careful with this operation. In general, every modeler applies camouflage in his own favorite way, but there are a few rules that everyone adheres to. Here they are: light colors are applied first, then dark ones; non-working (not to be painted) areas are covered with masks (anything from a piece of paper and tape to any special liquids). Just as when applying the main tone, you should not paint the model in one go; it is better to apply several thin layers. If you are working with water-soluble acrylic paints, then after applying the last layer you should cover the model with clear varnish. If the camouflage is multi-colored, then varnish should be applied after each color application.
8. Final finishing
At this point, do what you want - assemble the model, apply decals, age it, wash it off... There are no strict recommendations at this stage - everyone for himself, everyone builds what he wants and how he can. Sometimes it is more convenient to apply decals and then glue, and sometimes it is more convenient to glue and then apply decals. But it’s best to age it after - to age both the model and the decal at the same time.
The main thing is that if you apply varnish after all this, do not remove the masks (protective coating) from the transparent parts. Otherwise, the transparency of the varnish may be lost, especially if it is a nitro varnish. Although matte varnish on glass is also not very good...
Part 5. Conclusion
If you have carefully read the entire article, you can start modeling! The most important thing is patience, and the rest will follow. Modeling is like that, it requires a lot of time...
In contact with
The main purpose of the coloring of an aircraft model is to make it clearly visible in the air, so that at first glance it is clear in which direction and in what position the aircraft model is flying.
The second factor of painting is to give the aircraft model individuality and beauty, especially in flight. It's one thing when a plain white one flies radio controlled model airplane and it’s a completely different matter when a brightly painted model aircraft frolics in the sky.
In addition, there is such a saying - a beautiful aircraft model and flies well, it came to aircraft modeling from big aviation.
I never learned how to paint my aircraft models beautifully, so all my experiments in this area relate only to the first point - creating a paint scheme for the aircraft model that is clearly legible in the sky.
For this I used:
coloring the aircraft model with markers and then covering it with transparent tape.
Covering an airplane model with multi-colored tape

priming the ceiling with Titan glue, diluting the latter with alcohol and adding ink for an inkjet printer.
But today the question will be about something else - painting aircraft models from ceiling tiles using acrylic paint in spray cans.

My dearest one bought me black and yellow acrylic paint in a store for artists at Winzavod (Kursk). I'm sorry, four, but she didn't have enough money for blue and red. Maybe in a less branded store for artists you can find the same paint at a lower price than 250 rubles per bottle, but in model stores I saw similar balloons with a capacity of 125 grams (versus 400 from an artist store) for the same 250 rubles.
The cylinders are quite voluminous, full painting and touch-up - both models were painted in 4 layers, I spent about a tenth of the cylinder. In addition, I also experimented - trying to make acrylic paint, or rather the solvent contained in it, corrode ceiling tiles. I didn't succeed.
When applied at close range, acrylic makes the ceiling rough, but does not eat through or reduce the thickness of the ceiling.
If you apply the first layer from a distance of 60-70 cm, with quick strokes, giving a light cloud of paint, then the acrylic will lay down in an even layer. The second layer can be sprayed after some time from a distance of 50 cm. The third layer can be “poured” - the first layers have already set into a crust and will keep the solvent away from the ceiling.


The covering (coloring) ability of acrylic from cylinders is not high. It is better to apply 3-4 layers; if you try to paint it the first time, smudges will appear. The ceiling stops shining through after the 3-4th layer. At the same time, yellow already looked good on the third layer, and black had to be applied in some places for the fifth time.


You need to start by applying more light colors. You can use stencils and masking (paper) tape to limit painting areas. It’s better to look at the thematic forms for more details; I only have a couple of aircraft models painted.
The best way is to paint the workpieces immediately after cutting, but before assembling. Since here you can carefully place the part on a newspaper and apply a stencil that buries those places that are in this moment do not need painting, apply paint, then change the stencil or simply cover the applied paint with paper templates, paint with a darker color.
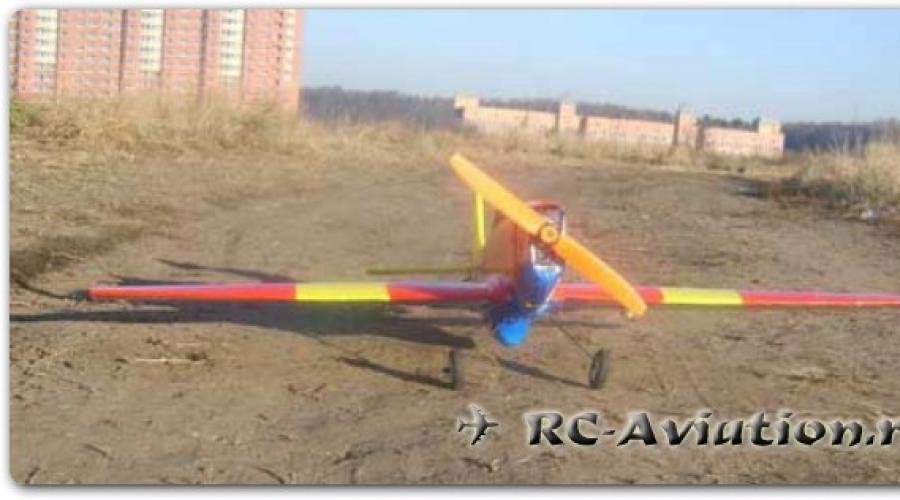
I painted the finished model, a Cessna - generally in a field with gusty winds, so
the color turned out uneven. In some places the paint didn’t reach the aircraft model, and a second later the gust brought a big “blob” :)
Acrylic “sticks” to the ceiling very well, thanks to the solvent. In essence, acrylic is plastic and 4 layers of paint completely replace priming with titanium. Although they do not cancel covering with tape, especially the wings from below.
This paint also works well on tape. It can't be peeled off with a fingernail, but if you dent the tape, it will crack. It is possible that if you go over the tape with fine sandpaper and degrease it with denatured alcohol or alcohol, then the acrylic will stick tightly. But I haven't tried it. It is easier to paint and cover with wide transparent tape.
Do not attempt to paint model airplanes or blanks at home! It's better to go to landing and cover the painting area with newspapers. I painted the manon on the common balcony and now you can see there the silhouettes of part of the wing and nose of an aircraft model, light on a dark background :)
When I’m in those places, I’ll definitely buy more blue and red paint and I’ll immediately make the next aircraft model in color, even before assembly!
One of the important roles when constructing prefabricated aircraft models is its painting. Sometimes for some model scales, for example, 1:72, 1:100, 1:144, painting takes main role and here the most important thing is to do correct selection paints and apply them well, it depends on whether you emphasize the advantages of the model or not. In this article you will learn about basic painting technologies.
Let's look at two main methods of painting prefabricated aircraft models: painting models with a brush and painting with a spray (airbrush).
Painting with a brush
This method is considered the easiest and accessible to everyone, both beginners and experienced modelers.
Paints
The most common type of paint is nitro paint. But this paint has one big drawback- it's very sharp and bad smell. Such paints are suitable for work areas with good ventilation.
The optimal paint for painting plastic models is alkyd enamels. These enamels have a good texture, they are evenly distributed in a thin layer, giving the surface of the aircraft model a shine, and also have a faint odor. The drying time of such enamels ranges from 6 to 12 hours, this factor depends on the thickness of the applied coating and ambient temperature. To create a different palette, the right shades, you should stock up on the basic six colors: white, black, red, yellow, silver and blue.
Brushes
.jpg)
Now let's look at the question: what brushes should you buy for painting airplane models? You will need various brushes: large, small, thin, round, flat. Here the choice depends on the model you will paint, i.e. how smaller model, the smaller the size you need to choose brushes and, accordingly, vice versa.
You should choose brushes with even bristles, semi-hard, hair (for example, sable, badger, squirrel).
After each use, brushes are cleaned with paint solution, rinsed thoroughly with water and dried.
And let's move on to the process of painting aircraft models.
1. Preparing the model for painting. To do this, wash the model in a warm soapy water using a toothbrush to remove the oily layer. Then we thoroughly dry the model, to do this we leave it in an inaccessible place to minimize the ingress of dust and dirt. Or use a special degreaser.
2. Primer. Before applying paint to the surface of the aircraft, the model should be treated with a primer. This is done for alignment various types unevenness on the surface of the model, and also so that over time your paint does not peel off from the aircraft. The primer should be applied evenly to the model.
If there are still some unevenness after priming, and you are not satisfied with them, you should sand it. The aircraft model should be sanded using the finest sandpaper to avoid sandpaper marks.
We then repeat the priming process. The soil should be selected light colors- white or gray.
3. Coloring. If, after priming and sanding the aircraft model, you are satisfied with everything, the surface is smooth, without potholes or cracks, then you can safely move on to the painting process. One of the basic rules for applying paint to a model is that you should apply light colors first, then dark ones. First of all, you should paint the lower parts of the model, then the upper ones. We paint the upper parts of the model only after the lower parts have completely dried.
To achieve an even layer, apply paint in only one direction.
To avoid leaving marks from brush strokes, you should dilute the paint so that it becomes more liquid and apply 2-3 layers to the aircraft model. It is worth mentioning that each subsequent layer of paint should be applied to the dried previous one.
4. Upon completion of painting, leave the aircraft model to dry.
Airbrush painting
.jpg)
An airbrush is a tool designed to spray liquid paint compressed air on various surfaces.
Before you start painting aircraft models, it is important to adjust the paint supply level so that no smudges or overspray will form on the object being painted. If you are using an airbrush for the first time, you should, before painting, homemade model aircraft to test the capabilities of the airbrush on any other, unnecessary parts of the plastic.
To comply with safety precautions, when using an airbrush, you should use gloves and a respirator.
So, here are the basic principles of painting a model airplane with an airbrush:
- Before painting, the model must be thoroughly washed and dried.
- Then the surface should be sanded.
- The next stage is degreasing and drying the product.
4. After completely dry The model should be treated with a primer and, if necessary, sanded again.
5. When painting the entire aircraft model, you should cover the mirrors, headlights, glass, landing gear, etc. with tape or masking tape. Apply paint in one direction. After applying one coat of paint to the airplane model, let it dry for a few minutes, and then apply the next coat. After this, let the paint dry completely and leave it for 2 - 3 hours. Then we proceed to painting the remaining parts of the aircraft.
6. Complex drawings should be done using stencils. It should be taken into account that with each subsequent layer of applied paint we use a new stencil.
7. After completing the painting job, you should disassemble and thoroughly wash the airbrush.
To summarize this article, I want to say that quality painting will come to you with experience. When performing this work, you should be patient, diligent and careful - and the result will pleasantly please you!
Among beginning modellers, it is not customary to paint the first model. Therefore, we will talk about that moment when you feel the need to fill the “mountains of plastic” with flowers and give them a varnished shine. Agree, decals alone are not enough here, so let’s look at the process of painting models in detail.
What will you need first?
This is money, and a lot of it. It is necessary to take into account the fact that a modeler spends considerable sums on his hobby, but the expenses are fully compensated by the stunning aesthetics of the models and the pleasure of creating amazing models from a heap plastic parts. Depending on the coloring method you will need:
Paints or enamels
By the word “paint” we mean substances that are not so easy, and sometimes even impossible, to wash off with water. They are applied once and for all, and you should be especially careful with them. You either won’t wash them off, or you’ll inhale too much of the solvents. As for enamel, most of them can be easily washed off with solvents. On thematic forums you will find a lot of advice from masters who are accustomed to consider themselves “the ultimate truth.” It is worth noting that you can find “your” paints and enamels by trial and error. Therefore, we do not recommend getting involved in disputes on forums - they will only take away your energy and waste your nerve cells.
What principles should be followed in the selection process?
It is recommended to experiment with all options. However, it is necessary to take into account the properties of paints and enamels. For example, nitro paints have a strong odor and are not suitable for people with a particularly sensitive sense of smell; it is not recommended to use them when there are small children (under 12 years old) in the room. In this case, pay attention to water-based and acrylic paints - they have a less pungent odor. We also note that the nitro paints mentioned above are easy to use, but easily seep through transparent parts and are difficult to wash off from hands after use.
When painting the lion's share of models, you will need enamels or paints in the following colors:
- Silver
- Black
- White
Paints of these colors should be purchased first, the rest can be purchased depending on the models you are working on at the moment. The main thing is never to mix paints different bases and enamels from different manufacturers - they may become unusable. As for the quantity, one can of enamel or paint, when painted with an airbrush, is enough on average for 2 models. When working with a brush - for 1 model, when painting small parts and elements - for 9-11 pieces. It's better for a beginner to buy classic paints in jars - they are suitable both for working with a brush and for painting models with a brush.

Priming
A mass applied to the surface of the model, which actually acts as a connecting material between the plastic and the paint (enamel). The material is selected individually, depending on the paints or enamels you use. It is important to take into account the peculiarity of nitro paints - when painting a model with a brush, it slightly eats into the plastic - in this case you can do without primer. But when working with water-soluble paints and enamels, the use of primer is mandatory. Otherwise, you will encounter adhesion problems - water will roll off in droplets on the surface of the model, and you will not be able to achieve a uniform layer of paint. If you work with an airbrush, primer is always necessary - otherwise the paint will crack and will not adhere evenly to the surface of the model.

Varnish
Varnishing the painted surface is necessary to ensure the durability and practicality of the model, as well as to give it a complete, maximum aesthetics. You will be able to wipe and wash the products without fear of paint slipping and cracks appearing. There is no shame in showing such products to friends; they look impressive and professional. Varnishes are usually divided into nitro- and water-soluble. So, when using nitro paints, you should use nitro or acrylic varnish. When painting a surface with water-soluble paints, you need to take into account the specifics of their structure and coat only with specialized varnishes recommended by the manufacturers. Interestingly, paints, enamels, varnishes and primers are sold in the form of aerosols, which do not require a solvent and are easy to use. However, their cost is an order of magnitude higher than the price of classical materials.
 Solvent
Needed for diluting and rubbing off paints and enamels. Making a choice is extremely simple: on initial stages It is recommended to use the products indicated on the packaging coloring materials. As you gain experience, you will be able to experiment with solvents and select the most suitable ones yourself. However, all paint manufacturers produce specialized solvents (thinners) for them, and it is unlikely that you will be able to find something better (only if something is cheaper). If the paint is marked “dilute with water,” then it is better to use boiled or distilled water - it does not contain minerals and other unnecessary impurities.
 Washer
Technical wash is a means for cleaning brushes, tools, hands, work surfaces and other items that you have soiled. Do not confuse it with “washes”, which are used in attempts to artificially “age” a model and add visual effects. We also note that it is better to wash off enamels with a solvent, but for paints (not water-soluble) it is worth using a technical remover. Cleaning should be done immediately after completion of work, without waiting for the paint to dry and harden.
Tara
Usually the paints in the can are thick and need to be diluted when working. The easiest way to do this is to use tin lids, in which you can mix paint and solvent. We do not recommend throwing away the caps after use - over time, they will not only come in handy again, but will also form a full-fledged palette with which you can select the required shade for the models you are executing. Here you can re-mix the paints with solvents. If a crack forms on the surface of the models, you can also re-dilute the residue in the lid and use it as a “repair material”. Glass vials from all kinds of medicines and products are also suitable for containers.
How to choose a painting method?
In general, all modellers are divided in their preferences in choosing one of two types of painting models - with a brush or with an airbrush. Agree, it’s not so important to you how and what to paint, the main thing is to get a perfectly painted model. Therefore, for the first models, options made of colored plastic are suitable. After successful assembly, the initially painted plastic can be lightly decorated with patterns to suit your taste. And after successful assembly experience, you will be able to purchase unpainted plastic and saturate its surface with color yourself.
 If your family is not against further experiments, we will purchase a model that will need to be painted entirely. Next, we decide what we will paint with - a brush or an airbrush? The first method is complex and economical. The second is more expensive and aesthetically pleasing. If you are working with brushes, you will not need any other tools, but for an airbrush you will have to purchase a compressor. Test your ability to paint the surface evenly with a brush. To do this, take ordinary glass and try to apply the paint evenly on it, avoiding the appearance of bubbles, streaks, etc. If it works, work with a brush. If all attempts are unsuccessful, opt for an airbrush.
You can also use special aerosol cans for painting, but do not forget that this painting method is the most expensive. When choosing a brush painting method, purchase tools. Don't skimp on buying brushes different thicknesses, molds made from different materials. When choosing an airbrush, purchase a compressor, and do not forget to use a hood if necessary.
Assembling the model for painting
Remember the joke “All assembly instructions in Russian should begin with the phase “Well, did you break it?”.” Break this myth, read the instructions carefully and assemble the model in strict accordance with the recommendations. However, please note important nuance: After final assembly, it is no longer possible to completely paint the product. Therefore, look in advance at which parts should be painted before gluing on the next ones. So the figures should be painted completely, with the exception of weapons.
 We also paint armored vehicles completely (hull), separately before attaching we paint wheels, tracks, equipment, boxes and other elements, in particular interior decoration technology. You can hardly reach the steering wheel with a brush after assembly - paint it separately. Consider custom design Each model, because in its essence it is unique and inimitable, evaluate the scope of work in advance and experiment. The first pancake may not be “lumpy” if you calculate everything in advance.
Finishing work
In the process of finishing the model, take into account the sequence of stages of work, which in the end will allow you to get a truly beautiful, fully created model. So, we present you the algorithm.

Preparation
We take into account an important nuance: on rough surface the paint adheres better than on a perfectly smooth product. At the same time, we note that roughness always spoils the appearance of the model. Therefore, before painting, uneven surfaces are usually smoothed and polished. Typically, sandpaper of M-40 grain size and smaller is used for this. Ideal polishing materials can also be purchased in model shops, but their cost is slightly higher than in the same market. The “skin” is moistened with water and the surface is polished, removing, among other things, traces of glue. Ideally, start with coarse sandpaper and gradually move to finer grains. We continue polishing the surface until it becomes perfectly smooth. notice, that a large number of oblong and protruding elements significantly increase the scope of work, but polishing them should not be neglected.
Next, we prepare the parts directly for painting - we place them on the frame or other holders, where the elements will be in the process of painting and drying. Minimal amount models have a design that allows you to paint parts without cutting them off the sprues. Often ordinary toothpicks, sticks and the same sprues are used as holders. The element is attached to the holder in such a way that it does not touch any surfaces. Place of attachment to the holder = place of attachment to the model, so it can be safely left unpainted. In the process of filling the first models with color, you can use the edge of the table as a stand for the mandrel; in the future, we recommend arming yourself with a special board with many holes, where you can attach several mandrels at the same time. Attention: after fitting the parts, do not touch it with your hands.

Surface degreasing
For high-quality painting, it is necessary to degrease the surface in advance. In this case, you can use it as special means for modelers and simple remedies for washing dishes and even gasoline. Alcohol is most often used - after degreasing, it does not require drying the parts, whereas after use household chemicals You need to rinse each part with water and dry thoroughly. During the degreasing process, do not touch the part with your hands under any circumstances. If any parts (dust, hairs) get in, brush them off with a dry brush.
Primary primer
Let us remind you that a primer is necessary for reliable attachment of paint to the surface of the product. When using nitro paints, it may not be needed, but when working with other colorful materials, enamels, as well as when painting with a spray can or airbrush, it is necessary to prime the model. We apply protection to the transparent parts during the priming process ( simple will do masking tape), which is removed only after applying the last layer of paint or finishing varnish. Next, apply the primer evenly to the surface. If unevenness occurs, DO NOT WASH it, but leave it as is and wait for the primed parts to dry completely.
Intermediate sanding
Executed when received uneven surface based on the results of the primer. We take the finest-grained “skin” and carefully grind the soil, removing all smudges, drops and bumps. Be careful and careful: if you get too carried away with sanding, it is likely that some places will be erased “to plastic”. In this case, priming the surface will have to be repeated.
Finishing primer
After intermediate sanding, a final primer is always applied. It allows you to cover overly “cleaned” areas with the composition, as well as create ideal flat surface. Be extremely careful: during the process of repeated, final priming, beginners and even experienced modellers often again allow the formation of smudges and drops. It is possible that you did not make any mistakes, but the surface still seems ribbed. In this case, try sanding the primer again using finer-grain sandpaper.
Base tone
The main tone is the color largest area surface to be painted. It is determined according to the scheme, planning in advance color scheme. At the same time, in the process of working with light colors(red, yellow, beige, blue and others) it is recommended to apply under the tone white paint- this way the model will look much brighter. The surface of the entire model can be painted with the main tone (provided that you are not working with red). Usually several thin layers are applied - they look much better than one thick layer. When working with water-soluble paints, it is recommended to cover each layer with a clear varnish.
 Camouflage
The process of applying camouflage is the most crucial moment in painting any model. During it, you can either create the ideal aesthetics of the product, or completely ruin it. Note that the technique of drawing is different for all modellers and is developed in the process of painting many models. However, you should still adhere to a number of rules. This is how light colors are applied first and only then dark ones. Elements that do not need to be painted must be protected with simple masking tape or specialized liquids.
Finishing
At this stage, all protective tapes are peeled off (only after the paint has completely dried), the model is covered with a thin layer of varnish (if necessary) and this is also allowed to dry. Be careful: it is necessary to apply varnish at a time when everything protective coatings have not been filmed yet. Next, again if necessary, various decals (transfers) can be applied to the surface. Your model is finally ready. From now on, it will mark the beginning of your collection or become its worthy continuation. All that remains is to find a place to place the model and proudly display it.
Conclusion
To summarize, we note that you should be patient and try to take into account all the recommendations given in this article. Believe me, the first model is not always perfect. A modeler is an extremely patient, diligent and truly diligent person. Each model requires a lot of time and effort, for which it will fully reward you with its stunning aesthetics and believability. Be patient and persevere!
| Collections of prefabricated models are a whole miniature world. Small, detailed and realistically executed copies of military and other equipment - airplanes, ships, cars, motorcycles - often become the subject of enthusiastic collecting. Moreover, it’s nice not only to collect a collection of prefabricated models, creating, for example, a mini-exposition of a military event, but also to directly participate in their creation. The object model is sold as a set in disassembled form. This is a kind of three-dimensional puzzle that needs to be assembled, strictly following the attached instructions. The models are made of high-quality plastic, preserving all the smallest details inherent in a real object. |
In some models the parts are already painted, but in most cases the parts in the kit are a solid color grey colour, the picturesqueness of which must be imparted independently.
It is worth noting that painting a prefabricated model is quite a painstaking task. But are we afraid of difficulties? Then let's get started!
|
What is required to paint prefabricated models? 1 Paint Choosing paint for modeling is not as difficult as it might seem at first glance. Water-soluble acrylic paints are great and can be applied with a brush or airbrush. Modeling paints are conveniently sold in sets, specially selected according to the color of a particular type of equipment, for example, " Military equipment", "Ships", "Aviation", etc. |
 |
2 Brushes Any brushes will suit your taste, the main thing is that the bristles are soft and do not leave marks. Although in some cases such marks can give a realistic texture to the model. For example, to convey the texture of wood on the boards of a ship, you can use small-diameter bristles. Instead of a brush, you can use an airbrush, but this is a tool more likely for professionals.
|
In practice, you can achieve it with a brush excellent results. Take brushes of several sizes, round and flat, so that you can easily paint large surfaces and small details. 3 Primer When painting models with acrylic paints, a primer is required, otherwise the paint will simply “roll off” the surface without painting it. In addition, with a primer it is easier to identify unexpected irregularities on the surface, so that you can then fill them, clean them and prime them again. It is not necessary to prime models for nitro paint, but it will still be useful to identify and eliminate irregularities. Be sure to choose a primer suitable for polystyrene so as not to damage the model! |
 |
4 Lacquer Lacquer is excellent protection finished model from all of us external factors. The model can not only be wiped clean from dust, but even completely “bathed” under the tap without fear of erasing the paint or damaging anything. For nitro paints, both nitro and acrylic varnish are suitable. But for acrylic paints, only acrylic varnish should be used! Otherwise, the paint layer may swell.
7 Solvent When working with acrylic, you should keep acrylic solvent with you. It will help keep your brushes in their original form and erase random drops of paint.
For the model itself you will need a model knife or paper cutter, wire cutters, sandpaper different grain sizes, a needle file will not be superfluous. You may need a one-component putty designed for modeling, a flat spatula to apply the putty to uneven areas, and for very small models you can use a flat screwdriver instead of a spatula.
A large number of varnishes, paints and primers are sold in aerosol cans. The paints do not need to be thinned; in general, this option is well suited for large models.
Preparing for work
Having prepared and protected work surface and furniture around, you can start assembling the model. Carefully remove the parts from the sprues and carefully sand the cut areas to smooth them out.
Read the instructions carefully and see which areas you can paint after gluing and which areas you cannot. Based on this, some parts of the model can be immediately connected to each other. Apply the glue pointwise with the very tip of a brush or a regular sewing needle, then press the glued parts tightly together and leave for a few minutes. The glue will dry completely in about a day.
If the model contains transparent parts, it is better to cover them with masking tape.
Do it any way in a convenient way, for example, by soaking a cotton pad or lint-free cloth in a degreaser. Do not touch the part with your hands! Degreasers, such as alcohol and gasoline, disappear on their own, and dishwashing detergents should be rinsed off under running water, after which the parts should dry thoroughly.
Let's start painting
First you need to decide on the base color of the model. Look what color it is finished product there should be more of everything - take this color as a basis. It may need to be applied in several layers.
It is important to know!
When painting models of military and other equipment, you should not use pure colors. Even if the color seems rich and uniform, try adding a little black, white or sandy yellow to it. Don't be afraid to experiment with the palette, and then the result will be very natural. For example, if a piece looks black, try painting it dark brown and darkening some areas with black.
|
After covering the model parts with the main color and waiting for them to dry, you can begin tinting. To do this, you can use the same paints from the set, only diluting them heavily with water. You can apply darkening or imitate dried dirt with color. It's better to combine various colors tinting, so the model will turn out “more alive”. |
 |
A brown, gray filter, ocher are suitable, or you can apply several filters sequentially one after another. After applying the filter, leave the model to dry for at least a day.
You can make the model even more realistic. For example, the image of adhered dirt can be easily achieved with a sponge, and splashes can be easily depicted if you draw paint on toothbrush and run your finger over it, spraying paint onto the desired surface. You can achieve texture, for example, stuck clods of earth, by mixing paint with PVA glue and putty. Rubbing paint with a dry brush will also give interesting effects. And if you slightly blur some areas on the model with thinner, you will get an imitation of paint fading in the sun.
That's all. Now you can show your friends a real miniature model, not only assembled, but also painted with your own hands!
If you found this article useful, please rate it (at the top of the page). Thank you!
Visitors to this page most often choose from the online store: