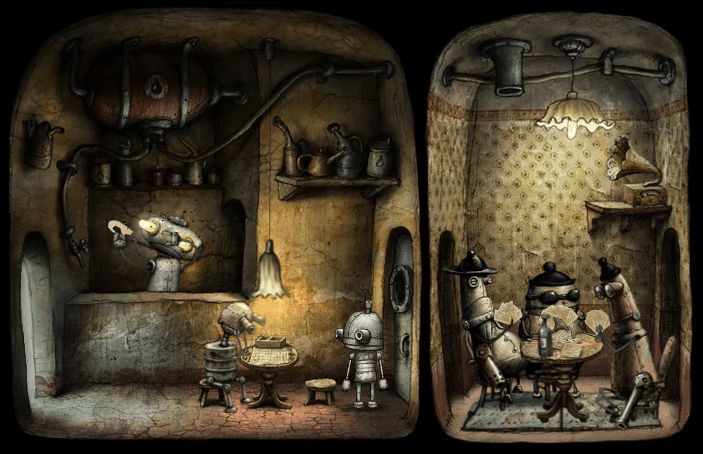
Machinarium level 6. Machinarium. Complete walkthrough of the game. Screen fourteen - Kitchen
Read also
Today we will offer a complete walkthrough of the puzzle game for Android “Machinarium”. This game has won many hearts, and solving its puzzles you can spend hours in the wonderful world of Machinarium. We will break the walkthrough into chapters, which run one after the other in the game.
If you haven’t played the game, you can play Machinarium online for free
Dump
First of all, we must collect ourselves; to do this, click twice on the body and torso, once on the head. Then we need to talk to the mouse, which in turn will bring us a leg.
We step to the right and swallow the magnet and the winding from the coil, go into the inventory and combine them. Tap on the pillar and use the magnetic lasso.
Crossing
We step to the right and pull the robot up, pull the handle and call the sentry. In order for him to let us through, we need to swallow the orange cone, and throw the remaining three into the abyss. Under the cones we will find a bucket of blue paint, we swallow that too.
Now we tip the bucket into a basin of water and dip the cone into it. We climb onto the lamppost so that there is only one step left under our feet. We take this step and thread it through the free hole above our heads. We repeat the action again.
Once we get to the top step, unscrew the light bulb and connect the cone to the lamp. We put it on our head. Now the guard will let us through.
Mine level
Having slipped on a puddle of oil, we fall into the mine. We go up the steps and take the handle and screw it to the end of the railing. We go down and approach the tank, a receiver is hidden under it. To get to it, you need to pull the robot down and click on it.
There are two knobs on the receiver; you need to place them in position 2-A and press the red button. We climb up until we can jump to the pipe. Having obtained the yellow step and placed it on the right side of the rail, you need to pull the lower part of the railing.
A trolley will appear on the left, but after driving a little it will turn over, now you can safely unscrew the wheels from it and put them on the rails. We sit on the railing and pull the handle, this will push us towards the exit.
Stove
We swallow the handle on the right on the wall. Press the big red button and see how the claw works. There is another small red and flashing button on the stove. Click on the flashing one to open the panel.
Now we can program the behavior of the claw. Move the sliders like this: 1 - bottom, 2 - up, 3 - bottom. And again we press the red button and immediately climb into the trolley, while the claw makes a revolution opposite the stove.
As soon as we rise into the air, press the space above the platform and the switch so that the robot jumps off it. We connect the handle to the switch and tilt it back, swapping the black and red wires (see picture below).
We jump down and launch the claw again - a short circuit occurs. Tap on the problem area and rewind the wires again. Now the movement of the claw has been changed, and we will be able to avoid the stove and dive into the open pipe (from where the fat man came out).
Now we launch the claw again, jump into the trolley, skip the platform with the switch and click on the pipe.
Jail
Probably one of the interesting levels in Machinarium. First, take a piece of grass that is on the pipe. Stand to the right of the toilet and stretch the robot by laying the grass on the lamp. Great, the filling for the cigarette is ready :) The wrapper will be toilet paper.
In the inventory we put everything together and give it to the cellmate. In return, we receive his hand, approach the hole and pull the robot down. We insert the resulting hand into the hole, then into the far right one. We begin to shake the cabinet until the mop falls.
We swallow the mop, go back to the pipe and double-click on the valve. We connect the mop and the valve. Using the resulting hook, we open the hatch and find ourselves in the observation room. At a certain interval, the guard's chair will stand on two legs - this is a signal to knock the guard down. Having done this, take the bullets on the plate. While your counterpart is standing near the target, unfasten the key and scatter it on the floor.
Afterwards we knock down the guard again and take the bullets, we get out. Let's use the key. We go into the neighboring yurt (where the two escapees were). We remove the plunger from the ceiling and go out into the corridor. We return to the observation room and go up the steps and into the next room.
We press the button near the telescope and look at the clock. The position of the arrows is highlighted (4:45) - this is the code. Return to the corridor with the prison cells and unlock the third door. And now a serious test awaits us.
Our task is to make sure that there are only green circles in the center of the puzzle. Unfortunately, the starting position is always different. Having solved the problem, we get a plunger, or rather a part of it. It needs to be attached to the plunger from the inventory. Afterwards we return to the room with the telescope.
Madame with an umbrella
We stand on the right side of the container and push them to the left until they are installed with a magnet. Near Madame hangs a control panel with levers, a button and arrows in the middle. Before starting the puzzle, pull the lever to lower the magnet.
The essence of the puzzle is to swap the yellow and red arrows. Here is the solution (first the color J is yellow, K is red, then the arrow number):
W-1, K-1, K-2, W-1, W-2, W-3, K-1, K-2, K-3, W-1, W-2, W-3, K- 2, K-3, Zh-1, Zh-2, D-3, K-2, K-3, Zh-3.
Pull the lever up and return the container to its place. We climb onto the container, pull it up and grab the ladder.
The arrow on the display shows the direction of the oil tank that floats on the surface of the water. The arrow position is set using the side buttons. The start button programs the movement of the tank, and the button with a drop icon programs the oil supply. We set the arrow as in the picture and wait for the tank to moor to the shore with the mouse.

Click on the button with the image of a drop. When the mouse smells the oil, it will run away and start eating. We go down and shoot at the mouse with a plunger. We return to the lady and exchange the mouse for an umbrella. Having overcome the waterfall we get to the next level.
Bar
It's time to relax a little - we go to the bar. This is the shortest level in Machinarium. We swallow the adhesive tape that is on the ceiling next to the water container. We sit down on the table and play tic-tac-toe. If the opponent loses, he will hit the table with his fist and lose five bobbins. Having collected them, we leave the bar.
When leaving the bar there is a trash can, we bring the tape to it and catch the flies. Then we return to the bar again and release flies on the bartender. While he fights them off, click on the oil barrel.
The robot will pull it out to the drummer, we give the saxophonist some hairpins. Aunt will drop a pot with a plant on you, take it and go to the city.
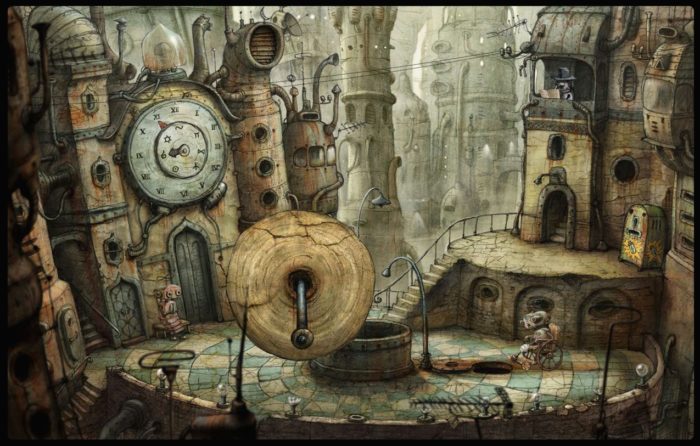
Town Square
We swallow the handle, placed in the same row with the light bulbs. And insert it into the hole under the dial. There, above the hole, there will be instructions with symbols and Roman numerals. Using the handle, move the hour and minute hands to one of the three positions indicated on the instructions.
Note that the position of the hour hand is determined by the movement of the minute hand. Otherwise, to move the hour hand one position, turn the minute hand to zero (perpendicularly upward).
If everything is done correctly, the doors to the chapel will open and the sitting lady will get up from her seat and go inside. At the place where she was sitting there will be another instruction with two combinations (one will be crossed out). We set the arrows according to the remaining one. After this, the lady will return, and the robot from the tower will take her place.
As soon as the chapel closes, we go up to the tower and swallow the loudspeaker and talk to the old man in the wheelchair. He will give us a vessel and ask us to put oil into it. Near the musicians, under the window, there is an arch leading to the crossing.
There we will see a puddle in which we can collect oil and return to the old man. Having lubricated the stroller, he will drive away from the lid and ask you to take some sunflower oil. Let's go up.
Tag
Find a puzzle behind the shield with the warning sign. We touch the upper right corner, a puzzle piece will fall from it and a bird will grab it. We step to the left, the bird will rush at you and sit on the wire. We pull the robot up and down very rhythmically so that the bird begins to repeat after you, breaks the wire and spits out the prey.
We select a piece of the puzzle and tie the wire to the railing. Let's return to the riddle. We put the puzzle together and insert the lost piece at the end. As soon as you complete the puzzle, current will flow through the wire.
We climb onto the stepladder and take out the drill, while the electrician looks at what the problem is, we pull the hanging red wire. We climb onto the stepladder again and pull the cat by the tail. We turn off the voltage and bring the puzzle into an unsolvable state, swallow the cat and return to the musicians.
We put the cat into the trumpeter's instrument, in response the aunt will throw off the radio, which will break when it falls. We select it and connect it to the loudspeaker. We return to the square to the clock.
Sewerage of the Machinarium
We open the hatch cover from which the old man drove away and go down. We remove the fishing line that hangs from the pipes. Open the box and take the book. There is a key embedded in the back crust, there is another one just below, we take it out using a fishing line.
Having three keys (two with you and one on the pipes), we close the pipes as in the picture.

After this, we place the radio on the table and ask the robot to help unscrew the bottom of the tank. We return to the square and climb into the empty tank and climb to the side pipe.
Elevator platform
Press the red button to make the elevator go down. Remove the pan from the stove and place it on the floor. We stand on the pan and lift the cabinet door and take out the corn. We put it on the stove. We push the fallen hook through the window.
We stand on the pan and use a hook to hook the door of the frozen container. There will be a pump inside. We hook it again. We put the pan on the fire and put the pump in there and connect the oil supply unit to it. We pull the red handle to start the engine.
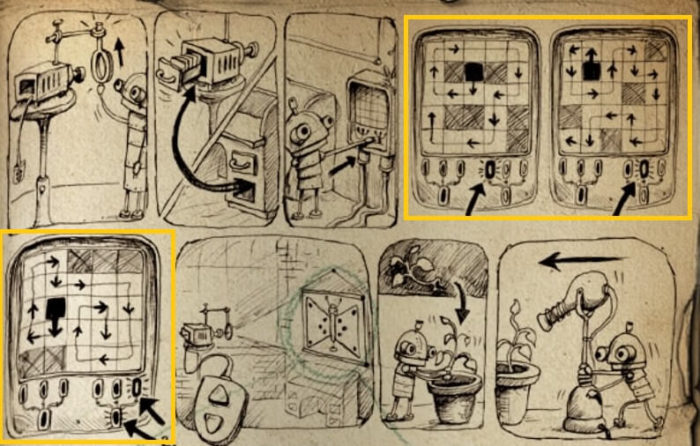
Before the next trip, you need to solve the puzzle on the elevator panel. To do this, swap the red and gray balls (see picture).

After solving the puzzle, pull the lever up. Now we “enable” the fan, click on it and constantly select “a”. When the propeller with the motor flies away, we climb into the middle.
Botanical Garden Machinarium
First, move the growth emitter to the right. We approach the panel on the left under the screen, here the principle is to fill the entire field with cells, directing it according to the diagram (see figure)

When we fill everything, press the button and the emitter will turn the biting plants green, take the stick supporting it, and go up the stairs. We close the flower's mouth with a stick and take a magnifying glass from it.
We examine the butterfly with a magnifying glass when it lands on the railing and remember the colors. We move the emitter to an empty pot and plant our plant in the pot. We turn on the emitter and take seeds from the grown sunflower. We approach the door and turn on the light bulbs to match the colors of the butterfly.
We pull the lever from below. We leave the garden, pour the seeds into the press, go down below, place the oil can under the pipe, go up to the press and move the handle up and down until we press the oil. We take the oil can and approach the robot, he will not let us in.
We go down the pipe on the left. We give the robot in the stroller the oil and take in return a ticket to the slot machine hall. Before playing the slot machines, you need to wind up the dynamo. We select the machine using the lever on the side of the dynamo. In the first one, you need to score a thousand points by shooting figures. Having received the coin, we pump the second one with electricity. Here the task is more difficult (see picture).

Taking coins, we buy batteries from the machine in the square with the clock. We make our way through the fountain to the lift. We give the batteries to the security robot, go into the elevator, dig deeper into the flower, scatter dirt on the floor, and a vacuum cleaner will run out.
We grab it and shake it until the light bulb falls out of it, insert it into the panel on the wall. In the upper right slot. “draw” a star and go up to the second floor. You can see how to draw correctly by moving away a leaf of a plant.
Bomb Machinarium
We go upstairs, approach the vacuum cleaner control lever, pull the lever down until the vacuum cleaner goes down. We go into the vacuum cleaner under the chandelier, turn off the electricity in the panel and climb onto the vacuum cleaner to cut off the chandelier and turn on the electricity supply by clicking on the electrical panel.
We drive the vacuum cleaner into the toilet and tap on the chandelier. Having hooked it to the toilet, we go to the lever and pull it up, the vacuum cleaner rips the toilet out of the floor. We go to the toilet and go down into the hole by clicking on the toilet paper.
Now you need to defuse the bomb in the allotted time, take out the fuses and place them in this order D, B, E, A, C. Click on the wires - the bomb is all defused. We go up to the second floor and see a sick Megamind. To help him, go left and click on the large panel, followed by the red button. Another riddle will appear.
We need to guide the balls to the marked areas (see picture).

After this, the door will open, from there we take an adapter, with which we connect to the megabrain. To cure him you need to run through the entire maze and destroy all the hooligans. When you destroy everyone, return to the starting place.
Megamind will come to life and give us a light bulb for the elevator panel. We go into the elevator, put a light bulb on, draw a star (see picture) and go down to the basement.

We take a sledgehammer and disassemble the protective window, take the key and go into the elevator. We open the door with the key and take the frozen cylinder. We go to the basement and freeze the castle and hit it with a sledgehammer.
Rising upstairs, our hero takes his beloved and the two of them rise to Megamind. To extend the stairs leading to the helicopter you need to play a melody; you can listen to it in Megamind's control room on the radio by dialing the frequency (7.0:108). The pedals are pressed like this: 1-4-2-3-5-2-3
We tap on the star with our beloved so that it fixes the stairs and watch the final video.
Here is a video walkthrough of Machinarium
That's all, complete walkthrough
You can download Machinarium for free from PlayMarket, but then you need to purchase a license for $5
The passage of Machinarium on iOS and Android can be simplified if you follow a number of our recommendations and tips. The game is made in the best traditions of the old school of quests. A huge number of witty puzzles and the rich imagination of the developers will surprise you.
The peculiarity of the game is very close interaction with objects, surroundings and characters. During the process, all key actions are performed independently, at a short distance from the goal. You will need to not only guess what is required of you in a given situation, but also clearly indicate what exactly to do and with what. The only drawback of the game is the short duration of the plot, so do not use the passage of the game Machinarium to its fullest, try to complete the game yourself.
For your convenience, we have divided the Machinarium guide into logical pieces that define each level of the game. There are separate hints for each Machinarium level. Which ones exactly? Read below.
Walkthrough of the game Machinarium - detailed video
 Immediately the hero finds himself among a pile of garbage, with the body divided into several parts, and a bathtub falls from above. To remove it, you need to touch it twice. After that:
- press on your robot’s body to make it fly down;
- assemble robot parts by touching them with your fingers;
- straighten the robot parts when an arrow appears after touching;
- invite the mouse near you to bring a leg, for which give it the bear;
- after collecting all parts of the body, tie the magnet and ribbon;
- bend the column using a magnet and ribbon.
Passing the level checkpoint

The passage of Machinarium at the checkpoint level is as follows:
- take the top part and throw away the rest;
- mix blue and white paint, and then paint the cone;
- climb up the column, attaching a beam to each level;
- stretch the robot to reach the light bulb at the top;
- then take the ribbons and pull the lamp.
Passing the levelIndustrial district

At this level, follow these instructions for successful completion:
- go up the steps and take the hook;
- using the hook, get close to the beam and set the lever in position 2-A;
- staying in place, stretch the robot, and, jumping up, grab the beam;
- get along the beam to the shoe and pick it up;
- place the shoe on the rail;
- remove the wheels from the cart.
Passing the level Stoker's shop
Start passing the level when the enemies disappear from the horizon:
- find the door on the right, take the hook for yourself;
- click on the red button;
- move the three levers in position – down all the way, the second – up all the way, the third – down all the way;
- press the button on the side;
- jump into the carriage;
- going up, jump onto the convex surface;
- use the hook to open the gearbox;
- click on the wires in the upper left;
- go down and turn on the lifting mechanism: to do this, jump into the cart and get to the pipe by pressing LMB.
Passing the level Camera

Walkthrough of Machinarium in the chambers:
- collect materials - grass, valve, roll of paper;
- stretch the robot to take out the lamp and connect it to the grass and paper;
- give the prisoner a cigarette in exchange for his hand;
- use your hand to make a hole in the wall;
- double-click on the cabinet to pick up the mop, which we connect to the valve and open the hole;
- go through the tunnel on the right side to open a new hole;
- when the guard goes for new balls, click on the chair, take the remaining balls and scatter them on the floor;
- when the guard collects the balls, steal the key from his belt;
- open all the cells, enter the middle one and take the plunger for yourself;
- enter the last door with the password 04-45, open the secret box by solving the puzzle;
- find the gun that connects to the plunger to lift it up.
Woman with dog

Here use this scheme:
- move the boxes under the magnet to reveal a panel with arrows;
- arrange the arrows like this: red at the bottom, yellow at the top;
- put the box in place, go to the control room behind the tank;
- press the button on the right to the desired position;
- then click on the top, and then on the bottom buttons;
- go down and kill the dog;
- take the umbrella from the girl and move on.
Musicians
You will see musicians who need your help, they will ask you to find the right instrument (or a separate part of it) or to clean the instrument.
Drum
At this level you will be in a cabaret where you need to:
- buy a tape to catch flies that are located near the tank on the street;
- throw caught flies at the bartender to take the drum from him;
- pick up the flower that grandma throws at the musician.
Saxophone
At the saxophone level, you need to play checkers and defeat your opponent. After losing, he will scatter the checkers, and you need to collect at least five and give them to the musician. He will play for you, but grandma will again throw a flower, which you also take for yourself.
Let's get the cat
Here we follow this plan:
- go up the steps on the left to the house near the clock;
- a riddle will appear in the window near the pillar that needs to be guessed;
- the required part falls out, but it is stolen by a bird that lands on the cable;
- go to the bridge, swing the robot so that the bird begins to repeat the movements and the part falls out;
- stretch the cable to the handrail;
- go up the steps;
- help the technician turn off the device by standing on his head;
- take the red wires for yourself;
- help the master get the cat, but to do this, turn off the power to everything around him.
Hour area

- find oil on the bench for the robot on the territory of the checkpoint;
- collect it in a canister;
- empty the pool and go down the hatch;
- but first you need to turn on the receiver by finding spare parts for it in the chapel near the handrails;
- turn the hands on the clock as shown in the picture behind the rusty robot that left;
- after completing its work, the robot will give you the key;
- you will find the second key in the book on the cabinet, then close the water in the pool and crawl through the hole.
Hostage
Walkthrough of Machinarium on the “Hostage” level:
- press the red button;
- in the window below you will see a hostage;
- place the bowl on the stove, throw corn in there so that it knocks out the hook;
- throw the hook to the hostage;
- then use it to remove the rubber hose from the hood;
- heat the hose on the stove and absorb it into yourself;
- return to the other robot and charge the lift;
- operate the lever, and then go inside.
Botanical Garden
Passing this level is not so easy:
- move the growth device to the right;
- you will find a panel on the left and solve the problem;
- take the board from under the flower to cover the blade;
- take the magnifying glass upstairs;
- follow the butterfly, or rather, the color of the wings, in order to open the pantry in the future;
- plant a sunflower and collect the seeds;
- light the lanterns near the storage room according to the color of the butterfly;
- pull the lever;
- collect the oil after processing the seeds into a pre-positioned oil dish;
- go down the pipe and give the robot oil, for which he will be allowed into the game room;
- turn on the machines with the lever on the right;
- collect coins from the machines to buy batteries for the guard;
- in the elevator, take the robot dust collector from under the flower;
- take the lamp from the robot and start the elevator;
- behind the leaf of the flower you will see a diagram to turn on the elevator and go to the second floor.
Bomb
On the Bomb level in Machinarium:
- turn on the lever on the dust collector so that it goes to the toilet;
- stand on the robot and take the scissors for yourself;
- turn off the electricity;
- move the robot under the gallery;
- take the lamp, plug it into the dust collector and turn on the electrics;
- attach the chandelier to the toilet, turn the lever on the dust collector up and pull out the toilet;
- lower yourself into the hole using paper;
- disable the bomb by entering the following combination on the levers: D, B, E, A, C;
- return to the second floor and help Megamind by pressing the red button on the shield and solving the riddle;
- pick up the adapter behind the open door and connect it to Megamind;
- solve one more problem;
- after recovery, Megamind will give out a lamp and a map;
- in the elevator, enter the desired combination and go underground;
- take the key from the glass box by breaking it with a hammer from the cabinet;
- use the key to pick up the freezing canister;
- freeze the castle underground and break it;
- pick up your beloved and listen to the melody on Megamind's receiver;
- Next, an asterisk will appear, which you need to click on, board the helicopter and go home.
This completes the passage of Machinarium, although it takes a lot of time and effort.
Walkthrough Machinarium
Let’s start playing through the first part of everyone’s favorite point and click game “Machinarium”.
Level one - Landfill.
At this stage of the game, we need to help our character collect his beloved self. To do this, we capitalize on the bathroom that covered us from above, and on the robot’s body. It should fall down. After that, we attach it to the head and pull it up. We give the bear to the mouse running past, in exchange for this it will bring us the missing leg. We find a magnet and a rope in the location, apply them to each other in the inventory and then to the pillar. After that we move to the next level.
Level two - checkpoint.
We find a stack of cones and click on the top one, it is automatically sent to the robot, the rest fall into the abyss. We find blue and white paint in the location, mix them and dip the cone into them. Next we climb onto the pillar. To do this, you need to use the lower bar, gradually moving higher and higher. At the top, reach for the light bulb and use it along with the colored cone to complete the robot assembly. To move to the next level, pull the rope.
Level three - Industrial zone.
We go up the stairs. We find a hook and use it on the railing. We set levers on the panel to reach the crossbar. We go up the stairs, pull the robot up, as we did earlier, and jump to reach the crossbar. We move along it to the left side of the location and jump down. Here we find the shoe, roll it onto the rails and press on the railing. The cart, which flies out of the opened gate, overturns. We remove the wheels from it and move on.
Level four - Stoker.
We watch a funny video about our robot enemy and begin to act. First, lock the right door with the hook. Click on the flashing light and set the controls correctly on the panel that opens. We press the side button and hurry back to the cart. The mechanism will launch the bucket, which will lift the robot up. After he goes for the second circle, we jump onto the ledge on the left and use the hook on the panel to open it. Inside, click on the upper left wires and jump down. Let's start the bucket again. At the moment when the robot flies over the pipe, we jump.
Level six - Lady with a dog.
Move the containers to the left side of the location. They should be located directly under the magnet. We launch the magnet by changing the position of the yellow and red arrows. We climb into the control room and press the buttons. We go back down and use the gun on the dog. We take it to the woman and take her red umbrella. Using an umbrella, we pass the waterfall.
Level seven - Musicians.
In a new location we meet robotic musicians who need instruments. You can find a drum for a drummer in a bar. To do this, we use Velcro on the flies flying near the barrel and release the insects into the bar. While the bartender waves them off, we roll the barrel out onto the street. The robot drummer will immediately begin to master his new instrument, for which he will receive a potty lesson from the robot grandmother. Saxophone keys can be obtained from the robot in the bar. To do this, you need to beat him at checkers. After the musicians start playing new instruments, a second pot will arrive from the robot grandmother. We take it and move on to the next level.
Level eight - Get the cat.
We go to the square with the clock and from here we turn onto the stairs on the left. We find a puzzle and try to solve it. In the process, one of the puzzle pieces will fall out and be carried away by a flying bird. We find a bird with a puzzle on the bridge. We stand in the middle and begin to stretch the robot back and forth. The bird will repeat all the movements of our character, which is why the wire under it will burst. Having taken the puzzle piece, we tie the wire to the post and go back to solving the problem. To make the process easier for yourself, do not rush to insert the found piece; the puzzle is much easier to assemble without it. After the found piece finds its rightful place, we go up to the technician. We climb onto him and de-energize his instrument. While he is fiddling with the connection, we pull out the red wires. The technician will move the ladder to correct the problem. After this, you need to climb on it again and click on the cat perched next to it. While the animal is being shocked, open the puzzle panel and move the piece to the side. Meanwhile, the robot grandmother, driven to a nervous breakdown by the robot musicians, throws a radio out of the window. Unfortunately, his speaker breaks upon landing.
Fans of difficulties and solving interesting puzzles should try their hand at the game Machinarium. Her world is filled with all kinds of robots, literally coming to life thanks to excellent graphics. Events take place in an old and mysterious rusty city.
The main character is the robot Joseph, who is trying to save his girlfriend and neutralize the robot villains. Step-by-step tips for each level and detailed instructions for solving puzzles will help to simplify the passage of this masterpiece game. So, we present to you: “Machinarium - walkthrough in pictures.”
Finding spare parts in a junkyard
A flying garbage unit dumped the protagonist's spare parts into piles of scrap metal. From them it needs to be collected so that the adventure can begin. Double-clicking on the bathtub will remove it from the hero's body, double-clicking on it will bring him closer to the head. Let's connect it to the body by pressing it. But arms and legs are still missing.
We stretch the robot and take out a toy mouse on top. We give it to the metal red-eyed rat, who will bring a hand in gratitude.
Among the piles of metal, we will find and take a magnet. To the right of it there will be a spool of thread; remove the rope from it. Let's tie it to the magnet by placing one item on top of another in the inventory. Then we approach a ravine with water, where we see a pillar - it needs to be bent. Now we’ll throw a rope with a magnet onto its top and take our hand out of the water.
Checkpoint

To get into the city you will need to outwit the guard. To do this, we disguise ourselves as a robot policeman using a striped cone, a light bulb and blue paint. Take one of the cones, click on the remaining ones and find blue paint under them. Pour it into a bucket of white. By dipping a striped cone into the blue liquid, we get an almost finished cap.
Now it’s the turn of the flashing light bulb, which can be pulled out from the lampshade on the lamppost.
We approach it and go up twice. Place the cursor on the outermost swaying bottom bar and click on it. We place it in the hole on the pillar above the hero’s head. We go up a step and do the same with another bar. After four steps up, we stretch the robot and remove the light bulb.
We connect the obtained light bulb with a cone painted blue. We place it on the head, stand under the rope to call security and stretch the robot to pull it.
Workaround

Unfortunately, it was not possible to enter the city this way. Let's try to do this using a cart with fuel. We go up the steps to the lever, pull it. We watch how the cart enters the city through the automatic gate. Accordingly, you can use the robot.
Under the lever we find a hook that needs to be screwed to the stair railing. We go down the steps and pull the edge of the handrail. This way you won't have to climb up to the lever next time. Then we approach the tank, which is located on the right of the screen. We make the hero shorter and reach for the pipe regulator.
Set the position of the handles to 4 and D, press the red button.
The pipe at the top falls into the hole above the lever, we rise back to it. We stretch the robot to the limit, jump and cling to the pipe. We slowly move along it to the golden ladle hanging on a hook on the right side of the screen. The taken bucket is a springboard, which we place on the rails on the opposite side of the robot, after which we call the cart. After turning it over, unscrew the wheels, sit on them and pull the lever again.
Furnace room

When the villain robot refreshes himself with fuel from the cart, we’ll try to follow him into the same pipe through which he got here. First, find the flashing red button on the stove and press it. There will be a key near the door - you need to remove it from the hook. You don't have to try to go through the door, because... it is tightly closed.
Then we head to the brush on the stove and set the sliders as needed. So, we lower the first and third all the way down, the second we lift completely up. Press the start button on the dashboard. We quickly reduce the hero to his original size. Now we run up to the empty cart as quickly as possible.
It is important to do this in the time it takes for the claw to wrap around the stove.
We put the robot in the cart and wait until the claw picks it up by the head. As soon as we rise to the ceiling, click on the ledge above the lamp on the left. Once on it and freed from the claw, we take the key and open the shield on the wall. Rearrange the wires on the blue terminals.
Now we go back down and hurry to launch the claw. She began to do everything in reverse order. Having completed the launch, we return the robot’s body to its original dimensions and sit down in the empty cart. As soon as the claw and the robot wrap around the stove, we place the cursor on the pipe through which the villain robot got out. After the arrow directing to the pipe appears, click there.
Imprisonment

As you can see, chasing the villain robot was not the best decision. We are trying to find a way out of the cell. The cellmate, by the looks of it, has been here for a long time. Let's fulfill his request - make a cigarette:
- Near the toilet, tear off a piece of toilet paper from the roll;
- we head to the tap and pull out green algae from it;
- unscrew the valve by making 2 turns;
- We dry the seaweed so that the cellmate’s lungs don’t rust. To this end, we return to the toilet, lengthen the hero’s torso as much as possible, warm up the algae on a hot lamp;
- roll the dry seaweed into a piece of paper.
- use the red buttons to turn the hand to 4 o'clock;
- press the green button to bring the dispenser closer to the shore;
- By pressing the red button with the image of a drop, we dispense a portion of oil.
- the first one is visible on the pipe with taps;
- second - in the nightstand we find a book with instructions, the pages of which we turn to the end;
- the third one fell into the drain hole under the tank. You can remove it by picking it up with a hook hanging on the pipes.
We give the homemade cigarette to our cellmate. In gratitude, he shakes the robot's hand and briefly lends his own. We head with her to the hole in the wall on the left and squeeze the hero as much as possible. In the cell next door we see two more prisoners.
We use the hand we borrowed from our cellmate. With its help, we reach the farthest hole in the wall of the adjacent chamber. We feel for the leg of the safe and loosen it until the mop falls off the lid. We pull it towards us, after which we screw the previously obtained valve onto it. Using the resulting tool, we open the hatch in the floor.
In the next cell of the cowardly robot prisoners, the hero will not need anything, so we direct him to the right side of the screen.
Warden's room

We move along the pipe to the right, find the hatch and open it with the help of a “mop valve”. We see a villainous warden in the room, guarding the prisoners. To free his comrades from the second chamber, you need to neutralize him.
For these purposes, you should get the key attached to the warden’s belt.
We wait until the warden leans on the back of the chair, the front legs of which come off the floor. At this moment we click on the chair, after which the warden falls off it. Before he gets up, it is important to steal the bullets from the table. As soon as the warden notices that the bullets are out, he will go to get them from the target. When he turns his back to the robot, we try to pull off the key by clicking on it.
Having the key in our pocket, we scatter the bullets near the warden’s chair, and we send him back to the target for more. While he is busy, we get out from under the table and use the key under the stairs to open the left lock. As a result, a couple of cowardly prisoners will divert the warden's attention to themselves. Now we head to the door.
Room with a spyglass

No special actions are required here. The robot may knock on the remaining tank or try to take a sip of oil. But it’s too early to leave the room. Let's take a look through the spyglass - outside, robotic villains are already implementing their insidious plan. Click on the switch near the door.
It is important to remember the time that will glow on the clock in the dark.
Then we head back to the warden’s room. Having gone down the steps, we head into the passage from which two robot prisoners were running out.
Hacking a prison safe

Let's go to the middle chamber. We lengthen the hero’s torso as much as possible and tear the plunger off the ceiling. Now move to the leftmost camera and click on the wall castle. Having remembered the time displayed on the clock in the room with the telescope, we enter it as a code.
Having reached the safe, we try to open it by solving a small puzzle.
It will open only after a triangle of green circles is lined up in the center. Here you will have to spin in large circles for a while. Then we remove the cannon from the opened safe, which will be needed after a while. There's nothing else to do here, let's head outside.
Lady with a dog

Once free, we move to the left. The task on the second screen is to pass under the broken pipe. But since the hero is made of iron, this is fraught with trouble for him. We see a pleasant lady flirtatiously batting her eyelashes. She offers her umbrella in exchange for a favor - to find her dog. And we can watch the latter barrels on the first screen of this part.
A gun connected to a plunger will help you get the dog out. But because of the barrel covering it, this will not be possible. You can lure out a mechanical animal using machine oil, which it will definitely like. An oil dispenser floats on the water, controlled from the booth at the top left of the screen.
You can get into the booth if you remove the extra container.
We approach them from the right, click on them, and then push them into the second screen of this part. We place the containers under a suspended magnet. Then we go to the push-button remote control and pull the lever on it so that the magnet lowers. To activate it, change the location of the arrows. We put the downward ones in place of the upward ones.
As soon as the container is magnetized, pull the lever again to raise the magnet. We return the second container to its place in the previous screen. We jump onto the stand next to it, and then directly onto the container. We lengthen the robot’s body and head up the stairs to the oil dispenser control cabin. Let's drive it to the other side:
We immediately go down and use a pistol with a plunger to pull the dog. You need to be in time before the portion of oil runs out, otherwise she will run for cover again - behind the barrels. Then we return to the lady in pink and exchange the dog for an umbrella. Now we can safely walk under the broken pipe along the path. We pass along the bridge on the left screen - there are no tasks here, so we go up the stairs.
Street orchestra

Let's talk to each of the musicians and learn about their unfortunate fates. They need help. The saxophonist is missing the saxophone buttons, the drummer's drum has been stolen, and the trumpet player can't get the rat out of the pipe. After the conversation, we head to the buttery pub, the entrance to which is marked by a bright sign with a neon image.
Butter pub

At the entrance we see a barrel - an excellent alternative to a stolen drum. But the barmaid will not allow you to get it for free. Take the fly tape hanging from the shelf. Let's keep the visitor company in a game of bolts and nuts based on the tic-tac-toe principle (5 in a row).
It is important to leave the game as a winner, because this way you will be able to get the buttons for the saxophonist.
This is not as difficult to do as it seems. Although the opponent apparently spent a lot of time here and has already beaten more than one visitor, we will try to outwit him. To do this, we alternately line up several lines in a row. He, tracking the actions of the hero, will place the bolts in the same lines where the nut was just placed.
Having completed the task, let's look through the door window on the right. In the next room, playing a card game, we will see already well-known robot villains. We collect the parts for the saxophone and head from the buttery pub back to the musicians.
Help for orchestra members
We hand the buttons to the saxophonist. We head to the tank with green liquid. We collect more flies circling above him on sticky tape. Then we go back to the oily pub and direct the flies to the barmaid. While she enthusiastically waves them away, we grab and take out the barrel.
After the angry aunt throws away another pot, we pull out a plant from it, which will come in handy later. We move towards the city center up the steps.
Main square

Let's talk to a disabled robot in a wheelchair. He holds out the oil can so that his request can be fulfilled - to bring him oil. Let's remember how the hero did not get into the city through the main entrance after disguising himself as a robot policeman, slipping on an oil puddle. This is where you will need to fill the oil can.
You can find the main entrance on the screen with the orchestra members.
As soon as the oil can is filled, we will take it to the disabled robot. After lubricating his stroller, he will move back slightly, but will ask for more sunflower oil. We will fulfill his request after a while. Now we have access to the sewer hatch - we lower ourselves into it.
Underground swimming pool

We find here another victim of the evil deeds of robotic villains - a monkey wrench. They stole his gramophone, which he asks to return. In exchange, he offers to help drain the fountain. But before that, you will need to turn off the water that continuously flows into it through the shower. Let's find the 3 necessary keys:
If you look into the next pipe, you can see robotic villains playing cards. On the shelf they can see the necessary gramophone. But, unfortunately, we won’t be able to get him, so we will look for a worthy replacement for him. As soon as the keys are collected, turn off the water. A black dot should appear in the window with an arrow in the pipe.
The correct position of the keys is shown in the picture above.
Now we return to the main square, and from there we climb the stairs to the next location.
Bridge in front of the playroom

The task is to catch the cat, which will drive away the iron rat from the trumpeter's instrument. We climb up the repairman’s stepladder and reach for the cat. As soon as he notices this, he runs away, so we move the repair robot. We climb up the ladder again and unplug the soldering iron from the socket. While he's distracted by the connection, let's pull the repaired wires.
When the repair robot moves, we climb up it again. We reach out to grab the cat by the tail, but to no avail - he manages to escape again. We head to the electrical pole, into which the socket for the soldering iron is inserted, and open the shield with the image of lightning.
Let's start drawing up a picture for supplying electricity to the wire. Almost at the very beginning, one of the parts will jump out of the shield, after which the iron parrot will steal it. But this will only be to your advantage - it’s easier to create a picture without one part. The result is shown in the image above.
To complete the circuit, you need to return the element stolen by the parrot.
We go out onto the bridge and notice that the parrot sits down exactly above the hero. We stretch the robot's torso and see that the iron bird copies its movements. We move to the left, continuing to stretch and contract. Thanks to this, the parrot swings on the wire, eventually breaking it.
After the parrot falls and the missing element is returned, we do not immediately add it to the picture - first we tie the broken wire to the railing. Now they are energized, you can again pull the cat by its metal tail. While the cat is also energized, we de-energize the wires by moving any element and breaking the circuit in the panel. We grab the cat and head to the trumpeter to drive the pest out of the chimney.
Street orchestra concert

As soon as all the instruments of the orchestra are tuned, they will play at full power. Hearing this, the angry aunt will launch a radio at the players. The latter would be an excellent replacement for a gramophone, but it broke. So before we hand it over to the adjustable wrench, let's get it repaired. We move to the main square.
Temple on the main square
We are trying to find a new speaker for the radio here. It hangs just above the curly head of the caretaker with the newspaper. However, you will have to try hard to get the part. As you can see, robots are also spiritual and have their own religions. They visit the temple at a strictly designated time, which we will try to adjust.
First, take the knob to set the main city clock. You won't have to look for it for long, because... it's hidden in plain sight. We remove it from the hole for the lamp in the fence in front of the fountain.
If you want to misbehave, you can break all the light bulbs screwed into the fence.
We place the handle in the hole specially designed for it near the entrance to the temple. We see notes left here, from which you can find out the start time of the service of each religion. We are setting up the time of serving a religion called “Infinity”. We adjust the clock in accordance with any of the lines indicated in the notes. As soon as the correct position is established, the woman sitting at the door will rush to the service in the temple.
An antenna is visible above the parishioner’s head, indicating her affiliation with this religion.
Above the bench where she was sitting we will find the last note. We will adjust the service time according to the records. If you do this properly, the curly-haired caretaker in the hat will go to serve. Let's hurry to his balcony and remove the speaker. By placing it in the radio receiver, it will be possible to repair the latter for transfer to the adjustable wrench, to which we will go next.
Sounds of music in an underground pool

We hand the radio receiver to the adjustable wrench. We use our satisfied comrade for his intended purpose - we open the spillway of the main fountain for them. Thanks to this, it will be possible to flood the villain robots in the gaming room. In this way it will be possible to punish them, but this is not the end of the task. We go to the main square, jump into the fountain and move to the right along the pipe.
Sweetheart in the kitchen
First, we adjust the elevator on the rails - press the button on the wall to release the emergency brake and go down. We talk through the window opening with the kidnapped friend. Without fuel, the elevator refuses to move down and the fuel tank is empty. To be able to get out, it needs to be refueled.
Looking through the window opening, you can control the hero’s beloved.
In the kitchen, near the door on the left, we see a tank filled with oil, which is suitable for refueling the elevator. In the closet we find an ear of corn. Remove the pan from the stove to the floor. Place a cob of corn on the heated stove - the popcorn from it will throw a long hook from the outer pipe. We take it and serve it to a friend through the window.
We climb onto the pan and use the hook to reach the air conditioner located under the ceiling. As soon as we open the lid, use a hook to pull the radiator out of it. We return to the floor, take the pan and place it on the stove. We put the extracted radiator in it.
Thanks to these simple steps, we become the owners of a long hose that needs to be connected to the fuel tap and tank.
As soon as the refueling of the elevator on the rails is completed, we start the engine by pulling the handle on the platform near the wall. Now on the control panel we swap the red and silver levers. As a result, a large lever will fall out, which we direct upward.
Air conditioner mysteries

Let's talk to the air conditioner, who will offer to solve several riddles. With the right answers you will be able to appease and put him to sleep. Wrong answers can make him terribly angry. When his rage reaches its peak, the motor will fly out. Now we penetrate into the resulting hole.
Pets' corner
In this room we will grow sunflowers to obtain oil from them. We head to a pot in which nothing is growing, and plant the previously saved young plant in it. We move the emitter towards it.
The left wall is equipped with a device for turning on the emitter and slide projector. It is presented as a simple puzzle, as it initially seems. Its task is to fill the existing squares with color.
The solution is shown in the picture above.
To activate the emitter, click on the lower left light bulb. The young plant rapidly stretches upward. After extracting the seeds from it, we try to get out of the room. We take the slingshot, which acts as a support for the outermost tree on the right. We pull the emitter towards the last one and turn it on.
After waiting for the flowers to open on the tree, we go up to the largest of them. Since it bites, we insert a slingshot into it and remove the lens. We put it in the slide projector, and then open the top drawer of the table. In it we find slides depicting mechanical insects.
We insert it into the slide projector and flip through the slides until a blue butterfly appears on the screen, its wings decorated with red dots. Then we head to the door and click on the lock with the outline of a butterfly. We light the light bulbs, the location of which corresponds to the pattern seen on the slide. Now we pull the handle.
Tower guard and oil extraction
As soon as we leave the living corner, we notice a device - an oil press. Place the seeds in it and place an oil can under the tap. We pump the lever with a reciprocating motion until the oil flows out.
Let's talk with the tower guard, who is saddened that his little animal refuses to work without batteries. We'll find them later, but for now we go down the pipe on the left side of the tower guard. We head to the main square to please the disabled robot with oil obtained from sunflowers.
In exchange for oil to lubricate his sore knee, a joyful disabled robot will give the hero a ticket to the game room.
We pick up the bandage that he dropped from the floor. We will later purchase the batteries the animal needs from the vending machine in the main square. You can get coins in the game room, at the entrance to which a mechanical cat was caught. A previously donated ticket will help you get in.
Game room

To get coins, you only need to complete two games. It feels like the room has been idle for a long time without visitors - even the devices are deprived of power. We sit on an electricity-generating bicycle. We turn the pedals at maximum speed to start machine number 1. We go through the simple shooting game presented in it, in which you need to collect 1000 points.
Having received the coin, we move the lever on the generator bike to the second position. Again, we pedal non-stop to start the machine number 2. The game in it is unusual and forces you to think carefully.
If you want to do without this, repeat the steps shown in the picture above.
There's no point in pedaling again. This is fraught with the final breakdown of machine number 3. Having received the second coin, we head to the machine that dispenses batteries. It is installed on the main square.
We buy batteries from a vending machine. Then we tie them tightly with a bandage left by the disabled robot, thus getting one larger one. Next we head to the tower guard, passing through the fountain. On the way, we’ll look at our beloved in the kitchen, and at the same time we’ll refuel the elevator on the rails. Now we go through the living corner to the tower guard.
Elevator repair

The hero needs to get to the 11th floor, but in order to take the elevator, it needs to be repaired. One light bulb is missing from his control panel. We dig in the pot to attract the attention of the mini-vacuum cleaner with the rubbish. As soon as the cleaning starts, grab and shake out the light bulb. We draw out the hero’s torso and look behind the sheet.
Symbols are drawn on the wall, depicting one of which will allow you to climb to the desired floor.
We set up the remote control and place the light bulb in the upper right hole. We display the required symbol. Having reached the required floor, we exit the elevator.
Hall 11th floor

We find ourselves on the topmost floor of the tower. We head to the lever, which is located on the left. Pull it down several times to move the iron vacuum cleaner to the next room on the right. Let's follow him.
It is impossible not to notice the robot placed above the control lever of the vacuum cleaner. This is the hero of the most interesting game Samorost 2, who guarded a missile silo on another unusual planet. He will tell his story of how he ended up here if you click on him.
Restroom

It’s not entirely clear why robots need so many toilets, but the idea and execution are simply excellent. We approach the toilet - through the hole in it you can see a bomb that needs to be deactivated. We climb onto the vacuum cleaner and, using the extension of the hero’s torso, reach the scissors located on the shelf above the sink. Now we get down from the vacuum cleaner and head to the next hall.
Chandelier in the hall

We return to the lever and move it to the up position. We repeat the action as many times as necessary so that the vacuum cleaner is under the chandelier. We head to the switchboard located on the right at the entrance to the restroom and turn off the power to everything. Now we climb onto the vacuum cleaner and cut the wire on which the chandelier hangs.
We go down to the floor and tie the obtained chandelier to the vacuum cleaner from the back side by the loop. We head to the lever again to move the vacuum cleaner to the restroom.
Before doing this, be sure to turn on the light.
We attach the chandelier attached to the vacuum cleaner to the toilet. We run back to the hall and lift the lever up. As soon as the vacuum cleaner returns, you can go to the restroom and assess the scale of the destruction. Let's see what happens if you pull on toilet paper.
Bomb deactivation

We press the bomb and feel like a sapper. We act slowly and focused. There is more than enough time to determine the direction of the wiring. Moreover, you can see a hint on the lid. If the role of the sapper is unsuccessful, we place the fuses to defuse the bomb in this order: D-B-E-A-C. After that, we run into the hall, and from there, up the steps.
Help the main robot

Here the circumstances of what happened will become known. The appearance of the main robot leaves much to be desired - he is drooling and coughing. He has been infected with a virus that he needs to get rid of. The safe on the left side of the screen contains the required tool. But it is protected by puzzles - some of the most difficult to solve in the game.
Green balls in the amount of 3 in both cases need to be moved to the green zone. The solution can be seen in the image above.
As soon as access to the contents of the safe is obtained, we remove the cable from there and connect to the main robot. It's time for the next mini-game. Her task is to find the cannon and eliminate the pests inside the labyrinth brain.
After destroying the robot viruses, the main robot will come to its senses. He will help the hero out by giving him a light bulb that was missing from the elevator remote control. After this, you can begin to save your beloved. To do this, we go to floor -1.
Basement

The hero will have to merge the robotic villains and rescue his beloved from captivity in the kitchen. We find a sledgehammer, but hitting the castle with it is pointless. First, use it to break the glass on the right, behind which the key is hidden. But they won’t be able to open the lock, since it only fits the safe near the elevator. We head there and unlock it.
In the safe we find a freezing bottle. Then we spray it on the lock and break the last one with a sledgehammer. Finally, the beloved is saved. However, this does not end there; the heroes still have to leave the city on the pepelats. We leave the main robot's room and go out onto the roof.
Final Rooftop Adventure
You can get into the pepelats only after extending the steps. The control panel is visible on the left side of the screen, which offers to solve the puzzle by ear. We remember the frequency shown on the device and return to the main robot’s room. We find a radio receiver and tune it to this frequency. The melody you hear must be played on the roof.
If selecting a melody on your own is unsuccessful, you can use the key: 1-4-2-3-5-2-3 (key numbering 1-5 from left to right).
As soon as the steps extend, click on the crosspiece, near which the beloved is waiting. She will turn it to block the steps. That's it, now you can enter the pepelats. But it doesn’t end there either – the couple suddenly crashes. Perhaps this is the developers hinting at the continuation of the adventure.
Video on the topic
Subscribe to our interesting articles on social networks!
) is a paid mobile game for Android from Amanita Design. In its short lifespan, it has become a real masterpiece among similar applications. Thanks to realistic physics, high-quality graphics and non-standard gameplay, the gameplay is more and more addictive every minute. Throughout the entire gameplay, your protagonist will be faced with a lot of amazing and unusual tasks that will not always be possible to solve the first time. However, do not be upset because the application provides tips that are located near the “Inventory” icon.
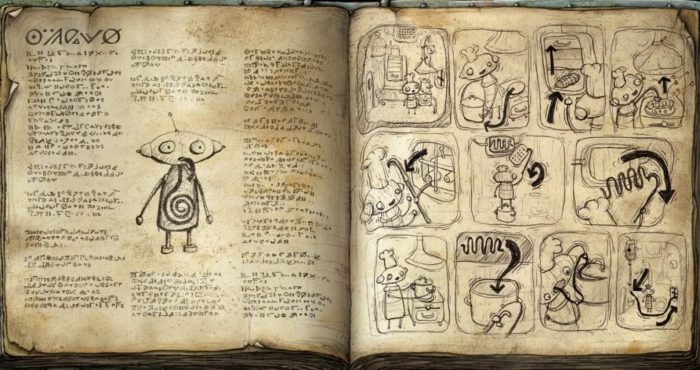
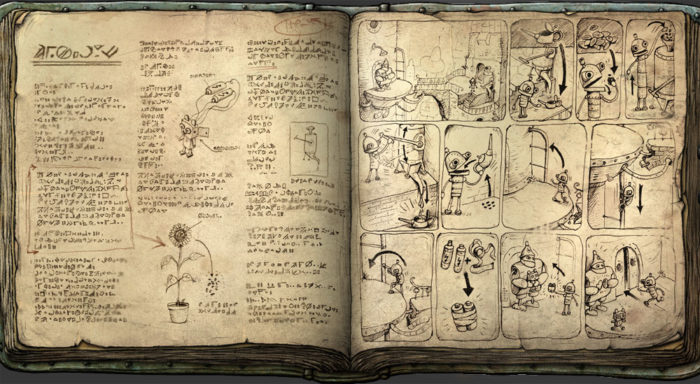
There are two types of clues: a book and a lamp. The book allows you to get acquainted in detail with the passage of each mission, but you can only get it for completing a mini-level. A lamp is a small picture where some actions are schematically drawn. Be careful, study the available locations, force your brain to think, and then you will definitely achieve your goal. In our article, we decided to describe in detail some of the chapters so that you can avoid incidents and dead ends in the game.
Control
The controls here are pretty clear. It is carried out mainly using taps. The main advantage of our character is the ability to stretch and compress his body. To perform this action, simply click on the character and move your finger up or down. The backpack opens by lightly pressing the icon located at the top of the display, but the main menu is located at the very bottom of the screen.
Dump
It is possible on our website. Once the APK file is completely installed on your phone or smartphone. The first thing users will see is a landfill, where the initial actions in the game will take place. Huge trucks transport unnecessary scrap metal, outdated equipment, broken parts, and incapacitated robots here. Among all these useless objects, the body of your hero is “lying around”, which has crumbled into small parts and, moreover, lies under the bathtub. To remove the bathtub, click on it twice. After this, we perform a similar action with our ward. Next, users will have to find the lost parts and put the robot together. Please note that during the reconstruction of the robot, gamers will be helped by other characters. For example, somewhere not far from the robot a mouse runs, we good-naturedly ask it to bring us the protagonist’s right leg, and in return we thank it with a valuable gift. As soon as the robot’s body is completely assembled, we begin to move and explore the nearby territory. After taking a couple of steps, the robot will see a small rope and a pendulum in front of it; they need to be connected into a single element. Next, we head to the column, bend it and use a rope and a pendulum on it to get the character’s hand from the lake. That's all - the hero is assembled.
Checkpoint
At this stage, our main task is to lower the large bridge so that the robot can move to another section of the map. We go to the “Inventory”, look for several cones there and throw them into the lake. After this, a bucket with blue paint will appear on the screen, which needs to be poured into the vat. Next we go to the lamppost, and we force the hero to crawl up it. As soon as the steps begin to end on the pillar, we take out the lower planks and insert them into the upper cells for the steps. We repeat this procedure until the robot reaches the very top of the pillar. We unscrew the lamp and screw it into our character, putting a cone on top of it. Next, we pull the lever near the cabin, cross the bridge, but at the end of the path, because of a puddle, the character suddenly falls down.
Abyss
We quickly go up the stairs, grab the handle near the lever, attach it to the railing and go down. We move to the tank, shorten the robot and wait on the toggle switch. We set the switches to position A2, bring the protagonist into the standard form, go up the steps and grab the pipe. Using our hands, we crawl along it to the right, take the deck and jump down. We install it on the rail, lower the lever, attach the wheel to the trolley and sit in it. We pull the lever and instantly find ourselves in another room.
Suddenly, an unknown robot steals your berry from the trolley. After much thought, the ward remembers that this is the same thief who offended him as a child. We begin to take revenge on the ill-wisher. We stand in the center of the room, press the red button, go to the door connector, find the key there, and take it. We go to the panel that appears and set the handles: the first - down, the second - up, the third - down. We press the button again, reduce the size of the robot, and climb into the trolley. As soon as it rises up as much as possible, we activate the platform. The key will help open the panel, which is located to the left of the hero. Please note that only the wires at the top of the panel need to be crossed and the others just straight. We jump off again, press the red button and jump into the trolley. We wait until she reaches the pipe and click on it.
Camera
Suddenly, some bandits put our protagonist in a cell. Without thinking twice, the robot decides to use all existing chances to get out of the dungeon. We go to talk with the cellmate. He asks you for a cigarette. We pick off the mold, unscrew the tap, take paper from the toilet and enlarge the hero to put the mold on the lamp. As soon as it dries, take the paper and wrap it there. We give the resulting cigar to our cellmate, and in return we receive his hand. We find a hole in the wall and push it through. We shake the closet several times and get a broom. Combine the broom and faucet handle to get the key. We open the sewer hatch with it, crawl along the drain pipe and open the second hatch with the key.
Jail break
Having opened the second hatch, our protagonist finds himself directly under the stool on which the bandit is sitting. He swings imposingly on stools and shoots at the target. At the moment when the bandit starts to swing again, we pull the chair so that it falls to the floor. We quickly grab the cartridges from the table. The bandit discovers that he has run out of bullets and goes to get the remaining bullets from the target. We grab the key from the bandit and insert it into the panel to open the door. Please note that users must insert the keys alternately into both wells. We are waiting for the prisoners to leave, the man will run to tie them up and suddenly fall to the floor. We quickly get out of the hatch, run to the stairs and go through the door. We approach the telescope and observe the bandits, who in fact turned out to be terrorists and are planning to destroy the citadel. Find the red button on the panel, click on it and remember the time on the clock. We go downstairs, go into the next cell with the bandit, stretch the robot and take the plunger from the top shelf. We go into the corridor and open the left door using the combination lock (4:45). We go into the room, open the safe and solve the puzzle.
The solution to the mini-level is that you must arrange all the elements in such a way that there are only green rounds in the center, and red figures on the sides. Users will find a pistol in the safe. Next, we go to the room with the telescope and go out into the courtyard through the upper door. On the right side we approach two boxes, push them several times to the left. We approach the main building and look for a wall panel. We lower the toggle switch and arrange the levers in accordance with the specified pattern.
The top box will immediately be attracted to the magnet, the second one needs to be returned to its place. We climb onto the box and go up the stairs. To correctly place the buoy you need to click four times on the right icon, which is located on the right side of the radar. Click on the triangular button; when the displacer is on the surface, click on the drop-shaped button. As soon as the dog starts drinking, we quickly go down and shoot at the dog. We take the dog and take it to the owner, in return he will give us an umbrella. We use it on the current roof to close the hole, and move on.
Traveling musicians
Along the way, our protagonist will meet wandering musicians. Each of them has their own problem with the tool that we will be required to solve. We go to the next bar, in the right area of the room we take the shelves - tape for flies. We sit down with the robot and start playing a mini-game with it. The main task is to build chains of five elements faster than your opponent. After a loss, the losing robot will hit the table with his fist and scatter all the nuts. We collect them, leave the bar into the yard and look for a garbage tank, apply fly tape to it. We return to the bar and release the caught fly on the bartender, select the barrel and give it to the drummer, the nuts should be given to the saxophonist.
We take the plants near the pot. We climb up the stairs to the square. Near the fountain we find a handle and insert it into the hole in the wall near the young beauty. Set the clock: set the red hand to VI, and the black hand to IX. We go to the place of the robot caretaker to take the megaphone. We ask the disabled robot for Maslenitsa, which needs to be placed on an oily spot near the musicians. We return to the disabled robot and give the filled carnival so that he can lubricate himself. We go up the stairs and pull out the cable from the socket; falling down, we pull the cord out of the left hole. We approach the pillar and open the shield on it. At this stage, players must play tag. We move two tiles, when suddenly the parrot picks up the dropped element. We go with the bird to the bridge, squat several times, stretch the protagonist. At this moment, the parrot will repeat all your actions; it will swing the cable and break it. The parrot falls down and gives us the stolen element. We screw the broken cable to the fence and go on to play tag.
After the tags are collected, tension will appear. We climb onto the stairs and pull the cat by the tail. As soon as the cat is short-circuited, we move any tile in the shield and approach the musicians. We approach the left one, take the tube and throw the cat into it. We pick up the tape recorder and go to the disabled robot, find the hatch and go down. To the right of the table, open the drawer and take out the notepad containing the key. We go to the pool, look into the pipe, go up and see the pipes on which the second key hangs. We pick the drain with wire to get the third key. Next, click on the “Inventory” icon, go to the menu and connect the loudspeaker and tape recorder. We place the tape recorder on the table and spin up the tank. We leave the sewer and go to the fountain, unscrew the flywheel and crawl along the pipe. On the platform, wait for the red button and solve the mini-riddle in the left corner of the platform. The task is to swap the places of gray and red balls.
We look through the window with bars and start playing as the girl. We put the pan on the floor, go to the pantry to take a head of corn and put it on the stove. Next, our hero must take the hook and attach it to the window. As a female character, we stand on the pan and hook the freezer twice. We put the pan on the stove and put the battery into it. We give the first part of the hose into the hands of the robot, and put the second part in the sink. We turn on the installation and raise the lever on the mystery mine. Click on the fan and answer all the questions incorrectly to anger him. Let's go to the laboratory.
Laboratory
We throw out all the boxes from the table and go to the right panel. Let's solve the riddle. The main task is to fill the entire field with yellow squares. There are six stages in total. We place the element in the lower left cell and move along the upper arrow. Next, move the first chip to the left of the red square and move to the left. We install the element below the red dot and move to the bottom. We go to the teacher, take the key near the pot and go on to solve the riddle. We press the lower left icon, as soon as the emitter is activated, we go up the stairs and insert the key into the plant’s mouth. We take out a magnifying glass and look at the butterfly. We move the radiation installation to a free pot, take the flower out of the backpack and plant it. We activate the installation, go to the sunflower and pick up the seeds. Let's solve the puzzle. We place the main element between the red squares, go down and go to the left. Next, we place the element in its original position, retreating two cells from the right edge and two from above, and so on. Click on the right icon and take the telescope. We install a box and a magnifying glass in it. We study the pattern of a butterfly near the right door, light it correctly and pull it by the tail. We throw the seeds into the right unit and go down the steps, place the oil pan under the valve of the unit and lower the lever until the oil begins to flow.
Slot machines
We go to the central alley, give the old man butter, and he gives us a ribbon. We return to the place where the cat was electrocuted. We use the given card on the counter and go into the hall with the machines. We get on the bike and quickly click on the screen to start generating energy. As soon as there is enough electricity, we activate the machine. Let's start playing a mini-game. The main task of the gamer is to kill all enemy ships, as well as avoid being hit by shells. Having collected 1000 points, we get one gold coin. We get on the bike again, change the speed to second and earn energy to open the second machine. We solve the puzzle and get the second coin. We go to the square and throw all the gold coins at the man. He gives us batteries, which we combine with tape to give them to the big man. We go through the open door and enter the room.
Elevator and bomb defusing
We study a new puzzle near the panel. With its help, the robot will activate the elevator to travel through the floors. We get the first cable from the cleaner. We go to the elevator door and turn on the lever so that the vacuum cleaner ends up in the toilet. We stand on it and take out the scissors from the shelf. We go out into the corridor and again pull the handle so that the vacuum cleaner drives up to the chandelier. We turn off the electricity in the panel, stand on the vacuum cleaner and cut the chandelier with scissors. We combine a vacuum cleaner, a chandelier and go to the toilet. Clinging to the toilet paper, we go down into the hole. Having collected all the cables, we put them in the required sequence - DBEAC. Having done everything correctly, the bomb is immediately deactivated. We go to the hall and click on the head of the large robot. We watch the video for a few minutes and approach the safe to click on the red icon. Let's solve a new riddle. Here you need to place the snake on the green cells.
Once the riddle is solved, the safe will open, containing the cord. It needs to be inserted into the head of a large robot. Next comes the next mini-level, where our hero will schematically run through labyrinths, killing dangerous mutants. Having fulfilled all the conditions of the task, our big-headed robot will return to its senses. In gratitude, he will give us a second cable for the shield. We quickly stomp to the elevator, install the missing two LEDs, as soon as a burning octagon appears on the screen, the elevator is activated. Next we go to the hole and take the hammer there. We break the window with it and take the key. We run back to the elevator and use this key to open the safe where the freezer is located. We water the castle near the hole with a freon cannon and hit it with a hammer. Together with my beloved we go to the big robot to tune the radio. You need to set it this way: 7-108 and remember the song. We go to the roof to the sign where there is the inscription “Frequency”, click on the buttons and listen to the melodies. After this, a ladder in the form of steps will appear on the roof, activate the fan, rise up and fly away.
Bottom line
In our review, we tried to describe as simply as possible walkthrough of Machinarium (Machinarium). We hope that our tips will help you avoid awkward and dead-end situations in the game. Install the application and try on the role of a funny robot. Here you will find a lot of exciting tasks, puzzles and unusual stories from each character.