Minecraft what to make from an iron ingot. What can be made from iron in Minecraft? Cold Forging Tools
Read also
Minecraft is a popular sandbox game. She won the hearts of many players. The basic principles that are used in the game are the creation of things and objects. Or, as they say, "crafting". Today we are going to learn how to make an iron ingot in Minecraft. This procedure is the basics that every player should know about.
About iron ingots
Iron in the game Minecraft is one of the most popular resources. It must be mined in various places on the maps. It is used to create many things and objects.
In the game "Minecraft" you can make an iron block from an iron ingot. This is a unique way of storing the resource being studied. Also, such a technique contributes to the creation of an anvil in the future. Therefore, iron and iron ingots should not be neglected. They will be useful to every player.
Search for a resource
How to make an iron ingot in Minecraft? You have to understand that direct crafting of these does not take place. In other words, they cannot be created. But getting it is easy. The main thing is to be attentive and persistent.
An ingot is mined from iron ore. It is necessary to process the corresponding blocks in the oven. To find them, it is recommended to study the world around you. Iron ore deposits are located near the surface. You can walk around the world or look into caves - there will probably be corresponding blocks there.

How to make an iron ingot in Minecraft? To do this you will need:
- Dig iron ore. It is recommended to do this with a stone pickaxe. It, in turn, is created on a workbench using 2 sticks and 3 cobblestones.
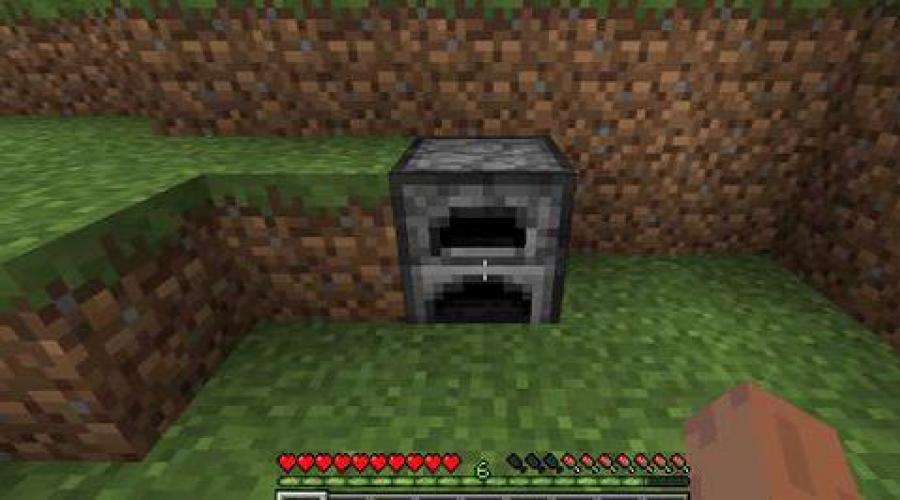
- Create a stove. To do this, 8 cobblestones are combined on the workbench. They are located around the perimeter.
- Collect any fuel. Wood or coal will do.
- Place the iron ore block in the furnace. Next, load fuel into the appropriate cell.
- Wait a while.
As a result of these actions, the player will receive an iron ingot. Nine of these items, combined on a workbench, form a block of iron.
Search the world
From now on, it’s clear how to make an iron ingot in Minecraft. But the described algorithm of actions is not the only method of resource extraction. There are a few more tricks that will help you get your hands on processed iron ore.
Which ones exactly? The fact is that iron ingots are not found very often in the game Minecraft. For example, you can extract a resource:
- By fighting creepers. For example, with a zombie or an iron golem. The drop chance is not very high, but it is there.
- Processed iron can be found in temples. For example, in deserts and jungles.
- Treasure vaults and abandoned mines are another source of finished ingots. The main thing is to thoroughly explore the map!
Now it’s clear how to make an iron ingot in Minecraft 1.5.2 or any other version of the game. In reality, everything is not so difficult. The main problem is finding the appropriate ore. Some people wonder how to create a workbench for processing a resource. To do this, you will need to combine 4 units of processed wood in your inventory.

How to make an iron ingot in Minecraft? Either find it or get it by processing iron ore - there are no other options. Every player should remember this.
Every owner spends a lot of time thinking about how to decorate their home. Today there is a huge choice of materials - wood or plastic, but in the first place is metal - one of the most durable, strong, resistant materials in the world, serving as an example and standard of metaphors.
History of origin
Metal products became most popular in Europe in the 11th century. Everywhere, facades of buildings, fences, and decorative statues began to be decorated with unusual forging, and the profession of a blacksmith became an honorable and famous figure in the early Middle Ages.

What kind of craft can be made from metal?
Having thought carefully, the owner decides to present a piece of the unusual to his home, but the question immediately arises: should he buy it or make it himself? Of course, do it yourself, because doing something with your own hands is much more pleasant and more profitable from a price point of view.

Today, forged ornaments for grilles, doors or fences are in fashion; forged animals, a mysterious owl, or a Russian bear also look great in the garden. Ladies prefer forged bouquets, and a rose created with their own hands will surprise anyone.

What do you need to make metal crafts?
There are not as many tools as it seems, all you need is the following list:
- Photo of a craft you like;
- Paper;
- Welding machine;
- Chisel and hammer;
- Grinder for cutting metal;
- Special rust solvent;
- Pencil and scissors, when using a stencil;
- Several washers or bolts for decorative elements;
- Steel rods, from a few centimeters to a meter.
- The basis of creation is sheet iron.


Step-by-step DIY crafts
An original idea for a metal craft would be an owl. First, for aesthetics you will need a template or stencil. It can be made from a sheet of paper with drawings printed on it.

After cutting out the owl drawing, the stencil should be applied to a sheet of steel and the drawing should be transferred; it should be done in the most realistic way.

The next step is to trim the metal with a grinder and drill holes for mounting and inserting the owl's eyes. After creating the body, you should move on to the details: the legs are made from a rod, and the irregularities are smoothed out with a grinder. At the end, our beauty is treated with a chemical rust remover and painted.

Master class on making roses
And materials. List of basic tools:
- Welder.
- Hammer and pliers.
- Sheet steel
- Bulgarian.
- Special paint for metal.
- Grindstone.
- Steel wire with a diameter of 6 mm.
- Metal scissors.


Attention. Do not forget about safety precautions when working with these tools! Be sure to wear gloves and a welding mask when working.


We take metal cutting scissors and cut out thirty rose petals (thirty petals will make the bud seem more magnificent). You need to move in cutting from small to large, that is, from 15 mm to 80 mm. Your rose should not be prickly. Therefore, a sharpening stone will help smooth out all the unevenness of the petals.


After forming a complete flower, we weld the spikes and clean off the excess with a grinder, clean the seams and cover with a layer of protective paint - the craft is ready.

Metal products with steel wire
The British National Academy of Sciences declared in 1856: “Everything that can be invented has long since been invented,” but time has shown a different outcome. So it is now. Every year new ways of decorating are invented.

For example, in recent years it has been fashionable to make a figure from wire or rod. Combinations and special weaves create an impression of indescribable beauty.

Master class - butterfly made of twig
In terms of its complexity, a steel butterfly is not difficult and will not take much time. Typically, the work technique consists of twisting the wire (the manufacturing process depends on the correct material: the material should not be too thick so that it can bend, but should not be too thin so as not to bend) into several layers.

A body is created using spiral turns, after which wings made from two ovals are attached.


Some interesting facts
Metal is the most ancient mineral of interest to humans. He mined it, forged it, and then a new fence or another forged deer lit up the smile of passers-by.


During the rapid introduction of Hollywood films and the development of artificial intelligence, the topic of androids and the like became relevant. Although the world is far from the rise of the machines, it is always possible to forge a transformer, say, for an exhibition.

Vitaly Yashkovich from Krasnoyarsk became famous throughout the city for his miracle robots. His collection includes such titans of world cinema as: Megatron, Terminator T-200 and T-800, Star Wars androids, as well as droids from cartoons. The owner himself claims that he will not sell his robots to anyone, they say, he created for the soul

You too create, because the world is unidentified and multifaceted. Give him something new and unusual.

Photos of metal crafts


Forged metal products have been and remain in demand, despite progress, new materials and technologies. The secret of popularity lies in the combination of two qualities - beauty and durability. Forged products may look light and elegant, but at the same time a person cannot break them! By mastering the production of metal products, you can create an excellent source of income. First things first!
In our imagination, forging metal represents taming it with the help of fire, a hammer and an anvil. However, along with the hot type of forging, cold forging is also possible. Unlike the first method, cold forging can be mastered by almost anyone at home.
Hammer and anvil for forging metal
Hot working involves heating a metal workpiece to a high temperature. Thanks to this, the molecules are in a less dense arrangement and the metal becomes ductile and malleable. Using a hammer, the blacksmith gives the desired shape to the workpiece - for this, many different techniques are used.
However, setting up a real forge at home with your own hands is not so easy. First of all, you will need to purchase a forge, which consumes a lot of fuel. It is simply impossible to install a forge in an apartment or garage for fire safety reasons, so you can forget about hot forging in urban conditions once and for all. The forge is not the only problem, because you need to know a lot of other features of high-temperature metal processing.

Forge
Cold forging causes much less problems. Firstly, it is accessible to a much wider circle. If you have a garage or workshop where there is still room for several devices and machines, then you can safely master the skills of cold forging. This can be a fun hobby at first, which is especially useful for homestead owners. However, over time, you can turn this hobby into an income source. In any case, you will first have to spend some money on tools and supplies.
Cold forging simultaneously bends and presses the metal, creating very strong products that are stronger than those produced by casting or stamping. The finished structure will be very resistant to damage - it is not afraid of vandals and thieves. Therefore, cold forging is so often used to create decorative and protective elements, such as window grilles, canopies, railings, gates, fences, gates, as well as tables and chairs, decorative stands and fireplace grates.
There are many ready-made machines for do-it-yourself cold forging - the simplest ones perform only one function, the more complex ones can perform several operations. In general, the equipment is quite simple - both in operation and in design.

Cold forging of metal
- The basic tool that both an experienced craftsman and a novice cold forging enthusiast should have is a bender. With this device you can bend a metal bar at any angle with your own hands. Gnutik will also help in creating beautiful arcs with any radius.
- The snail allows you to create spiral elements. Ready-made tools are most often limited to a bar diameter of 12 mm, but you can create a homemade snail to fit any workpiece diameter.
- Flashlight – equipment for creating an element of the same name. This equipment allows you to weave iron rods in a special combination. Using a flashlight you can also make a “Basket” element. To work, you will need either metal rods with a cross-section of up to 30 mm, or squares with a cross-section of up to 16 mm.
- Another tool for cold forging is the wave. The name matches what it does - by passing a square or rod through the tool you will get a wavy part. Using this tool, you can process a wide range of rolled metal with your own hands - from round tubes of small cross-section to hexagons.
- Of course, a cold forging master cannot do without a twister. Using this equipment, a bar or square profile is rotated around the longitudinal axis. This operation can be carried out with a square cross-section of up to 16 mm. A twister will help make ordinary rods in a product more refined, attractive, without losing strength and integrity.

Twister for twisting the rod around the longitudinal axis
Without these tools, it is impossible to do cold forging with your own hands. You don’t have to buy everything at once - perhaps you should get a bender first, then a twister, a snail, a wave, and then you can buy or make a flashlight yourself. When you completely master all the techniques with one tool, buy a second one. You can put aside the figured blanks you received during your studies - they will definitely come in handy when creating your first masterpiece.
When the first tools have been purchased and the skills to handle them have been acquired, it’s time to create something more worthwhile than a couple of curlicues. If you plan to turn this hobby into a profitable business, then the best advertising for you is finished products, for example, gates for a country house, window bars or flower stands. In a word, everything that catches your eye. Surely your neighbors and friends will notice the changes in the arrangement of your home and will want to buy such useful decorations for themselves.

Gates for a country house
The creation of any product begins with a sketch - carefully draw and mark all the details on a sheet of paper, maintaining the scale. By putting down the dimensions, it will be easier for you to calculate the number of elements needed and the volume of material.
The sketch will help you make all the parts the same. Then you can go to the store for shopping. To begin with, try to purchase rods and square profiles of medium section - they will be easier to work with. Rolled metal with a large cross-section is difficult to bend using cold forging; you may need stronger and more massive tools than those you already have.

Medium square rods
When the material is purchased, carefully set the settings on the equipment. Correcting mistakes can sometimes be very difficult. In addition to working with equipment for cold forging, do not forget to master the welding machine - the easiest way to connect parts is by welding. Be careful when working with thin-walled parts - they can easily be burned through.
Cold forged elements often imitate the forms of the plant world. However, all these curves and curls look incomplete - like a tree without leaves. Leaves are excellent metal products for decorating window bars or metal gates. You can get by with store-bought ones, but for the same money you can make twice as many leaves.
Making leaves from metal is not at all difficult. To get started, you will need one or more templates. Pick a leaf you like from the apple tree and transfer its shape to thick cardboard. If you need a lot of leaves, then the patterns should be different so that the finished ornament does not look monotonous. The templates should differ from real leaves in only one detail - special ears should be left on the tips on one side, with the help of which these elements can be secured to the frame.

Metal leaves
For such decor, a regular thin sheet of metal is suitable. It can be stainless steel or a sheet of steel - the thinner the better. You also need sharp ones. To begin, cut the required number of leaves according to the template with your own hands, then grind off sharp edges and burrs, smooth out angular shapes. Then mark lines on the outside, as on living leaves.
Go along the marked lines with a chisel. Punching out the contours is not at all difficult, the main thing is not to overdo it and not to punch through the metal. Place a thick wooden block under the metal - this will make less noise, make it more difficult to pierce the metal, and make the bends after the chisel more natural. First, walk along the center line, and then reflect the side ones - in the process you will see for yourself where the metal bends and how best to unfold it.

The contours of leaves knocked out with a chisel
If the leaves are large, then they can be used as separate elements directly to decorate the forging. Small leaves can be collected into wire branches. It is visually easy to understand how many elements are needed on each side of the branch. With the help of the ears, the leaves are easily attached to the wire, and then you yourself must determine how best to bend your branch and where best to direct it. If the leaves scroll, then each element can be secured with a soldering iron or electric welding.
Using the same technology, you can make more complex grape leaves or ivy leaves with your own hands. In a word, don’t stop there! Once these decorative elements are securely fastened, all that remains is to paint them - black paint with gold or silver highlights looks very good.
But this thing can be made at home with a minimum of tools. But the grill will last for many years, delighting you with delicious barbecue. The dimensions of the grill depend on your needs. The width is always the same - 30 cm, this is just the required distance for convenient placement of the skewer on which a portion of kebab is strung - 8 pieces of meat.

Grill dimensions
The length of the grill is calculated based on the number of skewers. Each skewer is allotted 10 cm, so just consider - in order to cook shish kebab for a company of 8 people in one go, you will need a grill 80 cm long. The depth of the grill is usually made within 20 cm. This space is enough for coals and placing the meat in such a way so that it cooks evenly and does not burn. Height is a strictly individual matter, and is calculated based on the height of the kebab maker at the level of the arm bent at the elbow.
You will need heat-resistant or regular sheet steel 3–4 mm thick, 4 meters of angle, an angle grinder with a disk for cutting metal, a welding machine and a drill. If you want to make a collapsible barbecue, then the welding machine should be replaced with bolts and nuts, but in general the manufacturing procedure remains the same. For the legs, steel corners with a shelf of 20–30 mm are used.

Manufacturing of a welded product
First of all, we make markings on a sheet of metal with our own hands in accordance with the calculations performed earlier. Then, according to the markings, the elements of the grill are cut out: walls, bottom. The fastest way to cut is with a grinder, but you can also use a hacksaw or jigsaw. In the lower part of the future walls, holes are drilled along the entire length - they are needed for oxygen access to the hearth. Holes can also be made at the bottom of the grill. Also remember to cut square or triangular holes on the top edges to secure the skewers. Then all that remains is to assemble all the elements into one design. If the grill is stationary, then all parts are fixed with a welding machine; if it is dismountable, then holes are made for nuts and bolts, and only corners with holes for fasteners are welded to the walls.
If you want the legs of the barbecue to be able to be unscrewed, then you should weld nuts to the walls, and cut threads at the ends of the reinforcement sections and screw the sections into place. In this case, the grill becomes more mobile - the legs can be unscrewed, and the box can easily fit into the trunk of a car.
The fastest and most reliable way to fasten metal parts is electric welding. Anyone can learn how to use it. Having bought an inverter, and also spent half a pack of electrodes to gain practical skills, you can safely try to create metal crafts with your own hands. Installation of structures, repairs at the dacha, production of garden accessories and much more from now on becomes available.
The first metal crafts
Many people now have welding. Often the device is purchased for construction or repair purposes. Not even necessarily for yourself. If there is a need for it, you can call a self-taught neighbor or a familiar specialist welder. After completion of the work, the unit simply stands idle.
But sooner or later the moment comes when you should make up your mind and try to cook something yourself. There is nothing wrong with that, if you want it. The main thing at this stage is not to get burned and not to catch “bunnies”, and experience comes with practice. If you have a country house, there will always be a use for welding. With its help, you can solve problems of territory development much faster.
Not everything can always be bought in a store. Welding a gate, building a base for a bench or table, “grabbing” a hook to a metal post for attaching a rope or an additional support for weaving grapes - this seems like a trifle, but it seems inconvenient to call a welder over and over again for this reason. This means you need to master the basics and solve everyday problems yourself.
Welding Basics
Of course, it’s not worth taking on serious work with critical connections right away. You can practice on a piece of scrap metal. At the first stage, you should learn how to light an arc and hold it, maintaining a constant working gap between the workpiece and the electrode as it burns.
After this, you need to work out the technique of forming a weld, fusing a layer of metal onto a flat surface. Then you can proceed to adjusting the current for different thicknesses of the workpieces being welded. Welding is a technique for joining two metal parts, based on melting their surfaces at the junction. They are joined into one by adding a layer of electrode binder material.

The current is selected in such a way as to ensure melting of only the surface layer without the formation of holes. It is better to master the technique on electrodes with a diameter of 2.5-3 mm. They must not be old and must be dry, otherwise the first experience will most likely be ineffective, which may discourage you from learning how to create metal crafts.
Welding makes it possible to correct minor and sometimes serious flaws or installation errors. It is enough to cut off the seam of the “tack”, and the parts are separated. After cleaning the area of unsuccessful welding, the process can be repeated.
Material
Any owner of a country house or owner of a summer cottage will probably have metal waste on their farm. These may be the remains of pipes after the installation of a gas pipeline, water supply or heating systems. A real owner usually does not throw away the remains of a channel or pieces of reinforcement. You can also find used nails, bolts and nuts.
Such scrap metal very often becomes a material for new repairs or improvements to old ones. There will probably be outdated garden tools, chains, old dishes, as well as spare parts from a car, motorcycle or bicycle in the garage or shed that have not yet been handed over to collection points.
From all this you can make useful and practical metal crafts. With your own hands, using welding and available materials, you can repair old garden tools or make new ones from waste, taking into account personal experience, your preferences and business conditions.

You can make your backyard cozy without purchasing new equipment. From used, but still strong metal, you can build a base for a country table or bench. Finding the right sheet of particleboard for the tabletop and boards for the bench won't be a problem. Racks can be made even from substandard inch pipes.
If you have a supply of material, you can swing on a swing. It is better to make the structure permanent, with the base concreted. You need two sidewalls made of pipes welded at an angle, with jumpers for rigidity. The more massive the swing seat is, the larger this angle should be. The jumpers can be welded at ground level or even below so that they are not visible.
It is better to make suspensions from chains, but you can also use a reliable rope. The beam for fastening must be massive. A thick-walled pipe, a piece of rail or channel will do. It is best to fasten frame parts and suspension brackets by welding.
At any dacha, with rare exceptions, there is a barbecue or other similar device. A couple of logs for sitting, an old stump as a table and charred bricks for limiting the fireplace and laying skewers - for some, this may be relaxation, but it is better and more convenient to use a more advanced design.
The grill can be disassembled. You can bring it with you to your dacha, or it can also have a permanent home with the possibility of transporting it to a storage location. A barbecue made from an old steel barrel is quite suitable for this solution. You can make it yourself and get by with just a grinder and a drill. However, it will be better and easier if you use a welding machine.

An empty and washed barrel is cut lengthwise along the vertical center line into two halves. Legs made of rods, fittings or pipe sections are welded to one part. The top part serves as a hinged lid and can be mounted on old welded door curtains for convenience.
Crafts made from thin sheet metal can be secured by welding only after gaining some experience. In order to reliably weld parts and not burn a hole with the electrode, you should accurately select the welding current and work with short tacks with constant monitoring of the quality of the seam.
Metal sculpture
The garden around a country house is not only an area where trees and shrubs are grown for collecting fruits and berries. This is also a place to relax! A garden sculpture will be an excellent addition to well-groomed plantings.
It may not necessarily be made of concrete or plaster. For a person with creative potential, there are no limits to its expression. If at the moment you only have at hand a welding machine, half a pack of electrodes, a crowbar and the desire to create, then from all this you can build an original and unique composition. Moreover, the complexity of execution may vary.

It depends on the available material and the idea. Such metal crafts for the garden in one case can consist of a dozen different, at first glance, incompatible parts of different origins and purposes. In another case, it can consist of hundreds of repeating elements of the same type, connected by welding into a three-dimensional model.
Where do you get ideas from?
This question cannot be answered unequivocally. Someone, seeing random details in one place, imagines how they will fit together if they are combined into a common composition. Another purposefully goes to a scrap metal collection point and wanders around mountains of this trash in search of a suitable part for the chosen sculpture.
You can get ideas or simply take someone’s already realized idea as a basis from specialized book publications that are dedicated to metal crafts. There is nothing wrong with creating something you like from scrap materials available around the house.
In any case, do-it-yourself metal crafts created according to an existing drawing or sketch will be original. Welding is not copying, but a kind of creativity. Anything that is made with a decorative design and repeats a pattern or composition is perceived as a kind of masterpiece.

Safety precautions
To ensure that DIY metal crafts do not serve as a constant reminder of a bad welding experience involving a burn or injury, care should be taken. Working without a mask or shield is strictly prohibited, otherwise you may be exposed to ultraviolet radiation.
A protective suit will protect clothing and body skin from flying sparks and splashes of molten metal, and thick mittens or gloves made of dense material will protect your hands. It is not recommended to knock scale off a seam without protective glasses; sharp fragments flying in all directions can get into your eyes.
When working near wood or fire-prone surfaces, have a bucket of water and a wet cloth on hand. Random sparks or electrode residue that bounce off and land on such materials can cause smoldering and subsequent fire. When working indoors, you need to pay attention to proper ventilation.