A magical transformation - from an old barn into a cozy summer house. More than just a garden shed: decorative solutions How to turn an old shed into a new one
How to make a house on your own from scrap materials? A young couple from Portland (Oregon, America) were able to prove by their own example that this is possible. They remade old barn and assembled their home literally piece by piece. What did they end up with? We decided to take a look at the results of their labors!
Young enthusiasts

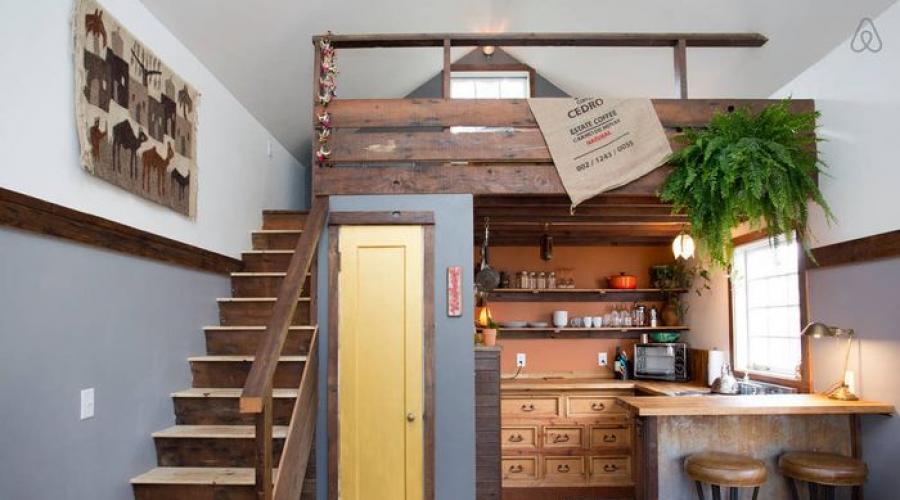
Newlyweds Michael and Jenny had long dreamed of owning their own home, but they were sorely lacking in funds to buy it. The only thing we managed to purchase for a small amount of money was an old dilapidated barn and a small piece of land. The young people still had some money left. It was decided to spend it on restoring the house and decorating the interior.

Everything you have at hand

The couple did not receive the barn empty, but filled with old boxes and boards. They were used to restore and strengthen the facade of the house, as well as partial interior decoration. Interestingly, Michael and Jenny were lucky with the wood; they got teak and cedar boards. This wood was also useful for creating furniture, which the owners of the house made with their own hands, which allowed them to significantly save money. The rest of the interior items were purchased at flea markets and family sales.


Despite the fact that the area of the house is only 35 square meters, zoning was well organized in it. The kitchen was separated with a bar counter. The living room was not cluttered with furniture; there is only a sofa, which was moved with the owners from the old interior, as well as homemade table and a stool. The second floor was completely dedicated to the bedroom. It turned out to be relatively spacious and well organized.


No matter how much space there is in country house, on personal plot You can’t do without such a necessary outbuilding as a barn.
If experience self-construction not yet, but the owner knows how to use tools, he can easily build a shed at the dacha with his own hands, following the instructions.

If the barn will be located next to the house, and it is important that it looks aesthetically pleasing, it is better to use the same materials from which the house is built. To reduce the cost of construction, you can decorate the barn with siding - it can be different, and imitates any materials - wood, brick, different textures stone.
How to make a shed quickly and inexpensively
Guided by step by step instructions how to make a barn yourself, you can build it in as soon as possible, while spending very little money.

One of the simplest, fastest and cheapest options is a frame shed. The frame itself can be made of wood or metal; the outside is sheathed suitable material, install the roof – and it’s comfortable outbuilding ready for use.

If the barn is made of wood, then the frame can be made of timber. But it is more convenient, reliable and durable to make a frame from profiled pipes with a rectangular or square cross-section - a profile with round more difficult to join and weld.

There are also ready-made ones on sale metal frames, which are assembled using self-tapping screws, and at the factory you can order a design according to your own drawing.

As practice shows, the assembly of both metal and wooden sheds usually takes only a few days. The photo shows sheds on frames - what they are like, and how beautifully they can be finished.
What should the foundation be like?
Sheds on frames are lightweight buildings, so the foundation for them is made lightweight. Most often, a few columns are enough, screw piles or concrete block– one or more depending on the area of the barn.

If the ground is on plot of land complex, the foundation can be a shallow strip foundation made of special monolithic blocks.

Reinforced strip foundation will withstand even brick and building blocks– the building will be reliable and will not crack on soil that is prone to swelling, since the movement of the structure will occur together with the foundation.

The choice of foundation type depends on the soil on the site, the area of the barn, the material from which it is built, as well as the financial capabilities of the owners of the site. But it’s easier, faster and cheaper to build a shed on a frame without a foundation.
Frame lean-to shed without foundation
Frame sheds can be built without a foundation at all. There are two options. In one case, the racks treated against rotting are buried 60-80 cm, concreted, and then attached to them bottom harness, on which the floor is laid on joists. It is worth noting that this method is only suitable for building a small area.

On soils that absorb and drain water well, you can also build a shed without a foundation this way: the area for construction is marked out in such a way that the area on which the shed will stand is 0.5 m wider on each side than the area of the building itself .

The turf is removed from the soil and a sand and gravel backfill is made, which must be thoroughly compacted. A strapping beam is laid on the prepared place, floor logs treated with an antiseptic are attached to it - the logs will be in direct contact with the ground, so the treatment antiseptic required.

As soon as the logs for the future floor are laid on the site, the floor itself is made. It can be made of planks, from sheets of moisture-resistant plywood or from oriented strand board (OSB). In this case, the recommended thickness of materials:

- for boards – 20 mm;
- for plywood and OSB – 13-15 mm.
When the site for the building is ready, you can begin building the shed.
Note!


During construction frame barn With pitched roof The roof should be installed correctly - its angle should be such that snow rolls off easily.

Practice shows that optimal angle the slope is achieved when the height of one wall is 3 m, and the opposite one is 2.4 m. It is a good idea to cover the roof with ondulin - this roofing material is also called euro slate.

Ondulin is much more attractive in appearance than slate, it has a wave-like shape, and its color can be different, this allows you to make the roof of the barn beautiful, cheerful, truly country-like.

Having started assembling the frame, first the racks of each wall are mounted into the floor one by one. If not boards are chosen for cladding, but ready-made slabs– made of wood, metal or other material, the cladding can be installed on the frame of each wall in advance, on the ground, and already in finished form attach the wall to the floor. As an option, the walls can be sheathed with OSB 9.5 mm thick.

Exists alternative technology– Balloon (balloon). With this method, installation is carried out gradually - corner frame racks are immediately attached to the frame or the blocks themselves as the racks are installed in height. A rope is stretched between them at each new height level, along which the next racks are then placed.
Note!


When installing window and doorways It should be taken into account that the load on the frame is greater here, so it is necessary to strengthen the frame in those places where the window and door sashes will be attached. For this purpose, the openings are equipped not only with corner posts, but also with reinforced posts.
Erection of the roof
Since the roof of the barn will be pitched, rafter system is simple: rafter boards, the length of which to provide an overhang (usually 30-50 cm) must be greater than the length of the side of the area intended for the roof, are laid on edge. For example, if the planned area of the shed is 3 m by 3 m, then the length of the rafter board should be 3.840 m.

The boards are nailed diagonally - two nails on both sides, so that the roof can more reliably withstand loads under snow pressure and when strong wind, it can be reinforced with metal corners.

It is necessary to install a sheathing on the roof (100*25 mm is suitable). If you plan to cover the roof with ondulin, then the manufacturer’s recommended roofing material the optimal lathing pitch should be 40 cm.

The final step is to cover the roof with the selected material - ondulin, slate or others.

Note!

Completing the construction of the shed
After the walls and roof are erected, windows and doors are installed in the prepared openings.

You can make a small porch at the door or just one or several small steps - depending on the height of the threshold of the barn.

The lining of the shed can be painted to match the roof, or, if it is wooden, leave it a natural color, which will look organic in the dacha by oiling it.

And to make the building look aesthetically pleasing and neat, the foundation should be covered with an asbestos sheet.

Such a barn, if the site on which it is being built has already been prepared, can be erected in just a couple of days. Built with your own hands and taking into account individual needs, it will turn out to be very comfortable and beautiful.

Photo of a do-it-yourself shed


Converting an old barn into a beautiful greenhouse
Conversion of an old barn main task designer Bob Trainor. Together with his wife, he decided to create a real architectural masterpiece on the site of a dilapidated building.
Initially, the dilapidated barn was just a magnet for garbage. But the couple saw the potential to transform it into something more interesting and functional by adding a greenhouse to it.

This is what the unremarkable barn looked like before reconstruction


Today it contains many beautiful plants.
IN new greenhouse Warm and humid air is maintained throughout the winter. Here you can grow fresh herbs for cooking, winter-hardy plants, prepare seedlings for planting in the spring and enjoy beautiful flowers all year round.

Exterior of the greenhouse
Weathered boards and vintage garden signs are an interesting and unique design element.

It's always summer inside the greenhouse
A long process of work by carpenters and architects resulted in the creation of a charming building that is the highlight of the garden. Sliding French doors and a green tin roof and extension transformed the old barn into an architectural masterpiece.

The married couple managed to achieve an amazing result!
Inside the renovated building there is a bright and cozy room, where it stands hydromassage bath, books and an antique corner was created - the pride of the owners. Here you can read, accept water procedures and just enjoy the view of the beautiful garden.

A great place to relax both in winter and summer
Lamps made from terracotta pots are given as gifts original lighting. The room also contains many antiques, such as the green cabinet on the right.

French door separates the recreation room from the greenhouse

View of the garden from the hot tub

The window is decorated with original multi-colored stained glass windows

The barn is always light and cozy

Inside the barn, even in winter, a wonderful oasis awaits the owners
Did you like the idea? married couple?
Categories:Places: . . . .
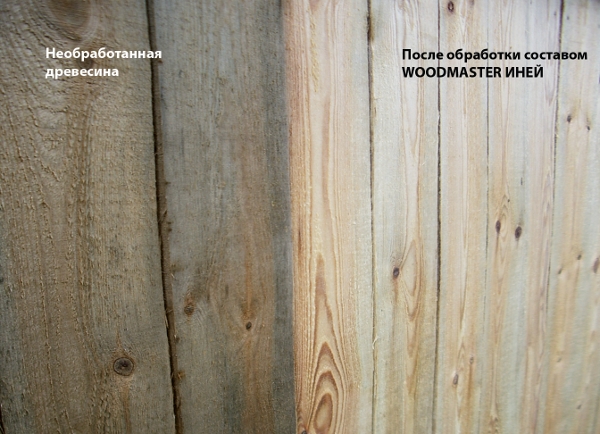
IN last years The trend is gaining more and more popularity not only to build new wooden houses, but also to restore houses and already battered buildings. It's no secret that over time wood loses its pristine beauty: golden, warm color this natural material After a few years it fades and becomes dark. And constant exposure to precipitation, temperature changes and other factors lead to the formation of mold and mildew.
How to restore old, darkened wood, returning it to its former attractive appearance? On this moment there are several in various ways solutions to this problem.
Some people prefer to use radical methods such as siding or cladding wooden structure brick. But such options do not initially imply the preservation of WOOD, so we will not dwell on them in detail. Let's consider only those methods that allow you to restore, renew and refresh damaged wood, and not hide it “out of sight”:
| Recovery methods | Advantages | Flaws | Result |
| 1. Grinding – mechanical method, which allows you to remove existing biological damage and remove the top darkened layer of wood |
|
|
The wood will look completely new and fresh, but we must not forget about the need for its MANDATORY further treatment with bioprotective and antiseptic compounds. Otherwise, the result will be very short-lived. |
| 2. Coloring– as a rule, inexpensive enamels or paints |
|
|
A building treated in this way will look refreshed and updated for some time, but, unfortunately, it will no longer look very wooden. And non-breathable coatings that form cheap paints and enamels will lead to the destruction of wood from the inside. |
| 3. Wood bleaching– the most popular currently are chlorine bleaching compounds |
|
|
As in the first case, we will get practically new wood from fresh and light color. But there is still a lot of work ahead - bioprotective treatment and, if desired, giving the wood the desired color. |
|
|||
| 4. Using a restorative composition– for example, Aquatex Restorer
|
|
|
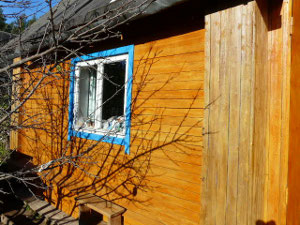
The result is impressive. After applying just two layers of the composition, we get not just renewed wood, but a durable coating of the desired color, providing bioprotection and strengthening the aged wood. |
Can't be consensus about how best to renew wood that has darkened over time. Radical measures are necessary only in extreme cases; most often the problem can be solved with minimal effort. When choosing a method that is optimal, remember that we're talking about about your home and the comfort in it. Excessive savings are hardly appropriate here. It is worth taking into account all the circumstances and giving preference as much as possible effective remedy, which will allow you to restore wood efficiently and quickly.

|
|
Old, unpainted house | House coated with Aquatex Restorer |
Of course, all of the listed methods of wood renewal are quite viable and have a right to exist. But now it can be argued that the use of a restoration composition, such as Aquatex Restorer, is exactly the way through which we get the desired result with minimal effort.
The product appeared on Russian market relatively recently, but its effectiveness has already been repeatedly confirmed in practice.