The best beer recipes at home. How to make it yourself according to the instructions step by step? Dark beer - calories, benefits and harm
Beer homemade compares favorably with cheap store-bought analogues due to its richer taste, thick foam and lack of preservatives. The result is a drink that does not contain anything extra. I'll tell you how to brew beer according to classic recipe using only traditional ingredients: hops, malt, water and yeast. To preserve the original taste, we will not resort to filtration and pasteurization.
It is believed that to make real beer you need to buy a microbrewery or other expensive equipment. This myth is imposed by manufacturers of such products. Together with the brewery, they will be happy to sell you a ready-made beer concentrate, which you just need to dilute in water and ferment. As a result, you will pay exorbitant prices for beer, the quality of which, at best, will be slightly higher than store-bought.
In fact, you can make homemade beer using available materials: a large saucepan, fermentation container, bottles and other available things, full list which are published below.
You will only have to buy hops, malt and brewer's yeast. I do not insist on choosing a specific company or brand. The range is quite wide, you can purchase any material you like.
In theory, malt and hops can be grown at home. But these processes go beyond current material. From now on, I will assume that you have all the necessary ingredients, whether they are homemade or purchased, it doesn’t matter. The only thing: I don’t recommend experimenting with brewer’s yeast, but immediately buying the best strains in the store, since beer differs from grain mash precisely because of its special yeast.
Homemade beer composition:
- water - 27 liters;
- hops - 45 grams;
- barley malt - 3 kg;
- brewer's yeast - 25 grams;
- sugar - 8 grams per liter of beer (needed for natural saturation carbon dioxide).
Necessary equipment:
- enamel saucepan for 30 liters - the wort is boiled in it;
- fermentation tank - needed for fermentation;
- thermometer (required) - if moonshine or wine can be made only by approximately controlling the temperature, then with beer this is initially a disastrous idea;
- bottles for dispensing finished beer (plastic or glass);
- small diameter silicone hose - for removing beer from sediment;
- bathroom with ice water or cooler for beer wort;
- gauze (3-5 meters) or a fabric bag;
- iodine and white plate (optional);
- hydrometer (optional) - a device for determining the sugar content of wort.
Making homemade beer
1. Preparation. The first stage, during which the brewer checks the presence the necessary ingredients and the readiness of your equipment for work. I also advise you to pay attention to the following points.
Sterilization. All containers and equipment used are washed well hot water and dry. Before working with ingredients, the brewer thoroughly washes with soap and wipes his hands dry. It is very important not to contaminate the beer wort with wild yeast, otherwise you will end up with mash instead of beer. Neglecting sterilization negates all further efforts.
Water. It is better to use spring or bottled water. In extreme cases, regular tap water will do. Before brewing beer tap water stand for 24 hours in open containers. This time is enough for the chlorine to disappear and heavy metals and the salts settled at the bottom. Subsequently, the settled water is carefully drained from the sediment into another container through a thin tube.
Yeast. For normal fermentation, brewer's yeast is activated with a small amount 15-30 minutes before adding to the wort. warm water. Universal method There is no method that allows you to properly dilute any brewer's yeast. Therefore, you need to follow the instructions on the package.
2. Grouting the wort. This term refers to the mixing of crushed malt with hot water to break down the starch in the grains into sugar (maltose) and soluble substances (dextrins). Sometimes malt is sold in crushed form ready for brewing (called a “mash”), which makes things a little easier. If not, you need to grind it yourself using a grain crusher or mechanical meat grinder.
Attention! Grinding does not mean grinding into flour; you just need to crush the grains into small pieces, making sure to retain particles of the grain skin, which will then be needed to filter the wort. Correct option grinding is shown in the photo.

correct grinding
25 liters of water are poured into an enamel pan and heated on the stove to 80°C. Next, the ground malt is poured into a fabric or homemade bag measuring 1 by 1 meter, made of 3-4 layers of gauze. The bag of malt is immersed in water, the pan is covered with a lid and boiled for 90 minutes, maintaining a stable temperature of 61-72°C.
Mashing malt at a temperature of 61-63 degrees promotes better release of sugars, increasing the strength of homemade beer. At 68-72°C the density of the wort increases, although the alcohol content in the drink will be slightly lower, but the taste will be richer. I recommend sticking to a temperature range of 65-72°C, which results in a tasty, dense beer at 4% ABV.

boiling malt in a bag
After 90 minutes of cooking, an iodine test is done to ensure that there is no starch left in the wort. To do this, 5-10 milligrams of wort are poured onto a clean white plate and mixed with a few drops of iodine. If the solution turns dark blue, you need to cook the contents of the pan for another 15 minutes. If the iodine has not changed the color of the wort, it is ready. You don’t have to do an iodine test, but simply increase the mashing (cooking) time by 15 minutes; the quality of the drink will not suffer from this.
Then the temperature is sharply raised to 78-80°C and the wort is boiled for 5 minutes to completely stop fermentation. Next, the bag with the remaining malt is removed from the container and washed with 2 liters boiled water temperature 78 degrees. This way, the remaining extractive substances are washed away. Wash water is added to the wort.
This mash method is called "in the bag." It allows you to do without filtration - separating spent grain (undissolved malt particles) from the main wort. In turn, filtration requires specific equipment (purification systems) and repeated transfer of wort from one container to another. Grouting in a bag does not affect the quality of the brewed beer in any way and takes much less time.
3. Boiling the wort. The contents of the pan are brought to a boil and the first portion of hops is added, in our case it is 15 grams. After 30 minutes of intense boiling, add the next 15 grams, and after 40 minutes, add the remaining 15 grams of hops and cook for another 20 minutes.
Depending on the chosen beer recipe, the time intervals and the amount of hops may vary. But by adhering to the specified sequence and proportions, you are guaranteed to get a good result.
Boiling takes an hour and a half, during which time it is important to maintain intense heat to keep the wort bubbling.

adding hops
4. Cooling. Beer wort must be cooled quickly (within 15-30 minutes) to 24-26°C. The sooner this is done, the less the risk of contaminating the drink with bacteria and wild yeast that are harmful to fermentation.
You can cool the wort using a special immersion cooler (one of possible designs in the photo) or carefully transfer the container to a bath of ice water. Most beginning brewers use the second method. The main thing is not to accidentally turn the hot pan over, scalding yourself with boiling water.

cooler design
The cooled wort is poured through cheesecloth into a fermentation container. To saturate the future beer with oxygen necessary for the normal development of yeast (after boiling there is almost no oxygen left), transfusion is done 3 times.
5. Fermentation. Diluted brewer's yeast is added to the wort and mixed well. In this case, it is very important to follow the temperature and proportions indicated in the instructions on the bag label. Yeast can be top-fermenting, which is introduced at a temperature of 18-22°C, and bottom-fermenting, which works at 5-16°C. These two types make different beers.
The filled fermentation container is transferred to dark place at the temperature recommended by the yeast manufacturer. In our case it is 24-25°C. Then install a water seal and leave it alone for 7-10 days.

example of a fermentation container
After 6-12 hours, active fermentation will begin, which usually lasts 2-3 days. At this time, the water seal intensively releases bubbles, then the frequency of carbon dioxide release slowly decreases. At the end of fermentation, young homemade beer becomes light. Its readiness is determined by two methods: a saccharometer (hydrometer) and a water seal.
In the first case, the readings of two hydrometer samples over the last 12 hours are compared. If the values differ slightly (by hundredths), then you can move on to the next stage. Not everyone has a sugar meter, so at home they often just look at the water seal. The absence of bubbles within 18-24 hours indicates the end of fermentation.
6. Capping and carbonation. Beer carbonation is its artificial saturation carbon dioxide, which improves taste and produces thick foam. Despite the complex name, the process itself is very simple.
Sugar is added to bottles for storing beer (preferably dark) at the rate of 8 grams per 1 liter. The sugar will cause a slight secondary fermentation, which will saturate the beer with carbon dioxide. Then the beer is drained from the sediment through a silicone tube, filling the prepared bottles with it.

spill completed
One end of the tube is lowered to the middle of the container with beer, the other to the very bottom of the bottle, this minimizes the contact of the drink with air. It is important not to touch the yeast, which, depending on the type, can settle at the bottom or accumulate on the surface, otherwise the beer will turn out cloudy. Bottles are not topped up 2 cm from the neck and are tightly sealed.
Easiest to use plastic container, since the lids can be screwed on by hand. For glass bottles you need yoke caps or a special device for sealing regular beer caps (pictured).

bottle with yoke stopper

device for closing conventional plugs
Bottles filled with beer are transferred to a dark place with a temperature of 20-24°C and left for 15-20 days. To dissolve the yeast sediment, they need to be shaken well every 7 days. After this, the drink is transferred to the refrigerator.
7. Maturation. Homemade beer is ready, you can already drink it. But if you let it sit for another 30 days, the taste will improve significantly.
Beer can be stored in the refrigerator for 6-8 months, open bottle- 2-3 days.

ready homemade beer (ale)
How to brew homemade beer and what recipes will we use to prepare this delicious drink? First, let's look at the ingredients we need to make beer at home.
Malt are called sprouted grains. It can be barley, wheat, rye (for beer it is best to take barley grains). First of all, it needs to be thoroughly ground. A mixer or coffee grinder is perfect for grinding; you just need to spray the grains with water, as they can turn into flour. To prepare light beer, light malt is used, the drying temperature of which does not exceed 70˚C. To prepare dark beer, you need to choose roasted and dark varieties of malt (drying temperature - more than 130˚C).
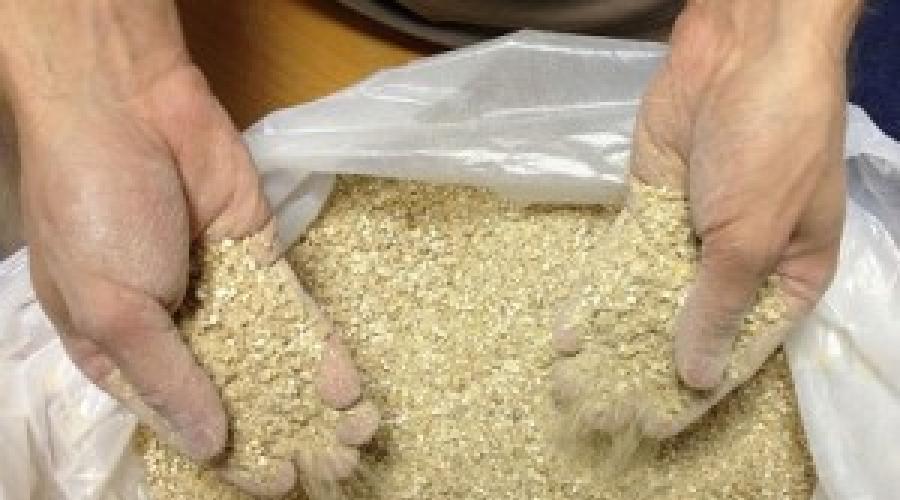
Hop- it's perennial dioecious plant with men's and female flowers. It grows from fifteen to twenty years. If you rub the hops with your fingers, you can see a flour called lupulin, which contains bittering substances and is very important for making beer. It is recommended to dry hop cones under a special canopy.
In addition to the quality of water, malt and hops play a big role in making homemade beer. yeast. Both regular dry yeast and homemade yeast are used.
♦ SIMPLE RECIPE (MALT, HOPS, YEAST, RICE, HONEY):

♦ STEP-BY-STEP CLASSIC RECIPE WITH PHOTOS AND DETAILED EXPLANATION OF ALL STEPS:

click on the photo and expand the beer brewing instructions
More homemade recipes:
Plum beer:
To prepare it, take six kilograms of ripe plums, which are softened through a sieve.
Then add a few liters of water. Add a solution of four kilograms of sugar, pour in two hundred milliliters of wine. All this must be boiled until it disperses.
On the third day, forty grams of chopped lemon peels are placed in a barrel, and a tube is inserted into the barrel's cork to allow air to pass through. This beer is aged for ten days, bottled and closed very tightly.
Beer in Russian:
Four kilograms of honey are diluted in twenty liters of water, fifty grams of hops are added and boiled for one hour.
The wort is filtered into a barrel, cooled and one hundred grams of yeast are added. All this is aged for 5-6 days at room temperature, while the hole for the plug must be open.
Next, the barrel must be corked and taken to the glacier or cellar, where it is placed with the cork down. After two or three days, a tap can be screwed into the keg and the finished beer can be poured into bottles, which must be tightly corked and stored in the cellar.
Hoppy beer:
Take two glasses of sugar, 25 grams of yeast, 500 grams of malt extract, 14 grams of hops. All this (except for the yeast) is poured into 4.5 liters of boiling water and boiled for one hour.
Strain and add water in a volume of four and a half liters, compensating for the original volume. Next, add the yeast and leave it in a closed container at room temperature for three days.
After aging, the beer must be strained, bottled and tightly closed with corks, which can be reinforced with wire. The beer is placed in a cold place for one week.
Table beer:
Take one hundred grams of hops, 2.4 kilograms of sugar, 50 grams of sultanas and 50 milliliters of wine.
Then pour in 13 liters of water and boil again.
After straining, add two tablespoons of yeast and leave to ferment for 8 days, after which the beer can be bottled and capped.
Last updated 06/13/2015
Brewing beer is, in general, not difficult. You just need to find a very large saucepan, preferably enameled, and stock up on malt and hops. However, the latter is sometimes replaced by yeast.
Malt
This is what makes a beer a beer. There will be no malt, and you will drink mash, mead, wine or kvass. Anything, but not beer.
Malt can be from any grain: rye, barley, wheat malt. To obtain malt, the grain is first germinated, then dried and ground.
To get malt, you need to take any grain, place it on a large baking sheet and add water. Leave in a warm place. In 2-3 days the grain will germinate. You need to dry it a little and grind it into coarse flour with a rolling pin. You will get malt.
But there is an easier way - you can buy ready-made malt, you can even buy ready set brewer with the right kind malt, hops and yeast, as well as beer recipes. This will make life a lot easier.
Hop
This climbing plant, for beer we use only its fruits - cones. Hops give beer a special, bitter taste. Participates in the clarification of the drink and the formation of strong foam.

Hops are sold dry, you can buy them in pharmacies, markets or in stores - they are included in brewing kits. When choosing hops, pay attention to the color; it should be yellow-green. Grayish is unripe, and reddish is overripe.
Dishes
For beer, it is best to take glassware. You can use enamel pans, but only without chipping. Stainless steel containers are suitable. Plastic is contraindicated for beer.
The container should be slightly larger than the planned volume of beer, as it needs room to ferment.
It is better to bottle beer in dark bottles. Champagne bottles with plastic stoppers. Corks can be sterilized and bottles sealed. They will let a little air through, and fermentation will not stop.
Fermentation
Beer is alive. It is constantly in a state of slow fermentation. As soon as fermentation stops, the beer dies. But first, beer ferments, like other alcoholic drinks. It is then that its taste and aroma are born.
Therefore it is very important to endure the necessary conditions, the main thing is temperature. Ideal -18-20 C, slightly below room temperature. If it is higher, up to 25 degrees, then fermentation begins too intense. At temperatures above 36 degrees, the yeast dies and the beer dies.
Homemade Beer Recipes
Dark beer

Step 1. Fry the grain in a frying pan until Brown, grind in a coffee grinder.
Step 2. Add chicory to the grain, boil everything with a third of water.
Step 3. Then add the rest of the water, add sugar, hops and zest and turn off.
Step 4. Leave for several hours, then strain the infusion through cheesecloth, pour into bottles and place in a cool place.
Mint beer

Step 1. Pour boiling water over the mint, cover the pan with a tight lid and leave for 1 hour.
Step 2. Meanwhile, add sugar to the yeast and wait until it rises.
Step 3. Strain the infusion, add sugar, bread crust and yeast.
Step 4. Leave for fermentation. When foam appears on the surface, add vanilla sugar, pour into bottles and store.
Honey beer
Recipe For this recipe you will need some kind of container from which it can continuously pour hot water. A samovar is the most convenient, since boiling water in it does not cool down, but continues to boil.
- 3 cups rye malt
- 2 cups honey
- 100 g hops
- 1.5 sticks of yeast
- 1 tbsp. sugar 10 liters boiling water
Step 1. Grind the malt, grind it with hops very thoroughly and put it in a linen bag. Sprinkle the yeast with a spoon of sugar and leave to rise.
Step 2. Place honey in a large saucepan. Place a samovar with boiling water on the table. The water should flow through the bag of malt into the pan. While it is pouring, the malt must be stirred all the time.
Step 3. When required amount water will fall into the pan, you need to mix everything, let the liquid cool and add yeast to the future beer.
Step 4. Wait until all the yeast has gone down, then pour the beer into bottles and place in a dark place. Leave it for 3-4 days and you can drink it.
Bread

Step 1. Cut the bread into thin pieces and dry.
Step 2. Mix the crackers in a large saucepan with malt, salt, pepper, yeast diluted in a glass of warm water, and a glass of sugar.
Step 3. Scald the hops with boiling water and also add to the pan.
Step 4. Pour in water, stirring the mixture all the time to obtain a creamy consistency. Cover the pan with a towel and leave overnight.
Step 5. Dilute a glass of sugar in 9 liters of water and add to the mixture. Mix. Cover with a lid and leave for 2 days in a warm place.
Step 6. Drain the liquid from the sediment. Add 1.5 liters of boiling water to the remaining grounds. Cool. And drain off the sediment again for the first batch of beer. Stir and boil.
Step 7 Skim off the foam, cool slightly and strain. Pour into bottles. Cork. Keep in a cool place for 2 weeks.

Beer is a popular drink due to its low cost, variety of varieties and walking distance. It’s easy to buy a bottle or two to while away the evening with friends at any nearest retail outlet. However, can we be sure of its quality and the absence of harmful additives? Unfortunately, not always.
Most types of drink contain a huge amount of preservatives, dyes, flavors and food additives. Living things are no exception.
You don’t have to give up your favorite alcohol; it’s easy to make it yourself and be confident in the quality and safety of the product. Today we will talk about how to brew beer at home without equipment.
How to make beer at home without equipment
Natural beer, brewed independently and with love, has a rich taste and lush foam, and is also more healthy due to the absence of preservatives and other additives. No store-bought analogue can compare with it in these indicators.
The main components of the drink are natural ingredients: malt, brewer's yeast, pure water and hop cones. And to prepare it, it is not at all necessary to purchase expensive special equipment; you can completely make do with available kitchen utensils.
Let's answer how to make beer at home without special equipment. The required equipment for a beginning brewer should be:
- Large saucepan (capacity depends on the volume of ingredients, preferably more than 30 liters);
- A glass container or bottle (in which the product will be fermented directly);
- Thermometer (to monitor the temperature of the wort);
- Silicone hose, narrow, to drain the beer without affecting the sediment;
- A piece of gauze fabric (about 5 meters for making a bag for malt);
- Bath with cold water(for cooling beer);
- Bottles for pouring with caps (plastic or glass);
- Water seal;
- Light plate, iodine for starch test in liquid.
Important: It is advisable to sterilize the equipment for brewing a foamy drink. The same requirements apply to the cleanliness of the brewer’s hands - be sure to wash with hot water. Otherwise, harmful microflora that gets into the wort will ruin the process.
Another important point in brewing is the requirements for water quality. It must be clean, free of impurities and unnecessary odors. It is better to take spring or bottled water. Making homemade beer yourself will not be much more expensive, and the taste will be much cleaner and softer.

Simple hop recipe
Homemade beer, prepared with your own hands, for true connoisseur means as much as the chocolate factory does to Willy Wonka. However, if you have no experience in brewing, then you should start with the simplest thing so that the result exceeds expectations and inspires further experiments.
We offer a simple recipe on how to brew beer at home without hop equipment.
The following components will be required:
- Purified water – 27 l.;
- Hops (acidity not higher than 4.5%) – slightly less than 50 grams;
- Malt – 3 kg;
- Yeast – 30 grams;
- Sugar – 200 gr. (per 1 liter of liquid – 8 grams).
All the main ingredients are easy to find in stores or specialized retail outlets, but there are some requirements for them:
- Malt. It is better to purchase it from Czech or German production, because... The domestic one is much inferior in quality. Pay attention to the color; for a quality product it is white. The taste should be slightly sweet and the smell pleasant. If you purchase ground malt, the husk must be intact, it is a natural filter;
- Hop. It can be bitter or aromatic, here everyone chooses according to their taste. But the color of the cones of a quality product must be reddish or yellowish;
- Yeast. Be sure to take special beer and the most highest quality. After all, the fermentation process depends on them.
Preparation:
- Pour water (25 liters) into the pan, heat it to 80 degrees (Don’t forget to use a thermometer to measure the temperature);
- We prepare the malt bag: we fold the gauze in 4-5 layers to make a square meter by meter. Pour malt into the middle, tie it and put it in water for about an hour and a half. The temperature should be maintained around 72 degrees. The strength of the finished beer will be lower, but the taste will be much richer.
- After the time has passed, it is necessary to conduct an iodine test for the presence of starch: pour about 10 ml onto a plate. decoction, add a drop of iodine. If the color changes to blue, then boil for another 15 minutes. If everything is ready by then, then 5 minutes at 80 degrees will be enough;
- Now take out the malt bag and rinse it in the remaining 2 liters of water. We then add them to the main volume of liquid. This manipulation allows you to bypass the filtering process;
- Now let the resulting decoction boil and add 1/3 of the hops to it. In half an hour the second part, in another 40 minutes - the remaining third. Boil for another 20 minutes.
- Now you need to cool the beer very quickly (literally within half an hour to 24 degrees) to avoid contamination with wild yeast. Transfer the pan to an ice bath (for a better effect with salt water), strain three times into another container through cheesecloth.
- The next step is adding brewer's yeast to the wort. They must be diluted according to the instructions on the package, then mixed thoroughly with the liquid. Afterwards we install a water seal and send it to a dark place to ferment for a week or a week and a half. The water seal will release carbon dioxide bubbles. As soon as the process stops (there won’t be a single bubble in a day), you can proceed to the next stage. By the way, at the end of fermentation the beer will acquire a lighter, pleasant shade.
- To fill the drink with carbon dioxide, add foam and improve the taste, carbonation is necessary. Add sugar to sterilized bottles (8 grams per 1 liter of beer). Now carefully pour the liquid into the container through a rubber hose, trying not to touch the sediment at the bottom of the pan.
- In order for the drink to “breathe”, you need to keep it about two centimeters from the top of the neck. Seal tightly. During this period, secondary fermentation begins, which will give the beer its final finishing touch.
- To ripen the foam masterpiece, we also send it to a dark place with a temperature no higher than 23 degrees (but preferably no lower than 20) for 2 or 3 weeks. After a week, the bottles must be shaken periodically.
- After maturation, such beer must be stored in the refrigerator.
As you can see, the recipe is quite simple and not labor-intensive. And all the time spent will more than pay off when you uncork the bottle and taste the results of your own labor.

How to brew beer at home without equipment: video
Before preparing, we suggest watching a couple of videos on how to make beer at home without equipment.
Is it possible to brew beer at home without special equipment?
Most beer connoisseurs would be happy to try making it themselves, but they believe that this can only be done with the help of a microbrewery or other expensive equipment, and do not want to spend money.
And they are doing the right thing, because this is not so. This myth is strongly imposed on us by the manufacturers of such goods; by the way, you can also purchase ready-made concentrate for making beer from them. But will it be natural and will it differ much from what is openly sold in any store? And given the cost of equipment and raw materials, the cost of such a drink will significantly exceed even the most expensive store-bought varieties.
Don’t rush to buy expensive appliances or run to the store for low-quality alcohol. Brew your own beer using this recipe and appreciate its unique taste.
More interesting things on our website.
There are hundreds of thousands, if not millions, of lovers of the intoxicating foamy drink around the world. But not everyone is able to brew beer at home for themselves and their friends, which would be not only natural, but also unusual and truly tasty. But only from such a drink can you get true pleasure! We want to tell you some secrets that will help you brew excellent quality homemade beer. It will bring pleasure to you, and you will not be ashamed to treat your friends. It is important to understand the algorithm, the technology that is the basis for making any beer, and experiment with the malt bill different varieties, using different types hops and yeast will be available later.
How to brew homemade beer from natural ingredients
First, let's look at the composition of any natural foamy drink. It includes:
Barley malt is very popular today, as it allows you to brew homemade beer with a rich malt flavor. Hops are usually used granulated. It is prepared in advance, which greatly simplifies the task. Yeast is a fermentation catalyst and is also very easy to buy, for example, at a malt shop. Now let’s look at the specific proportions and algorithm of actions.
Proportions for mixing ingredients
 It is impossible to brew beer at home without relying on specific numbers. Therefore, we will look at making beer from 35 liters of water (soft, as mentioned above), for which 5 kilograms of malt will be enough. As for hops, its proportions can vary (it all depends on the taste preferences of the brewer), but, as a rule, it is about 50 grams of granulated hops per 5 kilograms of malt per initial path home brewer, after a year the brewer’s “appetites” increase significantly. Based on these proportions, you can brew homemade beer in a volume of about 25 liters.
Algorithm of actions
To make it easier for you, we will schematically outline the algorithm for mixing ingredients and processing them:

Directly brewing beer

Often two weeks are enough for the sugars to completely ferment into alcohols. The beer can then be bottled. In this case, for every liter of beer you need to add one teaspoon of dextrose (glucose). This promotes carbonation (saturation of carbon dioxide) in the beer. This is what makes the beer “fizzy”. Carbonization time on average can be 7-10 days. You can also use sugar instead of glucose, but the taste of homemade beer may suffer from this.

Actually, now you have everything that will allow you to brew beer at home, which you will enjoy doubly. And the point is not even that it will be natural. The most important thing is that you managed to brew homemade beer yourself.
And even if the first “pancake” turns out to be lumpy, the main thing is desire, and our malt shop will help you with the rest. For any additional questions, you can always contact us using the information from the “Contacts” tab. Now you don’t have to think about how to brew beer, what’s more important is who you’ll share it with! Craft beer is a drink for friends.
- Thursday, 13 July 2017 15:15