Joists on floor slabs. Technology for leveling the floor in a panel house. Slab base, installation
Read also
Construction of a private house is a complex multi-stage process that takes a lot of time. And if you are not a professional, then you are unlikely to be able to do it yourself. After all, it’s impossible to do without special knowledge. But some steps can still be done with your own hands. For example, flooring. We won't say it's easy, but it's possible. So let's figure out how to make a floor with your own hands in a private house.
There are three designs of the floor base on which the finishing material will be laid:
- On a concrete floor slab.
- Along the floor beams.
- Concrete floor on the ground.
Floor on slab
Essentially reinforced concrete hollow core slab ceilings are already a finished floor. It is laid on the base of the foundation or on the walls of the building, which are filled with a reinforcing frame. It turns out a small but strong foundation right on the walls.
Such a plate, manufactured at the factory, goes through several stages of control, so its strength characteristics meet all the necessary standards. But the evenness of the surface leaves much to be desired. But this is not a problem, because such a concrete floor is subject to additional processing, insulation and finishing. So the evenness of the surface will ultimately have maximum parameters.
By technology construction work Installing a floor slab is the fastest process. To do this, you will need a crane that will install this reinforced concrete product anywhere in the building in a few minutes. But the floor arrangement does not end there.
What else needs to be done with the floor slab?
First, it is necessary to seal the joints between the slabs. To do this, they are filled with concrete mortar. To prevent the joint from leaking, formwork is installed on its lower side. This can be an ordinary board, which is supported from below by a stand or support. The same board can be pulled with wire to the lower plane of the slab, secured to a pipe or other metal profile located on top of the slab across the joint.
Secondly, a roll is laid waterproofing material. Please note that multi-strip installation must meet certain requirements:
- All strips are laid overlapping with edges offset up to 15 centimeters.
- To completely seal the layer, the edges of the material are sealed with self-adhesive tape, for example, construction tape.
- The waterproofing layer is applied to the walls up to the level of laying the finishing floor covering.
Thirdly, if you want the floor to meet the requirements of comfortable living, then on the first floor of the building it must be insulated. True, today many experts are of the opinion that the floor on any floor should be insulated. Therefore, we lay thermal insulation material.
The modern market offers a huge selection of insulation materials, so finding something necessary specifically for your floor will not be difficult. There are both traditional inexpensive materials on the market and new ones with excellent qualities and properties. Most often, expanded clay is poured onto the floor or slabs of extruded polystyrene foam are laid. Manufacturers of mineral wool began to produce dense products in mats that are not inferior in characteristics to either expanded clay or penoplex.
Fourthly, another layer of waterproofing is installed. Use the same material as in the first layer, and using the same technology.
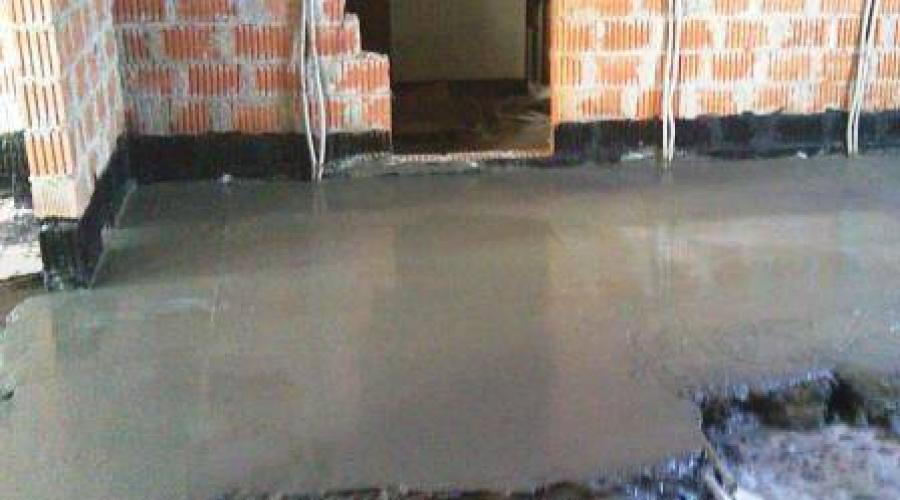
Fifthly, the screed is poured or installed. More on this in a little more detail.
Features of creating a screed

How to make a floor screed
There are three types of screeds:
- Regular wet based on cement-sand mortar.
- Semi-dry from ready-made building mixtures.
- Dry based on durable tile materials - plywood, gypsum fiber board, chipboard.
All options are used equally often, and the basis for the choice should be the time in which you need to meet. If it's pressing, then best option- this is a dry screed. If you have enough time, then you can take any other variety.
Attention! To increase the strength of a wet or semi-dry screed, it is necessary to lay a reinforcing frame made of metal fittings or wire. It is important here that the frame is located in the body of the screed, and not on its border.
The difficulty of laying the screed layer is that it must be precisely aligned and built in one horizontal plane. If you do not know some of the nuances, the error can be very large. Therefore, we advise you to read the articles on our website, where step-by-step instruction pouring or installing screed on the floor.
This is what the diagram for constructing a floor on a concrete floor slab looks like. Many private developers who have tried different methods of arranging the floor say that this option is the simplest and most convenient. And it doesn’t matter what kind of screed will be used to level the surface of the slab.
Floor on floor beams
This option is not uncommon construction sites in private housing construction. But not everyone can build such a structure. First of all, because the floor can be built on floor beams only by installing additional elements in the form of lags. It is not possible to lay out the sexual base in any other way. And the most important thing is that these logs will have to be aligned to achieve a flat surface.
Let's consider a scheme for carrying out such work. Typically, large-section wooden beams are used as floor beams. You can use metal profiles and concrete beams, but both of these options are expensive, and it is much more difficult to attach the joist structure to metal and concrete. Therefore, wooden beams are the best option. They are laid on basement part foundation with the obligatory lining of waterproofing material - a piece of roofing felt or roofing felt. Align wooden beams in a plane is not necessary, and this is inconvenient, because the weight of each element is quite large. Leveling the floor is carried out with lags.
There are logs on the beams. These can be the same small-section wooden beams or boards laid on the end. The lags are fastened to the beams either with self-tapping screws or with special metal corners. The second option is used more often because it is more reliable. But that's not all. Metal mounting angles allow you to raise or lower the joists, thereby simplifying the process of leveling the floor base.
How to level the floor along the joists

Floor installation on joists
The alignment scheme is quite simple. First, two logs are placed in the same plane and exactly horizontally on opposite sides near the walls. We remind you that this can be done using metal mounting angles. But you will still have to install pads under the logs - wooden, plastic or metal plates.
The evenness of each log must be checked with a building level. And in order to determine the location of two lags in the same plane, a rule or a long rod is installed on them, and it is this that is checked for horizontalness. Now 3-4 rows of threads are stretched between the lags so that they do not sag, and intermediate structural elements are placed along them.
Attention! The height of the logs is selected according to zero level, which is pre-applied to the walls in the form of a contour around the perimeter of the room.
Flooring
Usually a floor made of boards is built along the joists. This traditional version, which has several advantages:
- The plank floor is easily insulated. To do this, longitudinal slats are nailed along the lower edges of the joists, along which the subfloor is installed. Then a vapor barrier is laid, and on top of it is insulation, which is covered with a waterproofing roll material, for example, polyethylene film.
- In this design, communication systems and networks can be laid.
- It is possible to install a “warm floor” heating system.
A plank floor is a beautiful and warm covering that does not need to be decorated with other finishing materials. You can simply paint it or apply a colorless varnish, which will only highlight the beauty of the natural component of the floor covering.
Other flooring options on beams

The plank floors of the first floor can be laid on posts
Sometimes beams are not used as support for joists. The joist structure itself is a support for the floor base. If the house is small, then the logs are installed with their ends directly on the foundation, and this is enough to withstand heavy loads. If the room is of decent size, then additional intermediate supports in the form of columns will have to be installed under the logs. They can be built from brick, stone, concrete or finished products- reinforced concrete columns, metal pipe and other metal profiles. Choose the simplest and cheap option, for example, brick columns.
Please note a few very important points:
- The support columns should be located at such a distance from each other that the loads on the joists are distributed evenly - 40–50 centimeters is enough. Although everything will depend on the cross-section of the logs used. The larger it is, the less frequently supports can be installed. So the distance between them can reach up to 80 centimeters.
- The upper planes of the columns must be horizontal and in the same plane.
- A small foundation must be poured under each support.
- Waterproofing material is laid on the upper plane of each column.
Floor on the ground

Floor installation in a private house
This option for constructing a floor in a private house can be considered a subtype of installation on a floor slab, because the result will be a concrete base. But the works themselves differ significantly from the first version. They are more labor-intensive, they use a large number of different building materials, and besides, the design of the floor base itself is a multi-layer cake.
The work is carried out according to the following scheme:
- First, soft soil is removed to a depth of up to half a meter. The bottom of the pit must be compacted, and a cushion of sand and crushed stone is poured onto it. These two materials can be replaced with gravel. Please note that each layer of backfill must be compacted, and the sand can be watered.
- Waterproofing material is laid. The technology is the same as in other processes.
- Expanded clay or perlite is poured as insulation.
- A reinforcing frame made of metal is installed welded mesh. It is important that the frame is in the body of the screed, so lift it above the level of the laid materials.
- Poured concrete mortar, which will subsequently be the basis of the floor. Pouring the solution must be given Special attention, because a flat and durable floor is the key to the quality of the entire foundation. On such a floor it will be possible to immediately lay finishing, or you can install a joist structure. By the way, heated floors can also be installed perfectly on it.
Conclusion on the topic
So, we figured out how to make a floor. In our case, options for constructing a foundation without finishing processes were considered. After all, it is precisely this type of work that private developers have the most questions about. Because, firstly, it is not as simple as it might seem at first glance. And, secondly, finishing the floor with any floor covering is much easier. So choose the construction option, take our recommendations into account and get to work.
 Ruslan Vasiliev
Due to the high strength of the monolithic base, the floor can be installed on the foundation in any form using a screed on the slab to provide evenness. On this basis, you can set without additional preparation:
- fireplaces of any complexity;
- boilers for heating systems;
- various partitions.
With all these advantages concrete base very cold, so before installing the floor, insulation work should be carried out. To ensure that the surface of the foundation does not give off dampness and cold, a heat-insulating cake must be laid. Extruded polystyrene foam is a good choice for filling such insulation. It is best laid in the gap between the foundation slab and the rough floor screed. Sometimes it can be used between basement and the first floor.
Slab base, installation

In order to better understand the progress of work, it is imperative to familiarize yourself with the points of work execution on self-installation monolithic base. The first thing you should pay special attention to is calculating the foundation. Most often, when performing this type of work, many make gross mistakes, which have a negative impact at the time of installation of the base.
It is very difficult to make foundation calculations yourself without certain knowledge. In addition to the loads on the base at the time of calculations, it is necessary to take into account possible shrinkage, deformation, distribution of all loads along the slab, and so on. Calculations are carried out based on state standards and norms. If you do not have skills in such work, it is best to contact construction experts.
After completing the calculations, it is necessary to engage in excavation types of work. A recess should be made along the entire perimeter of the future foundation. Next, you need to lay geotextile materials, which are necessary to ensure that the sand cushion does not press through the weight into the thickness of the clay.
 Compacting the sand cushion
A sand cushion is being laid; in some situations, medium-fraction crushed stone can be used. Backfilling is necessarily accompanied by layer-by-layer compaction, which allows the material to be compacted. It is recommended to spill the mixture with water while compacting. After this, engineering communications are carried out. Next, a concrete mixture 10 centimeters thick is poured.
Waterproofing is laid on the resulting preparatory layer, which is necessary for the concrete slab. It is imperative to solder the joints of the material. For this, it is best to use burners. The dimensions of the waterproofing must be larger than the area of the foundation. The edges of the insulation must protrude so that they can be later attached to the base plate.
Upon completion of the installation of the waterproofing layer, thermal insulation is laid. The best material For this purpose extruded polystyrene foam will act. In most cases, a plastic film is laid on top of it. Installing thermal insulation will solve such a problem as cold floors in the room. Also, if it is available, heating costs will be reduced in cold period time.
 Reinforcement of the future slab
A structure made of metal reinforcement is installed on the surface of the finished foundation layers. The reinforcing mesh should be laid at a level of 50 millimeters from the bottom of the foundation, that is, from the polystyrene foam layer, and the second at 50 mm from the top edge. Along the perimeter finished design formwork panels are installed. They should be firmly connected to each other to avoid leakage during pouring. The final stage of the base slab is pouring it with concrete mixture.
The advantage of a monolithic base
A monolithic slab as a foundation has many advantages, for example, such as:

TO negative aspects The only thing that can be said is that with such a design it is impossible to make a basement, but a solution exists, it just requires a lot of expense. The cost of any home base is determined by the price of Construction Materials, transportation costs, purchase or rental of specialized tools, as well as workers’ wages.
Types of floors
 In the interior decoration of any room, the floors are an important part, since the outcome of the entire renovation depends on them. Their installation is carried out on a slab or on the ground surface. IN modern world floors are no longer considered a simple layer of concrete screed, they are made in the form of a multi-layer structure. Such floors include many building elements.
- leveling layer;
- thermal insulation;
- sound insulation;
- waterproofing layer;
- final coating.
 Nowadays, genders have different technical properties and performance characteristics. This diversity arose as a result of the fact that various requirements are placed on flooring, for example, such as: operational, sanitary, artistic and aesthetic. As a result of finishing, the floor should have the following properties:
- horizontal;
- low thermal conductivity;
- moisture resistance;
- perfect smoothness;
- the floor must not be slippery;
- easy to clean from dirt;
- high wear resistance.
Having finished smooth screed, you need to decide what material will cover the floor in the future.
Concrete covering
This is a fairly flat and undeniably smooth floor, which is used in industrial and warehouse-type premises. This floor has a flat and smooth surface thanks to chemical additives. These chemical elements give lasting strength to the coating as a whole. Such floors are applied to the surface of a concrete base and then rubbed to a perfect shine. Due to chemical element at the moment of grouting the surface, it penetrates into the structure of the foundation, making it stronger. After watching the video, you will learn how to properly install a concrete floor.
One of the important qualities of such a floor covering is durability and lack of dust. It is also important that the cost of installing such a floor is inexpensive. Low price materials allows you to reduce unnecessary costs.
Plank floors on slab
After monolithic slab will be filled with a rough screed, you need to decide on the choice of material. Plank floors are a good choice for flooring. The first step is to install the logs, that is, the element to which the plank covering will be attached. They should be placed on soundproofing pads. In the absence of a slab, columns are made, most often of brick, on which the logs are laid.
When you start building a house, the question of flooring arises Firstly, since both the strength of the coating and the preservation of heat in the rooms, and therefore the health of the residents, will depend on them. Flooring in a private home can be installed in several ways, but you need to consider each of them in order to evaluate the pros and cons of each option.
- Wooden flooring has always been considered the most popular and comfortable floor for a home, since wood, unlike concrete, is itself a warm material.
- Concrete coatings are more durable than wood, but require good insulation, so they are often combined with wooden floors.
- Loose or floating floors were not so popular among home owners in the past, but recently many are increasingly turning to this option, as it is easy to install and can be done in literally one day.
Whichever gender is chosen, it has specific features of your device, depending on the design of the house, the area on which it should be placed, the difficulties and nuances of installation, and even the financial capabilities of the homeowners.
In order for the floor in a private house to be warm and pleasant to walk on, each of its types requires insulation, so it is definitely included in the plan general works arrangement.
Wood floors can be made different ways, but they are always secured to logs, which are made from beams laid on a concrete base, support pillars, or embedded in the walls of the house. The latter option is only possible in a room with a small area, for example, narrow corridor or a small hallway.
In addition, wooden floors are divided into single-layer and two-layer, i.e. with subfloor.
Pole-supported floors
Floors on supporting pillars are made in cases where it is not possible to connect the logs to the walls of the house or this is not enough for the strength of the overall covering. A log system installed only on support pillars is called “floating”.
"Floating" floor on supporting pillars
Floors using this system are arranged as follows:
- The first thing to do is to dig holes in the underground space of the house for installation brick pillars. Such mini-pits are marked at a distance of 70-100 centimeters from each other. The depth of the pits should be at least fifty centimeters. The size of the section will depend on the height of the supports being erected; the higher the pillar should be, the greater its width and thickness.
- Crushed stone, gravel or sand, at least twenty centimeters thick, is poured into the bottom of the dug holes, then filled with water and thoroughly compacted. The better the bottom is compacted, the more reliable the support for the joist system will be, so this process must be carried out conscientiously.
- Red brick pillars are laid on the compacted cushion, or formwork is arranged, reinforcement is installed, and a cement-gravel mixture is poured. If the pillars are made of concrete, then their cross-sectional size should be at least 40×40, and preferably 50×50 cm. The erected pillars are checked for level, and, if necessary, their height is adjusted.
- On top of the pillars, to a depth of 10-15 centimeters, threaded rods are embedded or anchors are installed, onto which the floor beams will subsequently be attached.
- It should be noted that if the building or room has a small area, then support pillars can only be installed along the perimeter of the future room, but in this case it is necessary to lay massive beams on them.
- After the pillars are ready, waterproofing material is laid on their upper part. It is better if it is three or four layers of roofing material.
- Holes are drilled in the beams through which the mounting pins will pass.
- Beams made of timber or logs are laid on the waterproofing, they are put on studs and leveled, leveled using wooden boards. When the base of the floor is laid, it is better to fix the pads to the bars using nails, and the beams themselves also need to be secured by screwing them to the posts with nuts through a wide washer. If the studs have excess height, it is cut off with a grinder.
- It is best to pour expanded clay onto the surface of the underground in a layer of 15-20 centimeters - it will well retain moisture that can come from the ground and additionally insulate the floors.
- In order for the floor installed in this way to be warm, it is better to make it two-layer, especially since in this embodiment all the conditions have been created for this. If you plan to immediately lay it on the beams floorboard, then the underground must be completely filled with expanded clay, leaving between it and wood covering distance no more than ten centimeters.
Subfloor
The subfloor can be constructed in several ways. The choice of a specific method will depend on the insulation material.
- If slag or expanded clay is used as insulation, then the subfloor is made solid, from boards that are nailed to the bottom cut of the beams. The cracks between the boards are coated with clay diluted to a not very thick state. After the clay has dried, insulation can be poured into the cells, on top of which a vapor barrier film is laid.
- If the floors are insulated with mineral wool, then the boards are nailed to the underside of the beams at a distance of 50 centimeters from each other.
- A vapor barrier is attached to the beams and bottom boards and thin plywood is laid. Insulation is laid on it, which is also covered with a vapor barrier on top, attached to the beams using a stapler and staples.
- Then logs measuring 10 × 3 centimeters are nailed onto the beams, on which floorboards or thick plywood will be laid.
Video: a visual example of installing a subfloor
Wooden floor on the ground
A wooden floor is also installed on the ground. There is a scheme for this, focusing on which you can draw up a work plan.
- The soil in the underground must be compacted well, and a cushion of sand, gravel or medium-fraction crushed stone, 20 to 40 centimeters thick, placed on top of it, and then compacted again.
- Rigid waterproofing, for example, roofing felt, is laid on the compacted cushion. If desired, you can lay reinforcement mesh under it for greater strength. Waterproofing should extend to the walls at least 10 centimeters.
- For waterproofing, lay bricks or concrete blocks, which will subsequently become a support for the beams. The supports are placed in such a way that the beams are at a distance of 60 centimeters from each other (standard insulation width).
- The first layer of insulation is laid around the bricks - this can be 50÷100 mm polystyrene foam or mineral wool.
- Wooden beams are installed on bricks, or better yet, on concrete blocks, leveled, and secured with a corner.
- Between the laid beams, for greater insulation, you can additionally lay mineral wool slabs.
- Insulation on top, cash yeah attach a vapor barrier film.
- Then lay the floorboard, which is secured with nails carefully driven into its side.
- The board is laid at a distance one - one and a half centimeters from the wall to ensure ventilation.
Wooden floor on concrete screed
When installing the floor on concrete screed or slab, logs can be laid directly on concrete or, if you need to raise the floors to a small height of 10-20 centimeters, on threaded studs.
When laying floors on concrete, you cannot skimp on joists - they must be quite massive, then the floors will be reliable and non-creaky.
It should be immediately noted that with such a floor arrangement, it is imperative to make it two-layer, i.e. with the subfloor described above, otherwise it will be very cold.
- First on concrete covering Preliminary marking of the location of the logs is made. They should be installed at a distance of 60 centimeters, taking into account future insulation. Marking is done by marking a line with color.
- Next, marks are made on the broken lines at a distance of 30-40 centimeters.
- At these points, holes are drilled into which studs are installed with clamps located at approximately the same height from the floor - they will hold the beams.
- Holes are drilled in the beams themselves at a measured distance corresponding to the location of the studs built into the surface of the concrete, after which the beam is placed on the studs.
- Then, using a level, tighten the clamps in one direction or the other, bringing all the beams to an ideal horizontal level, controlling it with a level.
- The nuts are tightened on top of the studs, driving them into the prepared recess, and the excess part of the studs is cut off with a grinder.
- The next steps are the installation of the subfloor, insulation and laying of the finished floor.
Fastening the joists directly to the screed
Place joists on the concrete floor not difficult at all, and you can do it yourself if you have the right tools.
- Strips are struck on the concrete surface, also at a distance of 60 centimeters from each other, but from the wall they should be at a distance of the thickness of the insulation (150-200 mm).
- Then, using anchors, the logs are securely installed on the concrete floor. In this case, the beams can be of any height - this will depend on the desire of the owner of the house and on the ability to raise the floors to the desired height.
- Then it would be nice to put thin insulation, for example, foamed polyethylene, which can be secured to the joists using staples.
- All over the wall, all over strips cut from mineral wool mats are installed around the perimeter of the room.
- Next, they are laid on the covered polyethylene. insulation boards material or expanded clay of fine or medium fraction is poured.
- The top of the insulation must be covered with a vapor barrier film.
- Next, a floorboard or thick plywood is laid, and on top you can lay decorative coating.
Concrete floor
Concrete floors are also installed in different ways, but in general they are similar in technology, with minor deviations or additions.
Concrete coating is mainly done in houses with concrete or brick walls, and begin its construction after the walls are removed and the roof is covered.
- If necessary, the top layer of soil is selected to place a sand cushion in its place, which should be 10-15 centimeters deep. It needs to be compacted well by pouring water.
- The next layer is crushed stone of the middle fraction, which also needs to be compacted. The thickness of its backfill should be at least 10 centimeters.
- Next they arrange rough screed. It can be made insulated by adding expanded clay or foam chips to the solution. In addition, in this case the solution can be mixed not on sand, but on gravel. The screed is leveled and left to harden.
- On the finished hardened rough screed you need to spread waterproofing, which should extend 15-20 centimeters onto the walls. For it, you can take roofing felt or regular thick plastic film- the main thing is that the material is laid hermetically, with overlaps sealed.
- Insulation - expanded clay - is poured onto the waterproofing, or extruded polystyrene foam is laid high density, the thickness of which is selected at the request of the house owner and depending on climatic conditions region where the house was built.
- A metal reinforcing mesh is installed on top of the insulation, and then a finishing screed is poured into which you can also add insulation material. To ensure that the screed is level and there are no differences in floor height in the room, it should be done according to those exhibited according to the construction beacon level.
- If desired, such a coating can be made additional insulation. On ready-made screed You can lay wooden floors, lay laminate linoleum or ceramic tiles. Nothing prevents you from organizing a “warm floor” system.
Dry screed floors
There is nothing complicated about installing floors using a dry screed - it is done much faster than a concrete or wooden floor. That is why in last years it is being used more and more often.
The main thing in its installation is a high-quality uniform bulk material. For such a floor, perlite, quartz or silica sand, slag or fine-grained expanded clay are used. These materials are not only convenient to use, but also perfectly perform the task of sound insulation and thermal insulation. If the bulk material is well distributed over the area of the room, it almost does not shrink, so if the work is done conscientiously, the bulk floors will last a long time.
Leveling the bulk mixture
- To ensure that the floors keep their shape and the dry screed does not crumble, special bulkheads made of boards are installed.
- Plates made of moisture-resistant GVP, plywood or other materials are laid on top of the dry screed. sheet materials. The most important thing is to set the first slab perfectly level - this is done using a level. The next slabs to be laid will be aligned with the first one. The laid material does not need to be pressed into the dry mixture, but should be moved very carefully along the surface. The evenness of laying sheets during all work is controlled using a level. in areas that are subject to the greatest load, for example, in aisles.
- On gypsum fiber the sheets have folds with which they are connected to each other when laying them on a dry screed.
- The sheets are laid with an offset of half a sheet, by analogy with brickwork - this will increase the stability of the coating.
- Having laid the first layer of slabs on a dry screed, they usually move on to laying another one - it will make the floor more durable and stable. If used for flooring gypsum fiber sheets, then a fold is cut off from them on the first layer so that they fit tightly together and bulk material cannot get between the first and second layers.
- The second layer of sheets is always laid perpendicular to the bottom sheets.
- The laid top layer of sheets is fixed with the bottom with using glue and additionally fastened with self-tapping screws. They must be twisted under load - to do this, simply stand on the top sheet, and the weight of the master will serve as the necessary load.
- Exactly along the line doorways It is not recommended to join the sheets - it is necessary that the sheet be distributed in this place to both rooms. sealed with waterproofing material, for example, sealant.
- If such floors are installed in a room where humidity is high, the entire surface of the floor is treated with coating waterproofing before laying the decorative coating.
Thus, it is obvious that the floor in a private house on a dry screed is quite easy to install if you take the work seriously, do it carefully and take your time. Rush absolutely inappropriate– in terms of time for completing work, such a technology under any circumstances is many times superior to any other.
Ecology of consumption. Estate: One of the most important structural units Any building is a floor system - not a finishing decorative coating, but the entire “pie” consisting of several layers. There are several types of floors, differing in raw materials, manufacturing method and characteristics.
One of the most important structural components of any building is the floor system- not a finishing decorative coating, but the entire “pie”, consisting of several layers. There are several types of floors, differing in raw materials, manufacturing method and characteristics.
Everyone faced with construction or major reconstruction makes a choice in favor of one of the systems based on their capabilities, preferences and building parameters. Conveniently, some designs involve the simultaneous creation of a contour underfloor heating– singular or additional. Let's look at the main floor systems
- floors on the ground
- floors with joists
- floors on reinforced concrete slabs
Floors on the ground
Monolithic flooring is a multilayer structure installed directly on the ground inside the perimeter of the foundation, a type of concrete screed.
The system consists of the following layers:
Compacted soil– depending on the level, the soil is added or, on the contrary, the extra centimeters are removed. The more thoroughly the surface is compacted and leveled, the stronger and more reliable the screed will be.
Bedding– sand is most often used. If due to the height of the “pie” it is necessary thick layer, it is recommended to backfill in several approaches with compaction of each layer (10-15 cm). To compact the soil and bedding as much as possible, a layer of coarse crushed stone is poured and compacted on top of the sand. It is also possible to use a general layer of ASG instead of individual layers of sand and crushed stone; compaction is required regardless of the type of backfill. Vibrating plate, in several approaches with changing the direction of movements, - best friend floors on the ground.
Rough screed - a layer of concrete several centimeters without reinforcement. Relevant for strong pressures groundwater and when creating in-depth structures - in basements, ground floors. Fused over the screed bitumen waterproofing, sealing surface and requiring a flat, rigid base. If we are talking about regular floors on the ground and there are no problems with waterlogging, they do without this layer.
Waterproofing– cuts off moisture that will come from below, are used various materials, but in most cases it is a thick film (from 150 microns), overlapped with a margin (15-20 cm), in one or two layers. The joints are taped with tape for tightness, and 20 cm of film is placed on the walls.
Insulation– to insulate the ceiling, slab materials (PSB-25 or EPPS, with a thickness of 100 mm or more) are used, laid end-to-end on top of the waterproofing. When using extruded polystyrene foam, another layer of film is needed on top to prevent direct contact with the cement mortar. Polystyrene foam is not afraid of such a neighborhood.
Screed– the thickness of the concrete layer and the brand of mortar used are calculated based on the expected loads, on average it is 50 mm. The screed is reinforced metal mesh thickness from 4 mm. The thicker the screed layer and the greater the expected loads, the thicker the mesh should be. To ensure that the concrete layer protecting the filling from external influences is uniform, special plastic stands or improvised devices are used. To maintain the filling level, beacons are used, installed at an equal distance.
With a standard pie, there are two ways to create a floor on the ground– with the combination of the slab and the foundation (rigid screed) and through a damper tape (floating screed), more information about the damper tape can be found in the material “Dry screed...”. In the first case, the structure turns out to be dependent on the possible shrinkage of the foundation, in the second the screed lives its own life and is not subject to deformation.
The advantages of flooring on the ground include their energy efficiency - they accumulate heat, versatility - they are suitable for various types soil, durability - you can forget about a properly made screed for many years. Also attractive for home owners is the opportunity to immediately pour an underfloor heating circuit into the screed - water or electric. Plus, for most finishing materials the resulting slab will be the optimal base with minimal finishing touches or without it at all, if you try and maintain the level. For example, for a self-leveling decorative floor, a concrete base is considered the best option.
But there are some drawbacks - the process is also very labor intensive (one of the forum users suffered disc protrusion without calculating own strength), and the inability to conduct communications in the ground, and the rise in cost square meter for large volumes of backfill. However, it is one of the most sought after types of flooring.
Beam floor, as opposed to a monolithic concrete slab. When creating floors using joists, the base is a “lattice” of longitudinal elements - wooden, metal or reinforced concrete beams.
In a one-story and frame housing construction wooden beams or logs are more in demand– they can withstand heavy loads, their installation does not require much time or wet processes. Required thickness beams are calculated based on the expected loads, the optimal indicator is 1/24 of the length. Wood goes to the beams coniferous species, as it is more resistant to external influences, humidity should not exceed 14%. Before use, it is necessary to treat with special antiseptic compounds to prevent decay and damage by pests and microorganisms.
Depending on the type of foundation, the beams are installed in special grooves (left during pouring or laying, cut into wooden bases) or placed on top. If beams are in contact with metal, concrete or brick, additional waterproofing is required at the joints (resin, roofing felt, film).
Typical pie beam floor consists of the following layers:
Floor beams - the spacing between elements depends on the expected loads and span length, on average - 1 m.
Logs (sheathing)- a wooden beam laid perpendicular to the beams; the greater the distance between the beams, the stronger the logs should be. To maintain the level with curved beams, wooden spacers are used; the distance from the wall to the joist is 20 cm. When calculating the step, this nuance is taken into account. When the distance between the beams is less than 80 cm, you can immediately install the subfloor, without logs.
Subfloor - necessary for laying insulation, laid between joists or between beams, with a small pitch. Skull bars (beams with a smaller cross-section) are used as fasteners, attached to beams or joists. The boards are laid on bars without the use of fasteners, they are placed closely, but lie freely.
Moisture protection - protects the insulation from absorbing moisture from the subfloor, but should not retain steam, so regular film is not suitable. You can refuse waterproofing if the subfloor is dry and the groundwater level is low.
Insulation - most often slab or roll materials are used: stone wool, PSB, EPPS or backfill materials such as ecowool.
Vapor barrier - this can be a special membrane or ordinary polyethylene film.
Ventilation gap - when designing a ceiling, it is recommended to choose logs that will be slightly higher than the insulation layer - a gap for ventilation automatically remains. If this was not done, then after laying the insulation, a beam is filled, which will give the required distance.
Whether to lay another layer of subfloor after insulation depends on the future finishing coating– board or slab varieties are self-supporting; for linoleum and carpet you will have to spend money on a base layer.
The advantages of such a floor system include speed of construction, reduced load on the foundation, absence of heavy physical activity during manufacturing (no need to drag tons of sand and crushed stone, pour cubic meters of concrete).
Among the shortcomings is the need effective ventilation underground, lower load limit, fire hazard of wood and lower durability compared to concrete. In addition, to make floor water heating, you will need to spend additional money on screed or use alternative systems, for example, warm floors over wooden joists. However, this type of flooring is chosen by many developers, including portal participants, modifying the standard pie to suit their parameters.
Replaced with colyaseg fiberglass mesh waterproofing film, considering that it will more reliably preserve the insulation from destruction, taking into account the gaps in the subfloor.
Floors on reinforced concrete slabs
Like floors on the ground - a beamless floor, with the difference that the reinforced concrete slab is not poured on site, but is purchased ready-made.
A popular option for houses with full ground floor or a basement, when the slab is also the ceiling of the lower level. Unlike floors on the ground and floors on joists, it is necessary to use construction equipment, since it is impossible to lay even the lightest slab by hand. But in terms of speed, slab flooring devices outperform all other options.
Floor slabs are made industrially in two categories - single-layer solid and multi-hollow. The former are a reinforced monolith, the latter have through round holes (channels) into which it is convenient to hide communications. In private construction, hollow-core slabs are mainly used.
Their thickness is 220 mm, they are lighter than solid ones, have reduced thermal conductivity and better insulate sound. At standard thickness slabs are able to withstand different loads, depending on the grade of concrete and the parameters of the reinforcement frame. Length varies from 2.4 meters to 6.8 meters, width - from 1.2 to 1.5 meters, weight - from 0.9 to 2.5 tons.
Laying the slabs is carried out in several stages:
Preparation of the base - the foundation for the slabs must be perfectly level. If during pouring there are minor differences (up to 5 cm), they are leveled with a cement-sand screed. In some cases, especially on sloped areas, it may be necessary to pour a concrete reinforced belt or brickwork.
Preparation of slabs – Before laying, the channels at the ends are sealed with insulation (pushed inside) and cement mortar (covered).
Support - how much the slab should rest on the base depends on its type: overlap on brickwork is from 125 mm, on concrete - from 60 mm, the long side of the slab does not rest on the foundation. If the slabs laid next to each other have lugs, they are tied together (welded with reinforcement); if the slabs are without lugs, after removing the jig (laying device), they are moved close together.
At the points of contact between the slab and the base, a layer of cement mortar (M100) - 2 cm is laid; a reinforcing rod (10-12 mm thick) laid in the center of the seam will help prevent extrusion. Installation on a dry base is also possible, but this is not the case when it makes sense to save money. If the slab is both the base of the floor and the ceiling of the lower room, it is laid with the smooth part down to simplify later finishing.
Finishing - after laying, be sure to seal the seams formed between the segments: for small thicknesses, use DSP, for thick seams, add fine crushed stone to the solution.
Reinforced concrete slabs are considered one of the most durable and reliable types of flooring; they do not require several weeks for final setting, when correct installation it turns out Smooth surface. Depending on the type of finish, it may be necessary to pour a thin layer of screed (under a warm floor) or level it with a self-leveling mixture. It is also possible to install the cladding directly onto the slab, without additional operations.
The disadvantages of slab floors This may include an increase in the load on the foundation, the need to use special equipment and a higher thermal conductivity of the resulting coating than that of systems with insulation. Each type of floor has disadvantages; many choose reinforced concrete slabs as the best option for themselves.
Conveniently, some organizations manufacture slabs to order, which simplifies the covering of spans with non-standard dimensions. This method helped one of the participants of our portal, although he had to wait.
What type of flooring to choose, they decide based on many factors: the type of foundation and design of the house, financial capabilities, the presence or absence of good health to shovel tons of materials, etc.
Regardless of the chosen option, only compliance of the design with the expected loads, adherence to technology and high-quality materials guarantee the strength and durability of the floor system. In addition, it is important additional measures– insulation of the foundation and blind area, the presence drainage system. published
Wooden floors on joists are one of the oldest methods of flooring and the only one used in northern regions our country. Modern materials just improved ancient technology, due to which the scope of application has significantly expanded and performance indicators have improved. Before proceeding directly to consideration various options, you should familiarize yourself a little with the engineering requirements for calculations.
Logs are distinguished from beams by their smaller size and mobility. If beams cannot be moved after installation, and repairs are very long and labor-intensive, then logs are a mobile architectural element. They are much easier to install and, if necessary, repairs are carried out faster.
Before you start building a floor, you need to study the requirements regulatory documents to the size of the joists and the distance between them, taking into account the thickness of the floorboards.
Table of lag sections at a pitch of 70 cm
Table of distance between lags depending on the thickness of the board
In order to learn how to independently make calculations based on tables, it will be useful to consider simplest example. Initial data: the length of the room is 10 m, take a floorboard 30 mm thick.
Calculation method
According to the table, with such a thickness of the board, the distance between the logs is 50 cm; with a room length of 10 m, 20 logs will be needed. The distance between the logs and the walls cannot exceed 30 cm. This means that we will have to increase their number by one piece, the distance between the others will decrease to 45 centimeters.
Important note. During calculations, all roundings should be done only downwards, thus creating an additional margin of safety.
There is no need to calculate dimensions and distances accurate to the millimeter; no one takes such measurements. By the way, during construction the absolute majority architectural elements and structures are measured in centimeters, the greatest accuracy is half a centimeter. Millimeters are almost never used during measurements.
Floor subfloor options
These types of floors can be installed on wooden and concrete base or on the ground. Each option has its own technological features, which must be kept in mind during work. As for the specific purpose of the premises, taking this parameter into account, the base of the floor and its performance characteristics. The technology of the device itself remains almost unchanged. There are, of course, options for warm and cold floors, but these features also have general algorithm construction.
Installation of a wooden floor on joists on wooden bases
Such floors can be made in both wooden and brick buildings and can have several varieties. The features of flooring need to be considered at the building design stage. Not only the purpose of each room and its dimensions are taken into account, but also climate zone accommodation, microclimate requirements and financial capabilities of the developer. Below are given step-by-step recommendations construction of this type of flooring.
Depending on specific conditions, the algorithm can be slightly modified, but all main construction operations must be completed. The base can be moisture-resistant OSB boards or sheets of plywood. The design of the floor coverings provides for the possibility of laying insulation; the use of rolled and pressed glass wool or polystyrene foam is allowed. If there are insulation materials, then you should definitely install hydro- and vapor barriers.
Step 1. Take the dimensions of the room and calculate the number of joists, taking into account the above recommendations. Prepare materials and tools, make markings. Do the work slowly; mistakes made at this stage are extremely Negative consequences. Eliminating them will take a lot of time.
Step 2. Start installing the logs from the outer wall ones. If the room has subfloors, then the logs can be fixed directly to them. To make work easier, it is better to use metal squares with perforations; such elements significantly speed up work and increase the stability of the joists. Using the mark on the wall, taking into account the thickness of the floorboards, align one end of the joist and fix its position.
Practical advice. When installing the outer joists, do not fix them immediately; first, you should only tighten the screws. This will allow you to make final fine adjustments.
Do the same actions at the second end of the log, constantly monitor its level position. Once the lag lays down normally, you can firmly fasten the ends and begin installing intermediate fasteners. The distance between them depends on the thickness of the boards that are used for the logs; it is approximately 70 centimeters.
Step 3. You need to stretch the ropes between the outermost joists; place all the remaining joists along this line. Constantly check with a level; installation accuracy should be ±1–2 mm. There is no point anymore, it takes a lot of extra time. A small difference in height will be removed during finishing of the front surface of the floorboards.
Step 4. If the floors are warm, then you need to lay thermal insulation between the joists; waterproofing and vapor barriers are used to prevent moisture from entering. The distances between the logs must be adjusted taking into account the length and width of the insulation. This can be either mineral wool or polystyrene foam, or bulk species insulation materials. If all preparatory work completed, you can begin laying the floorboards.
There are options for installing joists on floor beams. These are so-called ventilated floors and are most often used for non-residential premises. There is no need to be particularly precise; size alignment is done using lags. The logs are attached to the beams with nails or self-tapping screws from the side. The algorithm of work is the same. First, the extreme ones are placed, a rope is pulled between them and all the others are fixed along it.
Ventilation is carried out through special vents in the foundations; the distance between the ground and the floor must be at least fifty centimeters. Otherwise, the air exchange rate does not meet the required indicators, and this causes damage to wooden structures.
Installation of floors on wooden joists on concrete
Such floors are considered more complex, labor-intensive and expensive; all wooden structures must be reliably protected from direct contact with concrete. Otherwise, the structures will quickly become unusable and will have to be replaced prematurely. There is a chemical way to protect lags from rotting processes using various impregnations. They are quite effective and actually prevent the process of wood deterioration. But unfortunately, impregnated wooden structures can no longer be considered environmentally friendly, and it is for this indicator that most developers install natural wooden floors.
If the logs are laid over the entire area on concrete, then waterproofing is required between them.
But they can also be secured using metal squares, which allows you to create a gap between the base and the joist. It must be borne in mind that in this case the load-bearing characteristics of the floor are somewhat reduced.

This fixation method has its advantages. Firstly, direct contact of wooden structures with concrete ones is completely excluded. Secondly, logs can also be installed on a black screed. Using the corners, you can eliminate irregularities of several centimeters; there is no need to make a finishing screed. This saves a lot of time and money.
The second method of laying on a concrete screed is to lay the logs directly on it; a material based on modified bitumen is used for insulation.
Laying logs on the ground
The method is used for outbuildings, baths, gazebos, verandas, etc. Wood must be treated with antiseptics. It is better to have a columnar foundation; if you want to make a more durable strip foundation, then it is necessary to provide vents for natural ventilation in advance.
How is this floor made?
Step 1. Remove fertile layer soil. You can use it to fill the beds or level the area in front of the house.
Step 2. Mark the columns. The distance between them is selected taking into account the load and size of the logs. The posts can be made of concrete, block or prefabricated. The dimensions of the supports are approximately 40x40 cm, the burial depth is within 30 cm. A layer of sand ≈ 10 cm thick should be poured onto the bottom and compacted.
Step 3. Fill the supports with concrete. To prepare concrete, you should use two parts crushed stone and three parts sand for one part of cement. Water is added as needed. There is no need to make formwork in the ground; formwork from boards or OSB scraps is installed above the ground level. During the manufacture of formwork, you need to use a level; all edges must be strictly vertical.
Practical advice. It is much easier to make columns from ready-made blocks. Horizontal alignment must be done along the rope. After the outer ones are aligned with the hydraulic level, a rope is pulled between them. Deviations should not exceed ± 1 cm. This variation is eliminated during installation of the log.
Step 4. Proceed to fixing the lags; you also need to start work from the outermost ones. For precise horizontal alignment, you can use shims. It is not advisable to take wedges made of wood; over time, they will dry out and wobble will appear: the floor will begin to creak unpleasantly when walking. Between wooden structures and concrete surfaces It is imperative to lay two layers of roofing felt for reliable waterproofing.
Step 5. After the outermost logs are laid, a rope is stretched between them and all the remaining ones are laid under it. The logs are fixed with metal squares on dowels and screws. To increase stability, it is recommended to install them on both sides. Floor boards can be laid directly on the joists or a subfloor can be laid first. The final choice depends on the operating characteristics and purpose of the room.
Always select joists with a safety margin, especially in cases where the installation method involves bending loads. It must be remembered that correcting mistakes made during the construction of floor coverings is always much more expensive than carrying out the work quality materials and in compliance with recommended technologies.
Choose your joist boards carefully. They must be absolutely healthy without signs of rot. The presence of through cracks and rotten knots is completely prohibited. If there are large healthy through knots, then you need to install the joists in such a way that there is a stop under them.
When attaching the lags, do not allow the possibility of wobbling.
Most lag oscillations cause very unpleasant creaks floor coverings while walking. To eliminate such phenomena, you will have to remove floor coverings; this is time-consuming and expensive; it is not always possible to keep the dismantled materials in a condition suitable for reuse.
Video - Installation of wooden floors along joists