DIY plywood dollhouse: diagram and step-by-step instructions. DIY plywood dollhouse: diagram and step-by-step guide Plywood house
Read also
- Original idea. You personally choose the location and design of the rooms. The building will undoubtedly be one of a kind.
- Shared activities with your child will strengthen your relationship.
- The construction process will help with the formation of motor skills and the acquisition of new knowledge.
- Possibility of choosing dimensions.
Material selection
If you decide to build a house on two floors, then the thickness of the material should be 9 - 15 mm; for one floor, less is possible.

There are many materials from which you can make your own dollhouse. Advantages of plywood:
- The strength of the building under construction. If the fastening is good, the links will not fall apart.
- Plywood easily acquires a finished, complete look with the help of simple tools that every man has at hand.
- Wooden toys are pleasant to the touch - they are always warm.
- The graceful appearance of wood makes it possible to limit yourself without special finishing.
- Affordable price of plywood.

Drywall
If you have recently done renovations and have some material left over, you can use it to make a doll house. To fix the sheets you will need tin corners, to secure them you need self-tapping screws, but they will stick out from the back side, and this, as you understand, is not safe. Another option is to use glue, but to do this you need to make the cut lines smoother to reduce glue consumption.

OSB
This material is similar to plywood, only more waterproof and made from wood chips.

Cardboard
The cheapest material, but most subject to deformation. The hardest is hobby cardboard. They are secured with glue. To make the house stronger, it is better to make a frame from planks and then cover it with cardboard.

Chipboard
Very dense material, high weight of the building, unreliability under lateral loads and the release of formaldehyde, it is not worth stepping over this.

Furniture panels
Environmentally friendly, strong, easy to process, but the material is not cheap.

Important information:
In the manufacture of plywood, formaldehydes are used, which are introduced into the structure of the glue to form fibers. Then, in order to avoid the receipt of this serious raw material by the child, show special interest in marking the sheets of plywood.

- E 0 -<6 мг /100 грамм
- E 1 – 7 – 9 mg/100 grams
- E 2 – 10-20 mg/100 grams

The most reliable sheets will be those marked E 0.

Beginning of work
The production of apartments for dolls consists of more than one stage. In order for everything to grow together as it should, follow a certain order of actions.

Preparing a sketch
The first step is to develop a project that reflects the location, boundaries of the tiers in width, length, height. Calculate the height of the ceilings to be twice the height of the doll itself so that they can move freely around the rooms. The top tier should be at the baby's eye level. The depth of the rooms is usually 30–45 cm. If the dimensions of the apartment are not small, wheels can be attached to the bottom so that the child can move the building independently.

The most important thing at this stage is to follow the ratio of the magnitudes in the scales in case you decide to correct the dimensions in the future.

Preparation of tools. To produce the base and its elements you will need:
- Plywood. To know how much plywood we need, we count the number of parts and their size, and get the single area of all surfaces. On average, for small buildings it takes 2 - 3 sheets, and for large buildings 7 - 10.
- Corrugated cardboard is used for the production of the roof.
- An electric jigsaw will be a good helper for cutting wood.
- Use wood glue to secure the parts.
- For additional fastening of the elements, mounting tape is required.
- You will need fine sandpaper.
- Arm yourself with a tape measure, ruler and pencil.

For finishing:
- PVA glue
- Self-adhesive paper
- Colored cardboard or paper

Transferring a drawing
First, you need to cut out the parts from the sheets; to do this, the sketches are put on paper, from which the finished parts are cut out and then used as a template.

We cut and connect.

- Use a jigsaw to cut through the displaced parts. Be more careful and attentive, follow the line clearly, otherwise the parts will not fit correctly.
- We clean the edges to ensure safety and protection from injury.

Build process
We start by connecting the internal area. We attach ceilings and partitions to the vertical end walls using glue and tape. In order to improve the connection, the corners can be fastened with thin slats, thanks to them the structure will be stronger.

We will make the staircase distances using wooden rulers. To do this, we will lean them in the form of slides, or we will divide one ruler and connect the parts to a real staircase.

Making the back wall
We cut out continuous slopes from cardboard, or assemble the roof from individual pieces in the form of tiles. If you are planning to make the roof gable, then consider having the top floor equipped with a partition in the center.

The structure must be left for one to two days so that the glue dries and the house gains strength.

After this, the most interesting procedure for the child begins - decorating the premises.

Thinking through the design
This is a personal matter for everyone, as far as one has enough imagination. Here are some useful tips:
- Talk to your child about how to design the floor.
- If a child wants to have swinging windows and doors, do not contradict him. To do this, fix the canvases to cardboard or use small door hinges. It is also possible to block door and window openings with scraps of fabric, and even create glass using transparent plastic bottles.
- The ceiling and floor can be decorated with wallpaper or self-adhesive paper, and the same with the walls. If you decide to glue the walls, it is easier to do this before assembling the structure.
- Exterior decoration can be decorated using thick paper and paints. The paper is torn into pieces, applied to the walls using glue and the desired relief is created. After drying, you can use paints.
- Lighting. You can do without unnecessary wires; there is a very simple solution. In large stores there are small lamps that run on batteries, and they are attached with Velcro. Each lamp has its own switch, the voltage is a couple of volts.
- We display furniture for dolls.

The dollhouse is ready for new residents to move in, everyone is happy and satisfied!

Secondary functions
In these beautiful apartments you can install special built-in drawers for storing accessories and various little things in the upper or lower tier.

Let's take the same plywood as the material. To do this, immediately determine the location for these boxes in the drawing.

We cut out the sides of the drawers from sheets of plywood and fasten them with glue. We attach the handle and put it in the department.

As an option, you can make a hinged door. To do this, we attach the base to metal hinges.

A home made doll building will be the best present for every child. A doll house with parking for cars will definitely delight both boys and girls!

All this construction will take you no more than 2 - 3 days. The child will be happy to decorate the rooms on his own. Use your imagination and make your child happier every day!
Hi all! Tell me, when you give your baby a toy, do you think about where it will live? Believe me, the baby is definitely thinking about this. And all because he projects his life onto them. He plays during the day, just like a toy, but evening comes and the little one has to go to bed. What about his ward? What to do with it? To give your child pleasure, continue playing and teach your toddler to be orderly, today let’s learn how to make a doll house out of a box with your own hands.
Preparing to create an apartment for a doll
Before you start working, decide what exactly you will create. The box itself already has “walls”. All that remains is to make them look like their place of residence. The size of the house can be different: it can be two-story or one-story, with one or several rooms; furnished with homemade or purchased furniture.
What materials and tools will be needed for work:
- Cardboard boxes;
- Glue;
- Colored paper;
- Scissors;
- Pencil;
- Ruler.
When everything you need is collected, you can start tinkering.
First house
I recommend practicing in a small one-room house. Then it’s not such a shame to throw it away, and the children quickly get bored with everything. Look how cute and cozy they are, even though they are small. Pictures enlarge by clicking.


But what a cute little house, even without wallpaper it already looks decent, but what if you hang curtains, throw in a couple of pillows, and lay down a carpet? By the way, the easiest way to make a carpet and pillows is from felt. And you don't have to sew! You can simply glue the felt with a moment or a hot gun.


Once you get bored, you can build either a castle or a country villa. You already have experience, your hand is full.


“Building” a house
From me a detailed master class with photos. Hope it helps you!


The little one's help will depend entirely on how interested the parents are and involved them in the process. Therefore, show your creative processes, prepare your baby with a fairy tale or an interesting story. Assign him a certain task or ask him for advice on a craft.
Furniture
Of course, dolls simply need furniture! And playing with an empty house is not interesting. What can you think of?
Bedroom furniture
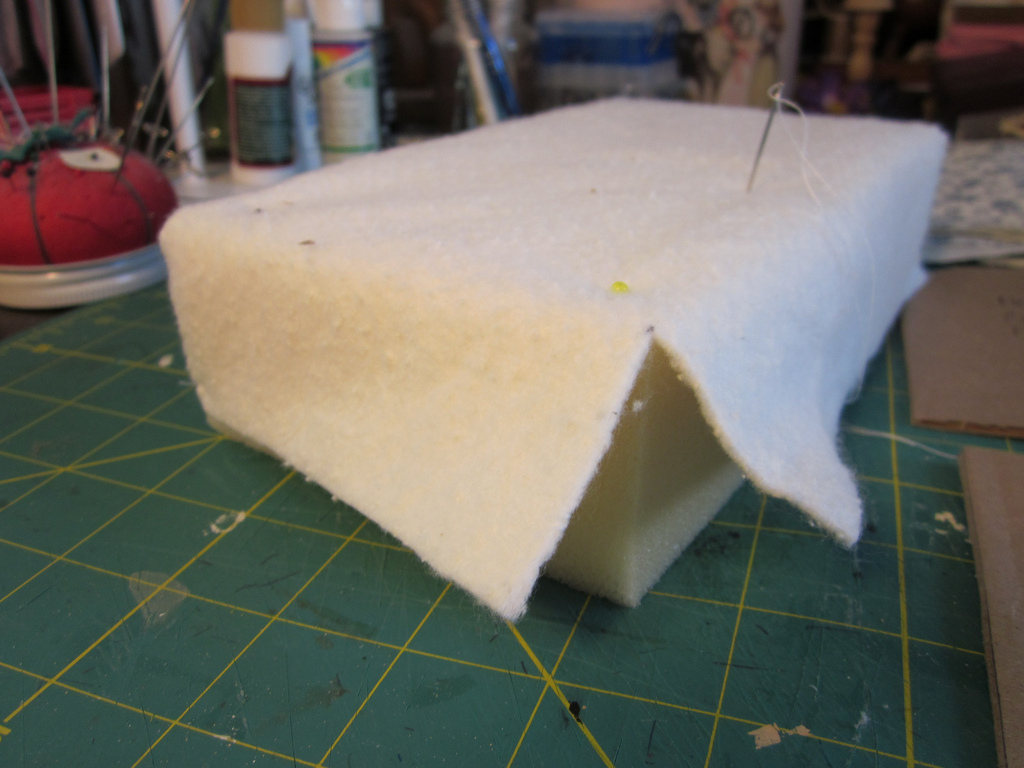
Bedroom furniture can be made from paper using the origami technique, glued from cardboard and laid out, but the most comfortable and beautiful option is upholstered furniture made from cardboard, foam rubber and fabric. You can glue everything using regular PVA, although it will take a long time to dry. Instead of foam rubber, you can take padding polyester or batting, or in extreme cases, cotton wool.
Bed MK

Step-by-step photos of production - enlarge when clicked:


Armchairs
Photos enlarge by click


Kitchen
The kitchen can be filled with a refrigerator, stove, countertop, beautiful chandelier and dining table. Cardboard and ice cream sticks are also suitable materials.
If you have a 3D pen, you can make furniture out of plastic.
Cardboard plate

Lockers
Cabinets, shelves, and a refrigerator are simply made from cardboard. Easy to glue with hot glue.


Furniture for kitchen
Furniture - chairs, a table - very beautiful ones made from ice cream sticks. You can cut such sticks with large scissors, but only carefully, they can crack in half. You can glue with instant or hot glue.


Little things for the kitchen
You can put a bird in a cage in the kitchen, or put a box of fruit or flowers. Detailed master classes in the photo. Enlarge on click.


Fruits, vegetables, dishes
Fruits, vegetables, dishes are the easiest make from plasticine. To prevent the product from getting dirty and losing its shape, it is coated with transparent nail polish.
You can make vegetables from salt dough - they dry out and look like they came from a toy store. From play to They also sculpt food, but my playdo cracks after it dries. Therefore, I prefer to make salt dough: 1 glass of flour + 1 glass of fine salt + water, knead a very stiff dough.
Also a very good option - air self-hardening plasticine(new material). It is cheap, bright, and when it hardens it is elastic, somewhat similar to hard rubber. We sculpt as from ordinary plasticine and leave to dry overnight.
Interesting ideas for a dollhouse
Some toys already come with a house, for example, for Lol dolls it is simply fabulous. You can copy some ideas from it. For example, the fact that the apartment is not limited only by the area of individual rooms, and the lower floor usually protrudes. Or you can even make a courtyard in front of the house with a sun lounger and flowers.


Another interesting idea is a house bag. This option is especially convenient when you are planning a trip with kids. You just need to attach a handle and “shutter doors” that close the house, and the mobile version is ready. 
If you like to sew, then a soft house bag made of fabric is ideal.


And one moment. Did you think that your craft is just the beginning? Over time, more and more rooms may appear in which other toys will live.
Create, make your baby happy and be surprised at how talented your little one is! I hope you enjoy spending time with your child and can develop your friendship with him. I suggest you become friends with our site so that you can always be aware of the latest articles! Subscribe and receive messages about what you can read on the site. Don't forget to tell your friends what you learn.
Until next time. Bye bye!
Andrey Vogachev talked about how to make it yourself. He noticed that his daughter was enthusiastically playing with houses the size of a cardboard shoe box. The idea arose to do something solid. Searching the stores didn't turn up anything worthwhile, they were either very small or too expensive. I thought it wouldn't be too difficult to make it myself. After searching on the Internet, I found decent sizes, from which I subsequently plan to make a house.
In the drawing, the cutting markings are marked with red lines on how to cut plywood in the store. Please note that the more accurately you can mark and cut in the store, the less time it will take later. The shop cut it very accurately, while doing it yourself can introduce some flaws.
Drawing of a doll's house

Plywood dimensions 1.5 x 1.5 m. Weight 16 kg. The total area is 2.3 square meters. Sanded plywood.


After cutting, all the parts began to form a smaller volume. White paint for facades. Small carnations. Glue and brush.
Markup process
All parts need to be trimmed. It's a small matter. Drill holes and cut out parts of the balcony. Continue from 5 minutes.
All photos from the article
In this article we will look at how to make a dollhouse from plywood. Of course, you can always go to a toy store and buy a ready-made model there, but there are several reasons not to rush into such a decision and still pick up the tools in order to create a small miracle for your child. So let's get started.

General provisions
First, let's look at the motivation why it's worth taking on making a dollhouse with your own hands:
Advantages of making it yourself
- Saving. The price of factory-made models is quite high, while home-made ones will significantly save the family budget;
- Uniqueness. The project you implement will be one of a kind; your daughter will definitely not find the same toy among her friends;

- Compliance with desires. In your dollhouse there will be exactly the kind of rooms, the kind of colors and the kind of decorations that the child wants to see;

Advice: involve your child in the work, this will allow you both to have more fun and make the homemade toy even more loved.
Advantages of choosing plywood
So, we figured out why you should get to work with your own hands and not run to the store. Now let's decide on the material.
Wood-laminated board consists of several sheets of wood veneer glued together, which determines the following advantages:
- High strength characteristics. Durable children's toys always last much longer than their flimsy counterparts;
- Ease of processing. Plywood is easy to saw, paint, drill, mill and fix with nails or self-tapping screws;

- Aesthetic appearance. The top veneer has a beautiful original textured pattern and a warm shade that is pleasant to the eye;

- Low thermal conductivity, making it warm to the touch. For a child this is an important factor;
- Relatively low cost. Wood-laminated board is not expensive, and you will need very little material to complete the task in question.
But, speaking about the advantages of plywood, it is necessary to mention its possible disadvantage, which is of no small importance. The adhesive used in the production process of wood-laminated board may contain formaldehyde, which is highly toxic.
Therefore, be sure to pay attention to the appropriate labeling and choose an environmentally friendly product, because your child will come into contact with it, and the following labeling will help you with this:
Let's get started
The instructions begin, as in most cases, with preparing all the necessary supplies that you may need in the process of implementing your planned project:
Step #1: Prepare supplies
- Required number of plywood sheets 5-7 mm thick;

- Wood jigsaw for cutting sheets;

- Wood glue for creating a roof;

- PVA glue for fixing decorative elements;
- Mounting tape;

- Paint and brush;
- Sections of wallpaper with small patterns;
- Corrugated cardboard for roof;
- Wooden rulers that will serve as stairs;
- Pencil and construction tape for drawing all the necessary sizes;
- Self-adhesive film with a wood pattern for forming a floor.
Now you need a drawing of a plywood dollhouse with dimensions in order to avoid mistakes during the assembly process and get a truly beautiful and functional design.
Step #2: drawing
Drawings of a dollhouse made of plywood can be borrowed from the Internet, making your own adjustments along the way, or you can draw everything yourself.

It is noteworthy that you can avoid installing a front wall altogether, so that there is constant free access to the house.
Step #3: assembly
Having everything you need at hand, including drawings of a plywood dollhouse, we proceed to the main task:
- We mark on a sheet of plywood all the parts of the future housing for the dolls;
- According to the markings, we cut out the walls and other structural elements using a jigsaw. We also create window and door openings;

- We sand all the ends to prevent the child from getting injured by the sharp edges of the cuts;
- We glue the joints of the elements in the middle of the structure and connect them, fixing the joints with mounting tape;
- Next we glue the back wall. Here you can already do without tape. Carefully remove any protruding glue using a clean rag;
- Then we also install all the internal partitions using an adhesive solution;
- We install the roof;
- We cut small “tiles” from the prepared cardboard, then glue them onto the roof and paint them with a brush and paint in the desired color;
- We paint or cover the walls with pieces of wallpaper, giving them an aesthetically well-groomed appearance;
- We glue a self-adhesive film to the floor, creating the illusion of a real wooden covering;
- We cut wooden rulers into small parts and assemble stairs from them;
- We install flights of stairs, arrange furniture and hang curtains. This completes the process of assembling a dollhouse from plywood.

There is no point in limiting your own imagination to what has already been achieved. You can, for example, build a fireplace from matchboxes, lay carpets from pieces of fur or wool, install a gym or even a swimming pool. All in your hands. The main thing is that the daughter is happy with the result.
Conclusion
The process of creating a plywood dollhouse is simple and very exciting, especially if you involve the child himself in it. The result will be an inexpensive, original, beautiful structure that will give you a reason to be proud of the work done. The main thing is to follow the recommendations outlined and be careful.

The video in this article will give you the opportunity to review some additional material related to the information presented.
Become a wizard for your child and make your childhood dream come true! If you have any questions on the topic after reading, you can ask them in the comments.
We have all dreamed of doll houses. but making them yourself was quite difficult. Today, there are many different materials that allow you to quickly and, most importantly, create a high-quality dollhouse for your child. Beginning needlewomen strive for the perfect creation of houses, so those who have not been able to master “construction” will learn a lot of interesting things today. We will tell you how to make a dollhouse with your own hands and what materials will be needed to make every girl’s dream come true.
How to make a barbie house with your own hands?
We all know that dollhouses are especially necessary for Barbie, so today we’ll talk about how to create this magnificent house so that your child will love it. It will be especially fun if kids join in the creation process themselves. The most important thing is to think over an action plan that will help you build an unusual and bright house for dolls.
There are several models of doll houses that are especially popular:

Materials for doll houses
- Dollhouse fiberboard(if you have ever carried out renovations, then it’s time to pay attention to the remaining pieces of drywall. They will make a particularly beautiful house.
- Dollhouse made of cardboard boxes(It turns out not so bright and unusual, but if you put in a little imagination and work, you can create a house that will be no worse than a building made from fiberboard. In fact, the main thing is to make an effort and in a few hours you will be able to recreate such a doll house , which every Barbie will envy.
- Plywood house(It is better to make such a house with the help of dad, since to create it you will have to work hard with a hammer and nails)
- House made from old furniture(if you had old drawers and chests of drawers in your house, then it’s time to pay attention to them. Just a few hours are enough to see an unusual house for Barbie, but it will turn out to be quite massive, and it will take up a lot of space, but if you omit these moments, durability and similarity to a real house are undoubted advantages.
So, each of these houses undoubtedly has its own diagram, which you can see on our website.
We provide house plans for Barbie and Monster High dolls so that you don’t have to waste time on calculations, but simply create ready-made layouts and arrange them to your liking.
Materials and tools:

Each house requires different tools, but there is a list of standards that are required to create each of the above houses. If you keep such tools at hand, you can quickly build a house for your daughters.
- PVA glue(necessary in cases where you need to paste wallpaper, as well as various small parts)
- Nails(useful if you are going to build a house from plywood, since using nails you can quickly and conveniently fasten them together.)
- Stapler(when building a dollhouse from thin plywood or old boxes, it is better to use it, since gluing is not always reliable, but a stapler will be an excellent solution for every parent)
- Double sided tape(necessary for small parts, various accessories. If you want to create a balcony, then double-sided tape is an excellent solution for fulfilling your desires)
- Fabrics, wallpaper(do you want to give your house a more real look? It’s time to pay attention to the fabrics. Tulle and organza will look especially beautiful. Try adding a little fantasy and decorating the windows with tulle curtains, you’ll see, it will look very unusual)
- Colored paper, cardboard(for finishing roofs, walls, floors and other parts)
- Magazine clippings(additional accessories to add liveliness to your home)
- Curly and regular scissors
- Various accessories for home decoration( artificial turf sponge and other interesting materials)

Now let's get down to the process itself. In fact, there is nothing difficult in building a doll house. The main thing is to be patient.
Do-it-yourself plywood dollhouse.

If you want to make a house out of plywood yourself, then prepare a hammer and nails. In addition, you will need a jigsaw, since cutting out the necessary parts will be very difficult, but with a jigsaw it is much faster. So, first of all, you will need to think about the layout of your house and cut out the necessary parts. On our website there are diagrams that will help you create a doll house.
It is best to sharpen plywood with sandpaper so that the child does not get hurt by splinters. Next, I coat each of them with varnish or paint, depending on how you want your future home to look. Next, we assemble the parts according to the diagram indicated on the website. Be sure to think about where the window will be located and, observing all the parameters, calculate the angles at which the roof will fall.

As for fastening, PVA glue is definitely not suitable here. It won't hold enough pieces together, and if it does, it won't last long, so it's best to use nails. As for the bayonets, cover them with a diluted solution of cement or soil.
Cover the inner surface with wallpaper and add furniture that you can build yourself from scrap materials. In our previous articles you can learn how to properly create furniture for a dollhouse. Use matchboxes and other materials that will make the structure cozy. By the way, you can easily make a house out of laminate. Houses made of plywood and laminate are characterized by increased strength and ease of finishing.
Dollhouse made of fiberboard.

In order to create a doll house for monster high from fiberboard, sketch out small sketches where you can calculate the dimensions you need. We will provide you with ready-made calculations, based on which you can build your house.
Working with fiberboard is much easier, since it is softer than other materials and can be easily cut with scissors. Just cut out the necessary parts and glue them together with regular PVA glue. If you doubt the reliability of the glue, use a hot gun or instant glue.
Pay special attention to the roof. It can be finished with a variety of cardboard for naturalness or use natural materials such as leaves and other details.
By the way, it is better to attach the house itself to plywood to make it more stable. So, he will not lose his balance and will not break.

Also, decorate the area near the house with various accessories and additions. Decorate your walls with magazine signs. By cutting out various pictures, you can make a kitchen and other interior items without wasting time on creating furniture.
Thus, a fiberboard house is made much faster than a plywood house. You can easily glue it together, and it will last for a very long time.
Doll house made of boxes.

If we talk about a dollhouse made from boxes, then everything is much simpler here. Gluing the boxes together is quite easy. The most important thing is to find suitable and strong ones that can maintain strength and beauty for a long time. Do not forget that interior items and dolls will be located inside the house, so try to choose stable and thick boxes.
On our website you will find a video where you will learn how to make a house for Barbie from polystyrene foam, cardboard, plywood and other materials. We also provide you with the necessary diagrams and drawings, based on which you can create a beautiful and cozy home with your children.
Also, the lists contain photo projects of doll houses, as well as various examples that you can use as a guide when constructing a structure. In the video you can learn how to make a light in a dollhouse and what materials are needed for the project.
Conclusion.

As you can see, making a dollhouse is not at all difficult. The most important thing is to choose the necessary materials and tools with which you can quickly create a doll house for Barbie with your children. You'll see, in a few days a beautiful and slender building will be showing off in the corner of the child's room, the most important thing is to pay more attention to the process and watch various video lessons.
Every needlewoman can create a dollhouse step by step, so we will be glad if you try to make a dollhouse based on our diagrams and will provide a lot of information for the next crafts.