Epoxy resin kitchen table. Epoxy resin: make a beautiful tabletop with your own hands. Using epoxy to fill various items
It often happens that you still have strong table the surface has acquired an unsightly appearance. Or, after the repairs have been completed, you want to add some of your own flair to standard factory furniture. For craftsmen who prefer creative solutions, there is a wonderful solution: a tabletop made of epoxy resin, made with your own hands. At the same time, such a tabletop will fit perfectly into the interior of any room: the main thing is to choose the right decorative details and place accents.
Advantages and disadvantages of epoxy resin countertops
Epoxy resin is unique material, using the properties of which, you can create real masterpieces, from miniature decorations to finishing large surfaces, such as countertops and even floors.
Epoxy casting is a two-component material consisting of a resin and a hardener. One of the most remarkable properties of the fill is that it retains its original volume after drying. It covers surfaces with an even transparent layer without forming cracks or bulges. Therefore, using epoxy resin, you can turn any surface, no matter how complex its configuration, into a real work of art.
It can be used to cover surfaces with a pre-applied pattern or ornament, as well as with small decorative elements laid out on the surfaces. In this case, the surface of the table will be an interesting 3D image, made according to an individual project.
Table top coated with epoxy resin, except impressive looking acquires a number of advantages in operation over a conventional wooden or plastic surface:
- When dry, the coating does not shrink and acquires a perfectly flat surface;
- It has good resistance to mechanical damage - dents from impacts, cuts or chips;
- Excellent moisture resistance, which is important for kitchen surfaces;
- Not afraid of the aggressive effects of most cleaning chemicals;
- Not subject to destruction under influence ultraviolet rays;
- Does not require the use of expensive products household chemicals for care.
The main disadvantages that epoxy resin has for pouring countertops include:
- With a sharp decrease in temperature, “white flakes” appear in the depths of the fill;
- When exposed to high temperatures, it can release toxins during evaporation;
- When preparing the filling, precision in proportions is necessary to obtain the desired result;
- The need for strict adherence to safety precautions when working.
In order to remove flakes that appear during hypothermia from the table surface, you can warm it up to 50-60 degrees. And avoid evaporation harmful substances from an epoxy surface it is possible if you cover it with a layer of protective transparent varnish, for example, yacht varnish.

Types of Epoxy Resin Countertops
Epoxy resin countertops can be of several types:- Entirely made of epoxy, no supporting surface;
- Epoxy-coated bases made of wood, chipboard or other material;
- Combined - wooden fragments and resin alternating in a free order.
A tabletop without a supporting surface, only made of epoxy resin, can be made for an elegant coffee table or coffee table, which is not expected to bear a large load. It will look original if you pour epoxy resin into a beautifully shaped ornament made of dried flowers or any other materials. You can also add multi-colored or plain glitter to the transparent fill.

In the second case, epoxy resin for filling countertops serves as a decorative and protective layer for a base made of another material. An old countertop can be used as a base, solid wood or paneled surface, multiplex.
The base can be of any shape - round or in straight lines and with corners. The main thing is to create sides for the base of the height necessary for pouring, so that after hardening the tabletop has even and smooth surfaces. side surfaces.
As a wooden base, you can take an array of natural structure, or artificially decorate it with carving, milling, marquetry. In addition, the old countertop can be removed after thorough cleaning. old paint and polish the varnish, repaint it and decorate it with small pebbles, coins, dried flowers, even buttons.

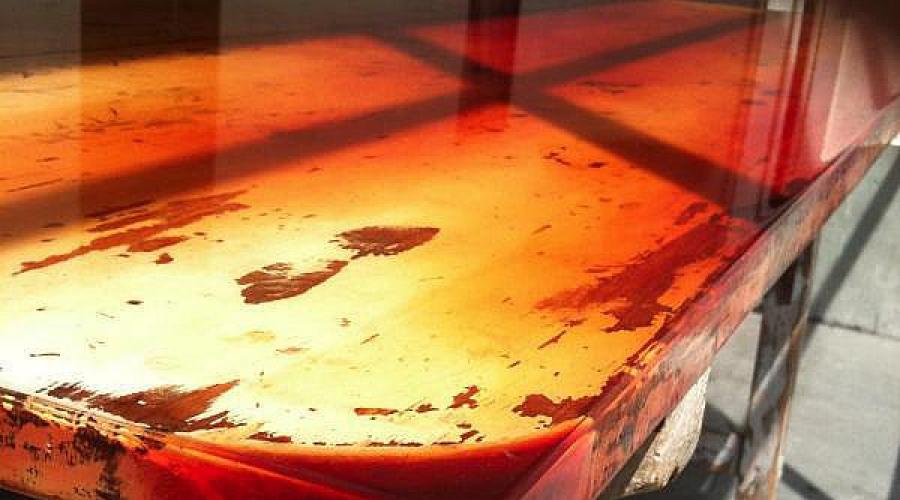
An example of what a countertop coating looks like after pouring epoxy
Making your own countertop
Since an epoxy countertop can be made with or without a base, we will consider both options - each has its own characteristics.
The tabletop, made only of epoxy resin without a base, looks very impressive due to its transparency and inclusions decorative elements. With certain skills, such a tabletop can be made with the most intricate outlines and an original 3D pattern in an array of hardened resin.
Make a transparent tabletop using glass as a mold:
- glass of the required size and shape is thoroughly cleaned, dried and degreased with acetone;
- before pouring, the surface of the glass is rubbed with wax mastic, which, after hardening, is polished with a dry rag;
- polished aluminum corners are used as sides for the mold, inner surface which are treated with a paraffin-turpentine mixture - this will allow you to easily remove the frozen tabletop from the mold;
- The corners are attached to the bottom surface of the glass using window putty.
Another option is possible, when a tabletop made entirely of epoxy resin is then inserted into a frame made of a material that matches the style of the product.
In order for the filling to harden properly, it should take 2-3 days. Before this, you cannot remove the tabletop from the mold.
To avoid having to drill holes in the hardened resin to attach the legs, plan for this in advance by marking the locations of future fastenings and securing small sections of pipe of the required diameter in the mold. After hardening, the sections are removed, and the fasteners for the legs are screwed into their place.
Tabletop on wooden base It’s easier to do because the countertop resin is poured onto an already prepared surface. At the same time, as in the case of glass form, along the edges of the tabletop, sides are made - they can later be removed. Or you can use the option when the wooden sides are part of the tabletop, and the resulting “bathtub” is filled with resin.

The process of pouring epoxy resin with your own hands is not so difficult, but it requires care when working
The countertops look very nice, where wooden parts alternate with transparent inserts. To do this, you can also use glass as a base, on which wooden fragments are laid out, and the distances between them are filled with epoxy fill.
If you plan to use it as a base old board, then the work must be carried out in two stages: first, existing cavities and cracks are slightly deepened in the board, which are then filled with tinted liquid epoxy resin. After the first layer has hardened, the entire tabletop is poured, while the previously filled recesses stand out beautifully on the transparent surface.
After the pouring work is completed, it is necessary to protect the surface from moisture, dust and insects during hardening - they can significantly ruin the entire work. To do this, stretch polyethylene over the tabletop, mounted on a pre-prepared frame.
After complete crystallization of the material, the surface is polished and coated with a protective varnish.
Rules for working with epoxy resin
There are several rules that must be strictly followed when working with epoxy resin:
- Before pouring, old surfaces must be thoroughly cleaned of old paint, varnish, degreased and polished;
- if it is a new board, it must be thoroughly dried and sanded with sandpaper before work;
- When preparing epoxy fill with hardener, you must first measure required amount resin, and then add a hardener to it, strictly observing the proportions and order of mixing the components;
- you need to stir the filling very carefully, but without sudden movements, avoiding the formation of air bubbles;
- all work must be carried out in a ventilated area;
- since resin is difficult to remove from surfaces when it hardens, it is better to cover the floor with polyethylene or paper;
- to work with epoxy, you should tuck your hair under a cap and wear a cotton suit - any lint or hair that gets on the surface to be poured will ruin its appearance;
- You should not carry out work on pouring the countertop in a room with high humidity or not warmed up enough - the air temperature must be at least +22°C;
- you cannot accelerate the crystallization process of epoxy using construction hair dryer– it boils at temperatures above 60°C, forming numerous bubbles.

Filling the wood should be uniform and neat
Conclusion
Even a person with no experience in carpentry is quite capable of making a tabletop from epoxy resin with his own hands.
The main condition for success is strict adherence to the instructions for preparing the filling, compliance with safety rules and the procedure for performing the work. Imagine, create – and enjoy the results of your work!

EpoxyMax is one of the best manufacturers resins and hardeners. The best option is "ED-20" premium capacity 5 kg
Video: creating an epoxy resin countertop
Photo examples


New modern Construction Materials appear on the market every day, and there are so many ideas for decorating your home with handmade items.
We've collected some interesting ideas how to make a countertop with epoxy resin and make it original and unique appearance and also decorate the interior of the house..  Materials for making countertops
We will show you the creation process step by step. epoxy countertop with his own hand, with creative ideas and skills for the craft. The tabletop is made of coins, looks great and will decorate any interior. For this purpose, you can use coins of any countries that you still have after traveling. To do this you will need coins, epoxy resin glue, and a ruler.  To create a product, the coins must be the same size. They must be thoroughly cleaned of oxides and dirt. Can be used for this special means, which will cope with this task in a few seconds.
  Place the first row of coins on the countertop. If you have a rounded edge, you will need to bend the coins using simple tools steel ring and pliers.
  Use a long ruler or building level along the countertop to make sure your coin surface is level and that the coins will stay in place and won't fall off. Using glue, we glue the coins onto the surface of our tabletop.
Continue gluing coins until the entire surface is covered.  Cover the floor with polyethylene protective layer to avoid damage flooring. We install our tabletop on a stand so that we can move it freely around the perimeter of the product.
  Make sure we have enough glue, then pour it onto the central part of the tabletop and carefully spread it over the surface using a wooden or plastic spatula.
  Epoxy resin should cover the surface of the tabletop with a thickness of at least 4-6 mm.
  Work very well with the ends of the product; cover them well with resin.
  In order for the remaining air to escape when pouring the resin, we heat the surface manually gas burner.
 After removing the air, leave the surface for 2-3 days, this is necessary for the epoxy resin to dry completely. After 3 days you received the original fabulous tabletop.


Epoxy has unique characteristics that allow you to create aesthetically pleasing and incredibly practical things, from small decorations to floors in an apartment or house. Epoxy resin is also used to fill the countertop.
This coating is not afraid of mechanical and chemical damage and looks really impressive, especially when using decoupage or similar techniques. The whole process will require funds personal protection and accuracy, but neither special tools, no special skills needed. Read more about the filling method in our article.
Features of the material
The epoxy countertop filler is two-component and includes a hardener and resin. After hardening, the substance does not decrease in volume and does not become covered with cracks; it perfectly fills small irregularities. The material is resistant to moisture, it cannot be scratched, but when exposed to high temperature melts.
Typically, epoxy refers to expensive materials, but it turns out to be cheap when compared with analogues for surface treatment with increased load against abrasion, moisture and mechanical damage. The price of epoxy fill as of 2018 varies between 200 and 800 rubles per kilogram, the wholesale price will be even lower, 180-190 rubles.

When filling the countertop with epoxy, the wood is stabilized: its pores are filled with resin. As a result, the tree becomes invulnerable to ultraviolet radiation, solvents, organics.
In addition to operational properties, epoxy resin also has decorative advantages. With its help, patterns, decorations, and imitations are created. For example, a table with a “flowing river” pattern. Epoxy resin has excellent paintability and allows you to create various shapes(the thicker the consistency, the easier), although this applies more to the glue than to the pouring.
Advantages of a countertop coated with epoxy resin:
- After drying, the substance does not shrink.
- After hardening, the surface becomes perfectly smooth, like glass.
- Resistant to damage caused by mechanical impact (dents, chips, cuts).
- It is immune to the effects of moisture and aggressive household cleaning products, therefore it does not require a special selection of care methods.
- Does not degrade under the influence of ultraviolet rays.
- Looks impressive.

Epoxy resin for pouring countertops also has its disadvantages:
- To make a high-quality fill, you will need to strictly adhere to the proportions of the components.
- It is necessary to work in compliance with safety rules as strictly as possible.
- A sharp drop in temperature will lead to the appearance of white flocculent inclusions in the deep layers.
- When heated strongly, the material will release toxic chemicals. human body substances.
Advice! Dealing with the last two shortcomings is very simple. To remove white flakes that appear, heat the countertop to +50-60˚ C. To prevent the release of toxins during heating, coat the countertop with an additional protective transparent varnish.

There are several types of countertops made using epoxy:
- Made entirely of resin, without support. This type is most often found in the production of coffee or coffee tables, for which significant loads are not planned.
- Made from boards and coated with epoxy as a protective layer. The role of the base can be played by a board made of any material: solid wood, multiplex, paneled surface, fibreboard, chipboard, OSB, etc. Before pouring, such tabletops are often decorated (with print, stencil painting, paper elements, according to the decoupage principle, mosaics, flowers, coins, shells - whatever).
- Combined, when resin alternates with fragments of another material, most often wood.
The base can have any shape (square, round), it is important to make the sides of the required height so that after the pouring hardens, the side surfaces of the tabletop are smooth and even.

Advice! When choosing a material for decorating a tabletop, remember that the more embossed the decoration, the thicker the layer of fill will have to be made; it will take longer to dry.
Review of brands
There are several popular types of epoxy resin that craftsmen use to create countertops:
- QTP-1130 perfect for creating a transparent table top for a desk or coffee table, if the fill layer is no thicker than three millimeters. The resin is particularly transparent and self-leveling.
- "Art-Eco" is the most suitable for making thin layers, especially if sufficient hardener is added. In addition, this manufacturer produces excellent colors that allow you to give the epoxy any shade. Reviews about “Art-Eco” on the forums are different, there are good and bad. Among the negative aspects, the appearance of a yellowish tint in the light and not completely hardening are mentioned.

- "ED-20"- the main disadvantage is the increased viscosity of the substance, which makes removing air bubbles from the mass very problematic. After some time, the ED-20 countertop loses its transparency and becomes yellowish. Master forums are filled with negative reviews about this material, the only advantage of which is its low cost.
- CHS Epoxy 520 (hardener 921OP) is suitable for working with complex fillers (herbarium, coins, lids) and is the best and most popular material for making countertops.
- - characterized by fluidity, and therefore ideal for creating thin layers and for working with fillers (coins, caps, flowers and grass), transparent.

- PEO-610KE- resin Russian production, does not turn yellow over time under direct sunlight and heat.
- EpoxAcast 690 - when hardened, it will not turn yellow, even if it is in direct sunlight or near heating devices.
- MG-EPOX-STRONG from company Epox is a popular and good quality product. On the forums, some recommend filling the countertop exclusively with this resin.
- Epoxy CR 100 - has excellent chemical resistance, wear resistance, and antistatic properties.
- - has strength, resistance to direct influences sun rays and water, is used in the manufacture of costume jewelry, pouring glossy coatings and 3D floors, and creating decorative items.

Advice! When working with use one part hardener to two parts resin.
The quality of the filling will vary depending on the expiration date; there are fakes, and in some cases, factory defects.
As a rule, epoxy and solvent are mixed immediately before pouring in a 2:1 ratio.

In order for a hand-made epoxy resin countertop to turn out to be a real work of art, you should take into account several recommendations from professionals:
- the resin will harden faster in a warm room;
- to avoid deformation, do not heat the surface from above;
- near fire or in direct sunlight, the solid resin begins to turn yellow;
- Do not mix the hardener with the resin at high speeds - otherwise bubbles and subsequently voids will appear;
- if there are still bubbles in the layer after leveling, pass the burner over the tabletop, the bubbles will come out - do not linger on the flame over one place;
- the hardened substance delaminates under the influence of extreme cold;
- It is imperative to coat the tabletop with a protective varnish, otherwise the resin will release toxins when heated;
- if uncured areas or spots appear during the pouring process, this indicates uneven mixing of the hardener with the resin due to adhesion of the substance to the walls of the container;
- To prevent uneven distribution of components, pour the filling mixture from one container to another several times while thoroughly mixing with a thick stirrer, spatula or spatula. Try not to bring the tool to the surface of the mass, otherwise there is a high probability of air bubbles appearing.
There is often a negative response to epoxy resin for pouring countertops. As a rule, problems arise when the rules for working with it are violated. Follow the proportions, take into account the advice of professionals, and the work will give excellent result.
Epoxy resin is a substance known to everyone, anyone at least a little familiar with the economy. The material appeared on the market in the last century and has long won the sympathy of craftsmen.
Resin is absolutely universal substance and is used in many areas of construction, repair and household management.

Modern science does not stand still and “epoxy” receives new compositions and, accordingly, new possibilities for use. However, one thing remains unchanged - the substance is never used in pure form, it is combined with a hardener, which makes it very reliable.

There are many variations of this material on the market; manufacturers do everything so that customers can choose the composition and volume of the substance they need.
Resin composition
The resin itself is a synthetic compound that is effectively used only in combination with a hardener, which helps complete the polymerization process of the substance.

This process is decisive in terms of what properties and characteristics the material has. For this reason, we can say with complete confidence that the resin is not used as an independent substance.

As you combine different compositions with different hardeners, substances with very different properties may appear.

For example, some may even be harder than metal, while some, on the contrary, are soft and may resemble rubber in consistency or something like that.

Hardening of “epoxy” can occur in a fairly wide temperature range from -10°C to 200°C. This largely depends on the type of hardener composition. In this case, the finished material can be divided into 2 types of hardening - cold and hot.

Cold-curing epoxy resin (glue) is more often used for domestic purposes or in industries where thermal exposure is unacceptable.

Hot curing can be used to create products that are subject to various types of loads, including temperature and mechanical.

This is done so that when the substance polymerizes, a denser crystal lattice is formed, which will increase the hardness of the substance.

Hardener for resin, used depending on the required proportions and substances contained. The polymerization process under the influence of a hardening agent is final and cannot be reversible under the influence of various solvents or water.

It is important to remember that the finished material is a polymer, which determines the need to maintain the correct proportions to obtain it.

If the amount of resin or hardener is not correct, the finished product will lose properties and may be susceptible to damage. external environment, such as:
- Moisture;
- Temperature;
- Chemical substances.

Do not forget that the speed of the curing process is affected only by the temperature and type of the curing component itself.


The opinion that the final result can be achieved due to the amount of hardener is erroneous.

The accelerator of the polymerization process is temperature. It turns out that increasing the reaction temperature by just 10°C can accelerate solidification several times, depending on the type of substance.

This makes it possible to develop formulations that can work under the most different temperatures, and the polymerization process can take place under a variety of conditions.

Resin Application
Since the time epoxy resin began to be actively used, its scope of application has remained the same.

Only the compositions and properties of the components have changed and finished materials. Resin is used in many industrial sectors such as:


- Electronics;
- Electrical Engineering;
- Aviation;
- Automotive manufacturing;
- Mechanical engineering;
- Shipbuilding;
- Production of fiberglass.

In these engineering industries, “epoxy” is used as an impregnation for glass fabrics and glass fibers, as well as for joining various elements.

Floor coverings - resin can have insulating properties. It is used in the construction of swimming pools or basements.

Production of paint and varnish products - moisture resistance and strength, allows the use of resin in finishing materials.

Photo of epoxy resin


List of everything you need:
- Epoxy resin, two-component
- Two syringes without a needle (sold at any pharmacy)
- Container for mixing resin and hardener (plastic cup)
- Stick for this mixing (wooden)
- Ceramic tiles or cardboard (in general, any flat, hard surface, preferably on a flat table)
- Scotch tape (wide, single-sided)
- Accessories for jewelry (connectors, earrings, connecting rings, bases)
- Mini drill (sold in almost any construction store, take the cheapest one, I personally use DREMEL 300)
- A set of attachments for it (a small drill and an emery head for turning)
- Good mood for yourself;) Well, gloves with a respirator would be nice

Advice: Before you shop, make sure you have a suitable workspace. If you live in a one-room apartment with your grandmother and mother, you will have to wait a little while making jewelry from resin. At a minimum, you need a separate room where you can inhale harmful resin vapors (if you don’t take care of ventilation) in splendid isolation.
This work is dirty, noisy and generally not conducive to health, but a few simple manipulations will help reduce negative influences creativity to a minimum.
Safety precautions when working with epoxy resin:
- if you are not a substance abuser, at least open the window
- always keep a cloth at hand - believe me, it is much easier to wipe off the resin than to then chip it off the linoleum
- don't want a thrill? Then remove all carpets within sight
- Have pity on your neighbors in your living space, don’t grind your jewelry while they’re at home. Wear a respirator during this activity.
Speaking of leaves
Leaves (petals, flowers) must be well dried. This is not a quick task (4 weeks), so prepare them in advance. I place fresh petals in folded white paper, then in a book (this is to prevent the letters from imprinting on the flowers). The thicker the book, the better (old Soviet textbooks work great). Magnetic photo albums can be used to store dried leaves.

If you decide to work with buds (for pouring into balls), you will need a dark, dry space, such as a closet. Thread the thread into the needle, tighten a thicker knot at the end of the thread and pass the needle through the stems of the buds (it is for this operation that these very stems should be left). We tie the resulting garland to two hangers and hide it in the closet. Four weeks and the material is ready.

It is worth keeping in mind that many petals visually change during work, and completely cease to resemble what you picked in the garden. Some shrink to something awkward, some turn black or completely discolored. And if you don’t feel sorry for a stupid daisy at all, then ruined expensive hydrangea flowers will definitely make you sad.

Accessories
The lion's share of the pleasure of working with jewelry is the choice of accessories. It's simple: the more expensive it is, the better the quality. You can save money in the entire process of creating jewelry, but not on accessories; this is exactly the case when the stingy pays twice. Not only do fasteners made in China regularly break, but they also look downright pathetic and, most likely, you won’t be able to stick something like that on your painstakingly nurtured leaf.

Resin preparation
Well, all preparations are completed, we can begin. First, read the instructions for your resin - mixing proportions vary from brand to brand. Personally, I use Crystal resin, 4 ml of resin per 1.2 ml of diluent.
We take both the resin and the hardener with syringes without needles, naturally different ones. After using them, it’s better to throw them away; they cost a penny. It is better to carefully lower the hardener along the wall of the cup so that it does not splash.

After this we begin mixing. There’s nothing phenomenal here: you can stir it with your finger for 3-4 minutes. Don't be embarrassed by the abundance of bubbles in the resin, let it sit and they will go away.
Stir the resin periodically. The ready-to-use mixture should have a consistency similar to honey. It is difficult to explain with your fingers exactly how much to mix; it naturally depends on the number of prepared petals, their size and, notably, the thickness of the resin. The fresh one instantly spreads and it turns out that you have tarred the tray itself more than the petals. So it's important to seize the moment here.
While the resin is settling, prepare workplace. Clear the table, take out the tray and flowers. It is advisable to do wet cleaning, because there is nothing more offensive than potentially beautiful decoration, covered in dust.
Preparing the tray
You need a flat table that you don’t mind getting dirty, and a tray. The key point here is the choice of coating, which should have a number of properties, such as:
- cheap
- affordable
- should not stick to the resin
- should be glossy ( matte coating makes matte and hardened resin)
The store one immediately comes to mind. plastic bag, but unfortunately it does not satisfy point 3 and sticks tightly. At one time I used food bags for baking, but they also periodically failed and ruined entire trays of decorations.
Advice: Cover the tray with tape and forget about the problem of decorations sticking forever.
Fill

So, the resin has thickened, the petals are laid out on a surface covered with tape, and we begin to create. We take our fighting stick, dip the tip in resin and apply a drop to the petal.
In principle, you can smear it over it, holding the leaf with your finger (with latex gloves so that there are no greasy marks left), but it spreads quite well on its own. Here you will check how level your table is. Having covered all the prepared petals with the first layer of resin, cover our miracle tray with a lid and leave it all for 24 hours. Then we apply another layer of resin (for now both layers are on the front part).

After a day, we turn the petals over and apply the last layer, but on the back sides of our products.

Turning
Now these shapeless epoxy blots with petals inside need to be processed.

It's time to uncover our mini drill. Attach an emery attachment to it and sharpen the jewelry (with a shudder I remember how I sharpened them by hand with a nail file). Keep the edge of the product perpendicular to the drill. After turning, you can coat the edges of the products with varnish or do another fill.

If you are satisfied with the resulting decoration, make holes for attaching rings. We make holes with the same drill, but with a drill bit (diameter 0.5 mm).

In general, the most difficult work We're done, now all that's left is to attach the fittings. We thread a ring into the drilled hole and a wire into it. Our earrings made from real flower petals are ready!

Rules for storing and caring for flower decorations
- Products covered jewelry resin, do not wipe with alcohol or any other solvent, as this may damage glossy surface. Epoxy is generally not friendly with chemistry, so keep it away from detergents, air fresheners, etc.
- Wear jewelry after applying decorative cosmetics, perfumes, and deodorants. Do not expose the glossy surface to acetone. It is better to wash off nail polish without rings, since acetone is a volatile substance, and it is not so far from the nail to the ring with a leaf.
- Don't wear jewelry while playing sports or go to bed with it on.
- Pin brooches to your clothing before putting it on (this will ensure that the pin is securely fastened).
- Cured epoxy resin itself is very strong, but with the right amount of diligence, anything can be broken, and in this case it is no exception; store products in boxes.
- You should not leave them in the open sun for a long time.