DIY pastry bag made of polyethylene, paper, fabric. DIY piping bag: master class How to use a disposable piping bag
Professional chefs use pastry bags to decorate baked goods and sweet products. Hobbyists, like confectioners, can buy the device in a store or make it themselves at home. The product, created without any special financial costs from improvised materials, will help the hostess decorate her work of culinary art.
What is a piping bag
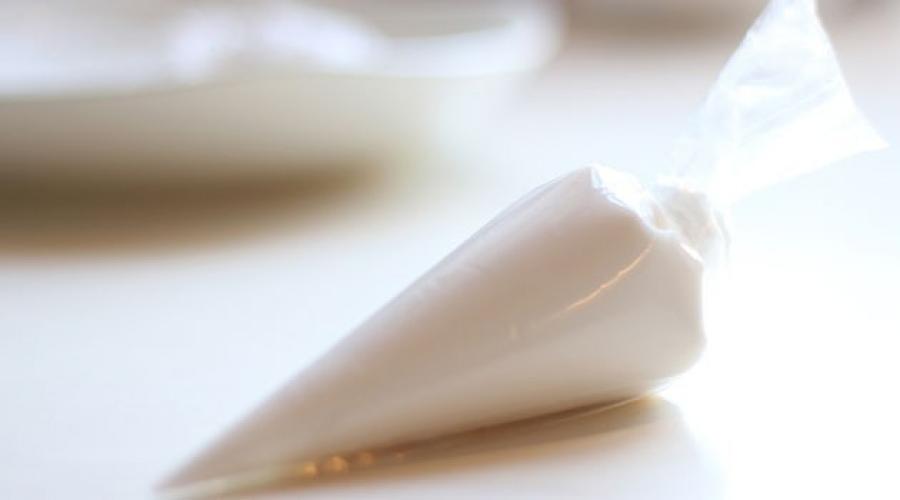
A narrow cone-shaped bag into which attachments for decorating cakes, pastries, eclairs, and other confectionery products are inserted is called a pastry (culinary) bag. With its help, you can draw patterns, flowers, simple drawings, and inscriptions on sweets. A device for decorating baked goods and confectionery products can be purchased at the store or made independently from paper, thick fabric, plastic bag.
Advantages
You can use pastry syringes or bags to decorate baked goods. The latter has a certain number of advantages:
- large volume allows you to hold a lot of cream, cream;
- durability: can be used more than once;
- a variety of attachments that are selected according to the wishes of the cook: stars, flowers, regular lines;
- convenience: it can be held in one hand;
- you don’t need to put a lot of effort into squeezing out the cream;
- easy to wash.
Types of pastry bags
There are three types of cooking bags. Disposable materials are made from food-grade polyethylene and paper and are intended for one-time use. For the production of reusable fabric materials, vinyl and cotton fabric, rubberized on the inside, are used. Nozzles included. The third type is reusable silicone, manufactured similarly to fabric ones, but having an advantage in operation.
Disposable
After one use, disposable bags become deformed and become unsuitable for use. This happens due to the material from which they are made: polyethylene, paper with special impregnation. The bags come complete with durable nozzles made of of stainless steel or without them (the cream passes through the cut). A disposable option can be made independently at home.
The advantage of disposable materials is their low cost (a set of one hundred bags costs 100-200 rubles), ease of use (does not require washing and drying). The disadvantages include narrow functionality. If the pastry chef does not have the skills, he can only make simple drawings. To use a disposable bag, you need to cut off the tip so that the nozzle is 2/3 inside, and the rest looks out. If the hole is made larger, the nozzle may fly out when pressed.
Reusable
Fabric and silicone reusable bags are washed and dried thoroughly after use. In addition to durability, the advantages of these types include convenience (they can be trimmed based on the volume of dough) and the included shaped nozzles, varied in patterns, thickness and consistency. The disadvantage of the fabric material is that it is relatively inconvenient to use: it must be dried thoroughly, otherwise the seams holding the instrument together will come apart. The reusable silicone piping bag dries faster and has no diverging seams.
How to replace a pastry bag at home
A device for decorating baked goods can be purchased at the store or replaced at home. The material for making is varied, depending on what is available at home. You can replace purchased material with polyethylene, paper (confectionery parchment), plastic bottle, fabric (thick white teak, which is less prone to shedding), mayonnaise bag, stationery file, oilcloth. You can cut a pattern on the caps of plastic bottles, then you will get a culinary bag with attachments.

DIY piping bag
Any material from which a cooking bag is made must first be shaped into a cone. If it is fabric, then initially cut out a triangle, connect the 2 sides and sew. The next step depends on the material: first you need to cut off the tip, insert (sew in) a nozzle or fill the cone with cream, and only then cut off the corner. This is the basic algorithm for creating a baking bag with your own hands.
From a plastic bottle and a cellophane bag
To make the device yourself you will need: a plastic bottle, a small plastic bag, scissors, a stationery knife, a marker. Next you need to use these materials step by step:
- Cut the neck of the bottle at a distance of 4-5 cm from the cap, from which you need to remove the silicone layer, make a hole with a diameter of 0.5-0.7 mm.
- On the silicone part of the lid, draw the desired pattern (star, circle, flower), cut out a curly icon stationery knife. These are DIY piping bag tips. Insert the resulting figure back into the lid, thoroughly wash everything from shavings and dust.
- Take the bag, cut off one corner by 2 cm. Insert it into the thread, screw on the lid. The bag must be securely attached between the cap and the neck of the bottle.
From paper
To make a culinary device from paper (its other name is a cornet), you will need: a sheet of waterproof paper or baking parchment, scissors. It will not be difficult to make the material:
- Make a cone out of paper. To do this, make a square out of paper, bend it in half into a triangle shape, and turn it up at a right angle. Fold and round the corners of the resulting figure until you get a cone. Choose the size of the cone based on your own preferences: the smaller the final product, the smaller the pattern will be.
- Cut off the upper edges of the resulting cone and bend them so that they do not interfere with the work process.
- Fill the paper with cream, cut off the tip of the cone.
- Start decorating your baked goods with beautiful patterns.

From a plastic bag
To make a cellophane bag you will need: a thick durable bag, a file or material from which the baking sleeve is made, scissors. If you decide to make a device from a plastic bag, it won't take much of your time. You don’t even need to turn the bag inside out - just find the sharp corner of the bag, pour the cream into it and carefully cut off the tip with scissors. The corner can be cut completely or not completely, which gives a different effect to the pattern.
Cakes without ornate patterns of cream look boring and not at all appetizing. If the aromas of homemade baked goods often linger in your home, then you probably have a pastry bag. What should those housewives do who don’t have this device, but urgently need to decorate their baked goods? What can you replace a pastry bag with?
You can make a homemade pastry bag with your own hands either from plain paper, which you can always find at home, or from a plastic bag or fabric. It all depends on how much free time you have. We offer several ideas on how to make your own pastry bag.
Plastic bagAll you need to make this bag is a bag and scissors. First, select a thick transparent plastic bag (preferably with a zip fastener). Open it up and carefully fill it with cream using a spoon. Then close the clasp or secure the bag with a knot (elastic band). Cut off a small corner of the bag and you can start decorating your baked goods.
It is worth noting that you cannot expect culinary “miracles” from this bag. You are unlikely to be able to achieve the same thickness of the squeezed out cream, and there is no opportunity to make shaped decorations. In addition, such bags are disposable, which will greatly displease environmentalists.
Paper bagHomemade paper pastry bags somewhat expand the possibilities of housewives. You can use wax paper or pastry parchment. If the paper is thick, then you can cut out a shaped corner, which will be some kind of nozzle. To make a pastry bag, you need to cut a triangle out of paper and roll it into a cone.
Make sure that there are no gaps between the layers of paper through which the cream can seep through! Fix the edges at the top by bending them towards the center. Now you can fill the bag with cream to the top and cut off the corner. Homemade disposable bag is ready!
Do you want to make a curly nozzle? Then use a plastic bottle. Cut off the neck and cut a hole of any shape in the lid. It could be an asterisk, a crown, or something like a snowflake. We recommend drawing the shape with a marker first to make cutting easier. All that remains is to screw the lid with a shaped nozzle to the bag.
Fabric bagIn stores you can find reusable pastry bags made from synthetic fabric. But it’s not difficult to make such a device with your own hands. Before sewing a piping bag, make sure that the fabric is washable and does not fade. An excellent choice is teak. This fabric washes well and is dense.
So, we cut out a triangle from the fabric, sew it into a cone, and cut off the bottom corner. Be sure to try on the attachments so as not to cut off too much! Then we sew in the nozzle and fold the seams. There is no need to turn the bag inside out; the seams should be on the outside so that the cream does not get clogged in them. After use, the bag must be washed without use. detergents and dry. This bag will last you a long time.
It is worth noting that homemade bags will not replace professional confectionery tools, as they do not allow you to achieve clear patterns of cream. This perfect solution for housewives who do not often pamper their family with beautifully decorated homemade baked goods. But for one-time use, homemade paper, cellophane or fabric pastry bags are quite suitable.
Cakes without ornate patterns of cream look boring and not at all appetizing. If the aromas of homemade baked goods often linger in your home, then you probably have a pastry bag. What should those housewives do who don’t have this device, but urgently need to decorate their baked goods? What can you replace a pastry bag with?
You can make a homemade pastry bag with your own hands either from plain paper, which you can always find at home, or from a plastic bag or fabric. It all depends on how much free time you have. We offer several ideas on how to make your own pastry bag.
Plastic bag
All you need to make this bag is a bag and scissors. First, select a thick transparent plastic bag (preferably with a zip fastener). Open it up and carefully fill it with cream using a spoon. Then close the clasp or secure the bag with a knot (elastic band). Cut off a small corner of the bag and you can start decorating your baked goods.
It is worth noting that you cannot expect culinary “miracles” from this bag. You are unlikely to be able to achieve the same thickness of the squeezed out cream, and there is no opportunity to make shaped decorations. In addition, such bags are disposable, which will greatly displease environmentalists.
Paper bag
Homemade paper pastry bags somewhat expand the possibilities of housewives. You can use wax paper or pastry parchment. If the paper is thick, then you can cut out a shaped corner, which will be some kind of nozzle. To make a pastry bag, you need to cut a triangle out of paper and roll it into a cone.
Make sure that there are no gaps between the layers of paper through which the cream can seep through! Fix the edges at the top by bending them towards the center. Now you can fill the bag with cream to the top and cut off the corner. Homemade disposable bag is ready!
Do you want to make a curly nozzle? Then use a plastic bottle. Cut off the neck and cut a hole of any shape in the lid. It could be an asterisk, a crown, or something like a snowflake. We recommend drawing the shape with a marker first to make cutting easier. All that remains is to screw the lid with a shaped nozzle to the bag.
Fabric bag
In stores you can find reusable pastry bags made of synthetic fabric. But it’s not difficult to make such a device with your own hands. Before sewing a piping bag, make sure that the fabric is washable and does not fade. An excellent choice is teak. This fabric washes well and is dense.
So, we cut out a triangle from the fabric, sew it into a cone, and cut off the bottom corner. Be sure to try on the attachments so as not to cut off too much! Then we sew in the nozzle and fold the seams. There is no need to turn the bag inside out; the seams should be on the outside so that the cream does not get clogged in them. After use, the bag must be washed without using detergents and dried. This bag will last you a long time.
It is worth noting that homemade bags will not replace professional pastry tools, as they do not allow you to achieve clear patterns from the cream. This is an excellent solution for housewives who do not often pamper their family with beautifully decorated homemade baked goods. But for one-time use, homemade paper, cellophane or fabric pastry bags are quite suitable.
Many people love sweets, be it pastries, pastries or cake. We are used to buying most of these products in stores, and this has its advantages. We don't waste our time in the kitchen, covered in flour, trying to create something delicious. It happens that we still want to tinker in the kitchen and please our loved ones with something delicious, for example, cakes with custard on top. But there is no pastry bag and there is no time to run to the store in search of it either. The three master classes presented will tell you how quickly and easily you can build a pastry bag from improvised materials.
First class mother. Pastry bag from a bag
Necessary materials:
Plastic bag;
Scissors;
Every home has a simple plastic bag and scissors. And if the need arises for a pastry bag, it can be quickly and easily constructed.
Execution steps:
1. Take the package, if it has a zip fastener, then this is only a plus. Carefully fill the bag with cream.
2. Next, close the bag with a zipper or tie its end into a knot.
3. Using scissors, cut off the corner of the bag. The pastry bag is ready, now you can squeeze out the cream.
The disadvantages of such a bag are that the cream is not squeezed out evenly from it and it will not be possible to make any shaped decorations.
The advantage is that such a bag is disposable and can be easily thrown away later.
Second master class. Kitchen parchment pastry bag
Necessary materials:
Kitchen baking parchment or wax paper;
Scissors;
Execution steps:
1. First of all, cut out a triangle from kitchen parchment and roll it into a cone.
2. Using scissors, cut out a corner at the end of the cone.
3. Then we fill our bag with cream, making sure that the cream does not come out of the cracks.
4. Then we fix the edges of the bag by bending its edges at the top.
5. If you are not satisfied that the cream will come out uniformly. Then you can perform an additional nozzle.


Materials for additional nozzle:
Plastic bottle;
Marker;
Construction knife;
Execution steps:
1. Take plastic bottle and cut off the neck with a knife.
2. Then we take the bottle cap, and with a marker we draw the pattern we need and cut it out.
3. Then screw the lid to the neck and attach the resulting nozzle to the pastry bag.

The advantages of such a bag are that you can attach many different attachments to it.
Third master class. Fabric pastry bag
Necessary materials:
Any dense fabric, such as teak;
Nozzles;
Execution steps:
1. First of all, cut out triangle shapes from the fabric, and then sew them together.
2. Cut off the corner of the resulting cone.
3. Next, sew the necessary attachment into the bag and bend the seams outward.

The advantages of such a pastry bag are that such a bag will last a very long time.
When making such a bag from fabric, you should remember that the fabric must be dense and so that it does not fade. Such a bag should be washed without detergents.
These pastry bags are easy to use and do not require much time to make. And they are perfect for those who don’t cook often.
Enjoy your meal!
You can sew the same pastry bag from thick fabric that does not fade and washes well. This homemade paper pastry bag is called a cornet. Such a pastry bag can last a very long time if after each use you immediately wash it without detergents or cleaning agents and dry it well.
Many confectionery It’s impossible to even imagine without decoration. Cakes, cupcakes, meringues, cakes without ornate patterns of cream look boring and not at all appetizing.
Plastic bag
All you need to make this bag is a bag and scissors. Open it up and carefully fill it with cream using a spoon. Cut off a small corner of the bag and you can start decorating your baked goods. It is worth noting that you cannot expect culinary “miracles” from this bag. Homemade paper pastry bags somewhat expand the possibilities of housewives.

You can make a beautiful cake at home
Do you want to make a curly nozzle? Cut off the neck and cut a hole of any shape in the lid. It could be an asterisk, a crown, or something like a snowflake. So, we cut out a triangle from the fabric, sew it into a cone, and cut off the bottom corner.
But for one-time use, homemade paper, cellophane or fabric pastry bags are quite suitable. If you have a book at home, the only destiny of which is to be handed over to waste paper, do not rush to do this, because you can make a practical box from an old book. We'll talk about this in our master class. Sometimes, when I needed to do it quickly and a little, I simply rolled up little balls like for seeds from notebook sheets, again cutting off the curly corners in different ways.
In such cases, you need a pastry bag into which melted chocolate is poured. But this is only if nozzles are used. You can sew a pastry bag from thick material for piping. It can be used more than once as it is washable.
And if you cut it under different angles, then you can make leaves or flowers in the form of roses from the cream. There is nothing easier than taking any plastic bag and filling it with your product - dough, cream, etc. As you press on the bag, the dough or cream will come out to the desired thickness.
Cut off one of the bottom corners and press as much as you like. All you need is a whole bag and scissors. Fill the bag with cream and cut off the tip of the bag. The pastry bag is ready. Now you can use it to decorate anything. If you don't have a factory-made pastry bag, today we will teach you how to make one yourself. The simplest option for making a pastry bag is to cut off a corner of a plastic file. You can also use a ziplock bag to prevent the cream from leaking out.
Plastic bottle attachments
So, your DIY pastry bag is ready! Using our master class, you can make several different shaped toppers to more often surprise guests and household members with beautiful patterns on cakes. Indeed, the cost of living and additional expenses, charged when reserving tickets, directly depend on which country you are traveling to.
The most interesting…
That’s why cakes need delicate ornate patterns of cream, bows and curls, flowers and figures. To beautifully decorate a cake at home, the hostess only needs to have on hand kitchen knife and scissors, a pastry bag with tips, wooden sticks. The type of cream must be selected so that it holds its shape and does not spread. Instead of pastry bags, cooks often use pastry syringes to decorate cakes.
What if the housewife decided to bake the cake herself, rather than buy it in a store, and then suddenly realized that she didn’t have enough to decorate? special devices? A thick transparent bag with a zip fastener is best.
https://youtu.be/jNVmFcOZt8Q
A self-made paper pastry bag gives you more options. To do this, you need to cut off a triangle and wrap it in a cone shape. But you have to work very quickly with such a paper bag, as the cream gets the paper wet and can tear. These fabrics are quite dense, do not fade and wash well.

Homemade plastic and paper pastry bags are very convenient when you need to use cream to decorate a cake different colors. Each bag is filled with cream of a certain color and they are used for drawings at the same time. Housewives with a particularly wild imagination came up with the idea of using empty and cleanly washed mayonnaise or ketchup packets for confectionery purposes. You shouldn’t completely fill your homemade pastry bag; it’s best to fill it two-thirds full so that the cream doesn’t drip from the back side when squeezing out.
Housewives often bake cakes and pastries at home. The most common method of making a baking bag is the use of a plastic bag. The larger the corner is cut, the thicker the cream is squeezed out. Therefore, if you need to make a beautiful thin inscription on the cake, then you should cut off a small corner.
In addition to a plastic bag, some craftswomen use a sheet of parchment or cloth. Enough to sew a bag required sizes and make a hole in it. You can use it to make a bag for curly designs.
A hole is made in a pastry bag made of fabric or a bag to insert a neck with a lid. Cream is poured into the resulting bag and the desired pattern is made. Thus, the design of a cake or other dish will amaze guests with its originality. There are different variants preparation of confectionery equipment.

If you consider yourself a novice confectioner or already dare to prepare world-class confectionery hits, you cannot do without a pastry bag. It is better to get a pack of good pastry bags and several attachments that will allow you to apply the most original patterns and decorations to the dessert. But the simplest and most readily available replacement is parchment or a plastic bag. A sheet of parchment should be folded into an envelope and then filled with dough or cream.
There is no need to turn the bag inside out; the seams should be on the outside so that the cream does not get clogged in them. The result is a practical pastry bag made of cellophane. If you have enough time, then you can sew a pastry bag. The pastry bag has always been and remains the main tool of the pastry chef.