Tile adhesive. What glue should I use to glue the tiles? What is the best tile adhesive? Tile adhesive - choose the best one according to characteristics, purpose and manufacturer. Why do you need tile adhesive?
Tiles are the optimal material for tiling a bathroom, where there is always high humidity and temperature. But in order for the finish to be strong and durable, you need to choose the right composition for fixing the tiles. Once upon a time it was “planted” on a regular solution of cement and sand, and real craftsmen added PVA glue to it for strength. However, such a mixture still did not provide good adhesion, so the tiles often came off.
Today, it is not at all necessary to mix the solution yourself, accurately calculating the proportions - there are special compositions that ensure reliable finishing. They also include fractionated sand and cement, and in addition, special modified additives - thanks to their characteristics, the tiles can last for years. The range of such mixtures on the market is very large, so those who are planning to tile a bathroom need to know some criteria for choosing products.
There are several criteria that must be taken into account when choosing a mixture for fixing tiles.
- The base on which the tiles will be laid: old tiles, drywall, concrete, plaster, etc. Particular attention should be paid to such features as warm floors and thin walls that are subject to increased vibration - in this case you need to think carefully about the choice of adhesive, otherwise the tiles will quickly fall off.
Base for ceramic tiles - tips and tricks
- The area of one tile and the size of the entire surface that will need to be tiled. It is better to lay large tiles with glue with increased adhesive characteristics - the weight of such tiles is much greater than that of ordinary ones, so they may not just fall off, but immediately “float” along the surface of the wall.
- Dry or ready-made mixture: most often, consumers choose dry compositions, since wet ones are more expensive, and in addition, the latter can only be laid on a perfectly smooth surface.
- Cement-based mixtures dry faster, that is, it is better to work with them if you have some experience, as well as at moderate air temperatures.
- If the cement mixture contains a large amount of plasticizers, it will dry out much faster.
- Plasticizers in the adhesive are necessary if the tiles will be laid on the floor, since in this case the coating must withstand quite heavy loads.
- If the person who will be laying the tiles does not have much experience, it is better to choose mixtures that do not dry too quickly, since the installer will need a certain amount of time to level each unit well. In this case, the best option is a one-component adhesive (for example, dispersion), sold in the form of a paste.
- Two-component mixtures must be made independently, but at the same time they are considered the most reliable or durable.
- If the question arises of using a universal glue or a specialized one, it is recommended to give preference to the second option. Universal adhesive can be safely used in the simplest cases, that is, when laying ordinary ceramic tiles on a flat cement or concrete base. In addition, it is better to use a separate type of adhesive for the walls and a separate one for the floor - this approach not only saves money, but also increases the reliability of the finish (the floor covering is usually subject to high loads and also suffers more from moisture).
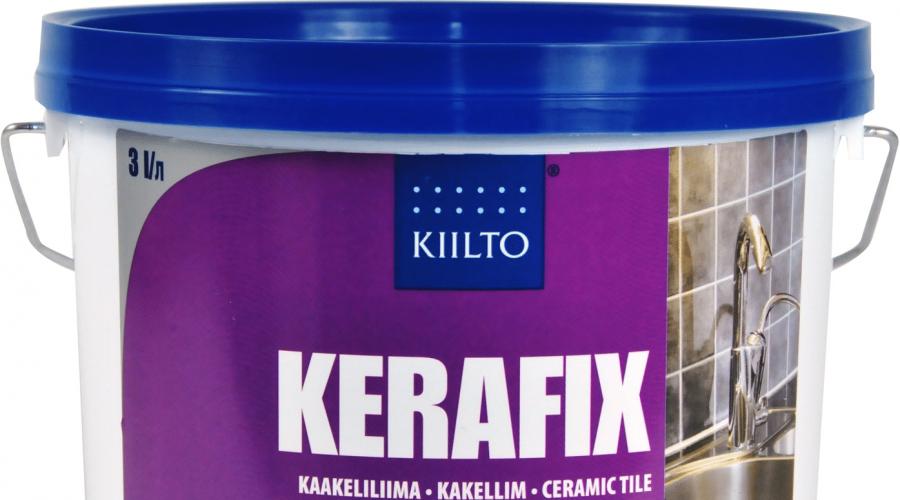
Tile adhesive K-11 “Universal”
- Shelf life of products. Even in order to save money, you should not purchase glue that has expired, is damaged in packaging, or has been stored in improper conditions (at high or low temperatures, high humidity, etc.). Such mixtures lose their qualities, so the tiles will not hold up well and will fall off or crack over time.
In addition, when purchasing adhesive for laying tiles, it is important to take into account the type of mixture, since the final result, that is, the strength of the future coating, depends on this.
Types of tile adhesive
There are not so many types of adhesive mixtures for tiles (unlike brands and manufacturers): these are cement, dispersion, elastic and epoxy mixtures, however, each of them has its own characteristics and characteristics.
Cement mixtures
As the name suggests, these mixtures contain cement. They are considered one of the cheapest on the market and are sold in the form of powders that need to be diluted with water and sometimes other components (liquid latex, resin, etc.) added. In the first case, the mixtures are called modified, since all the necessary ingredients are added at the production stage.
What do you need to know about choosing cement mixtures? The packaging of such products may be marked “thin-layer tile adhesive” or “thick-layer tile adhesive”. The first option is suitable when the tiles are laid on a flat surface with differences of no more than 10 mm. But thick-layer mixtures are used when the walls or floor are uneven, with large gaps or cracks.
knauf tile adhesive
Dispersion mixtures
Dispersion solutions have increased adhesion, so they are excellent for working with complex surfaces, as well as those that do not absorb various substances very well: drywall, painted surfaces, old tiles. But for concrete foundations it is better to choose another option. They are mixtures of acrylic with binders and artificial resins.
Such products are sold ready-made, in sealed plastic containers, and are slightly more expensive than cement ones, but at the same time they have a number of valuable advantages:
- do not require independent preparation of the mixture, that is, they allow you to avoid mistakes when observing proportions and save time;
- work is carried out without unnecessary dirt and dust;
- a sufficiently large “setting” interval, thanks to which individual tiles can be well aligned.
Elastic mixtures
This type of adhesive mixture is the best option for laying tiles on surfaces that are completely incapable of absorbing moisture, as well as on moving bases. They are often used for lining heated floors, since the adhesive can withstand the expansion and contraction of surfaces due to exposure to high temperatures.
Epoxy mixtures
Epoxy adhesive is least often used for laying tiles in residential premises, since, firstly, it is quite expensive, and, secondly, it requires some experience. In addition, there are some conditions that must be observed when working: maintaining a certain temperature, strict adherence to proportions, etc. Most often, epoxy mixtures are used for cladding saunas, swimming pools and other similar premises, as they allow tiling to be laid on any surface, including metal. After hardening, they become absolutely waterproof and are also resistant to acids and chemical solutions.
Ceresit CM 74. Technical information. File for download
How to choose adhesive for different types of tiles?
There are also many different types and colors of tiles today, and this is another criterion for choosing an adhesive mixture. The simplest and most affordable option is gray glue, which is suitable for porcelain stoneware and regular ceramic tiles.
If you plan to line the bathroom with glass mosaic or marble, it is recommended to choose white mixtures. Contrary to popular belief, it does not have the best performance characteristics, but marble can absorb glue and subsequently change color. When using white glue, the cladding will darken much less, which means it will look much better.
But the mosaic composition must have a fairly fine grain, since this material is laid on a thin layer of glue, and for a better appearance this layer must be compressed even more.
The most common and high-quality (according to consumer reviews) brands of adhesive mixtures for tiles include:
- Ceresit (Ceresit);
- Knauf (Knauf);
- Kerakoll (Kerakoll);
- Sopro (Sopro);
- Litokol (Litokol).
How to calculate glue consumption?
Glue consumption is usually indicated in the instructions for a specific product, but in reality it is not so easy to calculate it. The amount of mixture that will have to be used to lay tiles is influenced by a number of factors and conditions.
- Type of glue. All of the adhesive mixtures described above and their varieties have different characteristics: some are thicker, while others are more liquid. For example, the consumption of cement-based glue, which is diluted with water, ranges from 1 to 1.9 kg per square meter.
- Features of tiles. The surface of porcelain stoneware absorbs the least amount of glue, glazed tiles absorb a little more, and the maximum amount is absorbed by the facing material called cotto and handmade tiles.
- The surface on which the tiles will be laid. The ideal surface for tiling should be absolutely flat and smooth - in this case a minimal amount of glue will be needed. In addition, the surface of the base on which the tiles are planned to be laid has a different ability to absorb moisture: the higher the porosity of the material, the more it will absorb the adhesive mixture.
- Weather. The optimal temperature at which tiles can be laid is from 18 to 25 degrees. If the room is too hot, the moisture from the solution will evaporate too quickly, and the consumption of the mixture will increase. At sub-zero temperatures, it is generally not recommended to veneer surfaces, as the glue may lose its characteristics.
- Working technique and qualifications of the stacker. The amount of adhesive mixture consumed is largely influenced by the installation technology, the experience of the craftsman (a person with the appropriate skills and qualifications will use less glue than a beginner) and even the type of spatula that will be used to perform the work. Qualified installers say that it is best to lay mortar with a V-shaped tool, followed by a U-shaped trowel in terms of savings. But most often, spatulas with square teeth are used for work, which, in turn, come in different shapes. The required size of the tool teeth must be selected depending on the size of the tile - accordingly, the glue consumption in each individual case will be different.
Glue consumption
| Size of one side of the tile, cm. | Spatula tooth size, mm. | Recommended glue consumption, kg/sq.m. |
|---|---|---|
| Less than 5 | 3 | 1,9 |
| From 5 to 10 | 4 | 2,5 |
| From 10 to 20 | 6 | 3,8 |
| From 20 to 30 | 8 | 5 |
| From 30 to 40 | 10 | 6,3 |
| 40 | 12 | 7,8 |
However, there is one nuance here - when using this table, you need to take into account the surface characteristics. If the base is uneven, it makes sense to slightly adjust the above parameters: for example, when laying 30 by 30 tiles on a surface with a large number of cracks and potholes, it is better to take a trowel with teeth of not 8, but 10 mm. In addition, the tool must be held in a certain way: an angle that is as close to perpendicular as possible will create a thicker layer of glue.
There are three options for calculating the amount of glue required for wall and floor cladding, from which you should choose the optimal option in a particular case.
Option #1. This solution is suitable for those who already have experience working with a mixture of a particular brand. To calculate the glue consumption, you can look at the instructions or go to the company’s official page and use a special calculator: enter data on the size of the consumable material, the surface area that needs to be covered, and the type of adhesive mixture.
Option #2. This option allows you to calculate the amount of cement-based adhesive - it is not very accurate, but it will at least give some kind of reference point for inexperienced installers.
Initial data: weight of the ready-to-use adhesive mixture, tile dimensions, layer thickness, conditions (temperature, base surface) most favorable for tiling. For example, the weight of the glue is 1.5 kg, the size of the tiles is 30 by 30, the standard layer thickness is 4 mm. You need to multiply 1.5 by 4, the result will be 6 kg - this will be the required glue consumption per square meter. Accordingly, under other conditions and parameters, the amount of the mixture may increase or decrease.
Option #3. It allows you to find out how much adhesive is needed for a particular type of tile - it is best if the material is already available. Half the thickness of one tile in millimeters must be multiplied by the average consumption of a specific brand of glue (you can find it out from the instructions or on the manufacturer’s website), but the result can be very approximate.
Step-by-step instructions for laying tiles
Today, when it is very easy to prepare mixtures for laying tiles, it is quite possible to lay tiles with your own hands, even without experience and relevant knowledge. However, in order for the tiled surface to be smooth and attractive, you must strictly follow the appropriate instructions.
Stage one. Preparing the tiles
- the length of one row does not always coincide with the total length of the tiles (especially where there are niches, sinks, pipes, etc.), it will need to be trimmed - this is done using a tile cutter or glass cutter;
- After determining the required number of tiles, it is recommended to add 10-15% to them - in case any tiles are damaged, for future repairs or in case of defective products.
Before starting work, it is necessary to determine the technique for performing the work and draw up a laying diagram (especially if you plan to lay out any drawing or ornament). If you need to tile the walls, work starts from the far bottom corner, but in the case of flooring, the cladding options can be different (from the middle, from the walls, from the corner).
Stage two. Preparing the base
This is one of the key points on which the final result largely depends. Qualified craftsmen divide surfaces into simple and complex: the first type includes smooth surfaces that practically do not absorb glue, and the second includes uneven surfaces with serious differences, as well as those made of porous materials. Accordingly, preparing the base for the tile depends on its type and features.
Uneven surface
Laying tiles on an uneven surface entails the most expense, and sometimes this concerns not only the amount of adhesive, but also future repairs if the work is carried out incorrectly. Before you start tiling, you need to thoroughly inspect the base, remove the old finish from it and clean up problem areas - for example, if there are pieces of concrete or brick on the wall that can fall off along with the tiles, it is recommended to remove them and fill the holes with putty.
As soon as it dries, the surface must be thoroughly cleaned of dirt and dust. After this, treat the surface with a primer (the choice of brand depends on the adhesive composition for the tile) and make markings.
An important point: if the wall is very uneven, you will have to apply a thick layer of glue to some areas, which can cause the tiles to slide off before the mortar “sets.” In this case, you should use a rail that will hold the tiles in place - it is screwed in place where the bottom row will be located.
Concrete
If the concrete base is level, then laying the tiles will be a fairly simple process - you need to clean it well, apply a primer, and then proceed directly to the cladding.
Dye
It is best to remove old paint from walls, even if this is a labor-intensive and time-consuming process. Today there are many solutions that allow you to get rid of the finish - just treat the wall with them, and then remove the paint with a spatula, scraper or hair dryer. If the surface is painted, as they say, conscientiously, that is, it holds very firmly, there is an alternative option - to make notches with an ax at intervals of 2 cm.
Plaster
Laying tiles on plaster is possible only under the following conditions: they are applied with high quality, with preliminary cleaning of the surfaces and coating with a primer, laid at least two weeks before the start of work, and the height difference does not exceed 3 mm.
Old plaster that has partially crumbled or is crumbling is best cleaned off.
Drywall
The main problem with tiling plasterboard walls is that the sheets can warp and the tiles will fall off. To prevent such a defect, it is recommended to strengthen the surface - for this, special guide strips are used, which are inserted at intervals of 40 cm (if the drywall is too thin, the distance can be reduced).
For similar purposes, polypropylene mesh is used, which is glued to sheets or fastened with staples, and some craftsmen use both strips and mesh for reliability. Another option is to install another layer of drywall.
Important: you need to apply the primer on a plasterboard wall in two layers, and each of them should be allowed to dry for 40-60 minutes.
Old tile
As with old paint and plaster, it is best to remove old tiles from walls. This is not the most technically complex, but labor-intensive and noisy process, for which you will need a small hatchet with a wide blade, or a hammer with a chisel (sometimes a hammer drill is used). You need to beat off the tiles, starting from the top row and gradually going down. Sometimes you have to break the first tile completely, after which the work will become easier - you just need to drive a hatchet blade or chisel between the tile and the glue, and then try to separate the tiles from the wall with strong but gentle blows.
If for some reason it is impossible to dismantle the old tile, new tiles are laid on top of such finishing. In order for the cladding to hold tightly and reliably, a number of conditions must be met. First of all, carefully tap each tile: if the sound is dull, it will hold well, but if it is loud, it is better to dismantle it. Before starting work, it is good to treat the surface with a special primer, and to attach the tiles, use only elastic adhesive with a high degree of adhesion, so that the adhesion strength is as high as possible. If you use a harsh mixture, the new cladding will crack over time.
Wood and plywood
Laying tiles on a wooden surface is a rather difficult, but doable task. The first option for performing the work is to install plasterboard slabs on top of a wooden covering, after which the surface is prepared as described above.
The second method consists of several stages: first, the wood is treated with antiseptic compounds to avoid rotting. Next, roofing felt or roofing felt is laid on it so that the base does not crack or warp, after which the walls are sheathed with wooden slats, a plaster mesh is attached to the frame, cement mortar is applied and the entire structure is plastered (the plaster layer should not exceed 20 mm). After complete drying, you can begin tiling.
Video - Screed on a wooden surface
Video - Bathroom in a wooden house
It is not recommended to use gas- and foam concrete bases, as well as chipboard, as a base for tiling walls. Aerated concrete and foam concrete are too porous, loose surfaces that need to be treated with expensive waterproofing compounds, and the finish will hold up very poorly even when using an expensive adhesive. If there is no other alternative, pre-treated plywood sheets should be laid on the base. Chipboards also require careful processing, so finishing this material with tiles is not economically feasible.
Stage three. Preparation of the adhesive mixture
The first thing to remember when preparing glue is that the remaining mixture will have to be thrown away, as it will harden and will not be suitable for use. That is, in order to save money, you need to correctly calculate the amount of glue that will be required for the job. If glue is used in powder form, it should be diluted with water, sometimes with the addition of other components. On average, the proportions are as follows: 25 kg of mixture per 5.5-6 liters of water (more precisely, you can see on the packaging). Mix the solution manually or mechanically quite vigorously for at least 5 minutes until a homogeneous creamy mass is obtained.
Applying adhesive to the wall
It is not necessary to apply the solution to the tiles, but some types of tiles (for example, bicottura) are recommended to be moistened with water before installation. Seams 2-3 mm thick are left between the tiles - to make them uniform and even, you can use forming crosses.
If the tile needs to be cut, it is done as follows: it must be placed on a flat surface, the cut location must be marked, a glass cutter or tile cutter should be drawn along it, then gently hit flat on the floor. The tile should crack where it is cut.
After laying each unit, you need to press it with your hands or some object and remove the remaining mortar before it hardens. Having finished working with five rows of tiles, you need to take an hour break so that the glue sets well and the lower rows do not slide down under the weight of the upper rows.
While performing work, you should regularly check with a level the evenness of the installation. To ensure that the tiles are laid as evenly as possible, it is best to initially mark the zero level and carry out the markings using a building level. After the surface is completely covered, you need to wait until the glue hardens well (usually this takes about 24 hours).
Error in laying tiles - uneven seam
Stage five. Filling joints with grout
Grout mixture for joints can also be purchased at any store and prepared as follows: pour the mixture into a bucket of water in the proportions specified in the instructions, mix well, let sit for 5-10 minutes and mix again. Next, fill the seams with the mixture using a rubber spatula, wait 25-30 minutes and remove excess solution with a sponge. Grouting the joints plays a special role - it not only gives the surface an aesthetic appearance, but also allows you to mask installation defects.
Grouting tile joints and execution technique, stages 5-8
Tiling a bathroom with ceramic tiles is not an easy and quite labor-intensive task. However, if you choose the right adhesive mixture and follow the step-by-step instructions for the work, the tiles will hold tightly and reliably, and the appearance of the room will please the eye for a long time.
Video - How to choose adhesive for regular tiles, porcelain tiles, natural stone or mosaics?
Ceramic tiles are one of the most difficult facing materials to install. To fix it on surfaces, special solutions are used - installation glue, which has especially strong adhesion characteristics. It allows you to tightly and yet plastically hold the product on a plane, preventing it from deforming or falling behind.
What is this article about?
What is the best way to lay tiles?
Previously, such a question did not arise - what is the best way to lay tiles. Everyone used a cement-sand mixture for this. This is quite durable, but not always appropriate and convenient material. This solution provides clear adhesion, but requires a long drying time, which leads to premature sliding of the tiles from the vertical, and in addition, its technical characteristics do not allow lengthy preparatory work to be done. In particular, it releases liquid into the supporting base and the ceramic itself and they have to be pre-treated with water to prevent this from happening, and is also subject to slight shrinkage upon drying, which requires skillful leveling of the material.
Meanwhile, the adhesive mixture does not require such work; after applying it and priming the surface, you can immediately glue the tiles.
Glue composition and its advantages
Many old tilers do not like installation adhesive. This is due to the fact that not all of them know what this mixture consists of. The composition of tile adhesive includes the same cement, sand screenings and modifiers. It is the highest quality and careful control of the components that provide the solution with high technical characteristics, such as:
- low hydrophobicity;
- frost resistance (in specialized types of mixtures);
- heat resistance (again, depends on the brand);
- adhesion strength;
- durability;
- plastic;
- speed of hardening.
How to choose glue
When choosing adhesive for tiles, you need to take into account such factors as the installation skills of the finisher:
- Installation speed
- Professionalism and experience
And the following parameters that will help in the question of how to choose tile adhesive:
- Operating conditions (can it be used in places with high, unstable or sub-zero temperatures, as well as in a humid environment, the presence of antiseptic and antifungal additives).
- Intended use of the product on the surface (vertical installation, horizontal, universal). Experts recommend buying tile adhesive with a specific purpose for the location of the product.
- Adjustment speed, which allows, if necessary, to align the location of the tiles in time or to dismantle the glued material without harm, within a certain period of time.
- Ability to work with a specific base.
- Type of mixture - dry (requiring dilution) or liquid glue (ready to use).
- Economical product consumption.
- Acceptable layer - some types of glue do not allow leveling of tiles without a pre-leveled surface. Therefore, if you need to apply tile adhesive in layers of different thicknesses (which is only possible for experienced tilers), it is better to provide for this parameter in advance.
- Universal application - on the product itself or on the surface.
- Adhesive properties that allow you to hold laid tiles of a certain size.
- Possibility of laying a certain type of tile.

These technical characteristics are usually always found on packages with mixtures; there should also be instructions on how to apply glue and other features of a particular product.
All types of tile adhesives can also be divided into:
- Specialized
- Universal
It would seem that you can simply purchase a universal product and not read tons of information on the packaging. However, experts advise choosing more responsibly, since such a mixture still does not give the maximum result in a certain area, like a specialized one, and its guaranteed service life is much shorter, despite the fact that the description on the pack is usually silent about this.
Thus, it is better to take tile mixtures according to their purpose:
- Moisture-resistant with antiseptic additives - for masonry in places with high humidity and the risk of mold and mildew (for example, in the shower, bathroom, swimming pool)
- Heat-resistant for installation on hot surfaces (stoves, fireplace portals, barbecues)
- Frost-resistant - on open balconies and unheated loggias
Universal tile adhesive is suitable for ordinary dry rooms, both for wall and floor surfaces.
Price
Prices for mixtures vary - from 250 rubles per 25 kg to, on average, 1500. Many people believe that the better, the more expensive, but in fact, the high cost does not at all indicate which adhesive for tiles is better, but may only be premium for a brand name.
To avoid overpaying, you can simply compare the technical characteristics of an expensive product with an average-priced product in the store and, having made sure that they are approximately equal, you do not need to worry that the selected mixture is somehow worse than a more expensive brand.
TOP 10 best adhesive mixtures
A specially compiled, independent rating can also help determine the best product for installing tiles.
KNAUF FLIESEN

This tile adhesive is suitable for difficult surfaces. The price is approximately 250 rubles per 25 kg bag.
This is the best all-purpose glue. With its help, you can lay tiles both on walls and on the floor, regardless of the type of surface.
It is distinguished by:
- slow hardening, which facilitates work when making adjustments, as well as cleaning the seam;
- economical - considering that it can be placed under the tiles with a layer of 7 mm and at the same time provide high-quality adhesion;
- elasticity and this quality is undoubtedly very important for laying tiles in complex and hard-to-reach places;
- budget due to low cost and low consumption.
UNIS 2000
Almost on a par with Knauf, it is secretly recognized as the best tile adhesive with the most powerful adhesion. The price is the same - 250 rubles per 25 kg.
Its advantages include:
- 10-minute adjustment, which is the best option for a tiler;
- universal composition of tile adhesive, which performs well even in strict different temperature conditions;
- high elasticity, allowing it to withstand the deformation stresses of the tile of a temperature nature;
- even a beginner can glue ceramic tiles on Eunice; it is very easy to apply;
- ideal consumption rates are 3.5-5 kg/sq.m. m.
OSNOVIT MASTPLIX T-12

An ideal option for those who are wondering how to glue tiles onto uneven surfaces without prior leveling. Price 250 rubles per pack of 25 kg.
Advantages:
- tiles are placed on it with simultaneous assembly leveling;
- has excellent adhesive properties, so you can lay both standard tiles and porcelain tiles on it, even from top to bottom.
CERESIT SM-11
A universal adhesive for ceramic tiles. Price - 265 rubles per 25 kg.
The disadvantages include the poor performance properties of tile adhesive; it is not suitable for every tile. But in general, it is suitable for uneven surfaces and has low adhesion, more than 1.0 MPa.
IVSIL MOSAIK
Moisture resistant, good tile adhesive. Price 480 rubles per 25 kg.
It has a white color, high adhesion, more than 1.0 MPa. considered professional. It can be used to lay tiles in such difficult places as swimming pools, baths, bathtubs, showers. Designed to work with any material of tile origin.
LITOFLEX K80

Considered a professional mixture. Price - 530 rubles per 25 kg.
For those who are looking for how to glue porcelain stoneware and regular tiles with various installation difficulties, in particular - tile on tile, installation on heated floors, cladding of facades and plinths. One of the advantages is also economical consumption.
BERGAUF MOSAIK
Ideal for laying mosaics and glass products, but also suitable for large-caliber tiles. Price - 645 rubles per 25 kg.
Pros:
- White color;
- the ability to glue tiles during external finishing work;
- possibility of installation on a slope;
- no masonry restrictions.
MIRA 3130 SUPERFIX

Moisture-resistant adhesive mixture. Price - 650 rubles per 25 kg.
Suitable for cladding in damp environments, as well as when installing “capricious” materials. Distinctive features also include:
- high elasticity;
- water resistance;
- high frost resistance parameters.
SOPRO 450
You can glue tiles onto it to eliminate the risk of point impact, thanks to the reinforcing fibers in the composition. It is also characterized by increased moisture resistance. You can put both regular tiles and natural stone on it. Price - 700 rubles per 25 kg.
KERAFLEX MAXI

If we talk about what is the best adhesive for large-caliber tiles and heavy materials, perhaps Keraflex is the most worthy material:
- it has high adhesion;
- there is no need to level the surface under it;
- plastic, easy to install.
The downside is that this tile adhesive is very expensive.
Be that as it may, when choosing adhesive for ceramic tiles, it is not at all necessary to rely on the data of this rating. This should be done solely on the basis of the installation features and the type of material itself. To select the ideal mixture, carefully read the directions and ingredients on the package.
It is not visible behind the tiles, so its selection is often not given due attention. And this is wrong, because it is thanks to the adhesive mixture that the tile lasts for many years, maintaining its appearance.
Modern manufacturers offer dozens of different formulations, the price of which can vary significantly. Therefore, understanding all this variety is not at all easy, but knowing the main types of adhesives and their characteristics, you can easily choose the right product.
The main difference between adhesive mixtures is their composition, they are:
Cement adhesive mixtures for tiles
This is a common and affordable type of glue; it attracts investors with its low price for large volumes of material. Cement mixtures are sold in dry form, so they need to be diluted with water; for inexperienced builders, this task can become a whole ordeal. Cement mixtures dry quickly, this fact must be taken into account when working outdoors. The powder compositions are predominantly cement and sand, but modern variations of this glue have various elastic additives that significantly increase the quality and longevity of the material. It is elasticity that is important for the adhesive mixture, because thanks to this quality, the tile will stick well, will not crack and will not fall off due to changes in humidity or temperature. It is better to use cement mixtures for interior work in dry rooms for lightweight ceramic tiles.

Epoxy adhesive
This is a two-component adhesive mixture, often also called polyurethane. The peculiarity of this material is that it acquires its qualities only after mixing the ingredients. The mixing stage is very important; you must strictly follow the instructions and observe the proportions so as not to spoil the mixture. Epoxy adhesive has high elasticity and adhesion, it is ideal for laying tiles in. It is an order of magnitude more expensive than cement compounds, but has significantly higher performance:
- moisture resistance
- frost resistance
- elasticity
- strength

This adhesive can be used to work not only with ceramic tiles, but also with porcelain stoneware and natural stone. Make sure that the composition does not get on the surface of the tile, or better yet, always have denatured alcohol on hand, which can quickly remove the adhesive from the surface. Another advantage of this type is the ability to work with imperfectly smooth surfaces. After all, the glue promotes good fixation even with small base errors.
Dispersion adhesive mixtures
These are one-component formulations, which means you do not have to mix the components or dilute the dry mixtures with water, because the glue is sold ready-to-use. The pricing policy for this type of glue is average, so it is between cement and epoxy mixtures, which is why it has gained its popularity. Dispersion mixtures can rightfully be called universal, because you can work with them both indoors and outdoors. This adhesive will hold tiles well on a concrete wall or drywall, plaster or even old porcelain tiles. But this material is especially popular when finishing rooms with direct exposure to water:

- bathrooms
- kitchens
- showers
- swimming pools
- saunas, etc.
Changes in humidity and temperature are not a problem for dispersion glue, so you can safely choose it for any finish.
There are other types of adhesive mixtures, but most often they have one of the 3 bases indicated above, and differ only in auxiliary components. When choosing a mixture, follow the recommendations provided by tile manufacturers or consult with specialists.
Tile adhesive is available in a wide range, and it is not at all easy for a novice master to make a choice. But a properly selected composition is a guarantee that the tile will not move under load, and the coating will last for many years.
Which adhesive is better for ceramic tiles and which for stone tiles? What is more profitable - ready-made mixture or dry? Is it worth buying expensive glue and how can you save money? These questions concern everyone who has decided to do the cladding on their own for the first time. Let's consider how to choose adhesive for floor tiles in order to obtain a high-quality and durable coating.
Depending on the form of release, tile adhesive is divided into three groups - dry mixtures, two-component mixtures and paste-like compositions, ready for use.
Dry mixes
This group includes cement-based powder mixtures, which are mixed with water immediately before application. The glue is made from gray and white cement, and in addition to the binder, it contains various additives to improve the qualities of the material. For floor tiles, gray cement adhesive is mainly used (white is intended for transparent tiles and mosaics, so it is more suitable for walls).

Cement adhesive solutions are divided into thick-layer and thin-layer, depending on the composition of the components and the granularity of the filler. The first type allows you to lay tiles on a base with a height difference of up to 30 mm, thereby simplifying floor preparation. But at the same time, a thick layer causes severe shrinkage and requires more time to dry, and also increases material consumption.

Highly elastic white tile adhesive, thick layer: 3-10 mm
Thin-layer mixtures can be applied to floors whose differences do not exceed 10 mm. They are much less susceptible to shrinkage, dry faster, and are characterized by low consumption.

Two-component mixtures
These compositions have an epoxy-polyurethane base and have higher characteristics compared to cement adhesives. Prepare the solution immediately before application by mixing the base composition with the hardener. Such adhesives are characterized by the absence of shrinkage, elasticity, low specific gravity, and water resistance. They are resistant to vibrations and deformations, and are better suited than others for floors subject to intense loads.

The solution takes about 20 minutes to set, and complete drying occurs in a few hours, which can significantly reduce repair time. The quality of gluing directly depends on maintaining the correct proportions when mixing components.
Ready mixes
This group includes water-dispersion compositions made on acrylic, latex and polyvinyl acetate bases. The adhesive solution is mixed in production and sold in hermetically sealed containers. Before applying the glue, you just need to mix it. Ready-made solutions have a thick consistency, do not spread, and perfectly hold tiles of any weight and size.

The advantage of such compositions is that they save time during installation, since there is no need to be distracted by mixing the solution. In addition, dispersion adhesive has excellent adhesive properties, strength, and does not have a pungent odor or toxic impurities. After curing, the adhesive layer is sufficiently resistant to vibration, static and dynamic loads, which ensures a long service life of the cladding.
According to their characteristics, adhesive compositions are also divided into several types:
- universal- the most popular type used for internal and external cladding. It is affordable, easy to apply, and ensures reliable adhesion of the tile to the base. This adhesive is intended for standard tiles ranging in size from 10x10 cm to 30x30 cm;
- reinforced– contains special additives to increase the adhesion and strength of the adhesive layer. It is used when laying large tiles, porcelain stoneware and natural stone. After curing, such adhesive is impervious to static and dynamic loads, therefore it is best suited for rooms with heavy traffic;
- moisture resistant– contains special hydrophobic additives that provide resistance to moisture vapor and direct exposure to water. This glue is used for cladding bathrooms, showers, kitchens, and swimming pools. Many manufacturers add antifungal additives to the glue, so that mold does not grow in the tile joints.

Special compositions are also produced, for example, white cement adhesive for transparent cladding, adhesive for exterior finishing, and adhesive for underfloor heating.

Prices for tile adhesive "Ceresit"
ceresit tile adhesive
Basic requirements for tile adhesive
Regardless of the composition and form of release, tile adhesive must comply with accepted standards and meet the basic requirements:
- it must have high ductility and fit easily onto the work surface;
- have good adhesive properties and reliably fasten the cladding to the base;
- the glue should not shrink significantly (ideally, this indicator should be zero);
- the viability of the solution and the adjustment time must be long enough so that the master has the opportunity to properly fit all the elements and eliminate masonry defects.

These conditions apply directly to the solution, but there are also requirements related to the hardened adhesive layer:
- resistance to deformation, that is, the strength of the adhesive in compression and shear;
- resistance to temperature changes;
- resistance to high humidity.

The glue packaging indicates the main characteristics of the composition: its strength, specific gravity, pot life and complete drying time, degree of resistance to various types of influences. So before purchasing, you should carefully read the adhesive’s characteristics – this will allow you to choose the optimal mixture for specific conditions.
How to calculate consumption
The consumption of dry mixture depends on several factors:
- thickness of the adhesive layer– the thicker the glue is applied, the more it will be needed;
- floor quality– on a flat, weakly absorbent surface, much less glue is required than on porous substrates with differences of up to 10-15 mm;
- consistency and chemical composition of the glue– the thicker the solution, the more it is consumed. Synthetic-based mixtures have better adhesive properties and hold tiles well even when applied in thin layers, so their consumption is lower than that of conventional cement adhesive;
- type of tile– for small tiles, a minimum thickness of the adhesive layer is sufficient; for large-format tiles, the application thickness increases to 10-12 mm. The same applies to the density of the material - tiles with a porous structure require more glue than dense porcelain stoneware.

![]()


The professionalism of the master also plays a role, because it is very difficult for a beginner to correctly lay tiles on a thin layer the first time, a lot of mortar is spent on correcting mistakes.


The consumption of the mixture per meter of area is indicated on the packaging (minimum and maximum values), and all that remains to be done is to multiply it by the total floor area. For calculations, it is better to take the maximum value, and the resulting volume should be increased by another 10-15%.

Best Brands of Tile Adhesive
In order not to make a mistake in your choice, it is worth purchasing products from popular manufacturers that fully meet the specified requirements, in contrast to cheap handicraft mixtures. The leaders in this area are the companies Ceresit and Knauf: under the same brands they produce entire lines of tile adhesives and repair compounds in a wide price range. Here you can easily choose adhesives for all types of tiles, natural stone, porcelain stoneware, waterproof and frost-resistant compounds, and mixtures for laying tiles on heated floors.
The adhesives “Osnovit”, “Yunis”, and “Starateli” are in high demand. Even the simplest cement compositions are distinguished by their adhesive strength and durability, are easy to apply, and have a long setting period. Among the reinforced types of glue, “Plitonit” stands out due to its characteristics - mixtures of this brand are excellent for floors in high-traffic areas.
| Name of glue | Main characteristics |
|---|---|
| The adhesive has enhanced adhesive strength, resistance to moisture and sudden temperature changes, and is suitable for lining heated floors. Used for laying tiles from 30x30 cm to 60x60 cm. Can even out height differences on the working surface up to 15 mm. Average consumption is 1.4 kg/m2, pot life of the mixture is 180 minutes |
| A universal composition that is great for beginners. The mixture is very plastic, easily distributed over the surface, and firmly adheres to the base. The viability of the solution lasts 120 minutes, the adjustment time is about 20 minutes. Apply glue in a layer from 2 to 10 mm, consumption is 2.7 kg/m2 |
| Waterproof composition for ceramic tiles and porcelain stoneware up to 60x60 cm in size. Suitable for any surface, characterized by plasticity and ease of application. The maximum permissible layer thickness is 10 mm. The solution remains viable for 4 hours, dry mixture consumption is from 1.7 to 4.3 kg/m2 |
| The composition is suitable for tiles and porcelain stoneware of any format, can be used in unheated rooms, at normal and high humidity. It is applied in a layer up to 15 mm thick, consumption is from 3 to 5 kg/m2. The solution remains viable for 240 minutes, adjustment time is about 10 minutes |
| Ready mix with extended adjustment time. Suitable for ceramic tiles of any format, can be used in bathrooms, kitchens, bathrooms. Consumption per m2 ranges from 1.5 to 4 kg. |
| Ready-made heat-resistant adhesive mixture. It has increased moisture resistance and is suitable for all types of floor tiles, natural stone, and agglomerates. The maximum application thickness is 4 mm, complete drying time is up to 120 hours. Consumption ranges from 0.5 to 1 kg per m2 |


You should immediately take into account that it is advisable to use expensive compounds under specific operating conditions for which these adhesives are intended. For example, on substrates subject to vibration, shrinkage, and large dynamic loads, it is worth using two-component adhesives that are strong and elastic. When tiling the floor in a bathroom, washroom, or swimming pool bowl, waterproof mixtures are required, and in unheated rooms, frost-resistant ones.

If you are tiling a bathroom, you should use an adhesive with increased moisture resistance.

The use of special adhesives is also justified when it is necessary to lay tiles not on a concrete floor or screed, but on a wooden or stone floor.

For an ordinary apartment, it is best to use simple cement adhesives: they can withstand household loads, small changes in humidity and temperature, and are suitable for tiles of any type and format. You can take a cement composition with improved characteristics - thanks to various additives, such mixtures are more waterproof and elastic, and the price is not much more expensive.

Now regarding ready-made and dry adhesives. Ready-made mixtures are not intended for storage, so they need to be worked out at a time. They are applied in a thin layer, which means the surface must be carefully leveled in advance. On the practical side, it is advisable to choose such compositions for small rooms where glue consumption will be low. The advantages of ready-made mixtures include quick drying, excellent adhesion when applied in thin layers and saving time on cladding.

Dry glue is cheaper and can be used as needed, the main thing is to close the bag tightly so that the mixture does not get damp.

Using cement adhesive, you can level out small differences in the floor and reduce the cost of leveling screed. The main problem for beginners is preparing the correct consistency of glue, because if you just add a little less or overfill the water, the glue will no longer be so strong. But if you strictly follow the instructions, where all the necessary proportions are precisely indicated, then achieving the desired result is not at all difficult. So, from a practical point of view, it is still more profitable to choose dry mixtures for floor tiles.

How to prepare glue for work
Not only the quality of adhesion of the tiles to the base, but also the ease of working with the mortar depends on the correct mixing. A composition that is too thick or too liquid is difficult to distribute evenly, and it takes more time to finish. To dilute the dry mixture, you will need:
- two containers - empty and with clean water at room temperature;
- a bag of dry tile adhesive;
- drill with mixer attachment.
Step 1. Part of the water, approximately 2/3 of the norm, is poured into an empty container.

Step 2. Pour dry glue from a bag into the water, measuring out the required amount.

Advice. The dry composition is always poured into water, and not vice versa. This promotes better mixing, there are no dry lumps left at the bottom, and less dust is generated.
Step 3. Insert the mixer into the container and mix at low speed for about a minute.

Step 4. If the mixture turns out to be too thick, take it in lumps, add water in small portions and stir each time until the solution reaches the required consistency.
Step 5. Leave the glue to swell for 10 minutes and stir one last time. The solution must be absolutely homogeneous, plastic, and moderately thick.


How to glue tiles to the floor


The tiling process requires diligence and accuracy, because the slightest defects are clearly visible on the tiled surface, especially if the tiles are of the correct shape and monochromatic. Let's look at how to glue tiles to the floor to get a high-quality coating.
Step 1. The floor surface must be thoroughly cleaned—scrape off dirt, paint stains, putty, and vacuum.


Step 3. From the center of the doorway draw a straight line to the opposite wall.

Step 4. The first row of tiles is laid out along a line on a dry floor, observing the width of the joints.


Step 5. A second marking line is drawn along the outer edge of the last tile - perpendicular to the first. Laying will be carried out from the point of intersection of the lines.

Step 6. Prepare the adhesive solution according to the manufacturer's instructions.
Step 7 Apply glue with a trowel along the marking lines slightly wider than the width of the tile.

Step 8 The adhesive layer is leveled and then passed over it with a notched spatula, forming a relief.

Advice. If the tile is large-format, a thin adhesive layer is also applied to its back side. For standard tiles, an additional layer of adhesive is not needed.

Step 9 Take the first tile and lay it on the glue so that its sides exactly coincide with the marking lines. A wooden block is laid on top and hammered with a rubber hammer so that the tile lies evenly.


Step 10 Insert crosses for the seams on the sides and continue laying the first row, controlling the placement of the tiles using the rule and level.

Step 11 Having completed the first row, proceed to the next. During the work, it is very important to maintain the width of the seams and do not forget to control the plane.

Step 12 When cutting tiles, you must mark the cut line with a pencil, having first measured the required distance. It is most convenient to cut the material with a tile cutter, manual or electric.

Cutting with a manual tile cutter

Advice. If a shaped cutout is needed, first mark it with a pencil on the surface of the tile, and then divide the part that needs to be cut into squares. After making cuts along the lines, remove excess fragments, and break off uneven edges using pliers.


The remaining pieces are broken off with pliers or wire cutters.
Step 13 A ceramic plinth is fixed around the perimeter of the room, with crosses placed underneath for the seams.


Step 14 A day after the lining, the joints are grouted. The mixture is applied across the joints, carefully filling all the irregularities. As soon as the grout has set, the floor should be wiped with a damp, clean sponge. The remaining residue after drying is removed with a dry cloth.


Cleaning tiles with a cloth

